Project 18191EZ:
Shaker Pedestal Table
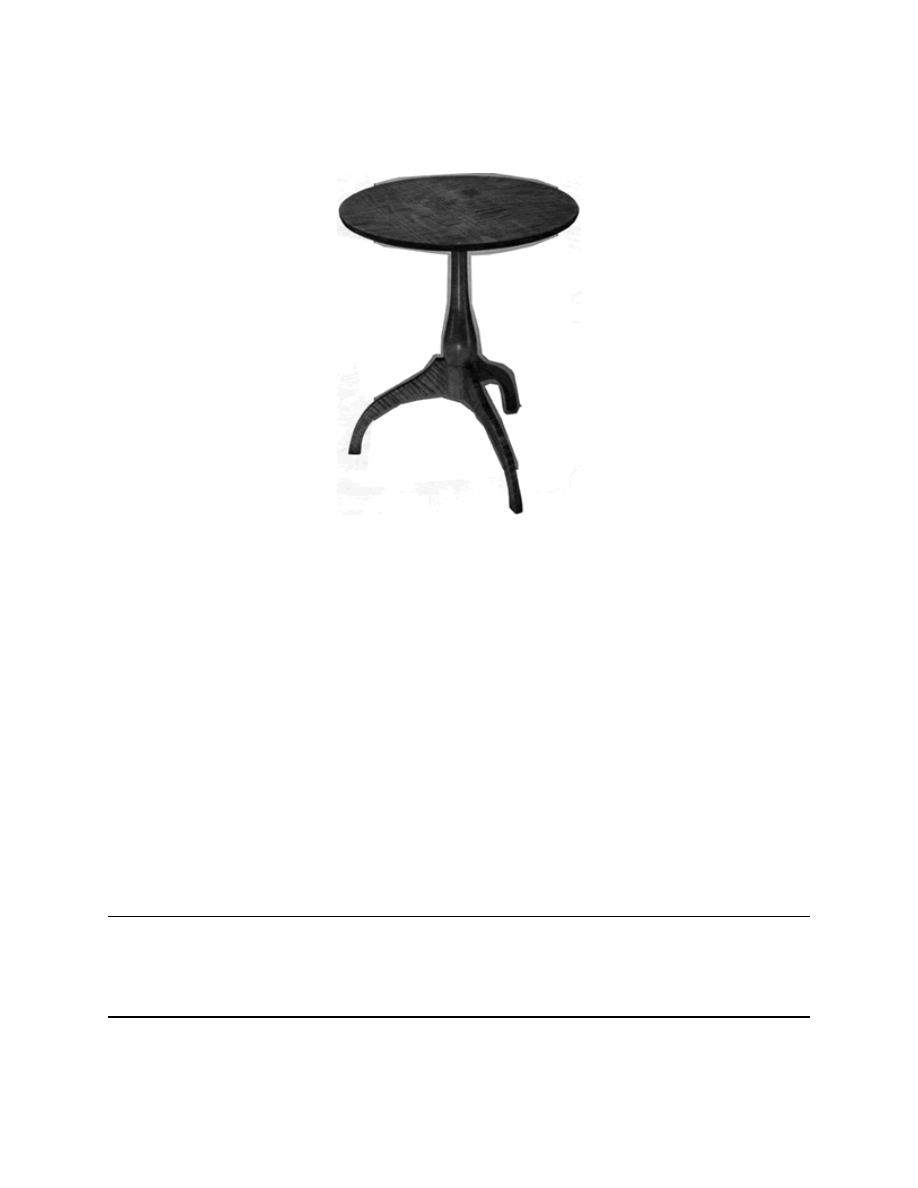
The general design of this lovely piece comes from a Shaker pedestal table made
in Hancock, Massachusetts around 1840. It’s a classic piece, one that’s been cop-
ied many times, and we suspect that a hundred years from now it will still be
popular. Ours is made from curly maple, although the original, like much Shaker
furniture, was made from cherry.
Shaker Pedestal Table Materials List
Part
Description
Size
No. Req’d
A
Pedestal
3-1/2" x 3-1/2" x 17-5/8"
1
B
Leg
See detail.
3
C
Cleat
3/4" x 4-3/4" x 15"
1
D
Top
21" dia. x 3/4" thick
1
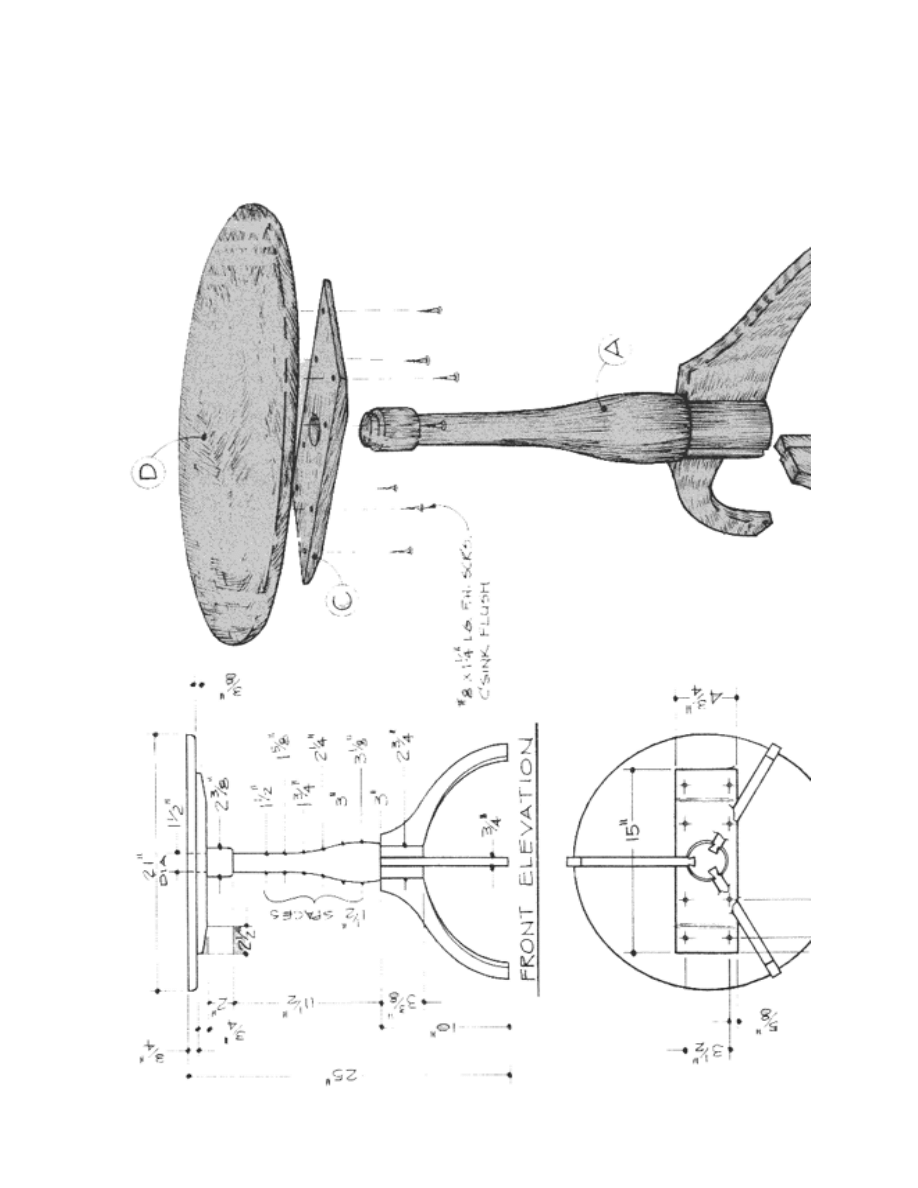
Shaker Pedestal Table Complete
Schematic

Shaker Pedestal Table Step-by-Step
Instructions
1. Purchase a 4" square by 18" long turning block.
2. Use a hand plane or band saw to cut about 3/4" from each corner of the
block. Note: Try to remove approximately the same amount of mate-
rial from each corner to maintain balance of the piece as it turns on the
lathe.
3. Use a lathe to turn the block to the dimensions shown for Part A.
4. Use sandpaper ending in 220 grit to sand Part A before removing from the
lathe.
5. Mark the location of the three dovetail pins 120 degrees apart on the bottom
of Part A.
6. Clamp Part A in a vice and use a sharp chisel to chop out each pin. Note:
the pins are cut to 9/16" deep.
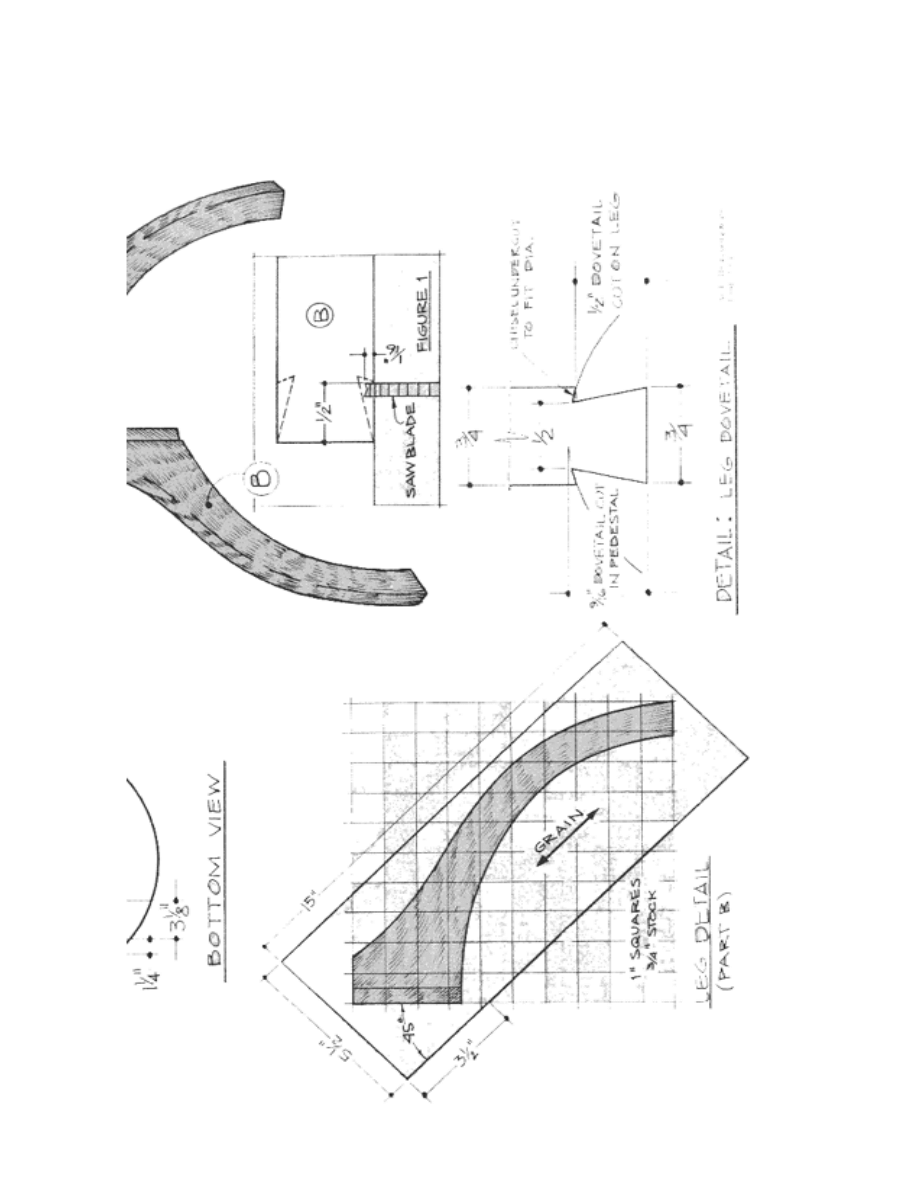
7. Cut 3/4" stock to 5-1/2" wide by 15" long (Parts B).
8. Make the 45-degree angle end cut 3-1/2" from the corner as shown in the
leg detail diagram.
9. Use a table saw set to 1/16" deep to make a 45-degree angle cut parallel to
the end cut on both sides of Parts B.
10. Transfer the curved profile from the drawing to one of the legs.
11. Use a band or saber saw to cut the shape just outside the line.
12. Use a file and sandpaper to smooth the leg.
13. Use the finished leg as a template to scribe on the other two legs.
14. Lay out the dovetail on each leg (see detail: leg dovetail).
15. Use a chisel to cut the dovetail sides and the undercut as shown. Note:
check to make sure the dovetails fit snugly in the pedestal pins as you
go.
16. Sand the legs thoroughly.
17. Use glue to attach the legs to the pedestal and allow to dry completely.
18. Cut Part C to size from 3/4" stock.
19. Use a hand plane to add a taper on each end as shown in the front elevation
view.
20. Use a drill press with a hole cutter to bore the 1-1/2" diameter hole through
the center of Part C. Note: Cut a trial hole in scrap stock to make sure
the hole will fit snugly on the pedestal tenon.
21. Apply glue to the hole in Part C and the pedestal tenon and attach both
parts, allowing them to dry completely.

22. Edge glue two or more pieces of stock to a dimension wider and longer than
required for Part D.
23. Scribe a 21" diameter circle on the stock. Note: a homemade compass
will be necessary. Drill a hole big enough for a pencil on one end of a
thin strip of scrap stock about 2' long. Drive a small finishing nail 10-1/
2" from the hole to serve as the pivot.
24. Use a band or saber saw to cut the scribed circle.
25. Use a file and sandpaper to smooth the edge.
26. Final sand all parts.
27. Apply two or three coats of a penetrating oil finish and allow to dry.
28. Use 1-1/4" by #8 flat head wood screws to attach the top as shown.
These plans were originally published in Volume 8, Issue 3 of The Woodworker’s
Journal (Jan./Feb. 1984, pages 28-29).
Wyszukiwarka
Podobne podstrony:
Pedestal Table Stand
Table Shaker Console Table
Shaker Single Drop leaf Table
oak dining table
Coffee Table 1
table style2, ♥Dokumenty
table cellspacin5, ❀KODY RAMEK I INNE, Ramki
table border (2)
Foresight Resolution Table
Chess Table
multiplication table
Effic Table (Table 4(V18)
Drill Press Table
table styl4, MOJE RAMKI, RAMKI 2
table cellspacin9, MOJE RAMKI, RAMKI 2
Table
więcej podobnych podstron