Extended Eating
A butterfly extension dining table with a
pedestal base.
By Glen Walling
This table was born from an inability to find an extension table that was rectangular,
and had a pedestal base. At the time the trend was for oval tables or square tables with
corner legs so I decided to try and make one from scratch.
I was unable to find plans either on the internet or in the local library so I had to piece
together the design features from other tables I had looked at. With some fiddling and
on the run alterations I eventually managed to put together something that works and I
think looks OK.
This was the project that got me interested in making things out of wood and I teamed
up with an acquaintance who had more experience and equipment than me. Over time
we developed a firm friendship and did a lot of work together. Unfortunately Glenn
passed away in June 2004 before the table was completed so he never got to see it
finished.
My first prototype table showed both my inexperience and some major design flaws.
The table shown above is actually my second prototype but this worked well and is
the design I will use for the next one to be made at a later date. I made this table out of
a pine packing crate kindly donated by some friends after they had a new pump and
solar panels delivered in it. The first one was made out of old pallets we got from the
rubbish dump. The next one will be made out of hardwood, either Jarrah or Wandoo
that was a shearing shed floor in a previous life.
Materials and Preparation:-
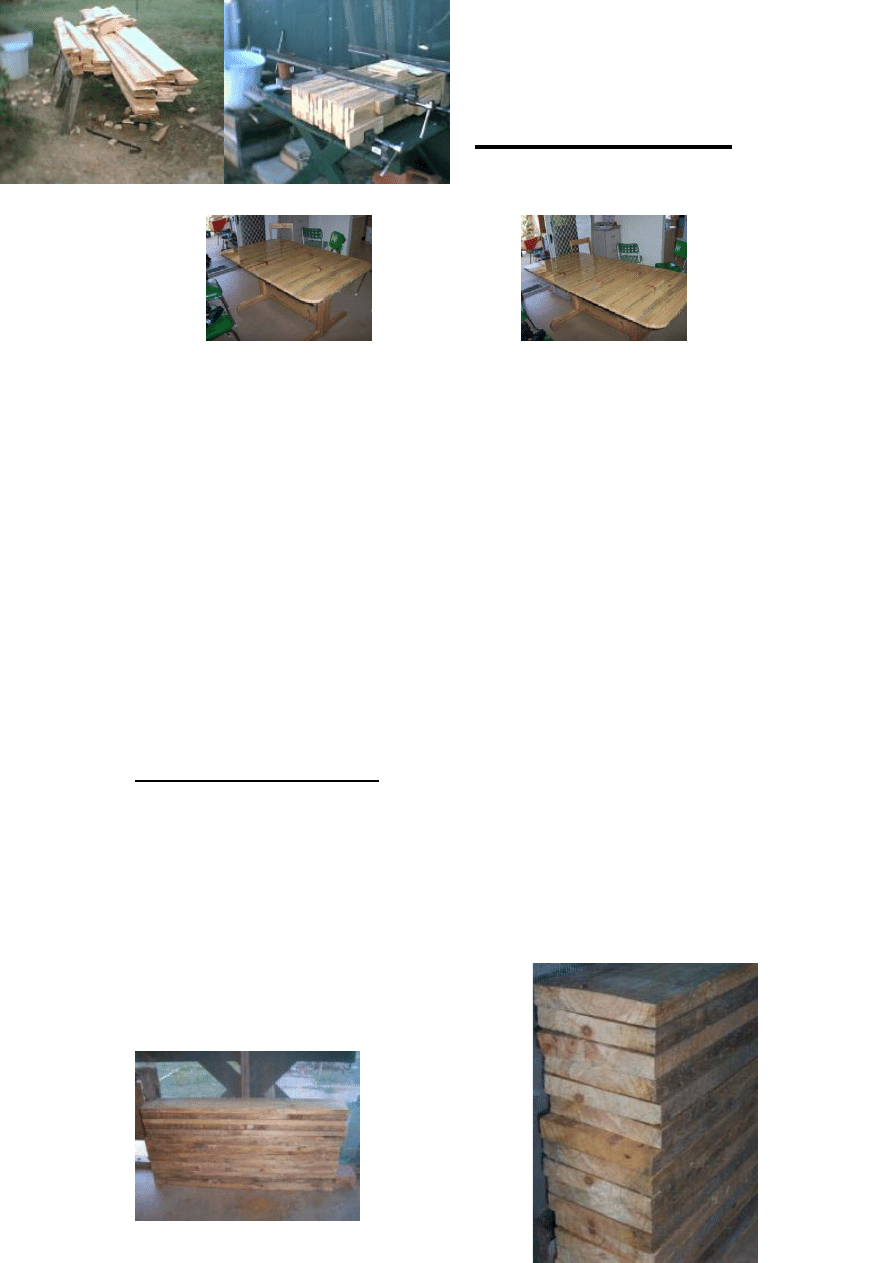
This table was made from an old pine packing crate that was full of nail holes knot
holes and cracks. This sort of timber is not the easiest to work with, but the flaws add
character to the finished project in my opinion.
After taking the crate apart I was surprised by the amount of timber I recovered.
Mostly it was 6"X 1" boards 11 feet long and 3 1/2" X 2" X 5 1/2 feet.
All of the timber was cut slightly over length before Jointing and planing.
The boards to be used for the table top were wet and then clamped together for some
time to try and remove the worst of the bow and warp.
The boards for the table top clamped after wetting to
try and remove warp.
Reasonably flat boards
after being removed
from clamps.

T
thicknesser until the dimensions were 80mm X 40m
and the planks were 20mm X 145mm, square and flat.
he stock was then jointed and passed through the
m
Cutting and Plan:-
roughly cut most
, Feet and Cross Piece X 2
and Slides from
brace X 1 (I made this by
laminating 3 planks together and then planin
slats X 12
lick on image to enlarge.
ronmongery:-
As I mentioned earlier I
of the material before preparation.
Frame:-
Frame Top
Legs X 4 All cut from 80mm X 40mm
Hinge Mount Pieces X 2
Slides X 4 of each
Hinge Mount Pieces
20mm.
Pedestal
g to size)
Top:-
154mm
100mm slats X 2
C
I
Recessed Hinges X 2

Cupboard Hinges X 2
Case Latches X 4
Screws
The recessed hinges were difficult to find. None of the hardware stores I tried carried
them or could find them from suppliers. I eventually managed to order them through
my local cabinet maker.
The cupboard hinges are standard but I had to remove the hinge rivet and turn them
around.
The case latches are to stop the table sections from moving apart.
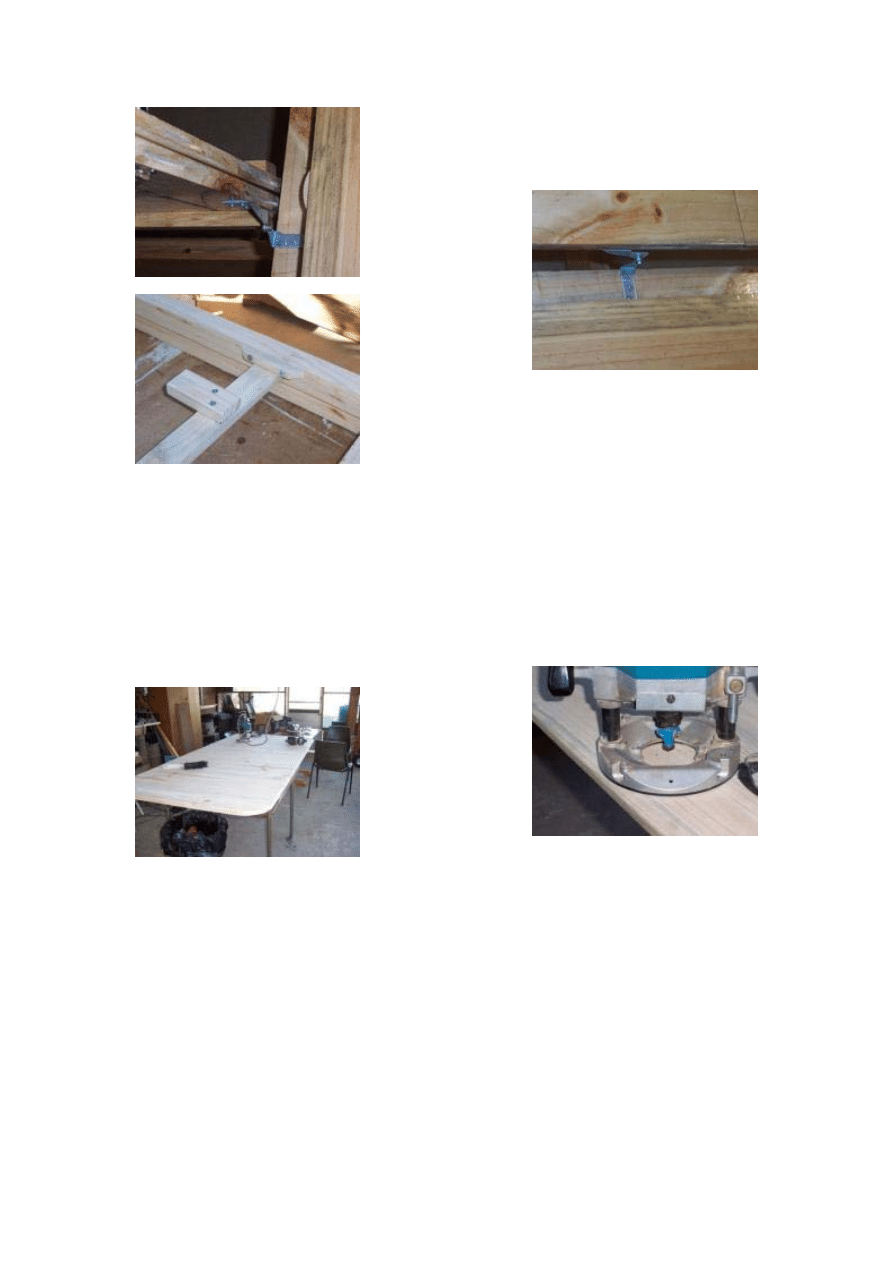
The Base:-
After preparing the timber to size cut to proper length and mark out joints, channels
and such.
I used a router to prepare all of the joints because I couldn't cut a straight line by hand
if my life depended on it.
I also cut all of the joints a little small and finished them to size with a file and sand
paper for a more precise fit being sure to mark the joints.
The joint between the top cross pieces and the rails was a little tricky because it did
not go all of the way through the timber. I did this purely for cosmetic reasons so the
joint was less visible.
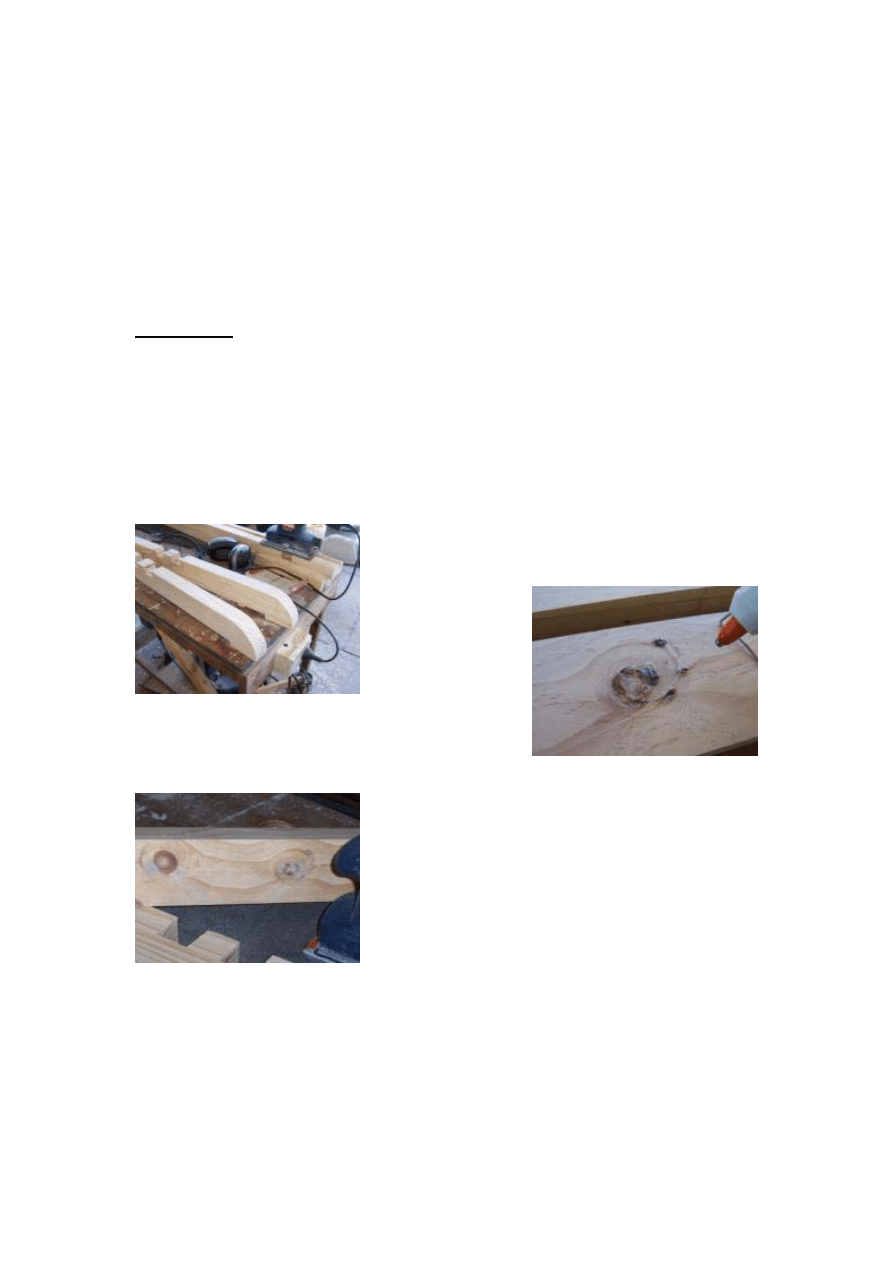
The inside curve and rebate of the feet was cut with a
12mm straight router bit. The outside curve was cut
with a cut off saw and rounded using a belt sander.
After cutting all of the
base pieces I routed t
outside edges of the
legs and the top of the
feet with a round over
bit.
Once the shape of all of the pieces for the base I
needed to fill the holes and cracks in the timber.
Because I was using recycled timber there was a fair number of these and I wanted to
make them a feature instead of covering them up. I
have used a number of different things to fill them
with, with varying effects. Putty is very difficult to
match exactly and unless matched perfectly I think
looks a bit scruffy. I have tried filling the holes with
PVA glue but it tends to remain milky. Varnish just
keeps soaking into the timber and cores are also not
the look I was trying for.
Instead I used hot glue. If applied carefully it cures completely clear, it is cheap and
sands well. When I made this table I used a different brand hot glue which did not
cure completely clear after having varnish applied as some I have used previously did.
he
It is OK for nail holes and small cracks but was a little milky when filling larger
holes.
I then sanded the pieces down to 180 grit paper before assembly.
The Table Top:-
The table top was assemble as 3 separate pieces using
biscuits.
Because the table was
made from packing
timber the wood was
back sawn which l
to wood cupping, for
this reason I tried to
join the wood with the
grain rings in alternate
directions. The end panels were made from 5 plank
each and the centre panel from two 145mm and t
100mm planks giving two pieces 730mm wide an
490mm (
th
The centre is cut in half and 6mm slots are cut using
the router in both halves 120mm from either edge fo
the hinges, but only t
the depth of the hinges
not right through
wood. Once the hinge
are fixed the other end
of all three panels are
cut to length. This
the centre doesn't end u
stage cut matching bisc
the two ends and the centre inserts. Cut two slots to e
of four and glue biscuits into one end and the oppo
the locating slots for mating the table sections. Do
instead.
ends
s
wo
d on
this is the centre piece). One end of each of
e panels is then cut square.
r
o
the
s
s
way
p shorter than the ends. At this
uit slots in the joining edge of
ach flap of the centre for a total
site edge of the centre. These are
wel or brass pins could be used
ssembly:-
e
A
be assembled is the top section of the base. The rails are glued to the
he
e
The first part to
cross pieces so that the channels are facing inwards and positioned towards the top
and the slots for the legs on the cross pieces are facing downwards. The rebates on t
end of the cross pieces are to allow the slides on the top to move in and out as the
table is extended. It is important to make sure the this is square and that the rails ar
true and parallel. When assembled clamp firmly until the glue is dry.
Prepare the slide by gluing the 50mm slat to the 30mm slat so you have
piece 40mm thick with a 20mm tail. Place the two end pieces of table top on a flat
surface with the best side down making sure the join is aligned properly. Place the t
part of the base centrally on the table top with the slides in situ making sure the ends
of the slides meet at the join between the top panels. When everything is positioned as
square and central as possible carefully mark the positions of the slides where they
rest on the table top.
After removing the ba
When the glue has dried try to slide the top onto the base from either end. Yo
find that it will not slide in easily and will require some sanding or planing to get the
slides to fit and slide smoothly.
Mark the centre of the top rail an
when the centre extension will sit when table is open.
Slide th
two end
pieces
together so
they meet
at the
centre
both ends.
Separate the ends and insert the extension
at the place marked and fit the matching
latch parts onto the extension.
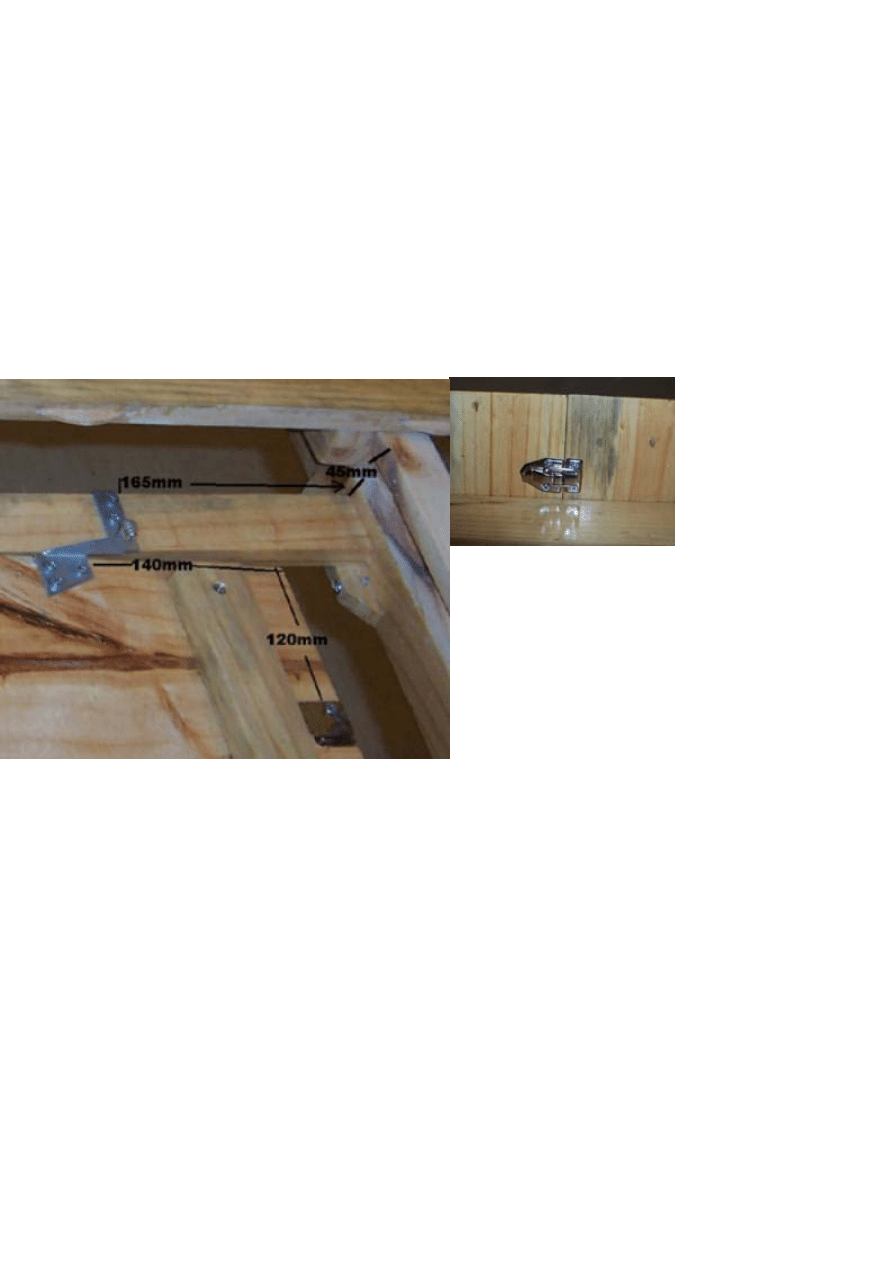
T
tricky!
must rest flat and level with the ends and at the same time will allow the folded
extension to turn over without hitting the rails.
On my table the hinge mount pieces sat 45mm fr
the hinge was placed 165mm from the top rail. The other part of the hinge was
140mm from the hinged edge of the extension.
The hinge mount struts were set 160mm from on
other, the difference is to allow clearance for the biscuits.
an "L" shaped
op
se fix the slides to the table top with glue and screws.
u may
d then measure 245mm either side of centre, this is
e
mark and fit the case latches to
his is where things start getting a bit
such a height that when open the extension
om the top of the rail and on those
e cross piece and 165mm from the
The hinge mount pieces need to be set at
The position of the
pivot hinge folded
down (above) half way
up (left) and fully
opened (right). Note th
biscuit slots in the
extension to align it
with the ends.
A piece of scrap 100mm long and 110mm from the r
attached to the underside of the hinge strut for the folded extension to rest on. The
small piece screwed to the rail is to help support the hinge strut. I did this because I
was making this part of the plan up as I went along and wasn't able to mortice or
dowel them in place.
When the top assembly of the base and the table top are set up properly the top should
be fairly level and flat. If they are not they need to be sanded flat and level. I would
suggest sanding the with the ends mated and when
they are flay sanding
the extension to level
with them. Why?
Because the table is
more likely to be left
without the extension
in place it would look
better if they are well
mated whereas the
extension is only used occasionally so any difference
is less noticeable ( there was very heavy rain between when I assembled the top
panels and fitted them to the base. The change in weather cause the panels to warp
badly and though I was able to flatten them with clamping the centre piece remained
quite warped need more sanding to get flat than the ends. There is a cross piece
screwed to the underside of the extension, this was to try and remove some of the
warping).
Once I had the table top all set and locked in place I then rounded the corners of the
top (I used a dinner plate as the radius) and routed the edge with a roman ogive bit.
e
ail
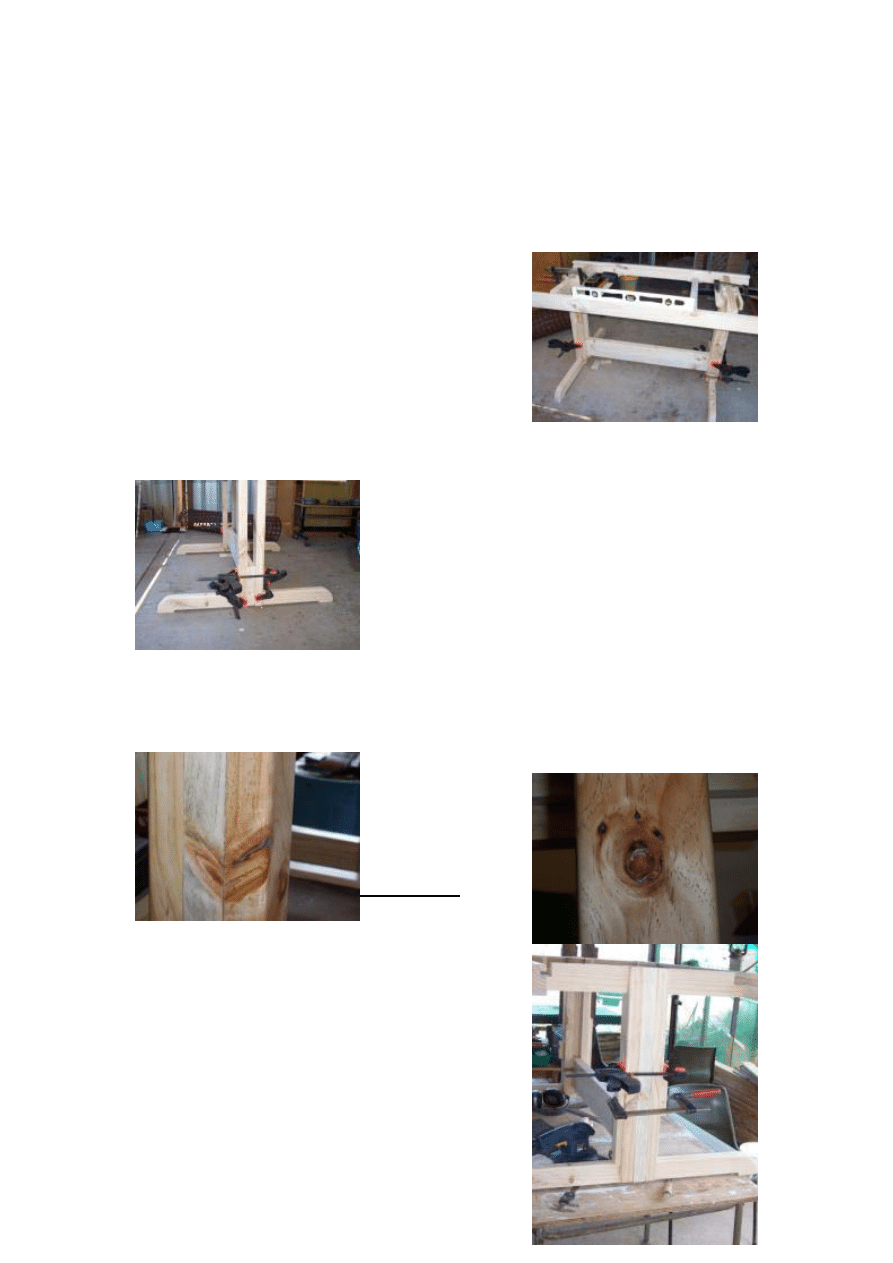
Now it is time to put it all together!
Firstly I assembled the base dry to make sure it would
all go together well. Then I picked a section of v
that I knew to be flat and level. Using PVA glue I
joined the legs to the feet then placed the cross piece in
place and attached the top assembly to the legs.
Because the joints are made so close fitting the table
could stand free as it was but due to my lack of skill
the base was not automatically level and square. With
the assistance of a spirit level and square this was rectified and the whole thing was
clamped until the glue had dried. It is more important to get the top of the base level
than that everyt
absolutely squ
W
finished I looked at t
gap between the legs
and thought that it
looked a bit bodgy so I decided to fill the gap between the legs and to cover the end of
the cross support above the feet. I measured the gap between the legs and cut pieces t
fill each end. I cut them slightly over size and sanded them down to fit so as to get as
an exact fit as I was able.
erand
hing is
are.
hen the base was
he
o
a
Finishing:-
After assembling all of
parts of the table I took
them apart and removed all of the hinges and such. I
filled all of the holes and cracks with hot glue as I
stated before. (If I ever find out which brand it is that
is truly clear I will alter this article to name it.)With
the base and the underside of the table top I sanded them down to 200 grit sand paper
and applied 2 coats of Bondall's Monocel Gloss polyurethane varnish.
Above is the same knot as shown earlier when being
filled
and sanded, this is after 2 coats of varnish.
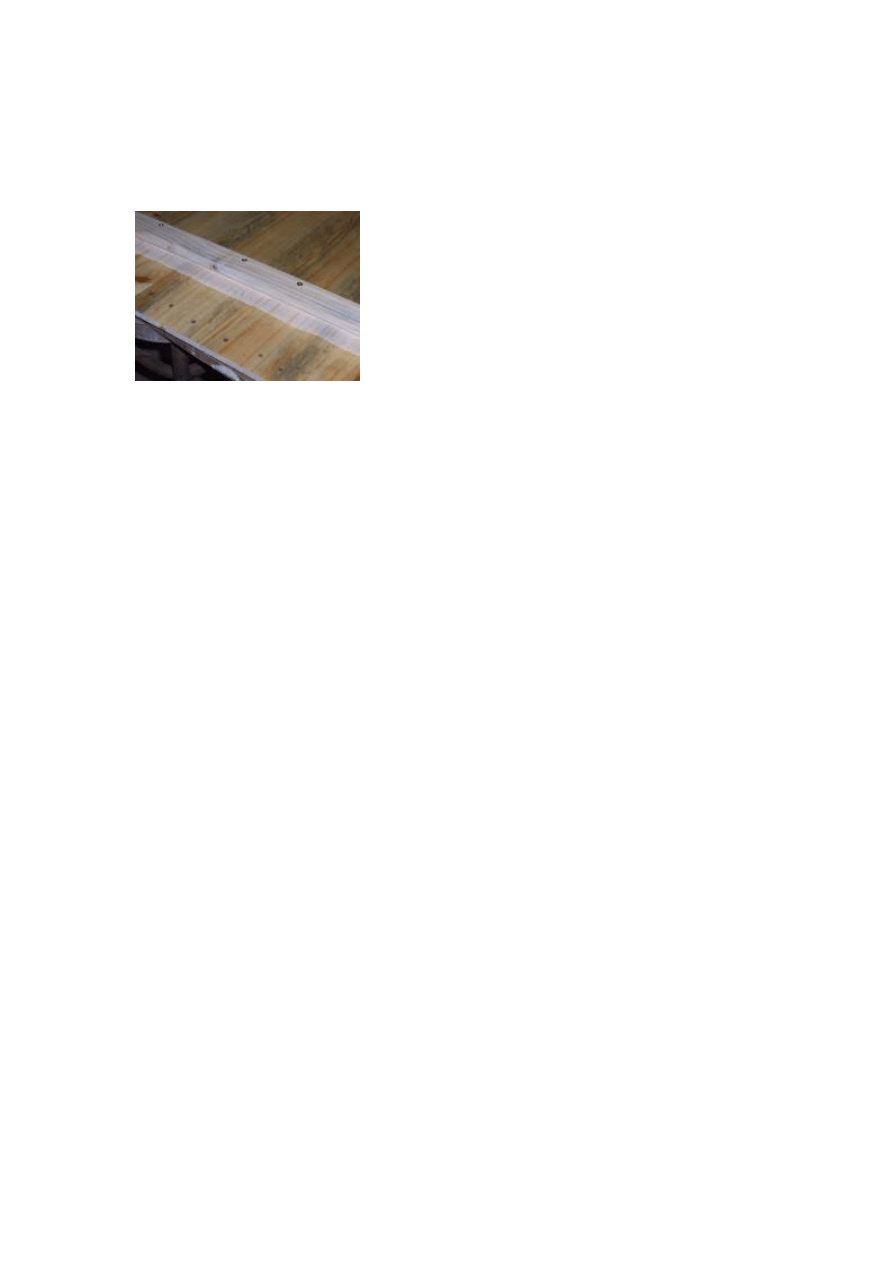
It is important not to apply varnish to the channels and
slides
other wise the tops will not slide smoothly.
With the table top I put a lot more care into it as this is the thing that most people see
and it also suffers the most punishment. I sanded them back to 150 grit then applied a
sealer of 75% Monocel and 25% turps. When the sealer had dried I sanded down to
320 grit and applied 5 coats of Monocel Gloss sanding with 320 grit between each
coat. After it was all sealed I replaced all of the hardware and the table was then put
into service.
Wyszukiwarka
Podobne podstrony:
oak dining table
Dining Table
Powers & Perils Extended Ranged Fire Table
Oak Dining Table
Oak Dining Table
dining table board
oak dining table
Foldout Dining Table(1)
dining table board
Dining at Downton Traditions of the Table From The Unofficial Guide to Downton Abbey
Dining Table(1)
Foldout Dining Table(2)
dining table
Dining Table(2)
Coffee Table 1
table style2, ♥Dokumenty
table cellspacin5, ❀KODY RAMEK I INNE, Ramki
więcej podobnych podstron