2009 Chevrolet Aveo
|
Aveo, Wave, G3, Barina (VIN S/T) Service Manual
|
Body Hardware and Trim
|
Exterior Trim
|
Repair Instructions
| Document ID: 2083318
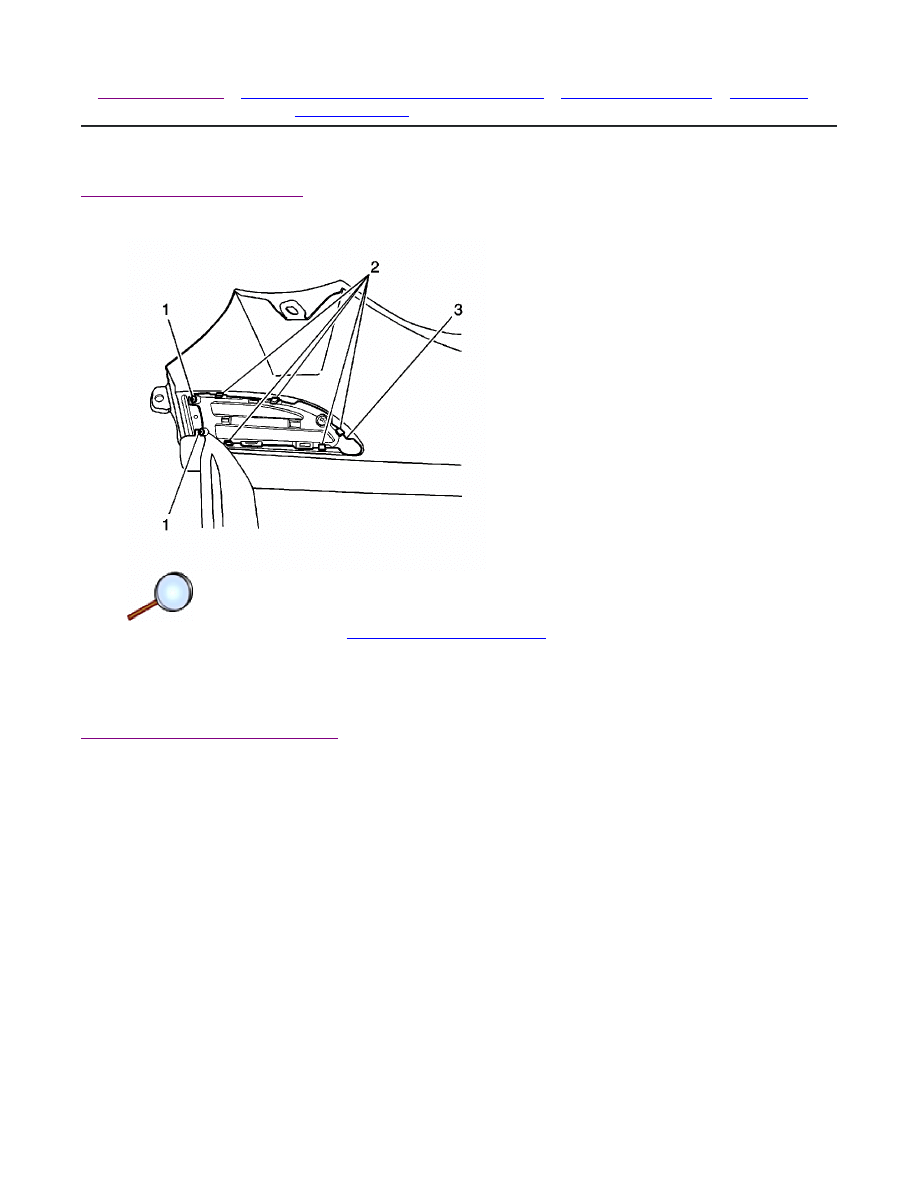
Front Fender Center Molding Replacement (Hatchback)
Removal Procedure
1. Remove the fender. Refer to
Front Fender Replacement
2. Remove the screws (1).
3. Disnengage the retaining tabs (2) and remove the fender molding (3) by pushing it out from
the inside of the fender.
Installation Procedure
© 2010 General Motors Corporation. All rights reserved.
Page 1 of 2
Document ID: 2083318
7/5/2010
http://localhost:9001/si/showDoc.do?docSyskey=2083318&pubCellSyskey=169606&pubO...
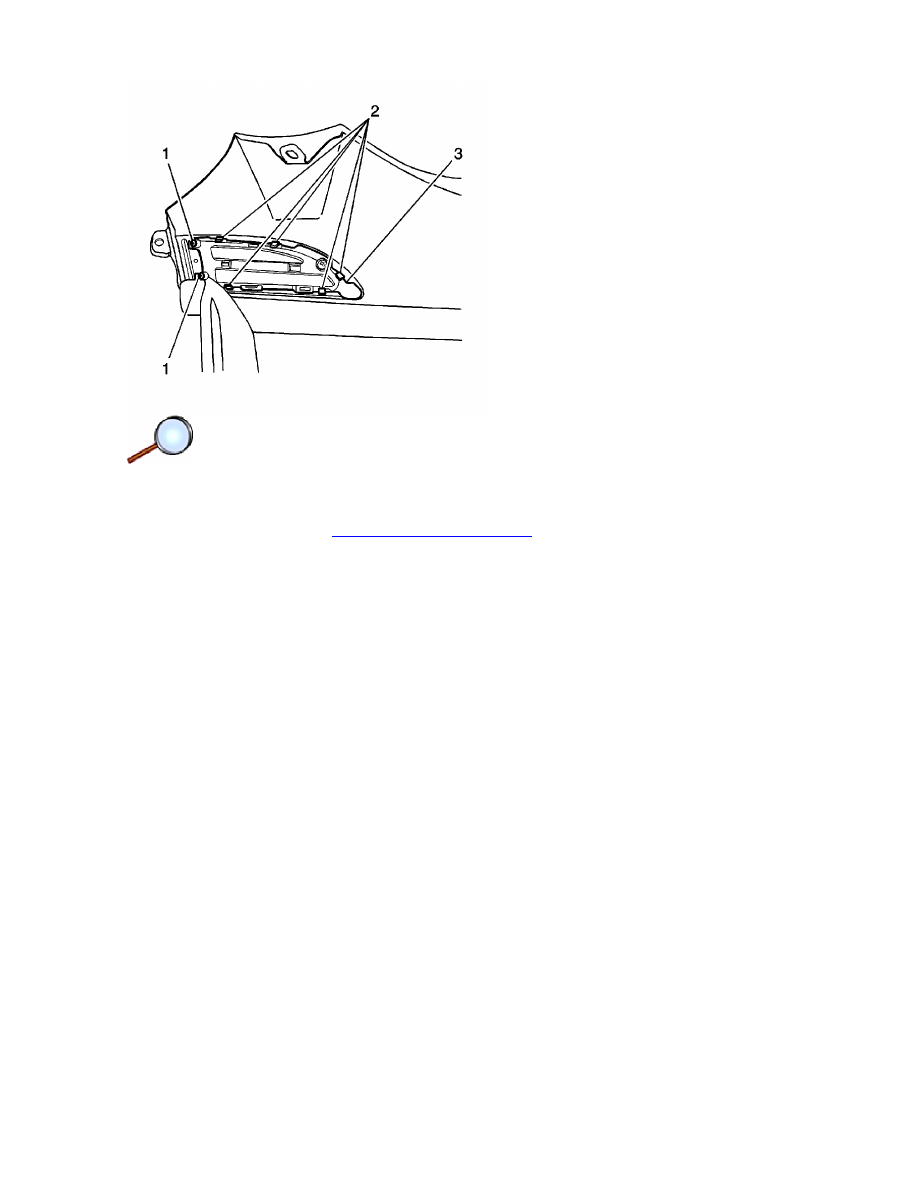
1. Install the fender molding (3) by pushing the retaining tabs (2) in from the outside of the
fender.
2. Install the screws (1).
3. Install the fender. Refer to
Front Fender Replacement
Page 2 of 2
Document ID: 2083318
7/5/2010
http://localhost:9001/si/showDoc.do?docSyskey=2083318&pubCellSyskey=169606&pubO...
2009 Chevrolet Aveo
|
Aveo, Wave, G3, Barina (VIN S/T) Service Manual
|
Body Hardware and Trim
|
Exterior Trim
|
Repair Instructions
| Document ID: 1723881
Fascia Grille Replacement (Notchback)
Removal Procedure
1. Open the hood.
2. Remove the front bumper fascia. Refer to
Front Bumper Fascia Replacement
.
3. Remove the screws and the radiator grille.
Installation Procedure
© 2010 General Motors Corporation. All rights reserved.
Page 1 of 2
Document ID: 1723881
7/5/2010
http://localhost:9001/si/showDoc.do?docSyskey=1723881&pubCellSyskey=148272&pubO...

1. Install the radiator grille with the screws.
2. Install the front bumper fascia. Refer to
Front Bumper Fascia Replacement
.
3. Close the hood.
Page 2 of 2
Document ID: 1723881
7/5/2010
http://localhost:9001/si/showDoc.do?docSyskey=1723881&pubCellSyskey=148272&pubO...
2009 Chevrolet Aveo
|
Aveo, Wave, G3, Barina (VIN S/T) Service Manual
|
Body Hardware and Trim
|
Exterior Trim
|
Repair Instructions
| Document ID: 2046755
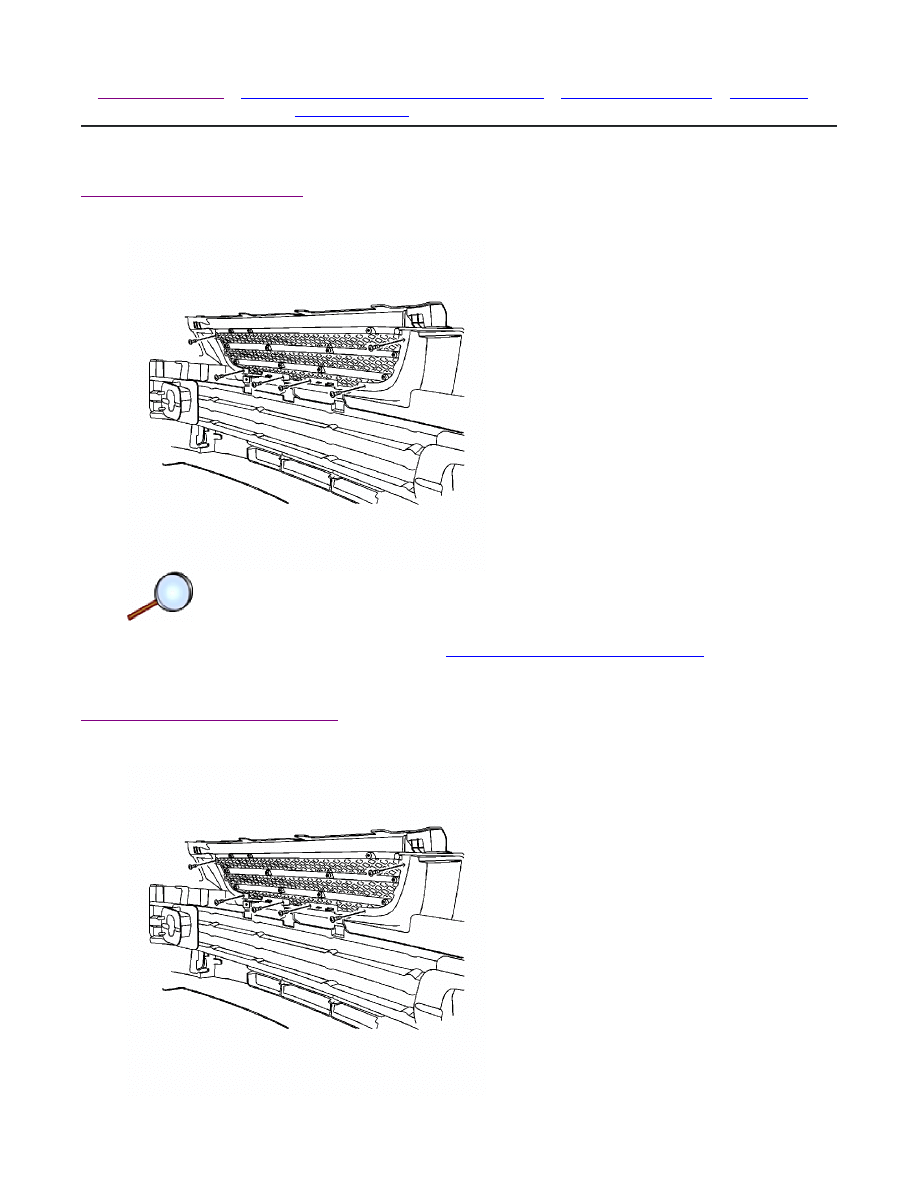
Fascia Grille Replacement (Hatchback)
Removal Procedure
1. Open the hood.
2. Remove the upper clips on the radiator grille.
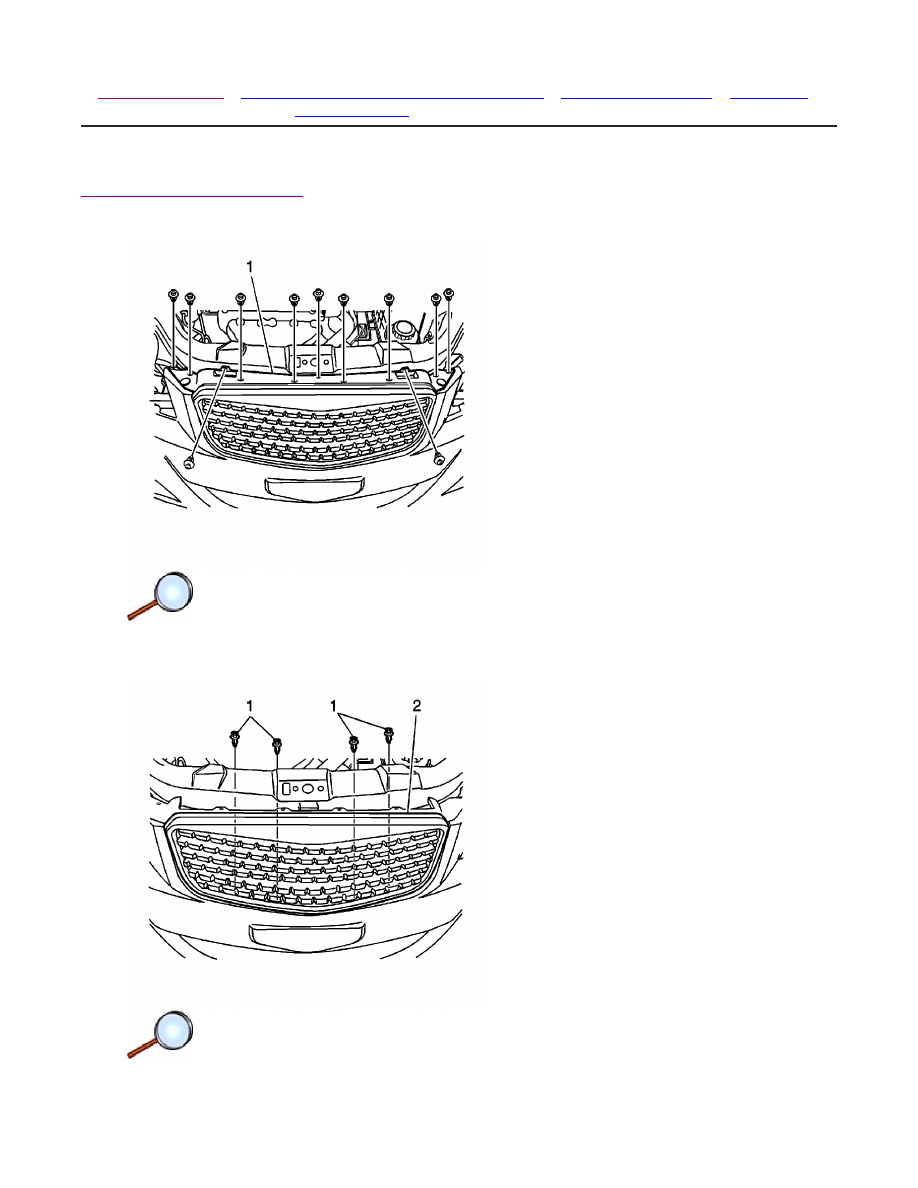
3. Remove the radiator grille upper cover (1).
4. Remove the grille to front fascia clips (1).
5. Remove the radiator grille (2).
© 2010 General Motors Corporation. All rights reserved.
Page 1 of 3
Document ID: 2046755
7/5/2010
http://localhost:9001/si/showDoc.do?docSyskey=2046755&pubCellSyskey=148272&pubO...

6. Remove the front fascia air guard clips (1), if necessary.
7. Remove the front fascia air guard (2) from the vehicle, if necessary.
Installation Procedure
1. Install the front fascia air guard (2) to the vehicle, if removed.
2. Install the front fascia air guard clips (1), if removed.
Page 2 of 3
Document ID: 2046755
7/5/2010
http://localhost:9001/si/showDoc.do?docSyskey=2046755&pubCellSyskey=148272&pubO...

3. Install the radiator grille (2).
4. install the grille to front fascia clips (1).
5. Install the radiator grille upper cover (1).
6. Install the upper clips on the radiator grille.
7. Close the hood.
Page 3 of 3
Document ID: 2046755
7/5/2010
http://localhost:9001/si/showDoc.do?docSyskey=2046755&pubCellSyskey=148272&pubO...
2009 Chevrolet Aveo
|
Aveo, Wave, G3, Barina (VIN S/T) Service Manual
|
Body Hardware and Trim
|
Exterior Trim
|
Repair Instructions
| Document ID: 1285294
Body Side Roof Drip Molding Replacement
Removal Procedure
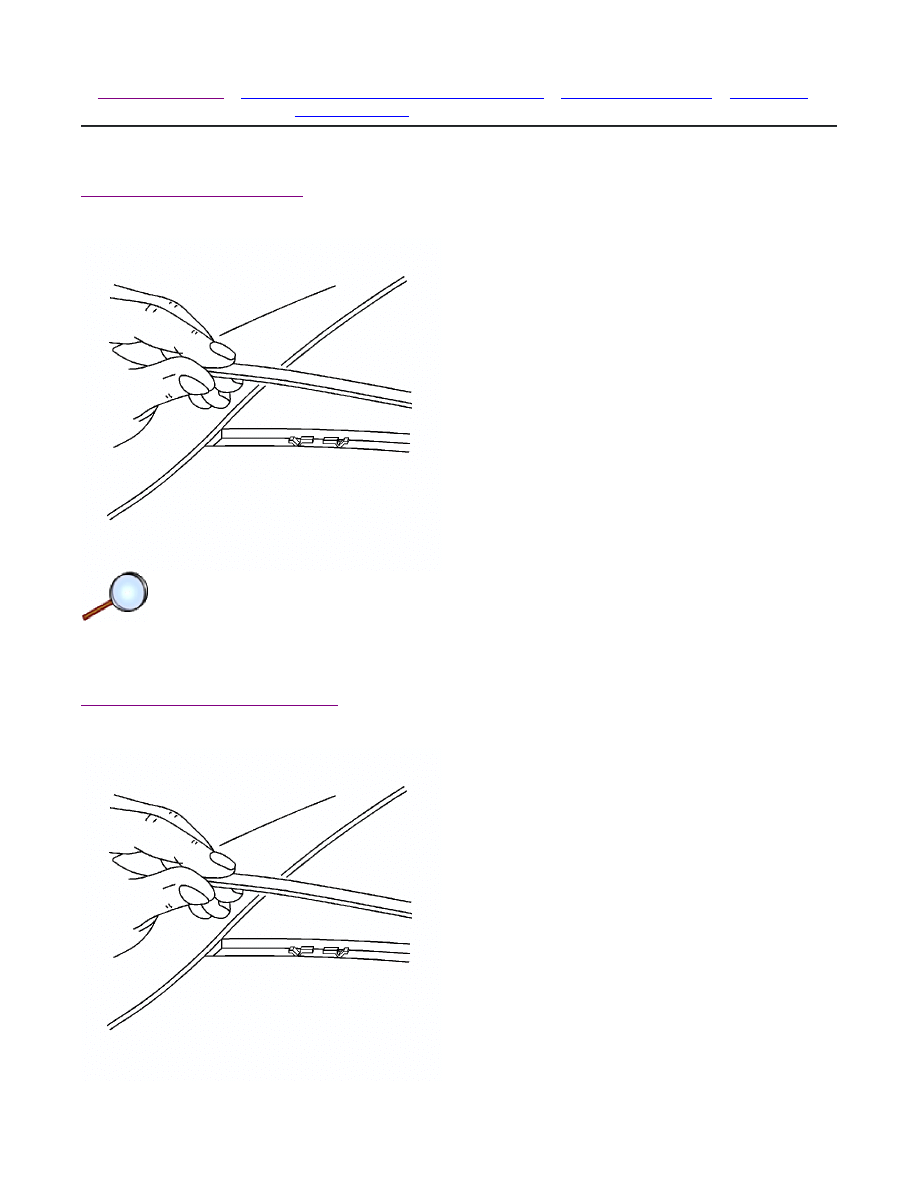
Remove the roof molding from the plastic clips.
Installation Procedure
© 2010 General Motors Corporation. All rights reserved.
Page 1 of 2
Document ID: 1285294
7/5/2010
http://localhost:9001/si/showDoc.do?docSyskey=1285294&pubCellSyskey=47110&pubObj...

Press the roof molding onto the plastic clips.
Page 2 of 2
Document ID: 1285294
7/5/2010
http://localhost:9001/si/showDoc.do?docSyskey=1285294&pubCellSyskey=47110&pubObj...

2009 Chevrolet Aveo
|
Aveo, Wave, G3, Barina (VIN S/T) Service Manual
|
Body Hardware and Trim
|
Exterior Trim
|
Repair Instructions
| Document ID: 1886161
Rear Spoiler Replacement (Hatchback)
Removal Procedure
1. Open the tail gate.
2. Remove the rear spoiler from the tail gate.
Installation Procedure
© 2010 General Motors Corporation. All rights reserved.
Page 1 of 2
Document ID: 1886161
7/5/2010
http://localhost:9001/si/showDoc.do?docSyskey=1886161&pubCellSyskey=148345&pubO...

Install the rear spoiler on the tail gate with the nuts.
Page 2 of 2
Document ID: 1886161
7/5/2010
http://localhost:9001/si/showDoc.do?docSyskey=1886161&pubCellSyskey=148345&pubO...
2009 Chevrolet Aveo
|
Aveo, Wave, G3, Barina (VIN S/T) Service Manual
|
Body Hardware and Trim
|
Exterior Trim
|
Repair Instructions
| Document ID: 2095618
Rear Spoiler Replacement (Notchback)
Removal Procedure
Warning:
Refer to
Battery Disconnect Warning
in the Preface section.
1. Disconnect the negative battery cable. Refer to
Battery Negative Cable Disconnection and
Connection
.
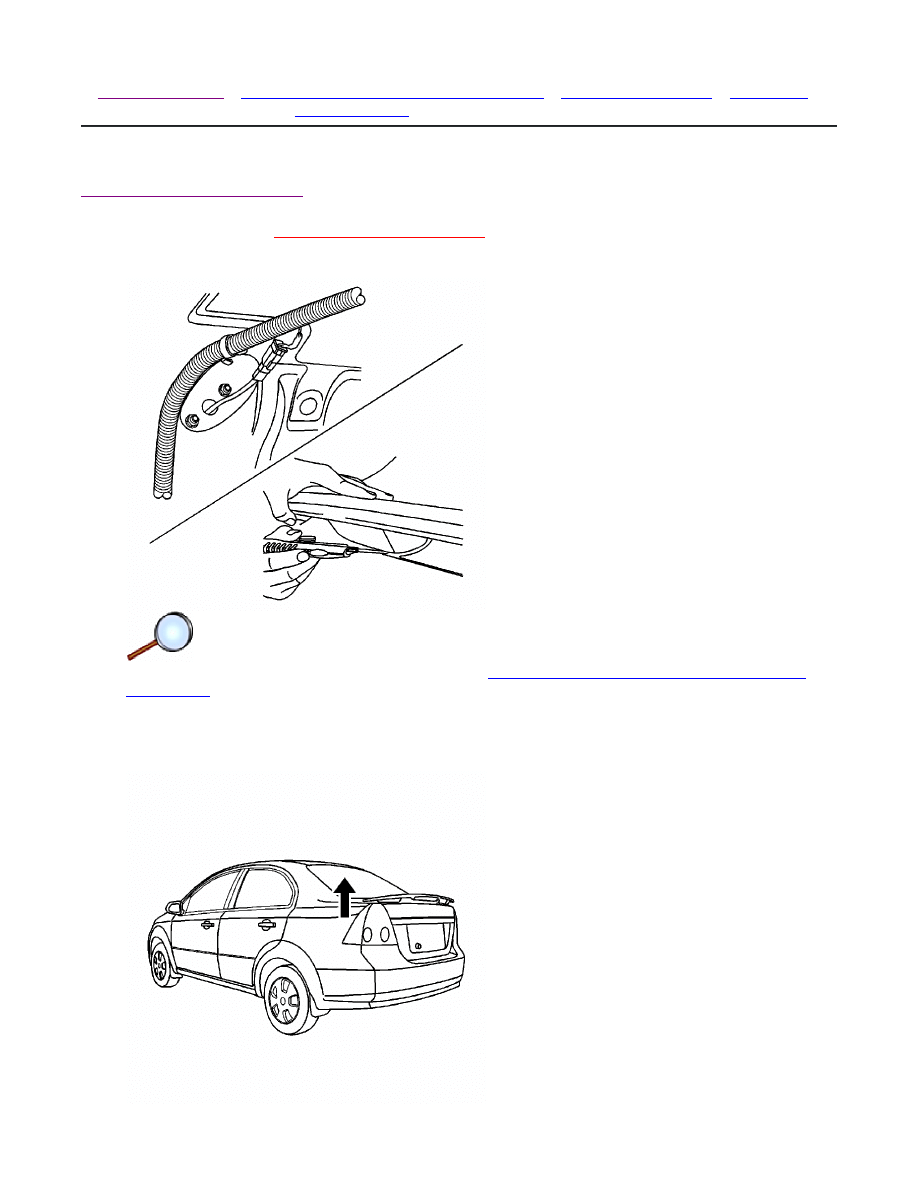
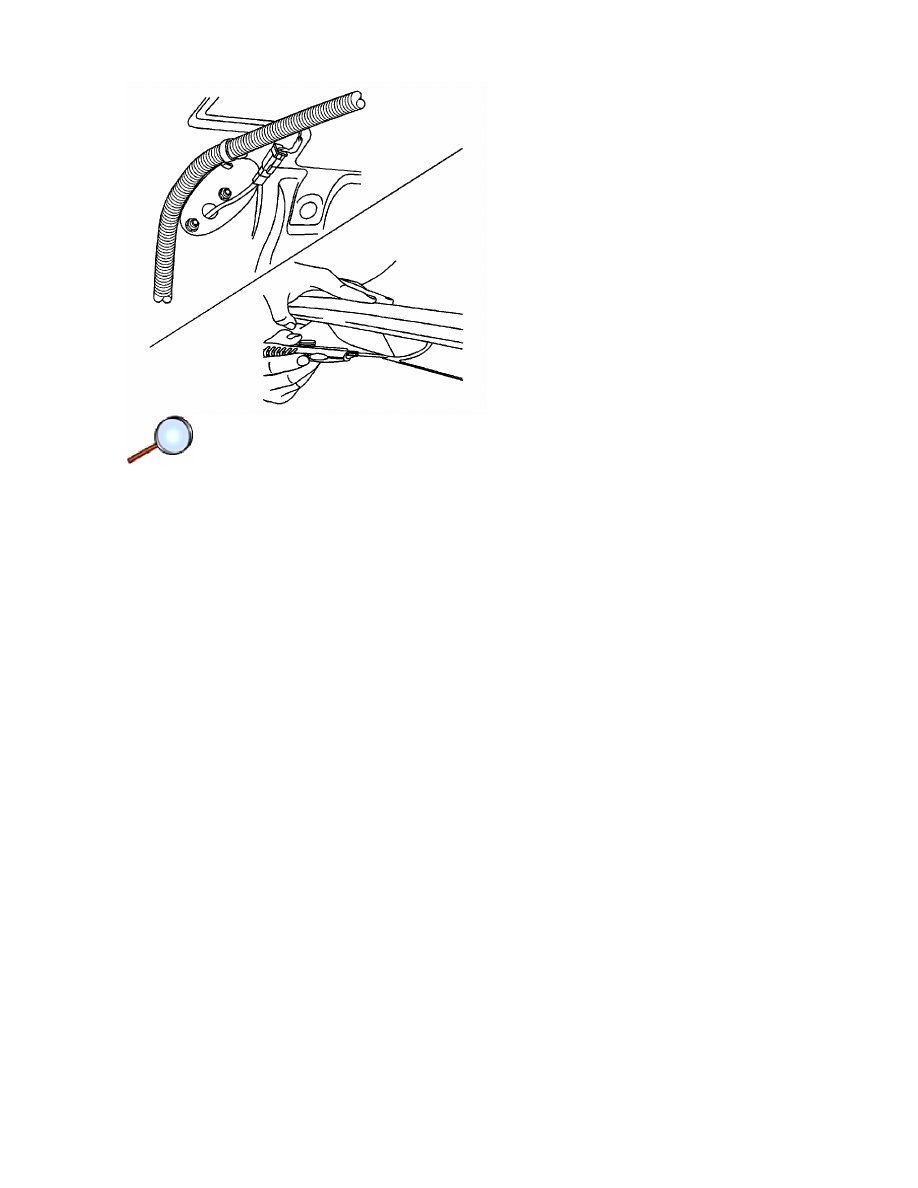
2. Remove the clips and rear compartment trim.
3. Disconnect the rear spoiler electrical connector.
4. Remove the nuts.
5. Using a flat-bladed tool, carefully separate the rear spoiler from the rear compartment lid.
© 2010 General Motors Corporation. All rights reserved.
Page 1 of 3
Document ID: 2095618
7/5/2010
http://localhost:9001/si/showDoc.do?docSyskey=2095618&pubCellSyskey=148345&pubO...

6. Remove the rear spoiler from the rear compartment lid.
Installation Proccedure
Note: If reusing the rear spoiler, remove any remaining double-sided tape from the rear
spoiler and the rear compartment lid.
1. Apply new double-sided tape.
2. Peel off the adhesive backing paper and affix the rear spoiler on to the rear compartment lid,
ensuring it is carefully positioned.
Caution:
Refer to
Fastener Caution
in the Preface section.
Page 2 of 3
Document ID: 2095618
7/5/2010
http://localhost:9001/si/showDoc.do?docSyskey=2095618&pubCellSyskey=148345&pubO...
3. Install the nuts attaching the rear spoiler and tighten to 3 N·m (27 lb in).
4. Install the rear compartment lid trim with the clips.
5. Connect the negative battery cable.
Page 3 of 3
Document ID: 2095618
7/5/2010
http://localhost:9001/si/showDoc.do?docSyskey=2095618&pubCellSyskey=148345&pubO...
Document Outline
Wyszukiwarka
Podobne podstrony:
M39m Exterior Trim
EXTERIOR TRIM SECTION 9M 5
EXTERIOR AND INTERIOR TRIM
76 Exterior and Interior Trim
76 Exterior and Interior Trim
76 Exterior Interior Trim
EXTERIOR AND INTERIOR TRIM
M39g Interior Trim
M 5588 Long Sleeveless Dress With Shaped Trim
20 body interio and exterior
L 5588 Long Sleeveless Dress With Shaped Trim
M 5589 Short Dress With Shaped Trim
Exterior Painting
Exterior Roof
L 5589 Short Dress With Shaped Trim
więcej podobnych podstron