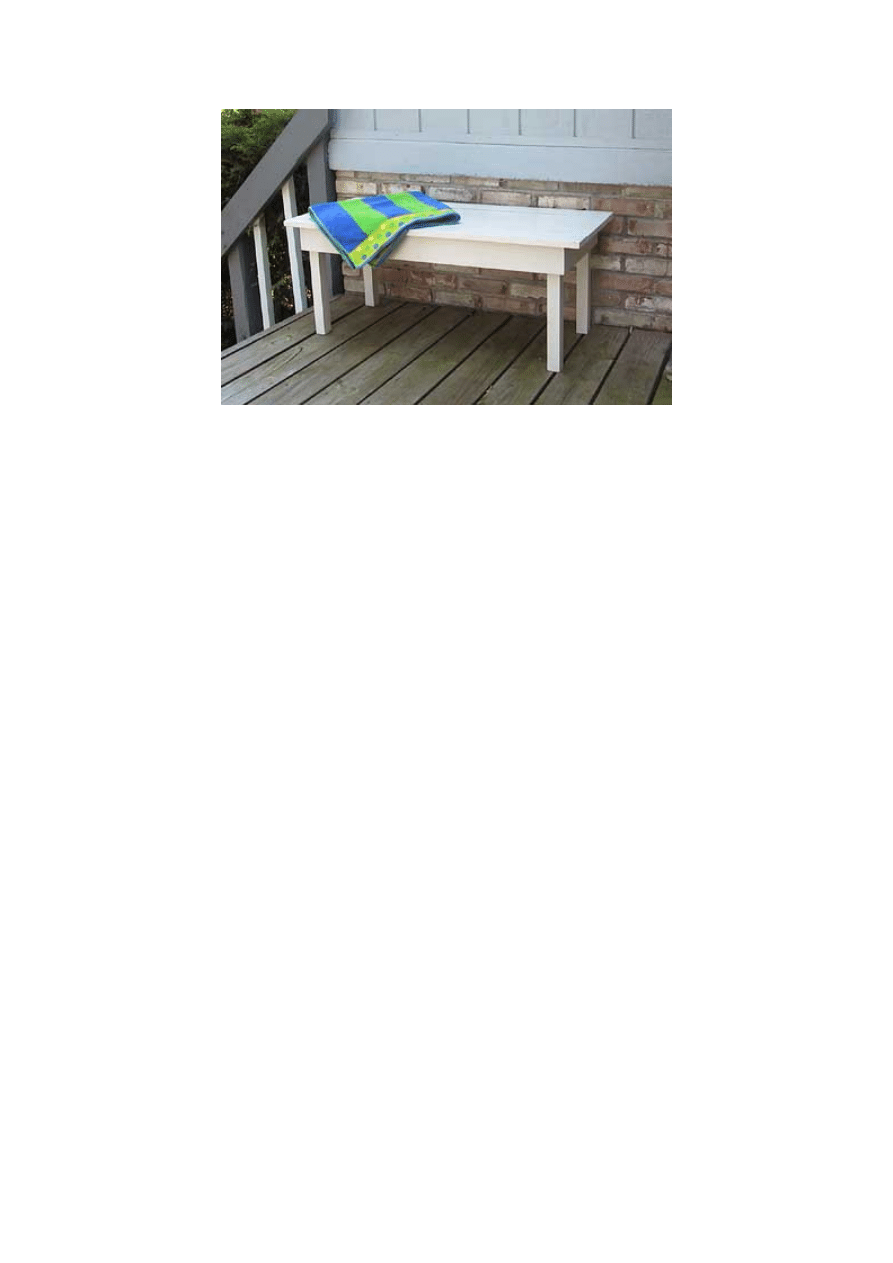
This handy deck bench can be used for extra seating or as an
extra BBQ table.
Building an outdoor bench
Materials needed
1 inch x 4 inch pine boards
2 inch x 2 inch pine boards
Circular saw
Tape measure
Carpenter’s square
Cordless drill/screwdriver
Galvanized wood screws
Exterior spackle
Sandpaper
Primer/latex exterior paint
Step 1: What kind of topping?
Cut five 1 inch x 4 inch top boards measuring 4 feet in length. Use
the circular saw to cut the boards to length. Sand smooth using 120 grit
sandpaper and soften the edges. Remember you'll be sitting on this, so
make it comfy.
Step 2: I'll have a leg please.
Cut four 2 inch x 2 inch boards to a length of 16 inches, these will be
used for the inside of the legs. Cut eight 1 inch x 4 inch boards to a
length of 16 inches, these will be the outer part of the leg.
Attach the 1 inch x 4 inch boards to the 2 inch x 2 inch pieces, lay
them lengthwise together and attach using 1 1/4 inch galvanized
screws. What you will have is a 2 inch x 2 inch bordered by the two 1
inch x 4 inch pieces, shaped like an "L." Assemble all 4 legs in this
manner. Sand lightly with 120 grit sandpaper.

Step 3: And your side choices are ...
Cut the front and the back apron boards
to a length of 37 1/2 inches. Why the half? Once the sides are attached
to the legs, the length of the sides and the legs together will allow the
top boards to hang over 3 inches on each end, get it? You will. Cut the
two side aprons out of the 1 inch x 4 inch to 14 1/2 inches in length.
Step 4: Set the bench
Lay two legs down flat a
legs. The board should butt against the 2 inch x 2 inch legs; attach it
using 1 inch galvanized screws.
Do the same for the other two le
to complete the bottom of the bench.
To support the top boards, cut three 2
length of the measurement between the front and back apron. Attach
the inside of the front and back apron by drilling pilot holes and using
galvanized screws. The three boards should be spaced evenly along the
length of the front and backboard for maximum strength. Patch the
holes with exterior filler. You should have the bottom of the bench
constructed.
Step 5: Put t
Find the centre of the side ap
board so that the centre of the top board will rest on the centre of the
side apron. Allow the board to hang over 3 inches on each end. Screw
up from underneath the 2 inch x 2 inch into the bottom of the top board
using 1 inch galvanized screws.
Drill pilot holes through the 2 in
Using a couple of nails as a spacer, place the next board on the top of
the bench and again attach from underneath. Do this for the remaining
top boards. You should have an overhang at the edge of 1 inch.
Now you should have a great outdoor bench. One tip: prime an
paint all the boards before you attach all the pieces. Believe me, it's
impossible to get between the slats once it's assembled.
out of 1 inch x 4 inch lumber
nd attach the front apron to the back of the
gs. Then attach the two side aprons
inch x 2 inch boards to the
to
he topping on.
rons and mark the spot. Set the first top
ch x 2 inch so the wood won't split.
d
Wyszukiwarka
Podobne podstrony:
Bench Outdoor
Outdoor Table and Bench
Woodwork Plans Outdoor Table And Bench
potting bench
Arbor Bench id 67571 Nieznany
planter bench
Build a Garden Bench(1)
Gardening Bench
Boot Bench(1)
Bridgewater Bench Swing lawka
171 91 Outdoor monta z i pielegnacja docid 174 (2)
planter bench plan
Classic Cedar Garden Bench
0 50V 2A LM10C, 0 50V 2A Bench power supply circuit diagrams, schematics, electronic projects
Planter Bench another
więcej podobnych podstron