
2009 Chevrolet Aveo
|
Aveo, Wave, G3, Barina (VIN S/T) Service Manual
|
Transmission
|
Shift Lock Control
|
Repair Instructions
| Document ID: 2094050
Shift Lock Control Solenoid Replacement
Removal Procedure
Warning:
Refer to
Battery Disconnect Warning
in the Preface section.
1. Disconnect the negative battery cable.
2. Remove the floor console. Refer to
Front Floor Console Replacement
.
3. Disconnect the wiring harness connectors from the shift control lever.
© 2010 General Motors Corporation. All rights reserved.
Page 1 of 5
Document ID: 2094050
7/6/2010
http://localhost:9001/si/showDoc.do?docSyskey=2094050&pubCellSyskey=57459&pubObj...
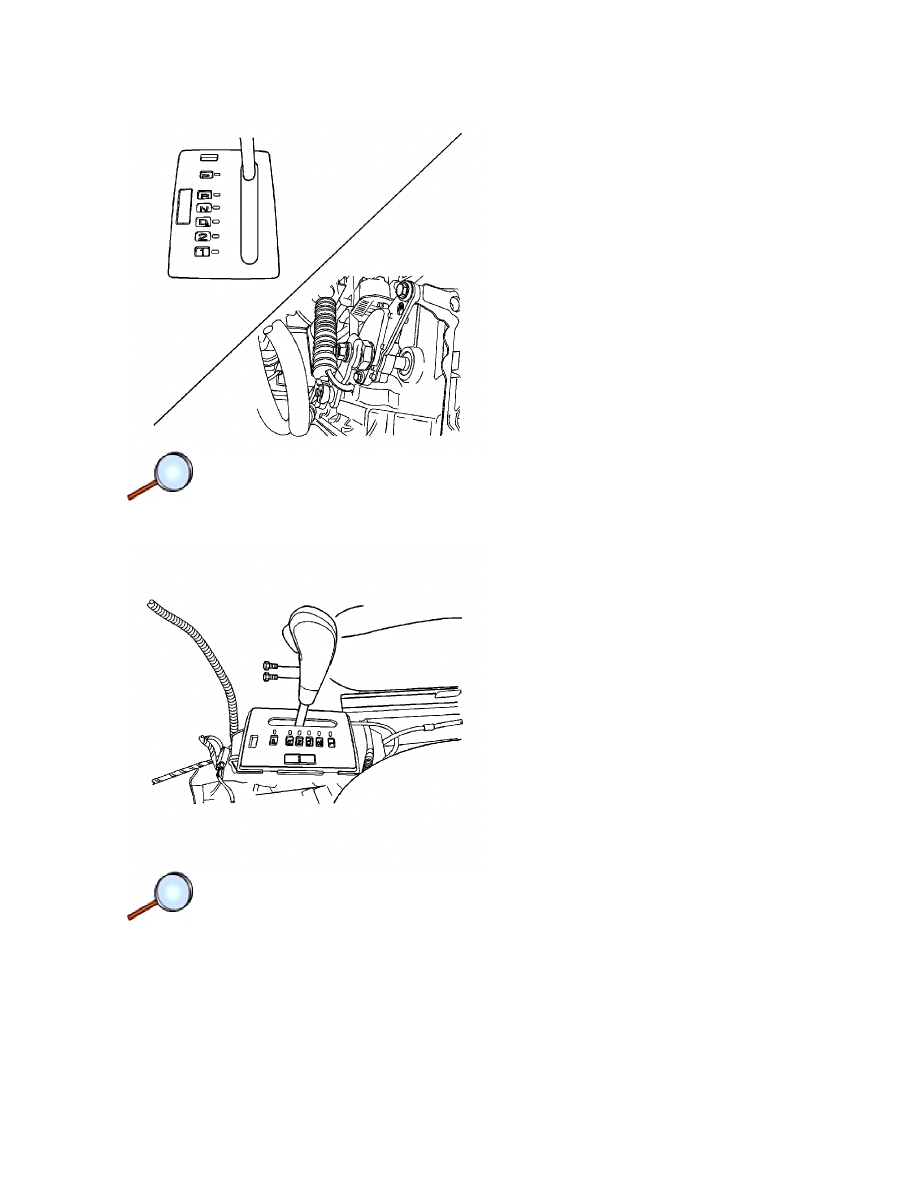
4. Loosen the control cable adjusting nut.
5. Disconnect the control cable from the shift control lever assembly.
6. Remove the shift control lever assembly mounting bolts.
7. Remove the shift control lever assembly.
8. Remove the two shift lever control knob retaining bolts and knob from the assembly.
9. Carefully remove the shift select cover from the lever assembly.
Page 2 of 5
Document ID: 2094050
7/6/2010
http://localhost:9001/si/showDoc.do?docSyskey=2094050&pubCellSyskey=57459&pubObj...
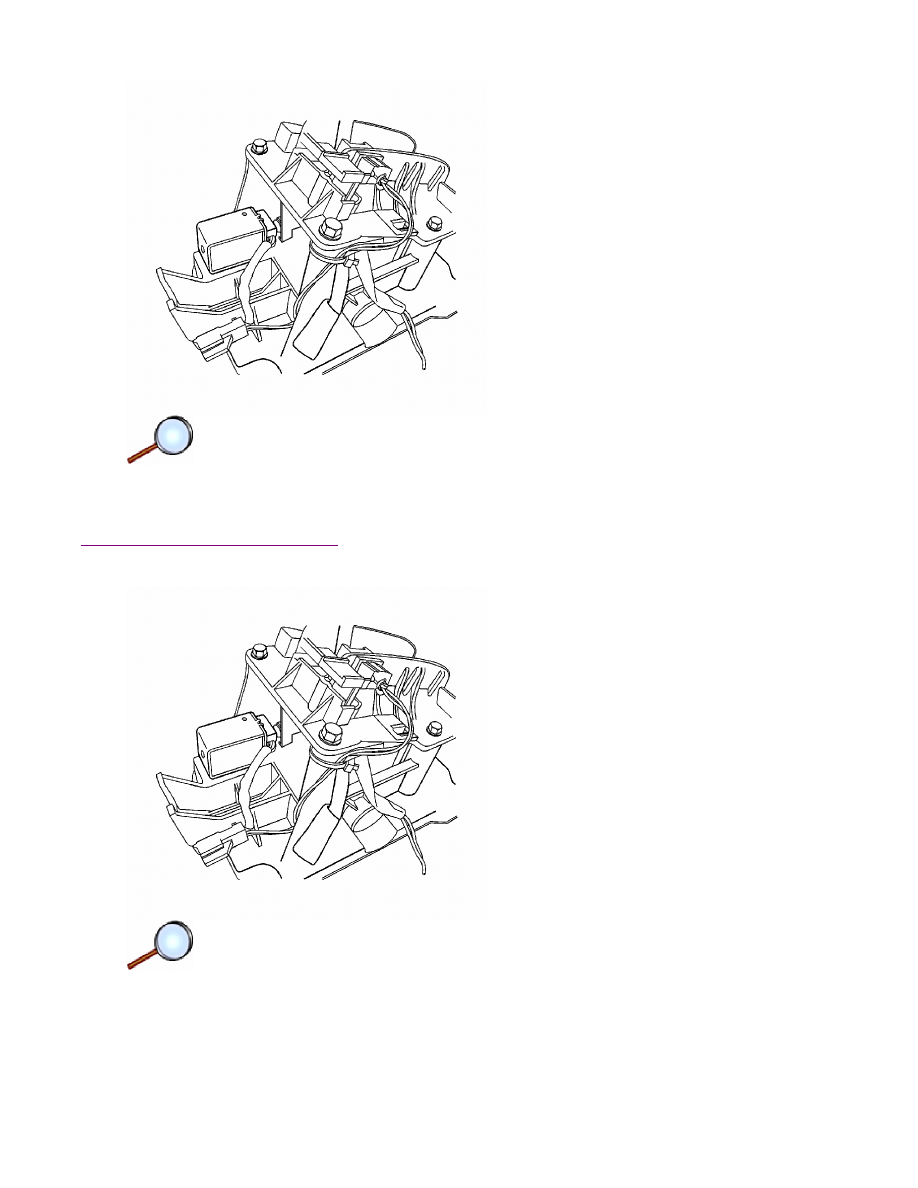
10. Remove the shift lock solenoid retaining bolts.
11. Remove the solenoid from the assembly.
Installation Procedure
1. Install the shift lock solenoid on the assembly.
2. Install the shift lock solenoid retaining bolts.
3. Carefully install the shift select cover to the lever assembly.
Page 3 of 5
Document ID: 2094050
7/6/2010
http://localhost:9001/si/showDoc.do?docSyskey=2094050&pubCellSyskey=57459&pubObj...
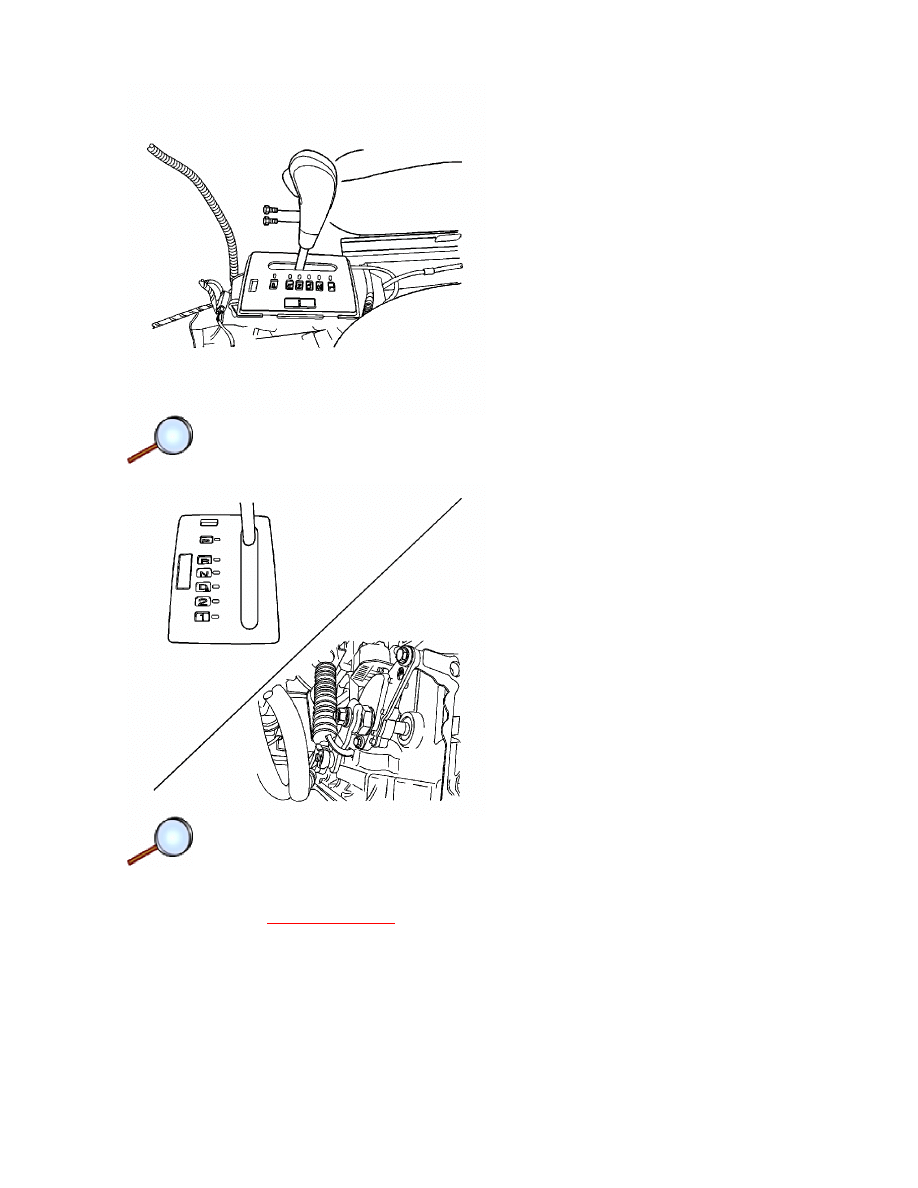
4. Install the shift lever control knob and retaining bolts.
5. Install the shift control lever assembly.
Caution:
Refer to
Fastener Caution
in the Preface section.
6. Install the shift control lever assembly mounting bolts and tighten to 8 N·m (71 lb in).
Page 4 of 5
Document ID: 2094050
7/6/2010
http://localhost:9001/si/showDoc.do?docSyskey=2094050&pubCellSyskey=57459&pubObj...
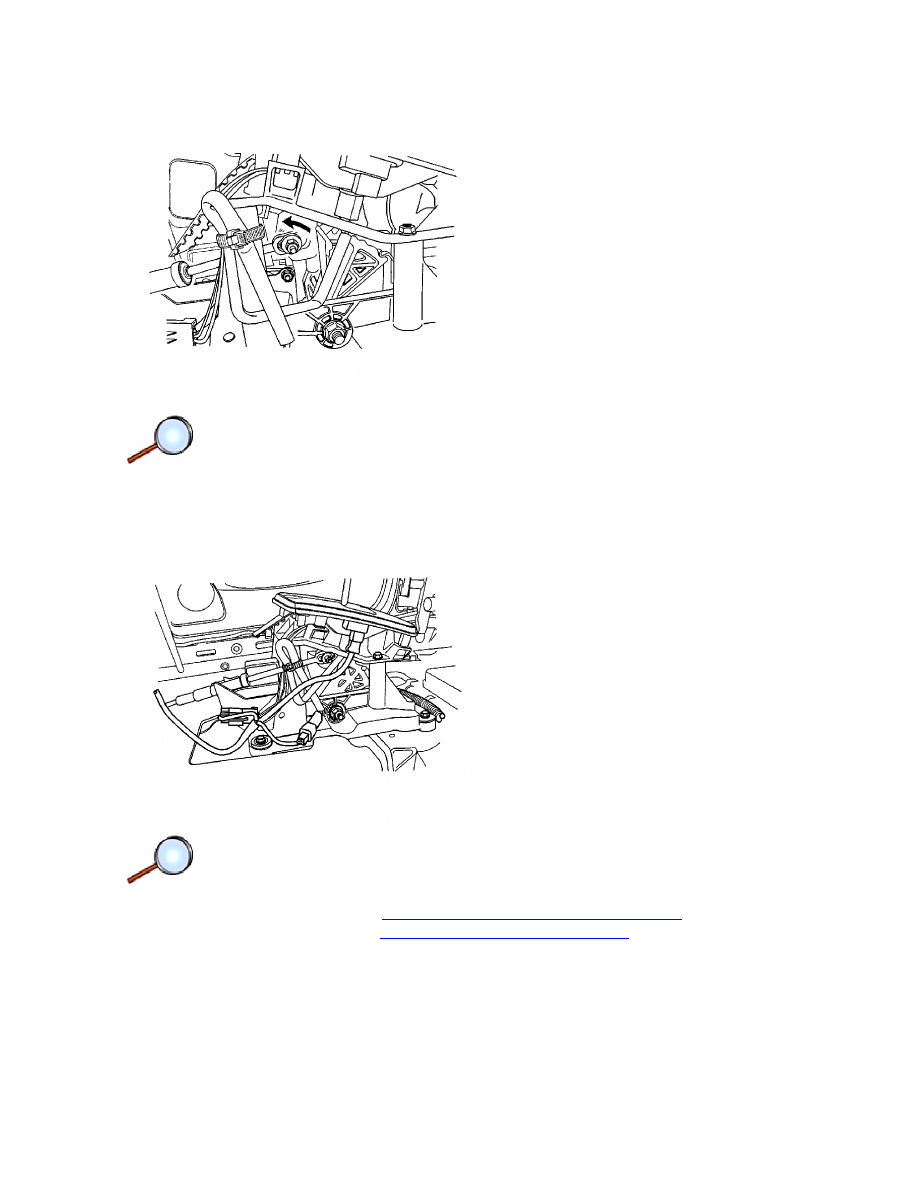
7. Connect the control cable to the shift control lever assembly.
8. Install the control cable adjusting nut and tighten to 8 N·m (71 lb in).
9. Connect the harness connector.
10. Adjust the control cable. Refer to
Range Selector Lever Cable Adjustment
.
11. Install the floor console. Refer to
Front Floor Console Replacement
.
12. Connect the negative battery cable.
Page 5 of 5
Document ID: 2094050
7/6/2010
http://localhost:9001/si/showDoc.do?docSyskey=2094050&pubCellSyskey=57459&pubObj...
Wyszukiwarka
Podobne podstrony:
407 B2CD3LK1 Odblokowywanie Funkcja (Shift lock)
Anti lock Brake Circuits, WO Traction Control
BMW E38 schematic Anti lock brake wo traction control 1
BMW E38 schematic Anti lock brake w traction control 2
Anti lock Brake Circuits, W Traction Control
BMW E38 schematic Anti lock brake wo traction control 2
BMW E38 schematic Anti lock brake w traction control 1
Damage Control Plan
14 Controllingid 15298 ppt
Controlling w przedsiębiorstwie
overview simatic controllers 04 2007 en plc
Control System Toolbox
control el heater pl
instrumenty Controllingu - praca zaliczeniowa (7 str), Zarządzanie(1)
~lock PID
rachunkowosc zarzadcza i controlling w 7
~$O Fire Control Symbols Regulations
Controlling ćw 14 10 27
controlling finansowy wykład 2 & 11 2011
więcej podobnych podstron