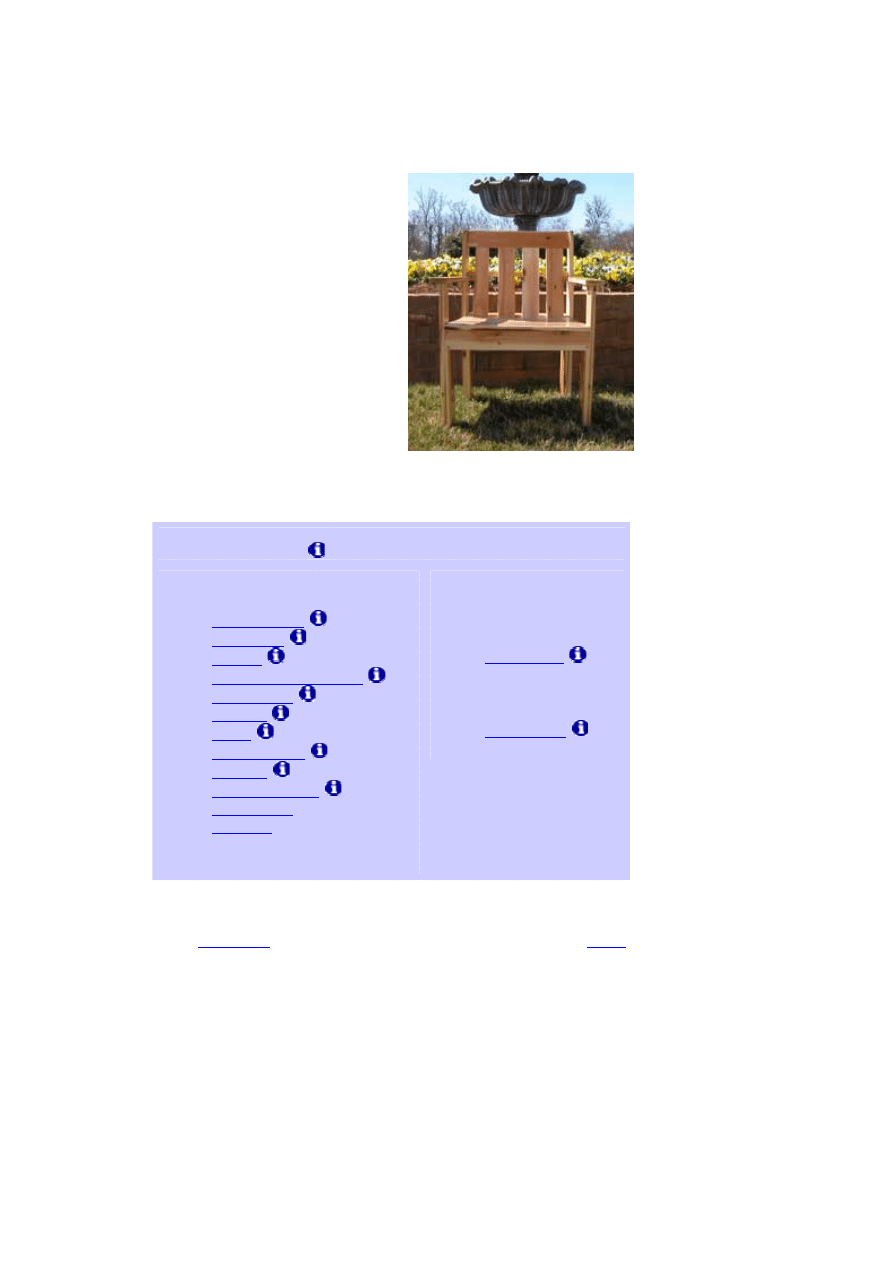
Build a
Patio Chair
Project Level: Intermediate
Enjoy the beauty of the great
outdoors from the comfort of a
chair you build yourself. This
chair is great for lounging on a
relaxing afternoon, reading or
adding entries to your daily
journal. You can build the chair
exactly as specified in our
instructions, scale it down for a
child or change the
measurements to create a fully
customized outdoor lounging
experience.
This chair is so comfortable, you'll want
to build a whole set.
Click a text link below to shop for that item.
Click the information icon
for a product buying guide.
Tools
•
•
•
•
•
•
•
•
•
•
•
• Hearing protection
Materials
• 1"x4"x8' cedar —
10 pcs
•
• Finish nails
• 1 1/4" galvanized
screws
•
Make the Side Frames
1.
the seat assembly supports to the inside
of one front side frame upright and one back side frame
upright. Use 3d finish nails to hold the boards together
while the glue dries.
2.
3. Measure and
mark 2 1/2" in
one of the
upright
connectors and
draw a seat
contour on it
that connects
the marks. (The contour's exact shape is a personal
preference.) Use a jigsaw or band saw to cut along the
contour line. Use the connector as a pattern to mark the
remaining upright connector and the center seat support.
Mark the front end of each piece for future reference.
Face-clamp the pieces together and
them so
their contours match.
4. Lay the uprights on your workbench with the inside faces
up. Lay an upright connector across a set of front and
back uprights so that its bottom
abuts the top ends
of each seat assembly support. Leave 3/4" between the
upright connector's ends and the outside edge of each
upright. Remember to orient the connector so that the
end marked "front" is toward the front upright.
5. Square the uprights and connector.
holes through
the connector and secure it to the uprights with glue and
screws.
6.
Use the remaining uprights and connector to assemble
the second side frame as a mirror image of the first.
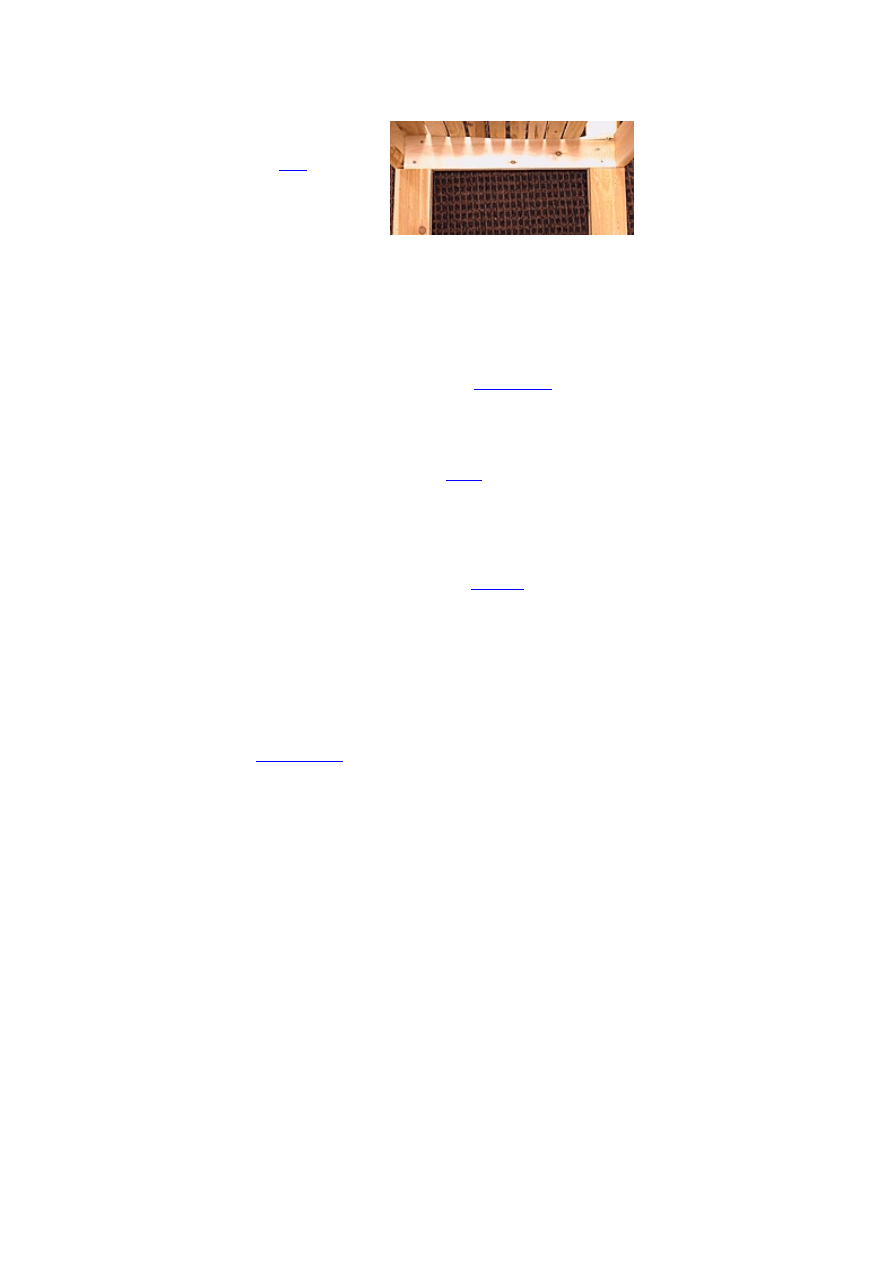
Install the Seat Rails and Center Seat Support
1. Predrill
holes near the ends of the seat rails
so you can screw through the rails into the ends of the
upright connectors.
2.
The upright connector with seat slats
already installed.

3. Secure the rails
to the side
frames with glue and screws. Check the assembly for
square and adjust as needed.
4. Measure to the center of each rail and mark the inside
face of the rail.
5. Screw and glue each of the 6" long 3/4"x3/4" support
blocks flush with the bottom of the rails, centered on the
marks from step 3.
6.
Cut a 3/4"x3/4" notch in the bottom of each end of the
center seat support. Position the center seat support
centered on the rails. Bore countersink holes in the front
and back seat rails and secure the center seat support
with glue and screws.
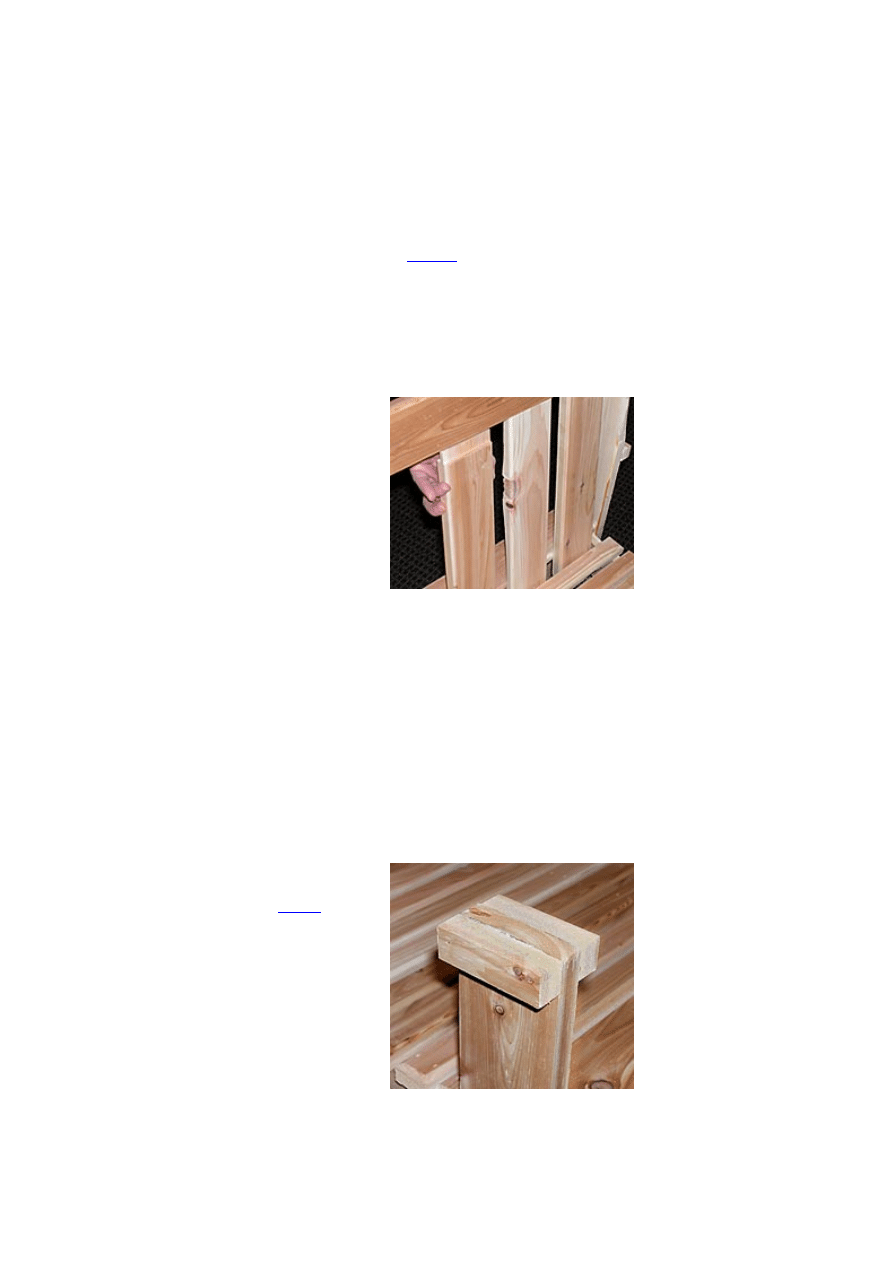
Install the Seat Slats
1. Use a router and a 1/4" round over bit to
the
1 1/2" seat slats and the 3 1/2" seat slats.
2. Position the front 3 1/2" slat on the chair so it overhangs
the front seat rail by 3/8". Secure the slat with finish nails
and glue.
3.
4. Lay a piece of
1x4 on edge so
its back face
abuts the front
edge of each
back upright.
This piece is a
spacer. Position
a 1 1/2" slat so
its back edge
abuts the front
face of the
spacer. Secure
the slat with finish nails and glue. Remove the spacer.
5.
Install the rest of the
1 1/2" slats equally spaced to fill in the area between the
front 3 1/2" slat and the rear 1 1/2" slat.
Install the Backrest
1. Rout or cut a 1/4" wide by 3/4" deep groove centered on
one edge of the backrest top rail. Use a router and a 1/4"
round over bit to round over the rail's edge on the
opposite edge from the
. The edge with the groove
is the bottom and the rounded edge is the top.
Secure the rails to the side frames with
glue and screws.
1.) Back upright
2.) Spacer
3.) Rear 1 1/2" slat
2. Position the rail so the top corner is 5/8" in from the back
edge of the back uprights and the bottom corner is 1 1/8"
in from the back edge of the back uprights. Bore
countersink holes in the back uprights so you can drive
screws into the ends of the rail. Secure the rail in place
with screws and glue.
3. Mill 3/4" long by 1/4" thick
into one end of each
backrest slat. The tenoned end of the slat is the top.
4. Use a router and a 1/4" round over bit to round over the
edges of the 1 1/2" backrest slats.
5.
6. Place a slat at
each end of the
top rail 1 1/2" in
from the end of
the rail. Secure
the slats by
gluing the
tenons into the
rail's groove and
driving 4d finish
nails through the
slat into the rear
1 1/2" seat slat.
7. Install the remaining backrest slats, evenly spaced across
the backrest.
8.
Position the back 3 1/2" seat slat in place so its front
edge abuts the back faces of the backrest slats. Secure
the slat in place with finish nails and glue.
Attach the Armrests
1.
2. Attach two 3
1/2" long
3/4"x3/4"
to each front
upright with 4d
finish nails and
glue. The top
edges of the
cleats should be
flush with the
ends of the
uprights.
3. Attach one 3
1/2" long
Install the backrest slats.
Attach cleats to both sides of each front
upright.
3/4"x3/4" cleat to the outside
face of each back upright, level
with the cleats on the front
uprights.
4. Bore a 3/16" diameter hole vertically in the center of each
cleat.
5. Measure in from the back end of one armrest 3 1/2" and
use a square to make a line across the armrest. Measure
in from the inside edge of the armrest and mark it at 1"
and 1 3/4". Use a square to mark lines from the back
edge of the board to the line you've already drawn across
the board. Use a band saw or jigsaw to cut out the 3 1/2"
by 3/4" notch made by the lines.
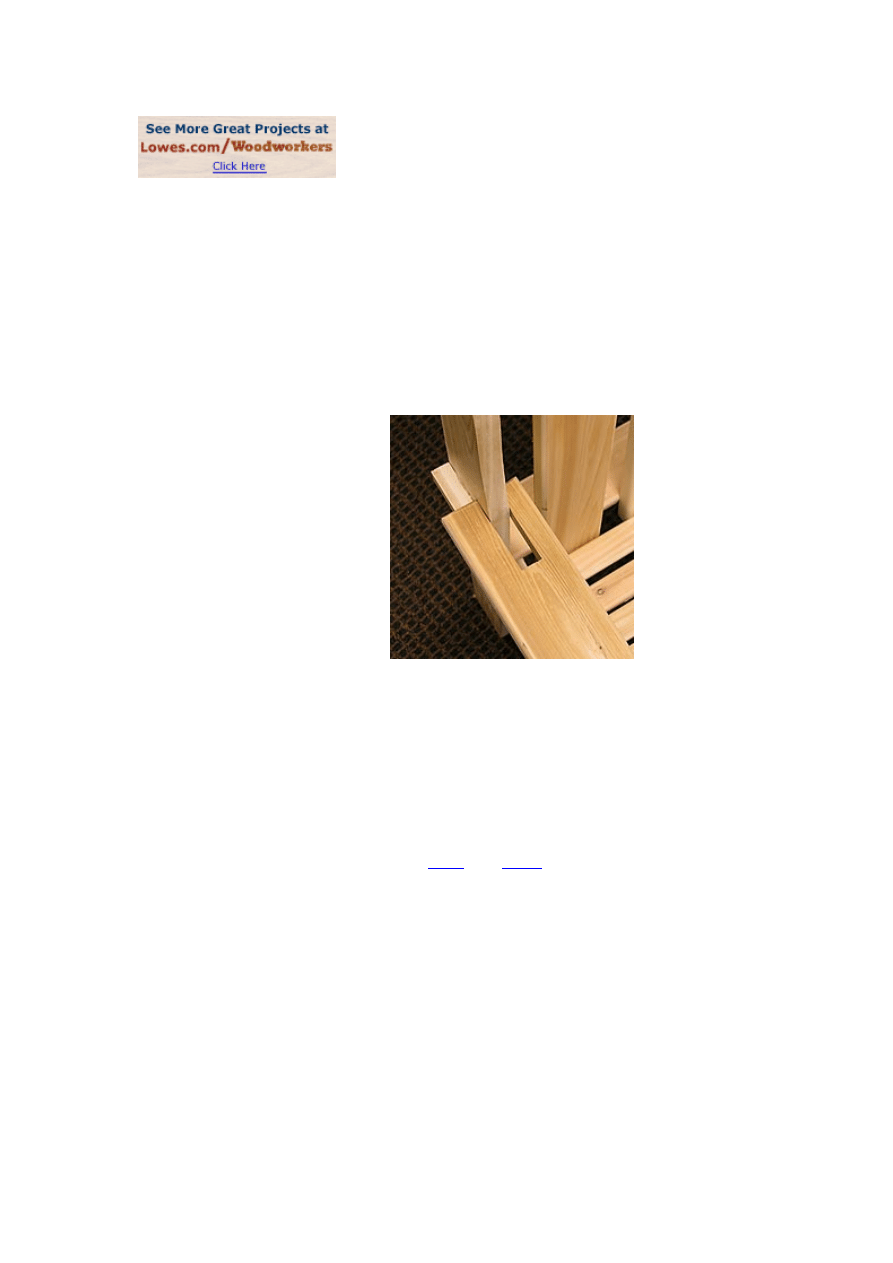
6.
7. Test fit the
armrest. The
notch should fit
around the back
rail with the wide
tail over the
back cleat. The
front of the
armrest should
overhang the
front rail by 3/4"
to 1".
8. Make the second armrest as a mirror of the first.
9. Secure the armrests in place with glue and screws driven
through the cleats into the bottom faces of the armrests.
10. Lay the 2" by 3/4" backrest stiffener across the tops of
the narrow armrest tails. Glue and nail the stiffener in
place with 4d finish nails.
11.
it as you
like or leave uncoated and allow it to weather to a
beautiful silver-gray.
Test fit the armrest.
Wyszukiwarka
Podobne podstrony:
Patio Chair and Love Seat
Patio Chair
basic patio chair
Chair Patio or Lawn Chair (Part 1)
Chair Patio or Lawn Chair (Part 2)
Chair Patio Chair and Love Seat
Chair Patio Chair and Footstool(1)
Adirondack rocking chair krzesla
Morris Chair
Anniversary Chair krzesla
Arts and Crafts Chair
Adirondack Chair
Kentuky Chair
A chair in the kitchen-games Kl.3, Scenariusze lekcji j. ang SP
Adirondack Chair(1) id 51566 Nieznany
avian flu chair text 2008
więcej podobnych podstron