Project 16136EZ:
Folding Deck
Chair
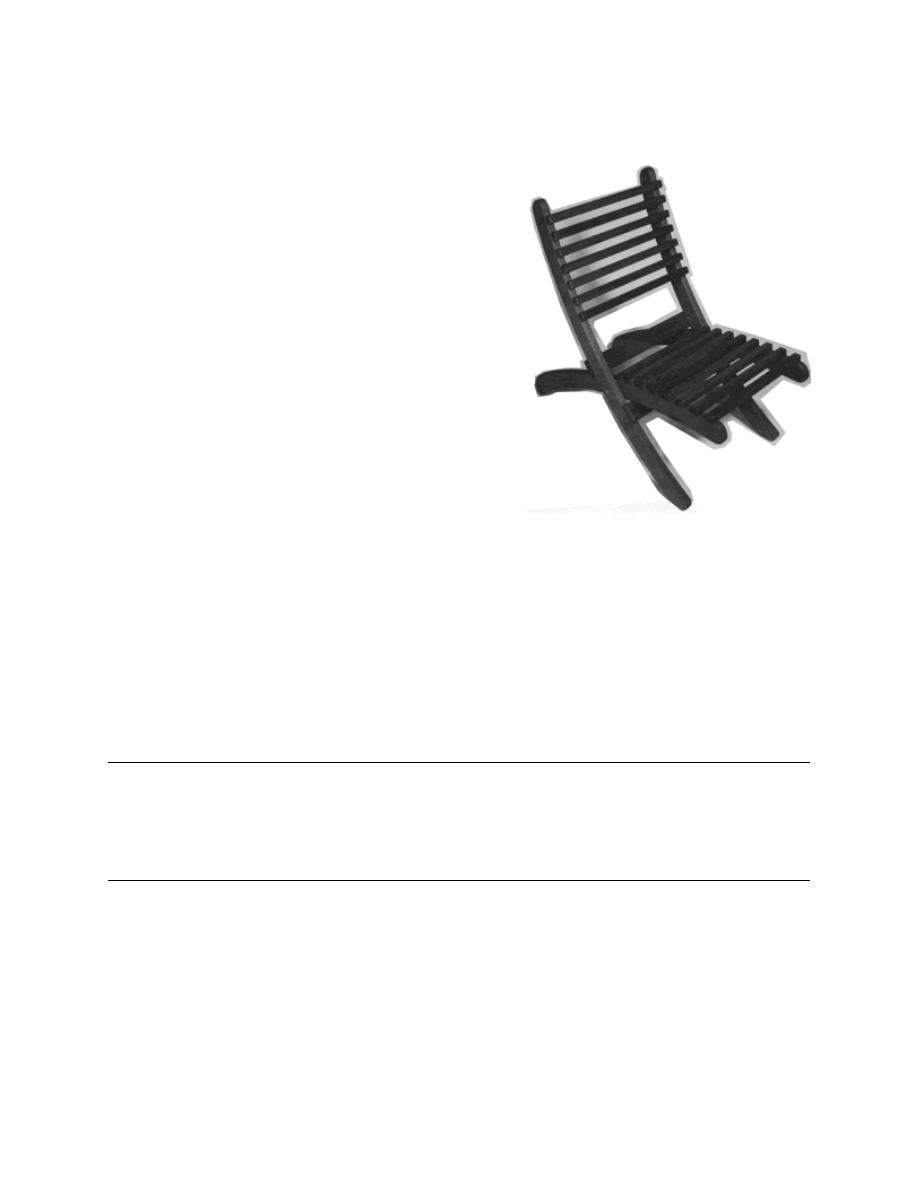
With that long awaited summer weather
soon to be here, we’re sure that you’ll find
many ways to put this sturdy outdoor chair
to good use. It folds nearly flat, a feature we
particularly like since it makes the chair
easy to carry and store. We used clear
redwood for ours, a wood that offers good
weather resistance, no small consideration for a piece that will often be out-of-
doors. And for the same reason, be sure to use brass screws (they don’t rust) and a
water-resistant glue such as plastic resin. We chose not to stain our chair since
the natural color of the redwood is quite attractive, but if you plan to stain yours,
it’s best to do so before the chair is assembled.
Folding Deck Chair Materials List
Part
Description
Size
No. Req’d
A
Outside Leg
1" x 7" x 44"
2
B
Inside Leg
1" x 7" x 40"
2
C
Cleat
1" x 2-1/2" x 19-7/16"
2
D
Back Slat
1" x 1-1/8" x 19-7/16"
7
E
Seat Slat
1" x 1-1/8" x 17-3/8"
8
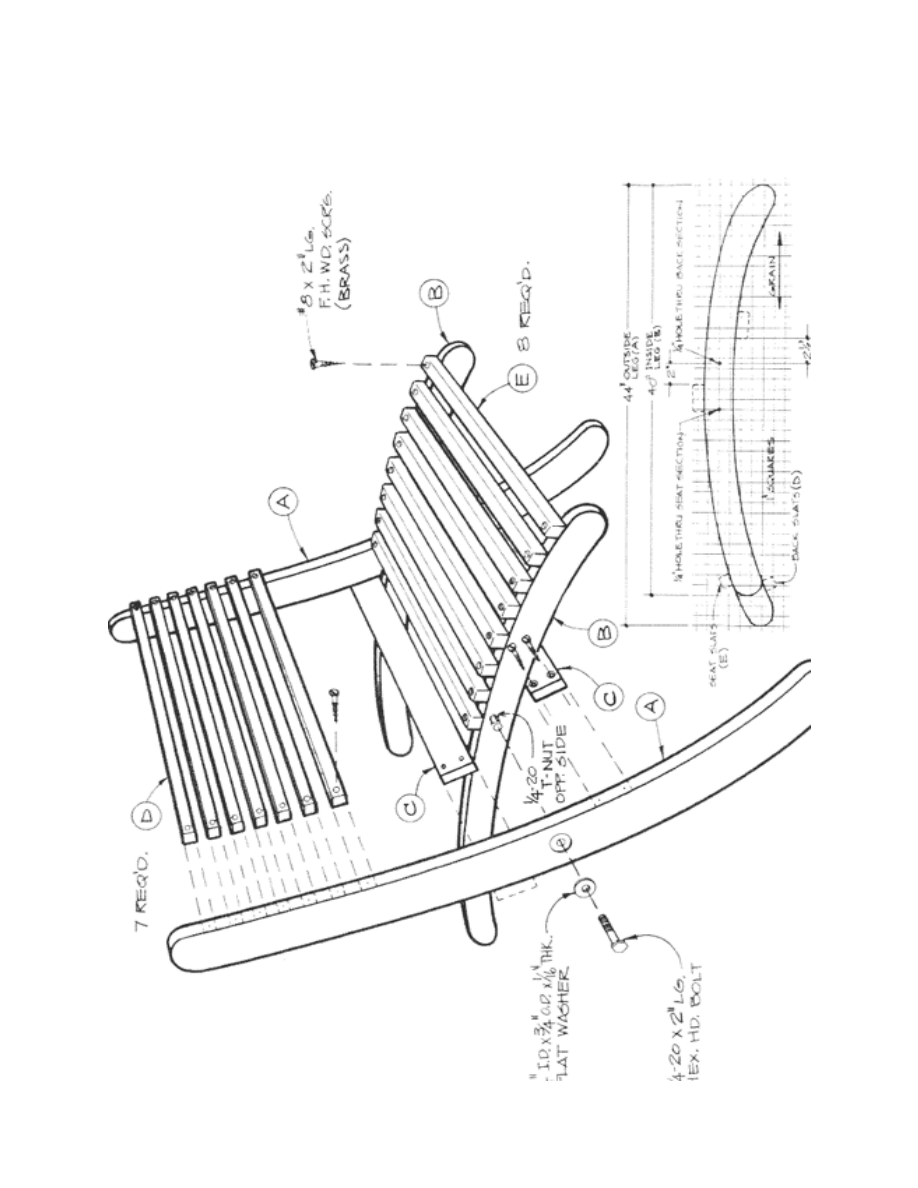
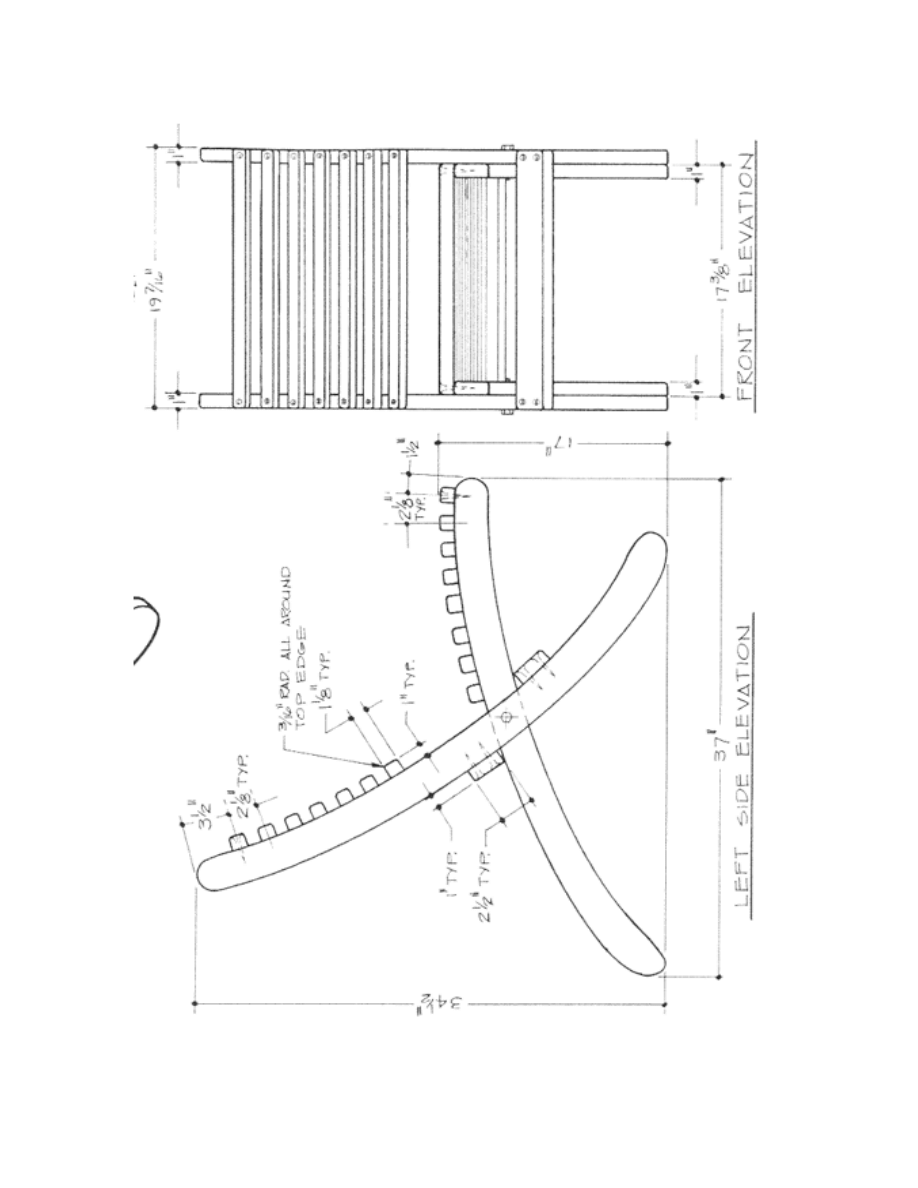
Folding Deck Chair Complete Schematic

Folding Deck Chair Step-by-Step
Instructions
1. Cut 1" stock (at least 7" wide) into two pieces 40" long (Parts B) and two
pieces 44" long (Parts A).
2. Transfer the profile of the outside leg from the grid pattern shown to one of
the 44" long pieces (Part A).
3. Use a band saw or saber saw to cut Parts A just outside the marked line.
4. Use a file and sandpaper to smooth the edge exactly to the marked line.
5. Use this piece as a template to trace its profile onto the three remaining
pieces of Parts A and B. NOTE: Keep in mind that Parts B are shorter
than Parts A.
6. Cut the three remaining pieces using the same procedure as in the first.
7. Mark the location of the 1/4" diameter pivot holes on each leg (see grid
pattern).
8. Use a drill press to bore each hole as shown.
9. Cut 1" thick stock to 2-1/2" wide by 19-7/16" long (Parts C).
10. Use glue and 2" by number 8 brass flat head wood screws (countersunk
about 1/8") to attach Parts C to Parts A and B. NOTE: To prevent splitting
of Parts C, drill holes large enough to accommodate the shank of the
screw before attaching.
11. Cut Parts D and E from 1" thick by 1-1/8" wide stock.
12. Use glue and screws to attach Parts D and E using the same procedure as in
joining Parts C.
13. Sand all parts thoroughly, rounding all sharp edges and corners.
14. Apply stain (optional) and three coats of varnish to protect from the ele-
ments.
15. Install a “tee-nut” to the inside of Part B.
16. Thread a 2" long, 1/4-20 hex head bolt and washer from the outside as
shown.
These plans were originally published in Volume 8, Issue 3 of The Woodworker’s
Journal (Jan/Feb 1984, pages 26-27).
Wyszukiwarka
Podobne podstrony:
Adirondack Style Folding Lawn Chair
Chair folding garden chair
Adirondack rocking chair krzesla
Morris Chair
Anniversary Chair krzesla
Arts and Crafts Chair
Adirondack Chair
Patio Chair and Love Seat
Kentuky Chair
A chair in the kitchen-games Kl.3, Scenariusze lekcji j. ang SP
Adirondack Chair(1) id 51566 Nieznany
Patio Chair
basic patio chair
avian flu chair text 2008
Adirondack rocking chair krzesla
Morris Chair
Anniversary Chair krzesla
chair cp
więcej podobnych podstron