
INTRODUCTION .............................................................. 1
SYSTEM REQUIREMENTS .................................. 1
Installing The Game.................................................... 2
WHAT’S NEW .................................................................... 2
Force Pool Management.......................................... 2
New Map Features ...................................................... 2
New Combat Dynamics .......................................... 2
Starting The Game ...................................................... 2
Uninstalling The Game ............................................ 3
Saving Files ........................................................................ 3
Electronic Documentation ...................................... 3
TROUBLESHOOTING ................................................ 4
Sound And Video Cards ........................................ 4
DirectX 7 Setup .............................................................. 4
Copy Protection .............................................................. 4
CONTACTING TECHNICAL
SUPPORT ................................................................................ 5
Technical Support .......................................................... 6
Online Technical Support........................................ 6
Mailing Address.............................................................. 6
GAMEPLAY............................................................................ 7
QUICK START .................................................................... 7
MAIN SCREEN .................................................................. 9
Play A Game .................................................................... 9
Boot Camp (Training) ................................................10
Create A Scenario........................................................10
Multiplayer ..........................................................................10
BOOT CAMP ........................................................................10
Quick Tour ..........................................................................10
Monitors/Toolbars ..........................................................10
Viewing The Terrain....................................................11
Infantry Tactics ................................................................11
Armour Tactics ................................................................11
THE COMMAND SCREEN ....................................11
THE BATTLE GROUP SCREEN ......................13
BATTLEFIELD CONTROLS ..................................15
Basic Unit Orders ..........................................................15
Hot Key Orders ..............................................................15
Movement Orders..........................................................15
Vehicles ..................................................................................16
Indirect Paths/Waypoints ........................................16
Fire ............................................................................................17
Line Of Sight And Range ......................................17
Smoke......................................................................................18
Defend ....................................................................................18
Ambush..................................................................................19
Group Orders ..................................................................19
OTHER CONTROLS ....................................................20
Naval Gun Fire, Mortar
Barrages, And Air Strikes ......................................20
Truce ........................................................................................21
Combat Messages ........................................................21
Options ..................................................................................21
Zoom Level ..........................................................................24
Unit Status............................................................................24
COMMAND AND MORALE ................................25
Rallying ..................................................................................25
Separation............................................................................25
THE BATTLEFIELD........................................................26
Hills ..........................................................................................26
Gullies, Trenches, and Gun Pits..........................26
Forests ....................................................................................27
Buildings................................................................................27
Rubble ....................................................................................28
Roads ......................................................................................28
Scrub ........................................................................................28
Mine Fields..........................................................................28
ENDING A BATTLE ......................................................29
Victory Locations............................................................29
Truce ........................................................................................29
Time ..........................................................................................29
Morale Failure ..................................................................29
Debriefing Screen..........................................................30
STRATEGIC LEVEL ......................................................31
The Strategic Map ........................................................31
Battle Groups ....................................................................32
Strategic Turns..................................................................34
Weather..................................................................................36
Air Strikes, Naval Gun Fire,
And Mortar Support ....................................................37
Intelligence ..........................................................................38
Winning Campaigns And Operations..........38
SCENARIO EDITOR ....................................................39
The Map................................................................................39
MULTIPLAYER....................................................................41
Using A TCP Connection........................................41
Using A UDP Connection ......................................42
Using A Serial Connection ....................................42
Using A Modem Connection................................42
Using The MSN Gaming Zone ..........................42
Using Mplayer..................................................................42
Communicating With Your Opponent ..........43
UNITS ..........................................................................................44
Infantry ..................................................................................44
Mortars ..................................................................................45
Machine Guns ..................................................................46
Flamethrowers ..................................................................46
Anti Tank Guns ..............................................................46
Crews ......................................................................................47
Vehicles ..................................................................................47
Tanks........................................................................................47
VEHICLES ..............................................................................49
M3 Half-Track ..................................................................49
M8 / M20 Armoured Cars ..................................49
M5A1 Stuart Light Tank ........................................49
M8 Howitzer Motor Carriage ..............................49
M4 Sherman......................................................................49
M10 and M18 Tank Destroyers........................50
SD KFZ 250/251 Half Tracks ..........................50
Marder III ............................................................................50
STUG III / STUH 42 ..................................................50
Panzer II ................................................................................50
Panzer III ..............................................................................51
Panzer IVG ........................................................................51
Panzer V Panther ..........................................................51
French Tanks ....................................................................51
Russian Tanks ..................................................................51
CREDITS ..................................................................................53
ATOMIC GAMES, INC. ............................................53
SSI/Mattel ............................................................................54
03661 CLOSE COMBAT 5 EX MAN 9/21/01 12:16 PM Page 1
2
1
Installing the Game
You must install C
LOSE
C
OMBAT
: I
NVASION
N
ORMANDY
game files to your hard drive and
have the C
LOSE
C
OMBAT
: I
NVASION
N
ORMANDY
CD in your CD-ROM drive to play this
game or use the Scenario Builder.
To install the game, insert the CD into the CD-ROM drive. When the pop-up window
appears, click on the Install option. If you have disabled the Windows Autorun, or if it
does not function, use W
INDOWS
E
XPLORER
to open the CD and double-click on the Setup
icon. Follow all on-screen prompts to complete the installation.
WHAT’S NEW
Force Pool Management
Each Battle Group now has a Force Pool from which to draw units. You can configure
your Battle Groups before heading into battle, replace units lost in battle, and if you play
the American side,
Reinforce your troops, restoring your Force Pool to full strength (see
page 13, “The Battle Group Screen” for more information).
New Map Features
In addition to the new, historically accurate maps of the entire Cotentin peninsula, from
Utah Beach to Cherbourg, C
LOSE
C
OMBAT
: I
NVASION
N
ORMANDY
has new defensive terrain
features such as complex trench systems, pillboxes, hardened emplacements, dragon’s
teeth, barbed wire, and beach obstacles.
New Combat Dynamics
C
LOSE
C
OMBAT
: I
NVASION
N
ORMANDY
adds a new support feature: naval bombardments.
Allied ships off the coast can shell German positions to provide cover for the beach
operations (see page 20, “Naval Gun Fire”). Also, airborne units now start the campaign
game behind enemy lines; airborne units start with five days of supplies, from which they
draw exclusively until exhaustion; after that, they must be connected to a supply depot by
the road network in order to be in supply. Finally, units that were not historically present
have been included in the Scenario Editor to allow you to create “what if” scenarios.
Starting the Game
Every time the CD-ROM drive is closed with the CD in place, the C
LOSE
C
OMBAT
:
I
NVASION
N
ORMANDY
Autorun program displays a menu with the options to run the game,
run the Scenario Builder, install DirectX, uninstall the game, or view the README.TXT file.
You can also start C
LOSE
C
OMBAT
: I
NVASION
N
ORMANDY
by opening the Start menu, select-
ing Programs and choosing the folder where C
LOSE
C
OMBAT
: I
NVASION
N
ORMANDY
was
installed and left-clicking on the C
LOSE
C
OMBAT
: I
NVASION
N
ORMANDY
program item.
INTRODUCTION
On June 6th, 1944, the combined forces of the United States, Great Britain, Canada, and
France launched the greatest amphibious invasion in the history of the world. The blow
fell in Normandy, France, striking Adolph Hitler’s Atlantic Wall with nine divisions of assault
troops plus support from naval gunfire and massive air strikes. The Atlantic Wall would
crumble before the weight of this onslaught, and Europe would be free of the Third
Reich less than a year later.
C
LOSE
C
OMBAT
: I
NVASION
N
ORMANDY
retells the story of
this historic battle from the per-
spective of the men who
fought for control of Europe. As
the American Commander, you
must fight your way off the
beaches and take the important
seaport of Cherbourg before
the end of June. The German
commander must delay the
Americans at the beach and
await reinforcements to throw
the Allies back into the sea.
SYSTEM REQUIREMENTS
• Pentium 200 MHz IBM PC or compatible
• 32 MB of RAM
• Windows® 95 or 98 — Note: This is a Windows game and was not designed to be
played on Windows® NT systems. Multitasking is not recommended when playing
C
LOSE
C
OMBAT
: I
NVASION
N
ORMANDY
• An uncompressed hard drive with 250 MB free for the “Recommended” install
• 4 X CD-ROM drive or faster
• An SVGA video adapter with 4 MB of memory and a Colour SVGA Monitor
• A Windows compatible mouse
• DirectX7 certified drivers required
In addition to the basic system requirements, the game requires that DirectX 7 or later
be installed in your system. The option to install DirectX 7 appears during the game
installation. For network play, you need a DirectPlay compatible network adapter.
03661 CLOSE COMBAT 5 EX MAN 9/21/01 12:16 PM Page 2
4
TROUBLESHOOTING
This section provides information that should help you solve some common problems.
Sound and Video Cards
This product requires Windows 95/98 and DirectX compliant sound and video cards. If
you experience problems with sound or video while using this product please contact
the manufacturer of your sound or video card for the latest DirectX certified drivers. If
such drivers are not used, this product may not run properly on your system.
DirectX 7 Setup
This game requires DirectX 7 or later. If you do not have DirectX 7, then it can be
installed or reinstalled from the CD. Installing DirectX 7 is an option when installing the
game. You can also install it by using Windows Explorer to open the DIRECTX folder on
the game CD. Double-click on DXSETUP.EXE to start the DirectX 7 install.
From within the installation program, you can also reinstall DirectX 7, test your driver’s
certification, or reinstate your previous audio and video drivers.
DirectX Disclaimer
C
LOSE
C
OMBAT
: I
NVASION
N
ORMANDY
utilises Microsoft’s DirectX sound and video drivers.
DirectX is a programming tool created by Microsoft, and the installation of DirectX may
cause video problems and system anomalies with computers using video drivers that are
not DirectX certified. DirectX is a Microsoft product, and as such, this publisher cannot be
responsible for changes that might occur to your computer system due to its installation.
For DirectX related problems that cannot be fixed by updating to your video card’s latest
Windows driver set, you must contact either Microsoft or the manufacturer of your video
card for further technical support or service.
Microsoft retains all intellectual property rights to DirectX. The user has been granted a
limited license to use DirectX with Microsoft operating system products.
Copy Protection
In order to play C
LOSE
C
OMBAT
: I
NVASION
N
ORMANDY
, the game CD must be in the
CD-ROM drive.
3
For complete and specific “how to play” information, please refer to the rest of the man-
ual. Some changes were made too late to include in this manual. Please read the
README.TXT file in your game directory for more information.
Screen saver utilities should be turned off before starting to play C
LOSE
C
OMBAT
: I
NVASION
N
ORMANDY
.
Uninstalling the Game
To uninstall the game, select that option from the Autorun menu, or choose Settings from
the Start menu, and select Control Panel; in the Control Panel, select Add/Remove
Programs, left-click on C
LOSE
C
OMBAT
: I
NVASION
N
ORMANDY
, and click on the
Add/Remove button. The game and all of its components are then removed from your
hard drive, except for your saved games and/or edited scenarios.
Saving Games
C
LOSE
C
OMBAT
: I
NVASION
N
ORMANDY
requires space on your hard drive for saved games
and temporary files. Each saved game can take up to 1.5 MB of hard drive space.
Electronic Documentation
If you do not already have the Adobe Acrobat Reader, you can install the software following
these instructions. Insert the game CD in your CD-ROM drive. Use W
INDOWS
E
XPLORER
to
open the CD, and double-click on the ACROWIN folder, located in the root directory.
Double-click on the file entitled ACROREAD.EXE and follow the on-screen prompts.
Once Acrobat Reader is installed on your system, you can read README.PDF by open-
ing the folder on your hard drive in which you installed the Adobe Acrobat reader, and
double-clicking on the file ACROREAD.EXE. From the File menu of Adobe Acrobat, you
may open the README.PDF located in the root directory of your game CD.
03661 CLOSE COMBAT 5 EX MAN 9/21/01 12:16 PM Page 4
6
UBI SOFT UK TECHNICAL SUPPORT
Technical support: 0870 800 6160 (local rate call)
Hints and tips hotline service: 0960 466 5200 (premium rate call)
On-line Support Options
Ubi Soft offers several on-line support options for their software products.
One of these is our website at: http://www.ubisoft.co.uk/support/
If you have a specific problem that is not addressed on our site, you can send your ques-
tion to us via e-mail at: techsupport@ubisoft.co.uk
Please be as specific as you can be about the problem you are experiencing. Also
include in the body of your e-mail: the name of the manufacturer of your computer sys-
tem; the brand and speed of the processor; how much RAM you have, the version
number of Windows you are using (if you aren't sure, right-click on the My Computer
icon on your desktop and select 'Properties'), and the manufacturer name and model
number of your video card, modem, and sound card.
Other Support Options
You can also contact Ubi Soft Customer Support by phone and fax. When you call,
please have all of the above mentioned information ready.
UBI SOFT ENTERTAINMENT Ltd.
Chantry Court
Minorca Road
Weybridge
Surrey KT13 8DU
Tel: +44 (0) 870 800 6160
Fax:+44 (0) 1932 838 274
In Nederland: Telefoonnummer: 0900 202 6766 (50 cpm.) Tijden: maandag tot en met
vrijdag van 09:30 tot 18:00 uur
E-mail: techsupport@ubisoft.nl
In Belgie: Telefoonnummer:02 73.25.57.7
E-mail: hotmail@ubisoft.be
Scandinavia: Ubi Soft Nordic Support
Ubi Soft Nordic offers different possibilities to obtain support.
On our website: http://www.ubisoft.dk
If you have a question, which is not described on our website, please e-mail us at:
support@ubisoft.dk
Other ways of reaching us: By telephone or fax, please call:
Telephone: (0045) 38 32 02 50
Fax: (0045) 38 33 34 49
Australia: Technical Support Hot Line: 1902 262 102 (calls are charged at $1.98 per minute
including GST. Higher from mobile and public phones)
We regret that we cannot offer game hints and tips, as the service is provided for techni-
cal difficulties only.
5
GAMEPLAY
C
LOSE
C
OMBAT
: I
NVASION
N
ORMANDY
is a real time strategy game that puts the emphasis
on REAL. During a battle, you command up to 15 units ranging from squads of infantry to
heavy tanks. The soldiers under your command act like real soldiers. If you order them to
exert themselves, they get tired, if the enemy shoots at them, they keep their heads
down, and when in danger they get scared. If a soldier becomes too scared, he may
stop listening to orders; he may even surrender or desert.
Your units have the same strengths and weaknesses that they would in real life, so in
planning your strategy you need to think about what would work in the real world.
Historically, real world tanks had a hard time detecting enemy infantry, and enemy infantry
could easily sneak up on a tank and use explosives to disable or destroy it. Real world
tanks used infantry to scout ahead of them; you are well advised to do the same.
Your goal during each battle is to do more than just kill the enemy. The invasion of
Normandy was a battle about ground, about taking it and about defending it. Each map
has a number of important strategic spots called “Victory Locations”, and success or failure
is determined by who holds them when a battle ends.
During
Campaigns and Operations you have both strategic command of the battlefield and
tactical control of every engagement. At the strategic level, you direct your Battle Groups
along the network of roads that connects the towns and villages of the Cotentin region.
You must deal with issues of supply, allocate sparse resources, and control your overall
battle strategy.
QUICK START
Double-click on the C
LOSE
C
OMBAT
: I
NVASION
N
ORMANDY
icon and start the game.
Once the game is started, go to
the Main screen and select
Play a
Game. If this is your first time
playing, you should consider
playing the
Boot Camp tutorial first.
03661 CLOSE COMBAT 5 EX MAN 9/21/01 12:16 PM Page 6
8
Place your troops to your best
advantage; left-click on a unit and
drag it to move it. You may also
give orders to units during this
stage. Right-click on a unit to
give it an order. When placing
Anti-Tank guns, which usually
cannot move quickly, it is useful
to check their fields of fire by
giving them a
Fire order and
moving the cursor around. You
can cancel the firing order by
ordering the gun to
Defend or
Ambush. Infantry should usually
start in cover, either in buildings,
woods, or ditches. Command teams improve the performance of other teams nearby.
To see the area over which a command team has influence, press the Space bar. The
coloured circles displayed represent the extent of the team leader’s command and con-
trol.
When you are satisfied with your troop placement, press the
Begin button on the tool bar
on the bottom of the screen.
While playing, keep in mind that the F5-F7 keys control your pop-up menus and that
you can issue orders to a unit by right-clicking on it.
Air Strikes, Naval Gun Fire, and Mortar
Barrage can each be used only once per Battle if they are available at all.
MAIN SCREEN
Play a Game
Left-clicking on the
Play a Game
option opens the Command
screen. From the Command
screen you may load a saved
game or select any of the single
player
Battles, Operations, or
Campaigns.
7
Once on the Command screen, if
you want to jump in quickly, choose
a
Battle listed in the window on the
upper left hand side rather than a
Campaign or Operation. Once you
have decided which Battle you
want to play, double-click on it.
This brings you to the Battle Group
screen where you can look at the
units you will be fighting the Battle
with. You can rename them if you
want, using the button on the bot-
tom of the screen. By clicking on
units, you can also look at their
Experience Level and Morale.
When you’re ready to fight, select
Next from the lower right hand corner; this displays the
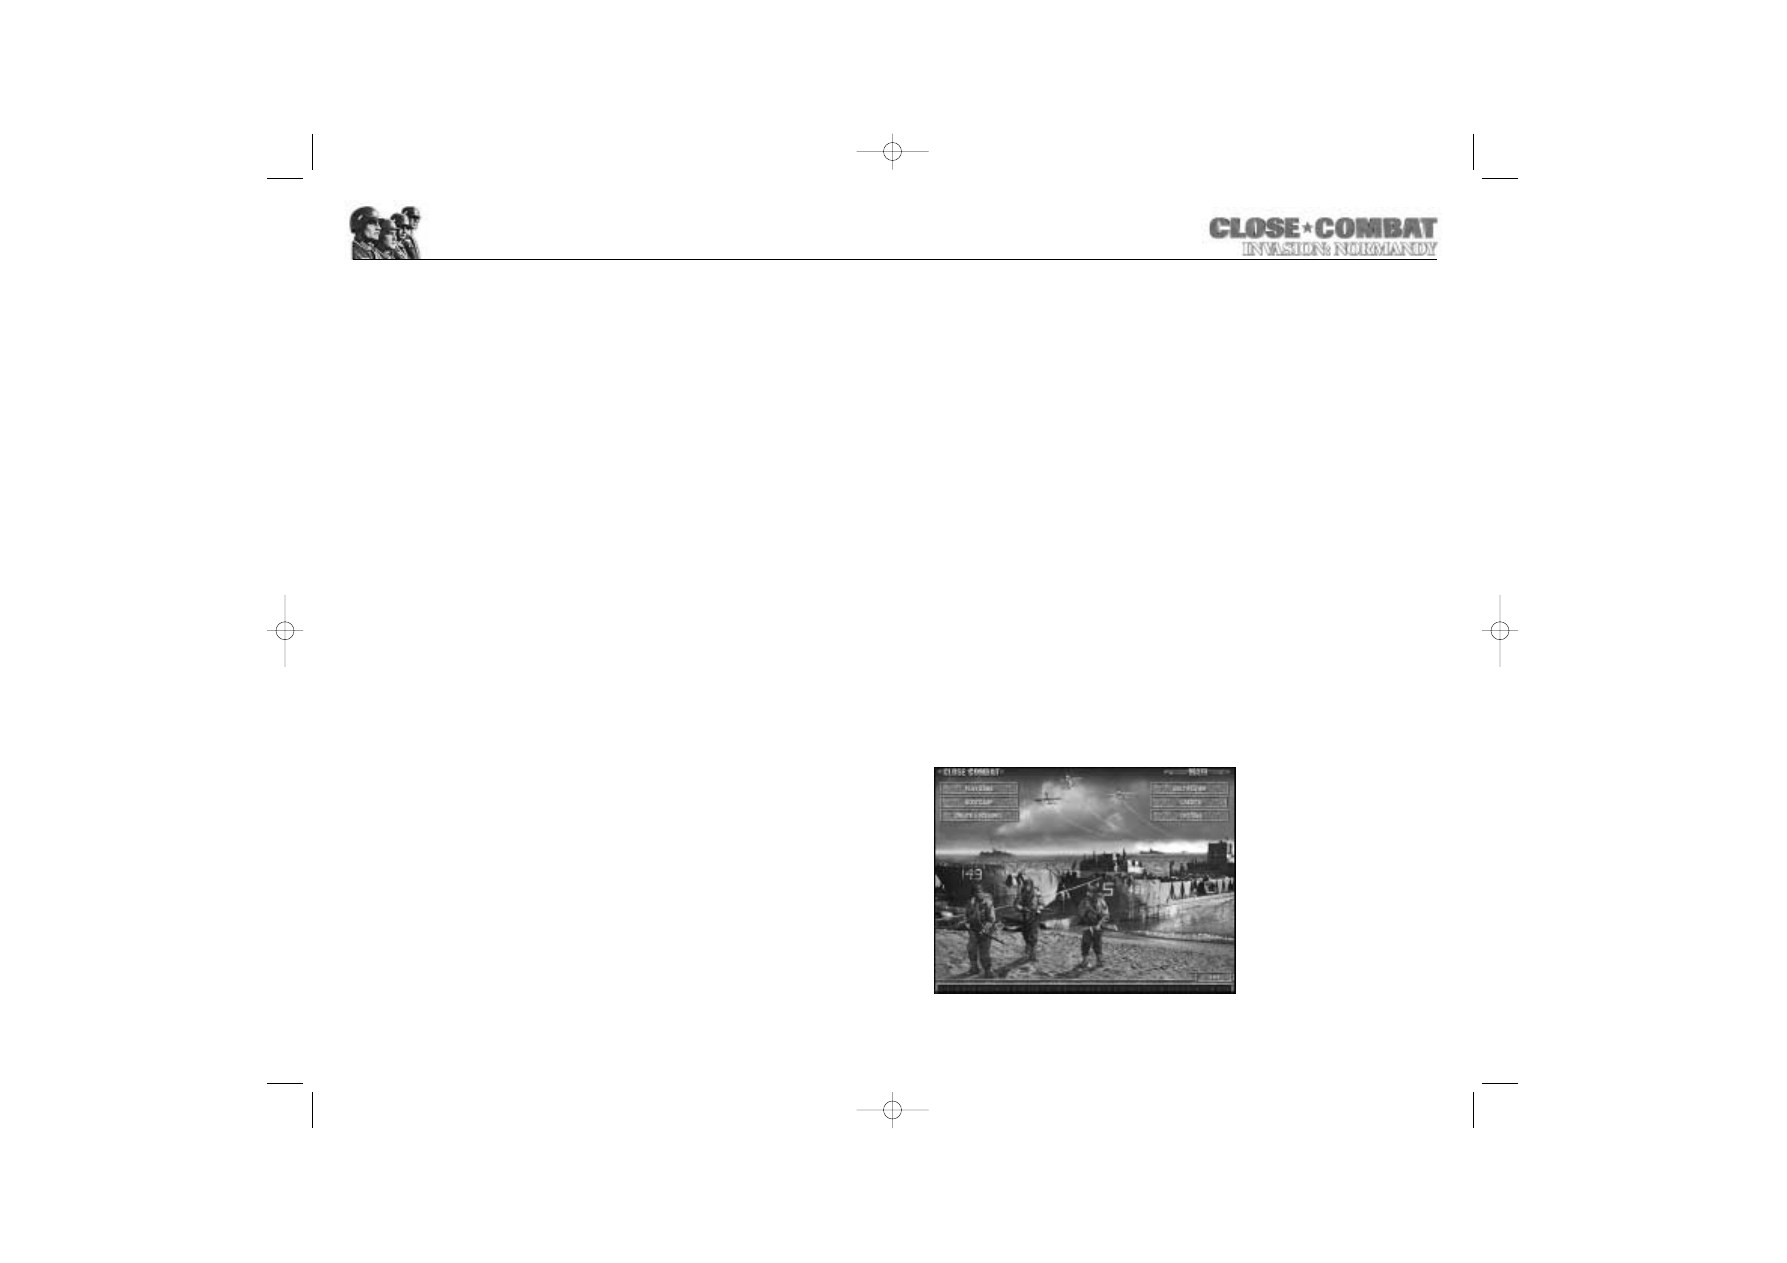
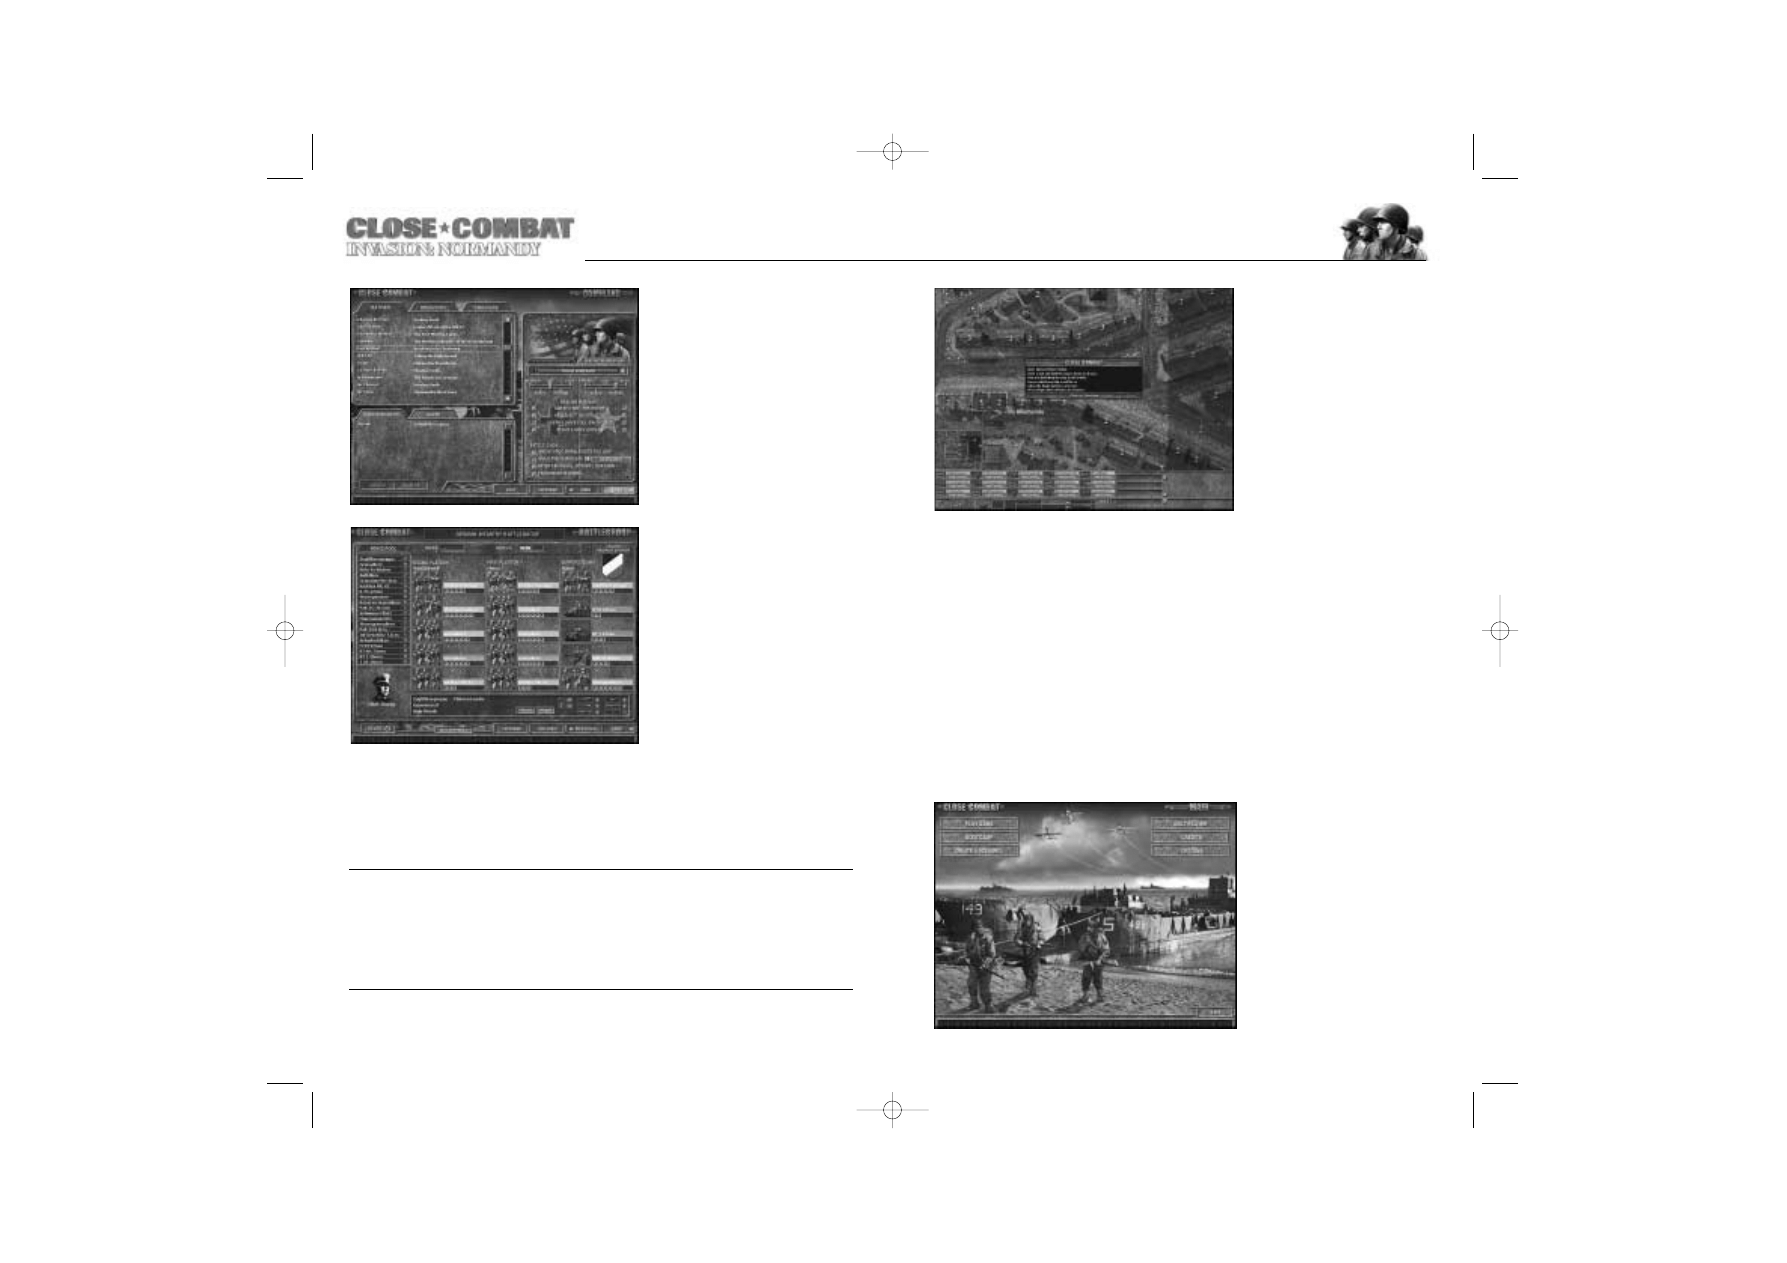
Battle screen. When you first bring up the Battle screen, the action is frozen. This repre-
sents the pre-battle phase, during which you can place your troops. The darkened
portion of the map represents where the enemy starts, the lightly shaded portion starts as
no man’s land, and the unshaded portion is yours.
General Schlieben, commander of the Port of Cherbourg called Rommel asking permission to sur-
render the Port of Cherbourg and his men on 25 June, 1944:
"Loss of the city shortly is unavoidable…2,000 wounded [are] without a possibility of being moved.
Is the destruction of the remaining troops necessary as part of the general picture in view of the fail-
ure of effective counterattacks? Directive urgently requested."…"In addition to superiority in material
and artillery, air force and tanks, heavy fire from the sea has started, directed by spotter planes."…"I
must state in the line of duty, that further sacrifices cannot alter anything.”
03661 CLOSE COMBAT 5 EX MAN 9/21/01 12:17 PM Page 8

10
Boot Camp (Training)
The
Boot Camp option opens the Boot Camp screen, where you may choose to play any
of the five training scenarios. The tutorials include pop-up windows directing your actions
and are designed to teach basic unit commands and tactics as well as strategic control. It
is highly recommended that all novice players play through all five boot camps.
Create a Scenario
While C
LOSE
C
OMBAT
: I
NVASION
N
ORMANDY
comes with a large number of pre-made
Battles, Operations, and Campaigns, an easy-to-use tool has been provided for creating
your own Battles, Operations, and Campaigns.
Multiplayer
While the AI computer opponent in the single player game does present a worthy oppo-
nent, there is something uniquely satisfying about outthinking a human being. C
LOSE
C
OMBAT
: I
NVASION
N
ORMANDY
presents a number of options allowing two human players to
square off.
BOOT CAMP
Boot Camp is an online tutorial that
teaches basic unit commands and
fundamental tactics. There are five
boot camps; it is recommended
that new players complete them in
order from top to bottom. During
the boot camps, you can always
repeat the previous instruction by
pressing Ctrl+H. You may exit
boot camp at any time by pressing
the ESC key.
Quick Tour
This explains how to give orders to a unit as well as basic targeting. Remember that right-
clicking on a unit selects the unit and creates an order menu. Orders may be cancelled
by right-clicking again, or by left-clicking off of the menu.
Monitors/Toolbars
This segment shows how to call in Air Strikes and Mortar Barrages, as well as monitoring
team abilities and status. The prime things to remember from this boot camp are that the
F5 key toggles the Team Monitor, F6 toggles the Inset Map, and F7 toggles the Soldier
9
Monitor.
Viewing the Terrain
This segment explains how to move your view around the map and the effects of terrain
on units. The important things to remember are that you can left-click in the inset map to
shift your view. You can zoom in and out with the
Zoom buttons on the bottom of the
screen. The properties of the various terrain types are also discussed.
Buildings provide great cover for infantry. Buildings with more than one story have a
number on them. For purposes of determining line of sight, all units in a building are
assumed to be on the top floor. A building’s roof becomes invisible when you have men
inside so you can see what is going on.
Infantry Tactics
This is a demonstration of basic infantry strategy, including the use of two or more teams
to lay down suppressive fire and how to use smoke to cover advancing infantry. Basic
mortar use is also covered.
Armour Tactics
This segment is short, but it teaches a vital lesson. Tanks are extremely vulnerable to
infantry at close range and bad at detecting them. To protect against these two failings,
armour works best when supported by infantry.
THE COMMAND SCREEN
The Command screen has three
panels. The top left panel allows
you to select from any of the
pre-made Battles, Operations,
and Campaigns. A
Battle is a sin-
gle engagement between
German and American forces. It
takes place on a single map, and
the forces available to each side
are fixed when the
Battle begins.
An
Operation is a series of
engagements between two Battle
Groups on the strategic screen.
Operations usually involve multiple
engagements. A
Campaign uses
the strategic screen and has mul-
tiple Battle Groups on each side.
03661 CLOSE COMBAT 5 EX MAN 9/21/01 12:17 PM Page 10

12
THE BATTLE GROUP SCREEN
Once you have selected your
fight, you gain access to the
Battle Group screen; this shows
all the forces available for a par-
ticular battle. Left-clicking on any
of the units listed selects the unit,
showing its Experience Level,
Morale, and armament in the bot-
tom panel, as well as giving you
a chance to rename the unit.
A new feature of the Battle
Group Screen allows you to
choose your forces from the
Force Pool. To change your
forces, you must Double-click on a unit to remove it from the Battle Group and return it
to the Force Pool. Next, you must select a new unit from the list of units in the Battle
Group Force Pool on the left hand side of the screen by Double-clicking on the unit in
the Force Pool list. Single-clicking on the unit in the force pool list will show the unit’s
strength at the bottom of the screen. Note: removing a squad from your active roster will
erase its history, including any experience bonuses or medals it has earned.
The button marked
Reinforce is only present when you have chosen to play as the
Americans and are playing an Operation or Campaign. This button refills the force pool
for the Battle Group once it has been depleted.
Reinforce can be selected only one time
per Battle Group. Once it is used, it will not appear on the Battle Group Screen again.
Note: the reinforce button will only work if the Battle Group is able to access a friendly
major supply depot through the road net. If you try to
Reinforce without such access, you
will get a dialog box explaining that you are out of supply.
The button marked
Rename allows you to rename the selected team.
The button marked
Remove allows you to remove the selected team. When the selected
team is removed, the next team in order of platoon precedence is selected. It may then
be removed by clicking
Remove again. This can be repeated until all teams are removed.
When a team is selected in the Force Pool and there is an open slot in the Battle Group
screen the
Add button appears in place of the Remove button. Clicking the Add button will
fill an empty slot in the Battle Group with the selected team. To change the type of team
to fill empty slots, simply select a different team by left-clicking on it in the Force Pool list.
The Revert button resets the Battle Group force to the computer-selected default force
mix of the Battle Group.
11
To load a saved game or to play a custom scenario, select it from the list in the lower left
hand panel. Selecting them and clicking the Delete button deletes saved games and sce-
narios; deleting files is irreversible, so make sure you really want these files to be erased
before you do this.
The right hand panel controls the parameters for new single and multiplayer games. At the
top of the window you may select between playing either the Germans or the Americans.
Below that are two sliders indicating the
Difficulty Level for each side. Recruit level difficulty
provides better forces with higher morale. Line level plays at normal levels of force
strength. At Elite level difficulty, that side starts with weakened forces. The Difficulty level
also controls how quickly reinforcements pools regenerate over time.
Below the Difficulty sliders are the
Realism Settings. You can change the indicators by click-
ing in the adjacent check boxes.
ALWAYS SEE ENEMY: Does exactly what it sounds like it should do. A side with this option
chosen knows where the enemy is at all times. This can be an extremely useful option for
new players as they learn the game.
NEVER ACT ON OWN INITIATIVE: Your soldiers never do anything unless they are specifically
ordered to.
ALWAYS HAVE FULL ENEMY INFO: With this selected, the player always has access to the
toolbar info of enemy units. This does not extend to Soldier Monitor information.
ALWAYS OBEY ORDERS: With this selected, your units always obey orders. This is for when
you tire of your soldiers’ senses of self-preservation.
Below the
Realism Settings is the Force Morale indicator. You can change the indicator by
clicking in the adjacent check box. The default settings are Force Morale enabled for
Operations and Campaigns and disabled for Battles. You may enable or disable this func-
tion by clicking on the check box. Designer’s Note: Be advised that disabling this option
will severely alter play balance when playing Operations and Campaigns.
Below the
Force Morale indicator are the Victory Condition settings. These determine what is
required to win a battle and how much time you have to play a battle. The two-minute
warning option allows a player who has no victory locations two minutes to capture one.
Designer’s Note: It is recommended that you play with the timer set to 15 minutes for
optimum play against the Artificial Player.
The
View Map tab along the bottom of the screen allows you to view the map used in a
particular battle.
03661 CLOSE COMBAT 5 EX MAN 9/21/01 12:17 PM Page 12

14
The button marked
Edit Opponent allows you to set the opposing side’s Battle Group’s
team strength. It is only selectable when playing in single player mode.
The
View Map button lets you preview the map with your area of deployment highlighted.
The enemy deployment area is shown in a darker shade.
The button marked
Soldier takes you to the Soldier Screen. The Soldier Screen shows
the
Health, Morale, Leadership, Intelligence, Strength, and Experience for each soldier in the
unit as well as accumulated achievements such as kills, medals, acts of bravery, or acts
of cowardice.
Health represents the physical status of the soldier.
Morale indicates the willingness of a soldier to fight on. Soldiers with high morale are
braver and are more willing to face danger than men with poor morale.
Leadership represents the ability of
a man to improve the morale of
the men around him and to keep
his team together. However, when
a unit leader with a high leader-
ship level dies, it can have a
devastating effect on unit morale.
Intelligence reflects how likely
the soldier is to go berserk or
panic in a firefight. Intelligent
men are less likely to make such
fatal errors.
Strength determines how quickly
the soldier becomes fatigued when moving and affects how severe his wounds are if he
is shot. The stronger the man, the longer he can keep going.
Experience is vital for a soldier and can affect a wide range of abilities, ranging from how
good a shot he is, to how well he can hide himself in
Ambush, to how well he conserves
ammo. More experienced soldiers do just about everything better than green troops.
Each soldier also has his kills and achievements listed as a cumulative total in Operations
and Campaigns.
The button marked
Previous takes you back to the command Screen so you can select
another Battle or exit the game.
The
Next button takes you to the battlefield to begin fighting.
13
BATTLEFIELD CONTROLS
Basic Unit Orders
Right-clicking on any unit brings up a popup menu listing possible orders
for that unit. These orders are:
Move, Move Fast, Sneak, Fire, Smoke, Defend,
and
Ambush. Not all orders will be available at all times. For example, a
tank that has thrown a tread can neither
Move, Move Fast, nor Sneak. Once
you bring up the popup menu, an order may then be selected by left-
clicking on the order option. If you change your mind and do not wish to
issue an order, either right or left-clicking on the map removes the popup
menu. Order options that a unit cannot perform are shaded gray.
Hot Key Orders
All orders can also be given by hot key commands. To give an order by hot key, left-
click on the unit, then press the appropriate key.
Z..................
Move
C..................
Sneak
B ......................
Smoke
M ......................
Ambush
X ................
Move Fast
V ..................
Fire
N ......................
Defend
Movement Orders
Units have three movement commands:
Sneak, Move, and Move Fast. After you select the
menu order, place the cursor where you want the selected unit to go and left-click. If you
wish to cancel the movement order during this phase hit Backspace on your keyboard.
When you give a movement order, a coloured dot appears on the map, marking the
unit’s destination. The unit attempts to reach its destination by whatever movement type
you have selected. The colour of the dot corresponds with the type of movement order
given.
Move......................Blue
Sneak ..................Yellow
Move Fast ..............Purple
Once placed, the destination dot can be moved to another location by left-clicking
and dragging it.
Sneak
When sneaking, your men crawl forward cautiously and quietly.
Sneak is the slowest of all
movement types. In addition to being stealthy themselves, sneaking troops have an
improved chance of finding concealed enemies. Sneaking troops never initiate combat;
this makes sneaking undesirable in potential close combat situations. Using
Sneak through
a minefield is the best way for infantry to traverse this type of terrain. Engineers/Pioniere
teams will clear minefields when they sneak though them. You may want to check the
overview map to see if the minefields changed to green to verify the clearing of mine-
field elements on the map.
When a squad of men has moved to a location using
Sneak movement, they then revert
to
Ambush mode.
03661 CLOSE COMBAT 5 EX MAN 9/21/01 12:17 PM Page 14
16
Fire
While your soldiers are capable of firing on their own initiative, it is often useful to direct
their fire. The Fire option brings up a targeting circle. The targeting circle is connected to
the firing unit by a coloured line.
When the circle is not sitting above an enemy unit, it appears as a thin, white circle.
When placed on an enemy unit, the circle either turns green, yellow, red, or black. This
colour corresponds with the chance that a shot will hit the enemy unit.
Green............100-60%
Red ................29-10%
Yellow..........59-30%
Black..............9-0%
When deciding whether or not to order a unit to
Fire, it is important to consider the situa-
tion. If a unit is laying down suppression fire, it does not have to actually kill the enemy to
have the desired effect. On the other hand, a small Bazooka team waiting in ambush
while an armoured column approaches had better wait for a killing shot.
Line of Sight and Range
The colour of the line connecting the targeting circle to the firing unit indicates line of
sight.
For direct fire weapons, the line is light green for clear lines of sight, dark green for lines
of sight obscured by foliage or smoke, and red for lines of sight that are blocked. Infantry
line of sight is determined for each soldier individually, so enemies visible to one soldier
might not be seen by another. For indirect firing weapons, the connecting line is orange
for targets in line of sight and brown for targets beyond line of sight. Teams that fire indi-
rect weapons, such as mortar squads, do not need line of sight to hit their targets.
However, having a clear line of sight greatly increases the accuracy of indirect fire.
The number by the targeting circle represents the distance from the firing unit. This dis-
tance is particularly important for infantry, whose anti-tank weapons and flamethrowers
have short effective ranges. The distance number by the targeting circle also indicates
range effects.
Green ............The unit is within effective range.
Yellow ..........The distance is too close or too far away; the weapon has reduced effectiveness.
Black ..............The distance is too close or too far away for the weapon to be effective at all.
If a line of sight is obstructed, a white number appears along the targeting line indicating
the range to the obstruction. If a line of sight is partially obstructed by smoke or foliage
and then completely blocked further along, both ranges are indicated.
Partial obstruction by smoke or foliage prevents the attacker from specifically targeting
enemies, but the firing unit can lay down fire in the hopes of suppressing the enemy or
getting lucky.
15
Move
This orders infantry to cautiously advance. Infantry on the move are not quite as stealthy
or as observant as men who are sneaking, but they are faster. Moving infantry initiates
combat if the opportunity arises. Using Move through a minefield is dangerous.
When infantry reach a location they have
Moved to, they then revert to Defend mode.
Move Fast
These orders cause infantry to move as quickly as they can. While running, soldiers focus
on getting to their destination and do not try to use cover at all. They engage in hand to
hand combat if the enemy gets in their way. Running men are not observant and tire
quickly. Using Move Fast through a minefield is very dangerous for your troops.
Infantry that
Move Fast will revert to Defend mode when they reach their destination.
Vehicles
Vehicles are not stealthy, particularly tanks. However, a sneaking tank is at maximum
watchfulness and at its slowest speed. Vehicles, unlike infantry teams, will initiate combat in
Sneak mode. A tank on the move is somewhat faster and slightly less observant. A tank
that is sneaking or moving attempts to maintain its original armour arc as much as possi-
ble. For example, a tank that is facing the enemy could be ordered to back up using the
Move command.
Tanks ordered to
Move Fast turn to face their destination and then move there at maximum
possible speed.
Tanks can fire while following any movement order, although their rate of fire and accu-
racy decrease.
Indirect Paths/Waypoints
Rather than having your units move
in a straight line, it is possible to
order infantry and vehicles to follow
an indirect route. Routes are deter-
mined by setting waypoints. To set
waypoints, right-click on a unit as nor-
mal and determine which type of
movement you desire, then press and
hold the shift key and plot the path
you wish the unit to take by left-click-
ing on the screen. Each number that
appears represents a point the unit
passes through on its way to its desti-
nation. When you have completed
your path, release the shift key and the unit proceeds as ordered. You can place a total of
20 waypoints. Set waypoints can also be selected and dragged to alter a unit’s path.
03661 CLOSE COMBAT 5 EX MAN 9/21/01 12:17 PM Page 16
Smoke
There are times in battle when the
ability to conceal yourself from the
enemy, even partially, can be the
difference between victory and
death. Vehicles and infantry on
both sides are often equipped
with smoke grenades. Units hiding
behind smoke are harder to
detect, and if they are detected, it
is impossible to target them specif-
ically.
Smoke has roughly the same
effect as partial obstruction by
foliage; units may still
Fire in a gen-
eral area behind smoke in the
hopes of suppressing the enemy.
The
Smoke command brings up a targeting circle for firing smoke grenades. Mortar teams
can lay down smoke virtually anywhere on the map; soldiers can throw smoke grenades
a maximum of 30 meters.
Some vehicles and guns have the ability to fire smoke rounds, which can reach out to
the weapon’s maximum range. If a unit has smoke rounds, the
Smoke command is avail-
able on the unit menu. Some vehicles have smoke dischargers and/or smoke mortars.
These work in the same way as smoke rounds.
Units, both tanks and infantry, often use smoke on their own when they come under
sudden attack in an attempt to screen themselves from enemy fire.
Defend
Units that have been ordered to
Defend stop, seek whatever cover
is available, and engage any tar-
get of opportunity. When ordered
to
Defend, a blue arc appears
above the unit; this indicates the
direction that unit is facing. To
change the direction of defensive
facing, left-click the highlighted
arc; a blue circle appears above
the unit. Move the cursor to the
arc, drag the arc to the point on
the circle that you wish the unit to
face, and left-click again. Anti-tank
guns and tanks rotate to face that
18
17
direction and infantry seeks cover defending from that direction. Defending units engage
enemies not in the blue arc, but only if those enemies are very close. Units that are
defending will fire on targets of opportunity that they have at least a 30% chance of
killing. That is equivalent to a yellow or green targeting circle.
Defend is the default setting for tanks. When not under specific orders, tanks Defend the
area in front of them.
Ambush
Ordering a unit to
Ambush is similar to the order to Defend. As in Defend mode, the units
stop in place and seek cover, but ambushing units only attack when an enemy comes
within 30 meters. When a unit is ordered to Ambush, a green arc appears above the
unit. This works in the same way as the blue arc in the
Defend order. To change the direc-
tion that the unit is ordered to ambush, left-click on the green arc, move the arc to the
proper facing, and left-click again to release. A unit in
Ambush mode is generally harder
to detect for the enemy compared to a unit on
Defend.
It is vital for any successful commander to understand the importance of the
Ambush
order. Infantry are generally far more effective at close range, and many anti-tank
weapons are more effective from the side or rear. Keeping infantry, bazooka and con-
cealed AT guns hidden until the right moment can be critical to success.
Group Orders
Orders may be issued to multiple units at the same time. To select the units to be given
orders, left-click on the screen and drag the cursor. This creates a darkened area on the
map; release the left mouse button when all the units you wish to order are inside the
darkened area. A second way for a group to be formed is to hold down the shift key
and then left-click on each unit you wish to give an order to.
Any order given to one unit is given to all selected units. If ordered to move, they
attempt to maintain their current relative positions when they reach their destinations.
Remember that if you give the order to Fire, line of sight is individually determined for
each unit, and for each soldier in each unit.
Once created, up to 9 groups can be saved into memory by pressing Ctrl (1-9) while
the group is selected. To later recall the group press the corresponding number (1-9)
without pressing Ctrl. If the number is pressed a second time, it centres the map on the
group.
To end giving orders to multiple units, simply create a darkened selector box around a
single unit.
General Rommel’s reply to General Schlieben.
“You will continue to fight until the last cartridge in accordance with the order from the Fuhrer."
03661 CLOSE COMBAT 5 EX MAN 9/21/01 12:17 PM Page 18
20
Naval Gun Fire
Naval Gun Fire barrages are called in the same way as Air Strikes. Naval barrages consist of
four 5-inch guns from destroyers lying off the beach, all firing at once. This battery of
guns fires between 10 and 20 rounds. Like
Mortar Barrages, Naval Gun Fire is not always
accurate, so be careful not to call it in where it would endanger your own troops. Only
Americans have
Naval Gun Fire available in battle and then only on select maps.
Truce
The
Truce command offers the enemy a chance to call an end to the fighting. If the
enemy offers a truce, you may accept by clicking the Truce button. If one side offers a
truce and the other does not accept the offer, fighting continues. If a truce is agreed to,
both sides declare a cease fire and stop fighting. The battlefield remains contested and in
the condition it was at the moment the truce was declared.
Combat Messages
The Combat Messages window
informs you of the situation on the
battlefield. If the message concerns a
unit, you may centre the view on
that unit by clicking on the message.
Options
The
Options button appears in the
lower left hand corner of the map.
The
Options are made up of three
panels,
Game Play, General, and About.
These can be selected using the
tabs on the top of the screen.
The top two options in
Game Play control battlefield graphics. Remove Killed Soldiers removes
the bodies of dead and incapacitated soldiers so that you can concentrate on the living,
and
Remove Trees makes the foliage on trees invisible, although it still affects line of sight.
In the centre of the
Game Play panel, the Status Indicators control the highlighted bar and
coloured outlines of friendly units. These can be set to reflect any number of conditions,
ranging from morale, to ammunition supply, to unit health. Set these to whatever you feel
you need to know about your men. The outline colours use the same colour spectrum as
the target dots. When the outline colour is green, the troops are in good cover. When
the outline is black, they are in poor cover.
Below the Status Indicators are toggles for:
Team Data
Inset Map
Soldier Monitor
19
OTHER CONTROLS
When first on the battlefield screen, the game is frozen because combat has not yet started.
This allows time to survey the battlefield, redeploy units, set options, and plan strategy.
Naval Gun Fire, Mortar Barrages, and Air Strikes
If available,
Mortar Barrages, Naval Gun
Fire, and Air Strikes can be selected
from the icons on the tool bar on
the lower left side of the screen. A
new targeting crosshair appears;
left-click on where you want the air
strike, naval gunfire, or mortar bar-
rage to occur. It is important to
remember that once
Naval Gun Fire,
the
Mortar Barrage, or an Air Strike is
used, it is not available for the rest
of that engagement.
Air Strikes are carried out by a
single plane making one pass over
the location. The type of plane is randomly determined from a list of four available. The
type of aircraft available is noted in the Combat Messages window. The plane comes from
a randomly determined direction and strafes and/or drops bombs in the target area.
Air
Strikes are not available at the start of the battle. Air Strikes become available 5-12 minutes
into the battle. Only the Americans can call in
Air Strikes; historically, there was too little
German air support to warrant inclusion in the game.
American Planes
P-51 Mustang ......................6x 0.50cal M2 machine guns
P-38 Lightning ....................4x 0.50cal M2 machine guns, 1x 20mm machine cannon, 2x 500 or 1000lb
bombs (always two bombs)
P-47 Thunderbolt ..............8x 0.50cal M2 machine guns, 6x M8 11.5cm rockets or 2x M43 500lb bombs
A-26 Invader ........................8x 0.50cal M2 machine guns plus bombs
Mortar Barrages
Mortar Barrages are called in the same way Air Strikes are. They consist of four 80mm mor-
tars, all firing at once. The battery of mortars fires a total of between 40 and 60 rounds.
Like on-board units’ mortar fire, mortar barrages are not always accurate, so be careful not
to call a barrage that would endanger your own troops. If it is available during a battle,
the mortar barrage option appears after 1-3 minutes for the Americans and after 3-5 min-
utes for the Germans.
03661 CLOSE COMBAT 5 EX MAN 9/21/01 12:17 PM Page 20
Team Data
Defaults as on, displays all the
teams on your side of the battle
on the bottom of the screen, and
shows their current status. You may
also select a team by clicking on it
from this window. Team Data can
also be turned on and off with the
F5 key.
Inset Map
This is a miniature map of the battle-
field that appears on the screen. This
map may be repositioned on the
screen by right-clicking and drag-
ging it. Left-clicking on a portion of
the Inset Map centres the screen in
that location. You can target units
under the map by normal means.
You can select units under the min-
imap by right-clicking on them. The
highlighted rectangle on the Inset
Map represents the current screen.
The Inset Map can be toggled on
or off with the F6 key.
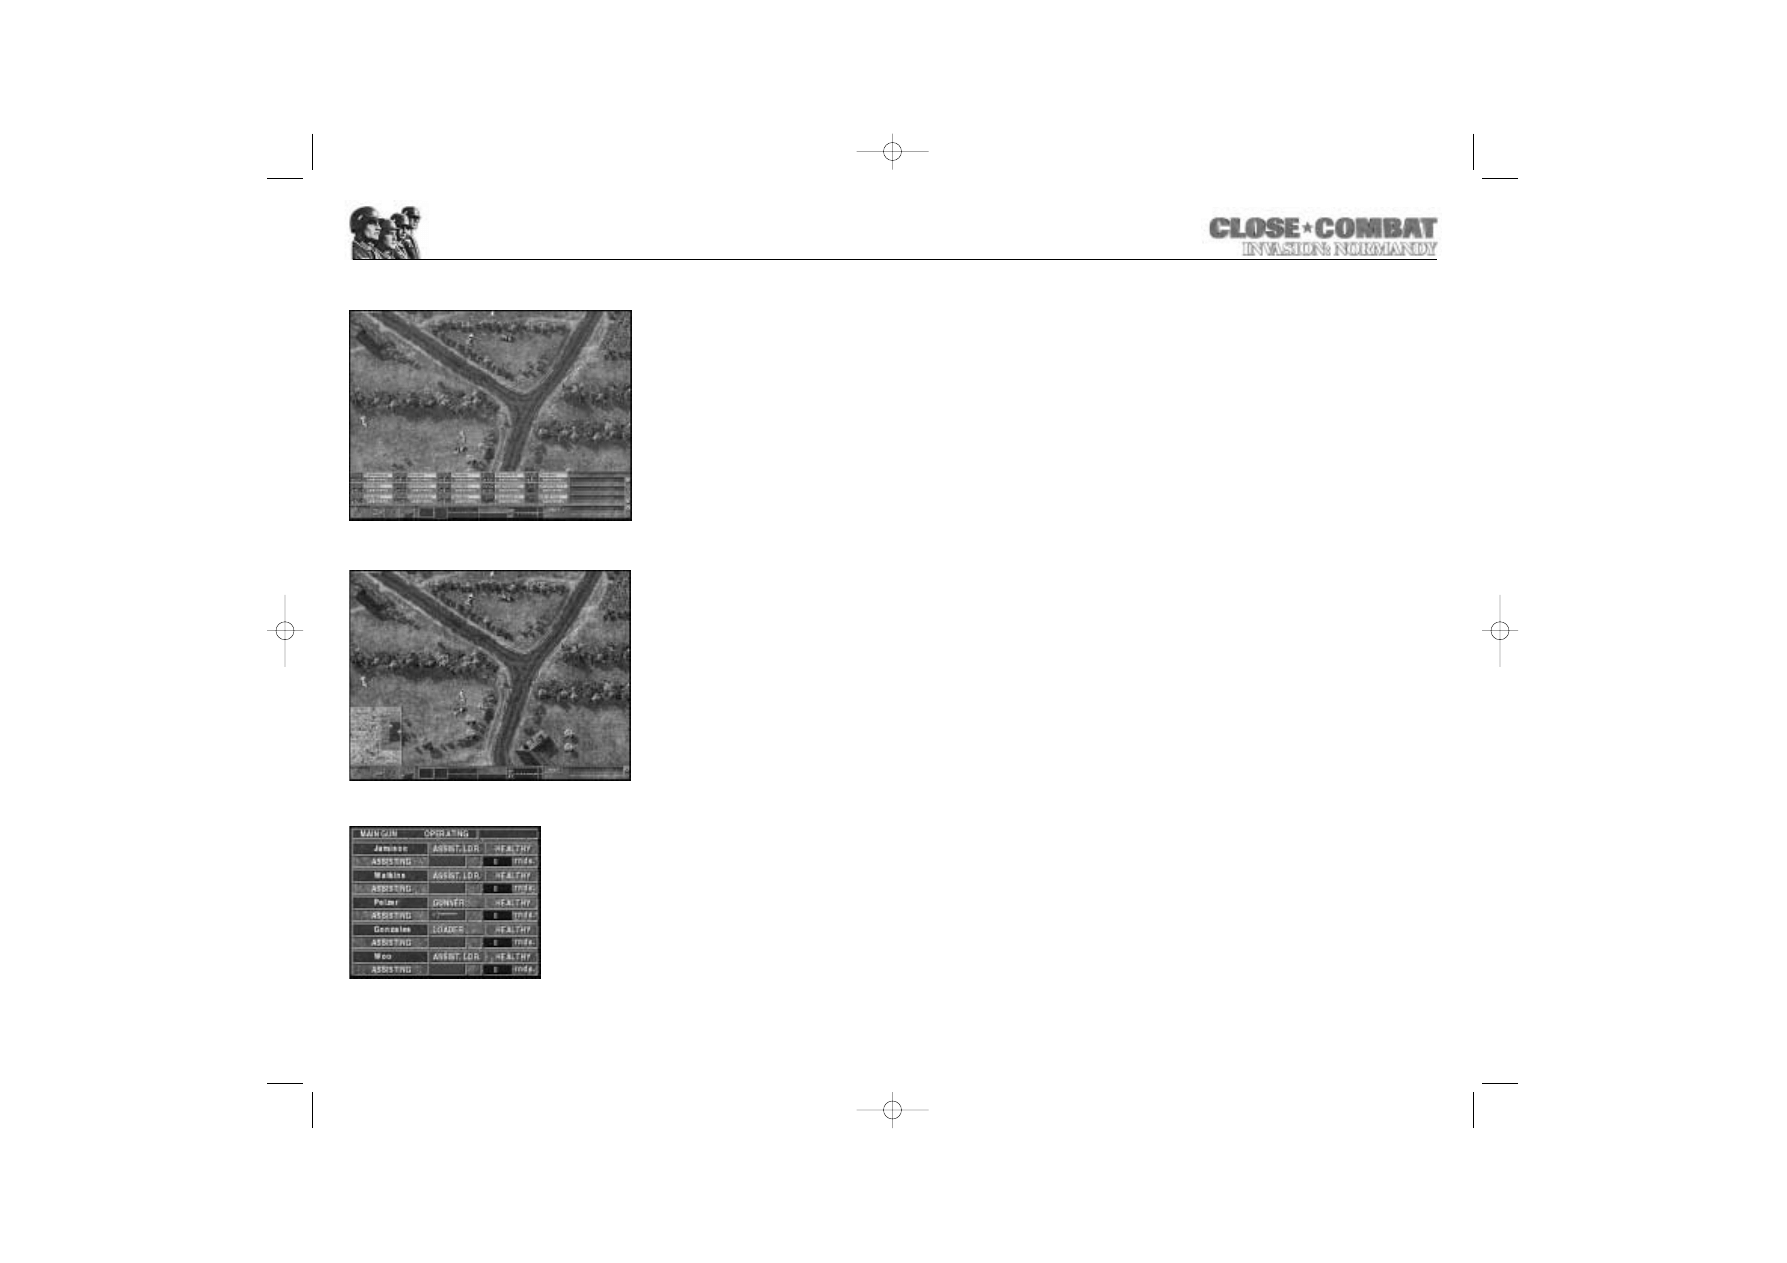
Soldier Monitor
The soldier’s name, the soldier’s role in the team,
and current Health/Morale state are shown along the
top. Current Actions, Weapon in use, and Ammunition
level for the type of ammunition in use are displayed
at the bottom.
This gives detailed reports on whatever unit is cur-
rently selected, showing the weapon type,
ammunition level, and state of morale for every man
in the unit. If a soldier has low morale or comes
under fire, his current action can be very different
from what you order him to do. The Soldier Monitor can be turned on and off with the
F7 key. The Soldier Monitor may also be repositioned on the screen by right-clicking
and dragging it.
22
21
Possible Morale States
Healthy ....................Soldier is in good health.
Injured ......................Soldier is hurt but can still perform actions at a reduced capacity.
Incapacitated ......Soldier is seriously injured and unable to perform any actions.
Dead ..........................Someone back home is getting a telegram.
Winded ....................Soldier is tired but able to recover with a short break; his performance
is slightly affected.
Fatigued ..................Soldier is completely exhausted, desperately needs a rest, and can
hardly act. His performance is severely affected.
Panicked..................The soldier is losing it. His combat efficiency is dramatically affected. He
may calm down given time, but you might want to keep the squad
around him until he relaxes.
Broken ......................The soldier has stopped obeying orders and is thinking about making a
run for it. As with panicked soldiers, he may calm down given time, and
the presence of a battlefield commander and his unit may help bring
him around.
Routed ......................The soldier has decided to make a run for it; he cannot be recovered.
Suppressed ..........The soldier is taking cover from enemy fire while firing back. His accu-
racy when firing his weapon is reduced.
Pinned ......................The soldier is taking heavy fire and is spending more time hiding than
firing. His accuracy is reduced, and he is unlikely to follow a movement
order.
Cowering................The soldier is staying put, keeping his head down, and will only fire
occasionally.
Stunned....................An explosion has temporarily knocked the soldier out. He will
regain consciousness again soon.
Heroic........................The soldier is feeling confident and is at an increased level of
performance.
Fanatic ......................More than confident, the soldier takes chances and is gunning
for a medal.
Berserk......................The soldier feels invulnerable and attacks the enemy without fear. Such
displays of fearlessness inspire those around him.
The
General sub-screen under Options provides such options as Game Speed, Screen
Resolution, and Scroll Speed. This screen also allows for the music, intro videos, and sounds
to be toggled on and off. It also controls what language German units will speak.
03661 CLOSE COMBAT 5 EX MAN 9/21/01 12:17 PM Page 22
24
COMMAND AND MORALE
While each unit has some kind of leader who leads his troops into battle, each unit’s fight-
ing effectiveness and morale is improved by being close to a higher ranking commander,
who can direct the efforts of those men under his command. Keeping battlefield com-
manders near units on the front improves performance and morale dramatically. The
higher ranking a commander, the larger the battlefield area he is able to administer.
Pressing the Space bar on the battlefield shows the command radius of command per-
sonnel. The colour of the circle indicates the quality of the commander.
Green ........................High
Yellow ......................Medium
Red ............................Low
Black ........................Very Low
During the placement phase, and during battle, it is often useful to zoom the map out,
press the Space bar, and make sure that your commanders are positioned to provide
leadership to the troops.
As a battle progresses, some soldiers may lose morale. Receiving enemy fire, having their
officers die, being flanked or ambushed, being around too many dead bodies, or facing
too many enemies can all sap a soldier’s will to fight. Eventually, a soldier may panic, run
from the fight, or even surrender to the enemy. Convincing enemy troops to surrender
by breaking their morale can be a very efficient way to win battles. Prisoners are walked
off with raised hands to the map edge; they can be recaptured/freed if your own teams
reach them before they leave the map.
Aside from competent command, you can improve soldiers’ morale by successfully
ambushing the enemy. Infantry that manage to destroy enemy tanks also get a large
morale boost during the current battle.
Rallying
Soldiers that are routed will rally after a time. If they are within the command radius of a
command team, this time period will be shorter. If the broken soldier is not within the
command radius of a leader, the time needed to rally the soldier will be longer.
Separation
Occasionally, a soldier may get separated from his unit. This can happen from either panic
or simple fortunes of war. If this happens, the soldier attempts to find his way back to his
unit. This process can be hastened by moving the unit closer to their lost man. The pres-
ence of a commander can also assist in keeping groups together and bringing in
separated men.
23
Zoom Level
Zoom control is in the lower left
hand corner of the map, beside the
Options button. Aside from the
default zoom option, the map can
be zoomed out, at which point all
units are represented by coloured
boxes. While it is generally easier
to control the game from the
default zoom level, the zoomed out
map is often useful for planning ini-
tial placement or to get a brief
glimpse of how the battle is pro-
gressing. One of the best uses for
the maximum zoom out level is to
check the areas affected by your
command teams. The Space bar shows the command radius of each commander, making
it easy to see who is benefiting from officers and who is not.
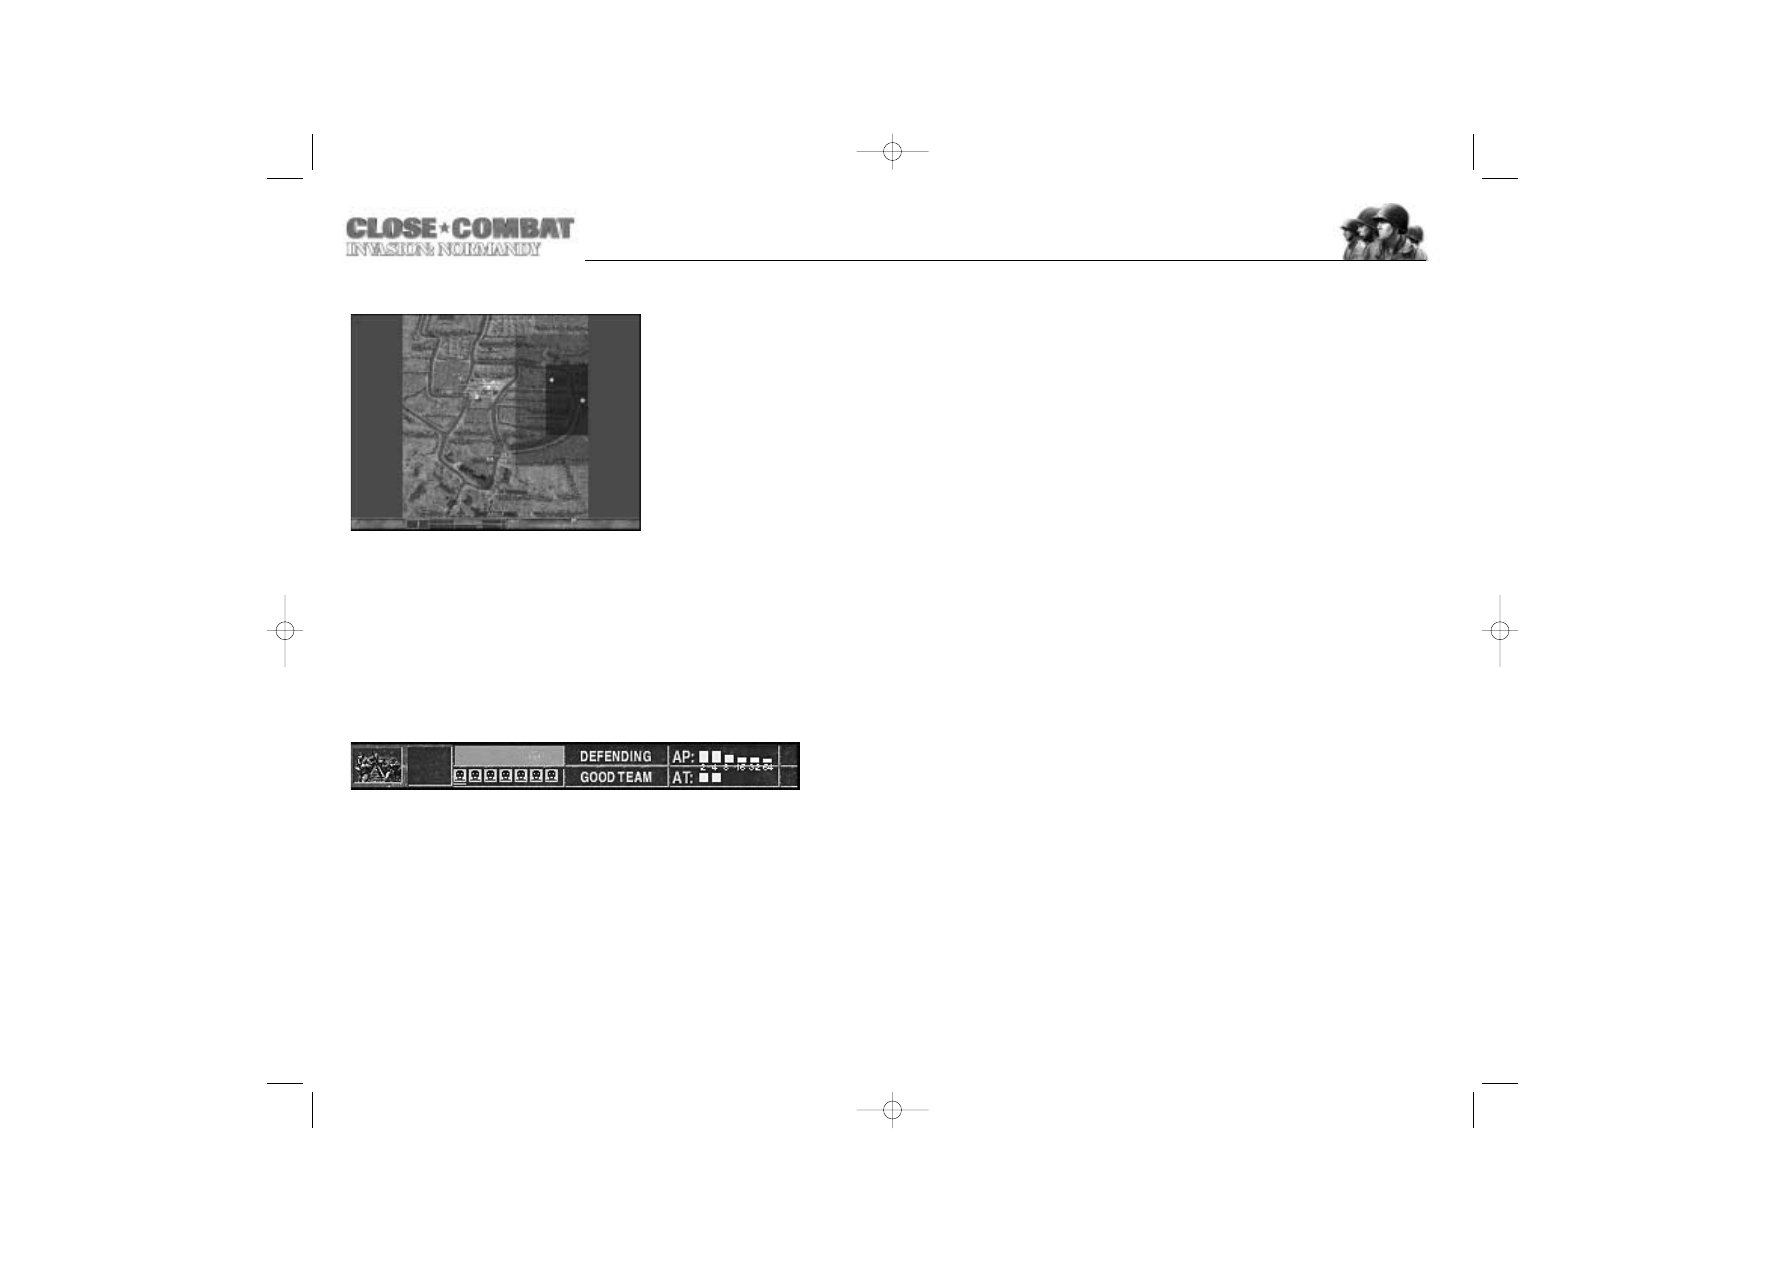
Unit Status
Unit status takes up the bottom centre of the screen. It shows the type of unit, what it is
doing, the health of its men, and how effective it is against infantry and tanks at various
ranges. The ranges denoted are 20, 40, 80,160, 320, and 640 meters. The top graph,
marked AP, represents effectiveness against infantry and the lower, marked AT, effective-
ness against tanks. The graph below demonstrates how an infantry squad can be highly
effective against a tank, but only if they can get in at close range.
The Colour of the faces indicates the status of the men in the Unit.
Green................................Healthy
Yellow ..............................Injured
Orange ............................Incapacitated
Black ................................Panicked
White ................................Surrendered
Red ....................................Dead
03661 CLOSE COMBAT 5 EX MAN 9/21/01 12:17 PM Page 24
THE BATTLEFIELD
In many cases, the terrain of a battlefield can be the best resource a commander has. A
clump of trees, an abandoned house, or a drainage ditch can all be powerful tools in the
right hands. Right-click and hold the button down with the cursor over a terrain feature to
get information about it. Details are displayed in the lower-left corner of the screen.
Hills
Holding the high ground is an old
military tactic, and it does have its
benefits. Units on top of hills can
see over obstacles, giving them a
good view and line of sight. The
drawback is that once detected, all
the enemy units can fire at your ele-
vated team. Also, moving uphill
slows units down; moving downhill
is generally faster. This is useful if
you do not want enemies to reach
you or to make a quick get away.
However, perhaps the most useful
trait of hills is that hills block line of
sight. Units can hide behind hills to avoid detection and to protect their flanks.
Gullies, Trenches, and Gun Pits
While units cannot cross deep
water, shallow water can generally
be crossed. Depressions in the
earth left by running water can also
serve as excellent natural protection.
Gullies and trenches conceal sol-
diers and make them harder to hit,
but they can become death traps if
the enemy can flank the position
and fire down the trench.
Gun pits are circular trenches dug
for mortars and AT guns.
In
Campaigns or Operations, if a Battle
Group does not move for a turn, they are considered to be resting. If a resting Battle
Group is attacked, any Infantry or AT gun it places in the open automatically starts in
either a trench or a gun pit.
26
25
Forests
Forests provide something of a
mixed blessing. Troops moving
through forests have a great deal of
cover. Tree trunks block fire, and the
foliage of the trees prevents units
from being specifically targeted. This
cover works both ways, so units have
a hard time firing out of forests. This
unusual feature makes forests a nat-
ural place for flamethrowers, which
can use the cover to approach the
enemy. The ability of infantry to hide
in forests makes them a dangerous
place for tanks, and tanks should
avoid forests unless absolutely necessary. Mortar fire into forests creates airbursts. This
enhances the effect of these weapons on infantry. Remember that the Ctrl+T command
can be used to hide the foliage of forests. The foliage is still there and affects the game,
but you can see the units much more easily.
Buildings
The key to understanding how to
use and deal with buildings is that
buildings are incredibly useful to
units inside them, particularly infantry.
Building roofs provide cover from
mortar fire, building walls provide
good concealment and hard cover
from enemy fire, and tall buildings
allow clear fields of fire over low-
level obstructions. This makes them
extremely valuable for infantry and
AT gun units, and a menace to tanks.
A tank on its own generally cannot
detect infantry in a building until it is
within Ambush range. A wise commander will go to great lengths to avoid putting a tank
anywhere near a building that has not been checked out by friendly infantry first.
When approaching a building, it is often useful to deploy
Smoke to allow units to advance
without fear of detection. It is also good practice to
Fire machine guns at buildings as your
infantry units approach to suppress any enemy units that might be in the building.
Because AT guns have only limited mobility and are vulnerable to mortar fire, buildings
are generally a good choice for placement. Unfortunately, placing an AT gun in a building
also tends to limit its field of fire. Only light AT guns may be placed in buildings.
03661 CLOSE COMBAT 5 EX MAN 9/21/01 12:17 PM Page 26
28
ENDING A BATTLE
Battles can end in a number of different ways. In single battle games, many of these possi-
ble endings can be de-selected in the lower right hand corner of the Command Screen.
Victory Locations
On each map, there are a number of
victory locations. Victory locations rep-
resent either important strategic
locations or other points of military
interest. If either side controls all victory
locations on a map, they win that
engagement; the opposing force is
given two minutes to recapture at least
one location or be forced to retreat off
the map if the
Two Minute option is
selected. Each victory location is
marked with a flag. A mixed flag repre-
sents victory locations controlled by
neither side. To capture a victory loca-
tion, move any unit other than a sniper to the location. Victory locations are also used to
score a battle. Each victory location is worth 1-3 points depending on its position and font
size. Victory locations with larger fonts are worth more points. Victory locations along map
borders are generally worth only one point.
Truce
A battle may be ended if both sides agree to end it. To propose a truce, click the
Truce
button on the tool bar in the lower right hand corner. Both players must agree to a truce
for the fighting to stop. Once a truce is offered, you may accept by pressing the
Truce
button. A
Truce offer that is not accepted can be withdrawn by clicking the Truce button
again and can be offered again at a later stage.
Time
In battles with a time limit, the engagement ends when the clock runs out. It is recom-
mended to set the timer to 15 minutes for best game play against the artificial opponent.
Morale Failure
When you play an Operation or Campaign, either historical or one you have made with
the scenario editor, the Force Morale end-of-battle option is always enabled. You may dis-
able this function by checking the box on the command screen. For individual battles,
either historical or self-made, the default setting for Force Morale is off. D
ESIGNER
’
S
N
OTE
:
Be advised that disabling Force Morale will severely alter play balance when playing
Operations and Campaigns. The Operations and Campaigns that are included in the
game have been designed to be played with Force Morale enabled.
27
While all buildings conceal troops from the enemy, the stronger the building the more
cover it offers from enemy fire. Wooden buildings provide no protection from cannon
fire and only limited protection from other kinds of attacks. Stone buildings provide
greater protection, and protect against small calibre cannon attacks. The few reinforced
military installations found in the Cotentin region provide shelter from all but the most
punishing attacks.
Rubble
Rubble can be treated like buildings in most cases, but in the absence of a roof, mortar
fire becomes a factor.
Roads
Roads provide a simple trade off. Moving along a road is generally faster than slogging
through the mud, but roads are, by their very nature, flat open places without obstacles to
hide behind.
Scrub
Not every plant is a tree, and sometimes a bush is all that a soldier needs to hide behind
as he lies in wait for the enemy. However, once he is discovered, that soldier may find
that a bush cannot stop a bullet.
Mine Fields
Mine fields are used to defend areas
and slow the enemy without using
valuable and vulnerable manpower.
You do not place mine fields; they are
automatically deployed if available in a
battle. Mine fields can be detected by
expanding out to maximum zoom
where mine fields are noted in red.
Vehicles and Infantry teams crossing
mine fields can be damaged or even
destroyed. There are several ways to
deal with mine fields.
Engineer/Pioniere units are skilled at
removing mines. Engineers/Pionieres passing through a mine field while ordered to
Sneak
disarm any mines they come across.
Other infantry types can
Sneak across mine fields with only a small chance of detonating
mines. Infantry that are
Moving or Moving Fast face great danger from mines.
Finally, if all else fails, concentrated mortar or barrage fire can be used to detonate mine
fields, but this is not a very efficient solution and some mines may be missed.
The easiest way to deal with mine fields is to move around them if possible.
03661 CLOSE COMBAT 5 EX MAN 9/21/01 12:17 PM Page 28
If a battle ends because of a truce or time-out, the battlefield is still split between the
forces. In Campaigns or Operations, the deployments for the following cycle are based
on how far each side pushed during the previous battle.
If a battle ends because of a morale failure, the Battle Group that flees loses 1-3 victory
locations depending on the ratio of the winner’s Force Morale to the loser’s Force
Morale. In addition, the Battle Group will lose two teams chosen at random from its force
mix as a rearguard/breakout force loss penalty. If the victor has 33% more force morale
than the loser, the winner will gain one victory location. If the ratio is between 33% and
66% the victor will gain two victory locations. If the ratio is greater than 66% the victor
will gain three victory locations. If the fleeing side still has any victory locations left, the
field continues to be split based on previous positions; otherwise, the losing side is
pushed off the map.
If a Battle Group is pushed off of a map, it is disbanded. If the Battle Group was still in
supply when it was disbanded, there is a 75% chance that each team makes it back to
be added to the Battle Group ‘s force pool.
If one side destroys all enemy units, they hold the field, and the enemy Battle Group is
disbanded. This very rarely happens because the losing side generally flees from morale
failure first.
Debriefing Screen
When a battle ends, the Debriefing
Screen appears. The Debriefing
Screen indicates which side won, why
they won, and what areas they con-
trolled on the map. Lightened
portions of the map indicate areas that
ended up under your control.
The
Details button on the lower left
hand side of the screen changes the
debriefing screen to show specific
casualty figures for both sides. The
Text
button returns to the original screen.
The
Soldier button allows you to see
how your individual soldiers performed in battle. Use the
Team Icon buttons in the lower
part of the screen to cycle through your units. Note that small + and - marks denote
changes in a soldier’s attributes. The soldier’s medals, acts of bravery, acts of cowardice,
and kills for the last battle fought are also listed.
The
Campaign Debrief tab at the top of the screen brings up a map of the Campaign area
showing the regions each side controls, and listing the current Campaign score. The
Details button on the Campaign Debrief screen lists the total losses incurred on each side
during the entire Campaign.
When you are done viewing the battle results, the
Next button advances you to the next
Battle or strategic turn.
30
29
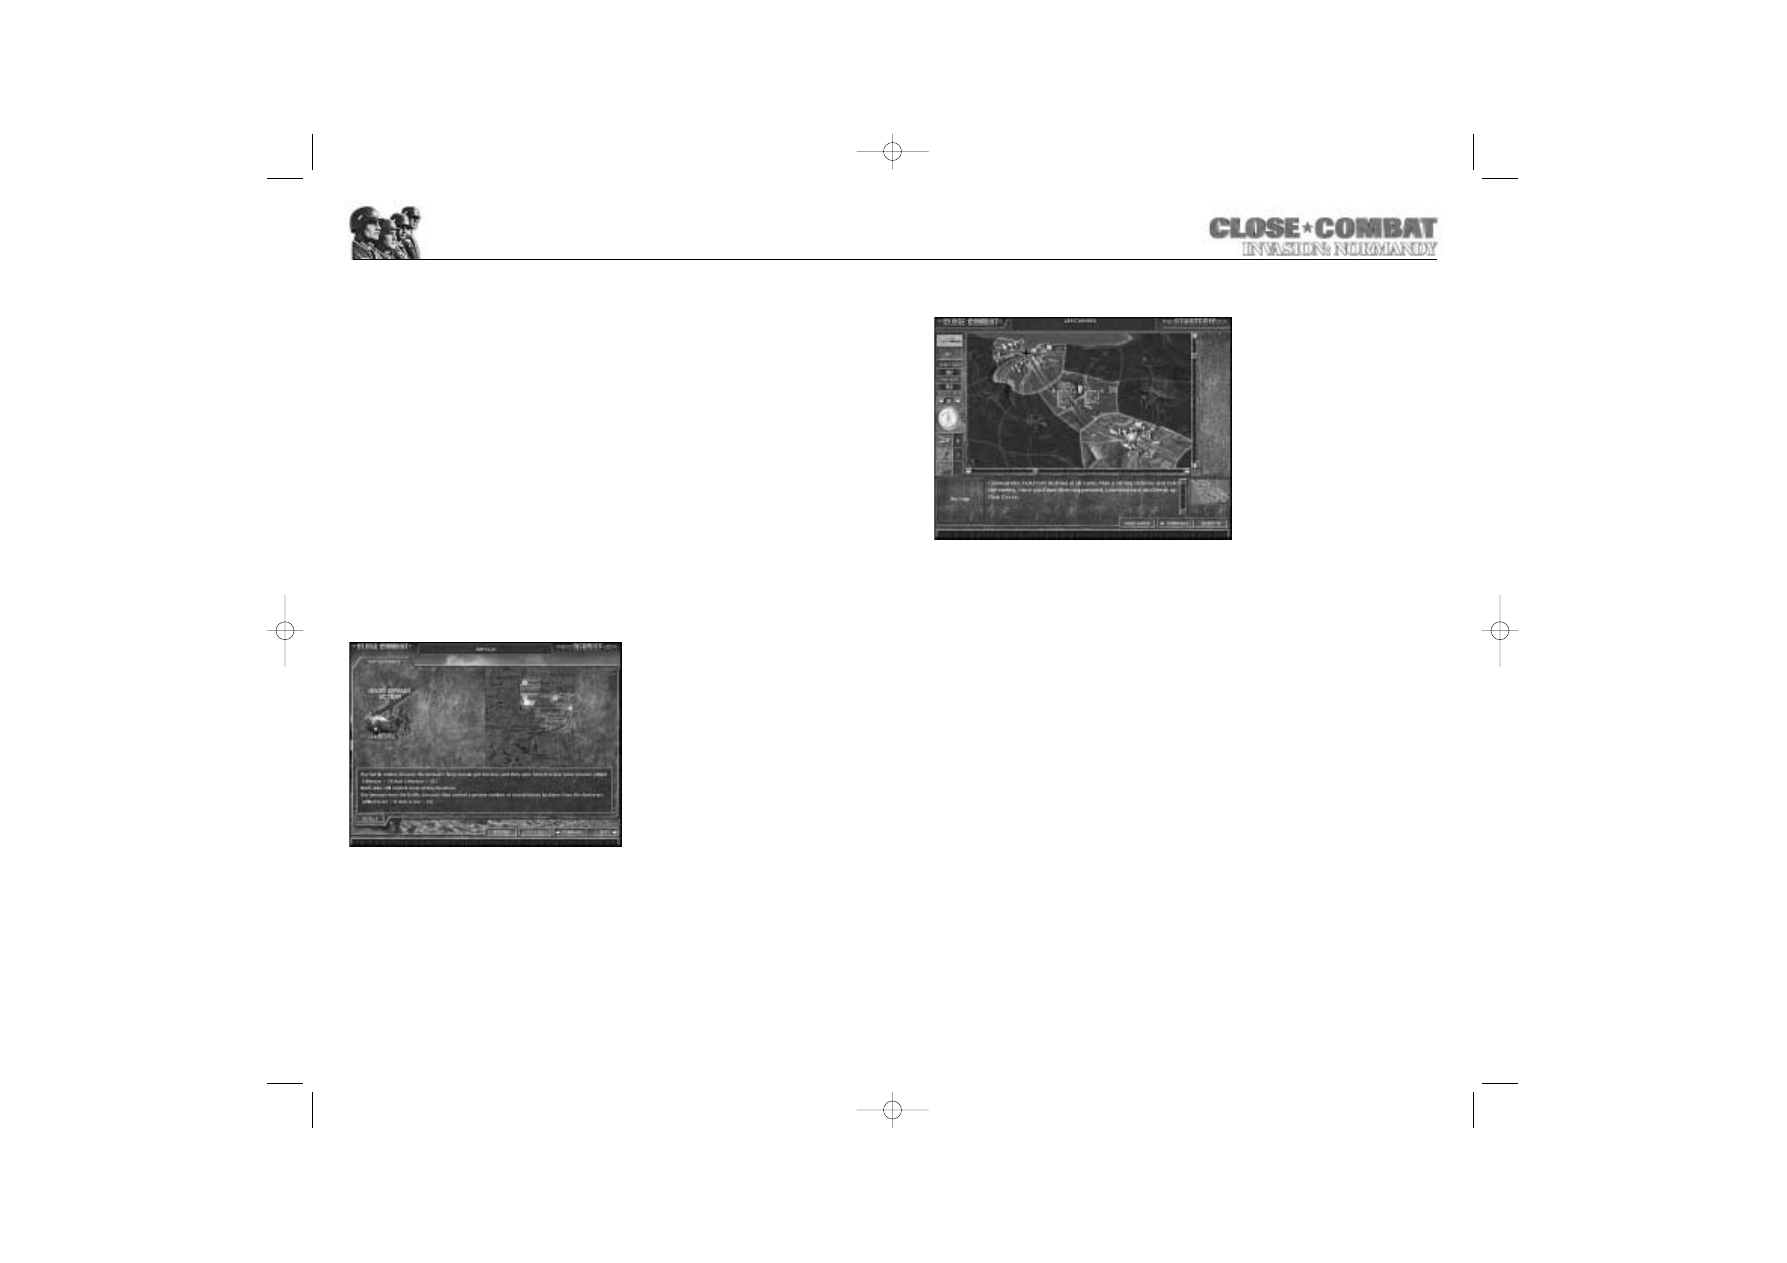
STRATEGIC LEVEL
The Strategic screen controls the
movements of Battle Groups for
Operation and Campaign play. At
this level, you determine the bat-
tle plan, not for squads of men on
the battlefield, but for “D-Day –
Invasion Normandy” itself. Each of
the Battle Groups represents a
unit roughly of battalion size that
fought in Normandy. The result of
combat between Battle Groups
represents the success or failure
of the entire formation.
Will you press forward on all fronts or secure an area?
Will you achieve what Germany historically could not?
The Strategic Map
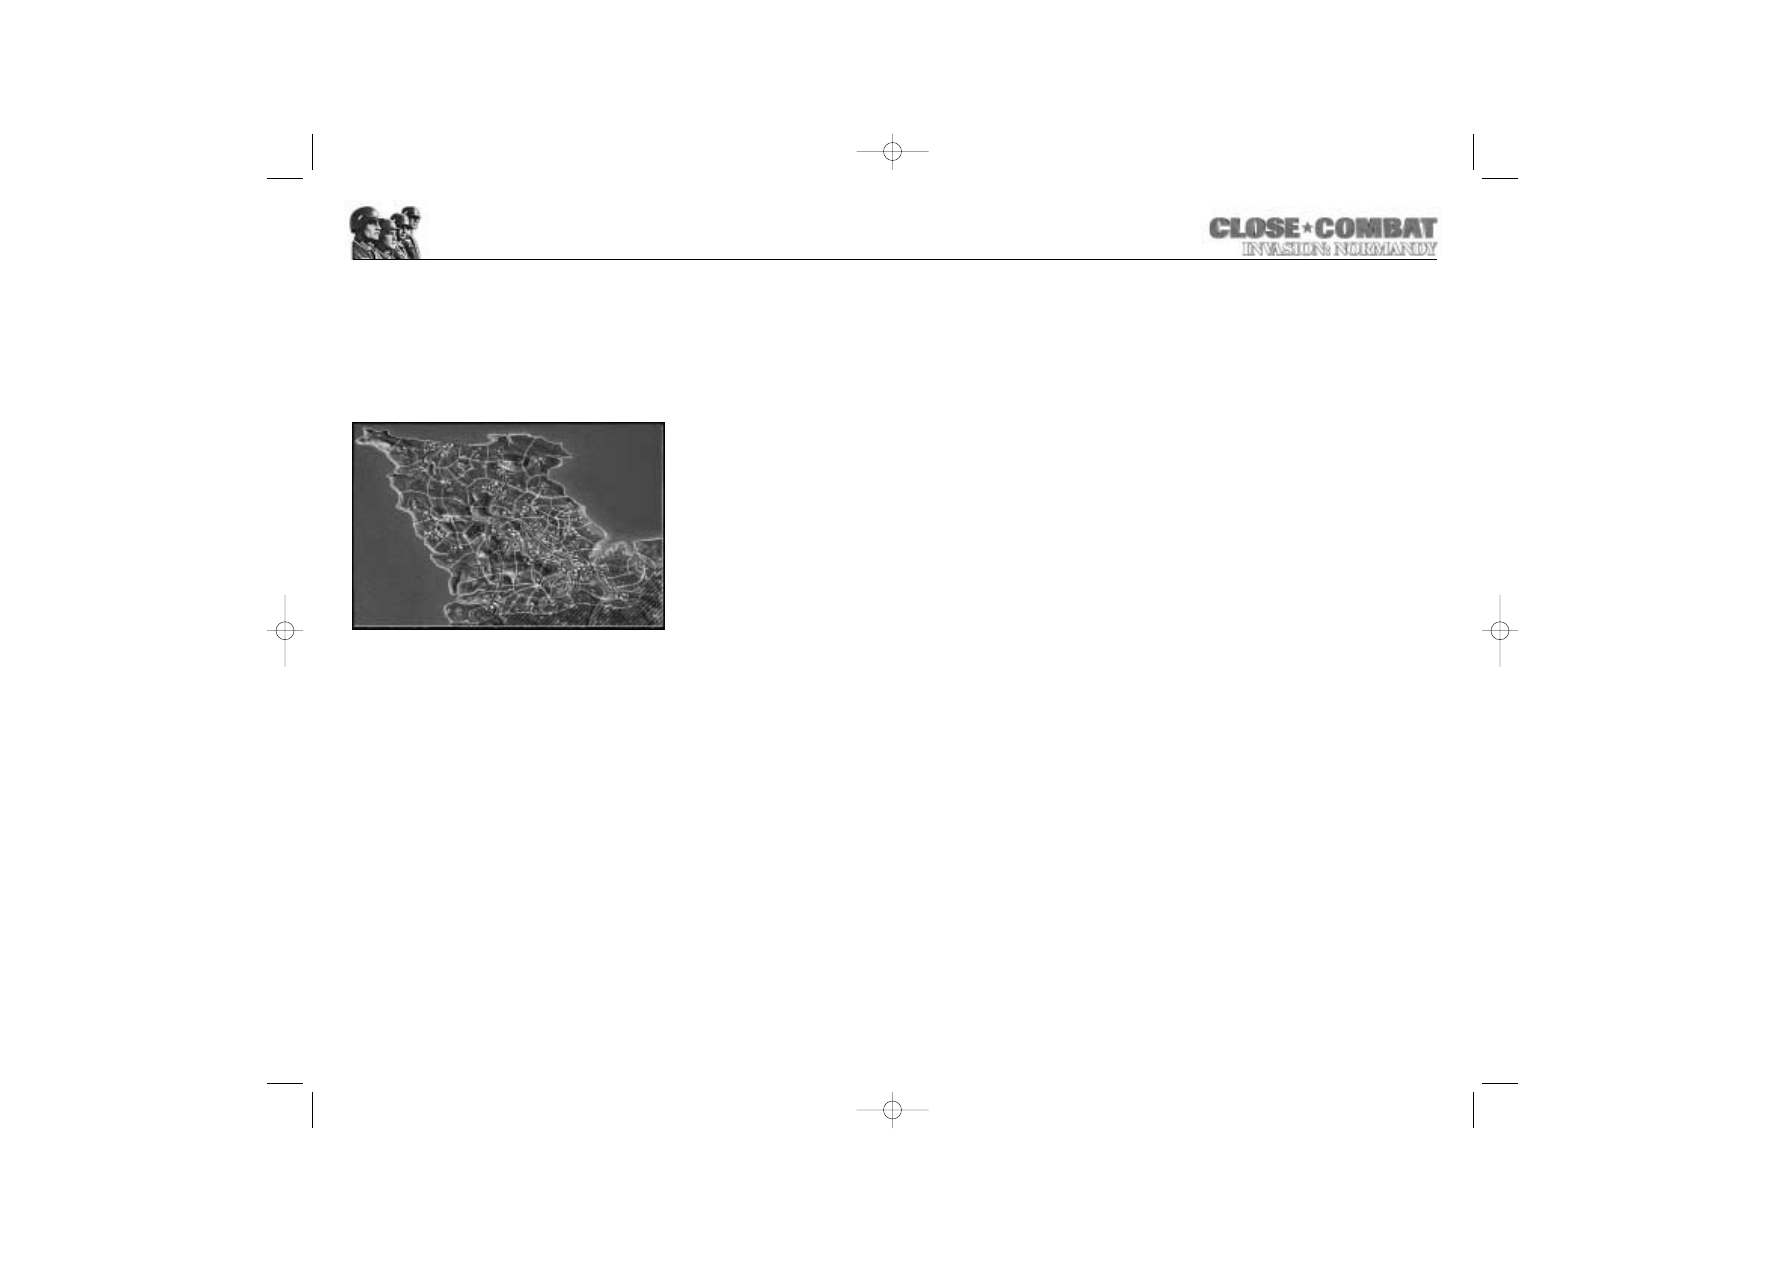
The Strategic Map shows the general region that most of the Normandy battles were
fought over. The map scrolls to allow more detail.
During a particular Campaign or Operation, some or all of the Strategic Map may be
available. Each available region has its own coloured square in its centre. This square
denotes who controls the region or if that region is currently contested. It also shows
where supply depots are. Roads connect regions. A Battle Group cannot move from one
region to another unless a road connects them and the Battle Group controls the victory
location connected with the road it is taking.
American Control ....................................White Star on Green
German Control ......................................Black Cross
Mixed Control ..........................................1/2 White star - 1/2 Black Cross
American Major Supply Depot..............Green Barrels
German Major Supply Depot ................Gray Barrels
American Minor Supply Depot ............Green Barrel
German Minor Supply Depot ................Gray Barrel
Detected enemy and friendly Battle Groups are visible on the Strategic screen. You can
look at any Battle Group by left-clicking on it. This displays the units that make up the
Battle Group on the task bar at the bottom of the screen. Click on any unit in the Battle
Group to examine the Soldier screen for that unit.
03661 CLOSE COMBAT 5 EX MAN 9/21/01 12:17 PM Page 30

32
Scrapped tanks and disbanded infantry units must be replaced from the unit’s reserve
Force Pool.
Replacements do not strictly come forward from “rear” areas. They are also supplied from
the larger organisation to which your Battle Group belongs. Even when surrounded, your
Battle Group can receive replacements because it is assumed they are being sent over
from company or division HQ, which has been surrounded along with your Battle Group.
Disbanding
Battle Groups are disbanded whenever the player chooses or whenever they are forced
to leave a map either through loss of victory locations or from morale failure. If a Battle
Group that disbands is in supply when it disbands, all of its units are returned to its rein-
forcement pool. If you have only one Battle Group remaining, you may not willingly
disband it.
Disbanding a weakened Battle Group that is in supply can be an excellent way of clear-
ing a road for better-equipped Battle Groups moving up. This allows the weakened Battle
Group to reform in the rear.
If a Battle Group voluntarily disbands while it is out of supply, it loses all of its vehicles,
and 50% of its infantry units are captured before they return to the group’s supply depot.
If an unsupplied Battle Group is forced to disband involuntarily, because it is forced off a
map, it loses all of its vehicles, then 75% of its infantry units are captured. This can be a
crippling loss.
Reforming and Reinforcements
When a unit disbands, it tries to reform on the map on the morning of the following day.
The unit will reform at a friendly supply dump held by its side first; then if none are avail-
able, it will reform at an enemy held friendly major supply depot.
Reinforcement units will arrive when the scenario defines the moment of arrival. These
units will arrive at pre-determined supply depots. If the depot is friendly owned, then the
unit is free to move. If the depot is enemy owned and an enemy BG is on that depot
map, then the unit has to fight its way onto the map.
In either case, reforming or reinforcing, the unit will bounce to the nearest supply dump if
the designated supply dump contains a friendly unit.
Supply
Units receive fuel and ammunition from friendly supply dumps. A unit can receive sup-
plies from any friendly dump that it can trace a path back to that passes only through
friendly, uncontested territory. This is the line of supply, and if you can cut it, you can dras-
tically reduce the combat efficiency of the unit you have cut off. A unit that has been cut
off is described as “out of supply.” For each turn that an unsupplied unit engages in com-
bat, it drops one supply level in ammunition and fuel. Loss of ammunition supply cuts
ammunition starting levels during battles. Loss of fuel does not affect tanks immediately.
However, once fuel supplies reach Low, there is an increasing chance that each vehicle
begins each battle out of fuel and thus immobile.
31
American and German Battle Groups also show a star or cross above them. The colour
of this icon displays the approximate relative firepower of each Battle Group.
Green ................Strong AT and AP
Yellow ..............Moderate AT and strong AP
Orange ..............Moderate AT and AP
Red....................Weak AT and moderate AP
Black ................Very weak AT and weak AP
Units with low firepower are best used defensively, to prevent enemy advance while your
stronger units attack. A properly led infantry group can hold even the heaviest armoured
column at bay.
Weather Indicator
At the top left hand corner of the Strategic Map is the weather indicator showing the
current weather for the strategic turn being played.
Ground Condition Indicator
Below the weather indicator is the current ground condition for the strategic turn
being played.
Strategic Turn Indicators
Below the ground condition indicator are the Strategic Turn Indicators showing the
current date, the ending date for the scenario, and the current time. Clicking on the
arrows next to the scenario length indicator shows reinforcement Battle Groups and
where they may arrive on the date shown. The dates run from the 6th of June to the
30th of June 1944.
Battle Groups
Battle Groups represent a force roughly the size of the lead element in a regimental
combat group. These Battle Groups are composed of various forces: infantry, tanks, and
other vehicles and support teams. A full strength Battle Group can have 15 units in play.
As combat occurs, Battle Groups take losses, and these are replaced from a limited pool
of reinforcements. Reinforcement pools slowly replenish as the days pass. Note: the rein-
forcement pools function automatically; these are forces distinct from the Force Pool.
Repair and Replacement
Tanks that have been damaged and infantry units that have taken losses are able to make
some repairs in the field. All damaged tanks are assigned for field repair after each battle.
40% of damaged tanks can be made functional, but the rest are either too damaged for
repair and/or scrapped for parts to repair the 40% that survive.
Any infantry team that has 60% or more of its soldiers killed or seriously wounded is dis-
banded and its survivors either sent to other units or rotated to the rear. Infantry units that
take less than 60% losses are assumed to find replacement men from disbanded infantry
units or from new men brought up from the rear.
03661 CLOSE COMBAT 5 EX MAN 9/21/01 12:17 PM Page 32

Fuel Levels
Supply State
Effect
High ............................Normal
Normal ........................Normal
Low ............................30% Chance for vehicle immobility
None ..........................60% Chance for vehicle immobility
Ammunition Levels
Supply State
Effect
High ............................100% Optimum
Normal ........................80% Optimum
Low ............................60% Optimum
None ..........................30% Optimum
A Battle Group that is out of supply and is low on fuel can capture fuel from enemy
major supply dumps. To use enemy fuel, the Battle Group must occupy the dump; once
it leaves the dump, the fuel supply starts to diminish as normal. Enemy major supply
dumps only provide fuel on site; no supply line is created. Unfortunately, enemy supply
dumps do not provide ammunition.
In addition to loss of supplies, units that are out of supply have a more difficult time
repairing damaged tanks. A Battle Group whose ammunition supply has reached “low”
only has a 75% chance for damaged tanks to be replaced to the force pool. A Battle
Group whose supply level has reached “none” is unable to repair tanks at all until it
gets re-supplied.
Strategic Turns
Each strategic turn represents several hours of fighting. There are two strategic turns
over the course of a day. Reinforcement Battle Groups only arrive on the morning turn.
During each strategic turn, you may move each Battle Group you control, and assign any
air strikes, mortar barrages, or naval barrages that are available. If you feel it necessary, you
may also disband any Battle Groups. When you have finished your turn, hit
Execute; this
brings up the Strategic Results screen. The game is automatically saved at this point.
After reviewing the results of your decision, you play out any consequent battles in
random order.
34
33
Moving Battle Groups
To move a Battle Group, left-click
on the Battle Group. When the
Battle Group is selected, movement
arrows will appear pointing to all
areas that the Battle Group may
legally move to. After you have
decided where you want to move
your Battle Group, you drag it to
an adjacent territory. Battle Groups
in uncontested territories may move
along any connecting road. In areas
that are of mixed control, you may
only move along roads for which
you hold the victory locations.
The Strategic Results screen indicates the outcome of the moves for the turn and if any
battles are to occur. To fight the battles listed, or to advance to the next strategic turn
left-click on Next. The order in which the battles are fought is from north to south and
from west to east.
Note: Each side is only allowed to have one Battle Group in each region at a time.
You may move a Battle Group into a region that you already occupy. However, if the
group currently in the region does not move out of it, the other group will not advance. If
you order two units into the same location, the orders issued to the second unit cancel out
the orders given to the first. It is possible for more than one unit to use a road, so units
may switch places. When ordered to do so, a two-way arrow is displayed on the map.
All movement on each turn happens simultaneously. If two adjacent enemy forces move
at each other, the battle occurs on the map of the slower Battle Group. Reconnaissance
groups are faster than motorised groups, and motorised groups are faster than infantry. If
the German and American Battle Groups are the same speed, the tie goes to the
Germans and the battle is fought on the American map.
Resting and Digging In
A Battle Group that does not move during a strategic turn is considered to have rested.
Battle Groups that have rested recover lost morale and have time to dig in.
If a Battle Group that is resting is attacked, it defends its map from prepared positions.
When an infantry or support unit is placed on an open stretch of ground, a trench or gun
pit is placed under them, providing cover where there was previously none. These fortifi-
cations are permanent, and appear on the battlefield in future battles. Enemy troops are
unaware of field fortifications until they have a line of sight, so what may appear to an
attacker as an open field on a map could actually be a vast network of enemy trenches.
Infantry trenches are dug based on the unit’s facing, so it is important to establish facing
before hitting
Begin.
03661 CLOSE COMBAT 5 EX MAN 9/21/01 12:17 PM Page 34

36
Air Strikes, Naval Gun Fire, and Mortar Support
Air Strikes, Naval Gun Fire, and Mortar
Support are available from buttons
on the lower left hand corner of the
map. The number by the various
support options indicates the num-
ber of support missions available
each day. It is important to remem-
ber that there are two turns in a
day. If
Mortar Support, Naval Gun Fire,
or an
Air Strike is assigned but not
used during a morning battle, then
the support mission is returned for
use in an afternoon battle. To assign
support, click on the appropriate
symbol and drag it to the unit you wish to support.
Mortar Support, Naval Gun Fire, and Air
Strikes are assigned to units, not to regions. A unit may have all three types of support for
a battle, but never more than one of each. To remove a support mission from a unit and
place it back in the available pool, left-click on the tab that appears above the unit on the
strategic map.
Note: the following charts show the default settings; playing with the Historical Weather
Conditions option turned on will alter the availability of Air Strikes and Naval Gun Fire.
Mortar Barrage Availability
German (per day)
June 6 ................................0
June 7-8 ............................3
June 9-11..........................4
June 12-18 ....................3
June 19-30 ....................2
American (per day)
June 6 ..................................0
June 7 ..................................3
June 8 ..................................4
June 9-11 ..........................5
June 12-30 ......................6
35
Weather
Weather affects the availability of
Air Strikes, Mortar Support, and Naval Gun Fire. Generally, the
clearer the weather, the more support is available. Pre-generated scenarios use the real
life weather conditions of D-Day. User-created scenarios can opt for random weather
effects. Weather also affects supply. During storm turns, the supply dumps for the
Americans are downgraded by one level.
Weather Model
The following is a list by date of the historical weather conditions during the D-Day
campaign in Normandy.
Date
Weather
Date
Weather
June 6th ..................Overcast
June 19th ................Storm
June 7th ..................Light Overcast
June 20th ................Storm
June 8th ..................Light Overcast
June 21st ..................Storm
June 9th ..................Overcast
June 22nd ..............Light Overcast
June 10th ................Light Overcast
June 23rd ................Clear
June 11th ................Clear
June 24th ................Clear
June 12th ................Clear
June 25th ................Clear
June 13th ................Clear
June 26th ................Clear
June 14th ................Clear
June 27th ................Clear
June 15th ................Clear
June 28th ................Light Overcast
June 16th ................Overcast
June 29th ................Light Overcast
June 17th ................Light Overcast
June 30th ................Light Overcast
June 18th ................Light Overcast
Variable weather would run along these probabilities:
Base Weather Role
Next Turn Weather Modifier
Overcast 0-25 ..................................................-5 modifier
Light Overcast 25-50 ................................-3 modifier
Storm 51 -63......................................................Automatic for three turns then random again.
Clear 64-99 ........................................................+6 modifier
The weather always starts in Overcast.
03661 CLOSE COMBAT 5 EX MAN 9/21/01 12:17 PM Page 36

Air Strike Availability
German – None
American (per day)
June 6 ..................................0
June 15 ..............................5
June 7 ..................................2
June 16 ..............................3
June 8 ..................................5
June 17 ..............................4
June 9 ..................................1
June 18 ..............................0
June 10-12 ......................0
June 19 ..............................1
June 13 ..............................2
June20-30 ........................2
June 14 ..............................4
Naval Strike Availability
German – None
American (per day)
June 6-11 ..........................2
June 12-22 ......................1
June 23-30 ......................2
Intelligence
When on the strategic map screen, you are usually unable to see the enemy. On a clear
or light overcast day, American forces can see the entire German force because of their
air superiority. Otherwise, the only enemy Battle Groups you can detect on the map are
ones that you have fought with during the previous turn.
Winning Campaigns and Operations
Campaigns and Operations continue until the pre-determined ending date or until one
side has complete control of all map areas. If a strategic layer game ends because of time
running out, then each side totals points for every victory location on every map in the
scenario and the player with the most points wins. Remember, each victory location is
worth between 1-3 points. The only exception in scoring is during the Grand Campaign
in the Campaign section. When playing the Grand Campaign your score is based not on
total victory location points, but on how each player does compared to how each side
performed historically.
38
37
SCENARIO EDITOR
The Scenario Editor is a very
easy to use feature that allows you
to design your own Campaigns
and Operations. It is strongly sug-
gested that you become familiar
with the strategic screen and play
a few Campaigns before designing
your own.
The Map
The map screen shows the entire
strategic map, but all of the location
boxes are blacked out. Left-click on
a location to rotate through all its
possible control and supply states. Choosing a Battle Group and placing it on a black-
ened map automatically turns its control to the Battle Group’s nationality.
The possible starting states are:
• American control (no supply depot)
• German control (no supply depot)
• Split control (no supply depot)
• American control (American major supply depot)
• Split control (American major supply depot)
• German control (American major supply depot)
• German control (German major supply depot)
• Split control (German major supply depot)
• American control (German minor supply depot)
• American control (American minor supply depot)
• Split control (American minor supply depot)
• German control (American minor supply depot)
• German control (German minor supply depot)
• Split control (German minor supply depot)
• American control (German minor supply depot)
Every map must be contiguous; there should be a possible path from every region to
every other region. Avoid unconnected islands. For Campaigns and Operations, each
side must also have at least one supply depot.
03661 CLOSE COMBAT 5 EX MAN 9/21/01 12:17 PM Page 38
40
MULTIPLAYER
Multiplayer games operate by having
one player, called the Host, start a
game. The second player Joins the
game that the Host creates. To play a
multiplayer game, the computer that
hosts the game and the joining com-
puter must both have a copy of the
game CD.
Internet TCP: Using this type of con-
nection, you can play the game with
another player over a LAN (Local
Area Network) or over the Internet.
Internet UDP: Faster, though slightly
less stable than TCP, players may elect to connect over the Internet or a LAN using the
UDP protocol.
Modem: Two computers with modems can connect over phone lines.
Serial Connection: You can also link to another player over a null-modem cable.
Using a TCP Connection
After both players have connected through their ISPs, both should select Multiplayer from
the Main Screen. From the Multiplayer screen, select the
Internet TCP button.
If you are playing over a LAN, you can join any game listed. To join a game, left-click on
it, then left-click on
Join, or simply double-click on the game you want to join. To get a
current list of available games, click the
Search for Games button.
If you want to join an Internet game, select the
Host IP button and enter the host’s IP
address. The host’s IP address appears on the bottom of their screen. You need to find
out from the host player what their IP address is. When you are done, select ready and
wait for the host to start the game.
If you want to host the game, click on the
Host button. Your IP address appears on the
bottom of the screen. You must inform the second player of your IP address so that they
can join. After electing to host a game, the
Select a Battle button brings you to the
Command Screen where you can select the Battle, Operation, or Campaign and realism
settings. When you have made your selections, select
Ready. When the second player has
joined, select
Next to start the game.
39
Once you have set all of the initial starting states on the map, you should turn your atten-
tion to the date bar. The date bar starts with two sliding markers, one on each side. These
represent the starting and ending dates of your Campaign. To change the starting and
ending dates, click and drag the bars to the dates that you would like.
If you click on a date, a small gray arrow appears over it. This arrow represents the date
that Battle Groups appear on the map. Changing the date allows you to have reinforce-
ments arrive during different days of the Campaign. Dates that you have set
reinforcements to arrive are marked with an R.
When looking at the Scenario Editor map, you will only see the units that first appear on
the date that is currently selected.
To place a Battle Group, left-click on it, and then drag it to the location where you wish it
to start. Remember that each side can have only one Battle Group at each location. Each
side must have at least one Battle Group appear at some time during the Campaign.
Once you have selected the Battle Groups you wish to appear, you can set the levels of
available supplies for each side. This affects ammunition and fuel levels for each side, and at
Low Supply there is a chance for tanks and vehicles to be out of fuel during each battle.
You can also set the availability of mortar barrages, naval gun fire, and air support, as well
as the weather, from the buttons on the bottom of the screen. When you are done, you
may save the scenario you have created.
Scenarios that consist of just one map are Battles. Scenarios that contain multiple maps
and/or multiple Battle Groups are Operations or Campaigns. In all cases, multi-map bat-
tles require all maps included in the scenario to be contiguous; in other words, you must
be able to trace along a road from any map in the scenario to any other map in the sce-
nario. Any map left unclaimed is inaccessible to the user once the game has started.
Now all you need to do is save the game. A popup window appears asking for the name
of the battle as well as a short description. Once you have named and saved it, this battle
is available on the command screen.
To create Operations and Campaigns all you need to do is add more maps, giving each
side at least one supply depot, and more Battle Groups. Remember that you can have
units appear on the strategic map after the first day by clicking on the date you want
them to appear and then placing them. There is a gray arrow overlaid on the date the
units are appearing.
03661 CLOSE COMBAT 5 EX MAN 9/21/01 12:17 PM Page 40

Using a UDP Connection
Other than selecting then using the different protocol, connecting with UDP is virtually
the same as using TCP.
Using a Serial Connection
Power down both machines and connect their serial ports with a null-modem cable.
Restart the machines and start the game; select
Multiplayer, then Serial Connection. A box
appears requesting port, baud rate, stop bits, parity, and flow control. Other than the port,
these settings need to be the same for both machines. Once this is done, players may
Host and Join as they do in TCP games.
Using a Modem Connection:
To connect via a modem, both players select multiplayer, then select the modem connec-
tion method. The player hosting the game should select
Host, verify their modem from the
pop up list, and click the
Answer button. To join a game, click on the Call button. When
the popup menu appears, either click on the host’s name and click on
Join, or Double-
click on the host’s name.
Using the MSN Gaming Zone
The MSN Gaming Zone (the Zone) is a free multiplayer gaming service available over
the Internet at http://www.zone.com. To access the Zone, you need an Internet connec-
tion and Netscape Navigator 4.0 or later or Internet Explorer 3.2 or later.
The first time you log into The Zone, you are asked to create an account and to down-
load the Zone software. Prompts in The Zone will direct you. Once you have created an
account and installed the Zone software, visit The Zone website and select C
LOSE
C
OMBAT
: I
NVASION
N
ORMANDY
from the strategy games menu. Once in the C
LOSE
C
OMBAT
: I
NVASION
N
ORMANDY
area of the Zone, choose a game room. You may then either
click on any unoccupied table to host a game or choose an occupied table and play
against a person waiting to host. The Zone has a built in chat feature, making it easy to
find other players. Next to each player’s name is a coloured bar indicating his or her
latency (the quality of their connection to the Zone). When starting a game, try and play
with people with green indicators. Make sure you check your password when logging on
to the Zone every time you log on. If you have trouble with Zone connections try using
the Zone as a matchmaking service and connect using the UDP method.
Using Mplayer
Installing mplayer.com is simple. Just follow these easy steps and you are on your way to
the excitement of online multiplayer gaming!
1. There are several ways to install mplayer.com from C
LOSE
C
OMBAT
: I
NVASION
N
ORMANDY
.
42
41
• From the game CD-ROM Autorun Menu: Select the option to Play on mplayer.com
• From the Windows 95/98 Start Menu: Select this game and the option to Play on
mplayer.com
From the Program folder: Click on the icon to Play on mplayer.com
2. This will start the mplayer.com installer, which will:
• Check for mplayer.com — if you don’t have it, the program will install everything you
need! Just follow the easy install instructions at the prompts. During the process, you
will set up an mplayer.com account and select your mplayer.com member name
and password.
3. After installing mplayer.com, your Web browser will launch and connect you to the
mplayer.com game page:
• Make sure your game CD-ROM is in the disk drive.
• Now click on ‘Play Now’ to log onto mplayer.com and head to the Lobby of your game.
• Before entering the game’s Lobby, we will automatically download any additional files
you might need to make the game playable on mplayer.com.
4. Now you are in your game’s Lobby on mplayer.com.
• Chat with other players by typing your message and pressing Enter.
• To enter a Game Room, double-click on a green Room icon.
• If you want to create a new Game Room, click on the Create Room button.
5. Almost there!
• If you enter an existing Game Room, Click on the ‘Ready to Play?’ button, or,
• If you create a Room, wait for players, then click on the ‘Launch Game’ button.
6. Have fun playing on mplayer.com!
Communicating with Your Opponent
You can send messages to your opponent at any time.
To send a message during play, press ENTER. Type in your message and then press
ENTER. The message appears briefly on the other player’s screen.
UNITS
The battles in the Cotentin region were conducted by hundreds of thousands of men
03661 CLOSE COMBAT 5 EX MAN 9/21/01 12:17 PM Page 42

44
AT Infantry
Infantry anti-tank teams are armed with weapons like the Panzerschreck and the Bazooka.
Infantry AT weapons generally have a low rate of fire and limited ammunition. Bazookas
are often only effective against the sides, rear, or top of German armour. Panzerschreck
teams are effective against most armour from any angle. These weapons are penalised for
concealment and accuracy because of their back blast when the rocket is fired. It is best
to set these teams up and let them fire at tanks on their own rather than issue them fire
commands. AT teams should use concealment and surprise to be effective.
Basic Infantry Tactics
During the Normandy campaign, the ratio between infantry and tanks was hundreds to
one. Infantry being the principal component of the battle, it is vital that you use them
properly. Infantry are extremely vulnerable to virtually every other unit when in the open.
They should always be kept under some kind of cover: buildings, bunkers, trenches, for-
est, or smoke if necessary. When facing armour, infantry should assume Ambush positions
and attack from the side or rear. Close assaulting tanks using grenades from ambush or
under cover of smoke can also be effective.
Secondary Weapons
In addition to their primary weapons, many soldiers carry secondary specialist weapons
like explosive grenades, pistols, panzerfausts, rifle grenades and demolition charges. The
number of these weapons available for each unit is listed on the Battle Group screen.
When the opportunity arises to use these weapons, your soldiers do so automatically.
Mortars
Mortar crews engage the enemy with indirect fire, lobbing powerful explosive shells
great distances. While a mortar team is more accurate while firing at targets they can see,
they are often best positioned well away from the front line where they can hammer
enemy infantry and light vehicles from safety.
The heavier a mortar is, the slower the rate of fire but the more powerful the shell. Heavy
and medium mortars are powerful enough to be used against buildings. Mortars can also
lend vital support to friendly units by dropping smoke at great distance.
Mortars are also effective against light vehicles, particularly open-topped vehicles such as
half-tracks.
Mortar Tactics
A mortar is more of a tool than a weapon. It is important to understand that in most cases,
the inaccurate nature of mortars make them only marginally useful at killing. Mortars are
useless against any tank with an armoured top and only kill an infantryman if the shell it
launches lands very close. Aside from its immense power to suppress infantry, where the
mortar shines is in destroying AT guns in the open, and for dropping smoke anywhere
on the map.
43
using a wide array of weapons and vehicles.
Infantry
Light Infantry
Light infantry are armed with rifles, submachine-guns, and grenades. Because they are
less encumbered, light infantry can travel good distances without becoming tired. This
makes them well suited for attacking flanks and probing open territory.
Medium Infantry
Medium infantry have rifles, submachine-guns, grenades, and machine guns like the
Browning Automatic Rifle (BAR). Medium infantry are well rounded in terms of both
mobility and firepower.
Heavy Infantry
Heavy infantry have even more firepower, such as flamethrowers, panzerfausts, and demo-
lition charges. Well suited to close combat, heavy infantry can also be quite effective
against tanks, if they can get close enough for a shot with a Panzerfaust or an anti-tank
rifle grenade; this also applies to a lesser degree to the lighter armed infantry teams.
Because of the heavy weight of their gear, heavy infantry are slow and can quickly
become winded.
Snipers
Snipers are deadly, long-range shooters who work alone. They are more accurate at long
range, are more likely to target enemy leaders, and are more likely to kill, but they have
a low rate of fire. Snipers are easily suppressed once they are discovered and should
switch positions regularly. Remember that the talent of a sniper is not in the amount of
enemies he kills directly; by targeting officers and suppressing enemy troops at long
range, he can sap enemy morale and reduce their efficiency.
Engineers
Engineers have heavy firepower, such as flamethrowers, panzerfausts, and demolition
charges. Well suited to close combat, engineers can also be quite effective against tanks if
they can get close enough. Because of the heavy weight of their gear, engineers are
slow and can quickly become winded. In addition to the heavy armament, engineers can
clear lanes through mine fields as well.
Scouts
Scouts are lightly armed and used for infiltrating enemy lines to check deployments and
set ambushes. They are quick and stealthy. They are faster and less likely to be discov-
ered than average infantry. They are very effective at close range but not effective at long
range. Scouts are particularly valuable in urban combat.
03661 CLOSE COMBAT 5 EX MAN 9/21/01 12:17 PM Page 44
Nothing lessens the blow of enemy ambush like the power to shower your units in
smoke while they pull a hasty retreat.
AT guns make good targets for mortars. AT guns are unarmoured, generally immobile,
and need line of sight to return fire. When an AT gun is detected in the open, it is often
wise to pull your troops back and simply pound the gun until it is disabled. If the gun is
inside a building, dropping smoke in front of the building can temporarily blind the gun.
Machine Guns
Machine guns are highly effective against infantry and light vehicles and are extremely
effective at suppression. However, heavy machine gun crews can only move their weapons
slowly and require time to set up the weapon when they reach a new position. Because
they are difficult to move and slow to set up, machine guns are often set up in buildings
or other such cover locations to prevent them from being destroyed by mortar fire.
Machine Gun Tactics
Machine guns are powerful weapons and are even more useful in that they generally do
not require close supervision. Place machine guns in well protected areas, preferably with
a roof and a wide field of fire, and they can work wonders against enemy infantry and
light vehicles. A successful Ambush attack by machine guns can be devastating. If a
machine gun draws the attention of enemy armour, it is definitely time to retreat.
Flamethrowers
These are very effective against both infantry and armour, but have a very short range
and limited shots. They are heavy and slow moving, but do not require a setup period
and can be fired on the run. As might be imagined, flamethrowers tend to set fires.
Troops with flame-throwers are extremely vulnerable and can actually explode if hit.
Flamethrower Tactics
Flamethrower teams require a great deal of support from other friendly infantry. Their
short range and vulnerability require either total surprise or that the enemy be well sup-
pressed. When fighting armour, other infantry units can provide support to flamethrower
teams by fixing the enemy’s attention elsewhere.
Anti Tank Guns
Anti-tank guns are field pieces, modern cannons placed in the field to deal with enemy
armour. AT guns are generally immobile, although smaller versions can be dragged about
by their gun crews. Inexpensive to produce but unarmoured, AT guns require a mix of
surprise and proper placement to be effective. AT guns can be highly effective against
infantry, but are often better left hiding in wait for enemy armour that friendly infantry is
unable to deal with.
46
45
AT Gun Tactics
There are two schools of thought regarding AT gun tactics. The first school says that AT
guns should be placed on hills and in other places with wide views and wide fields of
fire. This ensures that the AT gun has a chance to target and hopefully destroy the
enemy, but it also leaves the gun vulnerable to return fire or mortar bombardment.
The alternative is to conceal AT guns in buildings. This provides both concealment for the
gun and protection for the crew. The downside to this strategy is that the AT gun’s field
of fire is generally very restricted, and the building only offers limited protection against
tank rounds.
Crews
Vehicle crews have little value outside the vehicle and generally try to leave the battle-
field after abandoning their vehicle.
Gun crews are armed. They will use their rifles against infantry targets. If the gun runs out
of ammo, they will defend the gun; if the gun is destroyed, they try to leave as vehicle
crews do.
Vehicles
C
LOSE
C
OMBAT
: I
NVASION
N
ORMANDY
contains a wide variety of Allied and German
vehicles.
Half-tracks and Light Vehicles
Half-tracks and other light vehicles allow the rapid deployment of heavy anti-infantry sup-
port and occasionally anti-armour weapons. However, vehicles like half-tracks and
armoured cars are only lightly armoured and vulnerable not only to anti-tank weapons but
to rifle fire from the sides and top when a height advantage comes into play.
Light Vehicle Tactics
Light vehicles have traded off armour for speed. Use that speed to launch flanking attacks
and to reinforce infantry and tanks from a distance. Never bring a light vehicle anywhere
near an enemy tank. Remember to stay on the move as well or risk drawing enemy mor-
tar fire, which can punch right through the top of an armoured car or half-track.
Tanks
A tank is virtually invulnerable to small arms fire. Tanks can carry machine guns to use
against infantry, high explosive charges (HE) for longer ranged attacks against infantry
(like a hand grenade with a greater range), and armour piercing rounds (AP) that are
effective against all but the heaviest tanks. While tanks may seem like the lords of the bat-
tlefield, a tank is vulnerable to properly armed infantry who can get close enough. Tanks
are well placed behind advancing infantry, lending their considerable firepower while
allowing the infantry to ferret out anti-tank teams and other infantry that might lie in wait.
03661 CLOSE COMBAT 5 EX MAN 9/21/01 12:17 PM Page 46
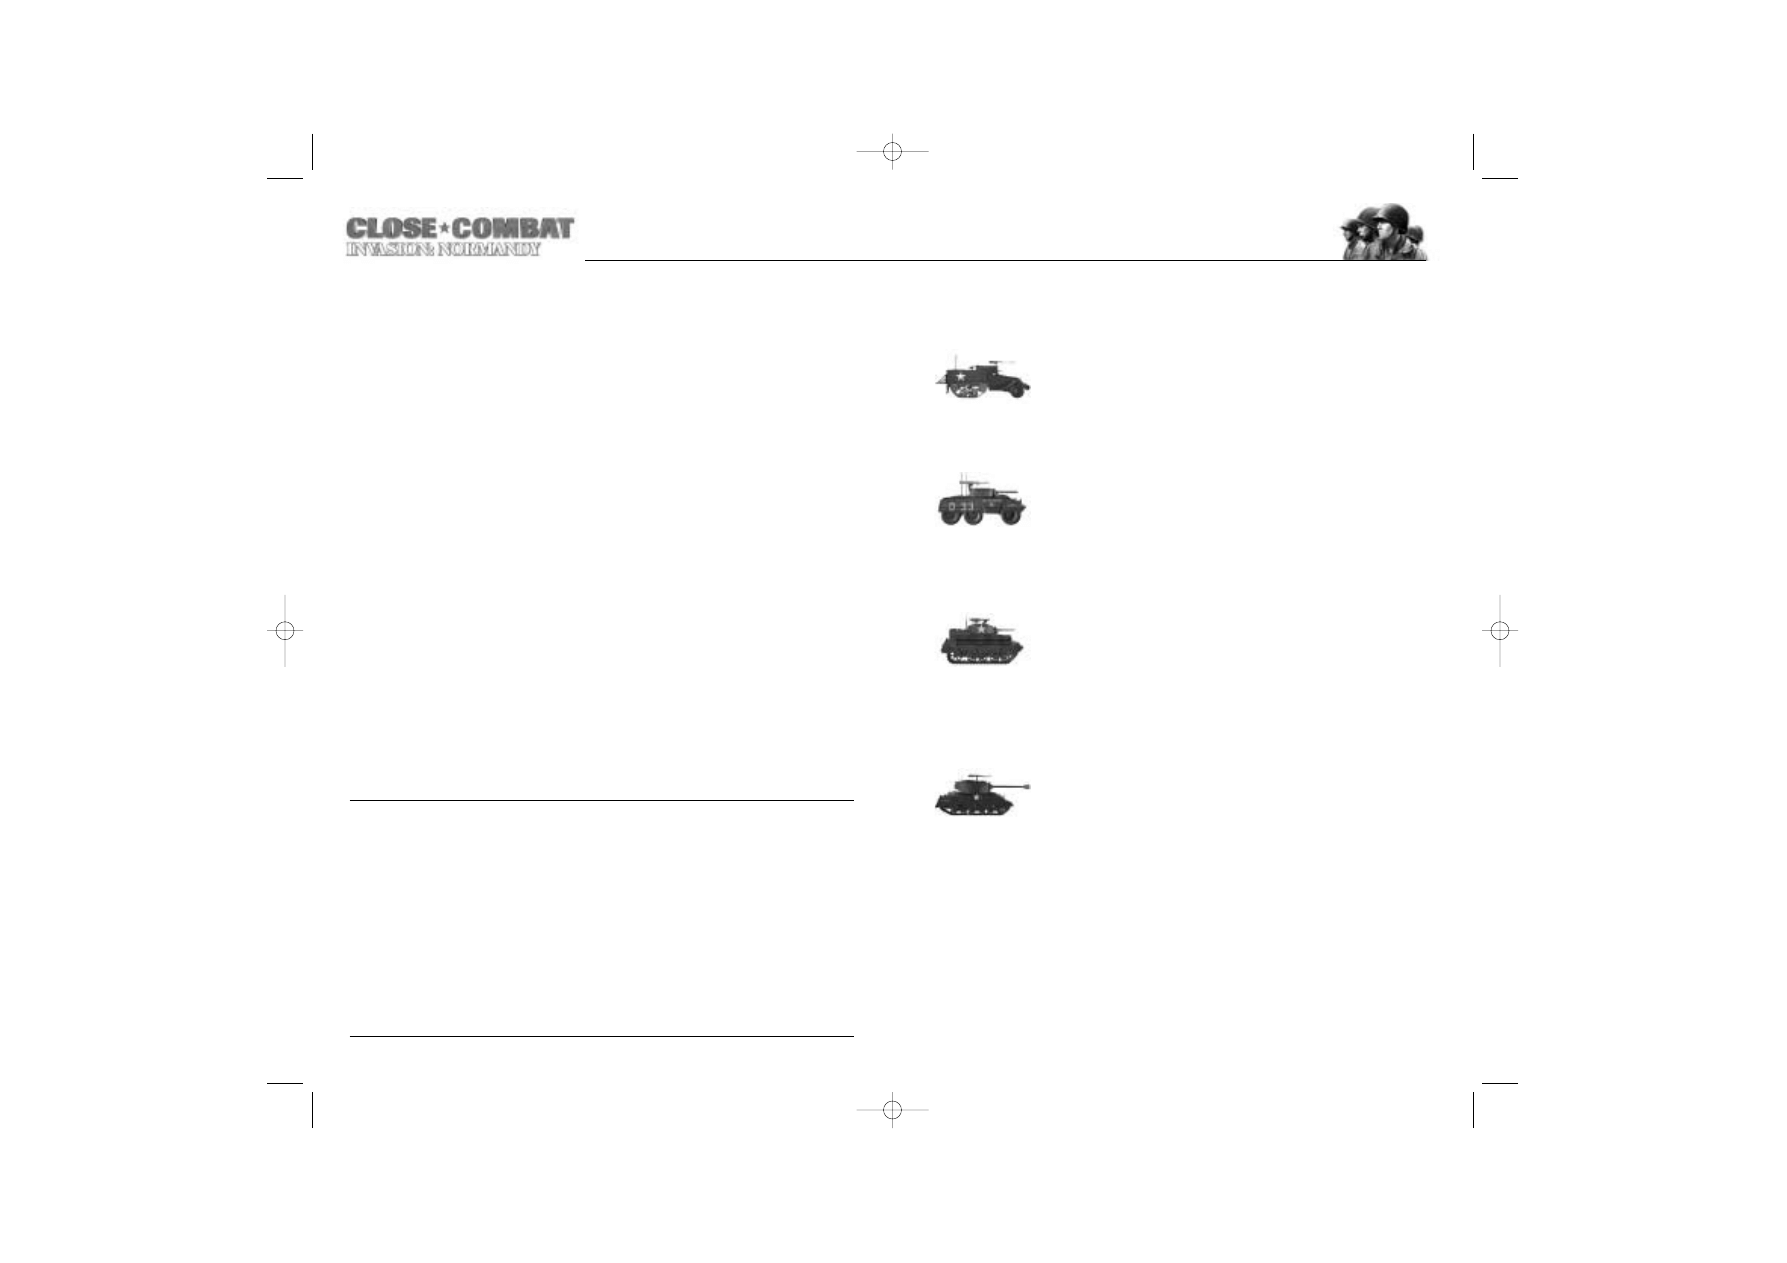
48
VEHICLES
M3 Half-Track
A half-track is a hybrid vehicle with two wheels in the front and tracks
in the rear. The M3 HT usually mounted a machine gun in a ring tur-
ret. M3s were also effective as mortar carriers. While they do possess
tank treads in the rear, half-tracks are very thinly armoured and can
be damaged or even destroyed by rifle fire.
M8 / M20 Armoured Cars
The M8 is a six-wheeled armoured car. Well armed for such a light
vehicle, the M8 mounts a 37mm gun along with two machine guns.
The M8 must use its speed, as high as 55 MPH, to defend itself. A
version of the M8 removed the turret and replaced it with a single
ring-mounted machine gun. This version, called the M20, was used both for transport and
as a command vehicle.
M5A1 Stuart Light Tank / M8 Howitzer Motor Carriage
The M5A1 is a fast light tank. Armed with a 37 mm gun and two
machine guns, the M5A1 is well suited for work against enemy light
vehicles and infantry. However, its main gun is inadequate for anti-
armour combat. The M5A1 was a modified version of the M3A3 with
a new turret and other modifications but was armed in the same man-
ner. The M8 was a modification of the Stuart chassis featuring a short-barrelled 75mm
howitzer in an open-topped turret.
M4 Sherman
The workhorse American tank, there were almost 50,000 M4
produced. The M4 saw numerous variations as modifications and
upgrades were made to the vehicle. The original M4 mounted a
75mm gun and three machine guns and had lighter armour than its
German counterparts. The 75mm gun proved largely inadequate
and most modifications centred on increasing firepower. Later M4’s were upgraded
with a long barrelled, high velocity, 76mm gun; and some were even modified to
mount a 105mm howitzer. Other modified versions included a version with a hull
mounted flamethrower.
47
When not in immediate danger, tank crews generally keep portholes and the top hatch
open. This allows maximum visibility, although it does allow the possibility of surprise
attacks while partly vulnerable, particularly from snipers. Once danger is recognised, such
ports are closed, affording protection but limiting visibility.
As a general rule, tanks have much heavier armour on the front then they do on the
sides or rear. Please refer to “Vehicles” on page 49 for an explanation of how movement
affects facing.
Mobile Guns
These weapons have large guns that can fire HE and AP rounds like tanks, but they are
not heavily armoured. They have good firepower, but little defence, and cost less than
tanks. Mobile guns generally have no turret, firing only forward over a limited arc. While
not nearly as flexible as tanks, their powerful forward guns are often the only way of deal-
ing with armour from the front.
Flamethrower Tanks.
These are very effective against both infantry and armour, but the flamethrower weapon
has a very short range. Because of their severe range limitations, Flamethrower Tanks
need to stay away from conventional tanks using buildings, foliage, smoke, and hills for
cover until they can get close enough to strike.
Basic Armour Tactics
While great books have been written about the high art of tank vs. tank warfare, the basic
principal is very simple. Whenever possible, be positioned in such a way so that you are
shooting at an enemy’s weak side or rear armour while he is shooting at your thick front
armour. Also try to bring several of your tanks’ guns to bear on an isolated enemy tank.
Also remember that infantry cannot harm tanks at long range but can destroy them with a
close range ambush on the sides or rear. To avoid this, tanks should act as support vehi-
cles, using infantry to ferret out enemy infantry and concealed AT guns. Once the enemy
is found, the tank can then blast away from range.
Utah Beach — early morning, June 6, 1944
Prior to dawn on June 6, 1944, Utah beach was completely obscured by smoke from naval and air
bombardments while 30,000 men and 3,500 vehicles were assembled offshore waiting for the sun
to rise.
Finally, the first waves of the US 4th Infantry Division landed at low tide while the water level was
well below the beach obstacles. Although the Americans had to cross hundreds of yards of open
beach to reach the dunes, enemy fire was sporadic at best. While infantry and tanks cleared enemy
bunkers, teams of engineers demolished as many obstacles as they could before the tide rose and
covered them.
Although some fighting took place around the German strongholds, American infantry began to
move off the beaches over flooded lagoons and met up with men from the 101st Airborne Division
by 1300 hours. By nightfall, a bridgehead had been established and was being held firmly against
sparse and uncoordinated attacks.
03661 CLOSE COMBAT 5 EX MAN 9/21/01 12:17 PM Page 48
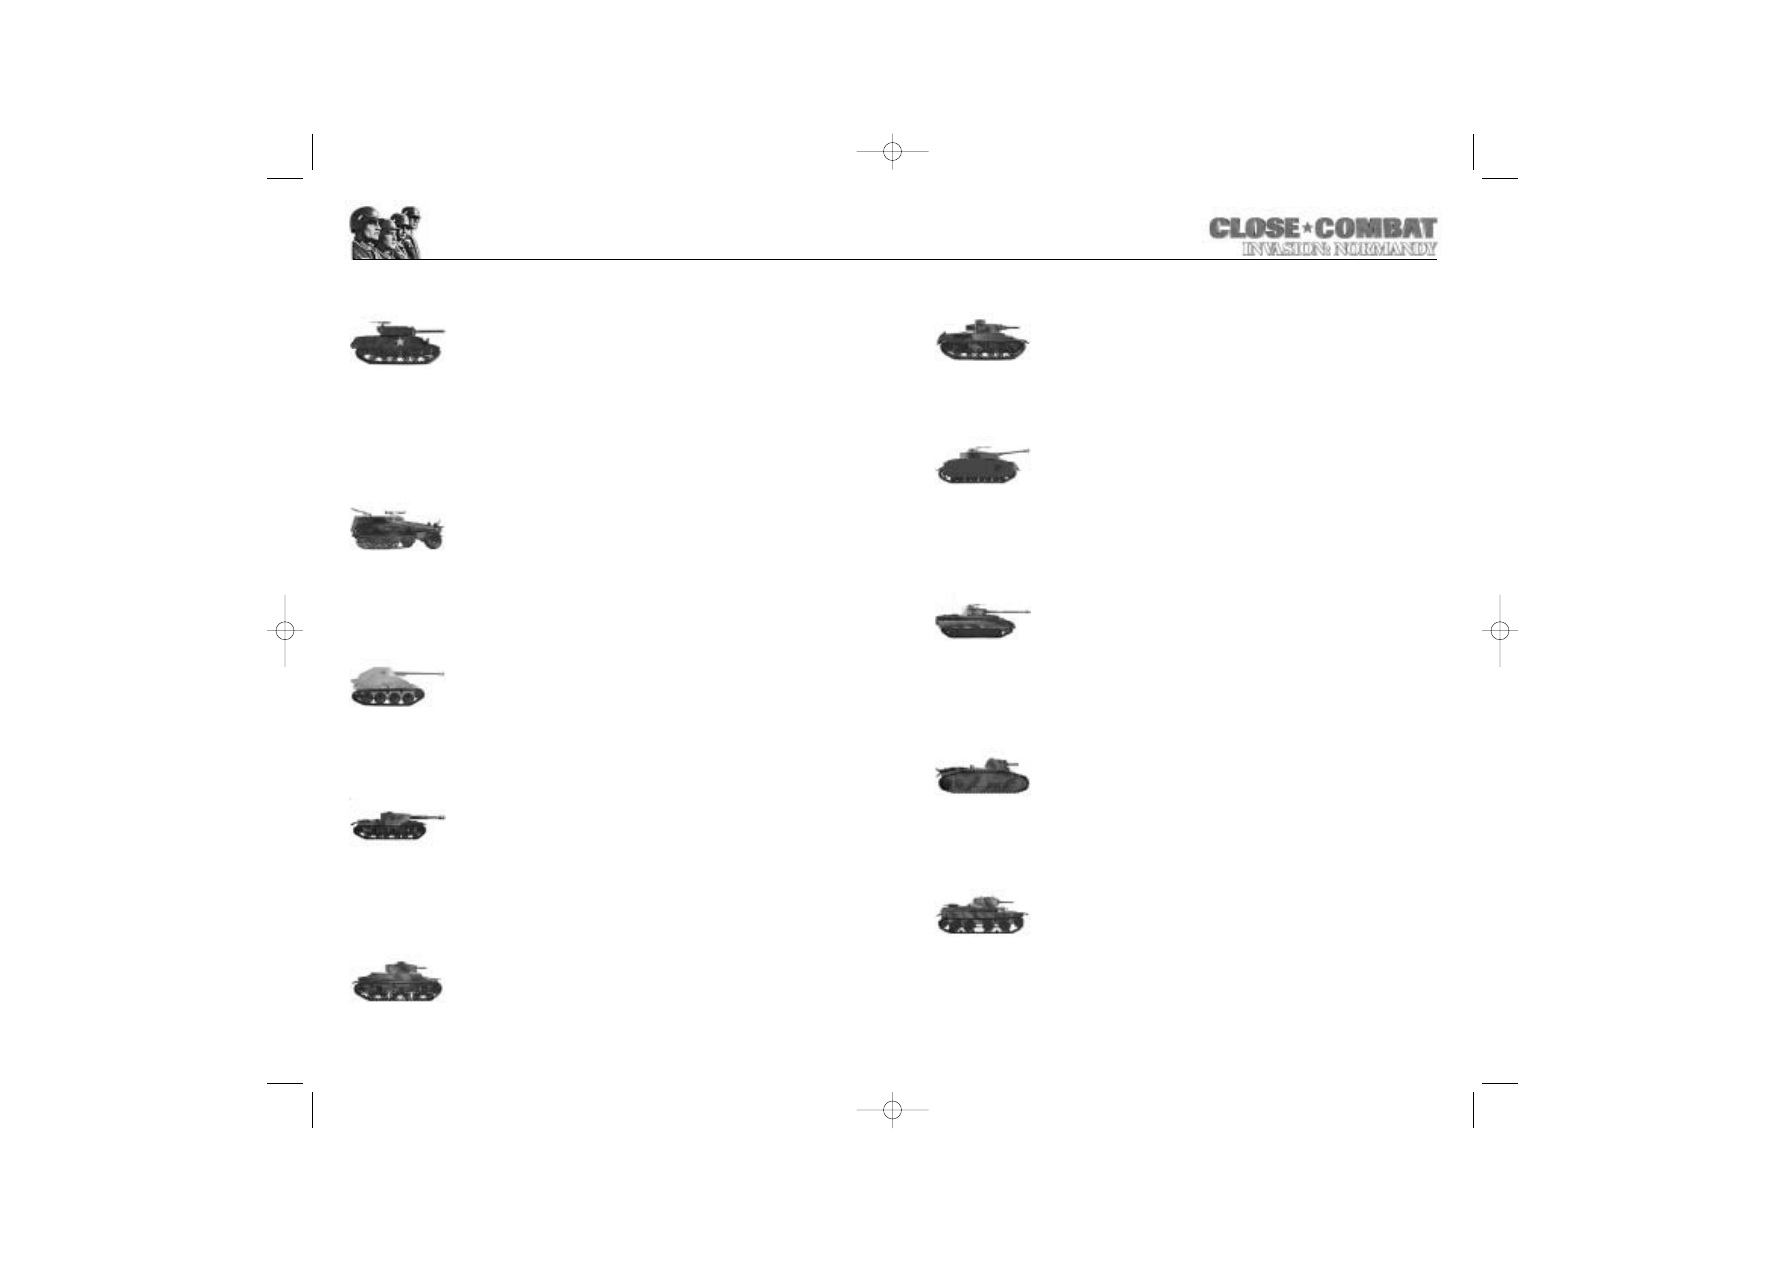
M10 and M18 Tank Destroyers
Based on a modified M4 hull, the M10 mounts a 76.2 mm cannon
in an open topped turret. It also carries a machine gun mounted on
the rear of the turret. Aside from its open top, the M10 is reasonably
well armoured. While the M10 descended from a modified Sherman
chassis, the M18 Hellcat was an original design with an excellent
power-to-weight ratio. Its speed and low profile are traded off with its light armour and
an open-topped turret. Nevertheless, the M18 proved rather successful and popular;
it mounted a 76mm main gun and a flexible .50 cal heavy machine gun on the rear
of the turret.
Sd Kfz 250/251 Half Tracks
The German SdKfz 250 and SdKfz 251 Half Track series were com-
monly used as troop transports and support vehicles; the SdKfz 250
series was the smaller one of these otherwise roughly similar vehicles.
Originally mounting a removable forward-firing machine gun and a
second removable anti-aircraft machine gun on a rear mount, these Half-Tracks saw numer-
ous versions mounting various AT guns, rockets, mortars and flame throwers. They are
open-topped, and their weak armour only offers limited protection against small arms fire.
Marder III
The Marder III is a hybrid light tank destroyer made from a Czech
chassis. The version featured in Close Combat: Invasion Normandy
uses a captured Russian 76.2mm gun and a Czech made machine
gun. The Marder III had an open top and almost no back armour to
speak of, making it particularly vulnerable to mortar and infantry attack. Despite appear-
ances the gun is not in a turret but fixed forward.
StuG III / StuH 42
Designed as an infantry support vehicle and, if necessary, a tank killer,
the StuG III has a 75mm cannon mounted in the chassis as well as a
machine gun. The StuG III is somewhat under-armoured for a tank
destroyer; this is only partly compensated for by its low profile. A
more powerful version was later introduced, the StuH 42, which was utilised more as
mobile artillery since it mounted a 105mm howitzer in place of the 75mm gun. The StuH
42 also mounted better armour protection then the StuG III, 10cm in the front.
Panzer II
The Mark II is a light German tank of pre-war design. Its armament of
one 2cm machine cannon and a machine gun was useless against
tanks, and its very light armour made it highly vulnerable. By 1944,
this type had largely been withdrawn from frontline service. Some
were still used for reconnaissance, training, or occupational duties.
50
49
Panzer III
By the time of the invasion, few Mark III tanks were left in active ser-
vice; some of them were modified and used as Befehlspanzer
command tanks. Armed with a 5cm main gun and a pair of machine
guns, their relatively light armour and weak main gun made them
obsolete by the tank standards of 1944.
Panzer IVG
Armed with a 75mm gun and a pair of machine guns, the Mark IV
tank mixed good firepower, speed, and armour protection. Although
somewhat outclassed by the German Panther, the Mark IV was easily
a match for any American tank in the Cotentin region. Although, his-
torically speaking, there were no Mark IV tanks in the Normandy fighting portrayed in
C
LOSE
C
OMBAT
: I
NVASION
N
ORMANDY
, optional Battle Groups for the campaign do have
some available.
Panzer V Panther
Built in response to improvements in Russian tank design, the Panther
tank is considered by many to be the best tank design of the war.
Faster and better armoured than the Mark IV, the Panther makes max-
imum use of its long-barrelled 75mm cannon. Although, historically
speaking, there were no Mark V tanks in the Normandy fighting portrayed in C
LOSE
C
OMBAT
: I
NVASION
N
ORMANDY
, optional Battle Groups for the campaign do have some
available.
French Tanks
These tanks include the Renault R35, Somua S35, Hotchkiss H39, and
Char B1 bis French tank models. All are pre-1940 designs and are
obsolete tanks. Captured from the French early in the war, they were
used as training vehicles and for occupational duties and were all the
Germans had in the area at the time of the invasion. They did do well against the lightly
armed American paratroopers on the first two days of the campaign.
Russian Tanks
These include the T-26 and BT-7. These are old model Russian tanks
captured on the Eastern Front and used as training vehicles in the
same manner as the French tanks listed above.
03661 CLOSE COMBAT 5 EX MAN 9/21/01 12:17 PM Page 50
52
CREDITS
Atomic Games, Inc.
Executive Producer ..........................Keith Zabalaoui
Director of Development ............Doug Walker
Art Director ............................................Jeffrey Baker
Lead Game Designer......................Eric Young
Lead Artist................................................Jeffrey Perales
Lead Programmers ............................Jesse Robinson, David Miller
Associate Game Designer ........John Peacock
Programmers ..........................................Jim Martin, Tom Kent, Steve Flint, Yujun Qin
Artists............................................................Scott Halvorson, Ron Ray, Gil John Rodriguez, Scott Juliano
Test Lead ..................................................Mathew “JP4” Herman
Art Interns ................................................James Holland, Daryl Stimley, Justin Ferguson
In House Testing..................................Larry “Dustoff” Morris
Manual Editor ........................................Michael Fitch
Voice Cue Translation ......................Markus Hofbauer
Voice Acting ..........................................From the Speed of Sound Studio, we would like to thank
John Joiner, Michael Olesch, Matt Manning, and Chris
Garcia.
Extreme Testers ....................................Markus Hofbauer, Mick (xe5) Conmy, G. Mark “Chief”
Kelm, Patrick P. Ceballos, Stephen Whitmore, Ross
Moorhouse “FUTURE”, Peter T. Szymonik, Greg Cyrier, Kyle
Sandstrom, Ron Gretz, Pekka “CplFilth” Saastamoinen,
Greg Bryant, Gary Olson, Tom “Mad Dog” Peters,
Napalm.
A special thanks to these people for all the great mods they made for all the Close
Combat Games:
Ron Gretz, Mick Conmy, Ross Moorhouse “FUTURE”, Andrew “Zonbie” Bruce, Pekka
Saastamoinen, George Thanos, Bruce Poon, Adam D’Arcy, Gerry Shaw, “Cappy-R” Ralph,
“Tin Tin”, Akira “Taki” Takizawa, “Luer”(aka “Eli”), Stephen Whitmore.
51
Supreme Headquarters Allied Expeditionary Force
Soldiers, Sailors, and Airmen of the Allied Expeditionary Force
You are about to embark on the Great Crusade, toward which we have striven these many months.
The eyes of the world are upon you. In company with our brave Allies and brothers-in-arms on
other Fronts, you will bring about the destruction of the German war machine, the elimination of
Nazi tyranny over the oppressed peoples of Europe, and security for ourselves in a free world.
Your task will not be an easy one. Your enemy is well trained, well equipped, and battle-hardened.
He will fight savagely.
But this is the year 1944. Much has happened since the Nazi triumphs of 1940-41. The United
Nations have inflicted upon the Germans great defeats, in open battle, man-to-man. Our air offen-
sive has seriously reduced their strength in the air and their capacity to wage war on the ground.
Our Home Fronts have given us an overwhelming superiority in weapons and munitions of war, and
placed at our disposal great reserves of trained fighting men. The tide has turned. The free men of
the world are marching together in victory.
I have full confidence in your courage, devotion to duty, and skill in battle. We will accept nothing
less than full victory. Good luck. And let us beseech the blessing of the Almighty God upon this
great and noble undertaking.
Signed: Dwight D. Eisenhower
3 November 1943
Top Secret
The Fuhrer
Directive No. 51
For the last two and one-half years the bitter and costly struggle against Bolshevism has made the
utmost demands upon the bulk of our military resources and energies. This commitment was in
keeping with the most serious danger, and the over-all situation. The situation has since changed.
The threat from the East remains, but an even greater danger looms in the West: the Anglo-
American landing. In the East, the vastness of the space will, as a last resort, permit a loss of
territory even on a major scale, without suffering a mortal blow to Germany’s chance for survival.
Not so in the West. If the enemy here succeeds in penetrating our defenses on a wide front, conse-
quences of staggering proportions will follow within a short time. All signs point to an offensive
against the Western Front of Europe no later than spring, and perhaps earlier…
Should the enemy nevertheless force a landing by concentrating his armed might, he must be hit by
the full fury of our counterattack…
I expect that all agencies will make a supreme effort toward utilising every moment of the
remaining time in preparing for the decisive battle in the West.
All authorities will guard against wasting time and energy in useless prejurisdictional squabbles,
and will direct all their efforts toward strengthening our defensive and offensive power.
Signed: Adolf Hitler
03661 CLOSE COMBAT 5 EX MAN 9/21/01 12:17 PM Page 52

54
SSI
Producer ..........................................................Shawn Storc
Associate Producer ..................................Kevin Hicks
Executive Producer..................................Rick Martinez
Install Programming..................................Brian Fitz
Product Test Manager ............................Vansouk Lianemany
Assistant Lead Test ....................................Steven Head
Core Tester ....................................................Robert Ivey
Product Test ..................................................Steve Jackson, David Wilson, Adam Rosen, Mike
Phelps, Thadd Abernathy
Manual Editor................................................Dave Sanini
Localisation Manager ..............................Judith Lucero
Localisation......................................................Hiromi Okamoto
Audio Engineering Support ..............Steve Lam
Senior Vice President ............................Amy Boylan
Novato Studio Director ..........................Carl C. Norman
Manual Layout & DTP ............................Louis Saekow Design
Legal Counsel ..............................................Douglas Reilly
Special Thanks ............................................Andrea Akmenkalns, Steve Asbell, Stan Biesiadecki,
Fernando Cuervo, George Chastian, Rich Fielder,
Jacques Hennequet, Eric Newman, Sarah Taylor,
Randall Turner
53
03661 CLOSE COMBAT 5 EX MAN 9/21/01 12:17 PM Page 54
Wyszukiwarka
Podobne podstrony:
GURPS4 Martial Arts Fairbairn Close Combat Systems 1 0 sjg37 1641
Martial Arts The Text Book Of Close Combat
Aldershot Close Combat Course
Martial Arts Close Combat Textbook
Close combat wacht am rhein cd working keys
WEB Griffin [Corp 06] Close Combat
Non Lethal Techniques (exerpt from Marine Close Combat)
D Day The Invasion of Normandy
Close Quarers Battle Czarna Taktyka
13 A X XI wiek sztuka romańska, Ruś, Bizancjum, Normanowieid 14428
Combat Advantage 02
The History of Great Britain - Chapter One - Invasions period (dictionary), filologia angielska, The
Normandia na szlaku Wikingów
krav maga hand combat QUXJMMAEAE7ZVYIIDRJCT4ZL7CTBEIJZ3Q77DAY
Combat 18, konferencje naukowe, AFB Lojaliści Ulsterscy
The?ginning of World War II German Invasion of Poland
więcej podobnych podstron