Merge to HDR using Photoshop CS2 - by Robert Berdan
Merge to HDR (high dynamic range) involves taking several shots of the same scene using a camera
mounted on a tripod and varying the exposures. For example you might set your camera EV to -4, -3, -2,
-1, 0, + 1, +2, +3, +4, F-stops to create a series of 9 exposures from the same spot braket in full 1 F-stop
values. You only need do this with scenes that have very wide dynamic ranges that exceed 8.5 F-stops
for example interior of home with large windows where you want to show both the inside and outside.
Another example would be shooting directly into the sun. Velvia slide film has a dynamic range of about
5.5 F-stops, most digital cameras about 8.5 stops. To merge multiple images varying in exposure here
are the steps for Photoshop CS2. The technique can be applied to .jpg or RAW files.
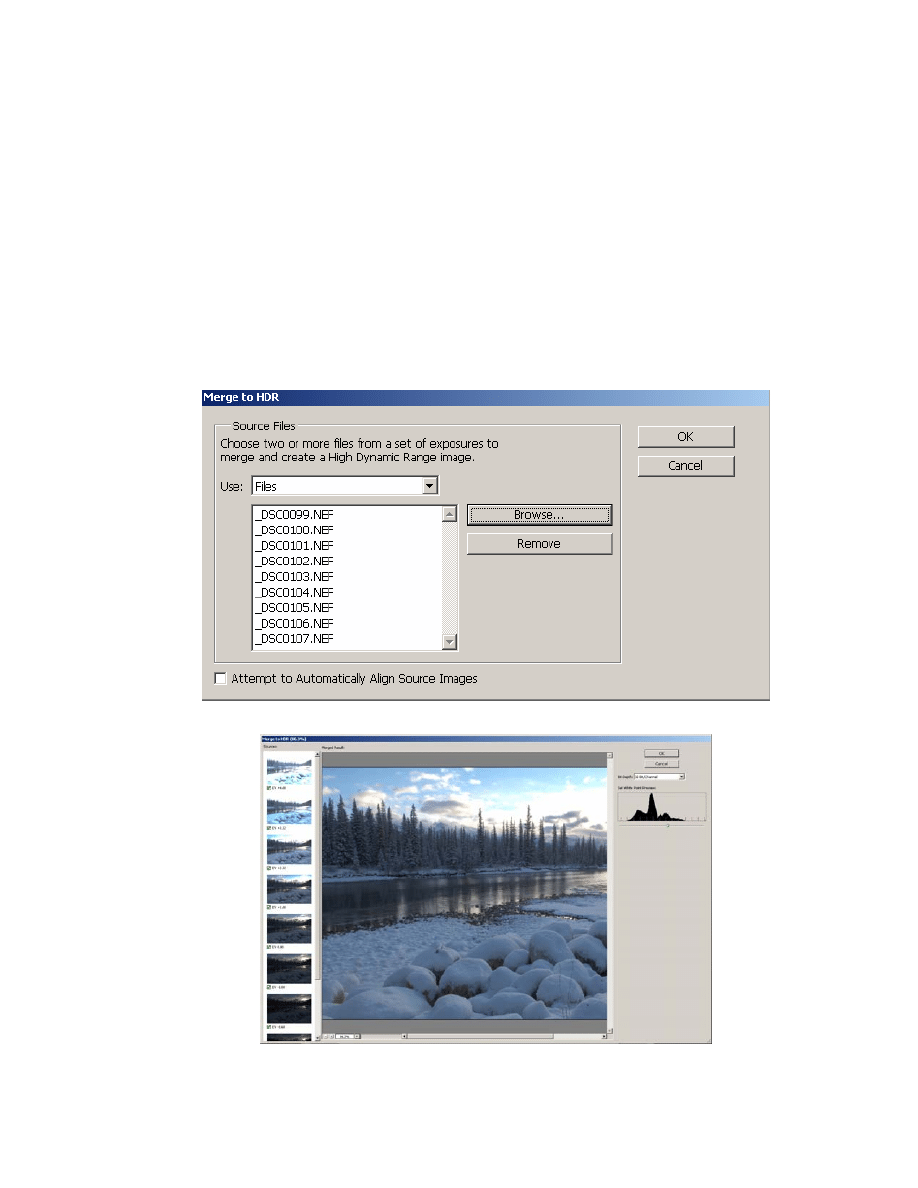
1. Choose File>Automate>Merge to HDR or in Bridge choose Tools>Photoshop>Merge to HDR (jump to
step 3 if using Bridge)
2. In the Merge to HDR dialog box, click Browse, select the images and click OK.
1

3. Click OK again when you see the menu with each image on the left and the main window with the full
32 bit dynamic range photo. Note this image will appear flat because it exceeds the display capabilities of
most monitors.
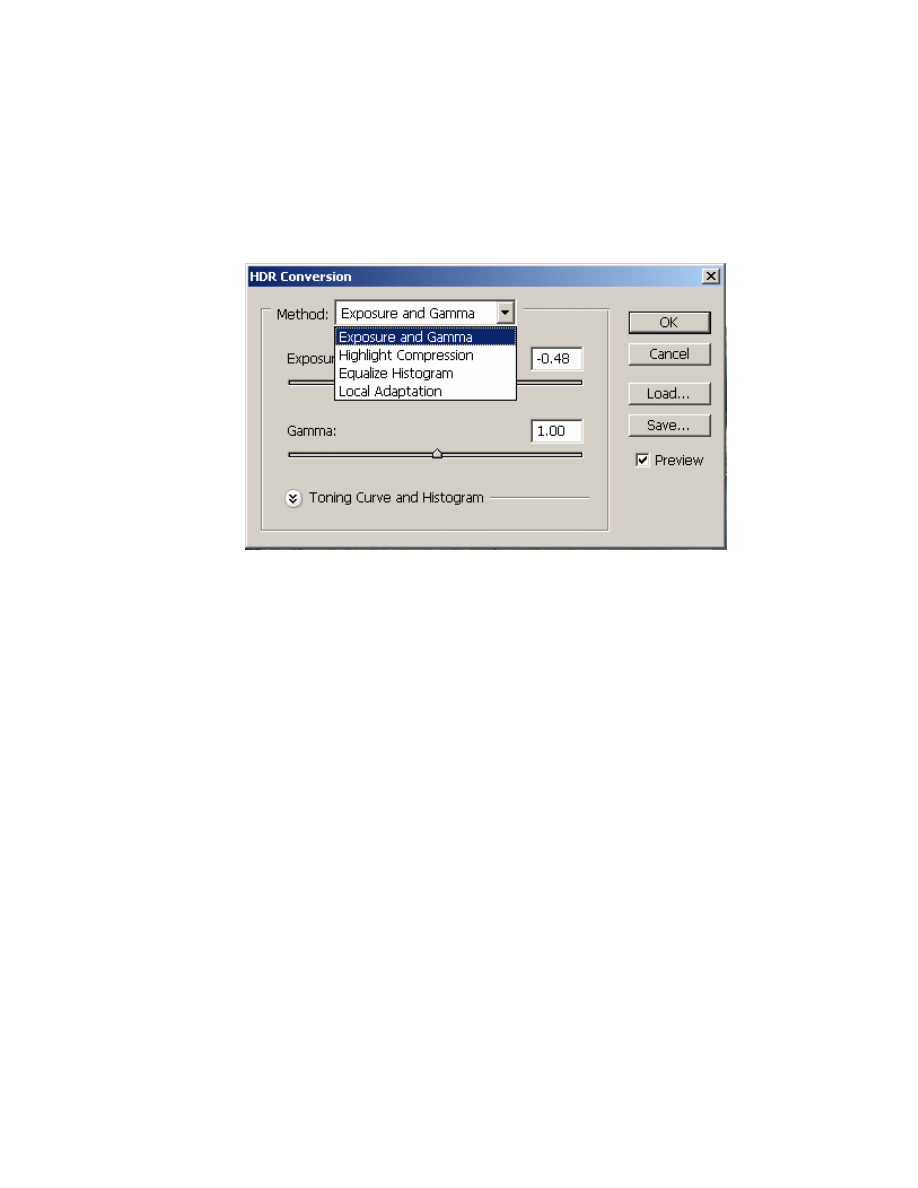
4. To convert from 32 bit to 16 bit Select Image>mode>16 bit and you will see the following pop up menu.
5. You have several controls
Exposure and Gamma – let you manually adjust brightness and contrast of the HDR image
Highlight Compression - compresses the highlight values in the HDR images so they fall within the
luminance values range of 8 or 16 bits per channel image file. No further image adjustments are
necessary; this method is automatic.
Equalize Histogram - compress the dynamic range of the HDR image while trying to preserve some
contrast – no further adjustments are necessary.
Local Adaptation – Adjusts the tonality of the HDR image by calculating the amount of correction
necessary for local brightness regions throughout the image.
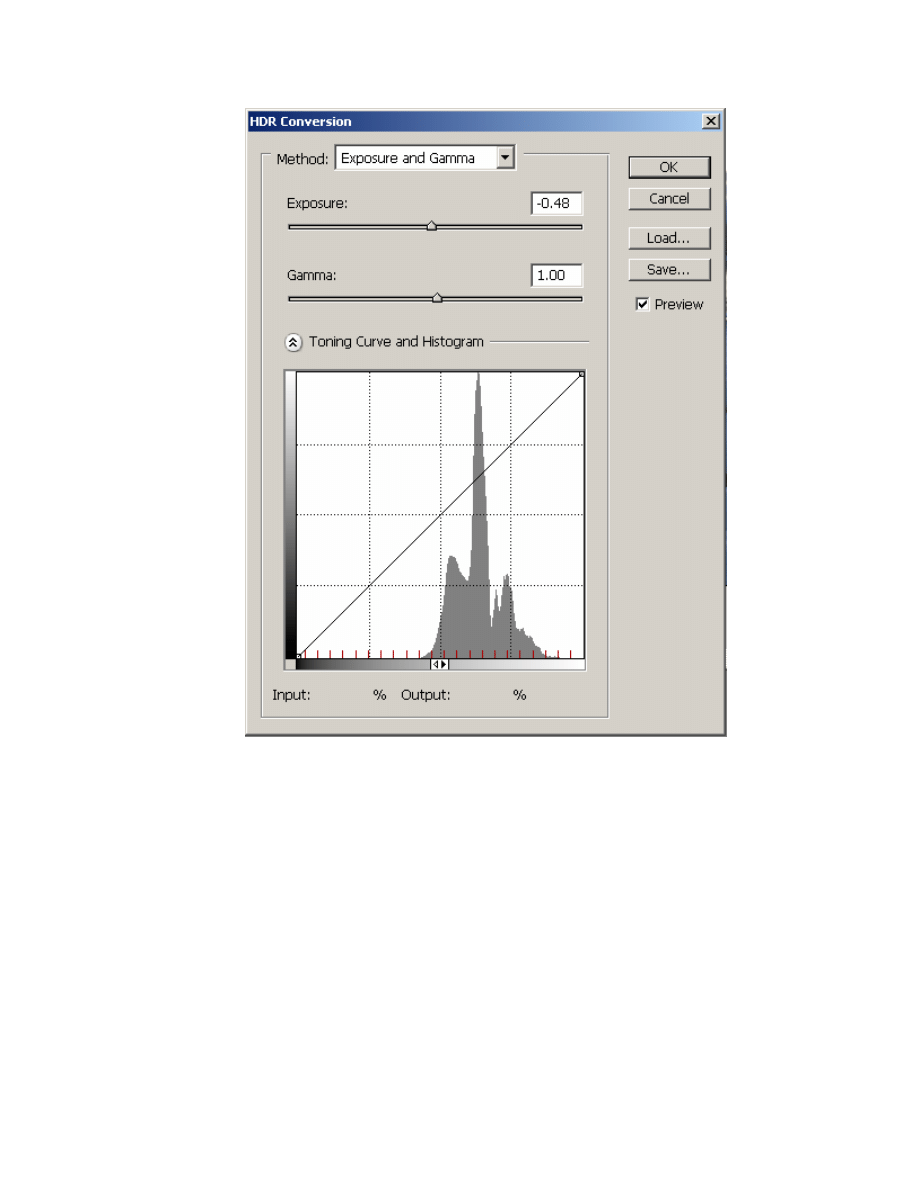
Optional Click the arrow to view Toning Curve and Histogram
2

You can 1) Choose exposure and Gamma – move the exposure slider to adjust the gain and move the
gamma slider to adjust contrast (do neither with the images I supply).
2) chose Local Adaptation, move the Radius slide to specify the size of the local brightness
regions (set to 88 px) set threshold slide to 23.15 with these images. This specifies how far apart
two pixels tonal values must be before they are no longer part of the same brightness region. You
can also use the toning curve to make adjustments – pull it up or down.
The resulting image may be too dark or too light - use your basic workflow 1) adjust tonal levels. 2) Boost
the Hue & Saturation.3) Adjust shadow\highlights 4) Burn & Dodge 5) Use unsharp Mask -6) Change the
image to 8 bit mode Image > Mode> 8bits per channel and save as a .tif file.
3

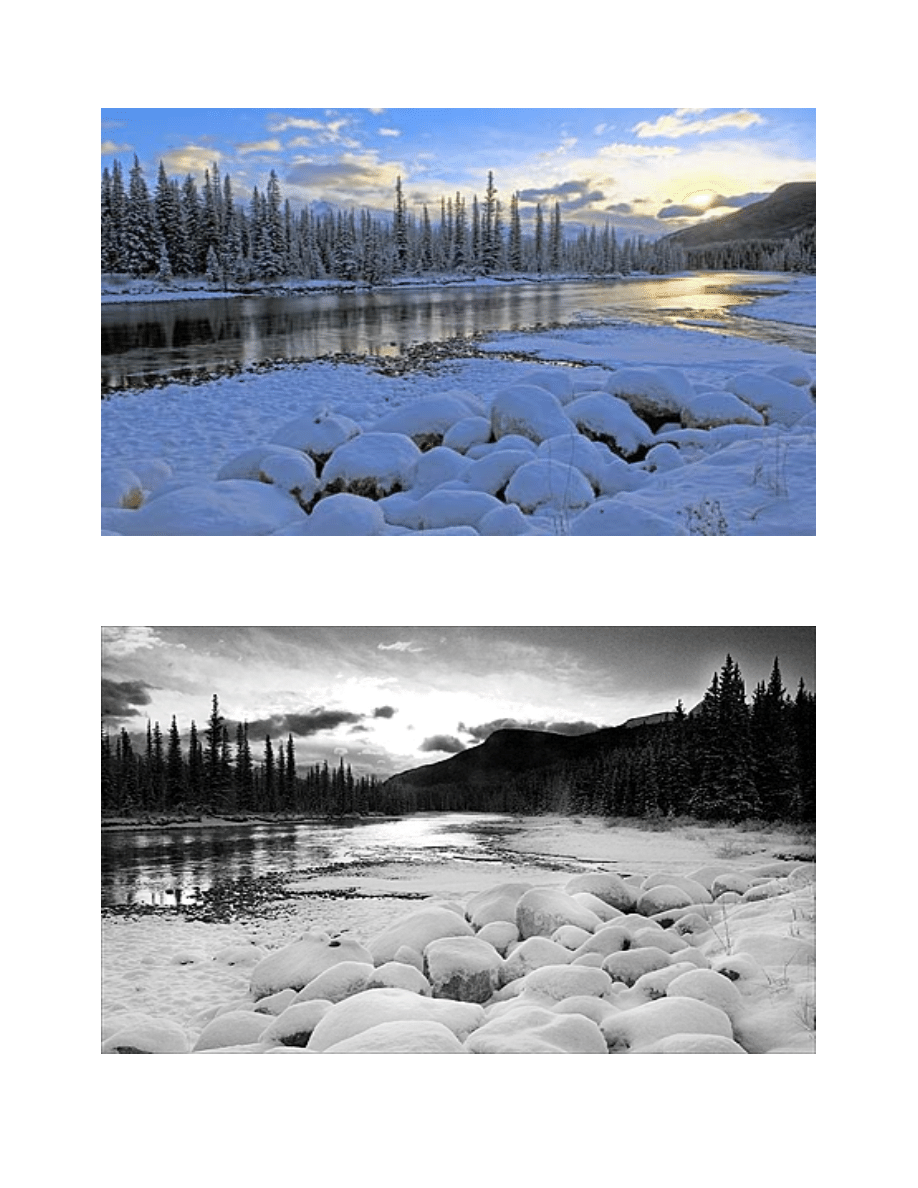
This images is the result of combining 9 separate exposures. A neutral density grad filter darkened the sky but
resulted in burned out highlights in regions where the river reflected the sun’s light. The HDR image was able to
capture detail in the water and in the clouds around the sun.
BW image taken with a 2 F-stop neutral density hard edge grad filter, note the lack of detail in the river.
4
Wyszukiwarka
Podobne podstrony:
Do you want to start using stories
Read me Using Photoshop Templates
Photoshop CS2 phocs2
°° Adobe Photoshop CS2 PL FULL, Obróbka zdjęć
Ekran roboczy Photoshop CS2
adobe photoshop cs2 pl oficjalny podrecznik Z4KRPOCBDOI7N4HHGU4TGKZZQ654UQMWLQF7QDQ
Photoshop CS2 3
Adobe Photoshop CS2 Wystarczy jedno kliknięcie!
Photoshop CS2
Korekcja ekspozycji w Photoshopie CS2
nowości w Photoshop CS2
Photoshop CS2 2
Photoshop CS2 phocs2
Photoshop CS2
Photoshop CS2 phocs2
How to Draw Manga Photoshop Techniques
Photoshop CS2 phocs2
więcej podobnych podstron