90
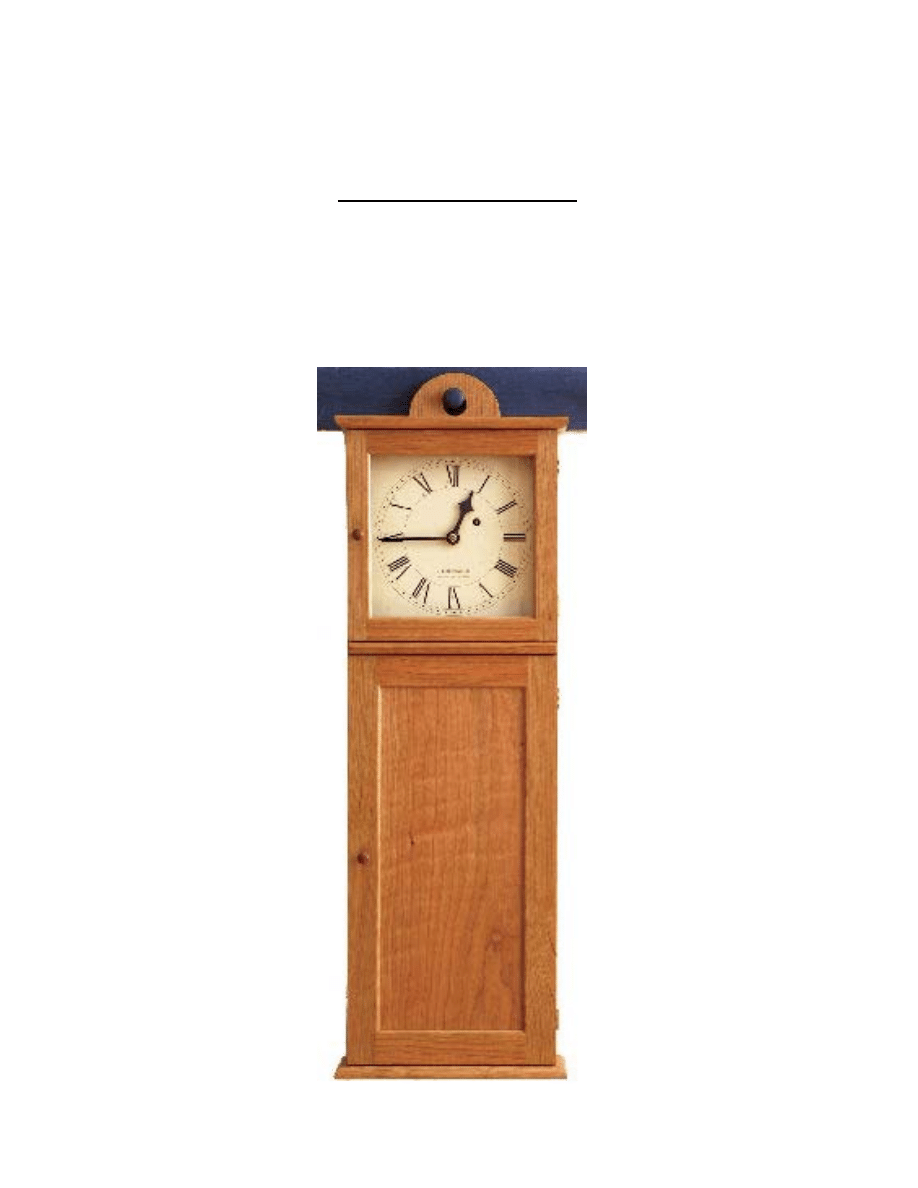
SHAKER WALL CLOCK
Copyright 2004 Martian Auctions
445
Make the case to fit the clock parts
I never start construction on a clock until I have the movement, dial and hands. Having these at the ready makes it much
easier to fit the dial and allow proper clearance between the shaft, the hands and the glass, as well as the clock movement
and the case back. I hate surprises.
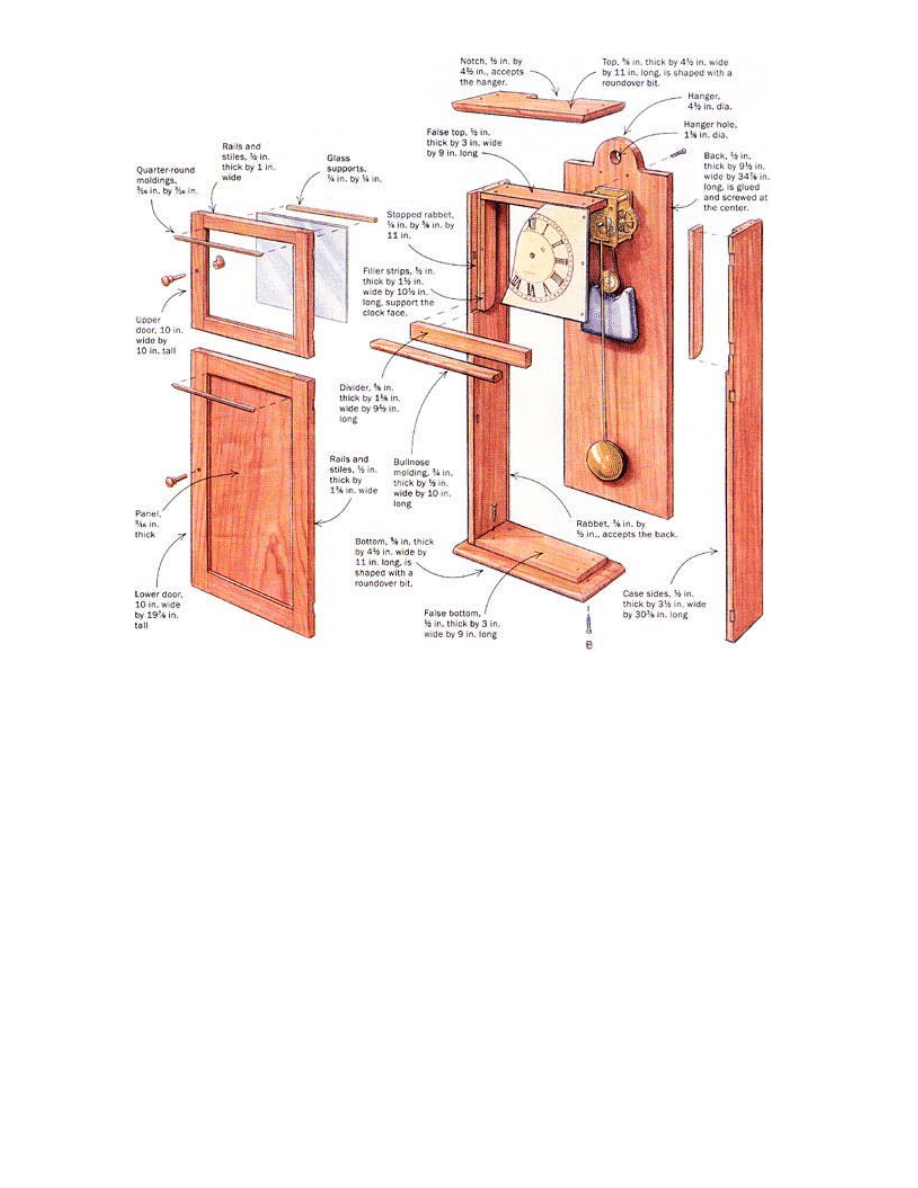
Once you have the clock parts, you can cut the sides of the case to size. Then cut 3/8-in. by 1/2-in. rabbets to accept the
back. The front of each side receives a stopped rabbet to accept the face. You could simply make the clock an inch wider
and avoid cutting rabbets in the front, but -- for reasons more aesthetic than historical -- I prefer to keep proportions closer
to the original.
Copyright 2004 Martian Auctions
446
Next, cut the top and bottom pieces and mold them with a quarter-round router
bit. The back of the top is notched out 1/2 in. by 4-1/2 in. to allow for the hanger
on the back of the case.
On the original, the top and bottom were merely nailed onto the sides. I use
long, thin screws and plugs. Another alternative is dowels. I once had a student
who attempted to use sliding dovetails, only to discover that they lasted from 12
until noon. With only 9/16 in. of overhang on the sides and part of that cut away
by the rabbet, the remaining end grain is extremely fragile.
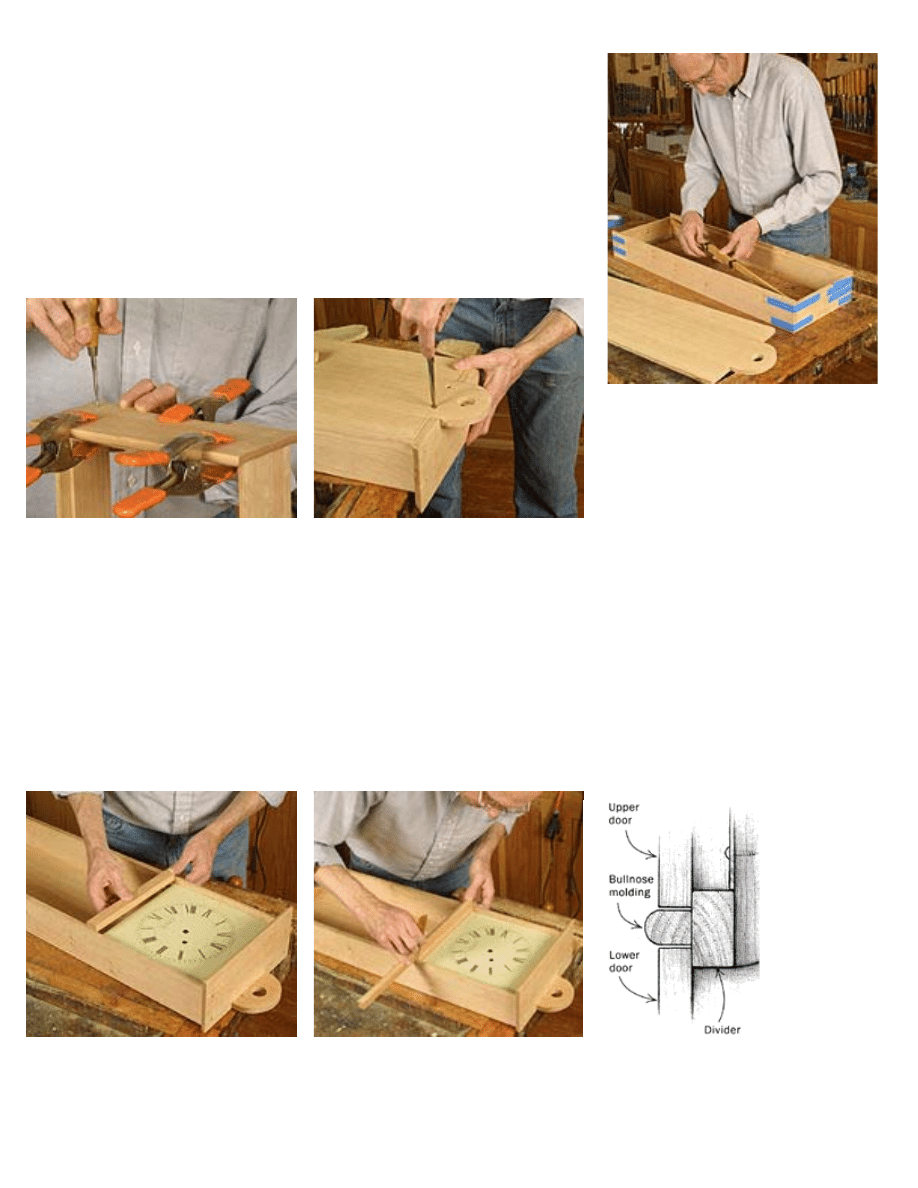
I prefer to use a false bottom and top, which not only make glue-up easier but
also act as a doorstop in front and create rabbets to house the back. Glue the
false top and bottom to the sides using butt joints. Once the glue dries, center
the actual top and bottom on the case and screw them into the sides.
The top is screwed straight into the sides,
then plugged and trimmed flush.
The back is screwed only near the center.
The edges are then nailed into place,
allowing for seasonal movement.
The clock back simply butts up against the false top and bottom and is screwed into place from behind. However, this is
where wood movement comes into play. The back is about 9-1/2 in. wide, which means that a piece of flatsawn cherry will
move about 5/32 in. (from 6% moisture content in winter to 13% moisture content in summer). If you can locate or glue up
a quartersawn back, the amount of movement is cut in half, to 5/64 in. So, if you're building in the summer, when the back
has reached a moisture content of near 12% or 13%, the back can be fitted tightly. In the winter, when the moisture
content of the back is closer to 6%, a gap of just under 3/64 in. is required on each side. Also, leave a small gap where the
half-round hanger protrudes through the top.
Another change I make is to increase the size of the hanger hole, from 1/2 in. to 1-1/8 in., to allow the clock to be hung on
a Shaker peg. The back is merely nailed into place, with a dab of glue in the center to ensure that wood movement is equal
in both directions.
The horizontal divider is sized to act as a
doorstop for both doors. It is set into the
stopped rabbet that holds the clock face.
Bullnose molding separates top
and bottom doors. Shape the
profile using a roundover bit,
then cut it to fit flush with the
sides.
The false top and false bottom are simply
butt-joined and glued to the sides. The
actual top and bottom will reinforce this
joint. Before the glue sets, check to make
sure the case is level and square.
Copyright 2004 Martian Auctions
447
Next, let in the two-piece molded divider between the top and bottom doors. A horizontal divider, which also acts as a
doorstop, is set into the rabbet flush with the face, and then a bullnose molding is glued over it.
At this point it pays to plan ahead. Measure the depth of the movement to check that you have proper clearance for both
the shaft and the glass of the door. Mechanical movements are either attached directly to the back -- as I've done -- or sit
on a shelf. Quartz movements, being much shallower, are usually attached to the dial. If you use a spacer, the movement
can also be attached to the case back. Planning ahead allows you to position the dial so that the hand shaft is close to the
glass but does not touch it. Once you've established the location of the dial, glue two vertical filler strips to the inside of the
case. Thick metal dials like the one I used can be screwed to these strips directly, while thin metal or paper dials should be
adhered to 1/4-in.-thick plywood backings.
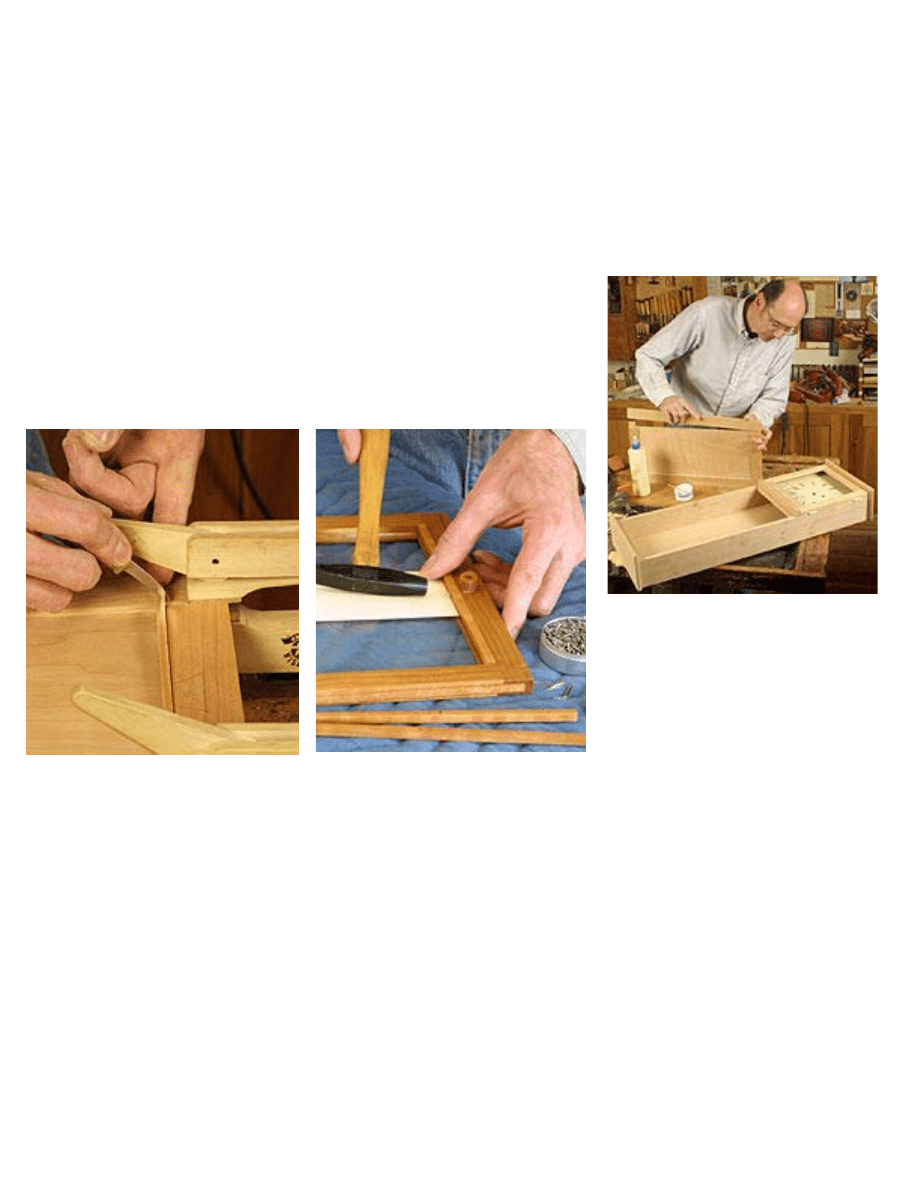
Simple joinery for the doors
The doors are relatively straightforward, mortised and tenoned at each corner.
Cut haunched mortise-and-tenon joints on center, and make sure to offset the
glass and panel grooves to allow room for the thumbnail profile along the fronts.
The frames are 1/2 in. thick, and the bottom panel is only 3/16 in. thick. The
3/16-in. quarter-round moldings are added after the panel is in place. On the top
door, add the quarter-round moldings to hold the glass on the outside, and add
3/16-in. glass supports, nailed from the inside, to hold the back of the glass.
The quarter-round molding is shaped on
the router, then mitered to fit the door.
Becksvoort simply glues the molding to
the rails and the stiles.
After the glass is set into the rabbet,
small glass supports are nailed into place.
As far as a finish goes, I am partial to Tried & True Varnish Oil. It leaves a silky, penetrating finish that I prefer. More
accurate for this clock would be a shellac finish, which was used on the original.
When hanging the clock from a peg board, carve a 1/2-in. flat spot at the top of the peg where it meets the hanger, leaving
a slight ridge, to keep the clock from sliding forward on the peg. If the peg board is 3/4 in. thick, use a 3/4-in. spacer
behind and near the bottom of the clock. A toggle bolt or similar anchor will attach the spacer to drywall or plaster if there is
no stud nearby. Once the clock is perfectly plumb and running smoothly, drill a hole through the back into the spacer and
anchor the clock with a screw. This keeps it from shifting during winding or an accidental bump.
Before applying glue, carefully dry-fit the
doors and see that they fit the case.
Copyright 2004 Martian Auctions
448
Wyszukiwarka
Podobne podstrony:
Shaker Wall Clock zegar
Wall Clock zegar scienny
Homework Event Based State Machine Alarm Clock
Clock
rock around the clock
Mantle Clock
135 rock around the clock
Blockbuster, Clock On placement test
clock pcb 2
CLOCK GENES OF MAMMALIAN CELLS PRACTICAL IMPLICATIONS
Peripheral clock gene expression in CS mice with
clock pcb3
clock diag
Blaupunkt CR5WH Alarm Clock Radio instrukcja EN i PL
Five o clock
alarm clock
Evidence of an oscillating peripheral clock in an equine fib
Kreml Clock
Ten O clock Postman
więcej podobnych podstron