HomeEnvy - Season 2: Project #33 Reading frenzy
http://www.homeenvy.com/db/0/90.html
1 of 7
11/05/2007 1:02 PM
Skip navigation
.
Search HomeEnvy.com
Search
Inspiring the best for your home
Fix it
Decorate it
Install it
Grow it
Build it
Secure it
More topics
Browse by:
Columnist
Columnist
Room/Location
Bathroom
Den
Dining Room
Family Room
Home Office
Kids Bedrooms
Kitchen
Living Room
Master Bedroom
Yard
Deck / Patio
Advertising Rates
About Us
Contact Us
Newsletter
XML Feed
HomeEnvy.com proudly
supports
Habitat for
Humanity Canada
.
New This Week
Subscribe to HomeEnvy Weekly Newsletter
Subscribe to our weekly newsletter
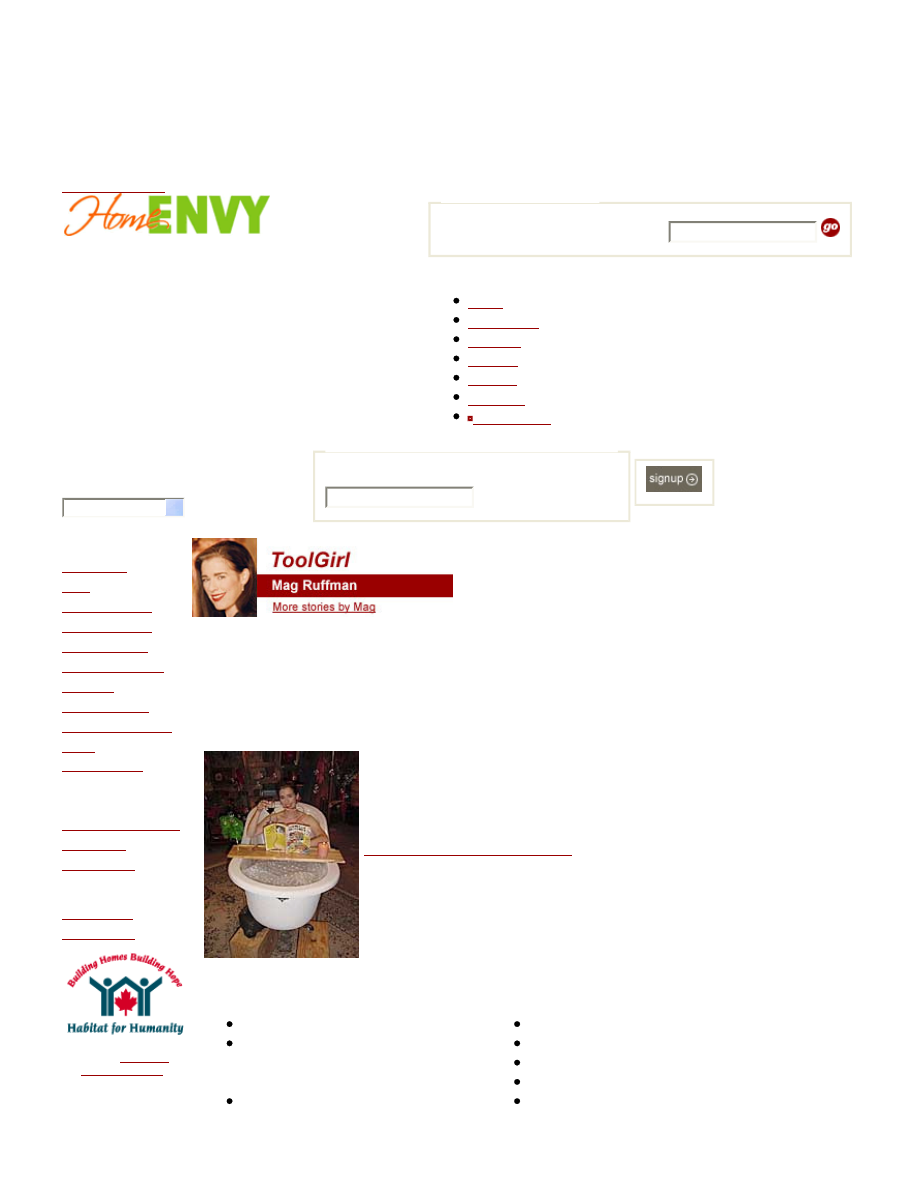
Season 2: Project #33 Reading frenzy -
Anything I Can Do
This easy-to-make bathtub accessory offers a brilliant
remedy for stress along with safe stowage for candles
and a glass of wine!
Artisans' work featured on this Episode
Materials:
Cherry wood - 8" x 32"
Copper refrigerator tubing - 3/16"
outside dimension (or ¼" if that's
all you can find)
Heavy gauge copper wire - about
Tools
Jigsaw
Router
Bull-nose router bit
Drill & drill bits
Rotary tool (i.e. Dremel)
HomeEnvy - Season 2: Project #33 Reading frenzy
http://www.homeenvy.com/db/0/90.html
2 of 7
11/05/2007 1:02 PM
12 gauge
Oak half round - 6'
Light oak filler
Carpenter's glue
Rare earth magnet
Sand paper
Water-based urethane
Epoxy glue
Belt sander
Orbital sander
Paintbrush
Eye protection
Ear protection
Clamps
Miter box and handsaw
Tube cutter
Steps:
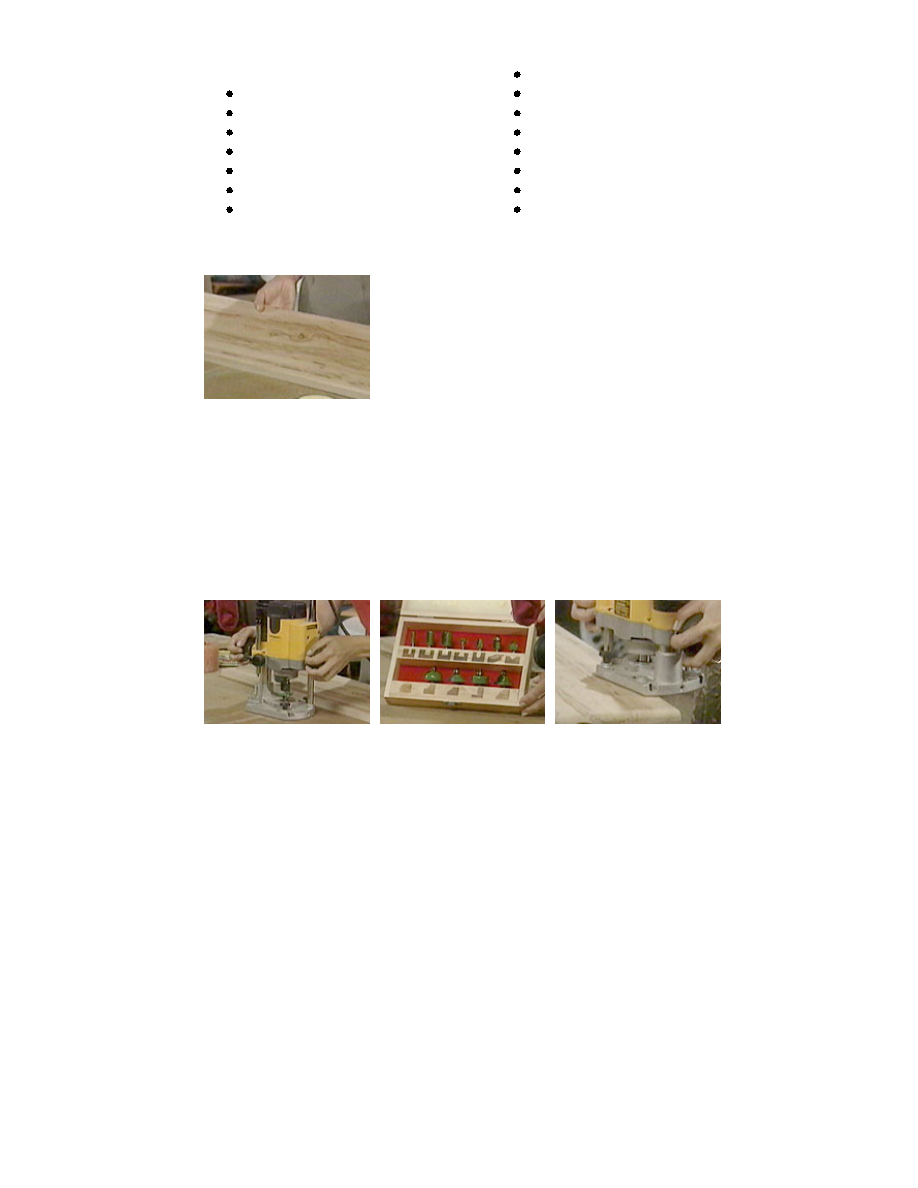
Choose a flat, clear piece of
cherry
Choose a piece of wood that is as flat and as clear of
knots as possible. If the board is terribly twisted, ask
the lumberyard to run it through their thickness planer
for you. This will effectively take the warp out. If you
want to prepare it yourself, use a plane or power
planer to take down the high points until the board lies
flat.
Typical plunge router
Router bit set
Move around the outside of the
board in a counter clockwise
direction
Prep the surface as necessary using a belt sander to
take out deep chips and scratches. Before final
sanding, use a router mounted with a bull nose bit to
round over the outside edge. Following the directions
for your router, clamp the board firmly in place and
run the router in a counter-clockwise direction around
the board. Move the router along quickly so as not to
burn the wood. The bit spins so fast that it will leave
burn marks if left in one spot too long. If the router
jumps or dances a bit, which happens especially
around corners, just go over it again.
Sand the surface and edges of the board progressively
through increasingly fine grades of sandpaper, up to
220 grit.
HomeEnvy - Season 2: Project #33 Reading frenzy
http://www.homeenvy.com/db/0/90.html
3 of 7
11/05/2007 1:02 PM
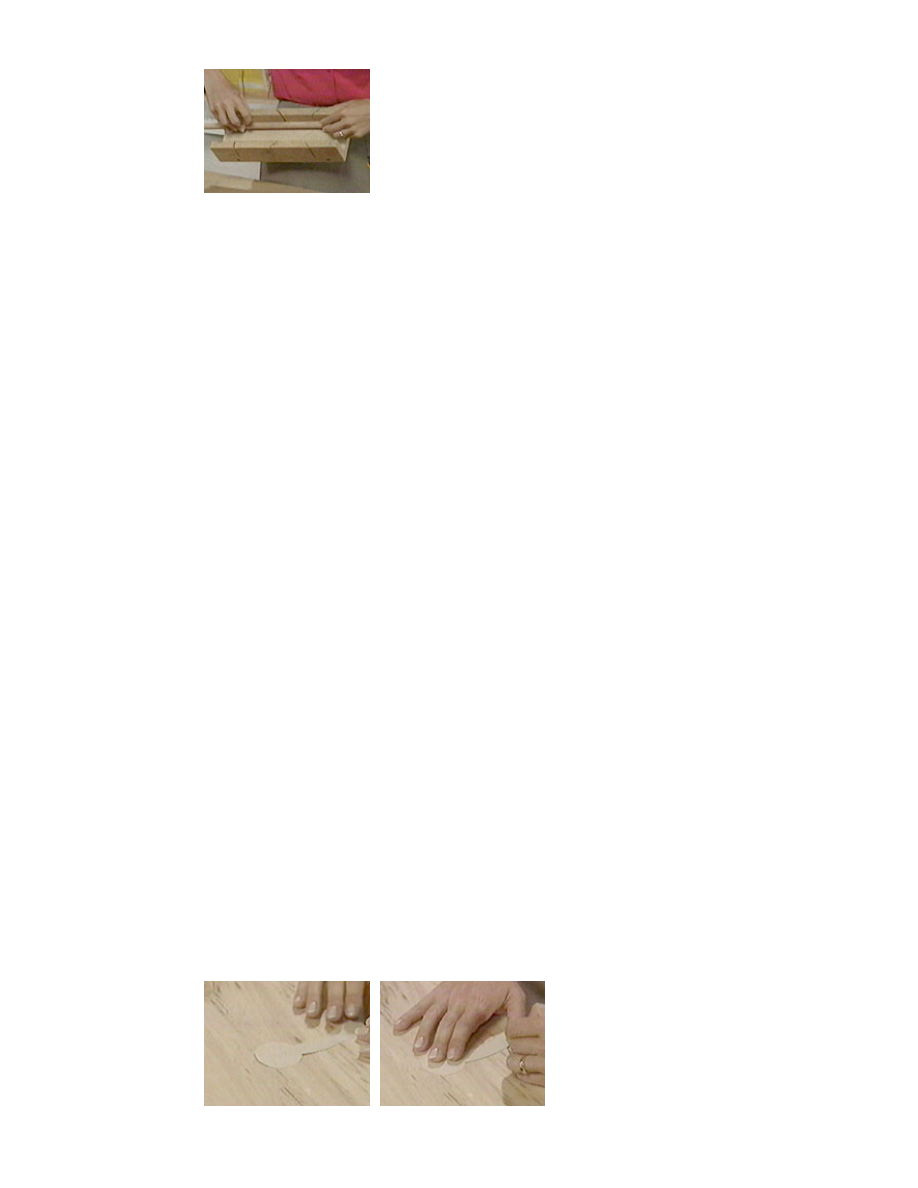
Cut the half round in a miter box
Cut the half round to fit. If you have a bathtub that fits
tight to one wall, cut just two pieces to fit around the
exposed outer rim. If you have a freestanding tub that
is positioned away from the wall, cut two sets of rails
to run along each side of the tub. Cut the pieces about
half an inch short of the width of the cherry board.
While you're cutting the oak half round, cut two
additional pieces to act as ridges that catch the bottom
of a book and hold it in place. Use a miter box to cut
all of them with a forty-five degree slope at the ends.
This gives you a pleasing design with no sharp edges
anywhere on the tray.
Fill the exposed surface of all of the half round pieces
with a light oak filler, since oak is rather open-grained.
Sand smooth to at least 220 grit. Also, fill any
unsightly pits in the cherry wood with the same filler.
Attach the runners to the bottom with carpenter's glue.
The bottom runners should be placed so that they fit
snuggly on either side of the bathtub edges. If both
edges of the tub are exposed, centre the tray first to
locate the position of the four pieces and glue them in
place. Clamp for at least 20 minutes before
continuing.
Glue the book rests to the top.
TIP: If you have a tub that is pushed against the wall,
merely measuring the board to find the center and
plopping the book ledge isn't going to work. The book
will be off-center, and this will be annoying. To avoid
irritation, place the tray on the bathtub first, find the
centre of the TUB and transfer that location to the
board as it sits with one edge pressed against thewall.
If, on the other hand, your tub is freestanding, the
centre of the actual board will fall over the centre of
the tub.
HomeEnvy - Season 2: Project #33 Reading frenzy
http://www.homeenvy.com/db/0/90.html
4 of 7
11/05/2007 1:02 PM
Cut a template for the glass
holder
Trace the shape on to the back
After all of the half round has been attached, locate
the position for the wine glass holder. The wine glass
should be away from the side that is commonly used
to enter the tub but not so close that the base of the
glass bumps the tub side while in place. Make a
template out of paper to fit the size of the glass and its
stem.
Generally, the diameter of the hole where the glass
rests should be about 1 3/4" and the width of the slot
leading to the hole should be about 5/8" wide. The
circular hole should be positioned slightly less than
halfway through the width of the whole tray.
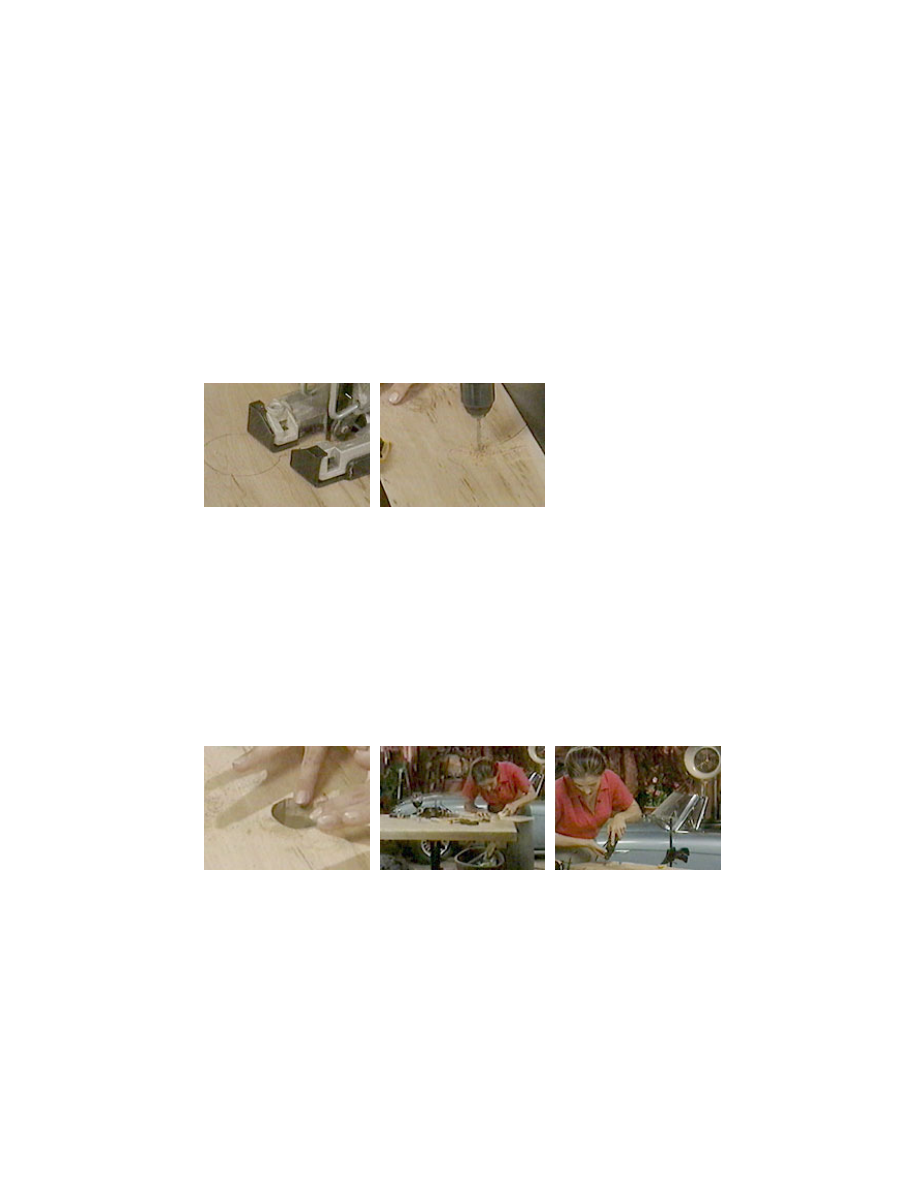
Cut out the shape with a scrolling
blade in a jig saw
Drill holes as necessary to help
start the blade
After making the template and locating the best
position for the wine glass, turn the board over, mark
and cut it from the back with the jigsaw. Use a
'scrolling' jigsaw blade to cut out the shape. It'll be
necessary especially for the tight circle. Jigsaw blades
cut on the up stroke and can tear out bits of fiber from
the nicely sanded surface, but if the cuts are made
wrong side up, the tear-out will be on the back where
it won't be seen.
The cut will be rough
Hand sand the rough edges
A rotary tool with a small
sanding drum also works very
well
Once the wineglass holder hole has been cut out, sand
any rough spots made by the jigsaw. Hand sand with
sand paper on a stick or use a rotary tool with a
sanding drum to smooth the rough spots.
HomeEnvy - Season 2: Project #33 Reading frenzy
http://www.homeenvy.com/db/0/90.html
5 of 7
11/05/2007 1:02 PM
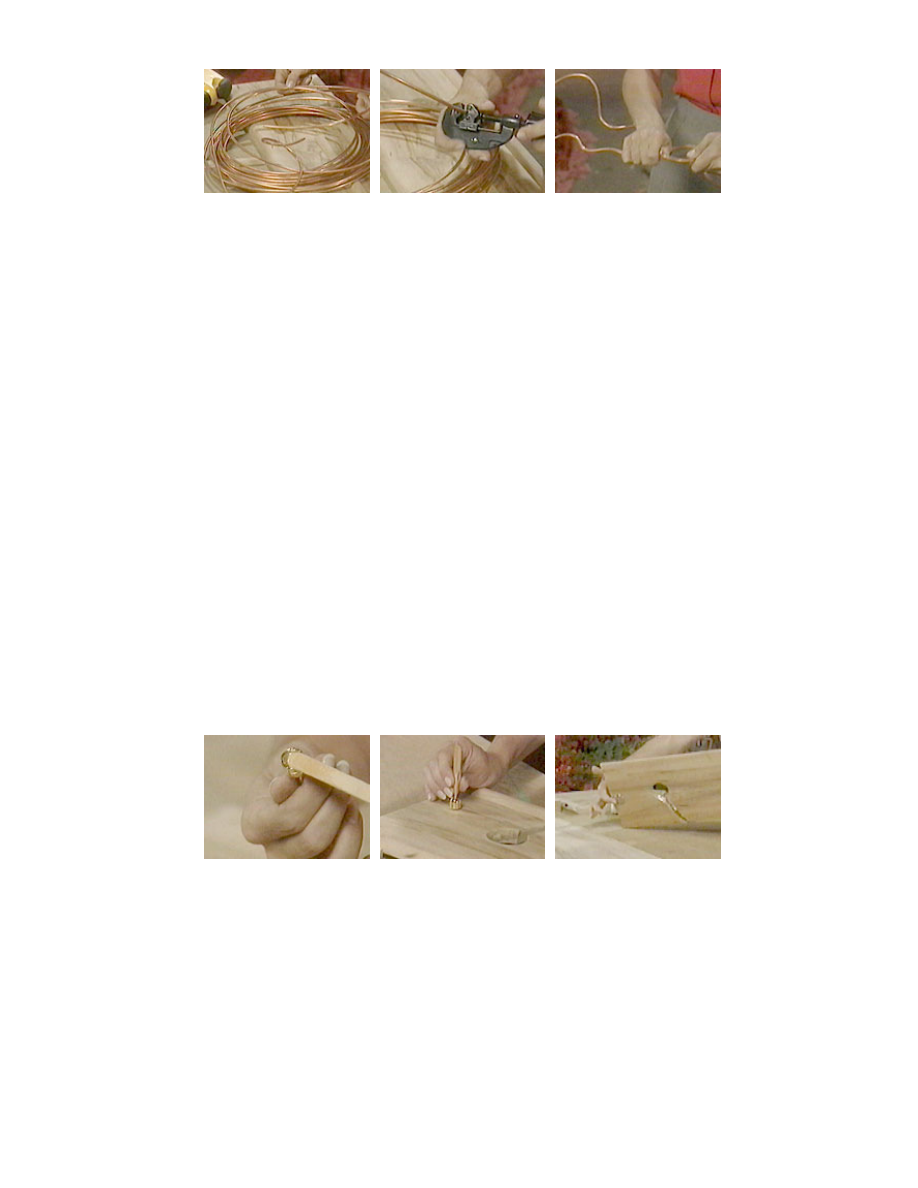
Use copper tubing to form the
book frame
Cut the copper with a tube cutter
Bend book holder to shape
Make the book support from refrigerator tubing. Cut
off a length about thirty inches long with the tube
cutter. Bend a shape by hand (see picture). The bends
help to make the soft copper more rigid so that it can
support a book. The height will be determined by the
sizes of books you may want to read in the tub. Once
bent to shape, cut the ends off so that that each side
has a 10" leg after bending. The distance between the
sides at the top is about 6 1/2". The space at the
bottom is about 3". It helps to have the bottom closer
together because the frame becomes more rigid and
will support the book better.
Coil some of the 12 gauge wire around the frame at
the height of the books you read. The wire can be slid
up or down as necessary once the frame is in place.
Put loops in the ends to hold the pages in place.
Locate and drill two holes in the board to fit the
tubular book frame. The base holes should be about 3
1/4" apart, 1 1/2" in from the back edge and 3/16" in
diameter (or to fit the tubing you are using). Be sure
not to drill all the way through the board! About half
way should do. If the holes are tight, the book frame
will sit in the holes without glue.
Attach accessories with epoxy
Pen holder
Magnet on the bottom
If your tray requires a magnet or if you want a
penholder, glue them in place with epoxy. Be sure to
locate the magnet so that it hits the tub edge
accurately. (Your tub has to be enameled cast iron for
the magnet to work.)

HomeEnvy - Season 2: Project #33 Reading frenzy
http://www.homeenvy.com/db/0/90.html
6 of 7
11/05/2007 1:02 PM
Clear coat with 3 coats of
water-based urethane to seal
thoroughly
Clear coat all surfaces with at least three coats of a
water based urethane. Follow the directions on the can
and sand smooth between coats with a fine 320 grit
sand paper.
Completed tray
Now add bubble bath, a robust Zinfandel and a
stirring novel. Relaxation is yours.
Artisans' work featured on this episode:
(click pics for Artist info and larger images)
David Hoekstra
Other Stories
Ceramic tile removal
Jewelry for window
treatments
Barbara Barry
Styling tips
Upholstered walls
©2004-2007 Home Envy Inc. All Rights Reserved.
Privacy Policy

HomeEnvy - Season 2: Project #33 Reading frenzy
http://www.homeenvy.com/db/0/90.html
7 of 7
11/05/2007 1:02 PM
Decorate It
Antiques
Bath
Crafts
Floor
Furniture
Home Office
Decor
Kids' Rooms
Kitchen
Paint
Wall coverings
Fix It
Appliances
Cooling
Decks
Do It Yourself
Doors
Electrical
Fireplaces
Heating
Home Organization
Home Repair
Home Technology
Lighting
Plumbing
Pools and Spas
Safety and Security
Sunrooms
Tools
Ventilation
Windows
Wood Finishing
Wood Working
Grow It
Plants
Landscaping
Garden Tools
Lawns
Outdoor Furniture
Patios
Decks
Research It
Energy Saving
Saving Money
New Products
Appliances
Wyszukiwarka
Podobne podstrony:
Reading the Book of Revelation A Resource for Students by Barr
forex analiza techniczna (e book www zlotemysli pl ) DK3ZOOPY4OOL2LNDIKQIOV6NQ566VKSXSPJLABQ
Encyclopedia Biblica Vol 2 Jerusalem Job (book)
acc book details 080702 132000
affect reading1
E Book Wprowadzeni do teorii automatow jezykow i obliczen
Practice Reading G
ebook microsoft sql server black book cff45xf7ii4jb4gq3rzk3uhmzhx5z3u62hytpuy CFF45XF7II4JB4GQ3RZK3
Audi TB 01 03 05 Readiness Quick Reference
Ogden T A new reading on the origins of object relations (2002)
Improvised Explosive Devices Booklet of Related Readings
[pl book] fr delphi 7 i bazy danych r 10 podstawy tworzenia komponentow 7FDOYSNI5YQ5QOZJJ6PQHI2UFEOM
E book Chlamydia trachomatis 2012
ielts reading test 5
więcej podobnych podstron