VOLUME 1 • ISSUE 3
WELCOME TO TECHTIPS. Maximizing bearing performance and life remains an objective throughout
The Timken Company, from design teams to manufacturing associates to our field sales team and distributors.
TechTips helps you install and maintain Timken
®
bearings, seals and components to maximize the life and
performance of your bearings and the systems in which they operate. For more information regarding Timken
automotive products and services, visit www.timken.com or contact your local Timken distributor.
WHEEL BEARING REPLACEMENT
Proper wheel bearing removal and installation is
essential in avoiding premature damage to bearings
and surrounding components. The following are the
steps for replacing tapered single wheel bearings
for passenger cars and light trucks.
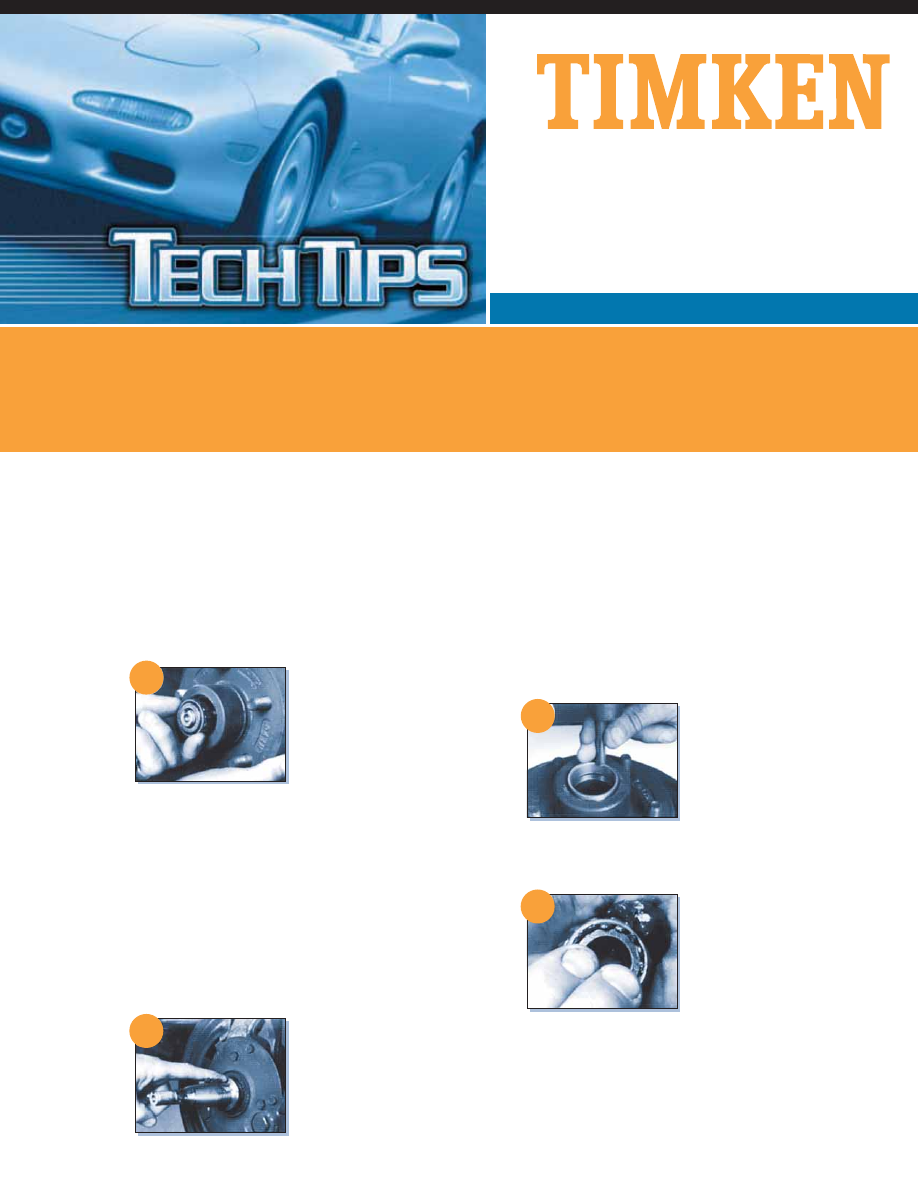
Wheel end disassembly
Follow vehicle manu-
facturer’s recommended
procedure to remove tire
and wheel assembly, disk
brake caliper, dust cap,
cotter pin, adjusting nut and washers.
Pull rotor toward you to loosen outer bearing
cone, then remove the outer bearing cone. Pull
the rotor and assembly off the spindle; the inner
bearing cup and seal will come with it.
To remove the inner cone, use a seal puller or pull out
the inner seal. Discard the seal after removal. Re-
move the cups from the housing with a steel bar.
Clean and inspect hubs
and spindles
Remove all old lubricant
from rotor/hub assembly
and spindle, then clean
them with kerosene or
mineral oil. Inspect spindle for scoring, bending,
thread or other damage. File off nicks and burrs.
Follow manufacturer’s recommendation for
permissible spindle wear. A light grease coating on
the cone seats will make installation easier and
prevent fretting.
Install cup
Use a cup driver or mild
steel bar to press or drive
the new cup into the hub
until it is solidly seated
against the hub shoulder.
Be careful not to damage the cup surfaces. Never
use a cone to drive a cup.
Lubricate
Pack cones fresh from
carton. A pressure grease
packer is recommended.
To hand pack cones, force
grease under the cage
between the rollers from the large end of the rollers
until it shows at the small end.
Fill the hub with grease to the inside diameter of the
outer races and fill hub grease cap. This layer
combats moisture and retains grease in cones.
SOLUTIONS FOR THE
AUTOMOTIVE INDUSTRY
SOLUTIONS FOR THE
AUTOMOTIVE INDUSTRY
SOLUTIONS FOR THE
AUTOMOTIVE INDUSTRY
1
2
3
4
WARNING: Failure to correctly lubricate bearing and
maintain proper lubrication may result in damage
that could cause wheel to lock or come off during
operation, creating a risk of serious bodily harm.
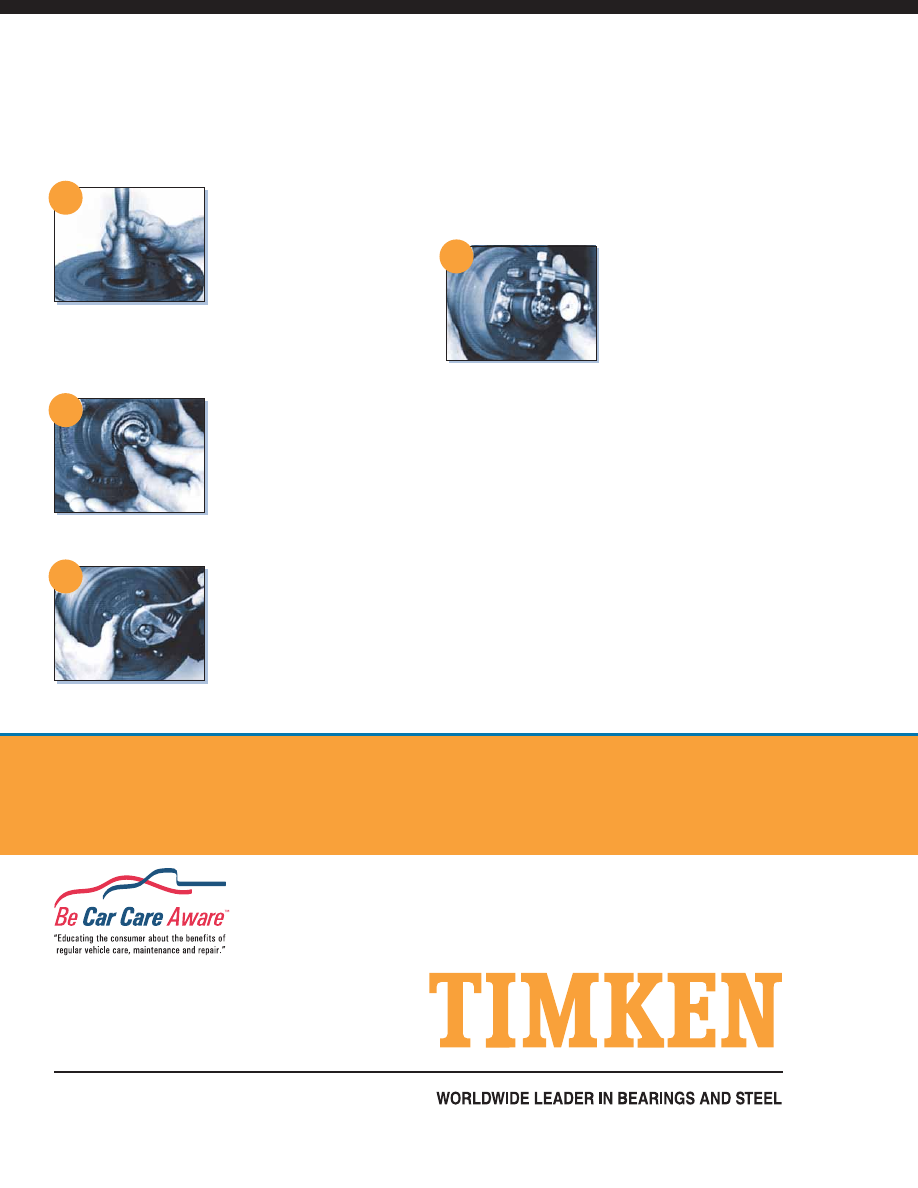
Install grease seal
Grease seals must be
replaced when they leak
or when bearings are
being repacked or
replaced. Install inner
cone in hub, then the seal. Make sure the seal lips
are pointed in the right direction. Use the proper seal
installation tool.
Install rotor/hub assembly
Slide the rotor/hub assem-
bly back over the spindle,
being careful not to
damage the seal against
the spindle. Insert the
grease-packed outer cone, washer and adjusting nut.
Adjust bearing
Use a 12” wrench to
tighten the adjusting nut
while turning the rotor.
When the rotor binds
slightly, all the bearing
parts are seated properly. Back off the nut 1/6 to 1/4
turn or sufficiently to allow 0.001” to 0.007” end play.
Then lock the nut with a new cotter pin.
WARNING: Failure to back off the adjusting nut may
cause the bearing to run hot and be damaged,
which could cause wheel to lock or come off during
operation, creating a risk of serious bodily harm.
Check bearing adjustment
Use a dial indicator to
measure end play. Mount
the indicator base as close
to the center of the hub/
rotor as possible. With the
indicator tip against the end of the spindle, set the
indicator at zero.
Grasp the rotor at three o’clock and nine o’clock.
Push the rotor in while oscillating and read the dial
indicator. Then pull the rotor out while oscillating and
read the dial indicator again.
The bearing endplay is equal to the total indicator
movement. Reinstall all components as manu-
facturer recommends.
Warning: Failure to follow recommended procedure
for removal and installation may cause damage
resulting in wheel locking or coming off during
operation, creating a risk of serious bodily harm.
Timken
®
is the registered trademark of
The Timken Company
www.timken.com
© 2004 The Timken Company
Printed in the U.S.A.
67M-01-04-7 Order No. 7562
5
6
8
7
WARNING: Proper maintenance and handling practices are critical. Failure to follow installation instructions
and maintain proper lubrication can result in equipment failure, creating a risk of serious bodily harm.
Never spin a bearing with compressed air. The rollers may be forcefully expelled, creating a risk of serious
bodily harm. Never mix lubricants! Mixing of lubricants may result in reduced service life.
Wyszukiwarka
Podobne podstrony:
TimKen com Seal and Shaft Installation Tips
Red Hot Sex Tips com s Sexual Survey Results From over 100 women!
Tripod com VW 2000 Passat V6 2 8L Timing Belt Replacement
PassatWorld com VW Passat B5 1 8T Waterpump Thermostat Replacement DIY
Advanced Polyphthalamide (PPA) Metal Replacement Trends
5 Połączenia klejone ogarnijtemat com
ARTICLE SUSPENSION STRUT FRONT REPLACE INSTALL
4 Polaczenia lutowane ogarnijtemat com
How To Read Body Language www mixtorrents blogspot com
praktycznyelektronik nr11listopad1996{antila} www osiolek com 7KRDP5JQ7HSJADGLVXRPYPQCRBRLYMBS7OWZYA
mapi com The Ayurvedic View of Marijuana
AllRoadFAQ com Audi C5 2 7T 402 AirLoweringMod[1]
E Zlacza HAN Com id 149081 Nieznany
Amendend proposal com 93 225
więcej podobnych podstron