© CAPCOM CO., LTD. 1997, 1999. ALL RIGHTS RESERVED. RESIDENT EVIL is a trademark of CAPCOM CO., LTD.
CAPCOM is a trademark of CAPCOM CO., LTD. Published by Virgin Interactive Entertainment (Europe) Limited.
Virgin is a registered trademark of Virgin Enterprises Limited.
PC CD-ROM
Can you survive the horror?
Can you survive the horror?
This product is guaranteed for a period determined by the law of the country
of manufacture or purchase. Virgin Interactive Entertainment (Europe)
Limited reserves the right at all times to make improvements in the product
described in this manual, at any time and without notice. Other than as
required under English law, Virgin Interactive Entertainment (Europe) Limited
makes no warranties expressed or implied, with respect to this product or
this manual, their quality or their fitness for any particular purpose. This does
not effect your statutory rights.

2
3
MISSION SET-UP
4
INSTALLATION
7
MISSION CONTROLS
8
SPECIAL CONTROLS
9
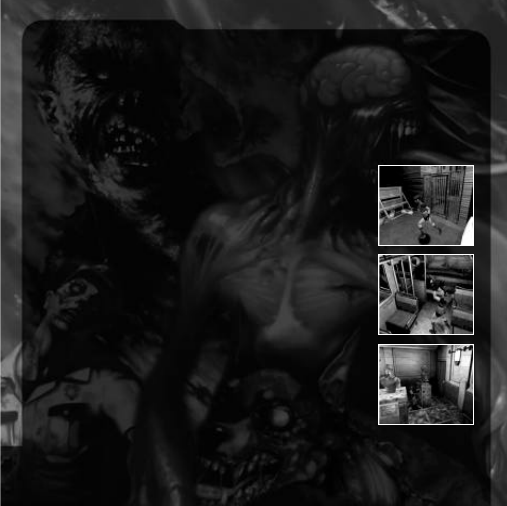
A CITY CRAWLING WITH CONFUSION
10
STARTING A MISSION
11
OPTION MODE
11
SAVING/LOADING
12
STARTING THE 2ND MISSION
13
STATUS SCREEN
16
RACCOON CITY’S ONLY HOPE
18
CAN’T SURVIVE? TRY THIS
19
TROUBLE SHOOTING AND NOTES
20
CREDITS
22
TECHNICAL SUPPORT

3
Mission set-up
Before attempting to play please ensure that your system meets the following requirements:
Minimum
Windows® 95/98
Pentium 166 MHz, Without 3D accelerator card
4X CD ROM
24 Mb RAM
2 Mb DirectX
™
6 compatible graphics card
DirectX
™
6 compatible sound card
1 Mb free harddisk space for game data plus 100Mb for swap file
Recommended
Windows® 95/98
Pentium 200 MHz, 133 MHz or higher with 3D accelerator card
8X CD ROM
32 Mb RAM
4 Mb DirectX
™
6 compatible 3D accelerator card *(see below)
DirectX
™
6 compatible sound card
450 Mb free harddisk space for game data plus 100Mb for swap file
DirectInput
™
6 compatible joypad highly recommended
*Supported 3D accelerator cards
Resident Evil 2 supports the following 4 Mb and above 3D accelerator chipsets:
Voodoo, Voodoo2, Voodoo Rush, Voodoo Banshee, Verite Rendition V1000 series, Verite
Rendition V2000 series, RIVA 128, RIVA TNT, 3D Rage Pro (ATI), Permedia 2 (3D Labs), Savage
3D (S3), Intel 740, Millennium II (Matrox), Millennium G200 (Matrox).
Please check with your card manufacturer that your accelerator contains one of the above
chipsets if you wish to play Resident Evil 2 in accelerated mode.
Please check the VIE web site for added 3D support.

Installation
Before proceeding, ensure that you close as many programs and functions as possible before
installing and running the game.
Insert the Resident Evil 2 CD into your CD-ROM drive. Resident Evil 2 uses the Autorun feature of
Windows® 95 so the installation program should appear automatically. If the Autorun feature is
disabled on your computer then click on the [START] button then [RUN], type
D:\RESIDENTEVIL2.EXE (where D: is the letter of your CD-ROM drive) then click on [OK].
The first time you insert the Resident Evil 2 CD into your CD-ROM drive you will be prompted with
the option to install the following software:
Microsoft DirectX
™
6
Intel Indeo® Video 5.06
Microsoft DirectX
™
Media 6
Resident Evil 2 requires all three of these programs to be installed before playing. Additionally, if
you have an older version already installed you must install the version off the Resident Evil 2 CD-
ROM. You will not be prompted for this again, but should you need to install any of them at a later
date you should run Windows Explorer located in the Windows Startbar and then look in the
following folders for these files...
To install Microsoft DirectX
™
6, double click DX6ENG.EXE located in REGIST folder.
To install Microsoft DirectX
™
Media 6, double click ENDUSER.EXE located in REGIST folder.
To install Intel Intel Indeo® Video 5.06, double click IV5PLAY.EXE located in REGIST folder.
An installation menu window will now appear with the following choices:
Play Resident Evil 2, Options (3D accelerator cards, graphics, sound, etc.)
Install Resident Evil 2
Uninstall Resident Evil 2
Save Game Folder (where your save game files are stored) View Readme file (please read this for
important information and possible last minute changes), Quit
Virgin Internet Homepage (www.vie.co.uk)
4
OPTIONS
SCREEN ADJUSTMENT
Device Setup
You may manually select the type of 3D accelerator card or choose SOFTWARE VERSION if you do
not have an accelerator card.
Please note:
Many 3D accelerator cards use the same chipset so in theory software designed for one board
should work on another board with a similar chipset. If your card is not listed please try an option
with the same chipset e.g. 3Dfx or Rendition. However, there are no guarantees that Resident Evil
2 will run correctly. If you are unsure which chipset you have please contact your card
manufacturer or supplier.
NOTE:
Although some cards offer 3D support, they may not be compatible. Please check the
exterior of the box for supported cards.
Detect
Click the DETECT button to automatically check for a 3D accelerator card. Please ensure that the
detected card matches the card in your system. You may encounter problems when playing
Resident Evil 2 in the wrong game mode, If you are unsure which card you have please contact
your system supplier.
Screen Resolution
Use this pull down menu to select which screen resolution to use. If you have a 3D accelerator
card selected you may not be able to change this.
FEATURES
The box in the top left of the window contains a list of options that you may change to gain the
best performance. Although some of it is quite straightforward (choose between Stereo or Mono
sound, for example) a few of the options are for advanced users. Beneath the selection box is a
brief description of what each option will do.
5

6
At the bottom of the window are two buttons
GRAPHIC QUALITY PRIORITY PERFORMANCE PRIORITY
Clicking on the GRAPHIC QUALITY PRIORTIY button attempts to increase the quality of the
graphics and sound but subsequently may reduce the machines performance, whereas the
PERFORMANCE PRIORITY button does the opposite.
Important Note
If you find Resident Evil 2 runs slowly on you machine please choose the NUMBER OF ENEMIES
in the OPTIONS/FEATURES menu and pick REDUCED. Do the same for SPECIAL EFFECTS. This will
make the game run more smoothly. You may adjust this in-game by pressing the F2 key.
Additionally turn the SHADING to OFF in the same menu.
FUTURE SUPPORT
With 3D accelerator cards continuously coming onto the market it was impossible to support every
one. To help solve this we have included this feature that will allow us to make Resident Evil 2 work
on cards that we were unable to support before release.
Please check the Virgin WWW page (www.vie.co.uk) for the latest information.
INSTALLATION
Click on the INSTALLATION button to begin the installation and a new screen will appear
prompting you to choose the destination directory. The default is C:\PROGRAM
FILE\CAPCOM\RESIDENT EVIL 2 if you wish to change this please click on the BROWSE button.
The next screen gives you the option to choose which data to install. Click OK once you have
made your selection and the installation will commence.
UNINSTALLATION
To uninstall Resident Evil 2 from your PC simply click on Uninstall in the Autorun requester box or
explore the CD and double click on Resident Evil2.exe to bring up the option box.
7
Mission controls (default)
CONTROL
KEYBOARD
SIDEWINDER
Moves Character
Arrow Keys
Directional Pad
Action
Opens Doors
Attack (Uses weapon)
C
A
Run
Cancel Previous Action
V
B
Status Screen
Z
C
Map
A
Y
Option Screen
CTRL
Z
Draws Weapon
X
R
Start Game
Start Button
Additional Keys
F2
This option will help users with a lower specification PC, such as a 133Mhz. This will
toggle sprites (fire and smoke effects) between half and full and also the number of
zombies on screen. By selecting HALF for each option will give you a smoother game on
slower machines.
F7/F8
Cycle through the available screen resolutions.
F9
Pauses / Aborts game
Throughout the rest of the manual any control references made are for the default keyboard setup
as listed previously. When using an altered configuration or a joypad please substitute the controls
accordingly.
Special controls (default)
Check item
Same as Action (the C key). If you press the C key during game play, your character will check the
object in front of him/her. A message will appear to let you know what you found. If there is
nothing there, no message appears. This control also opens doors and talks to other characters.
Run
Hold the V key, then press the directional key
▲ to run forwards.
Hold or with ▲ to run left or right. You cannot run backwards.
Use weapon
Hold the X key to draw weapon, then use the ▲ and ▼ arrow keys to aim
the weapon up or down; left and right arrow keys rotates weapon left or
right. Press the C key to activate weapon. If you are playing the Arrange
Mode the Auto-Aim function is activated (as soon as the Aim key is
pressed the character will face the nearest enemy).
Push item
Some items can be moved by pushing them. Face the item you want to
move and press ▲ directional arrow. If the object cannot be moved, your
character will not try to push it.
Reset game
To return to the Resident Evil 2 title screen during game play, press F9 key twice. To quit, keep
pressing the F9 key/
8
▲
▲
A city crawling with confusion
Imagine a normal mid-western U.S. town, built at the base of a vast forest. Business thrived here,
especially with the advent of several new industries. Heck, you can’t find a more peaceful
wilderness getaway than Raccoon City.
Then the trouble began.
And it leads back to when the corporation arrived.
Rumours began to spread, and the town was overcome with odd occurrences.
Unidentifiable creatures appeared out of nowhere, and fatal accidents happened at an
alarming rate. Word got out about a severe accident at a
mountain lab. No one in town knew what was happening to
their quaint town.
The Raccoon Police Department, in an effort to calm the
growing fear among locals, recruited several new officers.
Leon S. Kennedy is one of the promising new recruits.
As Leon prepares to join his new unit, he attempts to
contact the captain who hired him, but has no luck
reaching him. Unfazed, he continues into Raccoon
City to his new job.
At the other side of town, a distraught Claire Redfield
searches for her missing brother, Chris. Claire begins
her search in Raccoon City, the last known location of her
brother nearly two months ago, only to learn about the
“accident” in the forest. Is Chris still in Raccoon City?
Sadly for Leon and Claire, they are completely unaware of the
overwhelming world of horror and despair they both are about
to enter...
9

Starting a mission
If you want to play Leon’s mission, place Disc 1 into your CD-ROM and install the game as detailed
on page 4. To play Claire’s mission do the same but with Disc 2.
Once the game begins you may bypass the opening sequence by pressing the C or Return keys.
You will be presented with the RESIDENT EVIL 2 title screen. There are 5 options: LOAD GAME,
ORIGINAL MODE, ARRANGE MODE, SPECIAL and OPTION. Use the ▲ and ▼ directional keys to
highlight an option, then press the C or Return keys to select it.
ORIGINAL MODE
This is the European PlayStation® version of RE2. Select this option when you want to start a new
mission.
You can choose between Normal difficulty and Easy difficulty.
ARRANGE
MODE
This is a conversion of the Japanese PlayStation® version. Although the game is in essence the
same as the European version, there are a few differences…
Auto-aim - Press the Aim key and your character will automatically spin round and aim directly at
the nearest enemy.
Slightly different position of some items and enemies
There are 3 ink ribbons instead of 2 each time an ink ribbon is collected (used for saving).
The enemies require fewer shots to kill.
The short sequence when you die is different.
When the game is completed the best rating is "S" instead of “A”
If you set the game to EASY you will receive a machine gun with unlimited ammunition. This makes
the game easier but you will not be able to unlock any of the secrets by playing the game this way.
10

Option mode
Select this to enter the Option Mode, or enter this mode during gameplay by pressing the F5 key
(except during a cinema or while the Status Screen appears). You can adjust the configuration of
your keyboard or joypad controllers (KEY CONFIG), adjust the SOUND type and use MONITOR
ADJUST to make sure the colours are set right on your monitor.
When adjusting your key/button configuration use the arrow keys to choose the action and then
press the key you would like to use. Character movement is determined with the numerical
keypad arrows (8,6,4,2).
Select the SOUND mode to choose between Stereo and Mono, depending on the capabilities of
your system. You may also adjust the BGM (back ground music) and SE (sound effects) volume.
Note: Volume of the sound during cinematic sequences (other than the CG animation) cannot be
adjusted.
To adjust the brightness of your monitor to maximise picture quality, select MONITOR ADJUST.
Colour bars will appear at the top of the screen, so adjust the brightness of your PC monitor as
outlined in the instructions packaged with your PC monitor.
Saving/loading
To save a game you must place an ink ribbon into a typewriter. Ink ribbons
can be found in various places throughout the game. Once you find a
ribbon, stand in front of the typewriter and press the C key. You will be
asked if you want to save your progress. Choose YES or NO.
Note:
You’ll need to find an ink ribbon each time you want to save, so use
your ink ribbons wisely.
When saving a file, you will know the file is saving successfully from the
sound of the typewriter keys being tapped. Also, the save information will be typed on-screen.
11

Loading
If you have previously saved a game highlight LOAD GAME from the title screen and press the
RETURN key. Your file(s) will appear. Use the Directional keys ▲ and ▼ to highlight the file you
want to re-start, then press the RETURN key. If you want to return to the title screen without
loading a file simply press the V or ESC keys.
Starting the second mission
RESIDENT EVIL 2 is equipped with a new extended gameplay system. In essence, situations that
you encountered the first time you played the game through have a bearing on situations you
encounter the next time you play.
When you complete your mission as Leon or Claire, you will save your completed game data at the
end of the game. Take that saved game data and re-load it on the opposite disc and play the
adventure with the opposite character.
For example, when you play Leon’s mission and you complete it, save the completed game. Then
load the Claire mission disc. Choose LOAD GAME from the title screen and select the Leon
completed game data you saved. You will now experience the second mission with Claire, but
beginning on the opposite side of the burning car.
The same goes for Claire’s mission.
Give it a shot. . .if you’ve got the guts.
12
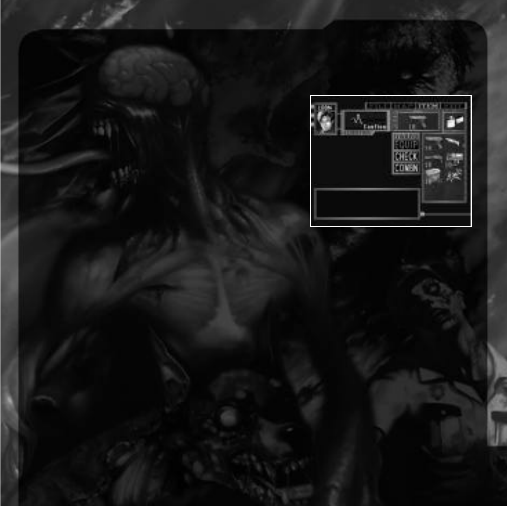
Status screen
When you press the Z or F4 keys during game play the
Status Screen appears. This screen shows your characters
condition and the items you are carrying. Use the
Directional keys to highlight an item or function, then
press the C key to activate the options.
Items
After highlighting the item you want to use, press the C
key. You then have 3 options in the command window:
USE/EQUIP, check or COMBINE.
Use/equip
To use the item, highlight USE and press the C key. For weapons, EQUIP will appear instead of
USE. If you select EQUIP, you’ll be equipped with that weapon. You cannot use a weapon until you
have equipped it. You can only use one weapon at a time.
Check
This option allows you to examine an item or weapon you have acquired. Highlight the item, then
select the check option to acquire further information about the item.
Combine
Some items have a different effect when you combine them with other items, particularly weapons.
When you want to re-load a clip of ammo for a gun, select the clip then select COMBN from the
command window. Use the Directional keys to move the cursor onto the gun you want to put
the clip in.
Try combining other items to discover new effects.
13

Condition
On the Status Screen next to your characters mug shot is an electrocardiograph (ECG). This ECG
shows the current condition of your character, and will read “FINE” or whatever the status of your
character is. To return your character to better health, you must find herbs or a first aid spray
Map/file
There are 2 other functions you can perform from the Status Screen:
MAP:
Select this option to view the rooms and areas you have already visited. This feature helps
you keep track of where you need to go.
FILE:
As you explore, you will discover notes, messages or other information that will automatically
be filed in your characters notebook. Select this to view the contents of messages filed. Hints may
develop from these notes.
Item box
You will notice that your character can only carry a certain number of items at a time (Leon and
Claire can carry up to 8 items). You cannot lose an item once you find it, but you can use it up (like
ammo, for example). In order to carry only the items you need at a certain time, you can store other
items in an Item Box.
These are located in strategic places, and you must use them wisely because they are limited in
space. Stand in front of the Item Box and press the X button. The Item Select Screen will then
appear.
14

You can exchange, give or take out items from the box. To place an item in the box, use the
Directional keys to highlight the item, then press the C key. Now select a slot that reads “NO item”
and press the C key. The item has now been placed into the box. If there are no slots that read
“NO item” the Item Box is full.
To exchange an item, place the cursor over the item you want to exchange and press the C key.
Now highlight the item in the box you want to exchange and press the C key. You have now
exchanged items.
To take an item out of the box, you must have an empty slot available to carry the item. Select the
empty slot first then press the C key to move the cursor to the item box. Highlight the item to take
out of the box and press the C key.
Ranking
When you complete the mission, you are given a rank based on how well you did. The rankings
are S (Superior), A, B, C and D. You are ranked according to several factors including total time
spent playing and the number of saves used during game play.
Try to increase your ranking, and who knows...good things may happen.
15
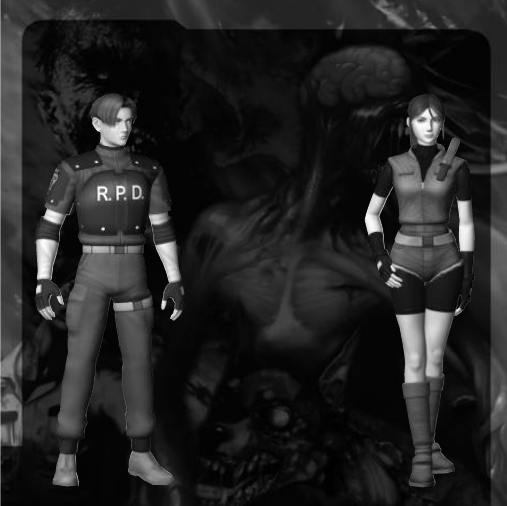
Raccoon city’s only hope
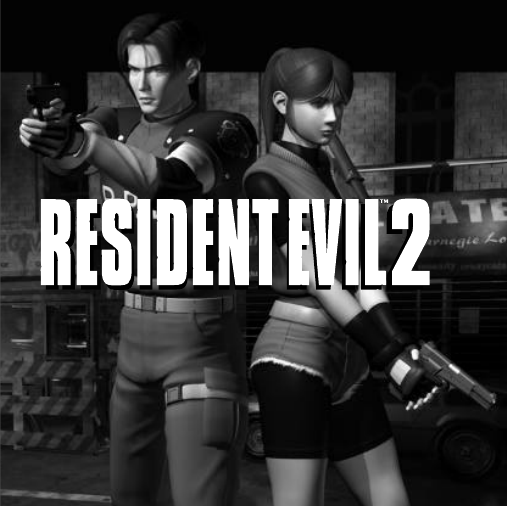
LEON S. KENNEDY
Leon is an idealistic rookie cop.
He burns with the need to protect
and to serve, and life as a
cadet was an eye-opening
experience. While reckless and
brash, Leon is certainly not
as naive as his demeanour
would suggest. He is highly
qualified for his new job with
the Raccoon Police.
CLAIRE REDFIELD
Claire is a light-hearted, articulate modern
woman. While she can be a bit of a
tomboy at times, she is somewhat wild.
Self-confident and extroverted, Claire is
typically the first person to try something
many others would not.
16

ADA WONG
Leon stumbles upon this mysterious woman who is quite secretive yet, at
the same time, a professional and skilled investigator. She can also come
across as condescending, and has a tendency to talk
down to those she deems inferior to herself.
SHERRY BIRKIN
A lonely and insecure 12-year-old, Sherry is
quite mature for her age. She is very shy and when
she speaks, she lacks self-confidence and always has
the feeling she is lost. Sherry’s parents are too
wrapped up in their work to heed the emotional
needs of their child.
17

Can’t survive?try this:
LISTEN:
You can hear the zombies stirring in a room even though they may be off screen. Listen carefully
as you explore to help you prepare for sudden attacks.
USE WEAPONS EFFECTIVELY:
Weapon effectiveness varies with range and target. Determine the best weapon for the situation,
taking into consideration ammo availability. This is the single most important factor in survival.
KNOW YOUR ENEMIES:
Each enemy is uniquely shaped, attacks differently and moves differently. Get to know your
enemies and learn their weak points. This can make you a more effective survivor.
TRY ALL OPTIONS, SEARCH ALL AREAS:
Stuck? Come across a new room with nothing to do and nowhere to go? Try using items, pushing,
climbing, investigating, etc. Walk the perimeter of rooms and areas to find more medicine and
other important items. Check dead enemies for ammo.
18

19
Trouble Shooting and Notes
If you find Resident Evil 2 runs slowly on you machine please choose the NUMBER OF ENEMIES
in the OPTIONS/FEATURES menu and pick REDUCED. Do the same for SPECIAL EFFECTS. This will
make the game run more smoothly. You may adjust this in-game by pressing the F2 key.
Additionally turn the SHADING to OFF in the same menu.
A few keyboards are unable to register multiple key inputs preventing some character actions. It is
therefore recommended that a joypad is used.
DirectX
™
6 or later, DirectX
™
Media 6 or later and Indeo 5.06 or later must all be installed before
playing Resident Evil 2.
If you have less than 24 Megabytes RAM the game may slow down slightly as data is swapped
between the CDROM, hard drive and the PC’s Memory.
This game can be played without installation but loading between rooms may cause a slight delay.
Installation is recommended.
Please turn off all power management systems before playing the game as this may cause
problems.

20
Credits
CAPCOM
Original PlayStation® Version
Masaaki Yamada, Kazuhiro Aoyama,
Junya Watanabe
Noboru Sugimura
Motoji Fujita, Miho Hamano, Koji Wakasono
Jun Takeuchi
Yasuhiro Anpo
Kiyohiko Sakata
Katsutoshi Karatsuma
Masami Ueda
Hideaki Utsumi
Hiroshi Sasaki
Shinji Mikami
Hideki Kamiya
Planning
System Plan:
Scenario:
Graphics
CG Modelling:
Motion design:
Software engineer
Main System:
Scenario program:
Enemy program:
Sound
Music Composition:
Sound design:
CG movie:
Team producer:
Director:

21
CAPCOM PC DIVISION
Masayuki Akahori
Kazuki Yoshida
Kazunori Inoue, Akira Kazaoka,
Yoichi Kodama
Kumiko Suekane
Kaori Funakoshi
VIRGIN INTERACTIVE (LONDON)
Tony Byus
Louise Gaynor
Llewellyn Ligas, Graham Archer
Al Perch, Steve Frazer, Dave Casey,
Drew Waldegrave, Chris Arnsby
Matthew Shanley, Robert Paul, Jeremy Perks
Producer:
Director & System Programmer:
Application Programmer:
Character Designer:
Development Assistant:
Producer:
Product Manager:
Quality Assurance:
Software Analysts:
Technical Services:

22
Technical Support
Thank you for purchasing Resident Evil
™
2. If you are experiencing difficulties with this title, please
take advantage of the following product support. Please note that all our operators only speak
English and that we are unable to give game play hints through our Technical Support number.
Technical Support : 0171 368 2266
Fax : 0171 468 2003
Internet : customer_support@vie.co.uk
WorldWide Web : http://www.vie.co.uk
Address : Customer Services Department
Virgin Interactive Entertainment (Europe) Ltd.
2 Kensington Square
London
W8 5RB
England
As mentioned before the Technical Support number is
for technical assistance ONLY, however if you find
yourself experiencing game play difficulties, then you
may want to try our automated hintline* on
09014 74 74 99
* All calls are charged at 60p per minute. Permission to use the service must be granted by
the person who pays the telephone bill. The maximum call length is 6 minutes. The service is
only available to residents of the UK. Prices are correct at time of going to press – FEB 1999.
23
If you do telephone, please be sitting in front of your computer (if possible) and be sure to provide
us with as much information as possible. Make sure to note the exact type of hardware that you
are using in your system, including:
Speed and Manufacturer of your Processor.
Make & Model of your Sound Card and Video Card.
Make & Model of your CD-ROM drive.
Amount of RAM present.
Any additional Hardware and Peripherals.
Information contained in your Config.Sys & Autoexec.Bat files.
Note:
If you have any problems in obtaining any System Information please consult your System supplier.
When contacting us by post, ensure you include the Title & Version of the game, a detailed
description of the problem you are experiencing and the exact type of hardware that you are using.
When sending us a fax, please remember to leave your fax machine switched on and ready to
receive. If you are using a Telephone/Fax system please make sure that the Fax connection is
enabled. Ensure to include the Title & Version of the game, your name, a return Fax number with
the area code and a Voice number so we can contact you if we experience problems when trying
to Fax you back.
CAPCOM ON-LINE
WorldWide Web: http://www.capcom.com
Email: megamail@capcom.com
Visit our website to see all the great new CAPCOM products! Or just e-mail us for help or find out
what’s new at CAPCOM!
CAPCOM ENTERTAINMENT, INC. 475 Oakmead Parkway, Sunnyvale, CA 94086
©CAPCOM CO., LTD. 1998. ALL RIGHTS RESERVED. RESIDENT EVIL is a trademark of CAPCOM CO., LTD.
CAPCOM is a registered trademark of CAPCOM CO., LTD.
Published by Virgin Interactive Entertainment (Europe) Ltd. All Rights Reserved. Virgin is a registered trademark of
Virgin Enterprises Ltd. All Rights Reserved
Can you survive the horror?
Can you survive the horror?
Wyszukiwarka
Podobne podstrony:
Resident Evil 6 poradnik do gry
[Resident Evil] 06 Code Veronica
S D Perry Resident Evil 03 City Of The Dead
Resident Evil 4
więcej podobnych podstron