
Volkswagen > New Beetle, New Beetle Convertible > 1998-2008
2.0 Liter 4-cyl. 2V Engine Mechanical, Fuel Injection and Ignition,
Engine Code(s): AEG, AVH, AZG, BDC, BEV, BGD
15 - Removal and Installation
.
Toothed Belt
Special tools, testers and auxiliary items required
Engine support bridge 10-222 A ( guide 10-222 A/21 changing )
Adapter 10-222 A/8
Torque wrench V.A.G 1331
Torque wrench V.A.G 1332
Pin wrench T10020
Changing the Engine Support Bridge 10-222 A
.
Guide 10-222 A/21
The engine support bridge 10-222 A is needed to support the engine/transmission
subassembly.
A new bore is required for securing the adapter 10-222 A/8 to the guide 10-222 A/21 .
Dimensions in mm.
Page 1 of 7
Toothed Belt
8/1/2009
x-ebahn:///C:/Program%20Files/eBahn/data/VW-A-NB-GE05.ebn/VW/A/NB/Repair%20M...
Drill a 12.5 mm diameter hole - arrow - into the guide 10-222 A/21 .
Removing
Remove the right noise insulation
Body Exterior - Repair Group 50
Remove engine cover.
Remove ribbed belt
Ribbed Belt
.
Remove the ribbed belt tensioning element.
Remove the coolant expansion tank (the coolant hoses remain connected).
Remove upper toothed belt guard.
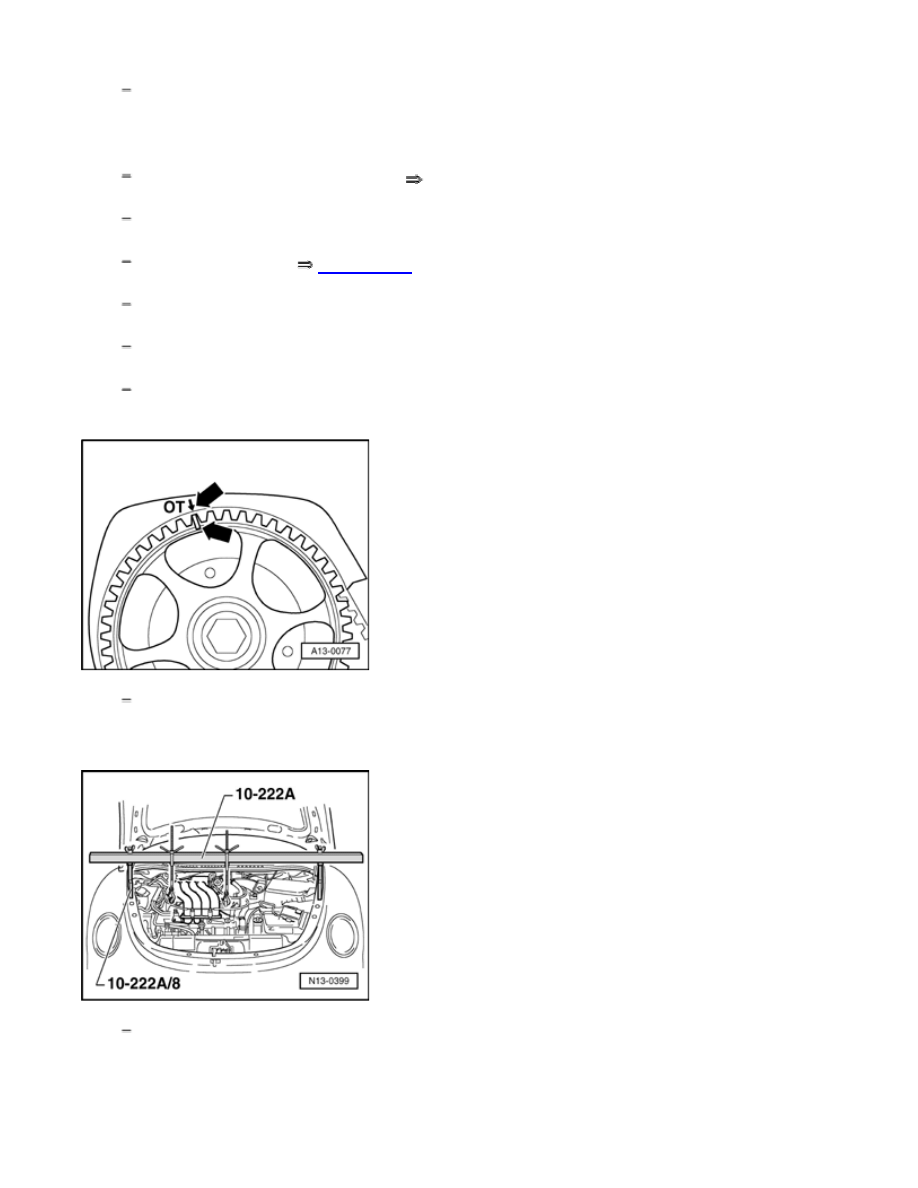
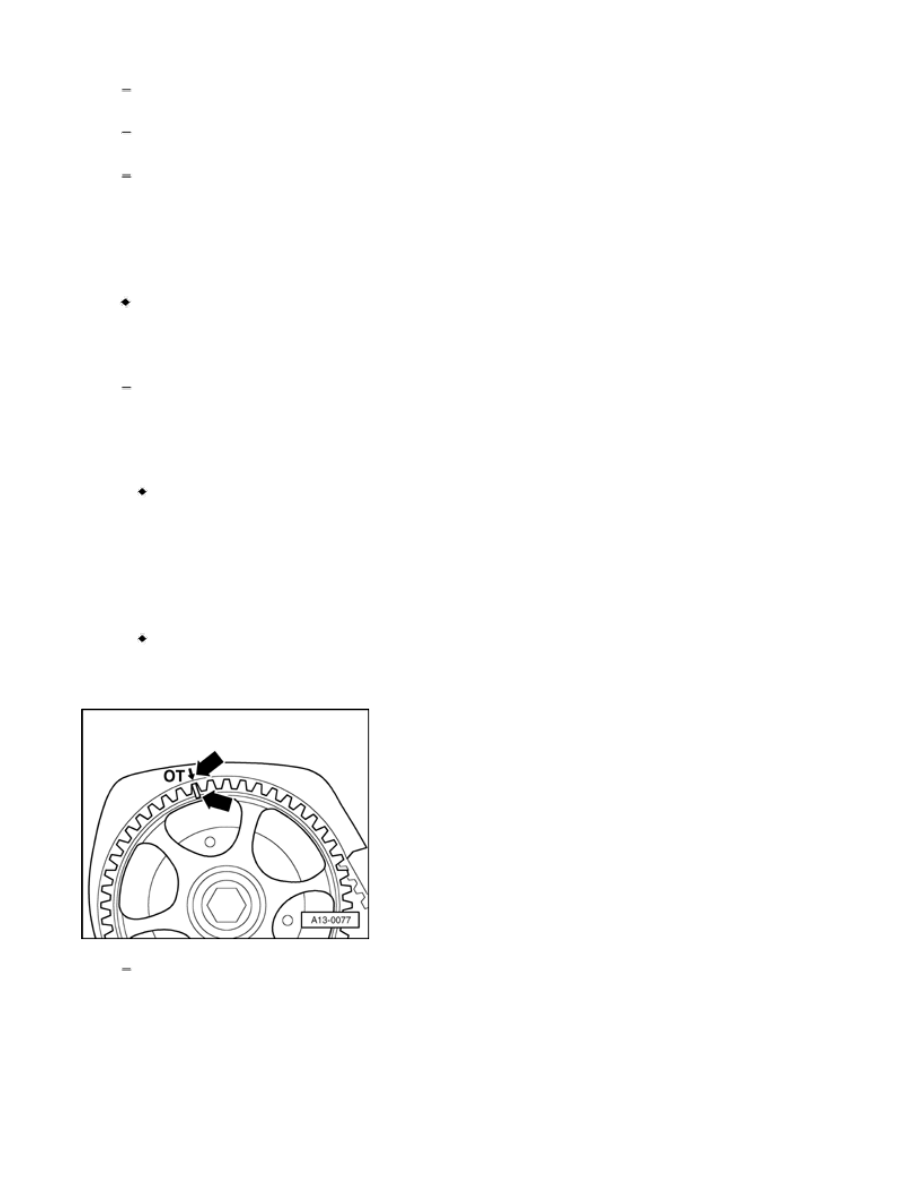
Bring camshaft gear to marking for TDC cylinder 1 by turning crankshaft. Marking on
camshaft gear must align with arrow on toothed belt guard - arrows - .
Mount the engine support bridge 10-222 A with the feet 10-222 A/8 as illustrated.
Page 2 of 7
Toothed Belt
8/1/2009
x-ebahn:///C:/Program%20Files/eBahn/data/VW-A-NB-GE05.ebn/VW/A/NB/Repair%20M...

Remove the subframe - 1 - as follows:
Remove the bolts - arrows - .
Loose the bolt - arrow A - .
Note:
The subframe may only be removed if the engine is supported by the engine support
bridge 10-222 A !
The engine bracket may first be loosened only when the subframe is removed.
Remove vibration damper/belt pulley.
Remove the engine carrier from the cylinder block.
Note:
To loosen the front engine mount bracket bolt, the engine must be slightly lifted by the
engine support bridge.
Remove the center part and the lower part of the toothed belt guard.
Page 3 of 7
Toothed Belt
8/1/2009
x-ebahn:///C:/Program%20Files/eBahn/data/VW-A-NB-GE05.ebn/VW/A/NB/Repair%20M...
Mark direction of rotation of toothed belt.
Loosen the tensioning roller and remove the toothed belt.
Then, turn the crankshaft back slightly.
Installing
Conditions
The piston must not be at TDC; if necessary, turn the crankshaft slightly backward.
Procedure
Mount the toothed belt on the crankshaft sprocket and the coolant pump (pay attention
to the direction of rotation).
Note:
With the engine removed beforehand, install the lower toothed belt guard as well as
the vibration damper/belt pulley.
Valve Timing, Adjusting
Note:
When turning camshaft, crankshaft must not be at TDC. Valves and/or pistons may
be damaged.
Align the marking on the camshaft gear with the marking on the toothed belt guard -
arrows - .
With Engine Installed
Page 4 of 7
Toothed Belt
8/1/2009
x-ebahn:///C:/Program%20Files/eBahn/data/VW-A-NB-GE05.ebn/VW/A/NB/Repair%20M...
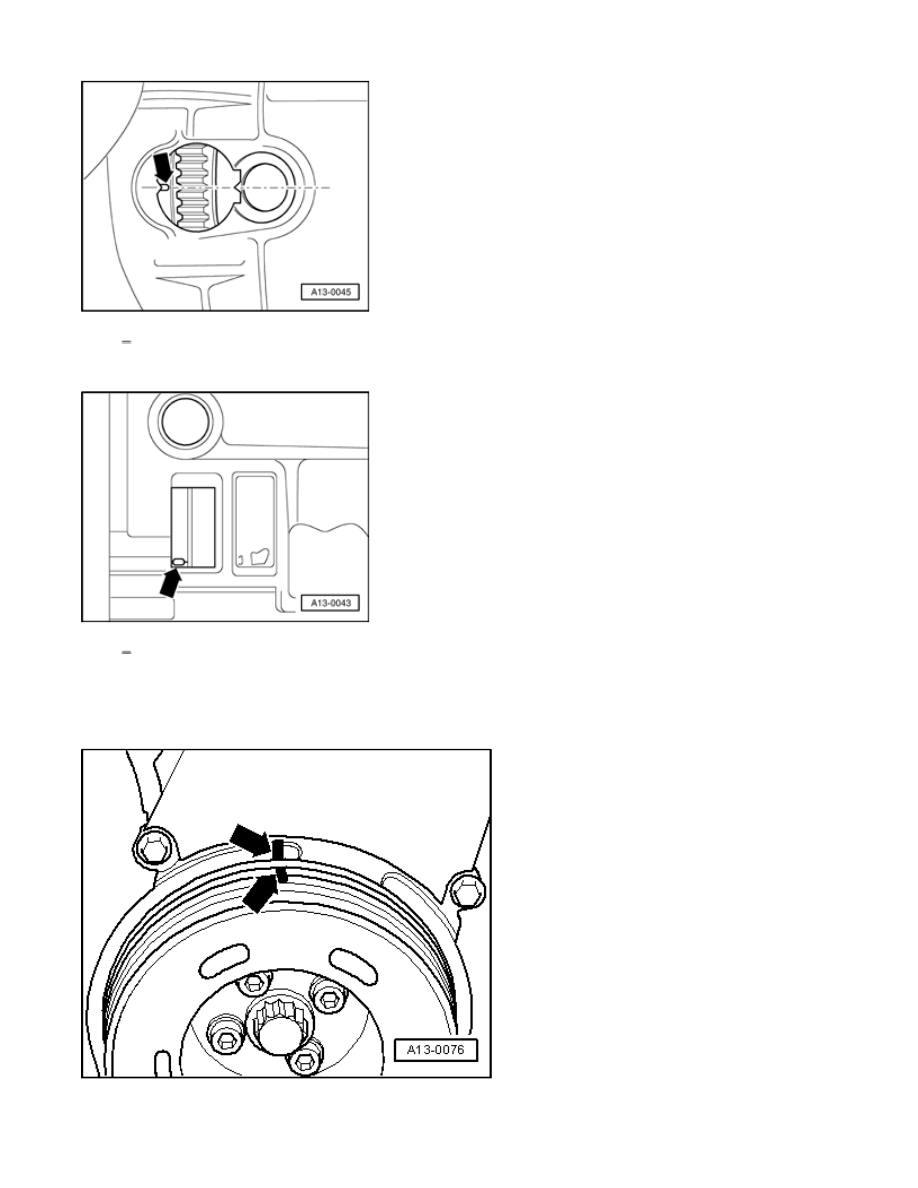
Position crankshaft at TDC cylinder 1 (vehicles with manual transmission).
Position crankshaft at TDC cylinder 1 (vehicles with automatic transmission).
With Engine Removed
Page 5 of 7
Toothed Belt
8/1/2009
x-ebahn:///C:/Program%20Files/eBahn/data/VW-A-NB-GE05.ebn/VW/A/NB/Repair%20M...
Position vibration damper at TDC cylinder 1 - arrows - .
Continuation for Both
Lay toothed belt on tensioner and camshaft gear.
Toothed Belt, Tensioning
Requirements
The engine must be no more than warm to touch.
Crankshaft is at TDC, cylinder 1.
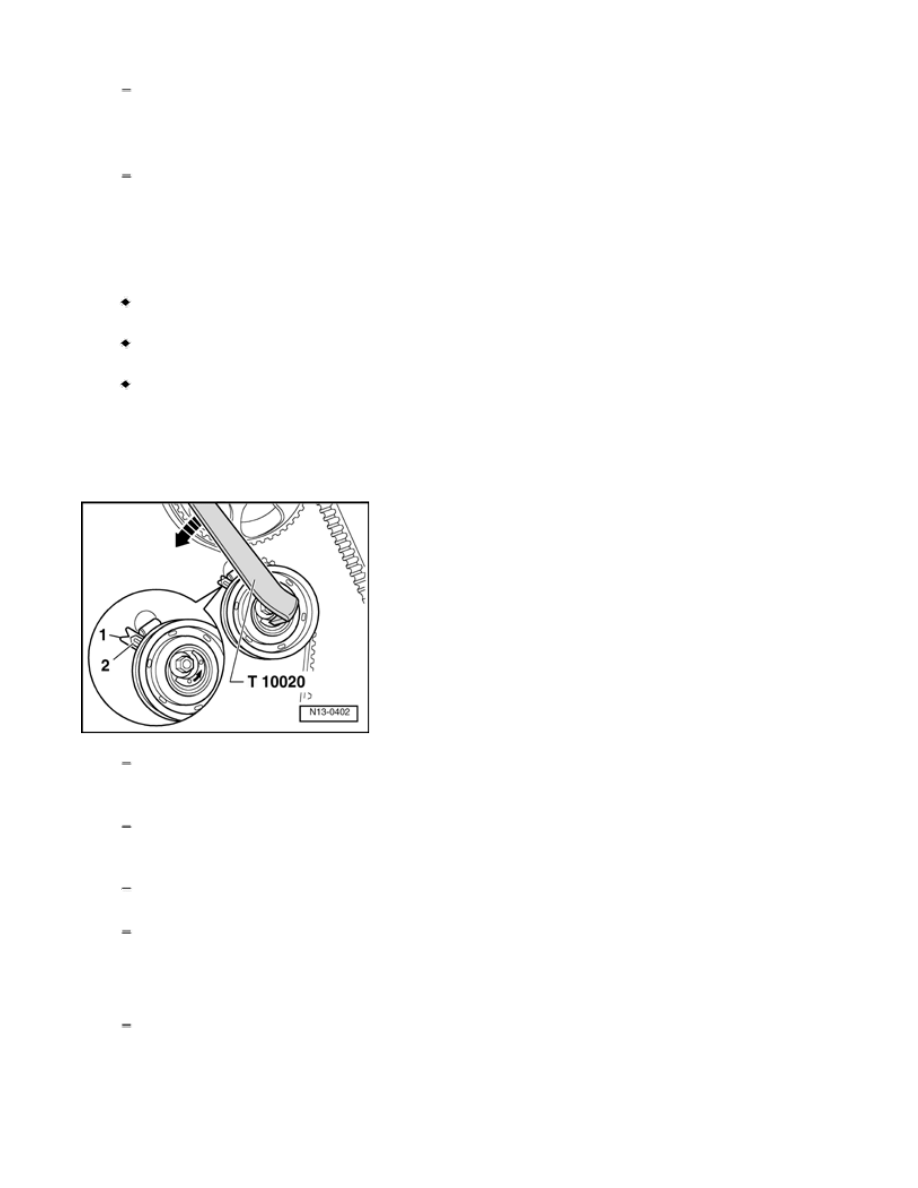
Before tensioning the toothed belt, turn the tensioning roller eccentric pulley using the
pin wrench T10020 five times all the way in both directions.
Procedure
Tension toothed belt. To do this, turn the pin wrench T10020 on the eccentric pulley to
the left (direction of arrow) all the way.
Release the toothed belt tension until the notch - 1 - and the arrow - 2 - align (use a
mirror).
Tighten mounting nuts to 20 Nm.
Continue turning the crankshaft two turns in the direction of the engine until the engine
is once again at TDC for cylinder 1. For this it is necessary that the last 45 degrees (
1
/
8
rotation) is turned without interruption.
Check the tension on the toothed belt one more time, specified value: arrow and notch
are aligned
Continuation, Installing the Complete Toothed Belt
Page 6 of 7
Toothed Belt
8/1/2009
x-ebahn:///C:/Program%20Files/eBahn/data/VW-A-NB-GE05.ebn/VW/A/NB/Repair%20M...
Install center and lower part of the toothed belt cover.
Install the vibration damper/belt pulley.
Tightening specification: 25 Nm
Install engine bracket on cylinder block.
Tightening specification: 45 Nm
Note:
Before installing engine bracket, insert bolts in bracket.
Before the assembly mounting can be installed, all bolts for the engine bracket must
be tightened to the tightening specification.
Install subframe mount for engine completely.
Align engine and transmission mounts
Engine and Transmission Mount, Alignment
Specifications
.
Subframe tightening specifications:
Engine and Transmission Mount Tightening
Specifications
.
Remove engine support bridge 10-222 A .
Install toothed belt cover - upper part.
Install the ribbed belt tensioning element.
Tightening specification: 25 Nm
Install ribbed belt
Ribbed Belt
.
Install coolant expansion tank.
Install the right noise insulation Body Exterior - Repair Group 50
Install the engine cover.
Copyright © 2008 Volkswagen of America, Inc. and Bentley Publishers. All rights reserved. Last processed:
Page 7 of 7
Toothed Belt
8/1/2009
x-ebahn:///C:/Program%20Files/eBahn/data/VW-A-NB-GE05.ebn/VW/A/NB/Repair%20M...
Wyszukiwarka
Podobne podstrony:
Tripod com VW 2000 Passat V6 2 8L Timing Belt Replacement
G 2 0 DOHC Timing Belt disassembly doc
VW 9a passat b3 timing belt
Bosch com AEB VW B5 Passat Timing Belt Procedure
Advanced Polyphthalamide (PPA) Metal Replacement Trends
ARTICLE SUSPENSION STRUT FRONT REPLACE INSTALL
easy500 timing relay HLP EN
RODZAJE TIMINGU DOJO KUN, Karate
Kto,blokuje tą wiedzę Antenna To Replace?tteries And Provide Unlimited Free Energy For Electric?rs
NFS U2 Replace?r's
Popular Mechanics Replacing U Joints
ARTICLE TENSIONER REPLACEMENT
Front End Replacing Tie Rod Ends
Alternator Check and Replacement
PIX Belt Catalogue
61 Seat Belt
K timing diag
Popular Mechanics Replacing a Bad Power Steering Pump
Popular Mechanics Replacing Loose Motor Mounts
więcej podobnych podstron