Reconstructed Manual for a
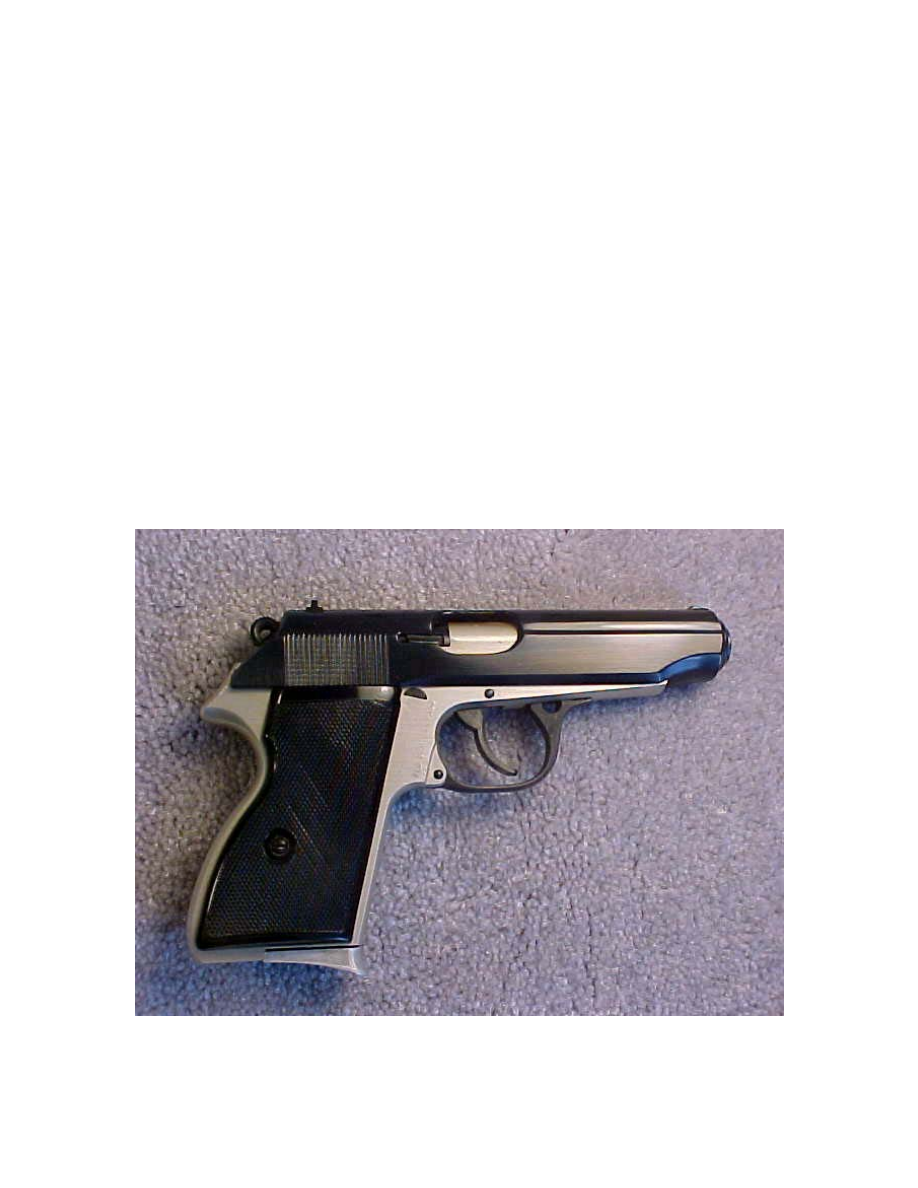
PA-63
Double Action – Semi-Automatic Pistol
9x18mm Makarov
More Gun Info can be found at:
http://Guninfo.tnet.com
The contents of this manual were reconstructed from graphical
Copies of the original and may be missing original content, may have
misstated content or may contain information that is no longer valid,
current or safe.
Please use this information with caution and if necessary,
contact the manufacture for a copy of the Real Manual.

INSTRUCTIONS AND SAFETY MANUAL FOR
PA-63
DOUBLE ACTION – SEMI AUTOMATIC PISTOL
Even though you may be familiar or have had experience with other
firearms, each firearm is different. In order to understand the basics
of the PA-63, this manual should be read in its entirety. Enrollment in
an NRA-approved safety course is encouraged if you are unfamiliar
with firearms.
CAUTION
Failure to heed the warnings in this booklet may result in serious
injury to you or others, as well as damage to the firearm or other
property.
Take note of the following warnings on gun handling before attempting
to use your pistol.
A. DON’T RELY ON YOU GUN’S SAFETY, TREAT EVERY GUN AS IF IT WERE
LOADED AND READY TO FIRE.
B. NEVER CROSS A FENCE, CLIME A TREE OR JUMP A DITCH WITH A LOADED
GUN.
C. NEVER LOAD OR CARRY A LOADED GUN UNTIL YOU ARE READY TO USE IT.
D. WATCH YOUR MUZZLE SO THE OTHER FELLOW DOESN’T HAVE TO.
E. KEEP GUNS AND AMMUNITION SEPARATELY AND IN LOCKED STORAGE.
F. DON’T SHOOT UNLESS ABSOLUTELY SURE OF YOUR TARGET AND WHAT IS
BEYOND IT.
G. KNOW THE RANGE OF YOUR GUN
H. ALWAYS WEAR EYE AND EAR PROTECTION WHEN SHOOTING
I. ALWAYS BE SURE THE BARREL IS CLEAR OF OBSTRUCTIONS . . . AND ONLY
CARE AMMUNITION SPECIFICALLY INTENDED FOR THE GUN YOU ARE USING.
J. ALWAYS CARRY HANDGUNS WITH THE HAMMER DOWN ON AN EMPTY
CHAMBER.
AMMUNITION SPECIFICATIONS
CALIBER
BULLET
WEIGHT
9mm Makarov
95 grains
(9x18mm)

AMMUNITION WARNING
Use only original, high quality, commercially manufactured
ammunition which is in good condition. Only use ammunition of the
caliber for which your pistol is chambered. You will find the correct
caliber engraved on the slide of the barrel. Never use ammunition of
any other caliber. You should always use ammunition that complies
with performance standards established by The Sporting Arms and
Ammunition Manufacturer’s Institute, Inc.
The use of hand loaded, reloaded or other non-standard ammunition
will void all warranties.
DISASSEBMLY
The PA-63 pistol can be disassembled into 3 main components in a few
seconds without any tools. No further disassembly is required or
recommended for cleaning purposes. With the safety “ON”, remove
the magazine. Pull the trigger guard downward and and to the side
allowing it to rest on the frame. With the trigger guard held in this
position, pull the slide all the way to the end of its travel. Lift the slide
up and off of the frame and allow it to ease forward over the barrel.
Note: Never let the hammer fall forward on the frame while the gun is
dismantled. Damage may be done to internal parts.
The trigger guard may be replaced to its normal position after
disassembly. The recoil spring may be removed for cleaning purposes
(the Small end goes around the barrel).
ASSEMBLY
With the safety “On” and the hammer cocked, pull the trigger guard
downward and to the side allowing it to rest on the frame. Holding the
trigger guard in this position, you can now replace the slide. Place the
end of the recoil spring in the slide and pull the slide back to the end
of its travel. Push it flat down on the frame allowing it to slide forward
to its normal position on the frame. Return the trigger guard to its
normal position.
OPERATION SAFETY
The safety lever is on the left side of the slide. It is “ON” when the
lever is turned down to cover the red dot; it is “OFF” when the lever is

turned up exposing the red dot. The safety lever locks the firing pin,
shields the firing pin, and uncocks the hammer. (If it’s already
uncocked, keeps it from being cocked.).
Note: When the safety is placed on “ON” and the hammer is cocked,
the hammer will drop forward, but cannot strike the firing pin. Keep
your finger off the trigger and the muzzle pointed in a safe direction.
To lower the hammer from the cocked position without letting it fall
down in the normal fashion, with the right hand thumb, hold back the
hammer and use the left hand to turn the safety lever “ON”. Now
ease the hammer down.
LOADING
1. Remove the magazine by pressing the magazine release button.
2. Load the magazine by pushing down the feeder platform in the
magazine with the rim of the shell and push it under the
magazine shell guides. DO NOT USE FORCE! 7 Shells in clip
maximum.
3. With the safety on “ON” and your fingers away from the trigger,
chamber the first round. Place the full magazine into the pistol
until it is held by its catch. Hold the pistol with the right hand;
with the left hand, grasp the rear of the slide and pull the slide
fully to the rear and release. The slide will snap forward
chambering the first shell. Note: The hammer cannot be cocked
until the safety lever is turned “OFF” exposing the red dot.
UNLOADING
With the safety on “ON”, remove the magazine. Pull back on the slide
to eject any shells remaining in the chamber. Keep the slide held to
the rear and check to make sure that the pistol is empty.
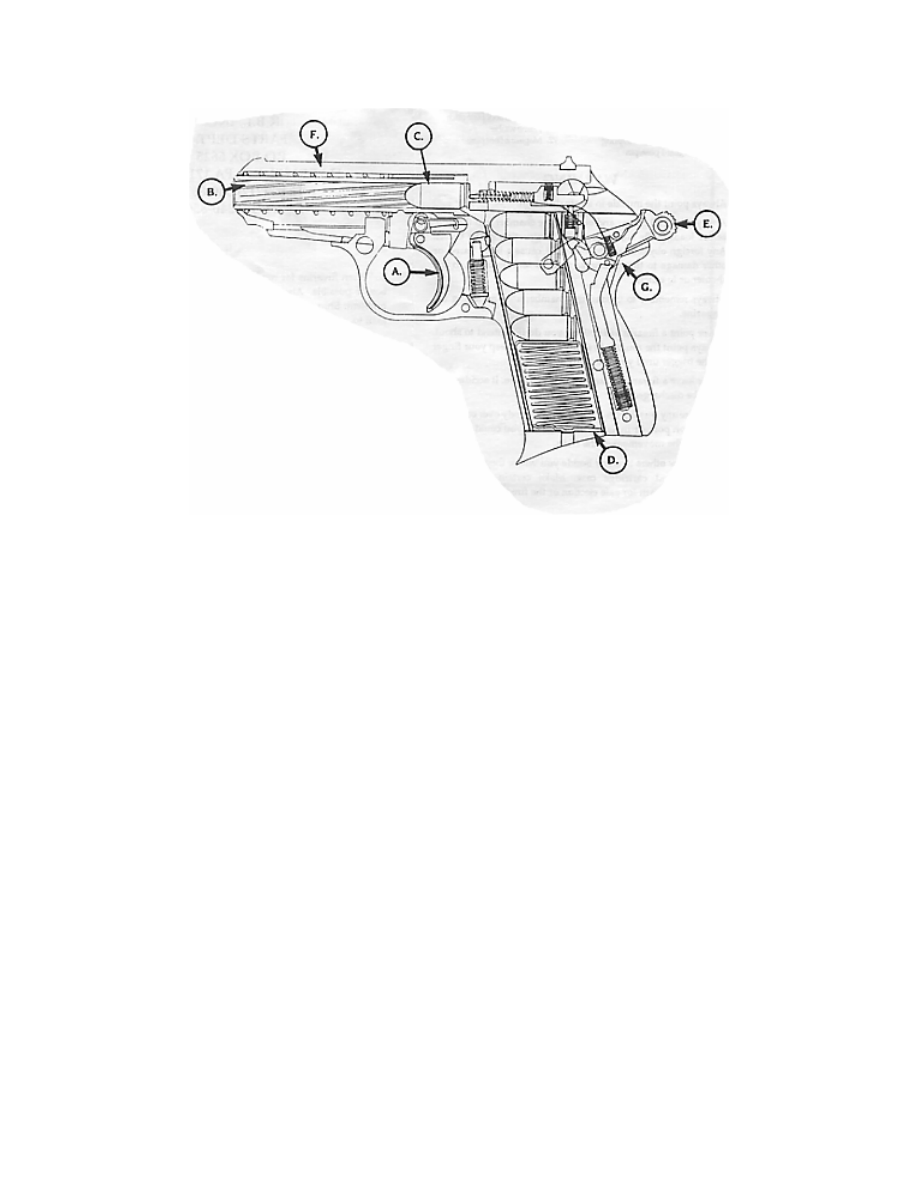
A. TRIGGER
B. BARREL
C. CARTRIDGE IN CHAMBER
D. HAMMER
E. SLIDE
F. FRAME
FIRING
The double-action trigger operation of the PA-63 pistol offers a choice
of 2 methods to cock the hammer for the first shot.
To shoot double-action, point the pistol at your target, push the safety
“OFF” with your thumb, take aim and pull the trigger the full length of
its travel. This will cock and drop the hammer in one motion, firing
the pistol and recocking it for the next shot.
To shoot single-action, point the pistol at your target, push the safety
“OFF” and cock the hammer fully to the rear. Keep your finger off the
trigger while cocking the hammer! To shoot, pull the trigger. For each
succeeding shot, the hammer is automatically cocked at the single
position until the magazine is empty. The slid will remain fully to the
rear after the last shot.
If you wish to continue shooting, remove the empty magazine and
insert a full one. Keep your finger away from the trigger. Pull the

slide to the rear and release it. The slide will move forward to
chamber the next round in the magazine.
If you wish to stop shooting after the first magazine is empty, turn the
safety “ON” and remove the empty magazine. Pull the slide to the
rear and allow it to run forward slowly uncocking the hammer.
CARE AND CLEANING
Your pistol is delivered factory – packaged and preserved with a light
coating of protective grease and oils. Before loading make certain that
all packing grease and oil has been cleaned from the bore and exposed
firing mechanisms.
PARTS LIST
Important. When ordering please give the model of the pistol for
which the part in question is required.
3
Frame
4
Barrel
5
Fixing pin to
barrel and
hammer spring
housing
6
Sear push pin
7
Sear push pin
spring
8
Sear push pin
housing
9
Sear push pin
housing pin
10
Sear
11
Nothing
12
Sear pin
13
Sear rod
14
Trigger
15
Trigger spring
16
Trigger pin
17
Nothing
18
Hammer
19
Cocking Rod
20
Cocking Rod pin
21
Hammer
cocking lever
pin
22
Pin to cocking
rod and
hammer push
pin
23
Hammer
Release lever
24
Nothing
25
Hammer pin
26
Nothing
27
Hammer push
pin
28
Hammer spring
29
Hammer spring
plug
30
Nothing
31
Magazine
32
Magazine spring
33
Trigger Guard
Pressure spring
34
Trigger Guard
Push Pin
35
Trigger Guard
36
Trigger Guard
Pin
37
Slide stop pin
38
Slide stop
39
Left-hand grip
40
Right-hand grip
41
Grip Screw
42
Grip Screw
washer
43
Grip Screw nut
44
Recoil spring
45
Nothing
46
Nothing
47
Slide
48
Back sight
49
Nothing
50
Nothing
51
Nothing
52
Firing pin
53
Firing pin spring
54
Firing pin
pressure spring
55
Firing pin
pressure spring
sleeve
56
Safety-Lever
57
Extractor Spring
58
Safety pin
59
Extractor
pressure pin
60
Extractor
61
Nothing
62
Magazine body
63
Magazine
platform
64
Magazine spring
65
Magazine floor
late catch
66
Nothing
67
Nothing
68
Nothing
69
Nothing
70
Nothing
71
Frame washer
72
Magazine Floor
plate
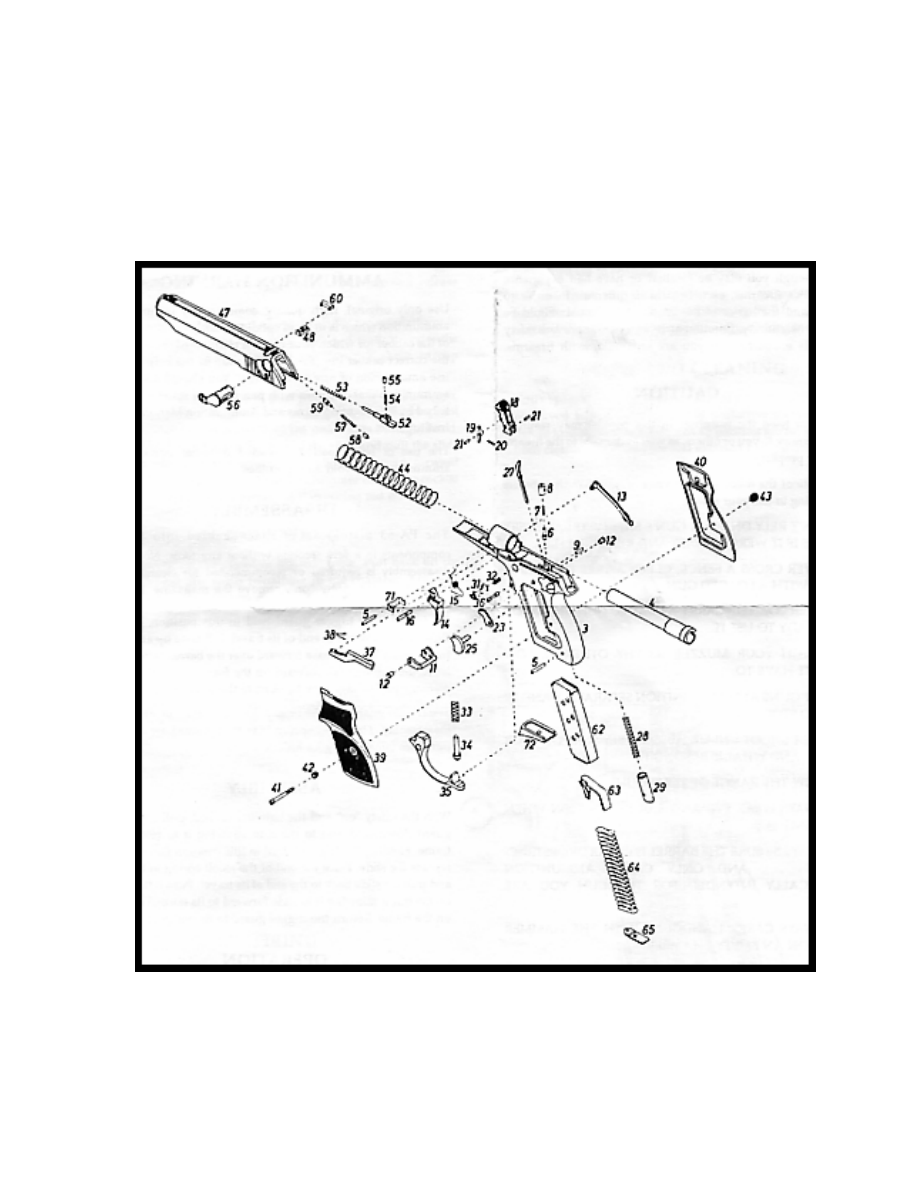
PA-63
PARTS DIAGRAM

WARNING
Always point the muzzle in a safe direction.
Always clean all the grease and oil from the chamber and the bore
before loading. Be sure there is no obstruction in the barrel. Any
foreign object in the barrel could cause a burst barrel or other damage
to the firearm as well as injury to the shooter or others.
Always remember to unload the chamber after removing the
magazine.
Never point a firearm at anything you do not intend to shoot. Always
point the muzzle in a safe direction. Keep your finger off the trigger
until you are ready to fire.
Never leave a firearm cocked and ready to fire. It accidentally could
discharge.
Never fire any pistol with any part of your body over or next to the
ejection port, or any position where you could possibly be hit by the
movement of the slide.
Never allow others to stand beside you where they may be hit by an
ejected cartridge case. Make certain there is an unobstructed path for
safe ejection of the fired case.
Wyszukiwarka
Podobne podstrony:
Manual Walther Laser 2252207 CP99Compact letter
WALTHER P
więcej podobnych podstron