H112/H412(PLUS)
HAND-HELD TRANSCEIVER
USER'S MANUAL
CYBERCOM ELECTRONIC CO.,LTD
2007-04 PRINT IN TAIWAN
PRIOR TO USAGE
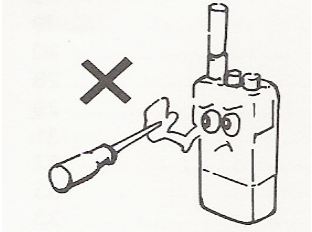
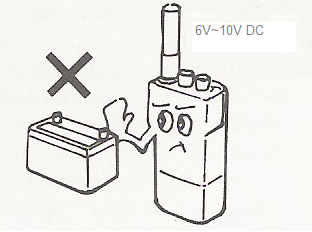
1.Apply 6.0 to 10.0V DC power supply only 2. Do not Disassemble and tamper


with cores and Trimmers The
Transceiver is Production
under strict Control and fully
Adjusted.
3.Keep out of high temperature,jumidity and dust.
CONTROLS AND CONNECTIONS
INSTALL THE BATTERY
REMOVE THE BATTERY
Operation :
Power ON/OFF
Push PWR button at front panel 1 sec. to turn on the radio power, and Push and hold 2 sec. to turn off the radio power.
Select Channel
Push
button at front panel to Up the channel and Push
button at front panel to down the channel.
CALL Channel Operation
Push F button until heard key tone , than release F button and Push CALL button at front panel until key tone , into Call channel , LCD show
Repeat this step again to quick CALL channel
SCAN operation
Push SCAN button at front panel until key tone, turn on scan operation, the radio will scan all programmed channel , when receive one active signal , it will stop and waiting until the signal stop , then continue to scan next channel .
To stop Scan operation , just Push SCAN button again .
LCD background light.
Push F button until heard Key tone than release F button and Push LAMP button , to turn on the LCD background light on or off.
Monitor Operation .
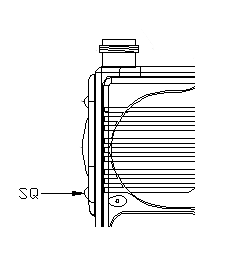
Push SQ button , to turn on Monitor function , the Speaker will turn on always whatever the Signal is coming or not . To stop Monitor function just Push SQ button again.

MANUAL SETTING
PUSH FUNC button and hold 1 second into MANUAL SETTING.
To Push and Hold FUNC button about 1 second , it will auto into manual setup process , and follow below list of sequence to setup each detail .
Push F and hold 1 second Tx output power F Compress on or off
F Scrambler on or off F
5 Tone ANI Encoder on or off F CTCSS or DCS select
F TX CTCSS or DCS tone setup F
RX CTCSS or DCS tone setup F Quit Manual setup .
** “ F “ is Mean Push Func button **
Statement :
STEP 1: TX power output
Push
to switch to Low power
STEP 2 : Voice Compress on of off
Push
to switch to on/off
STEP 3 : Scramble on or off .
Push
to switch to on/off
STEP 4 : 5 tone ANI encoder on or off
Push
to switch to on/off
STEP 5: CTCSS/DCS Select.
Push
to switch to DCS/CTCSS
STEP 6 : TX CTCSS or DCS TONE SETUP
When Choose CTCSS , it will show CTCSS tone at this time.
Push
to switch up or Push
to switch down.
When Choose DCS , it will show DCS CODE at this time .
Push
to switch up or Push
to switch down.
STEP 7 : RX CTCSS or DCS RX TONE SETUP
When Choose CTCSS , it will show CTCSS tone at this time.
Push
to switch up or Push
to switch down.
When Choose DCS , it will show DCS CODE at this time.
Push
to switch up or Push
to switch down.
VOICE VOLUME SET.
DIRECT TO ROTATE THE TOP KNOB TO SELECT THE SPEAKER OUTPUT LEVER
ROTATE THE TOP KNOB
I. LOCK
Push F button until heard key tone then release F button and puch Power button to lock this radio, repeat this step to unlock .
J. DUAL WATCH
Push F button until heard key tone than release F button and push Call button in to call channel , then Push SCAN button go to dual watch function .
Push Scan button to quit the SCAN function.
K. TX operation
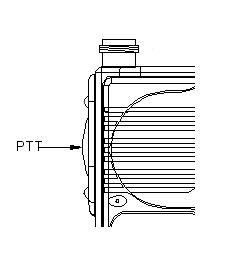
Push PTT button , the radio will in to TX mode .

LOW POWER
HIGH POWER
Note:
Please do not transmit when radio did not connect antenna.
The button push that must to push until hear the key tone , that is mean the push is active .
Please do not charge the battery pack over 24 hours .
When charger the battery, Please turn off the radio power .
When fill the radio body which temperature is very high when not transmits, please remove the battery pack . the radio should be damaged and be dangerous to continue operation . and send back to your local dealer to repair it .

When the LCD's battery lever indicate, and LCD display “LO” , please charge the battery.When Battery at Low Capacity, it will not accept to Transmitted.
2
Display and flash
DISPLAY
Wyszukiwarka
Podobne podstrony:
Operational Manual
6 Operating manual, 0005k
Instrukcja do karabinu M16 OPERATOR MANUAL M16 AND M16A1
FRC OPERATOR MANUAL
Boeing 767 200 300ER 400ER Operating Manual
OPERATOR MANUAL LONG RANGE SNIPER RIFLE CALIBER 50, M107
Player Operating Manual
M9 9x19mm OPERATOR’S MANUAL
Operation Manual E3200 E4000 Generators
DS350 1334 Operators manual
BA MACH4 en Operator's Manual
Heathkit AA 151 Stereo Amplifier Assembly and Operation manual
842 239 21 iTNC530 New Functions SW34049x 07
H857 & H957 Installation & Operator Manual
Operator's Manual for Advanced Combat Helmet
Operation Manual for Ladder Pro Nieznany
468 key pro third generation operation manual
Operational Manual
vr5000 operating manual
więcej podobnych podstron