181
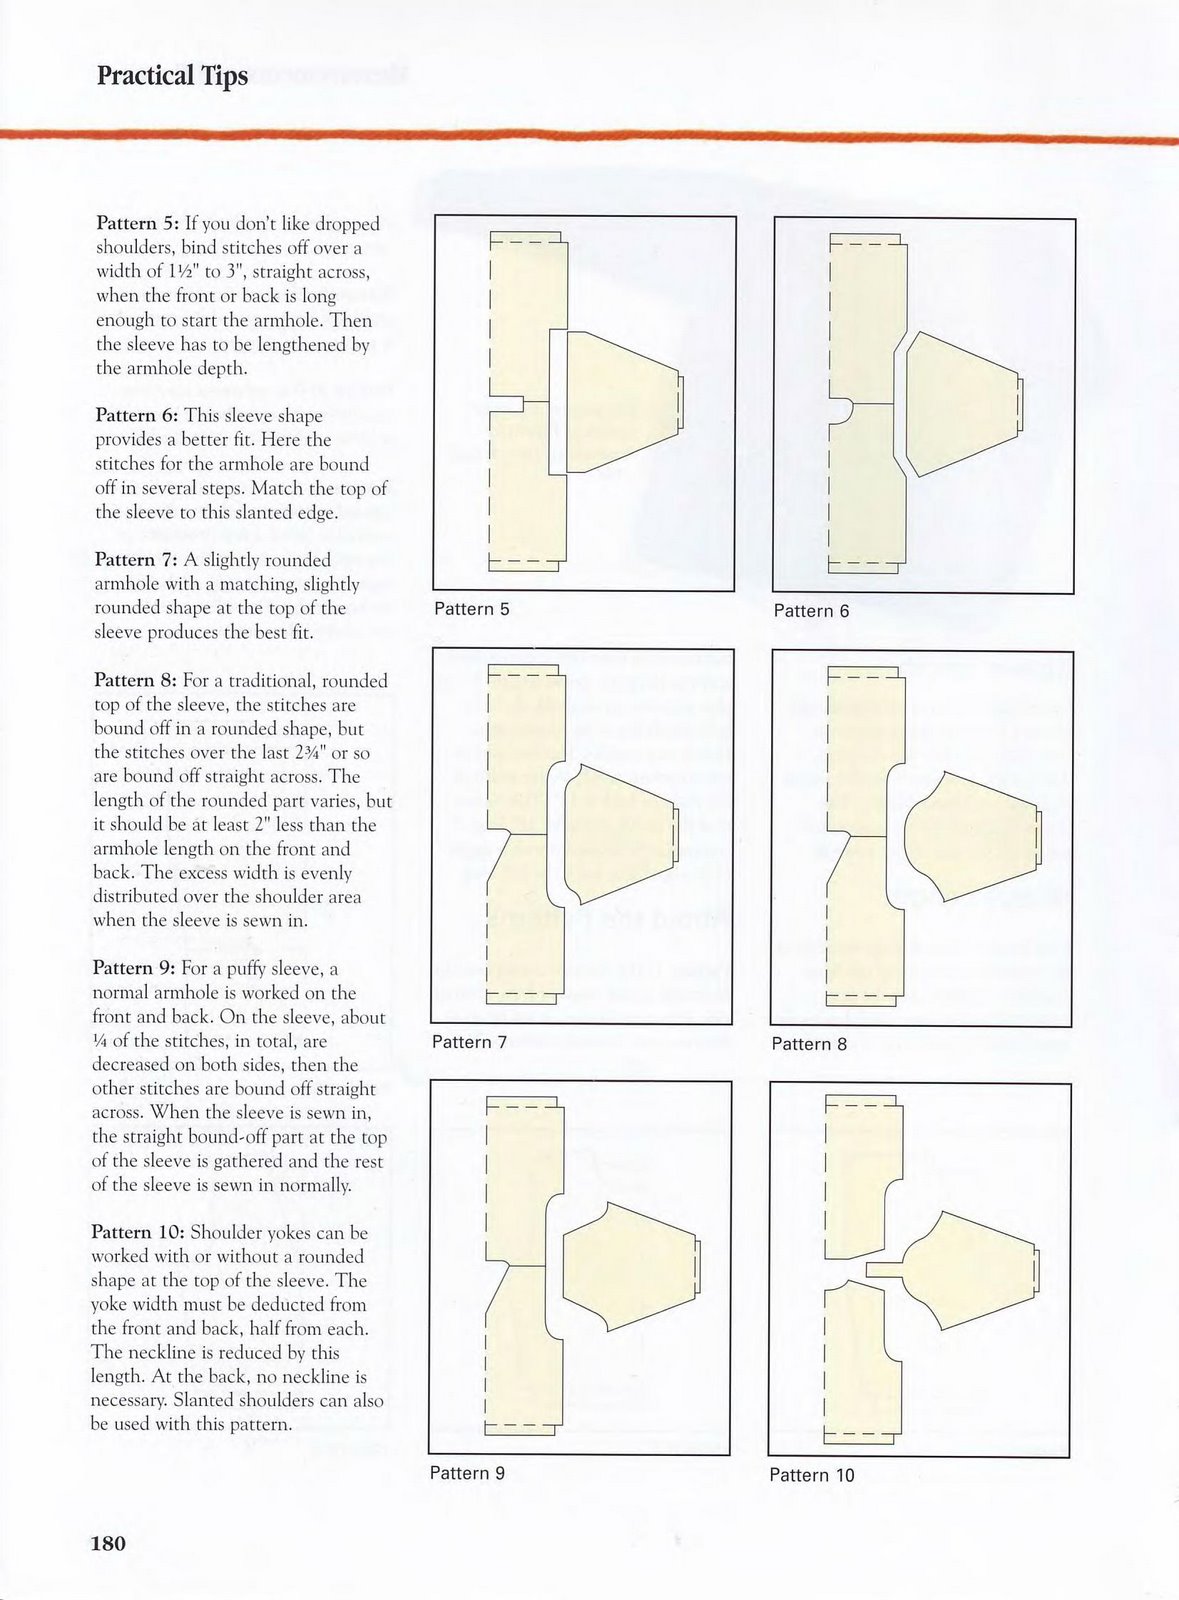
Pattern 5: If you don't like dropped shoulders, bind sticches off over a width of 1 Vi to 3", straight across, when the front or back is long enough to start the armhole. 7 hen the sleeve has to be lengthened by the armhole depth.
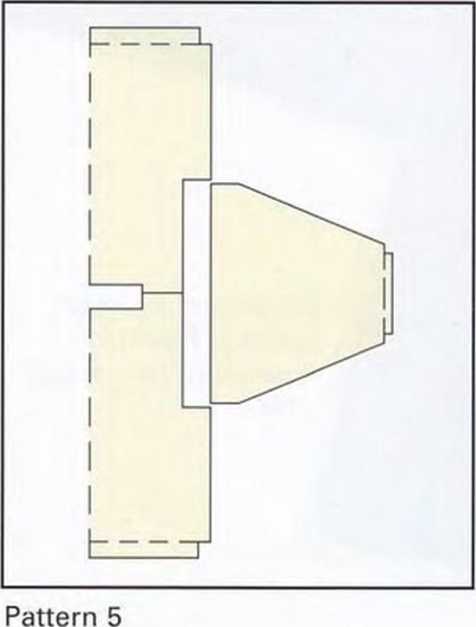
Pattern 6: This sleeve shape provides a better fit. Here the stitches for the armhole are bound off in several steps. Match the top of the sleeve to this slanted edge.
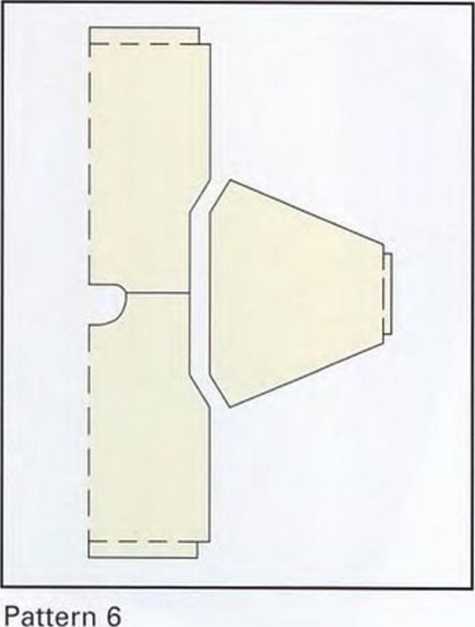
Pattern 7: A slightly rounded armhole with a matching, slightly rounded shape at the top of the sleeve produces the best fit.
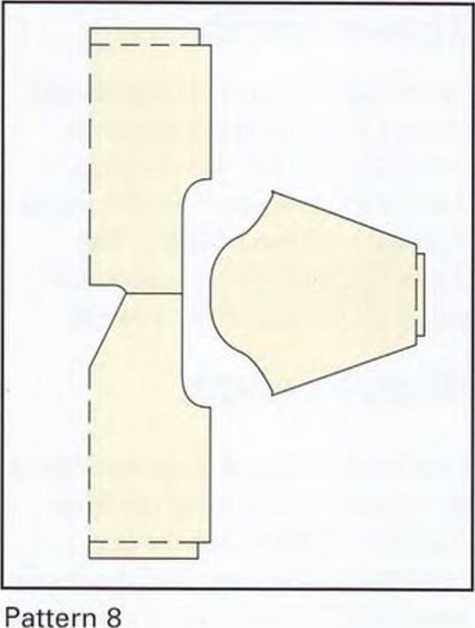
Pattern 8: For a traditional, rounded top of the sleeve, the stitches are bound off in a rounded shape, but the stitches over the last 23/i" or so are bound off straight across. The length of the rounded part varies, but it should be at least 2" less than the armhole length on the front and back. The excess width is evenly distributed over the shoulder area when the sleeve is sewn in.
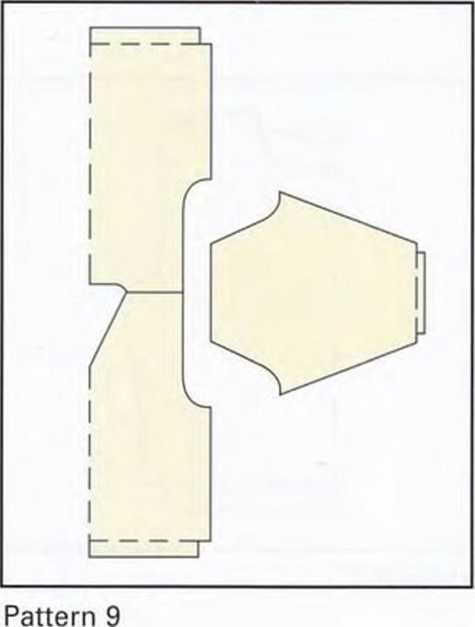
Pattern 9: For a puffy sleeve, a normal armhole is worked on the front and back. On the sleeve, about Vi of the stitches, in total, are decreased on both sides, then the other stitches are bound off straight across. When the sleeve is sewn in, the straight bound-off part at the top of the sleeve is gathered and the rest of the sleeve is sewn in normally.
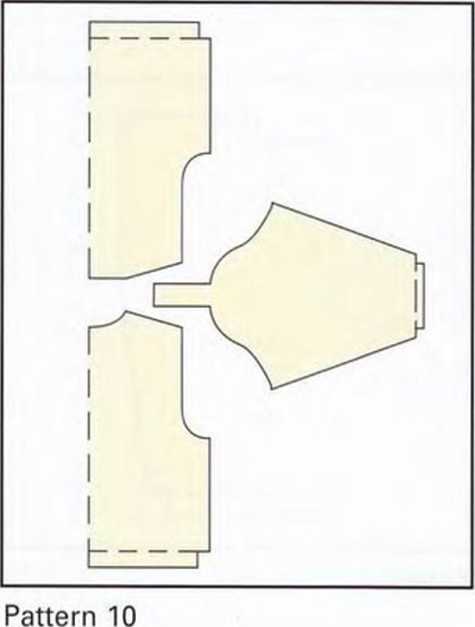
Pattern 10: Shoulder yokes can be worked with or without a rounded shape at the top of the sleeve. The yoke width must be deducted from the front and back, half from each. The neckline is reduced by this length. At the back, no neckline is necessary. Slanted shoulders can also be used with this pattern.
180
Wyszukiwarka
Podobne podstrony:
1aa LIFE.THIS IS YOUR DO WHAT YOU LOVE,AND DO IT OFTEN. IF YOU DONłT LIKE SOMETHING, CHANGE IT. IF Y
jak robić kolczyki str 2 2. Add Beads to the top of the earring according to individual beading pa
1337Zca jpeg You 11 never be brave if you don t get hurt You 11 never learn if you don t make m
You can selecl nonę address selup if you don’1 wanl any IP address You can selecl dynamie address as
3 6 Select a keyboard Please select a keyboard. If you don’t find the exact right choice below, plea
scheme Flyback Driver 47 - 200 pH 10A If you don’t have the irfp250’s you can use a couple of semico
2743 doggie Microsoft If you don t Buy Windows Vista, we won t feed this dog.
16257 skanuj0005 (487) 18 spiracji dla scenariusza. W Damned if You Don t wykorzystano także jego fr
a209128c6df89f4fmed Microsoftfu Windows Vista If you don t Buy Windows Vista, we won t fee
image015 (5) A request. If you use Filt5eq in your musie please send me a copy of the track. I d lov
Practical Tips In this chapter, you will find different pattern shapes, a way to convert patter
img044 (59) FOUR SIMPLE HANDKERCHIEF EDGINGSEDGING B_ This is a very simple little edging which, if
7Put / Don’t put your hand up if you know the answer. 8 Look / Don’t look at the a
więcej podobnych podstron