instr

CoBeTbi no BbiLUMBaHkiK):
- HannHakiTe pa6oiy c onpefleneHMH peHTpa nonoTHa. CoBMecTme ero c pempoM BbiwMBKM, yKa3aHHbiM Ha ABeTHOM cxeMe (S1, S2) CTpenKaMH.
- CxeMa BbiLUMBKH noi<a3aHa Ha 2-x pncyHKax. Ha po30BOM nonoce noKa3aH nocrieflHmźi p«A cxeMbi (S1).
- LjBeia 3H3HKOB (T1) Ha cxeMe (S1, S2) He cooTBeTCTByłOT pBeTy hmtok, ohm noAOÓpaHbi aj™ yAo6cTBa nonb30BaHMH cxeMOM. l_(BeT hmtok CMOTpMTe Ha npoHyMepoBaHHOM nnaiUKe c o6pa3qai\/iM HMTOK.
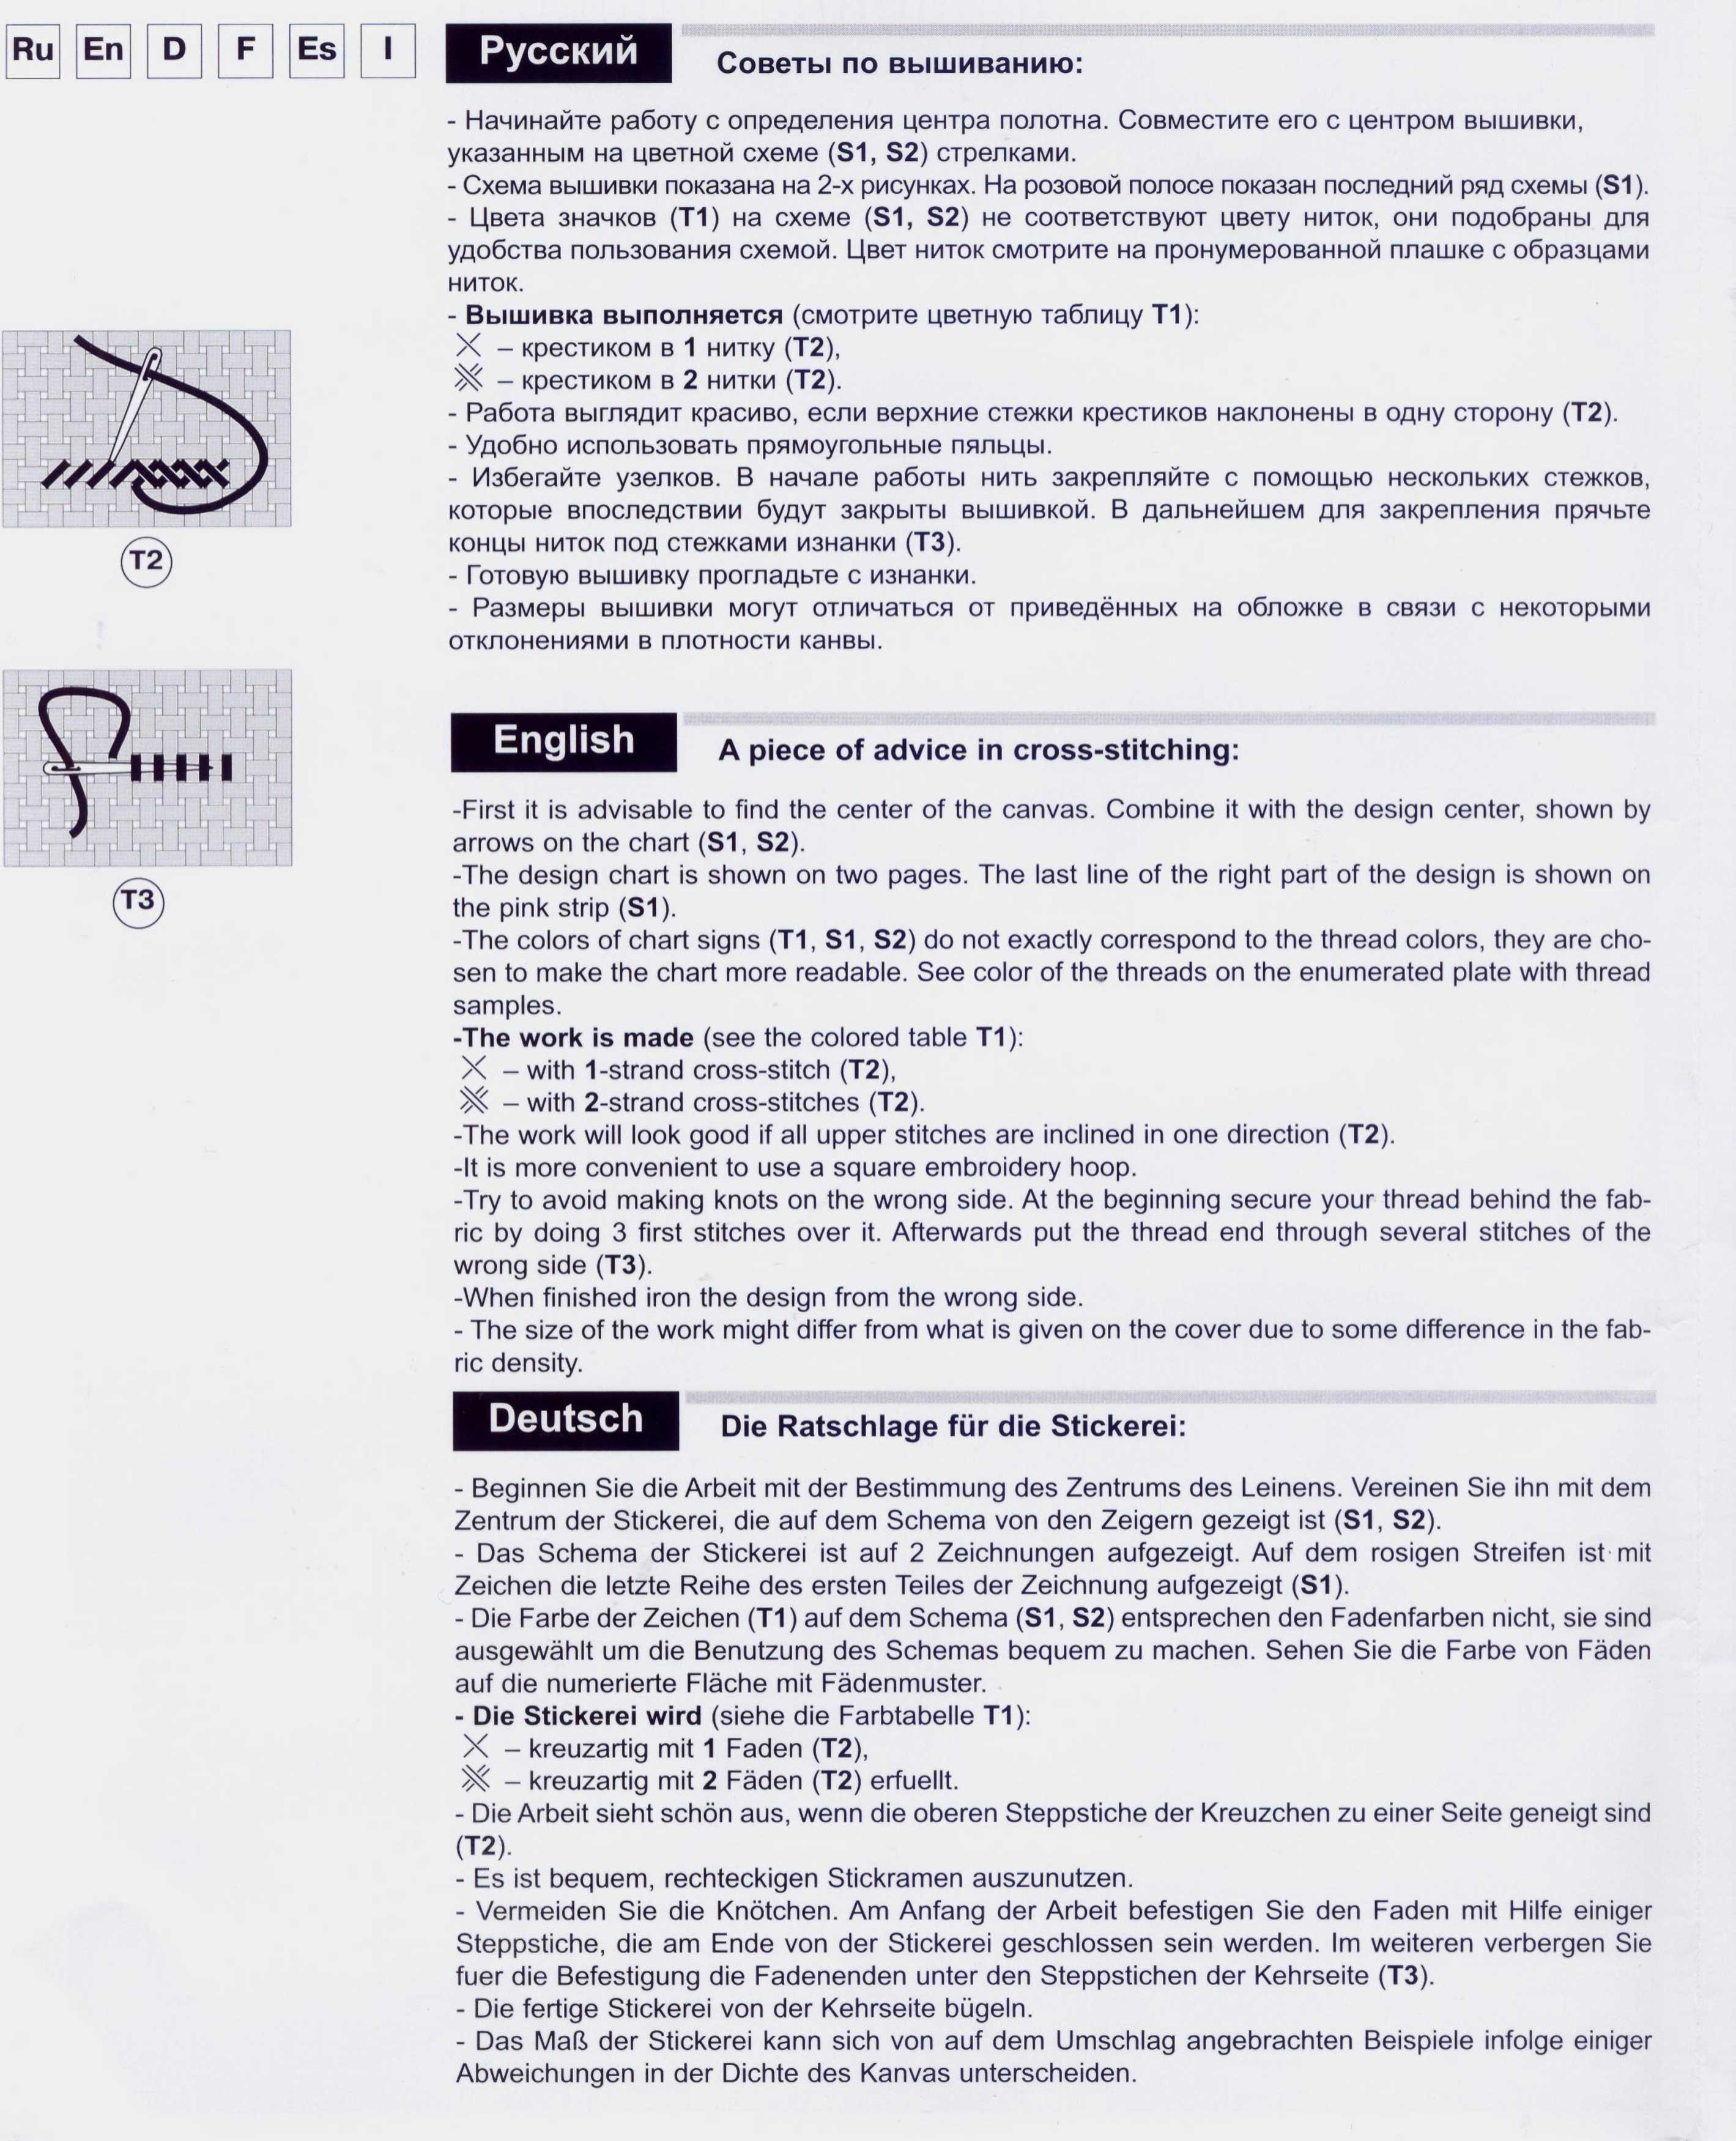
- BbiiuMBKa BbinonHBeTCB (CMOTpMTe ABeTHyio Ta6nMuy T1):
X - KpeCTMKOM B 1 HMTKy (T2),
^ - KpeCTMKOM B 2 HMTKM (T2).
- Pa6oTa BbimriAUT KpacMBO, ecriM BepxHMe CTe>KKM KpecTMKOB HaKnoHeHbi b OAHy cropoHy (T2).
- YaoGho Mcnonb30BaTb npaMoyronbHbie nanbAbi.
- H36eramre y3enKOB. B Hanane pa6oTbi HMTb 3aKpennaMTe c noMOLAbto HecKonbKMx CTe>KKOB, KOTopbie BnocneACTBMM 6yAyT 3aKpbiTbi BbiLUMBKOi/i. B Aa^bHeMiueM A^m 3aKpenneHMH npHMbre KOHAbl HMTOK nOA CTe>KKaMM M3H3HKM (T3).
- ToTOByto BbiLUMBKy npomaAbTe c M3HaHKM.
- Pa3Mepbl BblLUMBKM MOryT OTTIMHaTbCB OT npMBeASHHblX Ha o6nO>KKe B CBB3M C HeKOTOpbIMM OTKTIOHeHMBMM B nflOTHOCTM K3HBbl.

A piece of advice in cross-stitching:
-First it is advisable to find the center of the canvas. Combine it with the design center, shown by arrows on the chart (S1, S2).
-The design chart is shown on two pages. The last linę of the right part of the design is shown on the pink strip (S1).
-The colors of chart signs (T1, S1, S2) do not exactly correspond to the thread colors, they are cho-sen to make the chart morę readable. See color of the threads on the enumerated piąte with thread samples.
-The work is madę (see the colored table T1):
X - with 1-strand cross-stitch (T2),
^ - with 2-strand cross-stitches (T2).
-The work will look good if all upper stitches are inclined in one direction (T2).
-It is morę convenient to use a square embroidery hoop.
-Try to avoid making knots on the wrong side. At the beginning secure your thread behind the fab-ric by doing 3 first stitches over it. Afterwards put the thread end through several stitches of the wrong side (T3).
-When finished iron the design from the wrong side.
- The size of the work might differ from what is given on the cover due to some difference in the fab-ric density.

Die Ratschlage fur die Stickerei:
- Beginnen Sie die Arbeit mit der Bestimmung des Zentrums des Leinens. Vereinen Sie ihn mit dem Zentrum der Stickerei, die auf dem Schema von den Zeigern gezeigt ist (S1, S2).
- Das Schema der Stickerei ist auf 2 Zeichnungen aufgezeigt. Auf dem rosigen Streifen ist mit Zeichen die letzte Reihe des ersten Teiles der Zeichnung aufgezeigt (S1).
- Die Farbę der Zeichen (T1) auf dem Schema (S1, S2) entsprechen den Fadenfarben nicht, sie sind ausgewahlt urn die Benutzung des Schemas bequem zu machen. Sehen Sie die Farbę von Faden auf die numerierte Flachę mit Fadenmuster.
- Die Stickerei wird (siehe die Farbtabelle T1):
X - kreuzartig mit 1 Faden (T2),
^ - kreuzartig mit 2 Faden (T2) erfuellt.
- Die Arbeit sieht schón aus, wenn die oberen Steppstiche der Kreuzchen zu einer Seite geneigt sind
(T2).
- Es ist bequem, rechteckigen Stickramen auszunutzen.
- Vermeiden Sie die Knótchen. Am Anfang der Arbeit befestigen Sie den Faden mit Hilfe einiger Steppstiche, die am Ende von der Stickerei geschlossen sein werden. Im weiteren verbergen Sie fuer die Befestigung die Fadenenden unter den Steppstichen der Kehrseite (T3).
- Die fertige Stickerei von der Kehrseite bugeln.
- Das Mali der Stickerei kann sich von auf dem Umschlag angebrachten Beispiele infolge einiger Abweichungen in der Dichte des Kanvas unterscheiden.
Wyszukiwarka
Podobne podstrony:
40wz4 PMC.1 puc.2 E3ICoBeTbi no BbiLUMBatmio: -HannHaMTe paóory c onpefle/ieHua ueHTpa no/ioTHa. Co8
a (453) PyCCKMM CoeeTbi no BbiaiMBaHUK): - Ha^nHaMTe pa6oiy c onpefleneHMn pem-pa
RUINY NA PLA?Y (1) CoBeTbi no BbiujiiBaHiiio: - UeeTa 3HanK08 Ha cxeMe ne cooTBeTC
M156 i OBLUME MHCTPyKUMM no BbILUMBKE KPECTOM 1. nepen Hana^OM pa6orbi oÓMeTaiue w
Instr 4 Step 6: Examine piece A13 carefully. Enigmatic, no? Now examine the assembly illustration (f
012 (1) Ha 2 rojja.Hhtkh Hapuncc 2 motohke. HannHaerca B&saHne c kokctkh no cxeiviel. CnnHKa. Ha
dzwon 19a Abtcp SatanoTMM A. u. Hance pa6oiy iipoaonaorn, co-raacno cxcmc 6aHT»iKa no 9-fi
JleTOM 1949 r. HannHaeTcn hx noc/ieAHee nyTeuiecTBHe no AMepHKe. TyMSepra npecyie,qyioT nofl03pGHHH
więcej podobnych podstron