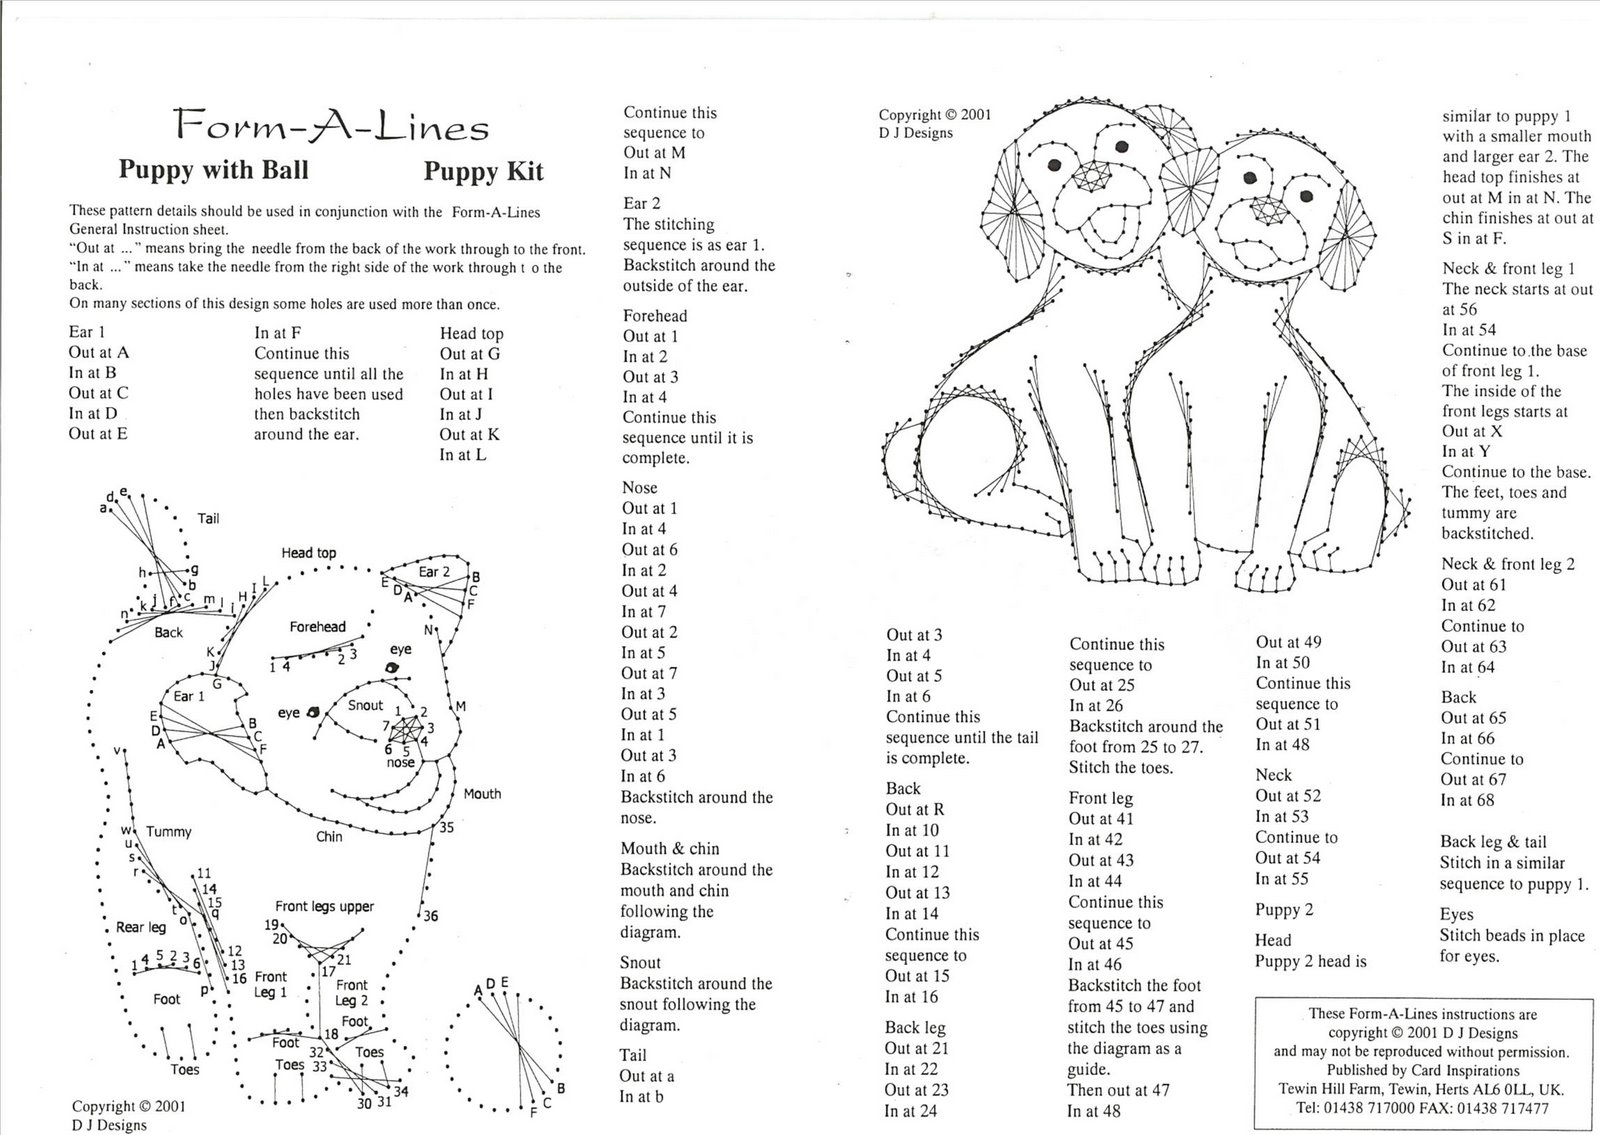
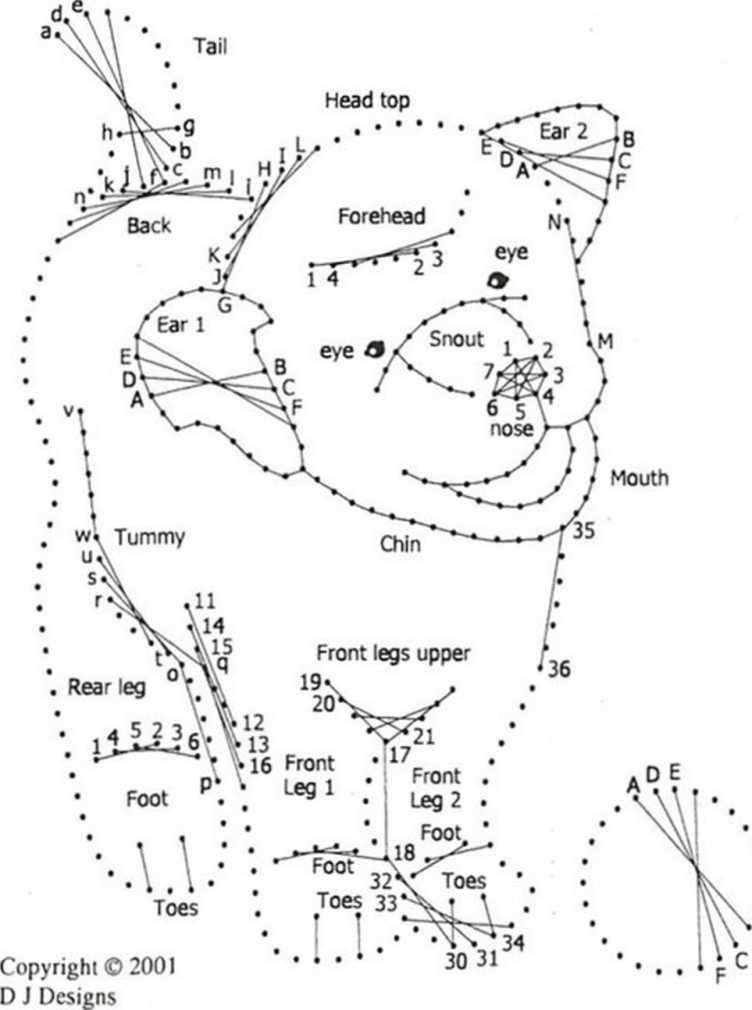
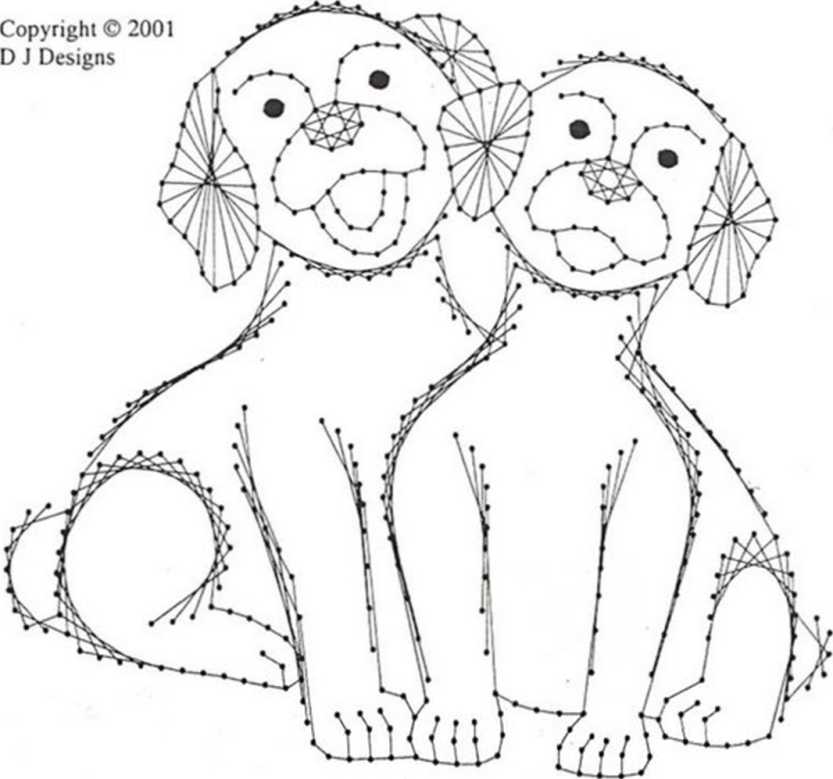
Puppy withºll

Continuc this sequcncc to Out at M In at N
Ear 2
The stilching seÄ…uencc is as car 1. Backstitch around the outside of the ear.
1-orm-^pA-J— ir\es
Puppy with Bali Puppy Kit
These patiem details should be used in conjunction with the Form-A*Lines General Instruction sheet.
*’Out at ..." means bring the needle from the back of the work through to the front. "In at ..." means take the needle from the right side of the work through t o the back.
On many scctions of this design sonie holes are used morÄ™ than once.
Forchead
|
Ear 1 |
In at F |
Hcad top |
Out at 1 |
|
Out at A |
Continuc this |
Out at G |
In at 2 |
|
In at B |
sequence until all the |
In at H |
Out at 3 |
|
Out at C |
holes havc been used |
Out at I |
In at 4 |
|
In at D |
then backstitch |
In at J |
Continuc this |
|
Out at E |
around the ear. |
Out at K In at L |
sequencc until it is complctc. |

Nosc Out at 1 In at 4 Out at 6 In at 2 Out at 4 In at 7 Out at 2 In at 5 Out at 7 In at 3 Out at 5 In at 1 Out at 3 In at 6
Backstitch around the nose.
Mouth & chin Backstitch around the mouth and chin following the diagram.
Snout
Backstitch around the snout following the diagram.
Taił
Out at a In at b similar lo puppy 1 with a smaller mouth and largcr ear 2. The hcad top finishcs at out at M in at N. The chin finishes at out at S in at F.

Neck & front leg 1 The neck starts at out at 56 In at 54
Continuc to .the base of front leg 1.
The inside of the front legs starts at Out at X In at Y
Continuc to the base. The feet, toes and tummy arc backstitched.
Neck & front leg 2 Out at 61
Out at 49 In at 50 Continue this sequcncc to Out at 51 In at 48
Neck Out at 52 In at 53 Continue to Out at 54 In at 55
Puppy 2
Head
Puppy 2 head is
Out at 3 In at 4 Out at 5 In at 6
Continuc this sequcnce until the taił is complete.
Back Out at R In at 10 Out at 11 In at 12 Out at 13 In at 14 Continuc this sequcnce to Out at 15 In at 16
Back leg Out at 21 In at 22 Out at 23 In at 24
Continue this sequencc to Out at 25 In at 26
Backstitch around the foot from 25 to 27. Stitch the toes.
Front leg Out at 41 In at 42 Out at 43 In at 44 Continue this sequence to Out at 45 In at 46
Backstitch the foot from 45 to 47 and stitch the toes using the diagram as a guide.
Then out at 47 In at 48
In at 62 Continue to Out at 63 In at 64
Back Out at 65 In at 66 Continue to Out at 67 In at 68
Back leg & taił Stitch in a similar sequencc to puppy 1
Eyes
Stitch bcads in place for eyes.
Thcsc Form-A-Lines instructions arc copyright © 2001 D J Dcsigns and may not be reproduced without permission.
Published by Card Inspirations Tewin Hill Farm, Tewin, Herts AIj6 0IT, UK. Tcl: 01438 717000 FAX: 01438 717477
Wyszukiwarka
Podobne podstrony:
form a line?lebrations kit glasses 2 Glass 1 Oul at A in at B Out at C in at D Out at E in at
Bridge Page 1 House patiem continuedfrom previous page. Pillars Out at G in at H Out at I in at J Ou
goldfish?nciers Coldfish Fanciers Were sorry, but were not even permittcd to /itot at wha the Sccrct
.AoukdBusiness As dn electwe program at Richards the business department is madÄ™ up of stu-dents who
56b Out at D through the bead and in at C. Out at F through the beads and in at G. Out at F through
Student access codęMyEnglishLab USE THIS CARO TO ACCESS YOUR DIGITAL PRODUCTMyEnglishLab FOR THE&nbs
w01U that a stuffed pad was nailed on to protect at least the fist and possibly the forearm, as seen
Scan0056 acceptable (that is to say, appropriate in context) without being grammatically well-formed
00453 ?960d11ee48a490cc71f653328fb9cc 458 Russell set. Especially when the retrace "pattem&quo
skanowanie0065 (5) 11.2.6. What a teacher needs to know to teach grammar: H Pattem and form, e.g. th
File0030 1 Gel readv to LISTEN Work in pairs. Answer the questions. 1 Do you live
więcej podobnych podstron