36 (494)


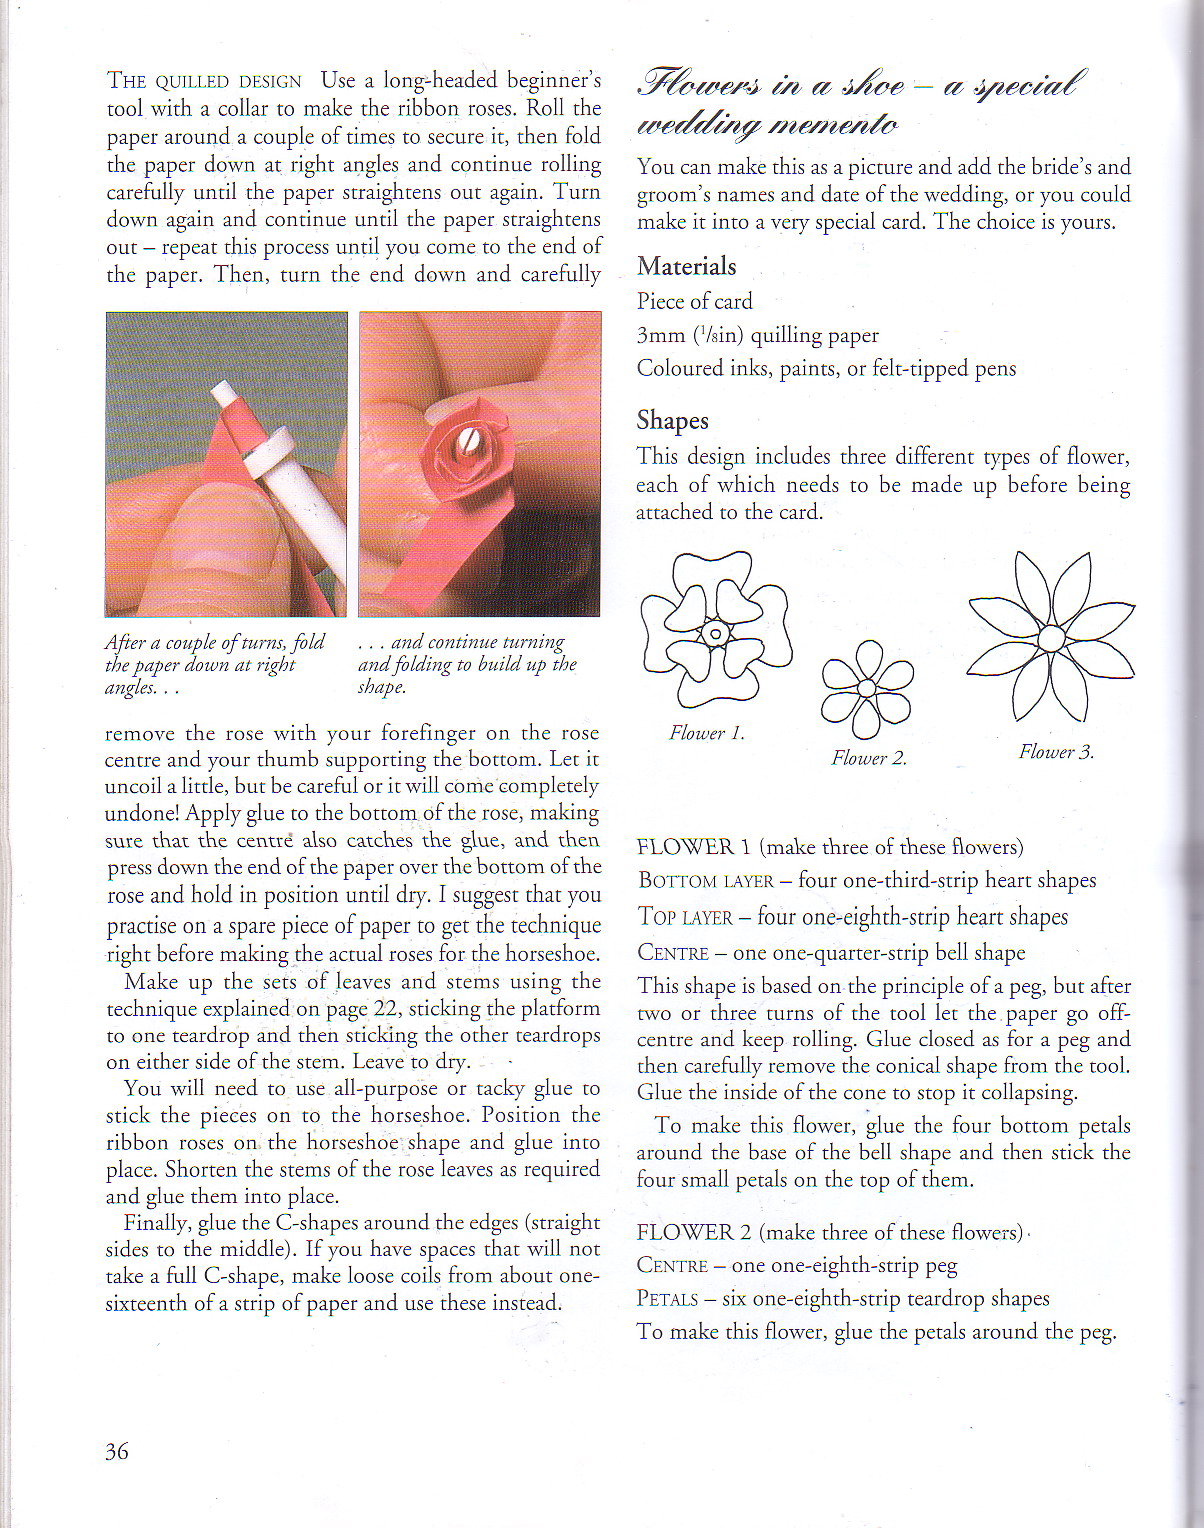
Flower 1.
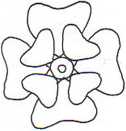
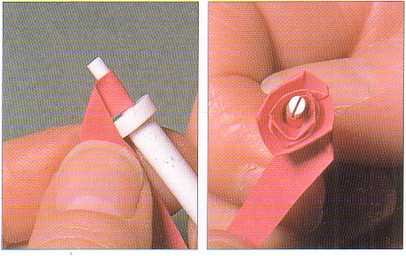
The QUILLED DESIGN Use a long-headed beginners tool with a collar to make the ribbon roses. Roli the paper around a couple of times to secure it, then fold the paper down at right angles and continue rolling carefully until the paper straightens out again. Tum down again and continue until the paper straightens out - repeat this proccss until you come to the end of the paper. Then, turn the end down and carefully

After a couple oftums, fold . . . and continue turning the paper down at right and folding to build up the
angles. . . shape.
remove the rosę with your foreflnger on the rosę centre and your thumb supporting the bottom. Let it uncoil a little, but be careful or it will come eompletely undone! Apply glue to the bottom of the rosę, nraking sute that the centre aiso catches the glue, and then press down the end of the paper over the bottom of the rosę and hołd in position until dry. I suggest that you practise on a spare piece of paper to get the techniąue right before making the actual roses for the horseshoe.
Make up the sets of Jeaves and stems using the techniąue explaincd on page 22, sticking the platform to one teardrop and then sticking the other teardrops on either side of the stem. Leave to dry.
You will need to use all-purpose or tacky glue to stick the pieces on to the horseshoe. Position the ribbon roses on the horseshoe shape and glue into place. Shorten the stems of the rosę leaves as reąuired and glue them into place.
Finally, glue the C-shapes around the edges (straight sides to the middle). If you have spaces that will not take a fuli C-shape, make loose coils from about one-sixteenth of a strip of paper and use these instead.
dri&e&em m a •} Aoe — a wer/r/mp /nwne/ł/o
You can make this as a picture and add the bride’s and grooirfs names and datę of the wedding, or you could make it into a very special card. The choice is yours.
Materials
Piece of card
3mm ('/sin) ąuilling paper
Coloured inks, paints, or felt-tipped pens
Shapes
This design includes three different types of flower, each of which needs to be madę up before being attached to the card.

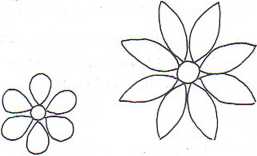
Flower 2. Flower 3.
FLOWER 1 (make three of these flowers)
BOTTOM 1.AYER - four one-third-strip heart shapes Top LAYER - four one-eighth-strip heart shapes CENTRE - one one-quarter-strip beli shape This shape is based on the principle of a peg, but after two or three turns of the tool let the paper go off-centre and keep rolling. Glue closed as for a peg and then carefully remove the conical shape from the tool. Glue the inside of the cone to stop it collapsing.
To make this flower, glue the four bottom petals around the base of the beli shape and then stick the four smali petals on the top of them.
FLOWER 2 (make three of these flowers) •
Centre - one one-eighth-strip peg
PETALS - six one-eighth-strip teardrop shapes
To make this flower, glue the petals around the peg.
36
Wyszukiwarka
Podobne podstrony:
Quilled furnitiire madę for an enchanting cottage. Very easy to make and with imagination many vari-
IMG (2) The Grid Work Design Use half a sheet of A4 parchment and stick down onto your grid of
96 (36) u e $ lFLORENTINE FLOWER BOX The Florentine Flower Box is a festival of vibrant and spirited
How to use this book B Iłem (o ciił with .scissors Show your child how to cut along the designated l
36 (350) 66 The Viking Age in Denmark type hall, up to thirty mctres long, which lacks the linę of r
gramatyka0001 Oą>[l[(sD li. Combine each pair of sentences. Use the second sentenee to make a rel
GEWi55 Moreover, every GEWISS product is always designed, manufactured and tested in conformity with
Automated measurements with ready-to-use test templates OTA measurements - SISO and MIMO T
IMGF76 (7) FIGURĘ 14-36. Alcoholic cirrhosis. A. The surface of the liver displays mnumerable smali,
Kavicsfestés I 13 Paint the hoad Use a bright color and your iarge brush to paint the fish s head
Kavicsfestés I 34 Palii t the open spaces Use a medium or large brush with black paint to darken t
Kavicsfestés I 57 O © (S>Paint the cyes When the biack paint is dry, use your smali brush and w
więcej podobnych podstron