
Tutorial: Working with layout
Welcome to CorelDRAW, a comprehensive vector-based drawing program for the graphics professional.
This tutorial introduces the layout and organization tools in CorelDRAW. These tools are essential for any kind of
project, whether it is an advertisement, newsletter, logo, poster, or any kind of artwork. Guided by your sense of
layout and design, you can use guidelines, preset alignments, and absolute values to organize text and images
for optimum results.
During the course of this tutorial, you will create an advertisement for The Coffee Shop. You will create some of
the design elements and text, but you will also learn how to import images and text.
to view what your final project should look like.
What you will learn
In this tutorial, you will learn how to
§
create backgrounds
§
use guidelines and snapping options
§
create frames
§
import images
§
use the PowerClip tool
§
apply preset drop shadows
§
work with artistic text
§
import and format paragraph text
§
apply alignment options
Creating the background
You’ll start by opening a new document and customizing the drawing page dimensions. Then, you’ll create the
background: a gold colored rectangle with rounded corners. After you create the background, you’ll apply the rest
of the advertisement’s graphics and text.
In this project, you’ll use the default units of measure in CorelDRAW: inches. However, you can use many others,
including points, pixels, and centimeters.
To create a drawing page
1
Click
File
menu }
New
.
2
On the prop erty bar, en sure the
Por trait
but ton
is en abled.
3
In the
Pa per
size
boxes
on the prop erty bar, type the fol low ing di men sions:
Width:
7
Height:
10
4
Press
En ter
.
1 of 15
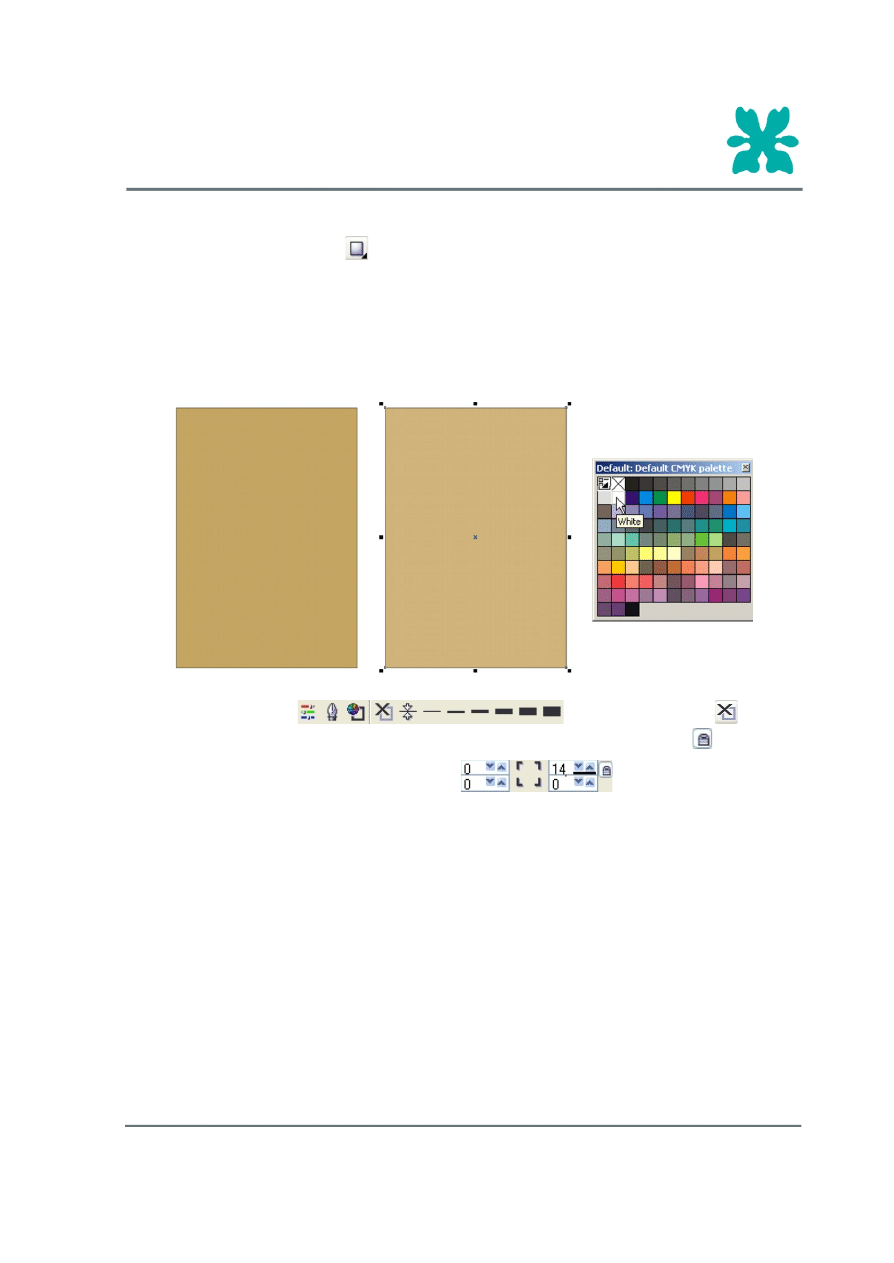
To create the background
1
Dou ble-click the
Rect an gle
tool
.
A rectangle the size of the drawing page is created.
2
If the
CMYK color pal ette is not dis played, click
Win dow
menu }
Color pal ettes
}
De fault CMYK pal ette
.
3
On the color pal ette, click the
Gold
color swatch.
4
Hold down
Ctrl
(Win dows) or
Com mand
(Mac OS), and click the
White
color swatch 3 times to lighten the
back ground color.
5
Open the
Out line
flyout
, and click
No out line
.
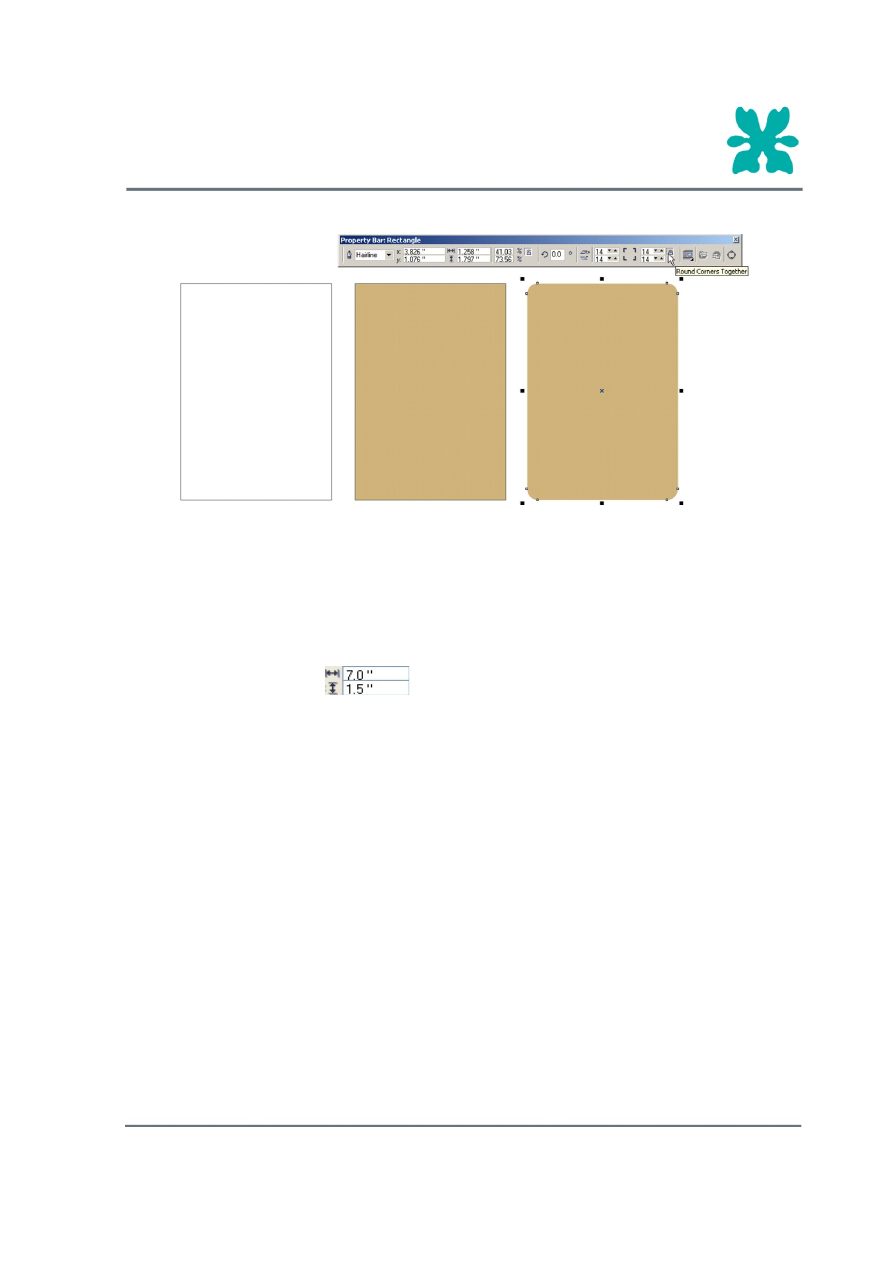
6
With the back ground rect an gle se lected, en sure that the
Round cor ners to gether
but ton
on the prop erty
bar is en abled.
7
In one of the
Rect an gle cor ner round ness
boxes
on the prop erty bar, type
14
.
8
Press
En ter
.
Tutorial: Working with layout
2 of 15
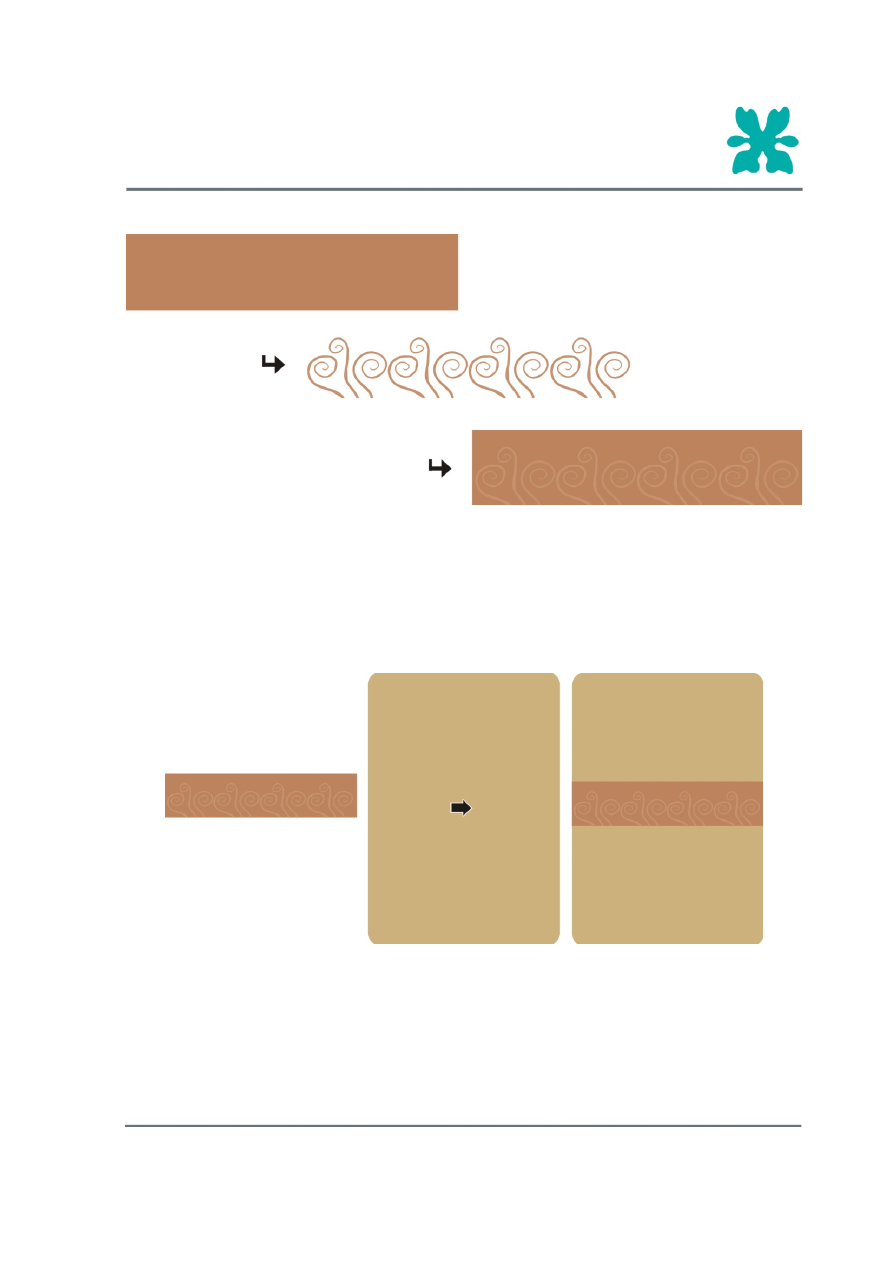
Adding a bottom border
First, you’ll create the bottom border. Then, you’ll import a design and add it to the border. Finally, you’ll use the
PowerClip tool to position and align the bottom border in the layout.
To create the bottom border
1
With the
Rect an gle
tool still se lected, drag out side the draw ing page (back ground) to draw a rect an gle.
2
In the
Ob ject(s) size
boxes
on the prop erty bar, type the fol low ing di men sions:
Width:
7
Height:
1.5
3
Press
En ter
.
4
On the color pal ette, click the
Red brown
color swatch to add a fill to the rect an gle and right-click (Win dows)
or
Con trol
+ click (Mac OS) the
Red brown
color swatch to color the out line.
To add a design to the bottom border
1
Click
File
menu }
Im port
.
2
Choose the folder where CorelDRAW is in stalled.
3
Choose the folder
Corel Graph ics 11\Tu to rials\Sam ple files
.
4
Dou ble-click the file name
steam.cdr
.
5
Click out side the draw ing page.
6
With the im ported im age still se lected, drag the cen ter
X
han dle to po si tion the steam within the red-brown
bot tom bor der as shown in the ex am ple af ter the pro ce dure.
7
Hold down
Shift
, and click the red-brown bot tom bor der to se lect the two ob jects to gether.
8
Click
Ar range
menu }
Group
.
Tutorial: Working with layout
3 of 15
To position the bottom border in the background
1
Click
Ef fects
menu }
PowerClip
}
Place in side con tainer
.
A black arrow displays in the drawing window.
2
Click the back ground.
Tutorial: Working with layout
4 of 15
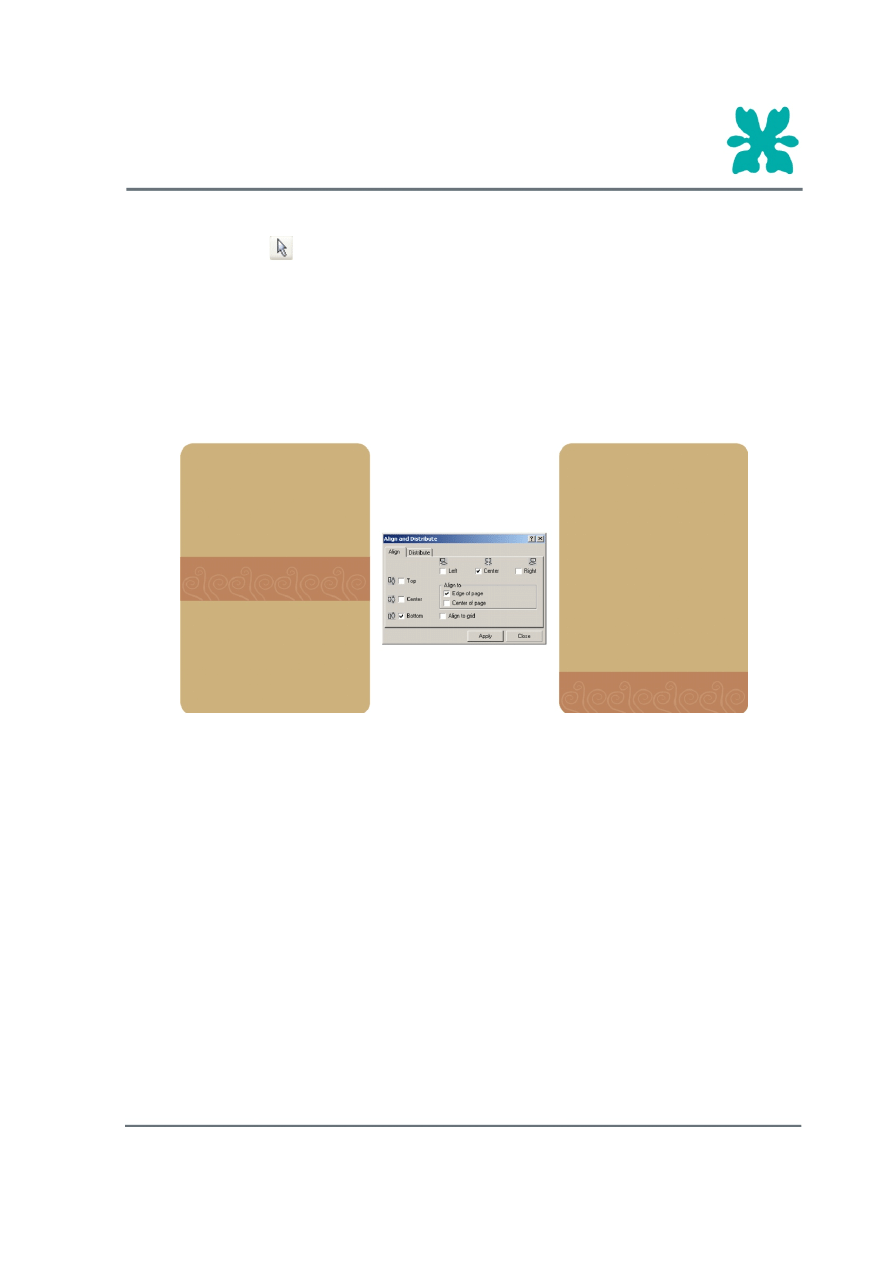
3
Click
Ef fects
menu }
PowerClip
}
Edit con tents
.
4
Using the
Pick
tool
, se lect the bot tom bor der.
5
Click
Ar range
menu }
Align and dis trib ute
}
Align and dis trib ute
.
6
In the
Align and dis trib ute
di a log box, en able the fol low ing op tions:
Ver ti cal align ment
:
Bot tom
Hor i zon tal align ment
:
Cen ter
Align to
:
Edge of page
7
Click
Ap ply
, and click
Close
.
8
Click
Ef fects
menu }
PowerClip
}
Fin ish ed it ing this level
.
Setting the guidelines
You will compose the advertisement using graphics and text in an interesting and effective layout. Guidelines will
help you align and position objects on the page.
In this tutorial, you’ll set guidelines using two methods: specifying values and dragging guidelines to the drawing
page. After you set your guidelines, you’ll lock them into place.
Before you begin, ensure that guidelines are enabled. Click
View
menu }
Guide lines
. A check mark be side
Guide lines
in di cates that the guide lines are en abled.
To set the center guidelines using alignment options
1
If the rul ers do not dis play, click
View
menu }
Rulers
.
2
Click in side the hor i zon tal ruler, and drag a guide line to any where on the draw ing page.
3
Click in side the ver ti cal ruler, and drag a guide line to any where on the draw ing page.
4
Hold down
Shift
, and se lect both guide lines us ing the
Pick
tool.
By default, a selected guideline displays in red.
Tutorial: Working with layout
5 of 15
5
Click
Ar range
menu }
Align and dis trib ute
}
Align and dis trib ute
.
6
In the
Align to
area, en able the
Cen ter of page
check box.
7
Click
Ap ply
, and click
Close
.
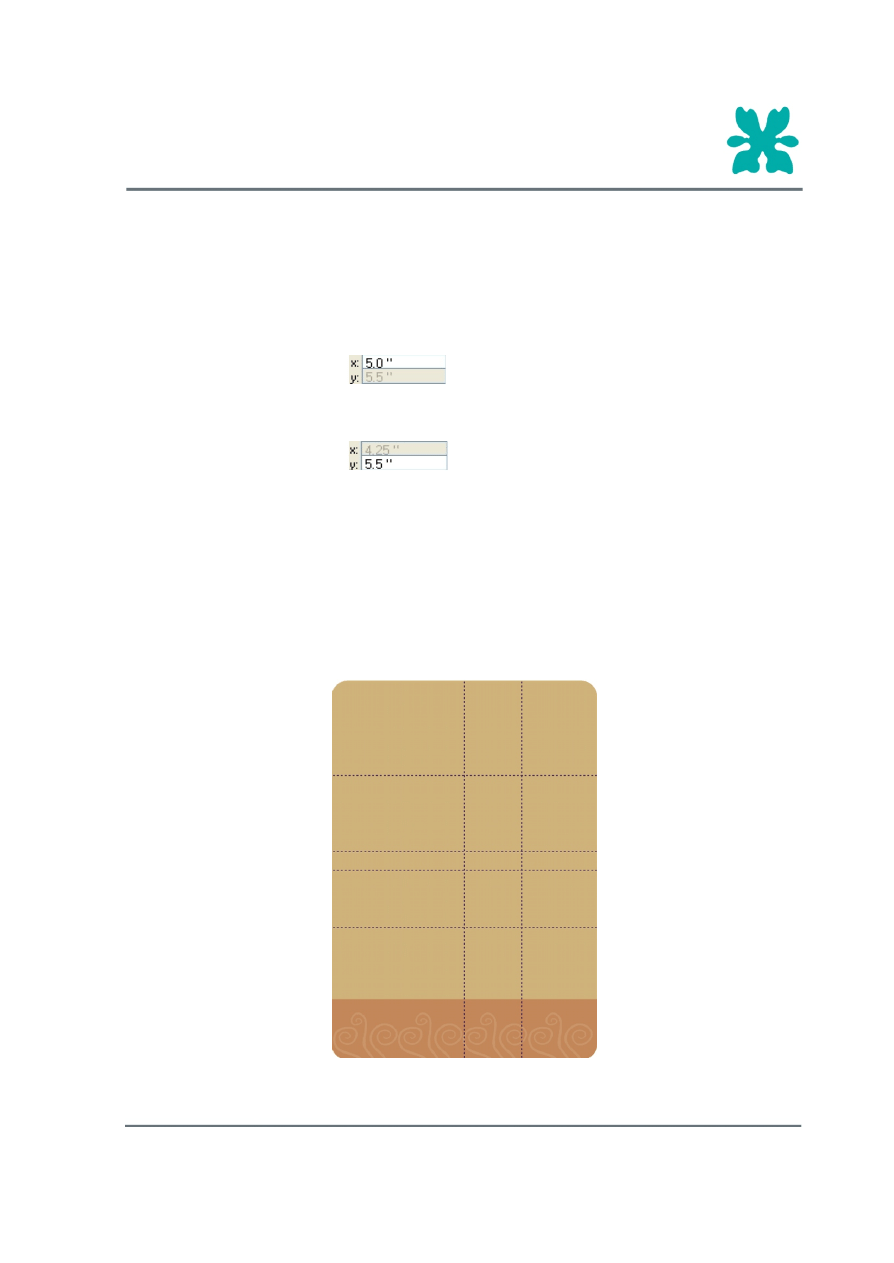
To set guidelines using the property bar
1
Click in side the ver ti cal ruler, and drag a guide line to any where on the draw ing page.
2
In the
x Ob ject po si tion(s)
box
on the prop erty bar, type
5
.
3
Press
En ter
.
4
Click in side the hor i zon tal ruler, and drag a guide line to any where on the draw ing page.
5
In the
y Ob ject po si tion(s)
box
on the prop erty bar, type
5.5
.
6
Press
En ter
.
To set guidelines using the main menu
1
Click
View
menu }
Guide lines setup
.
2
In the
Op tions
(Win dows) or
Pref er ences
(Mac OS) di a log box, click
Hor i zon tal
in the list of cat e go ries.
3
In the nu meric field, type
7.5
, and click
Add
.
4
Type
3.5
, and click
Add
again.
5
Click
OK
.
Tutorial: Working with layout
6 of 15
To lock all guidelines
1
Click
Edit
menu }
Se lect all
}
Guide lines
.
2
Click
Ar range
menu }
Lock ob ject
.
3
Save your file.
Adding an image
The advertisement’s message is that the Coffee Shop’s product starts with high quality beans. An image of a
coffee cup resting on a bed of coffee beans visually makes the point.
Here, you’ll create a rectangular frame and import an image into it. Then, you’ll use the guidelines to align the
framed image. Finally, you’ll add a drop shadow to the frame.
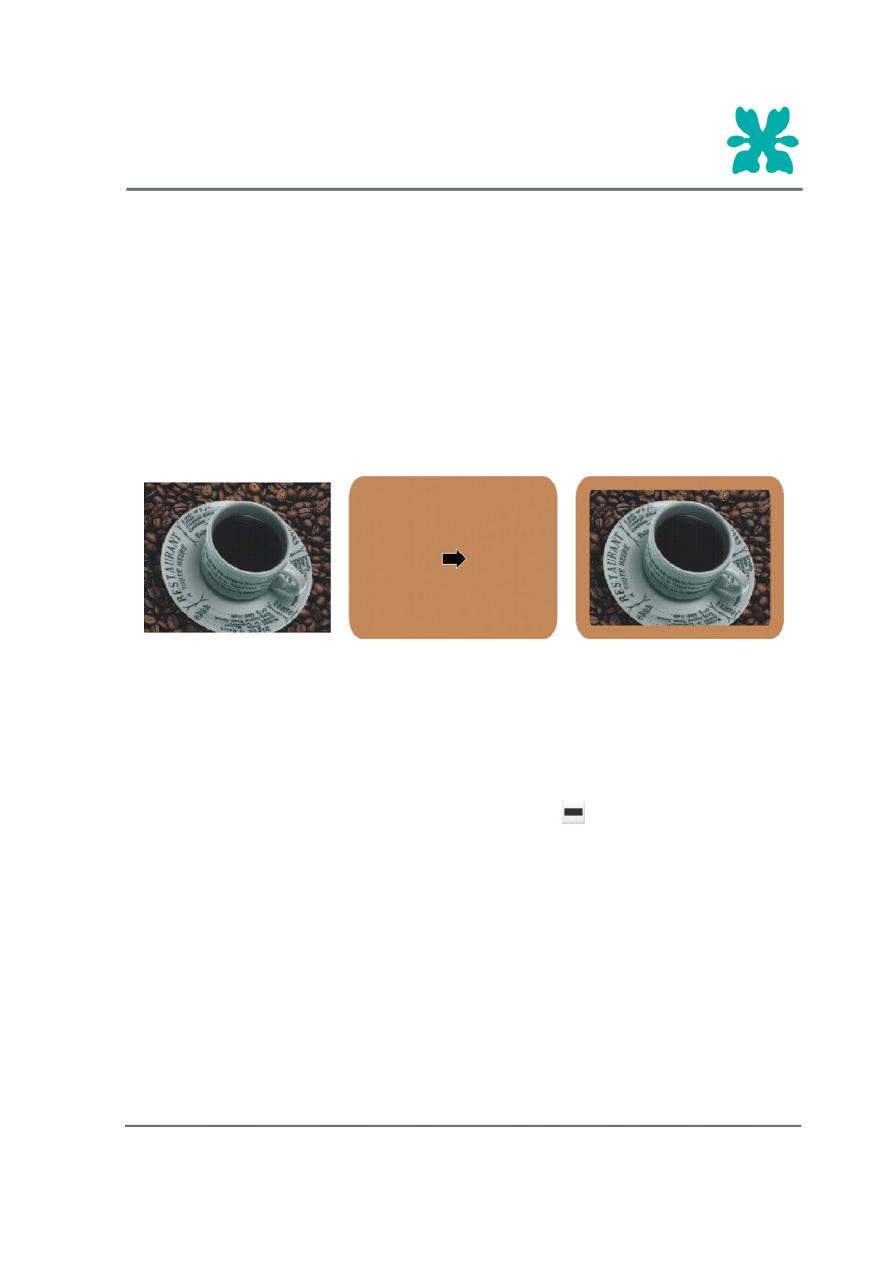
To create the frame
1
Click the
Rect an gle
tool, and drag out side the back ground to draw a rect an gle.
2
With the rect an gle se lected, type the fol low ing di men sions in the
Ob ject(s) size
boxes:
Width:
5.25
Height:
4
3
Press
En ter
.
4
Open the
Out line
flyout, and click
16 point out line (me dium-thick)
.
5
On the
CMYK
color pal ette, click the
Red brown
color swatch to fill the rect an gle and right-click (Win dows) or
Con trol
+ click (Mac OS) the
Red brown
color swatch to color the out line.
6
In a
Rect an gle cor ner round ness
box on the prop erty bar, type
20
.
7
Press
En ter
.
To import the image
1
Click
File
menu }
Im port
.
2
Choose the folder where CorelDRAW is in stalled.
3
Choose the folder
Corel Graph ics 11\Tu to rials\Sam ple files
.
4
Dou ble-click the file name
cof fee_photo.jpg
.
5
Click be low the red-brown rect an gle you cre ated ear lier.
Tutorial: Working with layout
7 of 15

To insert the image in the frame
1
Click
Ef fects
menu }
PowerClip
}
Place in side con tainer
.
2
Click the red-brown rect an gle.
To align the framed image
1
Click
Ef fects
menu }
PowerClip
}
Place in side con tainer
.
2
Click the back ground.
3
Click
Ef fects
menu }
PowerClip
}
Edit con tents
.
4
Click
View
menu }
Snap to guide lines
.
A check mark beside
Snap to guide lines
in di cates that snap ping to guide lines is en abled.
5
Click the framed im age, and drag it, so that its right bor der snaps to the 5" ver ti cal guide line and its bot tom
bor der snaps to the 5.5" hor i zon tal guide line.
The frame nodes snap to the guidelines.
6
Open the
In ter ac tive tools
flyout
, and click the
In ter ac tive drop shadow
tool
.
7
From the
Pre sets
list box on the prop erty bar, choose
Flat bot tom right
.
8
Click
Ef fects
menu }
PowerClip
}
Fin ish ed it ing this level
.
Tutorial: Working with layout
8 of 15

Adding artistic text
You’re ready to add copy to the advertisement. You’ll start by adding two headings in artistic text to the
advertisement. Because the headings are brief, you’ll type the text directly in the drawing window. Then you’ll
format and align the text to the guidelines.
To add the first heading
1
Click the
Text
tool
.
2
Click in the blank area un der the cof fee im age, and type
What do you take in your cof fee?
.
3
Tri ple-click the text to high light the en tire line.
4
On the prop erty bar, do the fol low ing:
choose
GoudyOlSt BT
from the
Font list
list box
.
choose
48
from the
Font size
list box
.
click the
Bold
but ton
.
click the
Hor i zon tal align ment
but ton
, and click
Right
.
5
On the
CMYK
color pal ette, click the
White
color swatch.
6
In sert the cur sor be fore the word
take
, and press
En ter
.
7
In sert the cur sor be fore the word
your
, and press
En ter
.
8
High light the let ter
W
.
9
On the prop erty bar, do the fol low ing:
choose
TypoUpright BT
from the
Font list
list box.
type
104
in the
Font size
list box.
10
Press
En ter
.
To align the first heading
1
Using the
Pick
tool, se lect the text.
2
Drag the cen ter
X
han dle to the in ter sec tion of the hor i zon tal 7.5" guide line and the ver ti cal 5" guide line.
The center X handle snaps to the intersection of the two guidelines.
Tutorial: Working with layout
9 of 15

To add the second heading
1
Click the
Text
tool.
2
Click out side the back ground, and type the fol low ing text:
THE FINEST BEANS. (Thank you)
3
In sert the cur sor be fore
(Thank you)
, and press
En ter
.
4
Click at the be gin ning of the text, and drag over it to high light it.
5
On the prop erty bar, do the fol low ing:
choose
GoudyOlSt BT
from the
Font list
list box.
choose
24
from the
Font size
list box.
click the
Bold
but ton.
click the
Hor i zon tal align ment
but ton, and click
Cen ter
.
To align the second heading
1
Using the
Pick
tool, se lect the text.
2
Drag the cen ter
X
han dle to the ver ti cal 3.5” (page cen ter) guide line, and snap the text’s top se lect han dles to
the hor i zon tal 5" guide line.
Tutorial: Working with layout
10 of 15

Adding paragraph text
Earlier, you added artistic text, a text format suitable for short lines such as headings, or if you want to apply
effects to the text. Paragraph text is a text format suitable for larger bodies of text as it allows you to specify
formatting attributes such as bullets, tabs and more. Paragraph text can be either imported from a text file or
copied into a text frame directly.
Here, you’ll import copy from the text file provided, and place it into a rectangular light-golden frame. Then, you’ll
align the framed text in the layout.
To import the paragraph text
1
Click the
Text
tool.
2
Drag out side the back ground to draw a text frame ap prox i mately 4.8” wide and 1.3” high.
3
Click
File
menu }
Im port
.
4
Choose the folder where CorelDRAW is in stalled.
5
Choose the folder
Corel Graph ics 11\Tu to rials\Sam ple files
.
6
Click the file name
ad_copy.txt
.
7
Click
OK
.
You can also open the text file in a text editor, and copy and paste the text into the text frame.
Tutorial: Working with layout
11 of 15

To format the paragraph text
1
Click at the be gin ning of the para graph text, and drag over to high light it.
2
Click
Text
menu }
For mat text
.
3
In the
For mat text
di a log box, click the
Char ac ter
tab.
4
Set the font to
GoudyOlSt 12 pt
.
5
Click the
Para graph
tab.
6
From the
Align ment
list box, choose
Cen ter
.
7
Click the
Col umns
tab.
8
En able the
Au to matically ad just frame width
op tion.
9
Click
OK
.
If necessary adjust the text frame height by dragging the bottom dotted line up.
To create a frame for the paragraph text
1
Click the
Rect an gle
tool
, and drag out side the back ground to draw a rect an gle.
2
In the
Ob ject(s) size
boxes on the prop erty bar, type the fol low ing di men sions:
Width:
5
Height:
1.5
3
Press
En ter
.
4
On the
CMYK
color pal ette, click the
Gold
color swatch.
5
Hold down
Ctrl
(Win dows) or
Com mand
(Mac OS), and click the
White
color swatch
6
times to lighten the
color of the rect an gle.
6
Open the
Out line
flyout, and click
No out line
.
7
In one of the
Rect an gle cor ner round ness
boxes on the prop erty bar, type
40
.
8
Press
En ter
.
Tutorial: Working with layout
12 of 15
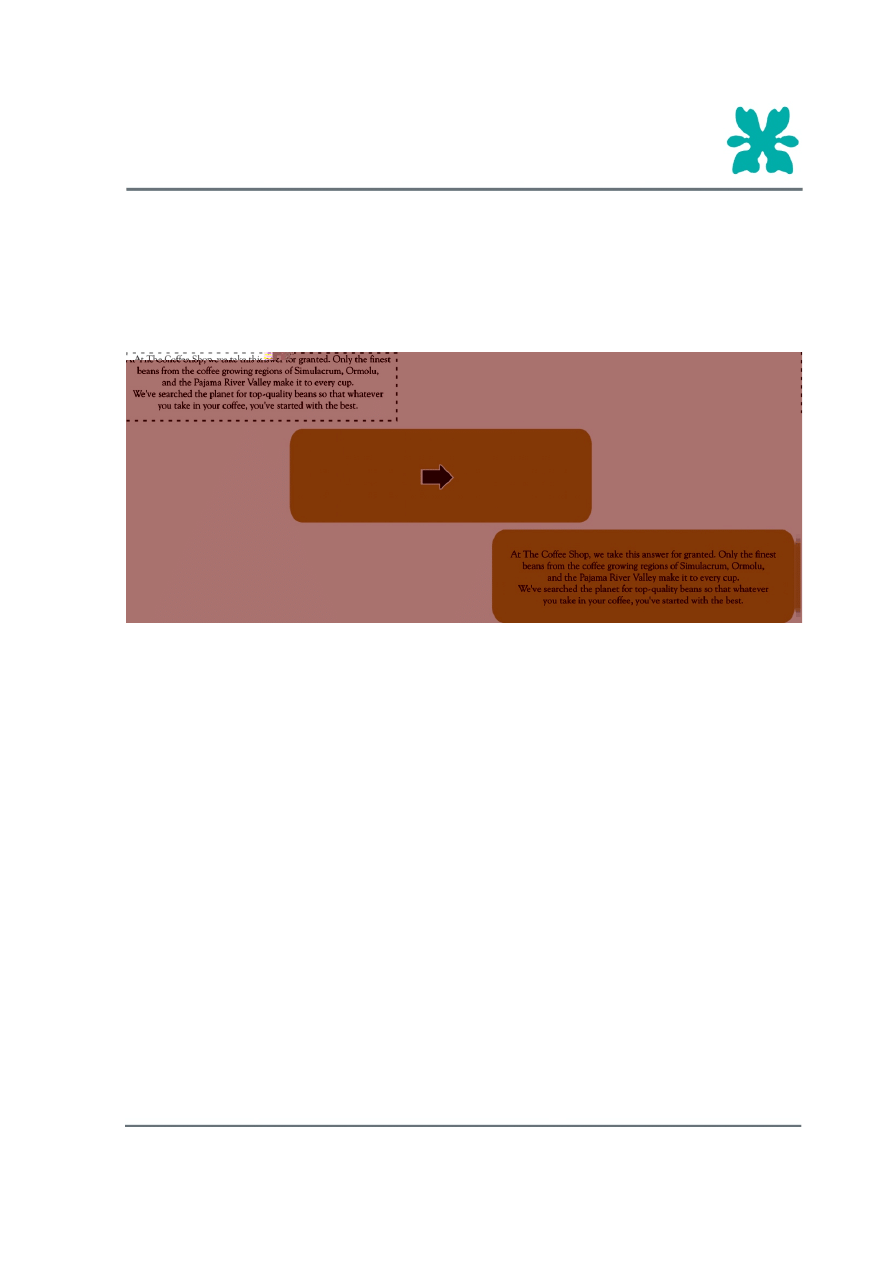
To align the framed paragraph text
1
Using the
Pick
tool, click the text frame con tain ing the para graph text.
2
Click
Ef fects
menu }
PowerClip
}
Place in side con tainer
.
3
Click the light-golden rect an gle.
The paragraph text is positioned in the light-golden frame.
4
Click
Ef fects
menu }
PowerClip
}
Place in side con tainer
.
5
Click the draw ing page.
6
Click
Ef fects
menu }
PowerClip
}
Edit con tents
.
7
Click
Ar range
menu }
Align and dis trib ute
}
Align and dis trib ute
.
8
In the
Align to
area of the
Align and dis trib ute
di a log box, en able the
Cen ter of page
check box.
9
Dis able the ver ti cal align ment
Cen ter
check box.
10
Click
OK
.
11
Drag the framed text, so that the top edge snaps to the hor i zon tal 3.5" guide line.
12
Click
Ef fects
menu }
PowerClip
}
Fin ish ed it ing this level
.
Tutorial: Working with layout
13 of 15

Importing and positioning the logo
You’ll finish the project by importing The Coffee Shop logo and positioning it at the bottom of the advertisement
page.
To import the logo
1
Click
File
menu }
Im port
.
2
Choose the folder where CorelDRAW is in stalled.
3
Choose the folder
Corel Graph ics 11\Tu to rials\Sam ple files
.
4
Dou ble-click the file name
cof fee_logo.cdr
.
5
Click the draw ing page.
To position the logo
1
In the
x Ob ject(s) po si tion
box on the prop erty bar, type
3.5
.
2
In the
y Ob ject(s) po si tion
box on the prop erty bar, type
0.7
.
3
Press
En ter
.
4
Click
View
menu }
Guide lines
to hide all guide lines.
5
Save your pro ject.
Tutorial: Working with layout
14 of 15

From here…
There are more layout and organization tools available in CorelDRAW. You can use grids, slanted guidelines,
customization of snapping options, object nudging, drawing scales, and customized ruler parameters.
You can continue to experiment with other images and different settings to create other unique projects, or you
can complete another CorelDRAW tutorial.
You can access the CorelDRAW Help, by clicking
Help
menu }
Help top ics
.
ã
2002 Corel Corporation. All rights reserved. All trademarks or registered trademarks are the property of their
respective companies.
Tutorial: Working with layout
15 of 15
Wyszukiwarka
Podobne podstrony:
menu Corel Draw
Corel Draw Wojowniczka Ćwiczenie rysunkowe w Corel Painterze
corel draw 10 step by step learning ebook gdb7h4vpmqfmtcqjt6hcag3bj4jdxptnc67pvly GDB7H4VPMQFMTCQJT6
Corel Draw Graphics Suite 12 PL
Foto sciaga 2, Pakiet Corel DRAW stanowią następujące programy:
Corel DRAW Graphics Suite 12
menu Corel draw, corel
menu Corel draw zadania, corel
Corel Draw Essentials 2
corel draw 12 oficjalny podręcznik ZOETY22CQXUF3XHJK4LXPZ2MVFSG5GI4QPXKJMI
Corel Draw cz2
Corel Draw cz1
Corel Draw Graphics Suite X6
corel draw x3 cwiczenia praktyczne (ebook promocyjny helion pl) S4D4NXRHTGEZBX7KNN4VEIY3MPSU3CGK33PZ
corel draw kompedium
menu Corel Draw
Corel Draw Wojowniczka Ćwiczenie rysunkowe w Corel Painterze
corel draw 10 step by step learning ebook gdb7h4vpmqfmtcqjt6hcag3bj4jdxptnc67pvly GDB7H4VPMQFMTCQJT6
więcej podobnych podstron