1
utler’s Chest
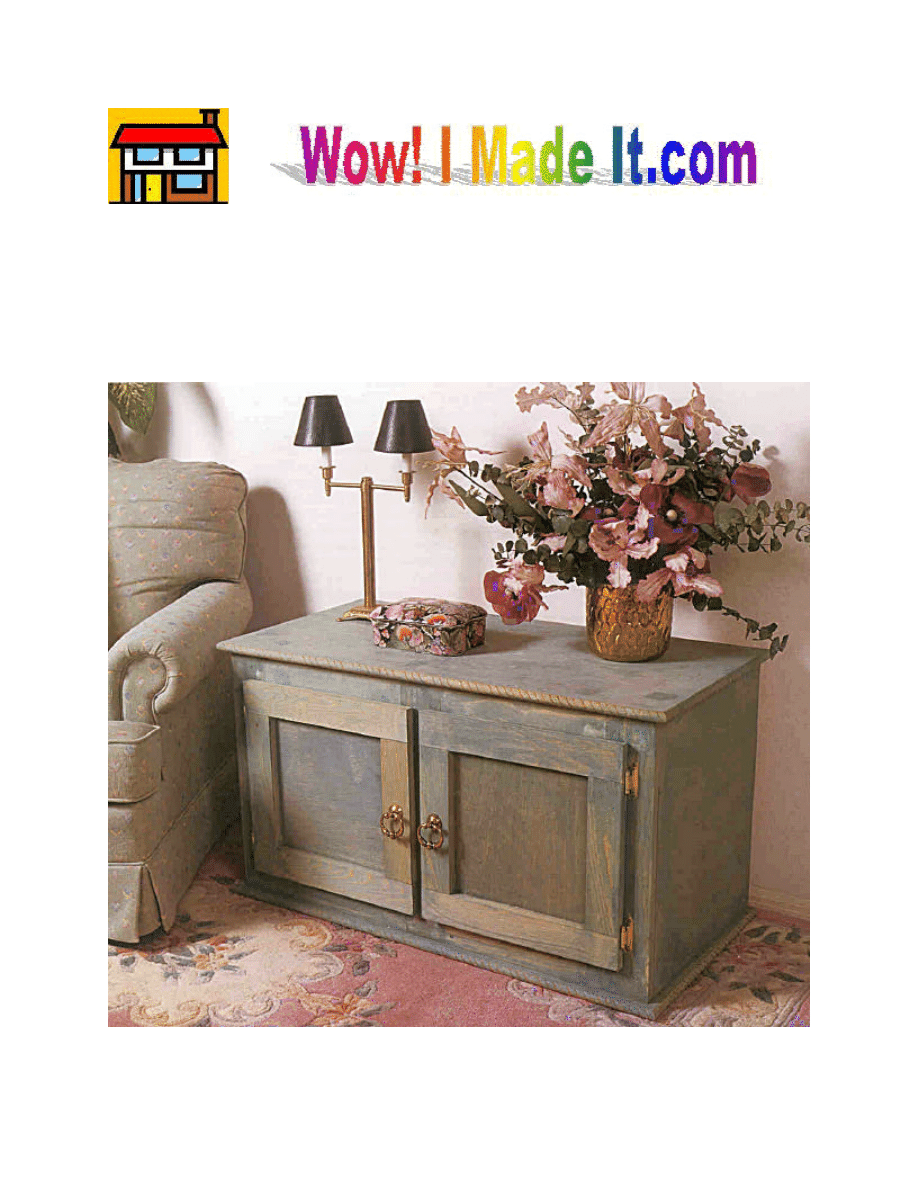
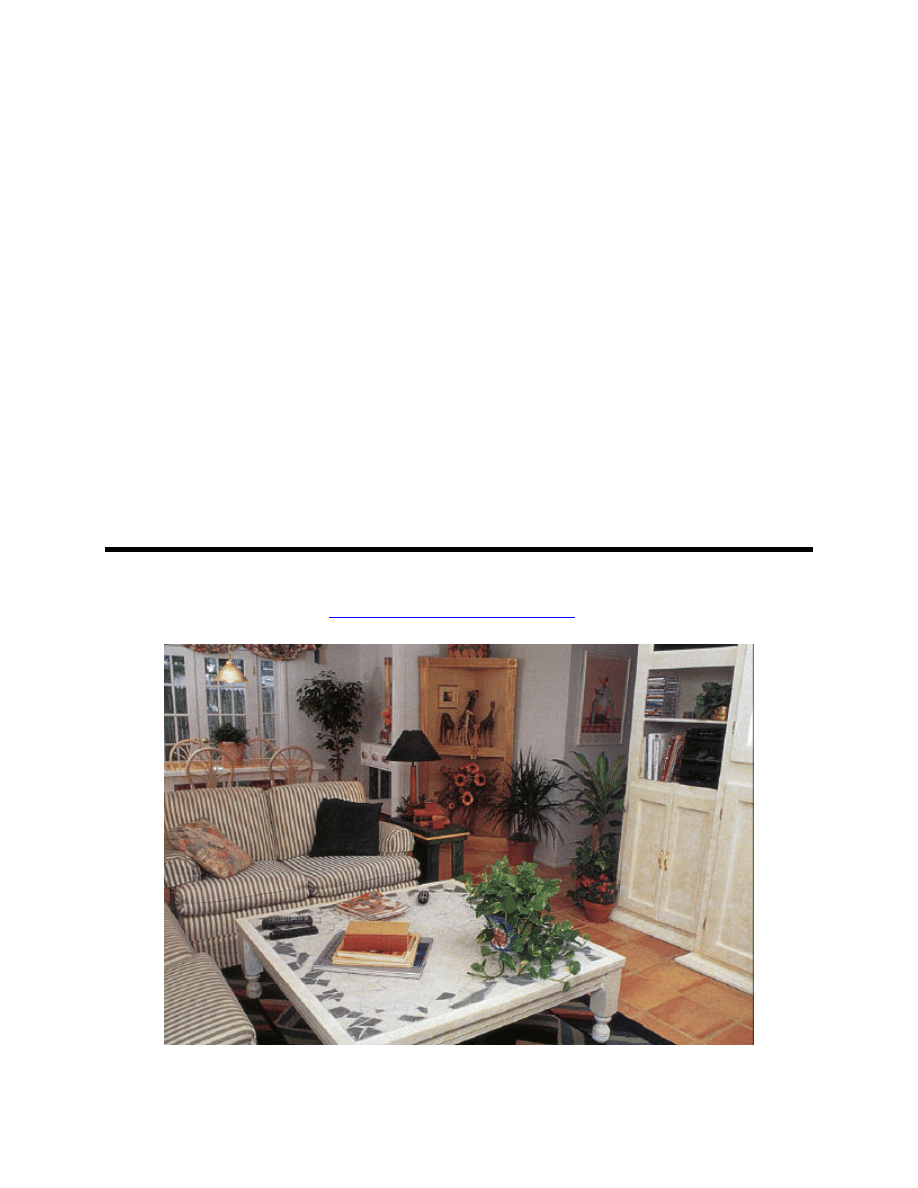
Because it’s designed to suit a variety of purposes, this butler’s chest is a piece of
furniture that absolutely anyone can appreciate. Used by itself, it can serve as an end table or
can be fit under a window. Two chests placed back-to-back form a great looking coffee table.
For extra storage space, you can even stack two or three chests on top of one another.
B
2
Special Techniques
•
Beveling
•
Mitering
Materials and Supplies
•
9 linear feet of 1 x 3 pine
•
10 linear feet of 1 x 4 pine
•
16 linear feet of 2 x 4 pine
•
1 piece of ¼”-thick plywood, 14” x 25”
•
1 sheet of ¾”-thick plywood, 4’ x 8’
•
20 linear feet of ¾”-wide decorative molding
Hardware
•
Approximately 20 #6 x ¾” flathead wood screws
•
Approximately 100 #6 x 1-1/4” flathead wood screws
•
Approximately 20 #6 x 2” flathead wood screws
•
Approximately 20 #6 x 2-1/2” flathead wood screws
•
Approximately 30 wire brads
•
4 offset door hinges
•
2 decorative cabinet-door pulls
Cutting List
Code
Description
Qty.
Material
Dimensions
A
Long Inner
Support
4
2 x 4 pine
34-1/2” long
B
Short Inner
Support
4
2 x 4 pine
12-1/2” long
C
Side
2
¾” plywood
16-1/4” x 20-1/2”
D
Back
1
¾” plywood
20-1/2” x 36”
E
Vertical Trim
3
1 x 4 pine
20-1/2” long
F
Horizontal Trim
4
1 x 4 pine
12-3/4” long
G
Top/Bottom
2
¾” plywood
18” x 38”
H
Cabinet Door
2
¼” plywood
12-1/4” x 13”
I
Top/Bottom
Trim
4
1 x 3 pine
14-1/4” long
J
Side Trim
4
1 x 3 pine
10” long

3
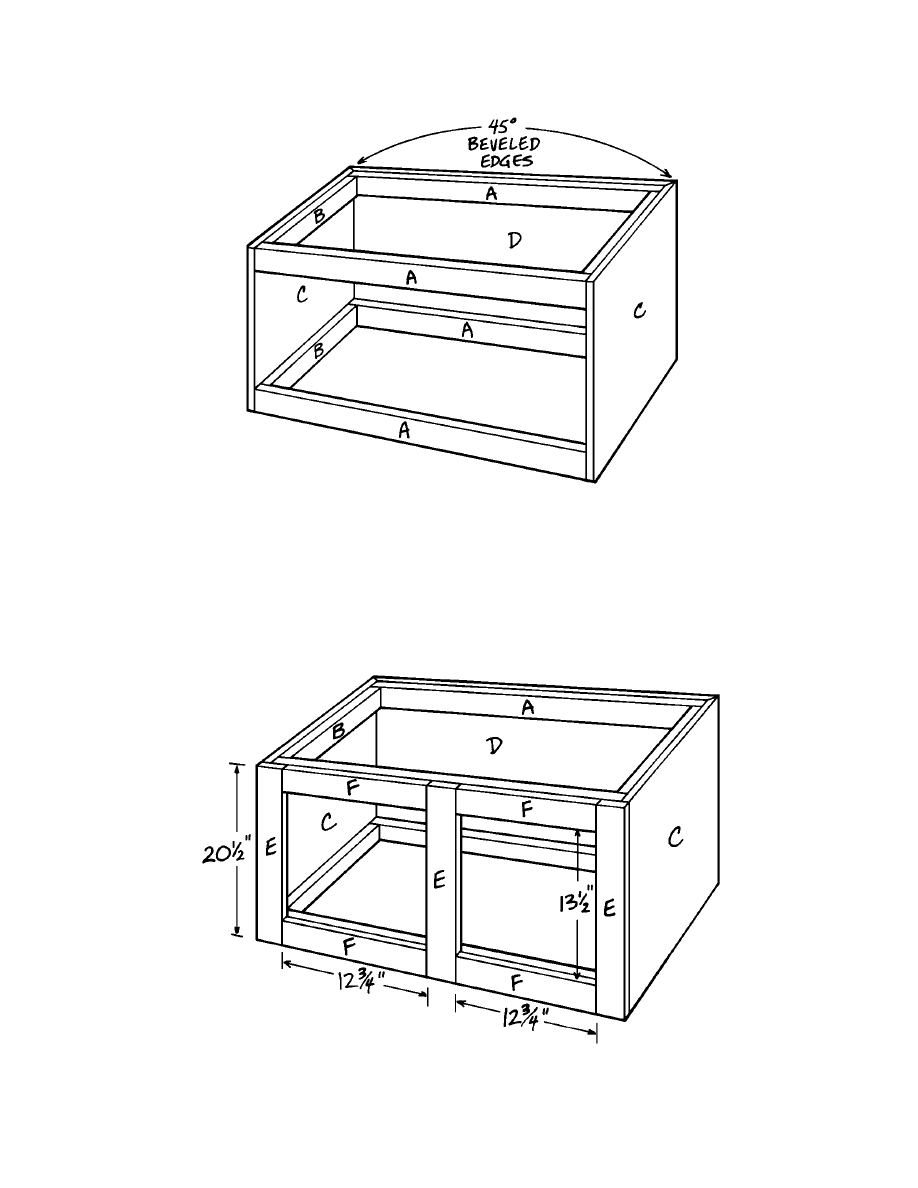
Making the Inner Frame
1. The inner frame of the butler’s chest, which is covered with ¾”-thick plywood, consists of
two rectangular inner support assemblies connected to each other by two sides and a back.
Start by cutting four long inner supports (A) from 2 x 4 pine, each measuring 34-1/2” long.
2. Cut four short inner supports (B) from 2 x 4 pine, each measuring 12-1/2” long.
3. Place two long inner supports (A) on a level surface, parallel to each other, on edge, and 12-
1/2” apart. Fit two short inner supports (B) between the two long inner supports (A), as
shown in Figure 1. Glue the supports together and insert two 2-1/2” screws through the long
inner supports (A) into the ends of the short inner supports (B) at each joint. You now have
one inner support assembly.
4. Repeat Step 3, using the remaining two short inner supports (B) and two long inner supports
(A) to construct a second inner support assembly.
Adding the Sides and Back
1. Cut two 16-1/4” x 20-1/2” sides (C) from ¾”-thick plywood.
2. Bevel one 20-1/2”-long edge of each side (C) at a 45-degree angle, as shown in Figure 2.
3. Glue one side (C) to the two inner support assemblies, as shown in Figure 3. Note that the
two assemblies fit flush with the 15-1/2”-long, non-beveled edge of the side (C) and that the
beveled portion of the side (C) extends past the assemblies. Secure with 2” screws inserted
through the side (C) and into each of the assemblies spacing the screws about 4” apart.
4. Repeat Step 3 to attach the remaining side (C) to the opposite side of the inner support
assemblies.
5. Cut one 10-1/2” x 36” back (D) at a 45-degree angle, in the same manner that you did on one
edge of each side (C).
Figure 1

4
6. Glue the back (D) over the
beveled edges of the sides (C),
matching the bevels as shown
in Figure 4. Insert 1-1/4”
screws, spaced about 6” apart,
through the back (D) and into
both of the long inner supports
(A).
Adding the Front Trim
1. Cut three 20-1/2”-long
vertical trim pieces (E) from 1
x 4 pine.
2. Glue one vertical trim piece
(E) to the left side of the
cabinet, as shown in Figure 5,
and insert 1-1/4” screws,
spaced about 6” apart, through
the vertical trim piece (E) and
into the long inner supports
(A) and the edge of the side
(C).
3. Repeat Step 2 to attach a second vertical trim piece (E) to the right side of the cabinet.
4. Attach a third vertical trim piece (E) in the center of the cabinet, as shown in Figure 5,
inserting two 1-1/4” screws through the top and bottom of the vertical trim piece (E) into the
long inner supports (A) at each joint. Note that the spacing between the vertical trim pieces
(E) should be exactly 12-3/4”.
Figure 2
Figure 3
5
5. Cut four 12-3/4”-long horizontal trim pieces (F) from 1 x 4 pine.
6. Using Figure 5 as a guide, glue the four horizontal trim pieces (F) flush with the top and
bottom of the cabinet, between the vertical trim pieces (E). Secure with three 1-1/4” screws
driven through each of the four horizontal trim pieces (F). Note that the opening between the
top and bottom horizontal trim pieces (F) should be exactly 12-3/4” x 13-12”.
Figure 4
Figure 5
6
Adding the Top and Bottom
1. Cut two 18” x 38” top/bottom pieces (G) from ¾”-thick plywood.
2. Center one top/bottom (G) over the cabinet assembly so that it’s flush with the edge of the
back (D) and overhangs by 1” at the front and at each side. Glue the top/bottom (G) in place
and insert 1-1/4” screws through it and into the inner support assemblies spacing the screws
about 6” apart.
3. Turn the cabinet upside-down and Repeat Step 2 to attach the remaining top/bottom (G) to it.
4. To cover the exposed edges and ends of the plywood top/bottom pieces (G), cut and fit ¾”-
wide decorative molding, mitering the molding at the corners. Glue the molding in place and
secure with wire brads spaced about 6” apart.
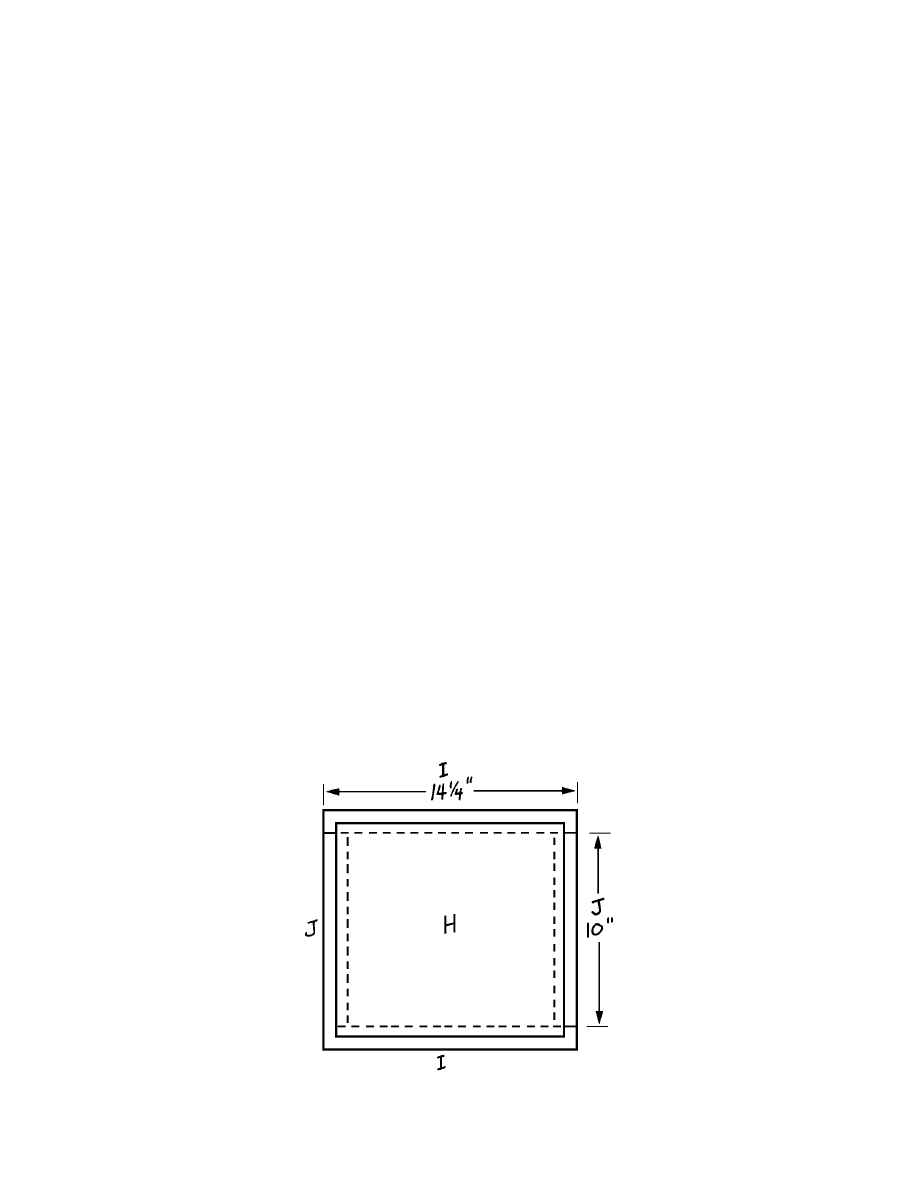
Making the Cabinet Doors
1. The cabinet doors are nothing more than pieces of ¼”-thick plywood trimmed with borders
of 1 x 3 pine. They’re easy to make, but do be certain that the finished doors are perfectly
square. Start by cutting two 12-1/4” x 13” cabinet door pieces (H) from ¼”-thick plywood.
2. Cut four 14-1/4” long top/bottom trim pieces (I) from 1 x 3 pine.
3. Cut four side trim pieces (J) from 1 x 3 pine, each measuring 10” long.
4. Place two top/bottom trim pieces (I) and two side trim pieces (J) on a level surface, as shown
in Figure 6. Center the cabinet door (H) over the trim pieces. There should be a 1”-wide
border of trim visible along each of the four edges of the cabinet door (H). Glue the pieces
together and insert ¾” screws through the door (H) and into the trim pieces, spacing them
about 4” apart.
Figure 6
7
5. Repeat Step 4 to assemble the second cabinet door.
Finishing
1. Fill any cracks, crevices, or holes with wood filler.
2. Sand all surfaces thoroughly.
3. Paint or stain the cabinet and doors the color of your choice.
4. Install the hinges on each of the doors, first measuring carefully to ensure that the hinges are
positioned the same distance from the top and bottom of each door.
5. Have someone help you support the doors while you hold them over the door openings. Line
up each door evenly with the door next to it and make sure that neither door scrapes any
surface of its opening. Then attach the remaining sides of the hinges to the cabinet.
6. Attach the pulls to each of the cabinet doors, spacing them evenly and aligning them with
each other.
Try other indoor and outdoor projects from
www.wowimadeit.com
!
Wyszukiwarka
Podobne podstrony:
Metoda Butlera
Maid Butler Character Sheet
chest i dolg vmeste s rossiej 3
Pressure Points Chest
Blanket chest id 89967 Nieznany
miesnie wskaznikowe poszczegolnych segmentow wg Butlera
Butler J., Akty performatywne a konstrukcja płci kulturowej
Document Chest
Butler - Akty performatywne a konstrukcja płci kulturowej (1), Gender
Pikul Chest imeyu 413359
Butler Imitation and gender insubordination
Butler, Octavia Patternists 3 Survivor
Butler, Octavia Mind of My Mind
więcej podobnych podstron