Page 1 of 4
Tools for Carving
I’ve been carving wood for 34 years and teaching others for 18, so I’m often asked what tools to
buy for woodcarving. My standard reply consists of a few questions of my own: What sort of
carving do you want to do? What size? What woods? The answers to those questions will help
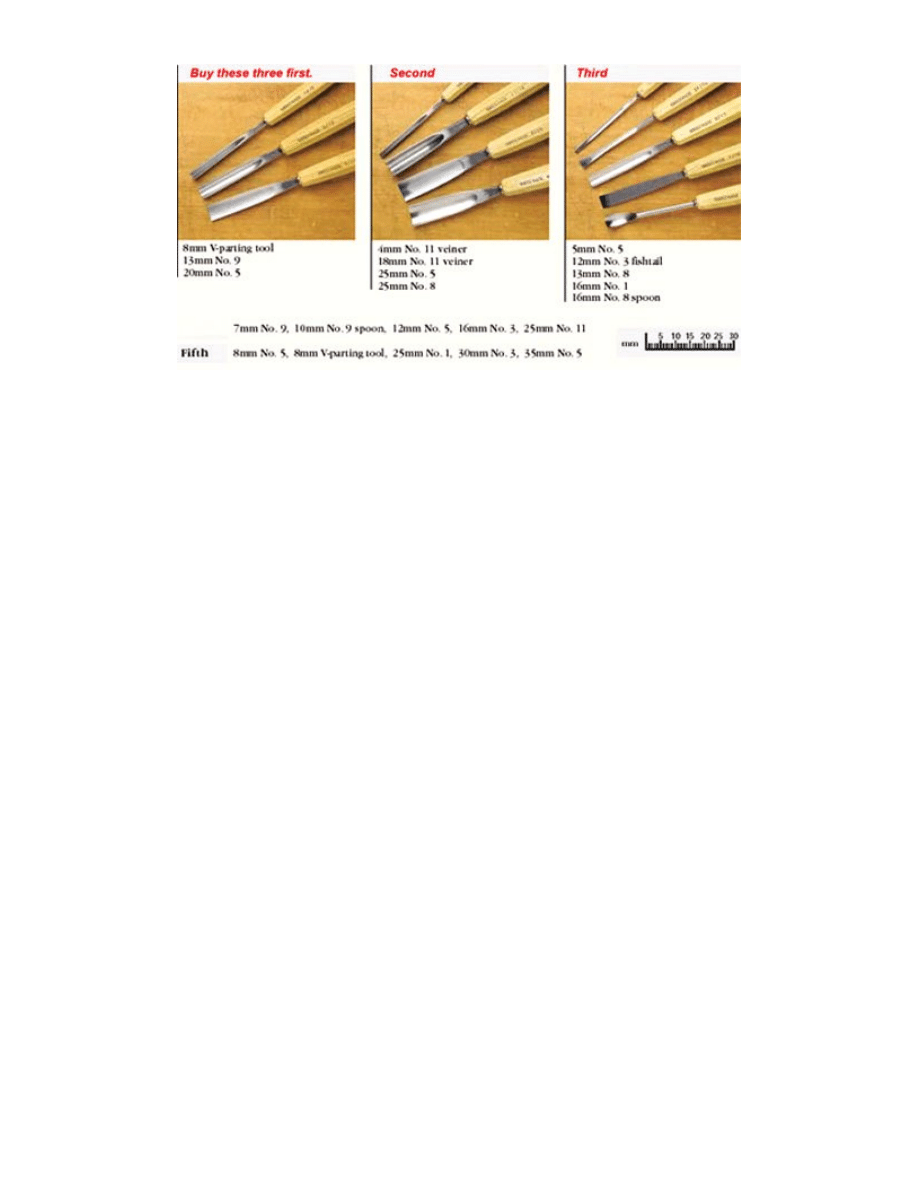
determine the tools a carver will need. A beginning carver can get by just fine with a few general-
purpose tools (see the box on p. 82). As a rule, I would avoid buying a prepackaged set. No matter
what the quality of the tools, usually one or two are a waste of space and negate the savings of
buying them as a set. High-quality carving tools, well-looked after and properly used, will last a
lifetime and more—some of mine are more than 150-years old. Buy the best, and buy just a few
tools at first. You can always add more when you need them. That way, you don’t end up with tools
you’ll never use.
Where to find them
Carving tools are readily available at
woodworking stores and in mail-order tool
catalogs. Of the current offerings, I prefer the
Pfeil tools (marked “Swiss made” on their
handles), distributed in the United States by
Woodcraft (210 Wood County Industrial Park,
P.O. Box 1686, Parkersburg, WV 26102-1686;
800-225- 1153). I think they’re the most refined
carving tools made today. This is especially
obvious in the smaller sizes, which are lighter and
better machined than any of the others generally
available. The second-hand market also is a
useful source of tools. At any decent-sized flea market, you can usually find someone selling these
tools. If you research current prices before you go tool hunting, you’re more likely to get a good
deal. You should be able to find good second-hand tools for half, or less, of what they cost new.
The best tools were made by Addis and Herring Bros., but neither of these companies has been in
business for years. Homemade or custom carving tools also can be superb. I have some that were
made about 100 years ago. They are light, delicate and well-made.
Page 2 of 4
Homemade tools often can be found at flea markets and used-tool dealers right alongside the
commercial offerings, or you can have them made for you (there are a number of specialty forges).
You can learn to make your own carving tools by reading toolmaking books or by attending
courses on the subject. Homemade tools are an especially attractive option when you need a
specific chisel for a particular carving. I have some excellent fishtails that are very handy—I’ve
never seen any comparable ones available commercially. Don’t pass up chisels without handles.
Making new handles is a good opportunity for you to practice some carving. If you’re not inclined to
spend time carving handles, replacement handles are generally available through woodworking
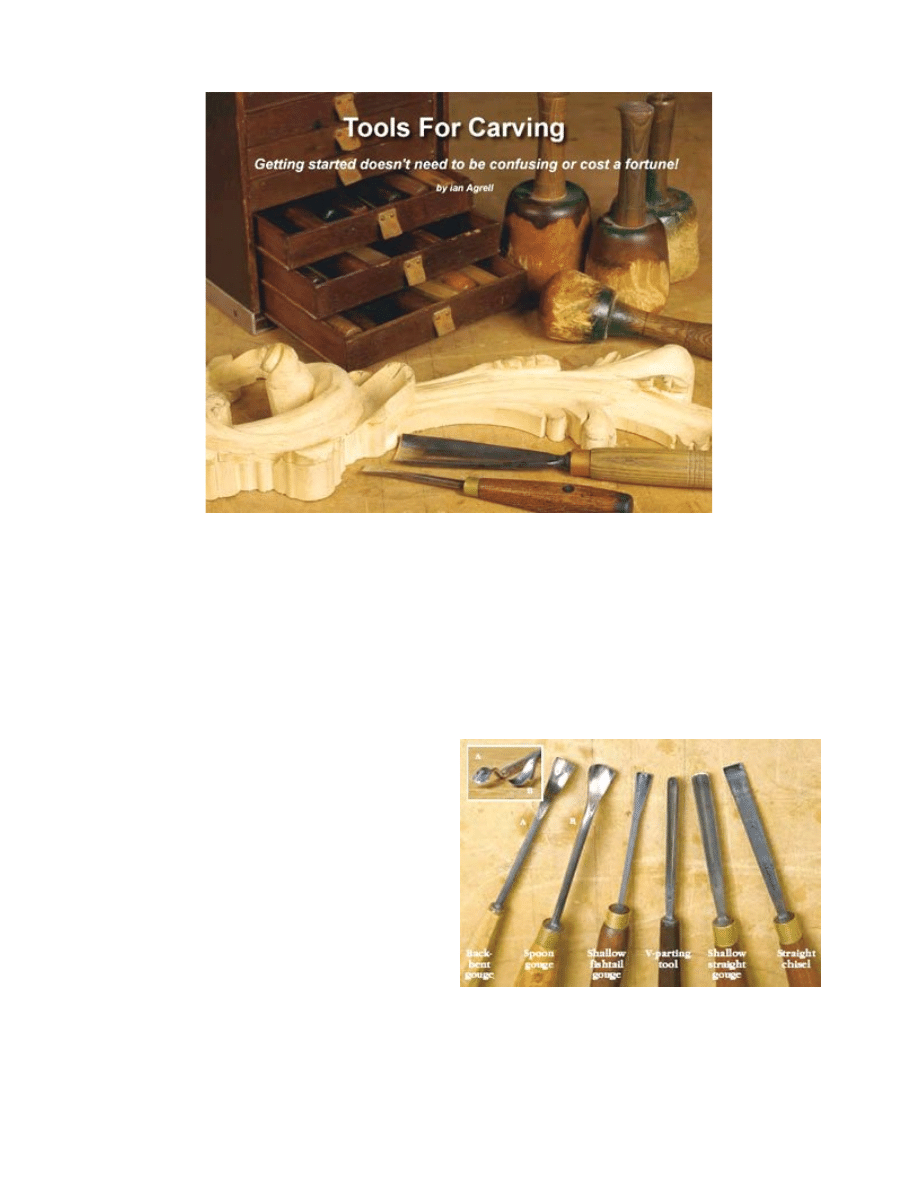
catalogs. Tool types: Start with the basics. Carving tools come in a huge variety of shapes and
sizes, but what you need to know is really pretty basic. I use a relatively limited range of tools, and
that hasn’t impaired my carving. The types of carving tools I find most useful are straight gouges,
V-parting tools, fishtail and spoon gouges (see the photo above). Straight gouges are all-purpose
tools that do most of a carver’s work.| Depending on the profile of the gouge, which is called the
section or sweep, a gouge may be used for rapid stock removal, for rendering detail on a carving
or for leaving a polished, finished surface in its wake. Gouges with a very high section are called
veiners. V-parting tools are used to define and separate areas of carving. Carvers make a sketch
on the wood with a V-parting tool and then use a gouge to shape the carving.
Fishtail chisels and gouges are useful because they flare out from the shaft at the cutting end.
They let you see the carving better (there’s less metal to block your view of the work) and allow you
to get into tighter corners and more restricted areas.
Spoon gouges are essential for getting into interior curves and any deeply concave
areas. I prefer spoon gouges to bent gouges, which curve gently from just in front of
the handle all the way to the end of the blade. When I put pressure on a bent gouge,
it’s not transmitted as directly to the end of the blade.
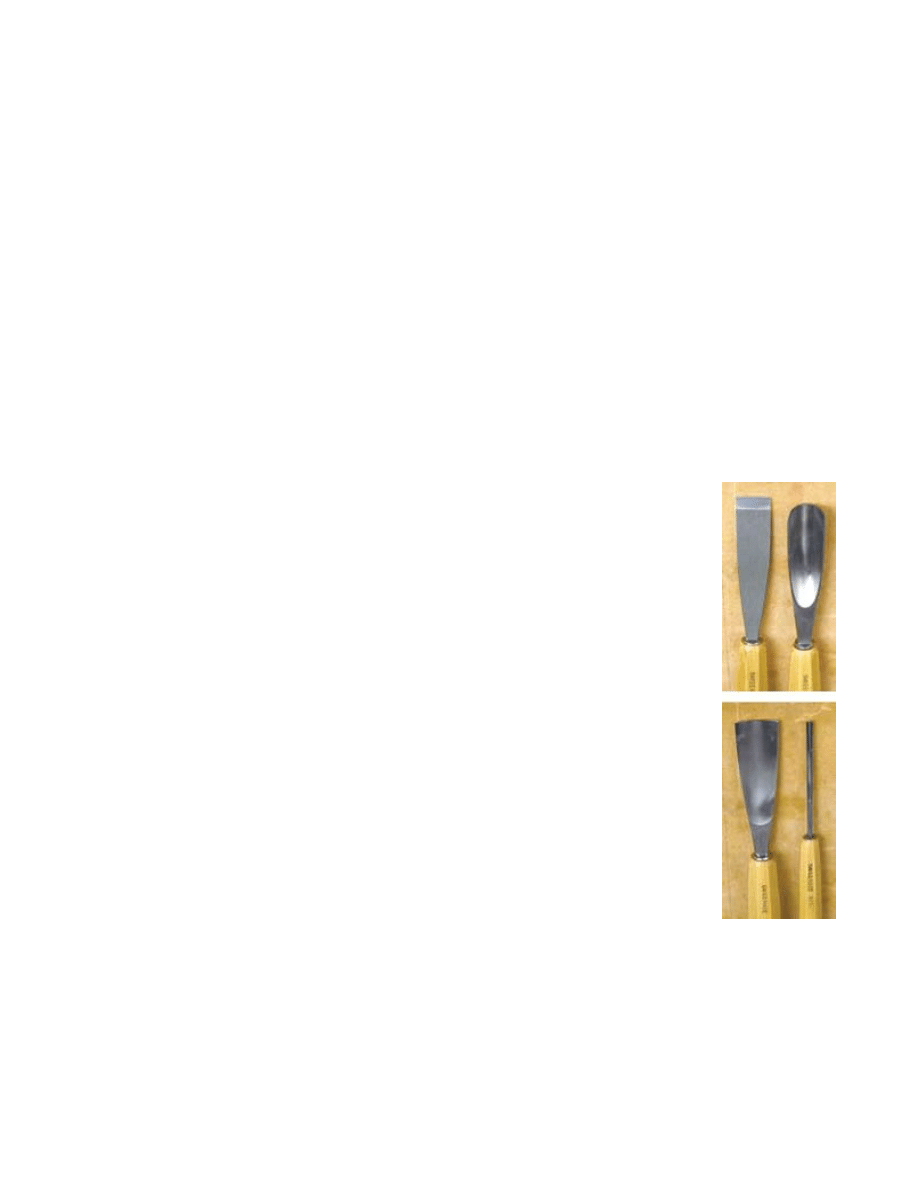
I don’t think flat-section (No. 1) straight chisels or back-bent gouges are essential,
though I sometimes use them. Flat-section chisels are more a tool for letter carvers.
Most of what a back-bent gouge does I can do by inverting a regular gouge and using
the inside to cut convex shapes (see the top right photo on the facing page)
. I don’t find skew chisels of much use because I have heavy, flared fishtails that can
get into the same tight spaces. And I haven’t yet come across a situation in which I
needed a dog-leg chisel or a macaroni tool (even though they look like they’d be fun
to have).
Section and size: What do the numbers mean?
Woodcarving gouges, like golf clubs, are numbered for different uses. Basically, they
go from No. 1 to No. 11. A No. 1 is flat, a No. 2 curves slightly, a No. 3 a little more
and so on to No. 11, which has a U-shape. For general carving, gouges with a No. 5
section are the most useful. Sections around No. 9 are better for going deeper. These
remove wood faster, which is helpful when creating a background or roughing out a
carving. Also, because their sides are steeper, they’re less likely to catch and rip the
wood.
Page 3 of 4
In addition to having different sections, all carving tools come in different widths. You can have a
3mm No. 5 or a 30mm No. 5 (most carving tools are sold in metric sizes). As a general rule, I tell
my students to use the biggest chisel they can for any given task. The work will flow better, be
cleaner (fewer tool marks) and go faster.| There are no definite rules or laws about which chisel
does what. Trying to find this information is like searching for the meaning of life, except less
rewarding. Any chisel can be rotated or even used upside down so you can cut with the inside of
the chisel (see the photos at right on the facing page).
As you become more skilled, you will find that you use the same chisel for many jobs. For example,
a carver might turn a No. 11 on its side and use it as a No. 3. This saves time, which is important if
you’re a professional. A really skillful carver can form a ball with a No. 1 flat chisel or a flat surface
with a No. 11.

Page 4 of 4
Driving carving tools: Use a heavy wooden mallet
Most of the time, you’ll be tapping the carving tool with a mallet, not
pushing it with your hand. Don't use a steel hammer because you
will ruin the ends of your carving tools.
You will need mallets of different weights depending on the work
that you'll be doing. Pecking at a large sculpture with a small chisel
and a 1.2-lb. mallet is just a waste of time. I prefer mallets with a
head of lignum vitae, a dense, hard tropical wood. When driving a
chisel with a lignum-headed mallet, there's no rebound. All the
impact is directed to the blade. I like sculptor's mallets, which are
turned and have no front, back or sides.
I've also seen urethane and laminated beech mallets, both of which
will work fine. However, I would stay away from bronze or rubber
mallets. Bronze mallets will rough up the ends of your carving tools
like a steel hammer, and a rubber mallet doesn't make much sense
unless you are concerned about noise. And if you turn your own
mallets, make sure that they can be rested on their heads, so they
don't roll off the bench.
Storing your carving tools
You'll need a proper box for your carving tools. Mine is made of
mahogany. Because I often take my tools with me when I fly around
the country, I added aluminum angle at each of the four corners of
the case to protect it. (The airline attendants have to put it in the
hold to save the pilot from a nut-case woodcarver.)
If you don't build a box for your carving tools, a chisel roll also will
help keep your chisels safe. Even wrapping your tools carefully in
an old towel will help prevent them from bashing against each other,
damaging their blades. You'll appreciate this more after you have
spent some time sharpening them properly.
Whatever you do, don't just dump your chisels into a cardboard box
to get chipped and rusty. But if that does happen, make sure you
sell them to that man at the flea market.
Wyszukiwarka
Podobne podstrony:
Debbuging Tools for Windows sposób analizowania błędów
Guide for solubilization of membrane proteins and selecting tools for detergent removal
n is for network new tools for mapping organizational change
(Parenting) 16 Tools For Effective Parents
Atmel Gcc Tools For Avr Studio User s Guide
(eBook PDF GUI) Design Patterns as Tools for User Interface Design
Woodwork Plans For Hydraulic Press
Tools for Finding and Removing Rootkits
Affirmations Tools For Your Mind, Soul and Spirit By Linda Ann Stewart
Library Tools for Biblical Exegesis(1)
64 919 934 New Trends in Thin Coatings for Sheet Metal Forming Tools
Celtic Woodcraft, Authentic Projects For Woodworkers G Bennet
19 237 253 Steel for Press Tools
A Potency Relation for Worms and Next Generation Attack Tools
Celtic Woodcraft, Authentic Projects For Woodworkers G Bennet
Diy Workshop Woodwork Plans Drawings For Homemade Wood Lathe
Carving Wood for Carvers
więcej podobnych podstron