
The Digital Photography Book: The Step-By-Step Secrets for How to Make Your Photos Look Like
the Pros'!
By Scott Kelby
...............................................
Publisher: Peachpit Press
Pub Date: August 23, 2006
Print ISBN-10: 0-321-47404-X
Print ISBN-13: 978-0-321-47404-9
Pages: 240
Table of Contents | Index
Scott Kelby, the man who changed the "digital darkroom" forever with his groundbreaking,
#1 bestselling, award-winning book The Photoshop Book for Digital Photographers,
now
tackles the most important side of digital photography--how to take pro-quality shots using
the same tricks today's top digital pros use (and it's easier than you'd think). This entire
book is written with a brilliant premise, and here's how Scott describes it: "If you and I
were out on a shoot, and you asked me, 'Hey, how do I get this flower to be in focus, but I
want the background out of focus?' I wouldn't stand there and give you a lecture about
aperture, exposure, and depth of field. In real life, I'd just say, 'Get out your telephoto lens,
set your f/stop to f/2.8, focus on the flower, and fire away.' You d say, 'OK,' and you'd get
the shot. That's what this book is all about. A book of you and I shooting, and I answer the
questions, give you advice, and share the secrets I've learned just like I would with a friend,
without all the technical explanations and without all the techno-photo-speak." This isn't a
book of theoryit isn't full of confusing jargon and detailed concepts: this is a book of which
button to push, which setting to use, when to use them, and nearly two hundred of the
most closely guarded photographic "tricks of the trade" to get you shooting dramatically
better-looking, sharper, more colorful, more professional-looking photos with your digital
camera every time you press the shutter button. Here's another thing that makes this book
different: each page covers just one trick, just one single concept that makes your
photography better. Every time you turn the page, you'll learn another pro setting, another
pro tool, another pro trick to transform your work from snapshots into gallery prints.
There's never been a book like it, and if you're tired of taking shots that look "OK," and if
you're tired of looking in photography magazines and thinking, "Why don't my shots look
like that?" then this is the book for you.

Copyright
The Digital Photography Book
PUBLISHED BY
Peachpit Press
Copyright ©2007 by Scott Kelby
FIRST EDITION: August 2006
All rights reserved. No part of this book may be reproduced or transmitted in any form, by
any means, electronic or mechanical, including photocopying, recording, or by any
information storage and retrieval system, without written permission from the publisher,
except for the inclusion of brief quotations in a review.
Composed in Myriad Pro (Adobe Systems Incorporated) and Lucida Grande (Bigelow &
Holmes Inc.) by Kelby Publishing.
The Digital Photography Book Team
TECHNICAL EDITORS Kim Doty Cindy Snyder
EDITORIAL CONSULTANT Bill Fortney
PRODUCTION EDITOR Kim Gabriel
PRODUCTION MANAGER Dave Damstra
GRAPHIC DESIGN Jessica Maldonado
COVER DESIGNED BY Scott Kelby
STUDIO SHOTS Dave Gales
Trademarks
All terms mentioned in this book that are known to be trademarks or service marks have
been appropriately capitalized. Peachpit Press cannot attest to the accuracy of this
information. Use of a term in the book should not be regarded as affecting the validity of any
trademark or service mark.
Photoshop and Lightroom are registered trademarks of Adobe Systems, Inc.
Nikon is a registered trademark of Nikon Corporation.
Canon is a registered trademark of Canon Inc.
Warning and Disclaimer
This book is designed to provide information about digital photography. Every effort has been
made to make this book as complete and as accurate as possible, but no warranty of fitness
is implied.

The information is provided on an as-is basis. The author and Peachpit Press shall have
neither the liability nor responsibility to any person or entity with respect to any loss or
damages arising from the information contained in this book or from the use of the discs or
programs that may accompany it.
9 8 7 6 5 4 3 2 1
Printed and bound in the United States of America
www.peachpit.com
www.scottkelbybooks.com
Dedication
Dedicated to the amazing Dr. Stephanie Van Zandt for her excellent advice, for taking such
good care of my wife, and for delivering the sweetest little baby girl in the whole world.

Acknowledgments
Although only one name appears on the spine of this book, it takes a team of dedicated and
talented people to pull a project like this together. I'm not only delighted to be working with
them, but I also get the honor and privilege of thanking them here.
This is my 37th book, and in each book I write, I always start by thanking my amazing,
wonderful, beautiful, hilarious, and absolutely brilliant wife Kalebra. She probably stopped
reading these acknowledgments 20 or more books ago because I keep gushing on and on
about her, and despite how amazingly beautiful, charming, and captivating she is, she's a
very humble person (which makes her even more beautiful). And even though I know she
probably won't read this, I just have to thank her anyway because not only could I not do
any of this without her, I simply wouldn't want to. She's just "it." It's her voice, her touch,
her smile, her heart, her generosity, her compassion, her sense of humor, and the way she
sneaks around behind the scenes trying to make sure my life is that much better, that much
more fun, that much more fulfilling, and you just have to adore someone like that. She is the
type of woman love songs are written for, and as any of my friends will gladly attestI am,
without a doubt, the luckiest man alive to have her as my wife. I love you madly, sweetheart!
I also want to thank my crazy, fun-filled, wonderful little nine-year-old boy Jordan. He won't
read this either, because as he says, "It embarrasses him." And since I know he won't read it
(or even let me read it to him), I can safely gush about him, too. Dude, you rock! You are
about the coolest little boy any dad could ask foryou love Star Wars (and our lightsaber
battles in the kitchen), you dig Bon Jovi, you're always up for a game of golf, you love to go
to the movies with me, and you get as excited about life as I do. You are nothing but a joy,
I'm so thrilled to be your dad, and you're already a great big brother to your new little sister.
I am very, very proud of you little buddy.
I also want to thank my beautiful daughter Kira, who is the best-natured, happiest little baby
girl in the whole wide world. You're only five months old, but you're already reflecting your
mom's sweet nature, her beautiful smile, and her loving heart. You're too young to know
what an amazing mother you have, but before long, just like your brother, you'll realize that
your mom is someone very special, and that thanks to her you're in for a really fun, exciting,
hug-filled, and adventure-filled life. Also, thanks to my big brother Jeff. Brothers don't get
much better than you, and that's why Dad was always so proud of you. You are truly one of
the "good guys" and I'm very, very lucky to have you in my life.
Special thanks to my home team at KW Media Group. I love working with you guys and you
make coming into work an awful lot of fun for me. I'm so proud of what you all dohow you
come together to hit our sometimes impossible deadlines, and as always, you do it with class,
poise, and a can-do attitude that is truly inspiring. I'm honored to be working with you all.
Thanks to my layout and production crew. In particular, I want to thank my friend and
Creative Director Felix Nelson (creator of all things that look cool). Thanks to my in-house
editors Kim Doty and Cindy Snyder, who put the techniques through rigorous testing and
tried to stop me from slipping any of my famous typos past the goalie. Also, thanks to Dave
Damstra and his amazing crew for giving the book such a tight, clean layout.
My personal thanks to my friend Dave Gales who shot the product shots for the book. Ya
know, for a photojournalist, you're not a bad studio guy. Thanks a million!
Thanks to my best buddy Dave Moser, whose tireless dedication to creating a quality product
makes every project we do better than the last. Thanks to Jean A. Kendra for her steadfast
support, and an extra special thanks to my Executive Assistant Kathy Siler for keeping
everything running smoothly while I'm out traveling and writing books. You are, without a
doubt, the best!

Thanks to my publisher Nancy Ruenzel, marketing maverick Scott Cowlin, production hound
Ted Waitt, and the incredibly dedicated team at Peachpit Press. It's a real honor to get to
work with people who really just want to make great books. Also, my personal thanks to
Patrick Lor at iStockphoto.com for enabling me to use some of their wonderful photography
in this book.
I owe a special debt of gratitude to my good friend Bill Fortney for agreeing to give the book
a good "once over" and it's infinitely better because of his comments, ideas, and input. Bill is
just an amazing individual, a world-class photographer, a testament to how to live one's life,
and I'm truly honored to have gotten the chance to work with someone of his caliber,
integrity, and faith.
I want to thank all the talented and gifted photographers who've taught me so much over the
years, including Moose Peterson, Vincent Versace, Bill Fortney, David Ziser, Jim DiVitale,
Helene Glassman, George Lepp, and Eddie Tapp.
Thanks to my mentors whose wisdom and whip-cracking have helped me immeasurably,
including John Graden, Jack Lee, Dave Gales, Judy Farmer, and Douglas Poole.
Most importantly, I want to thank God, and His son Jesus Christ, for leading me to the
woman of my dreams, for blessing us with such a special little boy and an amazing little girl,
for allowing me to make a living doing something I truly love, for always being there when I
need Him, for blessing me with a wonderful, fulfilling, and happy life, and such a warm,
loving family to share it with.

Other Books By Scott Kelby
The Photoshop CS2 Book for Digital Photographers
Photoshop Down & Dirty Tricks
Photoshop CS2 Killer Tips
The Photoshop Channels Book
Photoshop Classic Effects
The iPod Book
The Adobe Lightroom eBook for Digital Photographers
InDesign CS/CS2 Killer Tips
Mac OS X Tiger Killer Tips
Getting Started with Your Mac and Mac OS X Tiger

About The Author
Scott Kelby
Scott is Editor-in-Chief and Publisher of Photoshop User magazine, Editor-in-Chief of Nikon
Software User magazine, Editor and Publisher of Layers magazine (the how-to magazine for
everything Adobe), and co-host of the popular weekly video show Adobe® Photoshop® TV .
Scott is President and co-founder of the National Association of Photoshop Professionals
(NAPP) and is President of the software training, education, and publishing firm KW Media
Group.
Scott is a photographer, designer, and an award-winning author of more than 35 books,
including The Photoshop Book for Digital Photographers,
Photoshop Down & Dirty Tricks , The
Photoshop Channels Book, Photoshop Classic Effects, The iPod Book
, and is Series Editor for
the Killer Tips book series from New Riders.
Scott's books have been translated into dozens of different languages, including Russian,
Chinese, French, Dutch, Korean, Spanish, Polish, Czechoslovakian, Greek, German, Japanese,
Italian, and Swedish, among others.
For two years straight, Scott has been awarded the distinction of being the world's #1 best-
selling author of all computer and technology books, across all categories.
Scott is Training Director for the Adobe Photoshop Seminar Tour and Conference Technical
Chair for the Photoshop World Conference & Expo. He's featured in a series of Adobe
Photoshop training DVDs and has been training Adobe Photoshop users since 1993.
For more information on Scott, visit
www.scottkelby.com
.

Chapter One. Pro Tips for Getting Really
Sharp Photos
If Your Photos Aren't Sharp, the Rest Doesn't Matter
[View full size image]
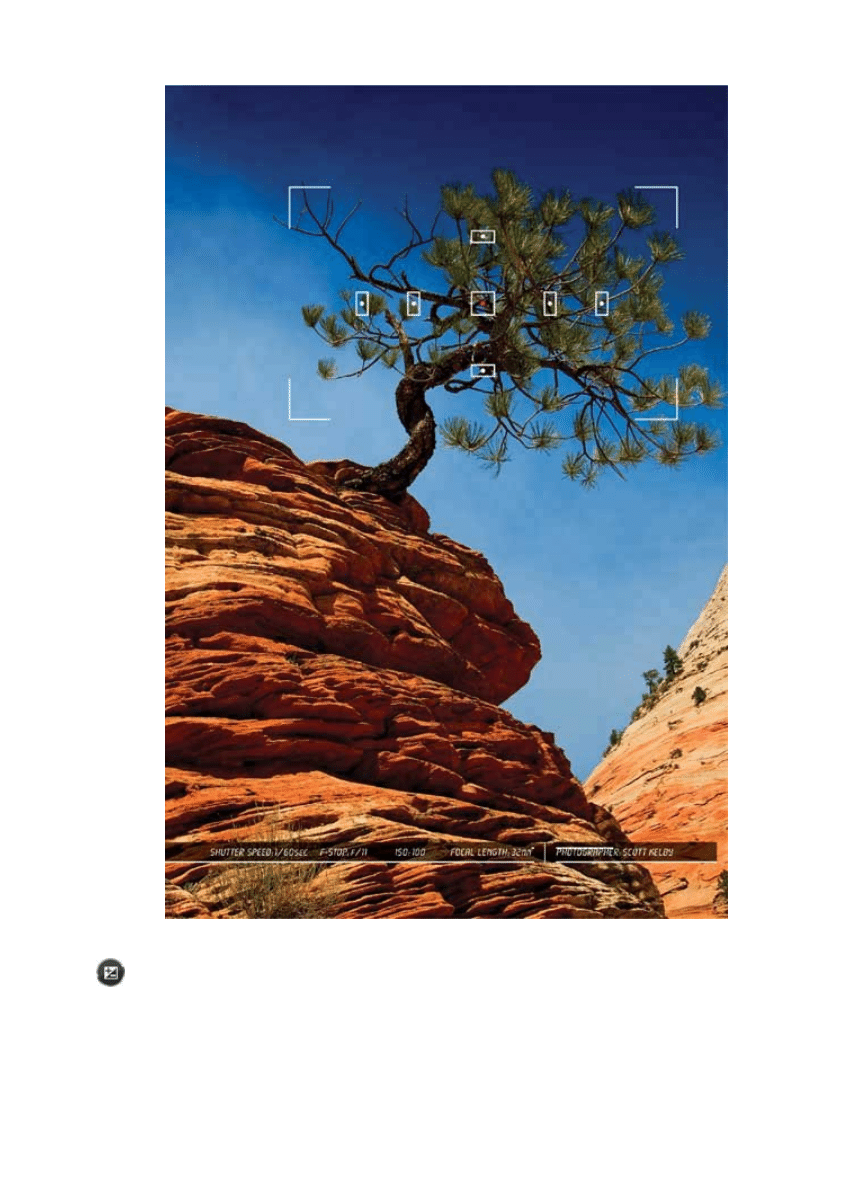
Having photos that are sharp and in focus is so vitally important to pro photographers
that they actually have coined a term for them. They call them "tack sharp." When I first
heard that term tossed around years ago, I naturally assumed that it was derived from the
old phrase "sharp as a tack," but once I began writing this book and doing some serious
research into its history, I was shocked and surprised at what I found. First of all, it's not
based on the "sharp as a tack" phrase at all. Tack sharp is actually an acronym. TACK stands
for Technically Accurate Cibachrome Kelvin (which refers to the color temperature of light in
photographs), and SHARP stands for Shutter Hyperfocal At Refracted Polarization. Now, these
may seem like highly technical terms at first, but once you realize that I totally made them
up, it doesn't seem so complicated, does it? Now, you have to admit, it sounded pretty
legitimate at first. I mean, I almost had ya, didn't I? Come on, you know I had you, and I'll

bet it was that "color temperature of light" thing I put in parenthesis that helped sell the idea
that it was real, right? It's okay to admit you were fooled, just like it's okay to admit that
you've taken photos in the past that weren't tack sharp (just in case you were wondering, the
term "tack sharp" is actually formed from the Latin phrase tantus saeta equina which means
"there's horsehair in my tantus"). Anyway, what's really important at this point is whatever
you do, keep your spotted palomino away from anything with a sharp, pointy end used to
attach paper to a bulletin board. That's all I'm saying.
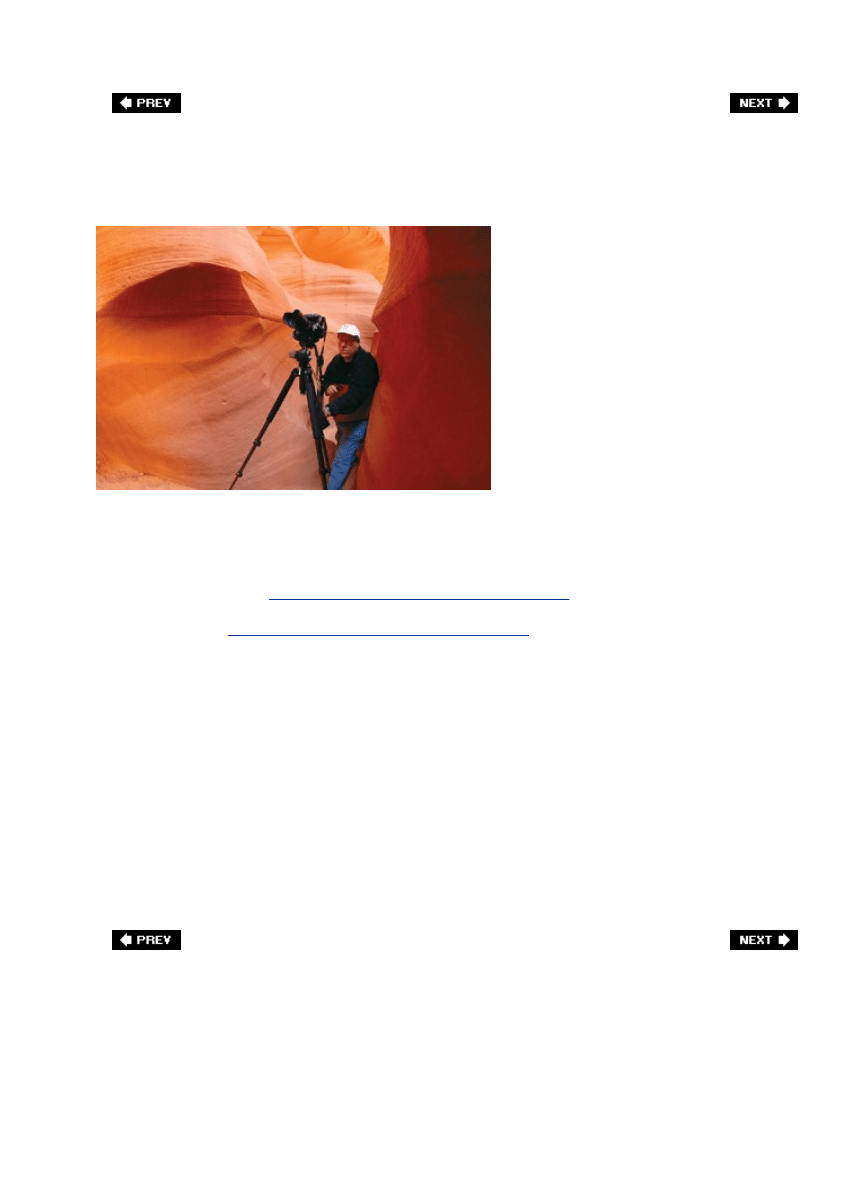
The Real Secret to Getting Sharp Photos
BILL FORTINEY
Hey, before we get to "
The Real Secret to Getting Sharp Photos
," I need to let you in on a few
quick things that will help you big time in getting the most from this book (sorry about
duping you with "
The Real Secret to Getting Sharp Photos
" headline, but don't worrythat
subject and more are coming right up, but first I have to make sure you totally understand
how this book works. Then it will all make sense and we can worry about sharp photos). The
idea is simple: you and I are out on a photo shoot. While we're out shooting, you have lots of
questions, and I'm going to answer them here in the book just like I would in real lifestraight
and to the point, without teaching you all the technical aspects and behind-the-scenes
technology of digital photography. For example, if we were out shooting and you turned to
me and said, "Hey Scott, I want to take a shot where that flower over there is in focus, but
the background is out of focus. How do I do that?" I wouldn't turn to you and give you a
speech about smaller and larger apertures, about how exposure equals shutter speed plus
aperture, or any of that stuff you can read in any book about digital photography (and I
mean any bookit's in every one). In real life, I'd just turn to you and say, "Put on your zoom
lens, set your aperture at f/2.8, focus on the flower, and fire away." That's how this book
works. Basically, it's you and me out shooting, and I'm giving you the same tips, the same
advice, and the same techniques I've learned over the years from some of the top working
pros, but I'm giving it to you in plain English, just like I would in person, to a friend.
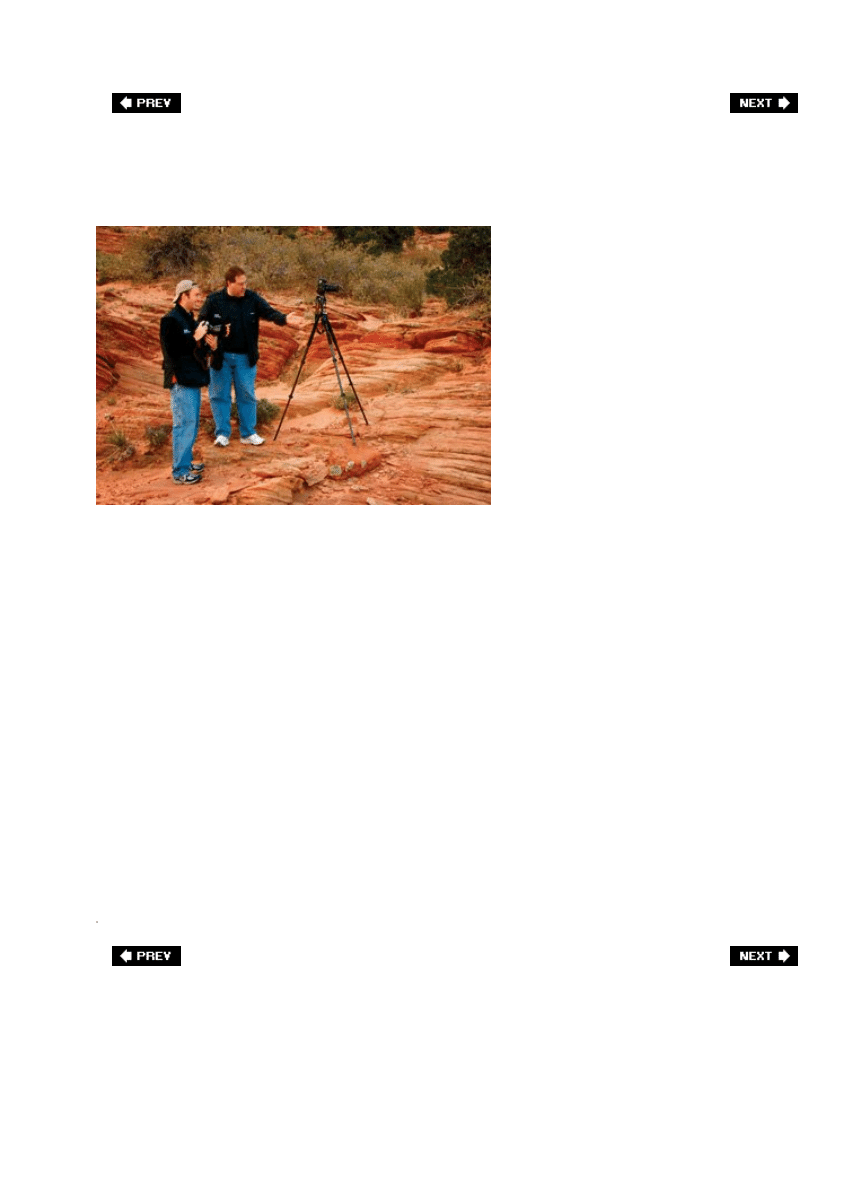
The Other Most Important Secret
BILL FORTINEY
Again, ignore that headline. It's just a cheap come-on to get you to keep reading. Anyway,
that's the scoop. Now, here's another important thing you need to know. To get the kind of
quality photos I think you're looking for, sometimes it takes more than changing an
adjustment in the camera or changing the way you shoot. Sometimes, you have to buy the
stuff the pros use to shoot like a pro. I don't mean you need to buy a new digital camera, but
instead, some accessories that the pros use in the field every day. I learned a long time ago
that in many fields, like sports for example, the equipment doesn't really make that big a
difference. For example, go to Wal-Mart, buy the cheapest set of golf clubs you can, hand
them to Tiger Woods, and he's still Tiger Woodsshooting 12 under par on a bad day.
However, I've never seen a field where the equipment makes as big a difference as it does in
photography. Don't get me wrong, hand Jay Maisel a point-and-shoot camera and he'll take
point-and-shoot shots that could hang in a gallery, but the problem is we're not as good as
Jay Maisel. So, to level the playing field, sometimes we have to buy accessories (crutches) to
make up for the fact that we're not Jay Maisel. Now, I don't get a kickback, bonus, or
anything from any of the companies whose products I recommend. I'm giving you the same
advice I'd give you if we were out shooting (which is the whole theme behind this book). This
is not a book to sell you stuff, but before you move forward, understand that to get pro
results sometimes you have to use (and that means buy) what the pros use.
Perhaps Even More Important Than That!
[View full size image]
Still a fake headline. Don't let it throw you. Now, although we want pro-quality photos, we
don't all have budgets like the pros, so when possible, I break my suggestions down into
three categories:
I'm on a budget. These are denoted with this
symbol. It simply means you're not loose with
money (meaning you're probably married and have
kids).
I can swing it. If you see this symbol, it means
photography is your passion and you don't mind if
your kids have to work a part-time job once they get
to college to buy books. So you're willing to spend
to have some better-than-average equipment.
If you see this symbol, it means you don't really
have a budget (you're a doctor, lawyer, venture
capitalist, U.S. Senator, etc.), so I'll just tell you
which one I would buy if I was one of those rich
bas*%$#s. (Kidding. Kind of.)
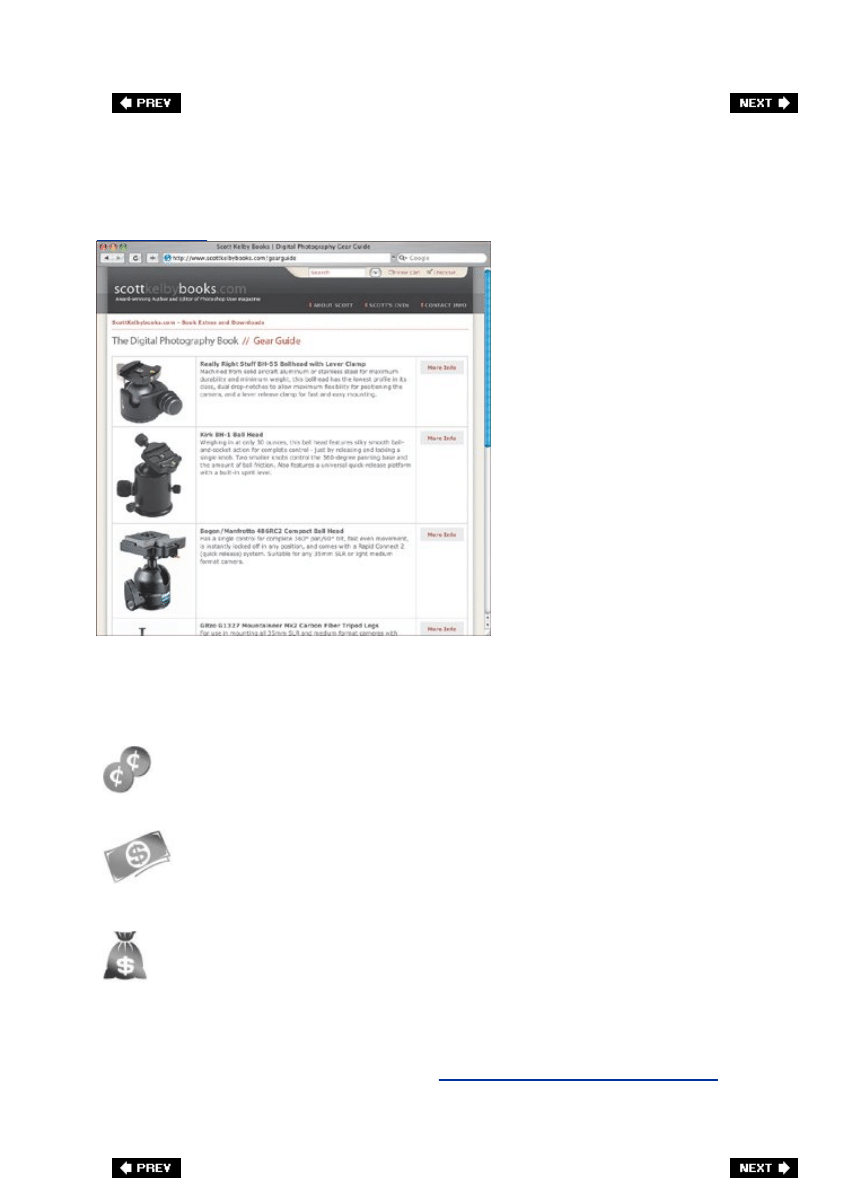
To makes things easy, I put up a webpage at
www.scottkelbybooks.com/gearguide
with
direct links to these goodies if you're so inclined. Again, I don't get a red cent if you use these
links or buy this stuff, but I don't mind because I made such a killing on you buying this
book. Again, I kid. Now, where do these links actually go? (See next page.)


If You Skip This, Throw Away Your Camera
[View full size image]
Hey, how do you like that grabber of a headline? Sweet! Totally a scam, but sweet
nonetheless. Now, those links on the webpage lead to one of two places: (1) to the individual
manufacturer who sells the product, if they only sell direct, or (2) to B&H Photo's website. So,
why B&H? Because I trust them. I've been buying all my personal camera gear from them for
years (so do all my friends, and most of the pros I know) and since you're now going to be
one of my shooting buddies, this is where I would tell you to go without a doubt. There are
three things I like about B&H, and why they have become something of a legend among pro
photographers: (1) They carry just about every darn thing you can think of, no matter how
small or insignificant it may seem. Lose your Nikon brand lens cap? They've got 'em in every
size. Lose your neck strap with Canon stitched on it? They've got them too. Lose that tiny
little cap that covers the input for your remote shutter release? They've got it. (2) When you
call them, you talk to a real photographer, and my experience is that they give you the real
straight scoop on what to buy. I've called up with something in mind, and have had their reps
tell me about something better that's cheaper. That's rare these days. And finally (3), their
prices are very, very competitive (to say the least). If you're ever in New York City, make it a
point to drop by their store. It is absolutely amazing. It's like Disneyland for photographers. I
could spend a day there (and I have). Anyway, they're good people. Now, does the headline
scam thing continue on the next page? You betcha.
If You Do This Wrong, It Will Lock Up
It's not as good as the last fake headline, but we're only one more page away from the real
chapter content, so I'm backing it off a little. Now, once you turn the page you'll notice lots of
photos of Nikon and Canon cameras, and it might make you think that I'm partial to these
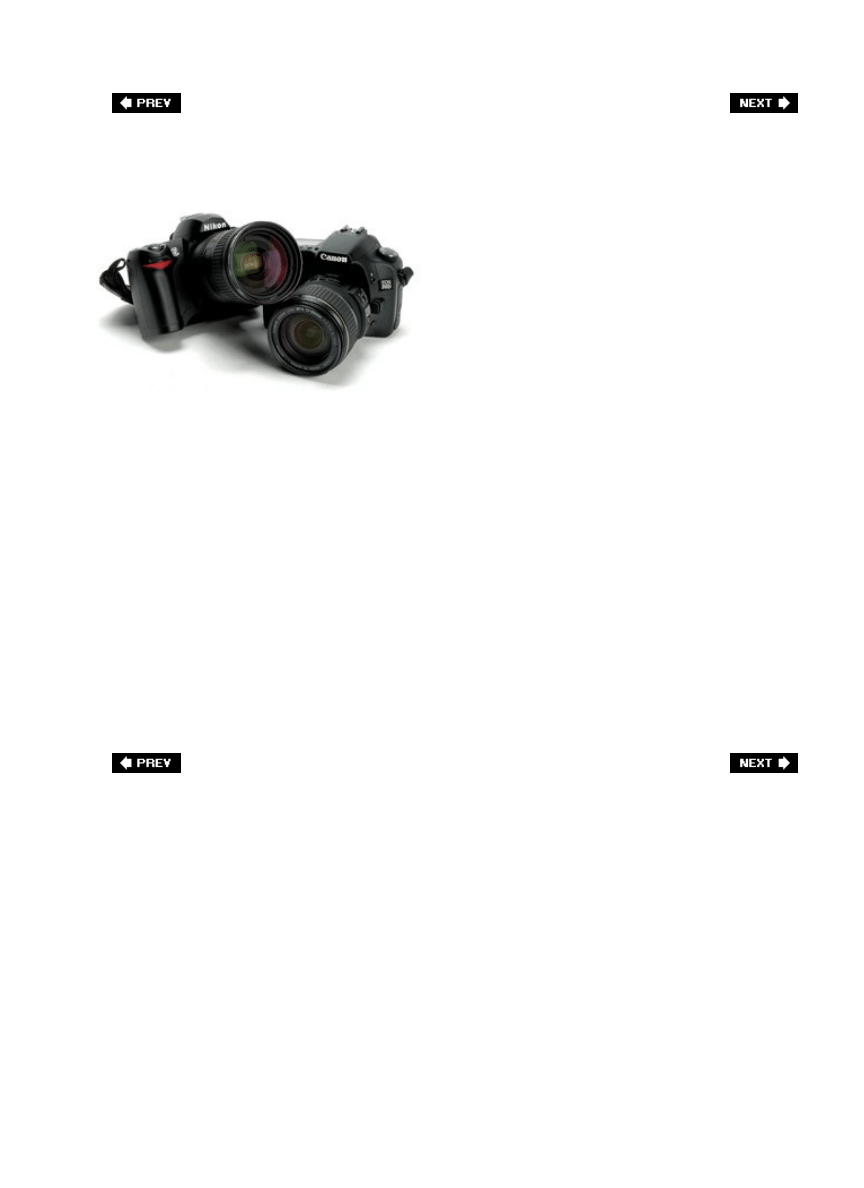
two brands. It's not just me. Apparently most of the world is partial to these two brands, so
you'll see lots of shots of them (mostly the Nikon D70s and the Canon 20Dtwo incredible
digital cameras for the money, and ones which many working pros use). Now, what if you
don't shoot with a Nikon or Canon camera? No sweatmost of the techniques in this book
apply to any digital SLR camera, and many of the point-and-shoot digital cameras as well, so
if you're shooting with a Sony or an Olympus or a Sigma, don't let it throw you that a Nikon
or Canon is pictured. This book is about taking dramatically better photosnot about how to
set up your Nikon or Canon, even though since most people are shooting with one or the
other, I usually show one or the other camera or menus. So, if I'm talking about white
balance, and I'm showing the Canon white balance menu, but you're not shooting with a
Canon, simply breathe deeply and say to yourself, "It's okay, my [insert your camera name
here] also has a white balance setting and it works pretty much like this one." Remember, it's
about choosing the right white balance, not exactly which buttons to push on your camera,
because if we were really out shooting together, we might not have the same brand of
camera.
It's Time to Get Serious
[View full size image]
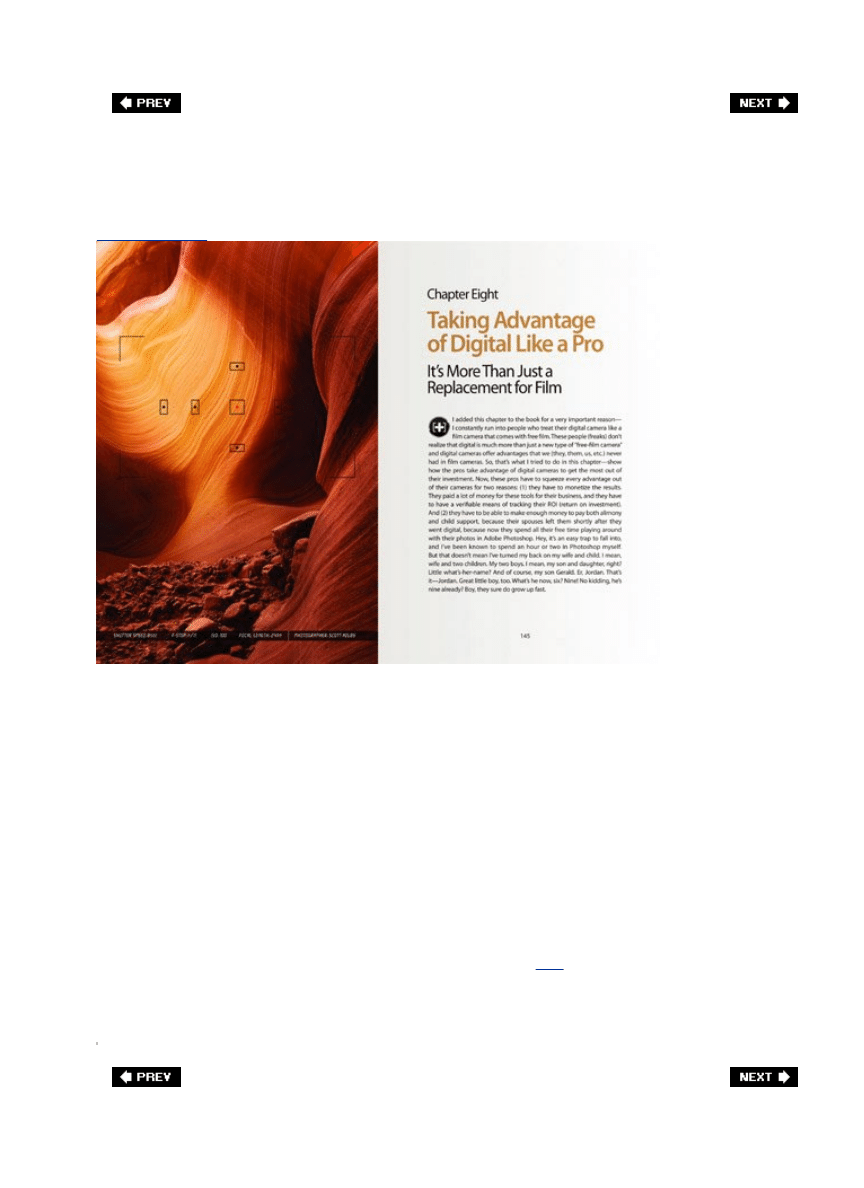
I have good news: Not only are we at the end of this "fake headline" thing, you'll also be
happy to know that from here on out, the rest of the book isn't laced with the wonderfully
inspired (lame) humor you found on these first few pages. Well, the intro page to each
chapter has more of this stuff, but it's only one page and it goes by pretty quickly. My books
have always had "enlightened" chapter intros (meaning I wrote them when I was plastered)
and the chapter names are usually based on movies, song names, or band names (the actual
chapter name appears below the fake chapter name). The other reason I do it is because I
need a chance to write something that doesn't use any of the terms shutter, aperture, or
tripod. In a book like this, there's not much room to interject personality (if you want to call
it that), and since the rest of the book is me telling you just what you need to know, there's
little time for my brand of humor. In fact, in life there's little time for my brand of humor, so
I sneak it in there. I have so little. Anyway, as you turn the page, keep this in mind: I'm
telling you these tips just like I'd tell a shooting buddy, and that means oftentimes it's just
which button to push, which setting to change, and not a whole lot of reasons why. I figure
that once you start getting amazing results from your camera, you'll go out and buy one of
those "tell me all about it" digital camera books (see page
192
for some suggestions). In all
seriousness, I truly hope this book ignites your passion for photography by giving you some
insight into how the pros get those amazing shots, and showing you how to get results you
always hoped you'd get from your digital photography. Now pack up your gear, it's time to
head out for our shoot.
Getting "Tack Sharp" Starts with a Tripod
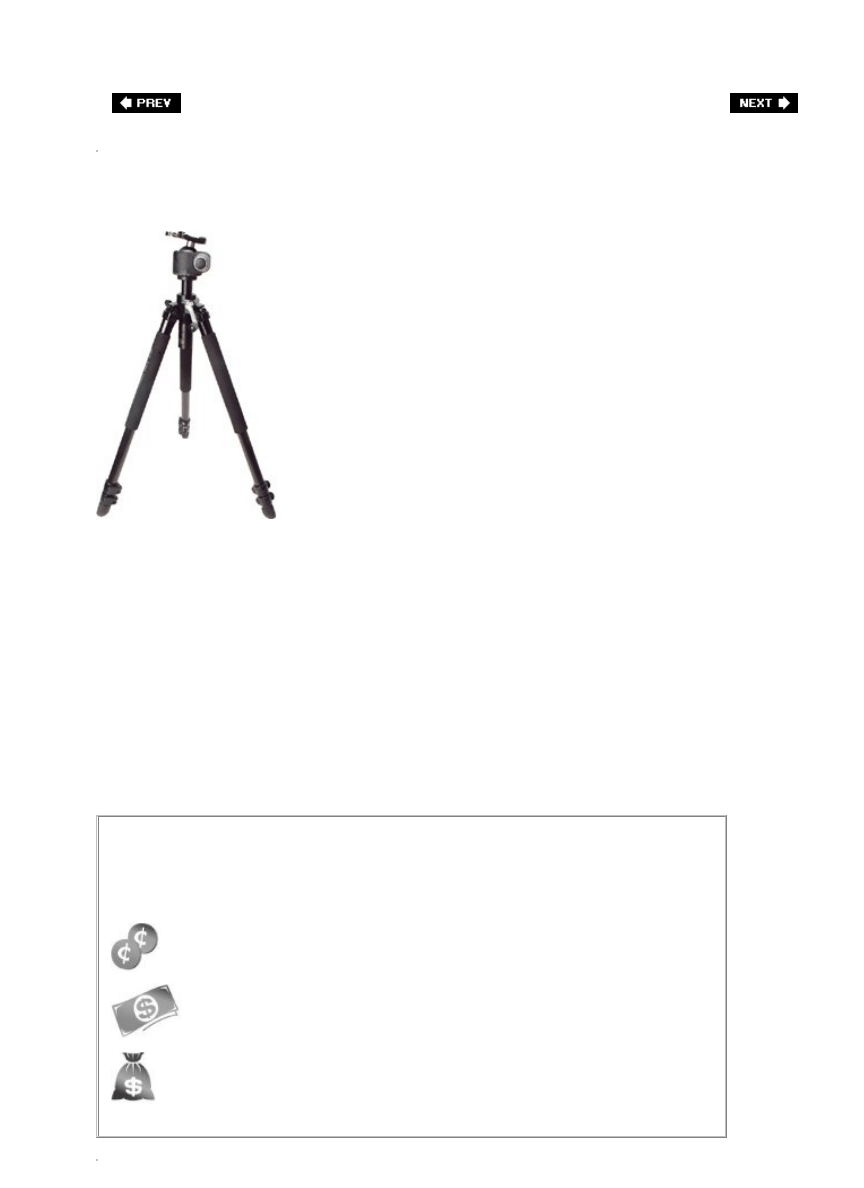
There's not just one trick that will give you the sharp photos the pros getit's a combination of
things that all come together to give you "tack sharp" shots. (Tack sharp is the term pro
photographers use to describe the ultimate level of sharpness. Sadly, we aren't the best at
coming up with highly imaginative names for things.) So, while there are a number of things
you'll need to do to get tack-sharp photos, the most important is shooting on a tripod. In
fact, if there's one single thing that really separates the pros from the amateurs, it's that the
pros always shoot on a tripod (even in daylight). Yes, it's more work, but it's the key
ingredient that amateurs miss. Pros will do the little things that most amateurs aren't willing
to do; that's part of the reason their photos look like they do. Keeping the camera still and
steady is a tripod's only job, but when it comes to tripods, some do a lot better job than
others. That's why you don't want to skimp on quality. You'll hear pros talking about this
again and again, because cheap tripods simply don't do a great job of keeping your camera
that steady. That's why they're cheap.
Scott's Gear Finder
Bogen/Manfrotto 3001BD (around $120)
Bogen/Manfrotto Mag Fiber 055MF3 (around $400)
Gitzo G1327 Mountaineer Mk2 (around $600)

A Ballhead Will Make Your Life Easier
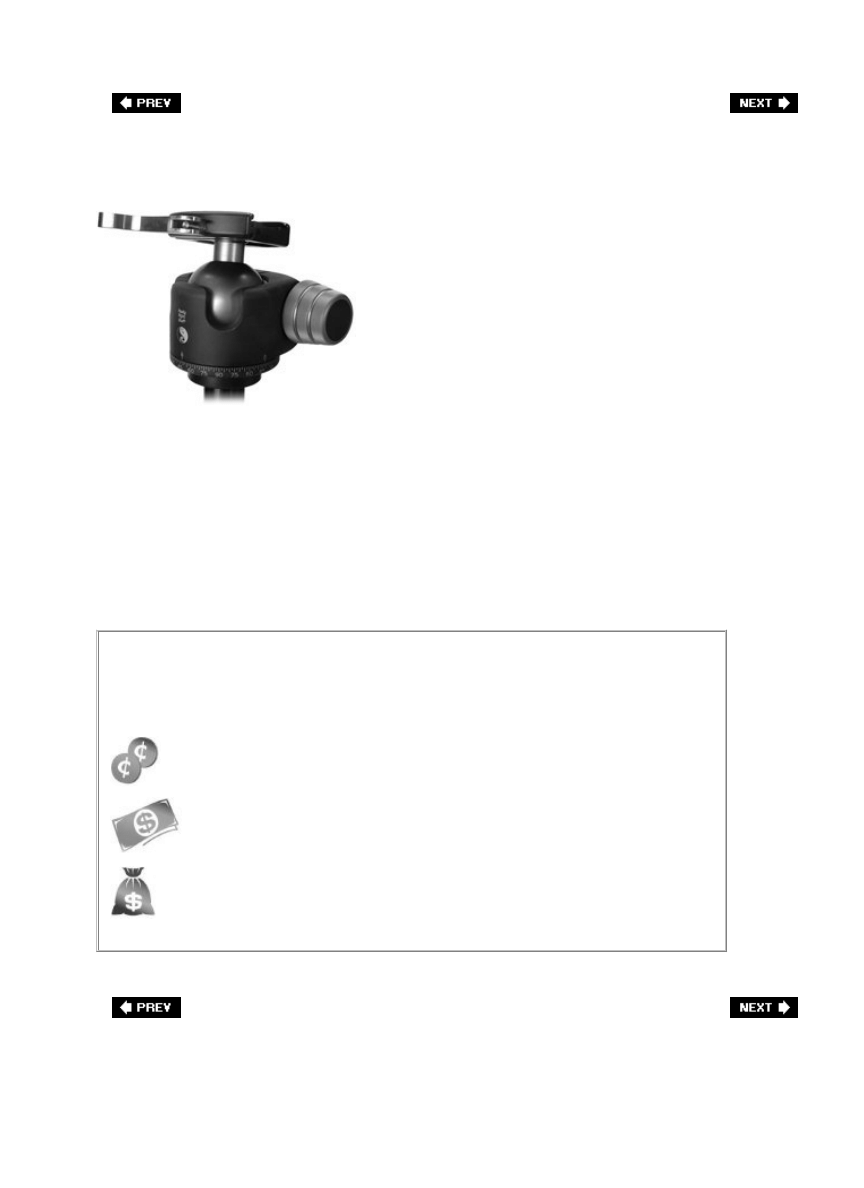
Here's the thing: when you buy a pro-quality tripod, you get just the tripod. It doesn't come
with a tripod head affixed like the cheap-o tripods do, so you'll have to buy one separately
(by the way, this ballhead thing isn't necessarily about getting sharp images, but it is about
keeping your sanity, so I thought I'd better throw it in). Ballheads are wonderful because
with just one knob they let you quickly and easily aim and position your camera accurately at
any angle (which you'll find is a huge advantage). Best of all, good ballheads keep your
camera locked down tight to keep your camera from "creeping" (slowly sliding one way or the
other) after you've set up your shot. Like tripods, a good ballhead isn't cheap, but if you buy
a good one, you'll fall in love with it.
Scott's Gear Finder
Bogen/Manfrotto 486RC2 (around $65)
Kirk BH-1 ($355)
Really Right Stuff BH-55 ($455)
Don't Press the Shutter (Use a Cable Release)
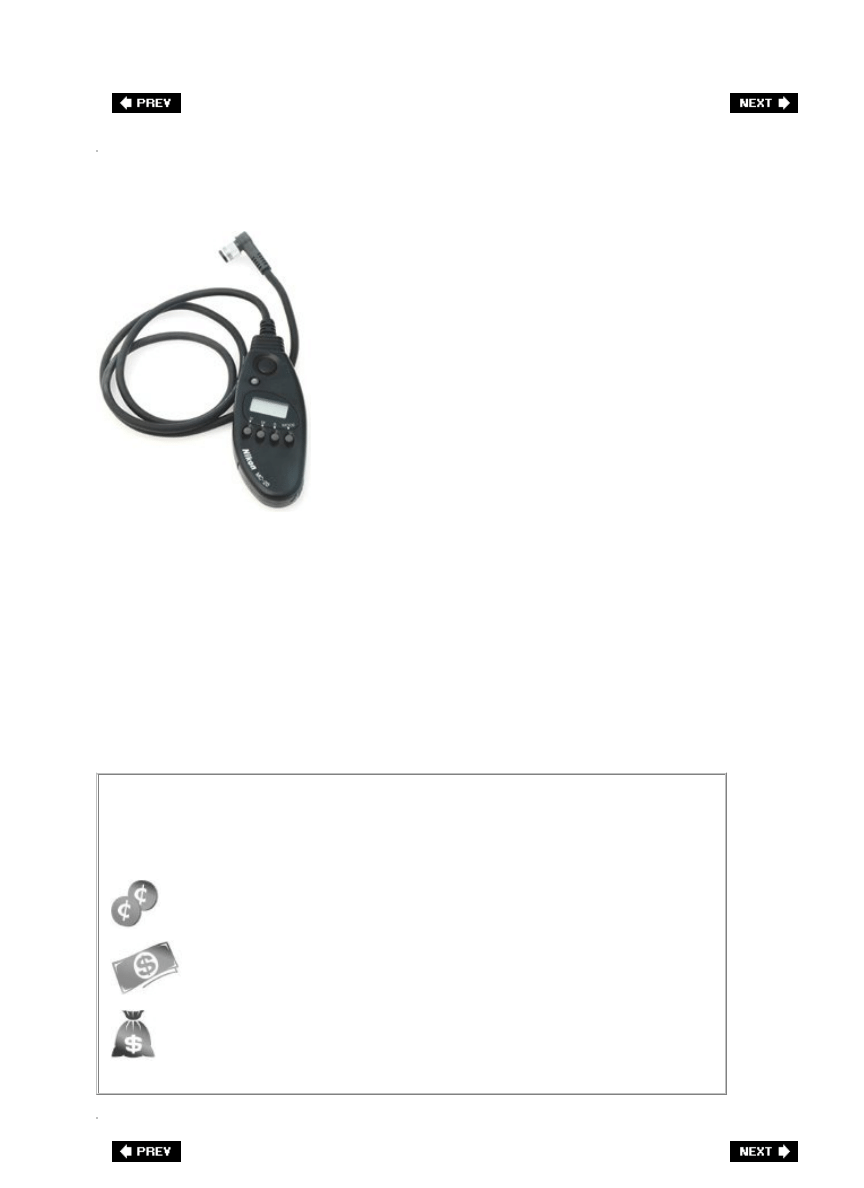
Okay, so now you're lugging around a tripod, but your photos are looking much sharper. Not
tack sharp yet, but much sharper. What will take you to the next level of sharpness? A cable
release. This is simply a cable that attaches to your digital camera (well, to most semi-pro or
high-end consumer dSLRs anyway) and it has a button on the end of it. That way, when you
press this button on the end of the cable, it takes the photo, but without you actually
touching the shutter button on the camera itself. So, why is this such a big deal? It's because,
believe it or not, when you press the shutter button on the camera, it makes the camera
move just enough to keep your photos from being tack sharp. I know, it sounds like a little
thing, but this one is bigger than it sounds. Using it is easier than you might think, and these
days most cameras support wireless remotes too, and they're fairly inexpensive as well. Now
your photos are just that much sharper.
Scott's Gear Finder
You can get a vinyl cable release for about 8 bucks.
You can get a wireless remote for about $25.
Get the Nikon high-tech remote for about $90.
Forgot Your Cable Release? Use a Self Timer
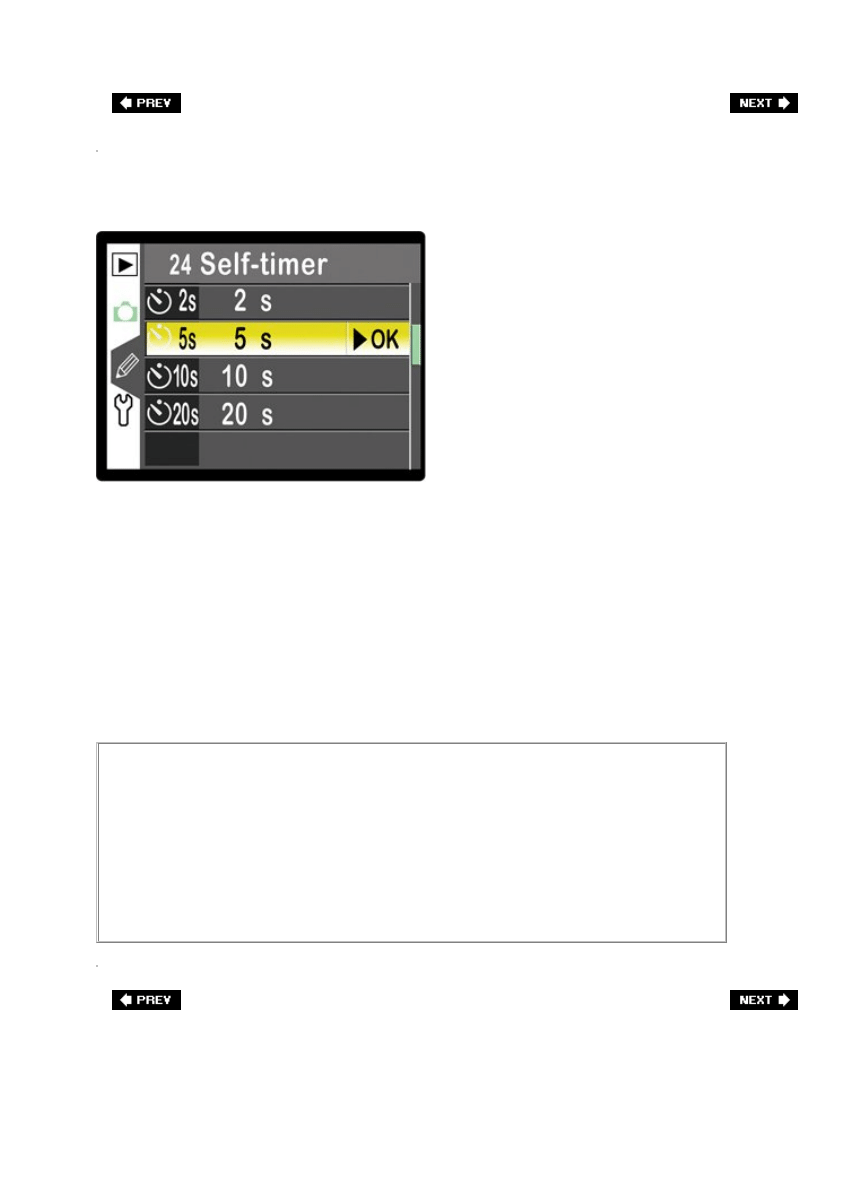
If you don't want to spring for a cable release (or wireless remote), or if you're out shooting
and forgot yours (which has happened to me on numerous occasions), then the next best
thing is to use your digital camera's built-in self timer. I know, you normally think of using
this so you can run and get in the shot real quick, but think about itwhat does the self timer
do? It takes the shot without you touching the camera, right? Right! So, it pretty much does
the same job of keeping your camera from movingyou just have to wait about 10 seconds. If
you hate waiting (I sure do), then see if your camera allows you to change the amount of
time it waits before it shoots. I've lowered mine to just five seconds (see the Nikon menu
above). I press the shutter button and then five seconds later, the shot fires (I figure that five
seconds is enough time for any movement caused by my pressing the shutter release to
subside).
A Better Cable Release
If you're thinking of getting a cable release to reduce vibration, you're better off
getting an electronic cable release rather than one that actually presses the
shutter button with a plunger-style wire. Because, even though it's better than
you pressing the button with your big ol' stubby vibration-causing finger, it
doesn't compare with an electronic (or wireless) version that doesn't touch the
camera at all.
Getting Super Sharp: Mirror Lock-Up
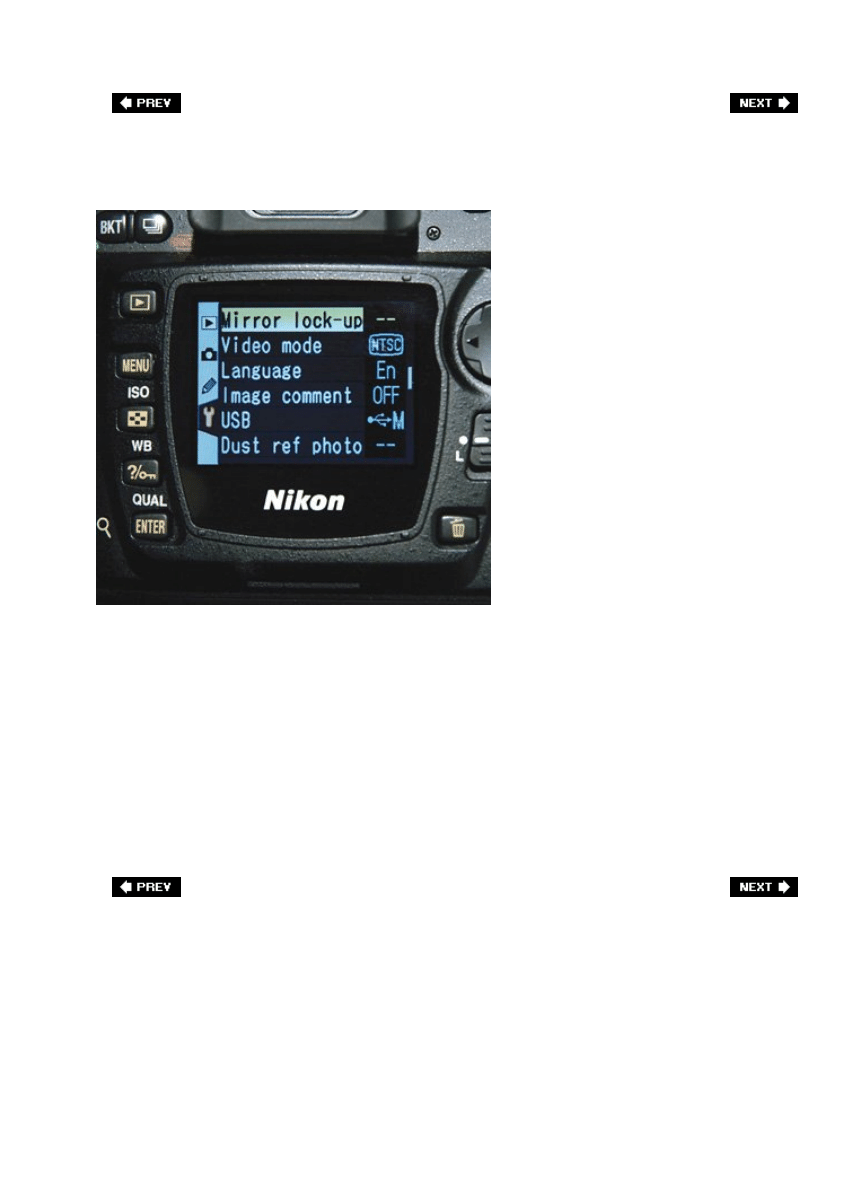
All right, we're starting to get a bit obsessed with camera shake, but that's what this chapter
is all aboutremoving any movement so we get nothing but the sharpest, cleanest photo
possible. The next trick we're going to employ is mirror lock-up. What this essentially does is
locks your camera's mirror in the up position, so when you take the shot, the mirror does not
move until after the exposure is madelimiting the movement inside your camera during the
exposure, and therefore giving you that much sharper a photo. How much does this matter?
It's probably second only to using a solid tripod! So, you'll need to find out where the mirror
lock-up control is for your camera (most of today's dSLR cameras have this feature because
you also use this to clean your sensor). Once you set your camera to mirror lock-up, you now
have to press the shutter release button (on your remote or cable release) twice: once to lift
the mirror, and then a second time to actually take the shot. Now, this technique sounds a bit
nitpicky. Does it make that big a difference? By itself, no. But add this to everything else, and
it's another step toward that tack sharp nirvana.
Turn Off Vibration Reduction (or IS)
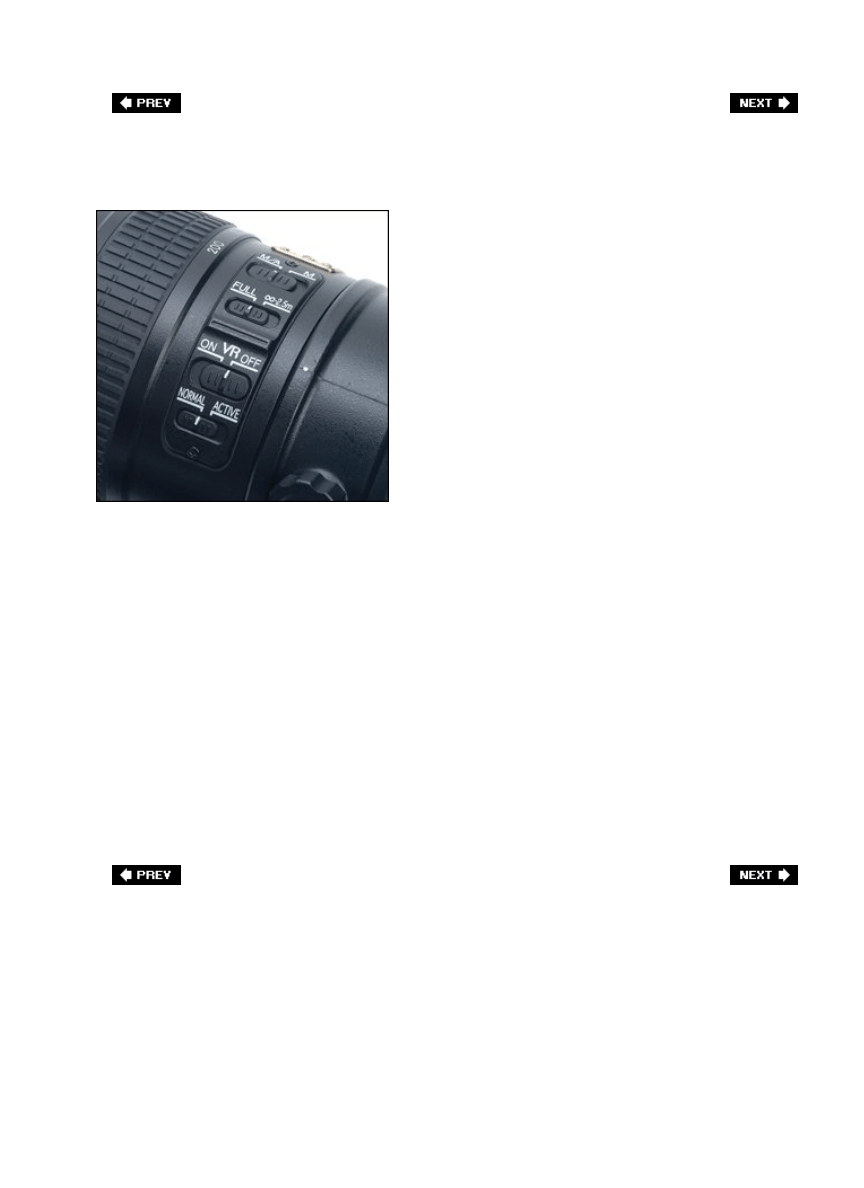
The big rage in digital lenses these days are the Vibration Reduction (VR) lens from Nikon
and the Image Stabilization (IS) lens from Canon, which help you get sharper images while
hand-holding your camera in low-light situations. Basically, they let you hand-hold in more
low-light situations by stabilizing the movement of your lens when your shutter is open
longer, and honestly, they work wonders for those instances where you can't work on a tripod
(like weddings, some sporting events, when you're shooting in a city, or just places where
they simply won't let you set up a tripod). If you're in one of those situations, I highly
recommend these VR or IS lenses, but depending on which one you use, there are some rules
about when you should turn them off. For example, we'll start with Nikon. If you are shooting
on a tripod with a Nikon VR lens, to get sharper images turn the VR feature off (you do this
right on the lens itself by turning the VR switch to the Off position). The non-technical
explanation why is, these VR lenses look for vibration. If they don't find any, they'll go
looking for it, and that looking for vibration when there is absolutely none can cause (you
guessed it) some small vibration. So just follow this simple rule: When you're hand-holding,
turn VR or IS on. When you're shooting on a tripod, for the sharpest images possible, turn VR
or IS off. Now, there are some Nikon VR lenses and some older Canon IS lenses that can be
used on a tripod with VR or IS turned on. So, be sure to check the documentation that came
with your VR or IS lens to see if yours needs to be turned off.
Shoot at Your Lens' Sharpest Aperture
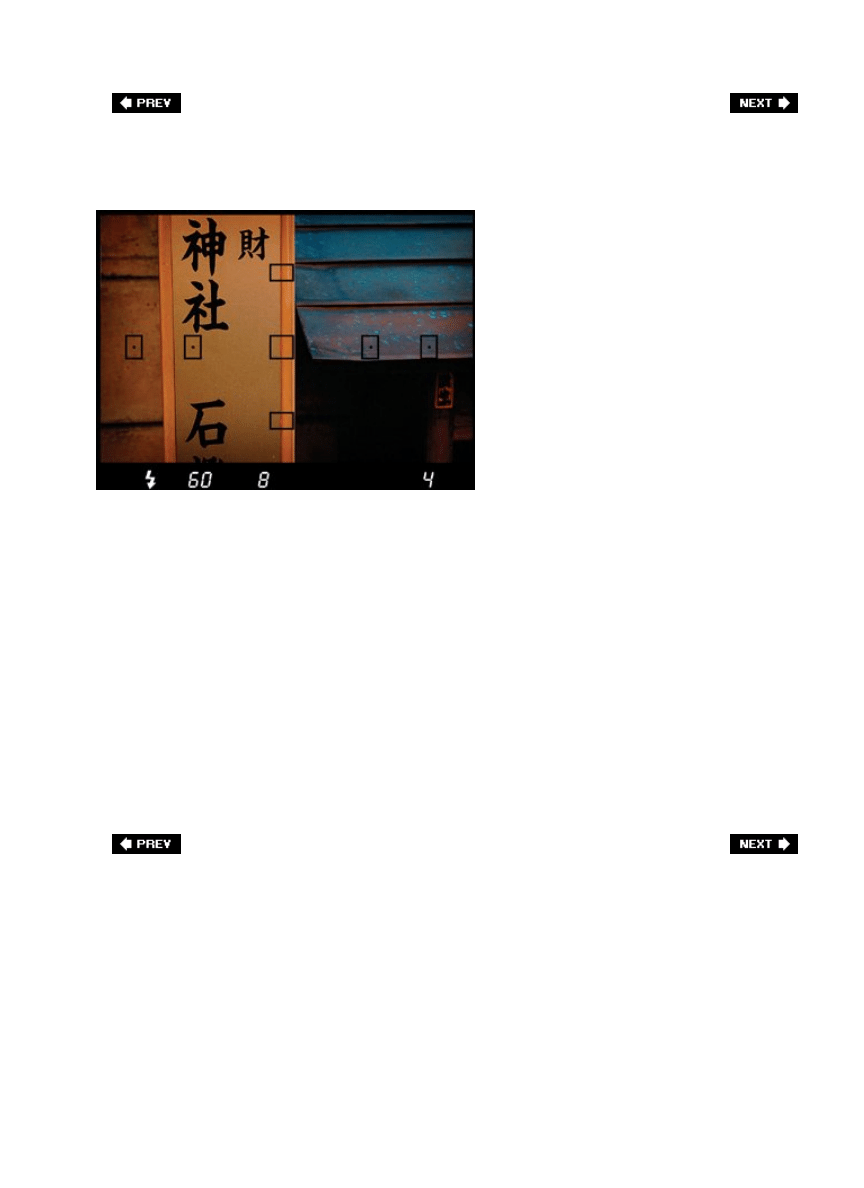
Another trick the pros use is, when possible, shoot at your lens' sharpest aperture. For most
lenses, that is about two full stops smaller than wide open (so the f-stop number you use will
go higher by two stops). For example, if you had an f/2.8 lens, the sharpest apertures for
that lens would be f/5.6 and f/8 (two full stops down from 2.8). Of course, you can't always
choose these apertures, but if you're in a situation where you can (and we'll talk about this
later in the book), then shooting two stops down from wide open will usually give you the
sharpest image your lens can deliver. Now, that being said, this isn't true for all lenses, and if
that's not the case with your lens, you'll find your lens' sweet spot (its sharpest aperture) in
short order if you keep an eye out for which aperture your sharpest images seem to come
from. You can do that by looking at your photos' EXIF data (the background information on
your shots embedded by your digital camera into the photos themselves) in Photoshop by
going under Photoshop's File menu and choosing File Info. Then click on Camera Data 1. It
will show the aperture your shot was taken at. If you find most of your sharpest shots are
taken with a particular aperture, then you've found your sweet spot. However, don't let this
override the most important reason you choose a particular aperture, and that is to give you
the depth of field you need for a particular shot. But it's just nice to know which f-stop to
choose when your main concern is sharpness, not controlling depth of field.
Good Glass Makes a Big Difference
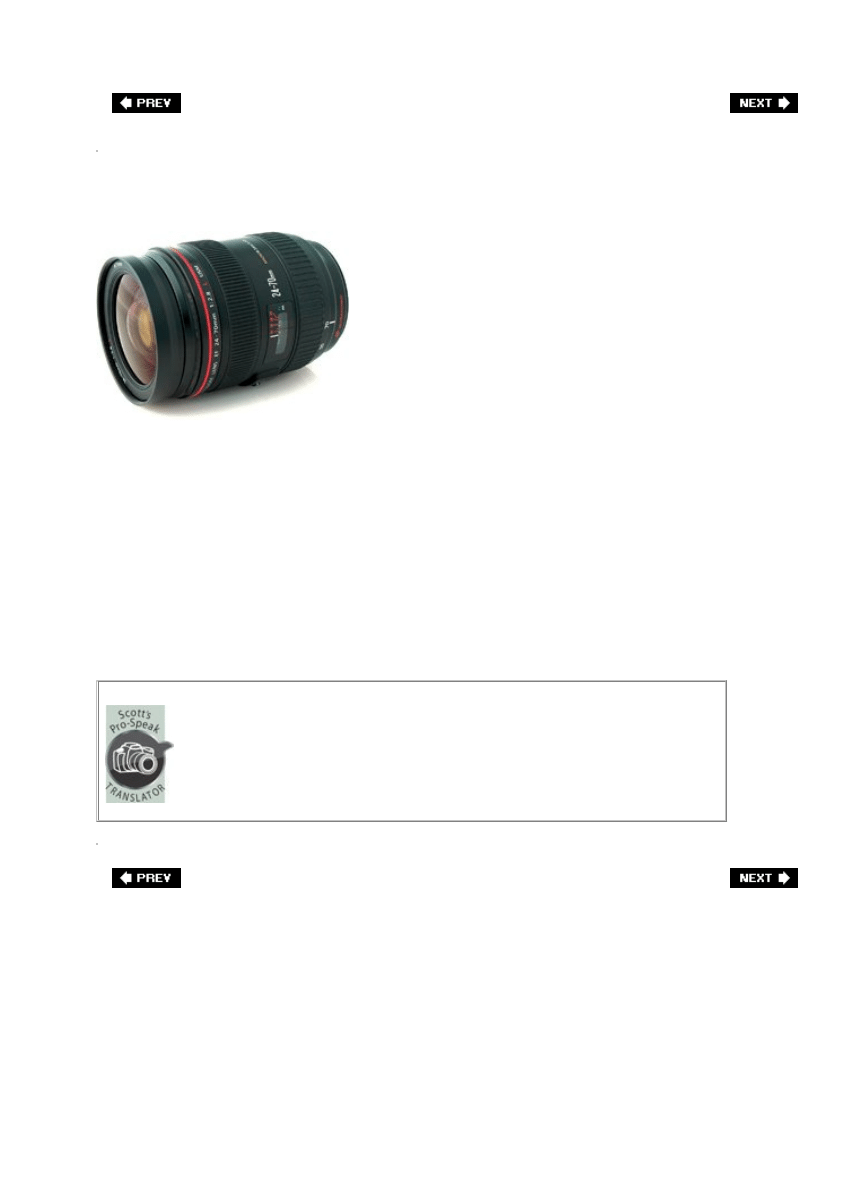
Does buying a really good lens make that big a difference in sharpness? Absolutely! A few
weeks back I went shooting with a friend in Zion National Park in Utah. He had just bought a
brand new Canon EF 2470mm f/2.8L, which is a tack-sharp lens. It's not cheap, but like
anything else in photography (and in life), the really good stuff costs more. His other lens
was a fairly inexpensive telephoto zoom he had been using for a few years. Once he saw the
difference in sharpness between his new, good quality lens and his cheap lens, he refused to
shoot with the telephoto again. He had been shooting with it for years, and in one day, after
seeing what a difference a really sharp lens made, he wouldn't shoot with his old lens again.
So, if you're thinking of buying a zoom lens for $295, sharpness clearly isn't your biggest
priority. A quality lens is an investment, and as long as you take decent care of it, it will give
you crystal clear photos that inexpensive lenses just can't deliver.
When talking about the quality of lenses, we don't use the word
"lens." It's too obvious. Instead, we say stuff like, "Hey, Joe's
got some really good glass," or, "He needs to invest in some
good glass," etc. Try this the next time you're at the local
camera store, and see if the guy behind the counter doesn't get
that "you're in the club" twinkle in his eye.
Avoid Increasing Your ISO, Even in Dim Light
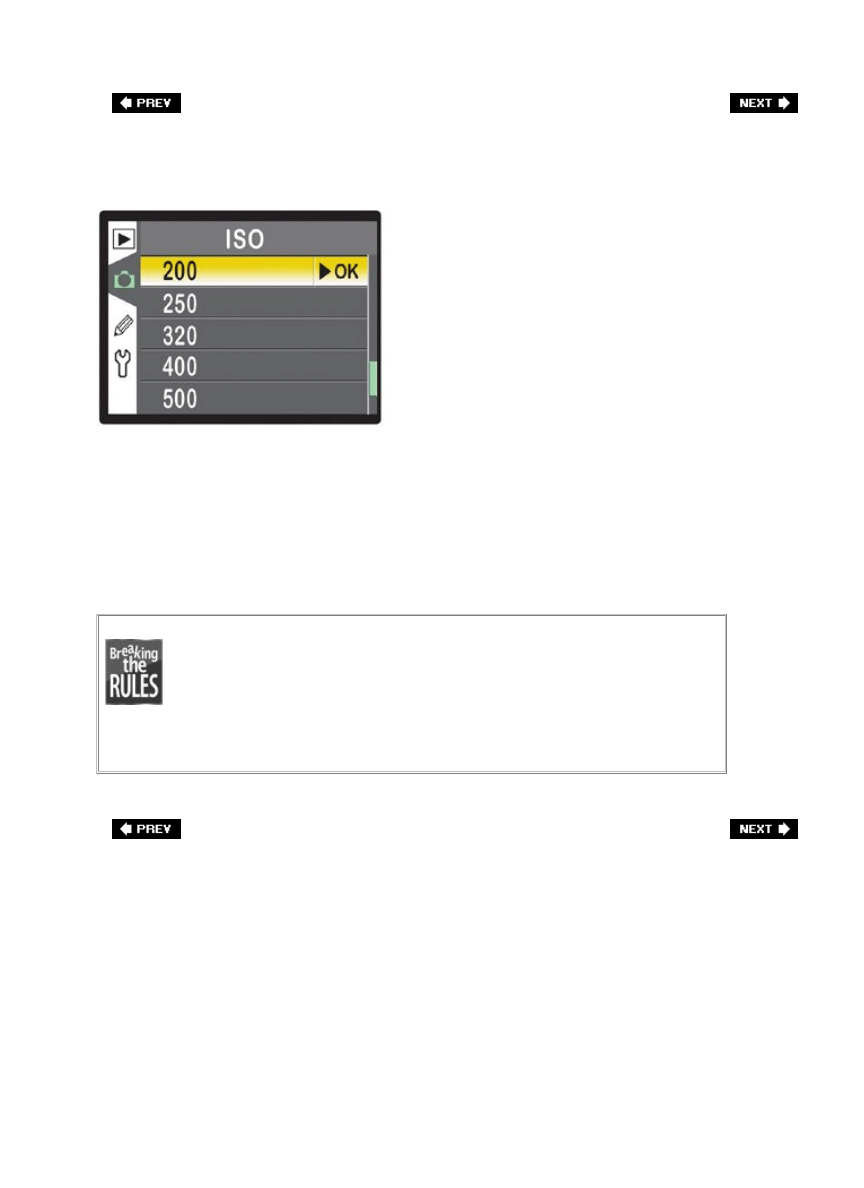
When you're shooting on a tripod in dim or low light, don't increase your ISO (your digital
equivalent of film speed). Keep your ISO at the lowest ISO setting your camera allows (ISO
200, 100, or 50, if your camera's ISO goes that low, as shown on the Nikon menu above) for
the sharpest, cleanest photos. Raising the ISO adds noise to your photos, and you don't want
that (of course, if you're hand-holding and have no choice, like when shooting a wedding in
the low lighting of a church, then increasing the ISO is a necessity, but when shooting on a
tripod, avoid high ISOs like the plagueyou'll have cleaner, sharper images every time).
So what do you do if you can't use a tripod (i.e., the place
where you're shooting won't allow tripods)? In this case, if
there's plenty of light where you're shooting, you can try using
very fast shutter speeds to minimize hand-held camera shake.
Set your camera to shutter priority mode and choose a speed
that matches or exceeds the focal length of your lens (a 180mm
lens means you'll shoot at 1/200 of a second).
Zoom In to Check Sharpness
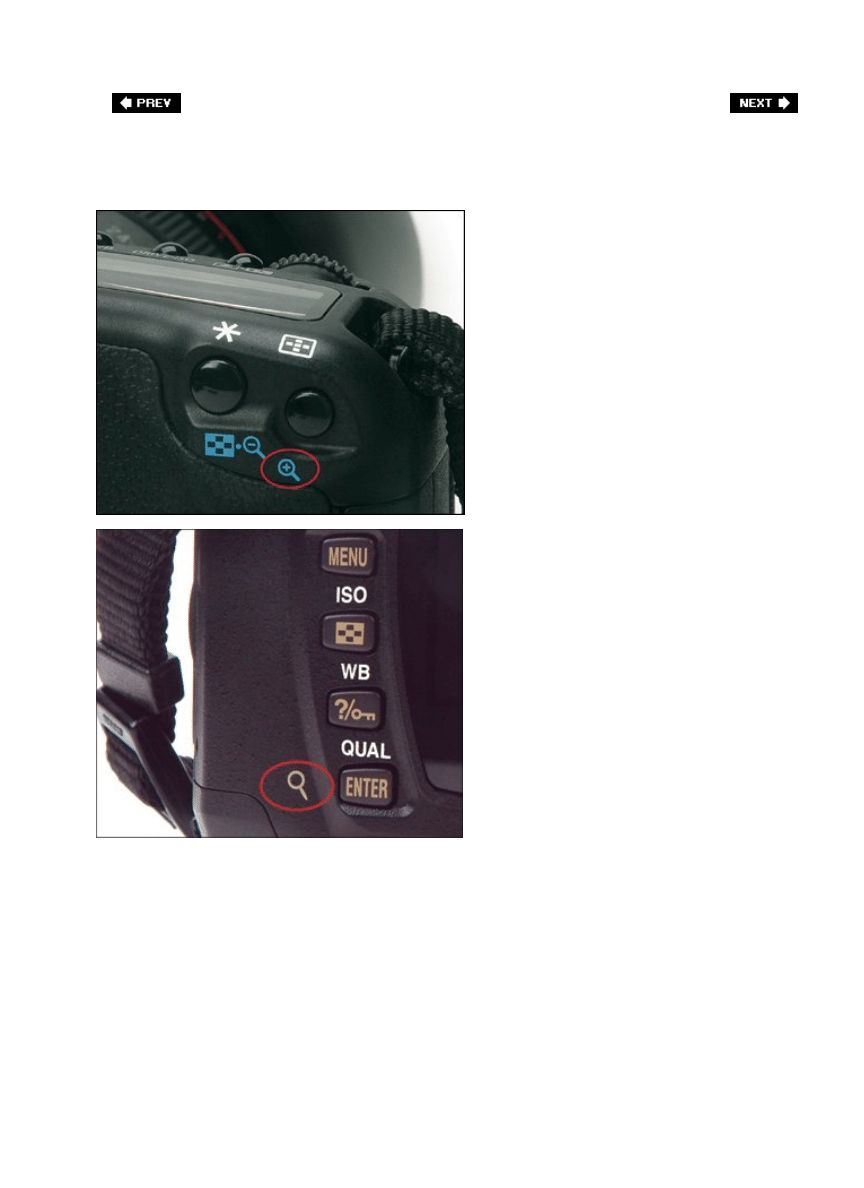
Here's a sad fact of digital photographyeverything looks sharp and in focus when you first
look at the tiny LCD screen on the back of your digital camera. When your photo is displayed
at that small size, it just about always looks sharp. However, you'll soon learn (once you
open your photo on your computer) that you absolutely can't trust that tiny little
screenyou've got to zoom in and check the sharpness. On the back of your camera there's a
zoom button that lets you zoom in close and see if the photo is really in focus. Do this right
on the spotright after you take the shot, so you still have a chance to retake the photo if you
zoom in and find out it's blurry. The pros always check for sharpness this way, because
they've been burned one too many times.

Custom Quick Zoom Settings
Some of today's digital SLR cameras have a quick zoom option, where you can set
a particular amount you want your zoom to zoom in to. Check your owner's
manual to see if your digital camera has a custom quick zoom setting.
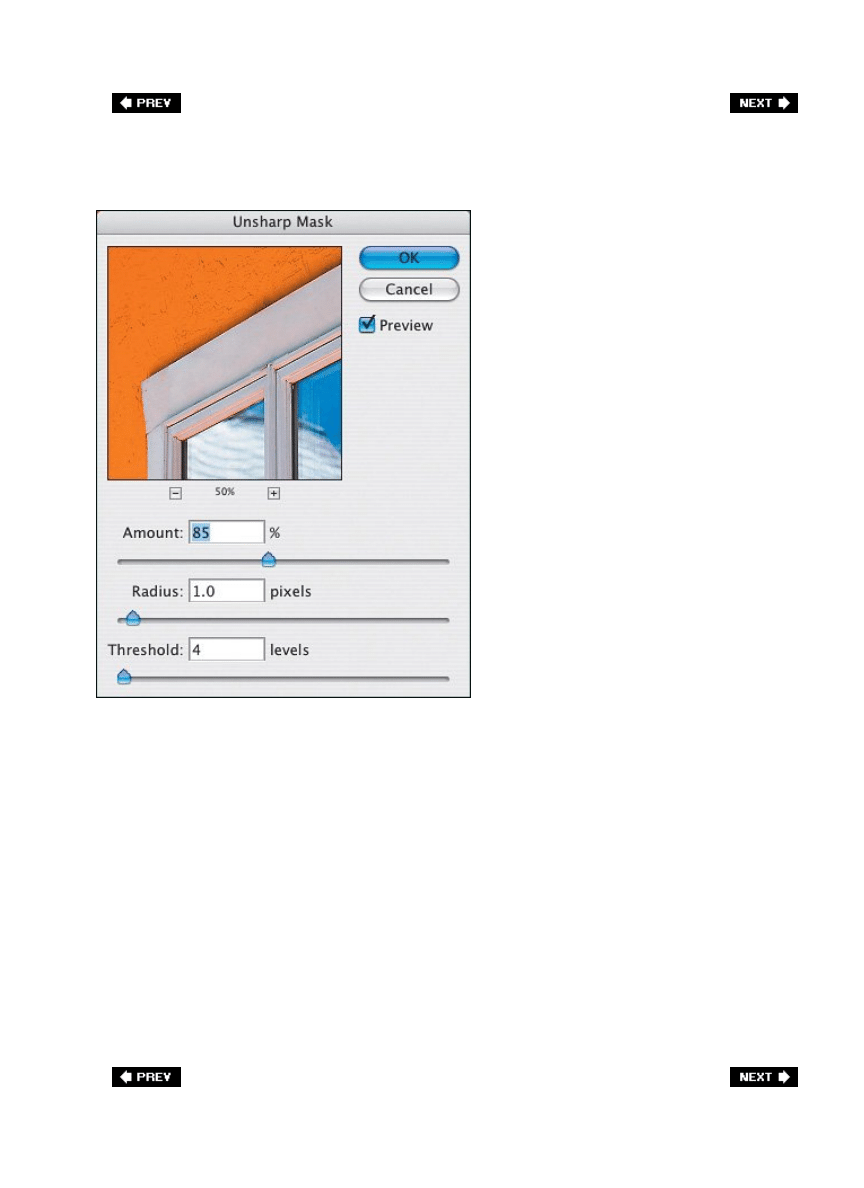
Sharpening After the Fact in Photoshop
If you've followed all the tips in this chapter thus far, and you've got some nice crisp photos,
you can still make your photos look even that much sharper by adding sharpening in either
Adobe Photoshop (the software darkroom tool the pros use) or Adobe Photoshop Elements
(the semi-pro version). Now, which photos need to be sharpened using Photo-shop? All of
them. We sharpen every single photo we shoot using Photoshop's Unsharp Mask filter. Okay,
it sounds like something named "unsharp" would make your photos blurry, but it doesn'tthe
name is a holdover from traditional darkroom techniques, so don't let that throw you. Using it
is easy. Just open your photo in Photoshop, then go under Photoshop's Filter menu, under
Sharpen, and choose Unsharp Mask. When the dialog appears, there are three sliders for
applying different sharpening parameters, but rather than going through all that technical
stuff, I'm going to give you three sets of settings that I've found work wonders.
For people: Amount 150%, Radius 1, Threshold 10
1.
For cityscapes, urban photography, or travel: Amount 65%, Radius 3, Threshold 2
2.
For general everyday use: Amount 85%, Radius 1, Threshold 4
3.
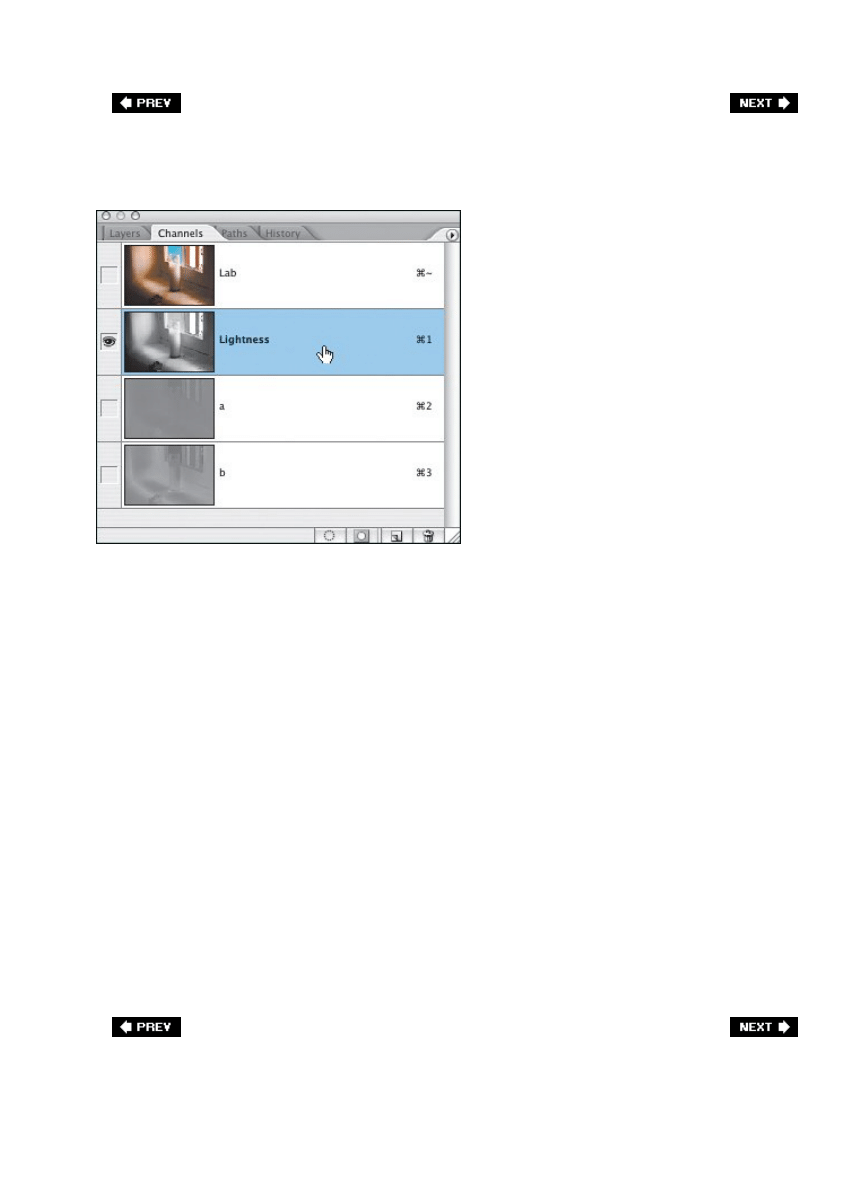
Pro Sharpening
This particular sharpening technique can only be done in the full-blown version of Photoshop
(in other words, not in Elements), because it requires access to Photoshop's Channels palette
(which Elements doesn't give you). So, if you have Photoshop, this is the method most widely
used by pros because it lets you sharpen more without creating nasty halos and color
artifacts which might otherwise occur when you use lots of sharpening. Here's how it's done:
1. Go under the Image menu, under Mode, and choose Lab Color.
2. Go to the Channels palette and click on the Lightness channel. (Note : This Lightness
channel contains only the detail and not the color in the photo, which is why you sidestep
some of the color problems you get by sharpening the full-color photo.)
3. Now apply the Unsharp Mask filter using the settings shown on the previous page.
4. Try applying the Unsharp Mask filter again, using the same settings. If your photo
appears too sharp, before you do anything else, go under the Edit menu and choose Fade
Unsharp Mask. In the Fade dialog, lower the Opacity slider to 50%, so you only get half-
strength on the second application of the filter.
5. Now go back under the Image menu, under Mode, and choose RGB Color.
That's itpretty easy stuff once you know the secret, eh?
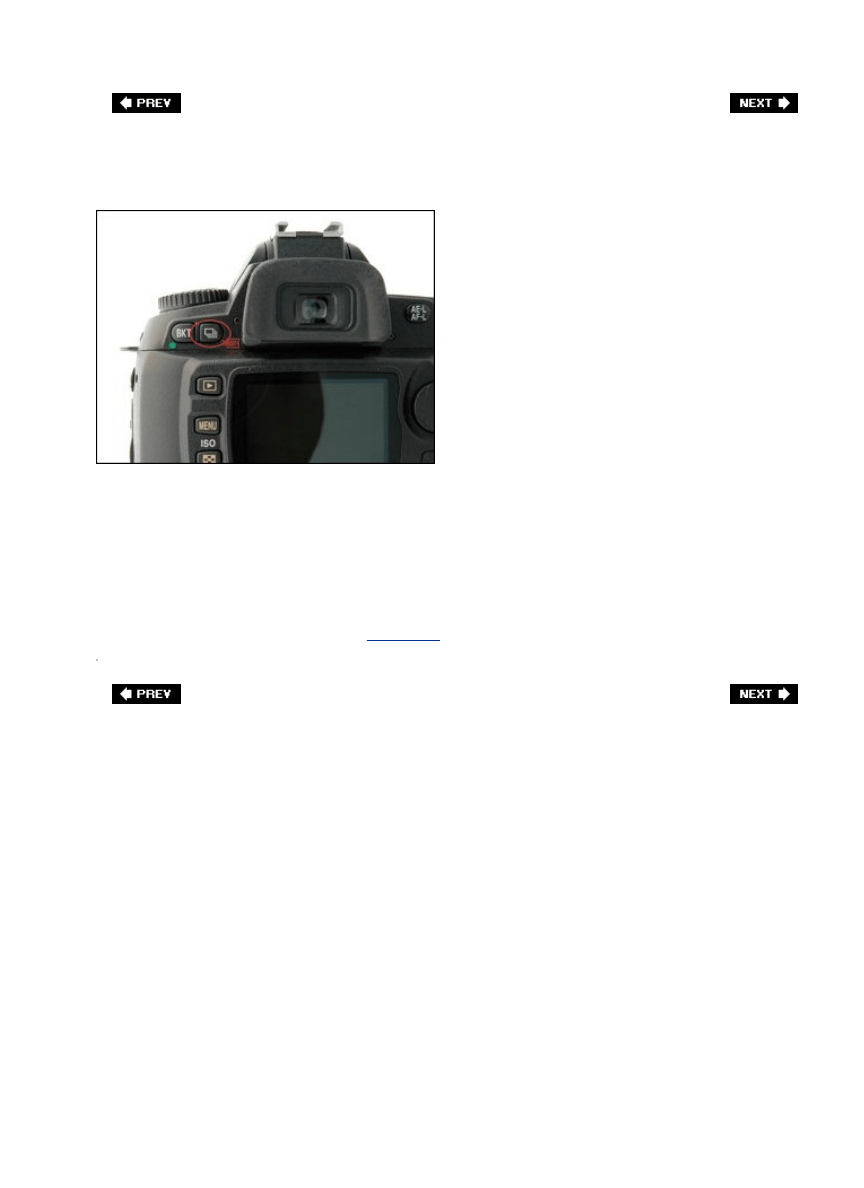
Hand-Held Sharpness Trick
Anytime you're hand-holding your camera in anything but nice direct sunlight, you're taking
your chances on getting a sharply focused photo because of camera shake, right? Well, the
next time you're hand-holding in less than optimal light, and you're concerned that you might
not get a tack-sharp image, try a trick the pros use in this sticky situationswitch to
continuous shooting (burst) mode and hold down the shutter release to take a burst of
photos instead of just one or two. Chances are at least one of those dozen or so photos is
going to be tack sharp, and if it's an important shot, it can often save the day. I've used this
on numerous occasions and it's saved my butt more than once. (Nikon's continuous shooting
mode button is pictured above. See
Chapter 5
for more on shooting in continuous [burst]
mode with both Nikon and Canon cameras.)
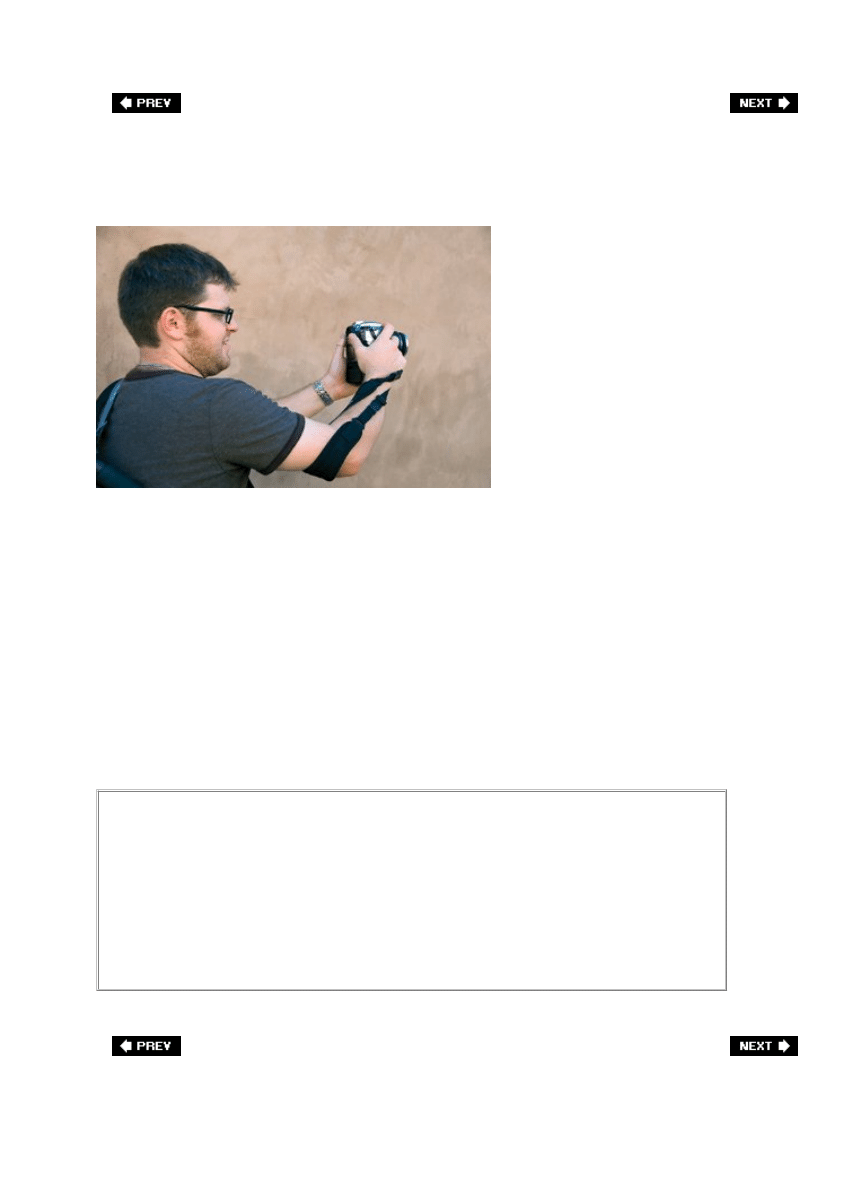
Getting Steadier Hand-Held Shots
SCOTT KELBY
I picked up this trick from photographer Joel Lipovetsky (pictured here) when we were out on
a shoot and I saw him hand-holding his camera with his camera strap twisted into what he
called "The Death Grip." It's designed to give you extra stability and sharper shots while
hand-holding your camera by wrapping your camera strap around your arm (just above the
elbow), then wrapping it around the outside of your wrist (as shown above) and pulling the
strap pretty tight, which makes your camera more stable in your hand. You can see how it
wraps in the photo above, but the pose is just for illustrative purposesyou still would hold the
camera up to your eye and look through the viewfinder as always. Thanks to Joel for sharing
this surprisingly cool tip.
Lean on Me!
Another trick the pros use (when they're in situations where they can't use a
tripod) is to either: (a) lean themselves against a wall to help keep themselves
steadyif they're steady then the camera's more steady, or (b) lean or lay their
lens on a railing, a fence, or any other already stationary object as kind of a
make-shift tripod. Keep an eye out for these tripod substitutes whenever you're
without yoursit can make a big difference.

Chapter Two. Shooting Flowers Like a
Pro
There's More to It Than You'd Think
[View full size image]
You're probably surprised to see a chapter in here about shooting flowers because
flowers seem like they'd be easy to shoot, right? I mean, they're just sitting therenot moving.
They're colorful. They're already interesting, and people love looking at them. It should be a
total no-brainer to get a good flower shot. But ya know what? It's not. It's a brainer. It's a
total brainer. Ya know why? It's because of pollination. That's right, it's the pollination that
naturally occurs in nature that puts a thin reflective film over flowers that can't normally be
seen with the naked eye, but today's sensitive CMOS and CCD digital camera sensors capture
this reflectance and it appears as a gray tint over our images. Not only does it turn the
photos somewhat gray (which causes flowers to lose much of their vibrant color), you also
lose sharpness as well. Now, there is a special photographic filter (called the Flora 61B from
PhotoDynamics) that can help reduce the effects of this pollination and both bring back the

sharpness and reduce the graying effect, but because of U.S. trade sanctions imposed by the
Federal Trade Commission, we can no longer buy this filter direct. Especially because I totally
made this whole thing up. I can't believe you fell for this two chapters in a row. Seriously,
how are you going to get good flower photos if you're falling for the old Flora 61B trick?
Okay, I'm just teasing you, but seriously, getting good flower shots is an art, and if you
follow the tips I'm laying out in this chapter, the very next flower shots you take will be that
much better (especially if you don't mind the graying and loss of sharpness caused by
pollination). See, there I go again. It's a sickness.
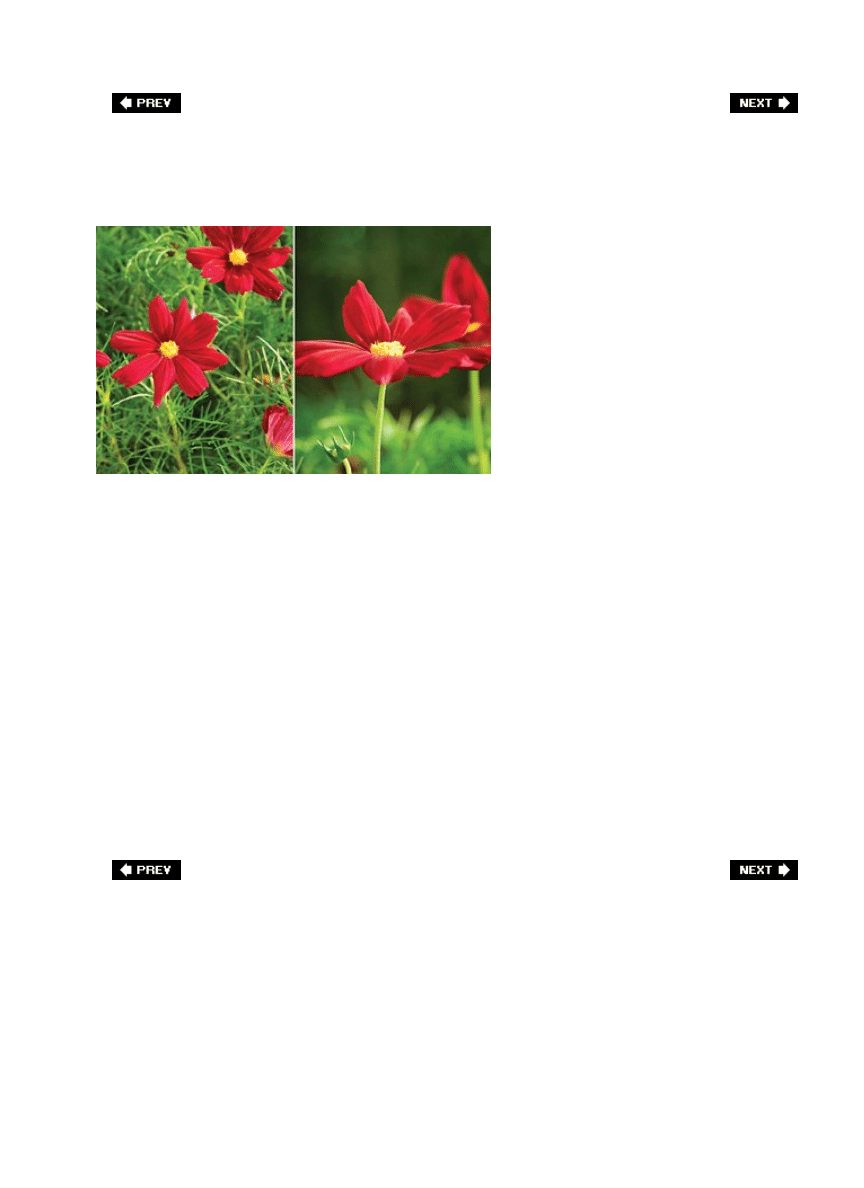
Don't Shoot Down on Flowers
SCOTT KELBY
On an average day, if you were to walk by some wildflowers in a field, or along a path in a
garden, you'd be looking down at these flowers growing out of the ground, right? That's why,
if you shoot flowers from a standing position, looking down at them like we always do, your
flower shots will look very, well...average. If you want to create flower shots with some
serious visual interest, you have to shoot them from an angle we don't see every day. That
usually means not shooting down on them, and instead getting down low and shooting them
from their level. This is another one of those things the pros routinely do and most amateurs
miss. Hey, if you're going to shoot some great flower shots, you're going to have to get your
hands dirty (well, at least your knees anyway). The shots above show the difference: on the
left, the typical "shooting down on flowers" shot; on the right, the same flowers in the same
light using the same focal length lens shot 30 seconds later, but I shot them from the side
(down on one knee) instead of shooting down on them. You can see the difference shooting a
non-typical angle makes. So, to get great flower shots, start by not shooting down on them.
By the way, while you're down there, try getting really low (down below the flowers) and
shoot up at them for a fascinating angle you rarely see!
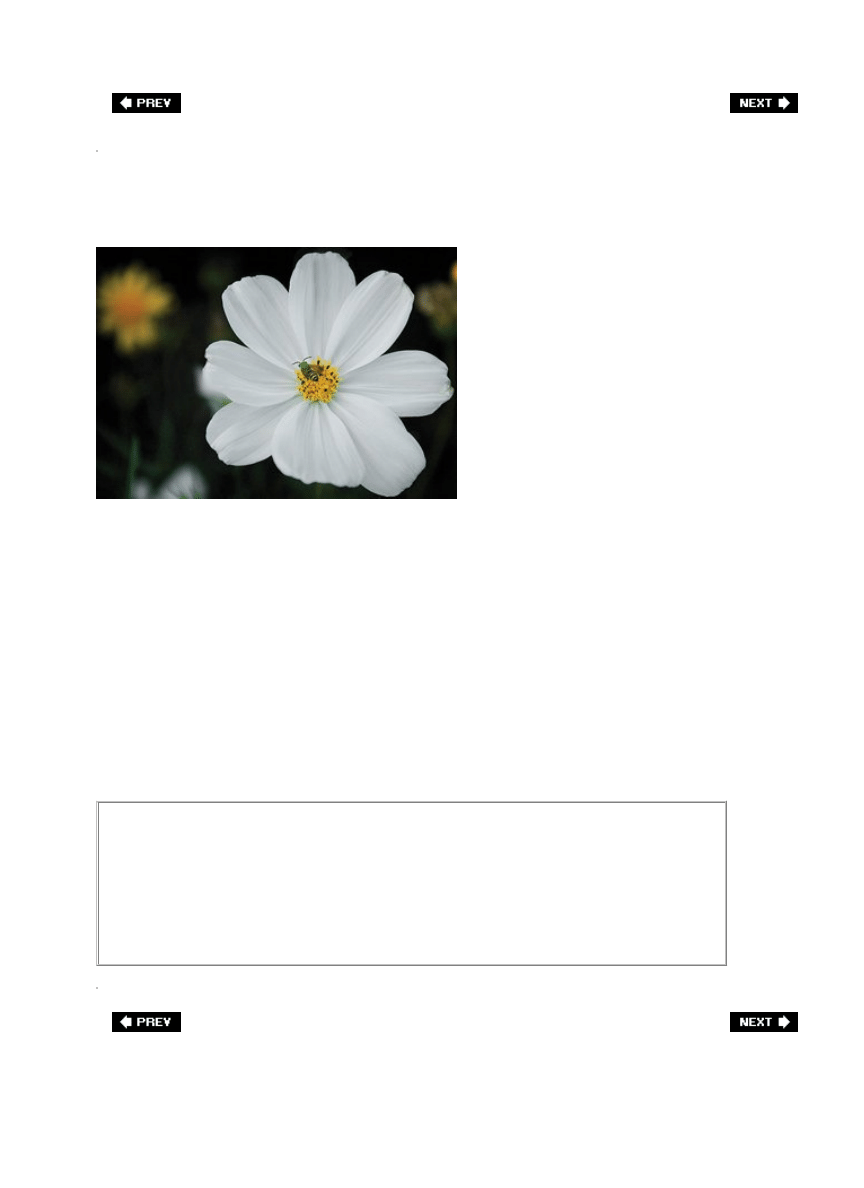
Shooting Flowers with a Zoom Lens
SCOTT KELBY
You don't have to have a macro (close-up) lens to take great flower shotszoom lenses work
just great for shooting flowers for two reasons: (1) you can often zoom in tight enough to
have the flower nearly fill the frame, and (2) it's easy to put the background out of focus with
a zoom lens, so the focus is just on the flower. Start by shooting in aperture priority mode
(set your mode dial to A), then use the smallest aperture number your lens will allow (in
other words, if you have an f/5.6 lens, use f/5.6). Then try to isolate one flower, or a small
group of flowers that are close together, and focus on just that flower. When you do this, it
puts the background out of focus, which keeps the background from distracting the eye and
makes a stronger visual composition.
Save Your Knees When Shooting Flowers
If you're going to be shooting a lot of flowers, there's an inexpensive accessory
that doesn't come from the camera store, but you'll want it just the sameknee
pads. They will become your best friend. Find them at Home Depot, Lowe's, or
any good gardening store.
Use a Macro Lens to Get Really Close
If you've ever wondered how the pros get those incredibly close-up shots (usually only seen
by bees during their pollination duties), it's with a macro lens. A macro lens (just called
"macro" for short) lets you get a 1:1 view of your subject and reveal flowers in a way that
only macros can. A macro lens has a very shallow depth of fieldso much so that when
photographing a rose, the petals in the front can be in focus and the petals at the back of the
rose can be out of focus. I'm not talking about an arrangement of roses in a vaseI'm talking
about one single rose. By the way, you must (see how that's set off in italics?), must, must
shoot macro on a tripod. When you're really in tight on a flower, any tiny bit of movement
will ruin your photo, so use every sharpening technique in
Chapter 1
to capture this amazing
new world of macro flower photography.
Turn Your Zoom Lens into a Macro Zoom
It's easyjust add a close-up lens (like we talk about on the next page) onto your
regular zoom lens. As I mention, these close-up lenses (also called two-element
close-up diopters) are cheaper than buying a full-blown macro lens, plus adding it
to your zoom gives you zoom capability, as well. You can buy single-element
close-up filters, but they're generally not as sharp at the edges, but for flowers
the edges usually aren't as important anyway.
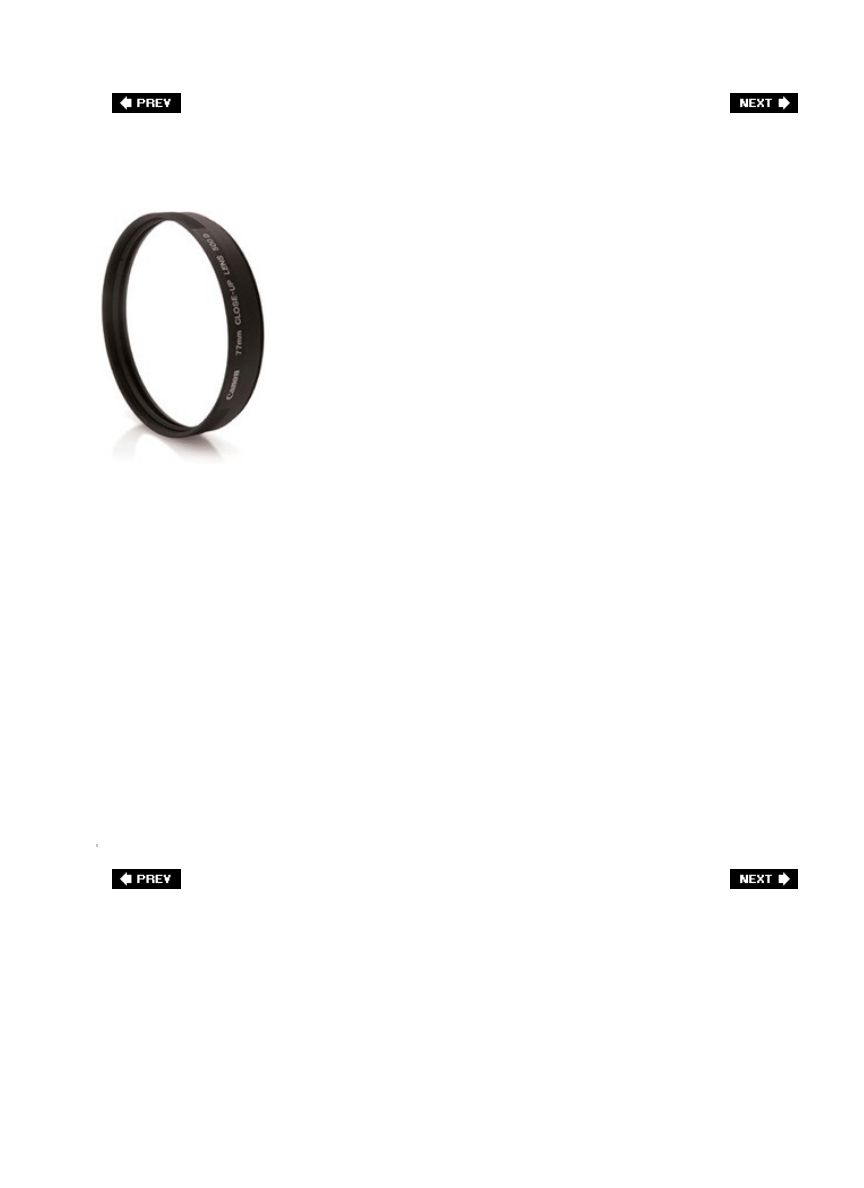
Can't Afford a Macro? How 'bout a Close-Up?
I learned about this from my buddy (and famous wildlife and nature photographer) Moose
Peterson, and what it lets you do is turn your telephoto zoom lens into a macro lens for 1/4
of the price, and 1/10 the weight and size. It looks just like a thick filter (it's about 1" thick),
and it screws onto both Canon and Nikon lenses just like a traditional filter, but it turns your
zoom lens into a macro zoom. What's great about this little close-up lens is that:
it takes up so little room in your camera bag;
1.
it weighs just a few ounces;
2.
and best of allit's pretty inexpensive (well, compared to buying a decent macro lens,
which would run you at least $500).
3.
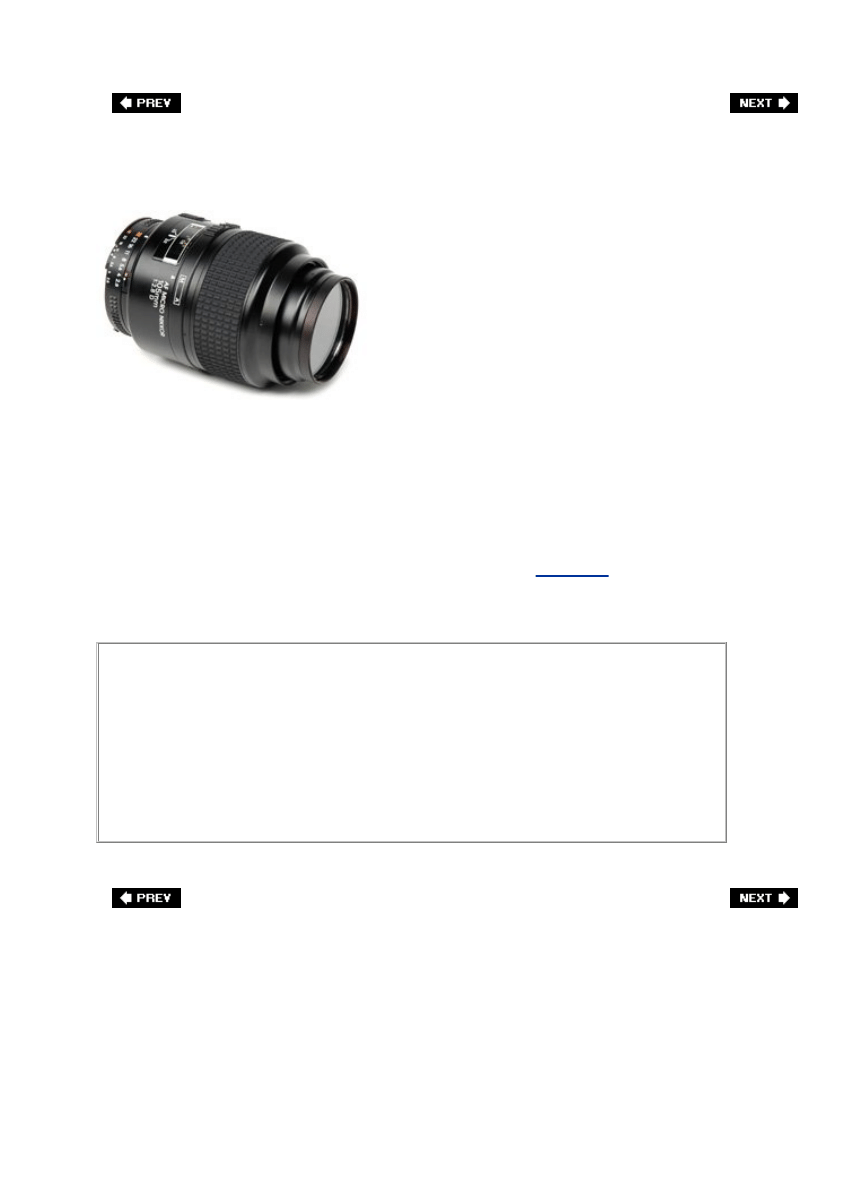
It's called the Canon Close-Up Lens (even though it's from Canon, you can get a version that
screws onto a Nikon lens. It's the only thing I know of from Canon that's designed for Nikon
cameras. I use the Canon Close-Up Lens 500D to attach to my 70200mm Nikon VR lens [it's
77mm], and it works wonders). So, how much is this little wizard? Depending on the size of
the lens you're going to attach it to, they run anywhere from about $70 to $139. That ain't
bad!
When to Shoot Flowers
©ISTOCKPHOTO/ANDREI BOTEZATU
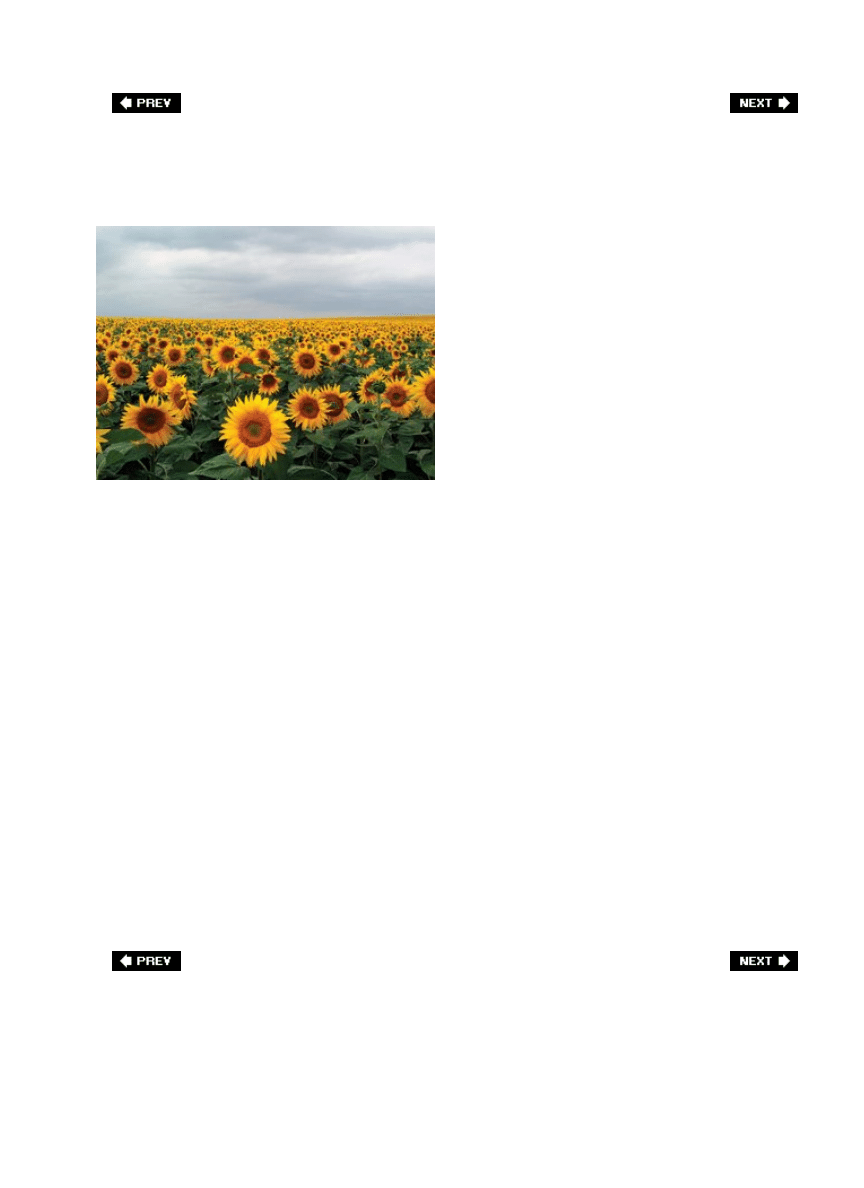
There are three ideal times to shoot flowers:
1. On cloudy, overcast days. The shadows are soft as the sun is hidden behind the clouds,
and the rich colors of the flowers aren't washed out by the harsh direct rays of the sun.
That's why overcast days are a flower photographer's best friend. In fact, there's
probably only one other time that's better than shooting on an overcast day, and that
is...
2. Just after a rain. This is a magical time to shoot flowers. Shoot while the sky is still
overcast and the raindrops are still on the petals (but of course, to protect your digital
camera [and yourself], don't actually shoot in the rain). If you've got a macro lens, this is
an amazing time to use it. While you're shooting macro, don't forget to shoot the
raindrops on leaves and stems as well, while they're reflecting the colors of the flowers
(of course, don't forget to shoot on a tripod if you're shooting macro).
3. If you shoot on sunny days, try to shoot in the morning and late afternoon. To make the
most of this light, shoot with a long zoom lens and position yourself so the flowers are
backlit, and you'll get some spectacular (but controlled) back lighting.
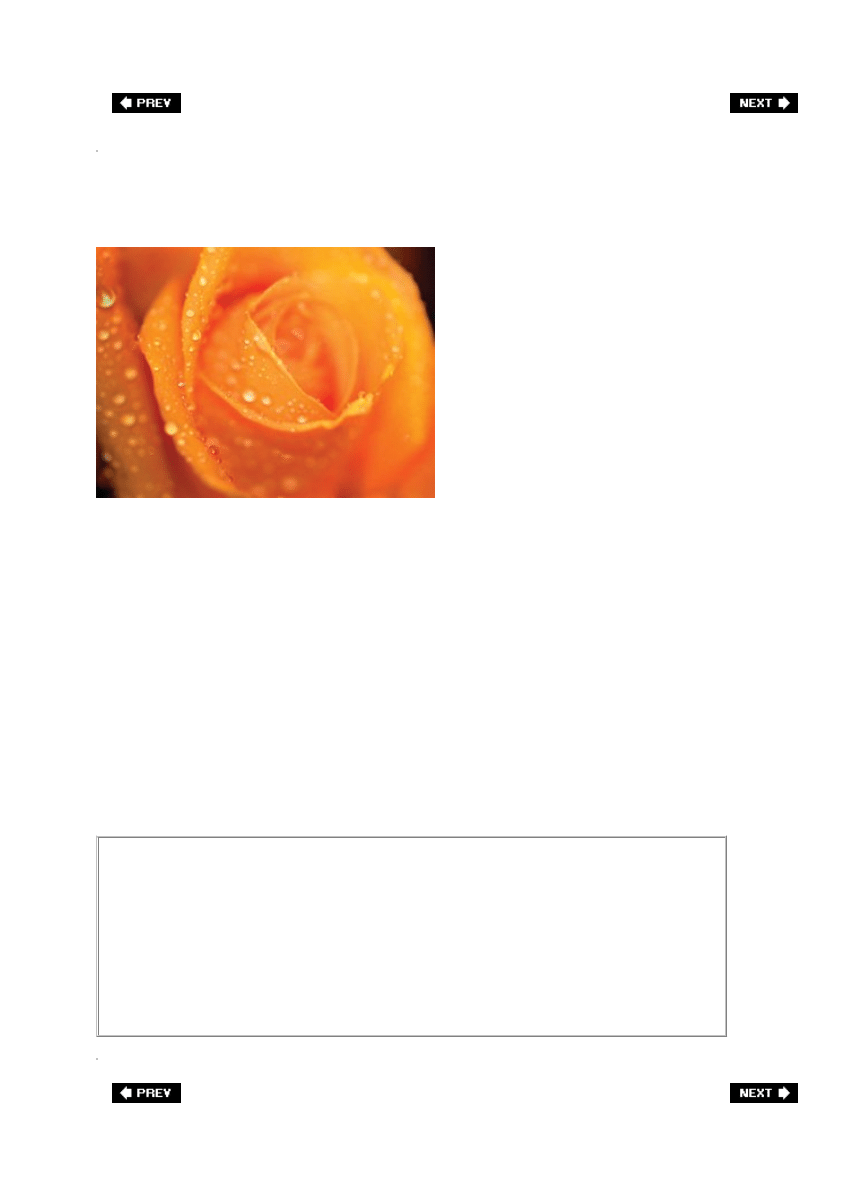
Don't Wait for RainFake it!
SCOTT KELBY
This one may sound cheesy at first, but you'll be shocked at how well this works. Instead of
waiting for a rainy day to shoot, take a little spray bottle with you, fill it with water, and
spray the flowers with water yourself. I found a nice little spray bottle in Walgreens' beauty
section (I know what you're thinking, "Walgreens has a beauty section?" Believe it or not,
they do) for a couple of bucks, and it works wonders. Just a couple of quick spritzes with the
spray bottle and you've got some lovely drops of water on your petals, and no one will ever
know you didn't wait patiently for Mother Nature to intervene. Get a small enough bottle and
you can carry it in your camera bag (empty, of course). By the way, I've used this spray
bottle technique to shoot some yellow roses I bought for my wife, and by using a macro lens
you'd swear I was shooting on the White House lawn after a spring shower. Try this
onceyou'll become a believer.
Tip That Doesn't Belong in This Book
There's another hidden benefit of carrying a small spray bottle in your camera
bag: getting wrinkles out of clothes. Just give your shirt, sport coat,
photographer's vest, etc., a couple of spritzes before bed and when you wake up
in the morning, the wrinkles are gone. I know, this has little to do with
photography, but I had this empty space at the bottom here, so I figured I'd pass
this on.
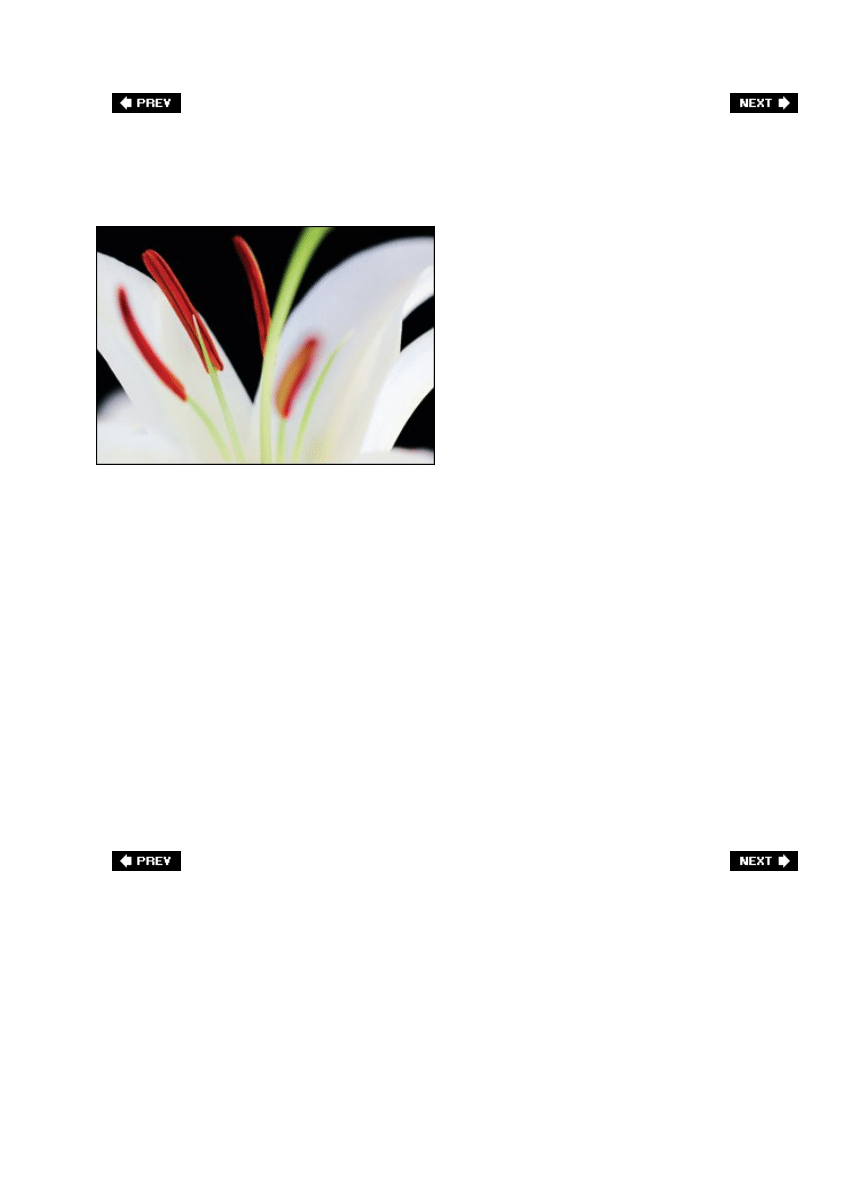
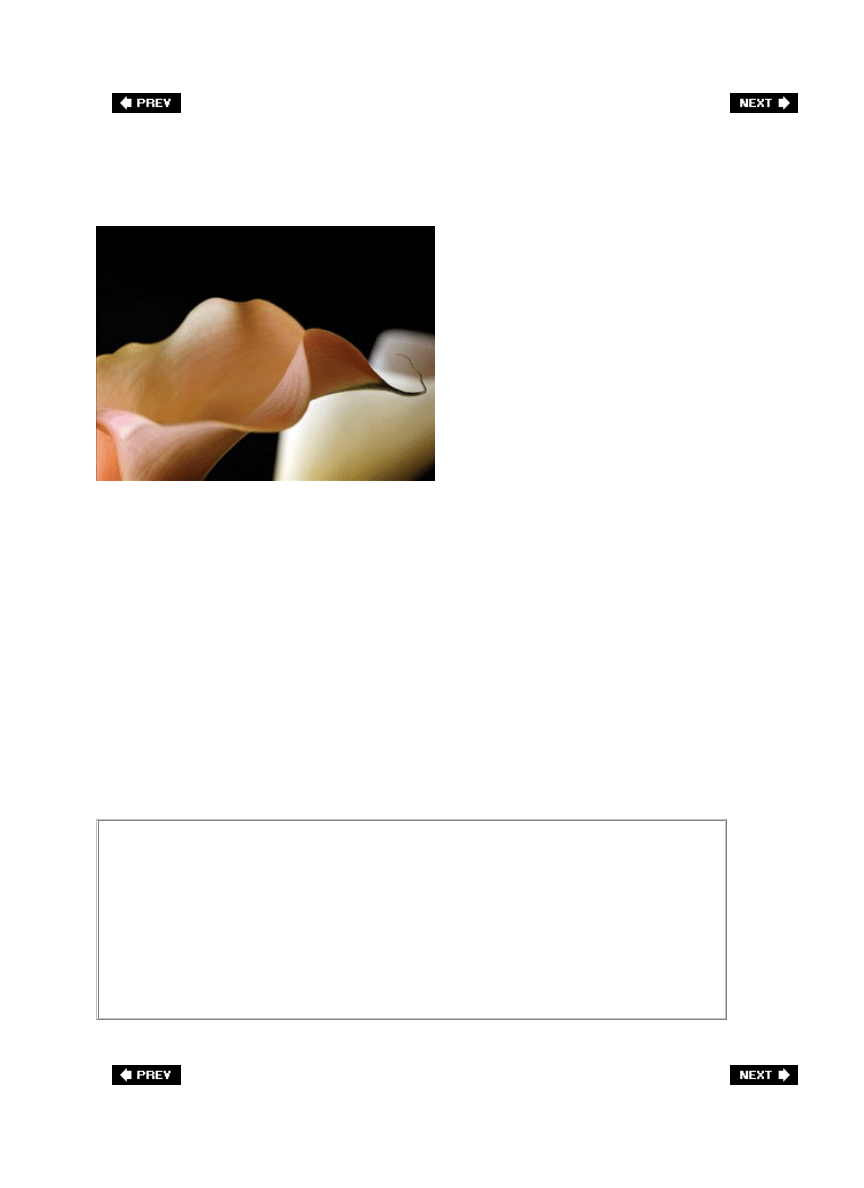
Flowers on a Black Background
SCOTT KELBY
One of the most dramatic compositions for shooting flowers is to position a single flower on a
black background. You can add a black background in Photoshop, but in most cases that is
just way too much work. Instead, do what the pros doput a black background behind your
flower when you shoot it. My buddy Vincent Versace, one of the leading nature photographers
(and instructors) in the business, told me his trickhe wears a black jacket while out shooting
flowers, and if he sees a flower he wants on a black background, he has his assistant (or a
friend, or his wife, or a passerby, etc.) hold the back of his jacket behind the flower. I know,
it sounds crazyuntil you try it yourself. If you're shooting flowers indoors (I shoot nearly
every arrangement I buy for my wife, or that we receive from friends), buy a yard of either
black velvet or black velour (velvet runs around $1015 per yard; velour runs around $510
per yard) and literally put it behind your flowers. You can prop it up on just about anything (I
hate to admit it, but I've even propped up my velour background by draping it over a box of
my son's Cookie Crisp cereal). Leave a few feet between your flowers and the black
background (so the light falls off and the black looks really black) and then shoot away. Now,
what kind of light works best? Keep reading to find out.
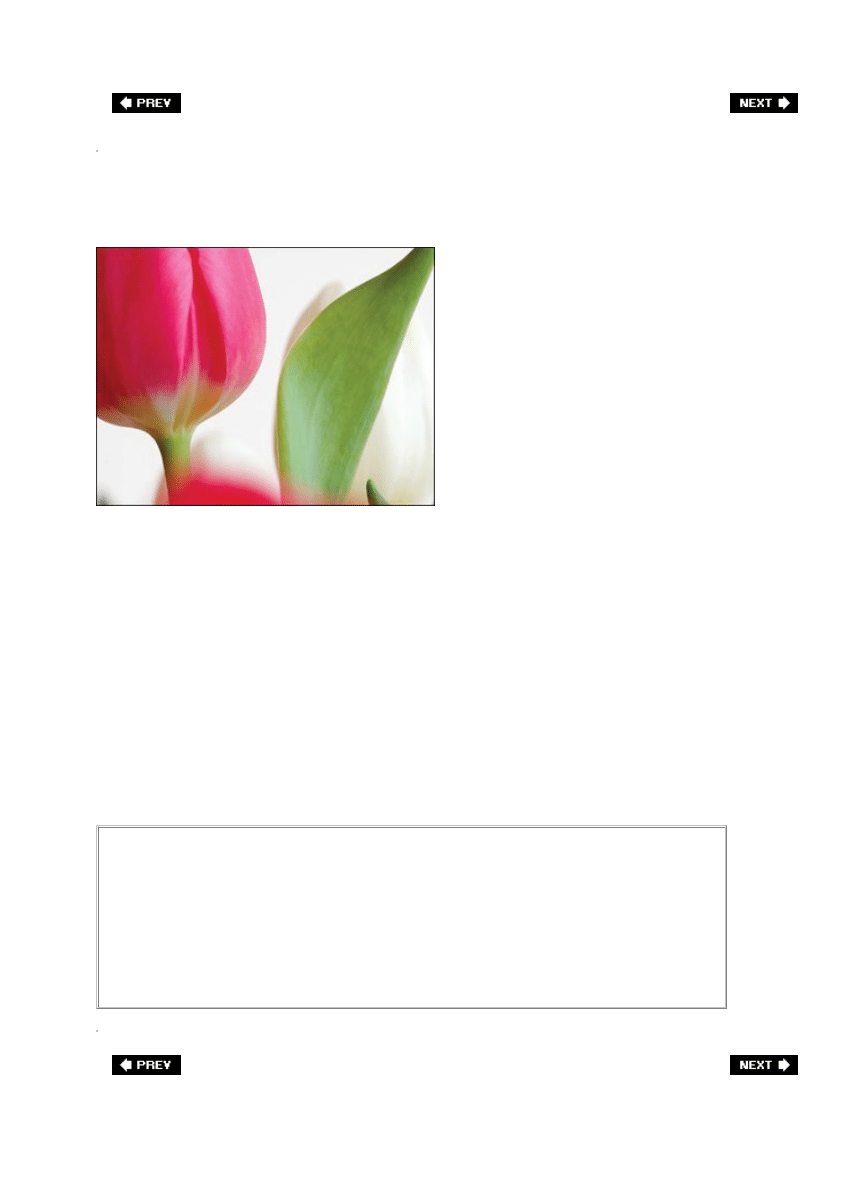
Shooting on a White Background
SCOTT KELBY
Another popular look for a flower photographer is to shoot on a white background. You could
buy a seamless roll of paper from your local camera store (it's pretty cheap), but it's usually
much wider than you need. Plus, unless you're shooting flowers for a florist, you're usually
not going to want to see the vase. That's why I go to Office Depot and buy two or three
20x30" sheets of white mounting board (it looks like poster board, but it's much thicker and
stiffer). I usually position one behind the flowers (in a vase), and then use the other to reflect
natural light (from a window with indirect sunlight) back onto the white background so it
doesn't look gray. Again, put about 3 feet between your flowers and the background, and use
that natural light to capture your flowers on what appears to be a solid white background you
added in Photoshop, but it was even easier because you did it in the camera.
Put That Shower Curtain to Work
If you buy the white shower curtain mentioned in the tip on the next page, here's
another way to stretch your shopping dollaruse it as your white background. As
long as you're using a shallow depth of field, you'll never know that white
background is a shower curtain. Just don't shoot at f/11 or f/16 or people will say
things like, "Hey, nice shower curtain," or, "Did you shoot that in the bathroom?"
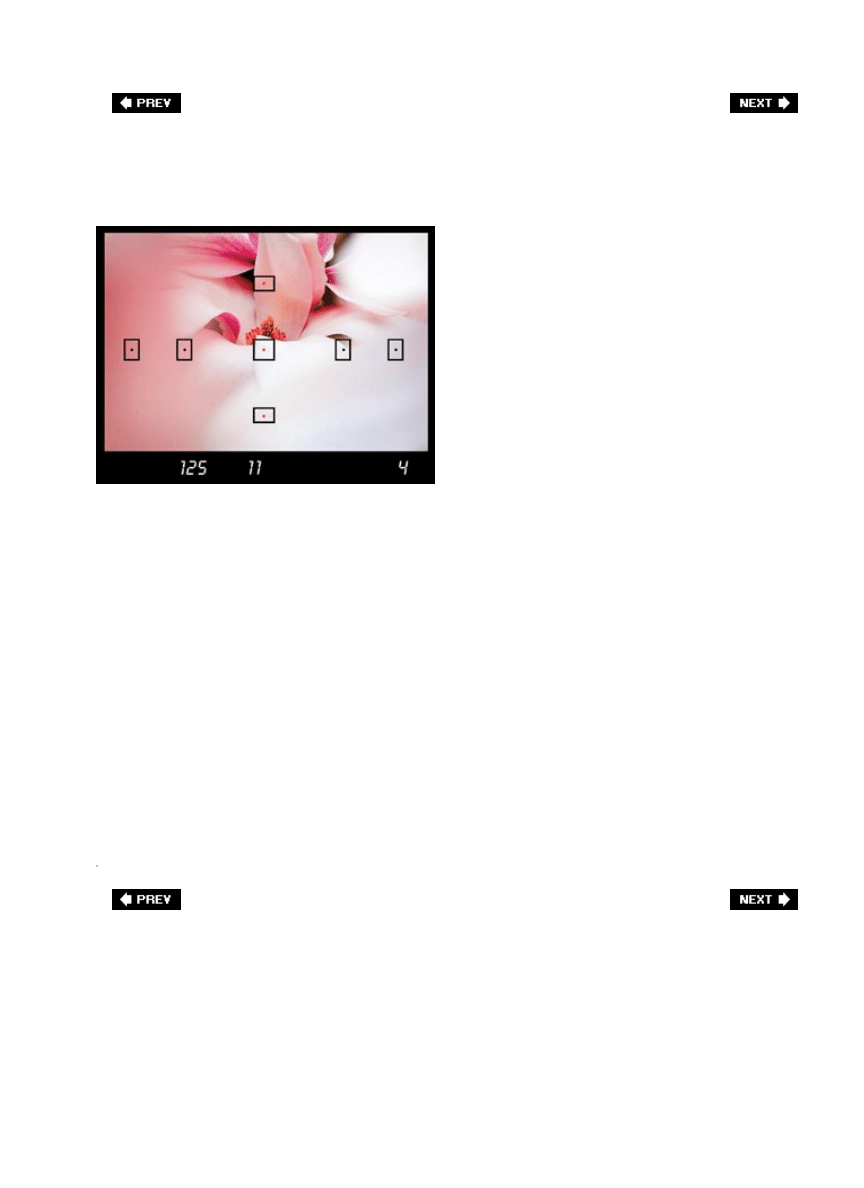
The Perfect Light for Indoor Flower Shots
SCOTT KELBY
If you're shooting flowers indoors, you don't have to buy an expensive lighting rig (finally,
something you don't have to spend a bunch of money on), because flowers love diffused
natural light. By diffused, I mean that it's not getting direct sunlight, so any soft light coming
in from a window works just great. If your window is really, really dirty, that's even better
because it makes the light even more diffuse. So look for a window in your house, studio,
office, etc., that has non-direct sunlight coming in. Then set your flowers near that window,
and position them so you're getting side lighting (if the natural light hits the flowers head on,
they'll look kind of flatyou need that extra dimension that side lighting brings). Now set up
your tripod so you're shooting the flowers at eye level (remember, don't shoot down on
flowers). Now you're ready to shoot in some beautiful, soft light, and you didn't spend a dime
(at least on lighting, anyway).
How to Create the Perfect Natural Light by Cheating
If you're faced with nothing but harsh direct sunlight through your open window,
you can cheatjust go to Wal-Mart, Kmart, or Target and buy two things: (1) a
frosted white shower curtain (or shower curtain liner), and (2) some tacks or push
pins. Go back to your harsh light window, tack up your frosted shower curtain,
and enjoy the best diffused natural light you've seen. Don't worryI won't tell
anybody.
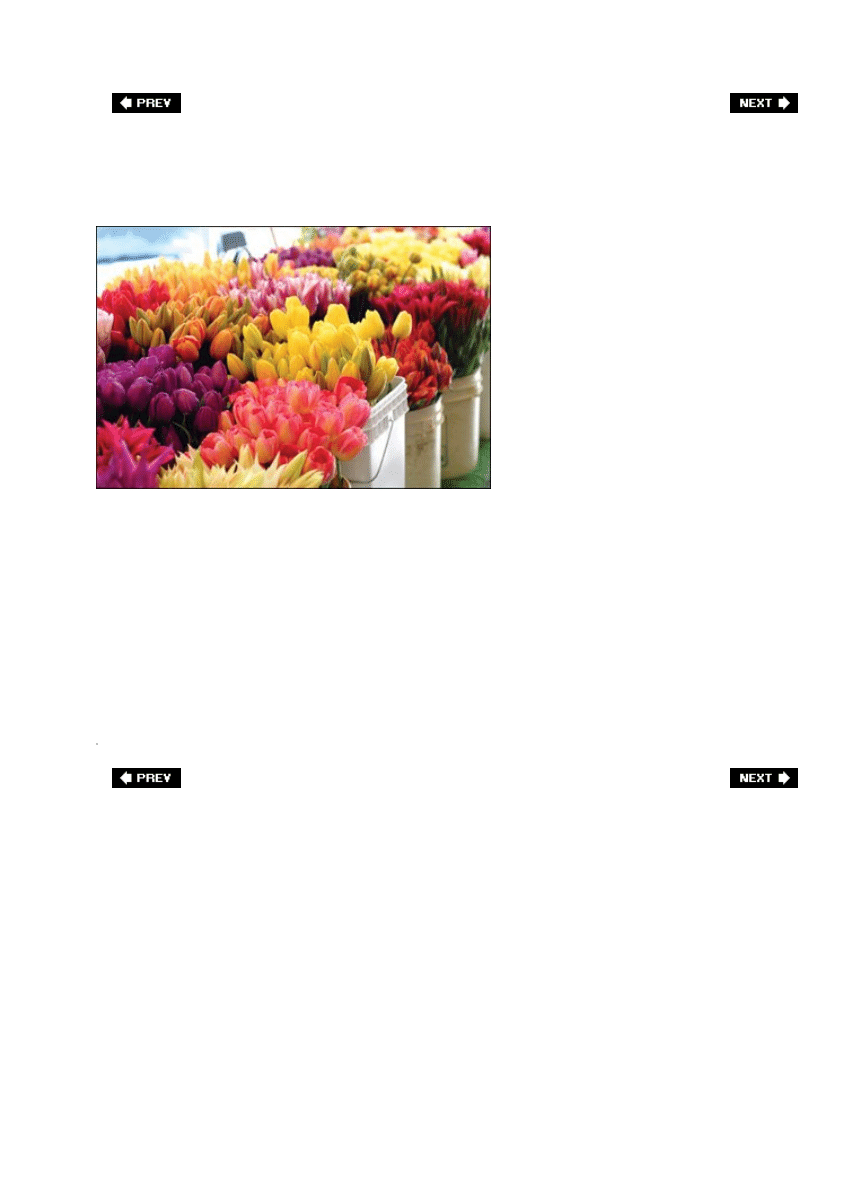
Where to Get Great Flowers to Shoot
©ISTOCKPHOTO/CHRIS BENCE
This may sound like the "Duh" tip of the book, but I can't tell you how many times I've told a
photographer about this and they say, "Gee, I never thought of that." To get some really
great flowers to shoot, just go to a local florist and buy them (see, there's that "duh" part).
You can pick exactly which individual flowers you want (I like shooting roses, calla lilies, and
daisies myself), and chances are the flowers you're getting are in great shape (they're fresh).
You can reject any flower they pull out that has brown spots or is misshapen (I love that
word, "misshapen"), and you don't have to pay to have them arranged. You can often walk
out for less than 10 bucks with some amazing-looking subjects to shoot at the height of their
freshness (though sometimes you have to wait a day or so until your roses are in full bloom).
Stopping the Wind
SCOTT KELBY
If you're shooting flowers outdoors, you're bound to run into the natural enemy of flower
photographywind. There's nothing more frustrating than standing there, tripod set, camera
aimed and focused, and you're waiting for the wind to die down enough to get the shot. This
is especially bad if you're shooting macro, where the slightest movement spells disaster (well,
not disaster, but a really blurry photo). You can try the old use-your-body-to-block-the-wind
trick (which rarely works by the way), but you're actually better off letting the camera fix the
problem. Switch to shutter priority mode (where you control the shutter speed and your
camera takes care of adjusting the rest to give you a proper exposure), then increase the
shutter speed to at least 1/250 of a second or higher. This will generally freeze the motion
caused by wind (unless it's hurricane season). If the higher shutter speed doesn't do the
trick, then you have to go to Plan B, which is making the wind the subject. That's right, if you
can't beat 'em, join 'emuse a very slow shutter speed so you see the movement of the flowers
(you'll actually see trails as the flower moves while your shutter is open), and in effect you'll
"see" the wind, creating an entirely different look. Give this seeing-the-wind trick a try, and
you might be surprised how many times you'll be hoping the wind picks up after you've got
your regular close-ups already done.

Chapter Three. Shooting Weddings Like
a Pro
There Is No Retaking Wedding Photos. It's Got to Be Right the First Time!
[View full size image]
If you're living your life and you think to yourself, "Ya know, I've got it pretty easy," then
it's time to shoot a wedding. Don't worrythis isn't something you're going to have to go
looking forif you've got even one long lens (200mm or longer), it will find you. That's because
in a lot of people's minds, if you have a long lens, you're a serious photographer. It's true.
Seriously, try this: show up at an event with a 200mm to 400mm lens on your camera and
people will literally get out of your way. They assume you've been hired by the event and
that you're on official photography business, and they will stand aside to let you shoot. It's
the equivalent of walking into a factory with a clipboardpeople assume you're legit and they
let you go about your business. Add a photographer's vest and it's like having an official
press pass to anything (try this oneyou'll be amazed). Anyway, if you have a long lens,
before long someone you know will get married but they won't have a budget for a

professional photographer (like your cousin Earl). He'll ask, "Can you shoot our wedding
photos?" Of course, you're a nice person and you say, "Why sure." Big mistake. You're going
to work your butt off, miss all the food, drinks, and fun, and you'll experience stress at a level
only NORAD radar operators monitoring North Korea ever achieve. A wedding ceremony
happens once in real time. There are no second takes, no room for mess-ups, no excuses.
Don't make Earl's bride really madread this chapter first.

The Trick for Low-Light Shooting in a Church
Although you usually should use a tripod when shooting the formals (the group shots after
the ceremony with the bride, groom, family members, etc.), when shooting the wedding
ceremony in a low-light situation like a church, you'll often need to hand-hold your shots.
This is a problem because hand-holding in low-light situations is almost a guarantee of
having blurry photos (because of the slow shutter speeds of low-light situations). So, how do
the pros get those crisp low-light shots in a setting like a church? Two things: (1) they
increase their digital camera's ISO (the digital film speed). Today's digital SLR cameras (in
particular, the Nikons and Canons) let you shoot at very high ISOs with little visible noise. So
how high can you go? At least ISO 800 (see Canon LCD panel above), but you can usually get
away with as high as ISO 1600 in most situations. This lets you get away with hand-holding
in the low light of a church, while avoiding the camera shake you'd get at ISO 100 or 200. (2)
They shoot with their fastest lens (your lens with the largest available f-stop, like f/1.4, f/2.8,
or f/3.5), which lets in more available light, allowing you to shoot in lower light without
blurring your images.
Way Cool Tip
If you're shooting in very high ISOs, you'll want to know about a popular
Photoshop plug-in for wedding photographers called Noise Ninja (from
PictureCode.com). Besides reducing noise, a happy side effect is that it also
smoothes skin.
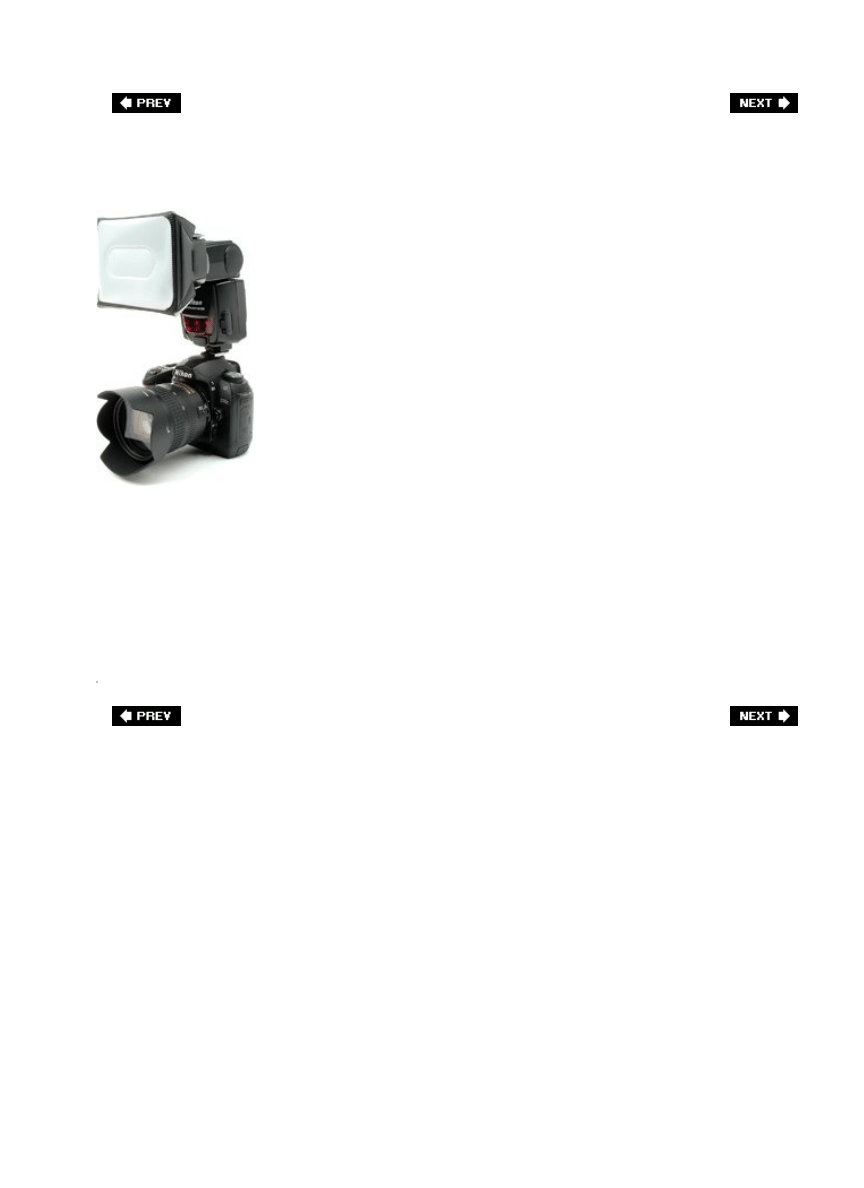
Getting Soft, Diffused Light with Flash, Part 1
If you're shooting your weddings with a flash indoors, you're likely to get harsh shadows and
unflattering, flat light, but it doesn't have to be that way. The trick for getting soft, diffused
light from your built-in flash without those harsh, hard shadows is to get a flash diffuser (a
translucent sheet that fits over your flash to make the light softer and diffused). If you have a
built-in pop-up flash on your digital camera, you can use something like LumiQuest's Soft
Screen Diffuser (which runs around $13), or if you have an external flash unit, take a look at
Gary Fong's Lightsphere-II, which sells for around $48, attaches over your flash unit, and
does a great job of softening the light and dispersing it evenly. This will make a big difference
in the quality of the light that falls on your bride, groom, and bridal party, and you'll get
much more professional results for a very small investment.
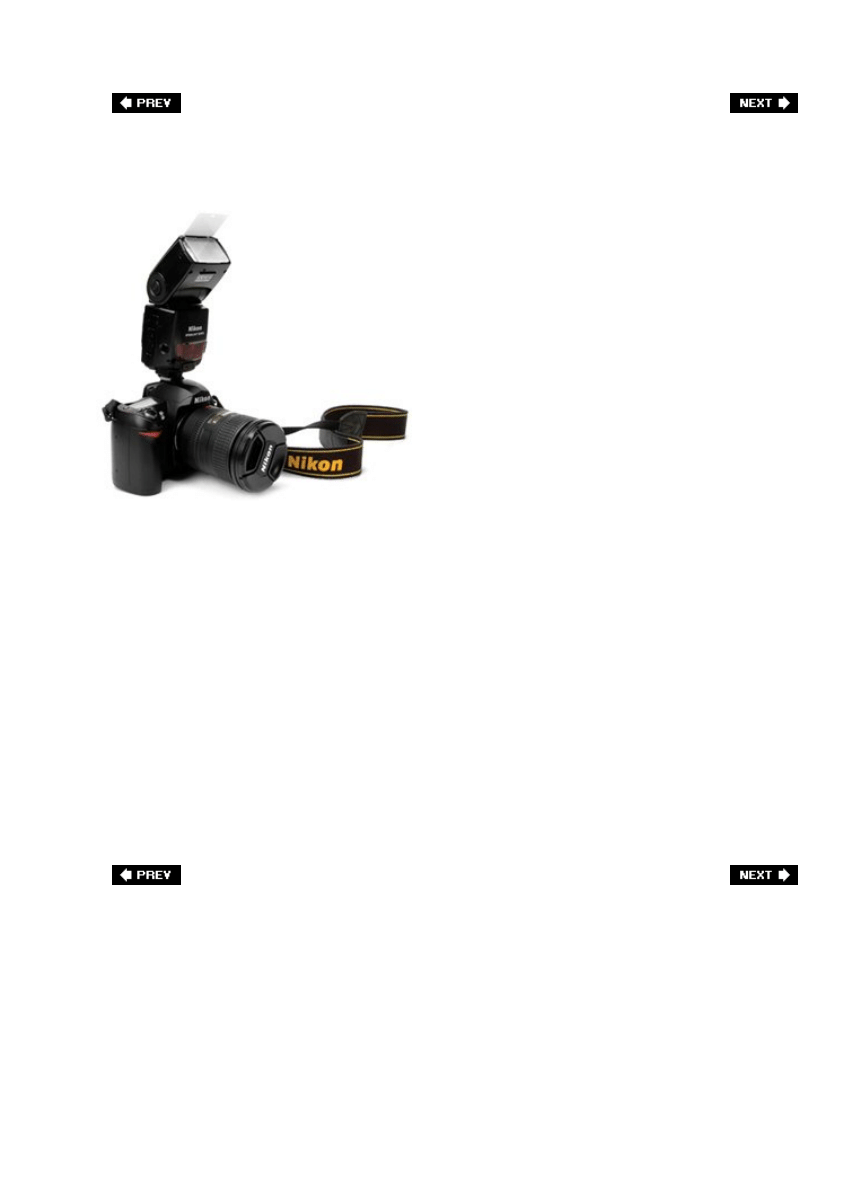
Getting Soft, Diffused Light with Flash, Part 2
The other method of getting soft, diffused, and better yet, directional light using a flash (the
key word here is directional, because it keeps your flash shots from looking flat) works if
you're using an external flash unit (and not the built-in flash on your camera, which is pretty
limited, as you'll soon see). The advantage of an external flash unit is that you can change
the angle and direction of the flash. The reason this is cool is that instead of aiming your flash
right into your subject's face (which gives the most harsh, flat light you can imagine), you
can bounce the light off one of two places: (1) the ceiling. If the room you're shooting in has
a white ceiling (and chances are the ceiling is white), then you can aim your flash head up at
the ceiling at a 45° angle (as shown above, and provided that the ceiling isn't more than 10
feet tall) and the ceiling will absorb the harsh light, and what will fall on your subject is much
softer, smoother light and, best of all, it won't cast hard shadows behind your subject.
Instead, your soft shadows will cast on the ground (and out of your frame). Now, want to
take this up another notch? Then instead of aiming at the ceiling, (2) have an assistant (a
friend, relative, etc.) hold a reflector on your left or right side, slightly above shoulder height,
then angle your flash head into that. So now, the reflector eats up the harsh light, but better
yet, since the reflector is at an angle, it casts soft directional light on an angle, too. This puts
soft shadows on one side of the bride's (groom's, bridesmaid's, etc.) face, giving a more
pleasing and less flat lighting effect (think of it as side lighting).
Use Your Flash at Outdoor Weddings
MATT KLOSKOWSKI
One trick that wedding photographers have been using for years is to use fill flash outdoors
on sunny days. I know, it sounds crazy to use a flash when the sun is bright in the sky, but
wedding photographers add flash to these daylight shots to help eliminate those hard, harsh
shadows in their subjects' faces, and make the bride and groom look more natural under
these undesirable lighting conditions (plus it will usually add nice catchlights in the eyes of
your subjects, as well). Make sure you check the results in your LCD monitor to make sure
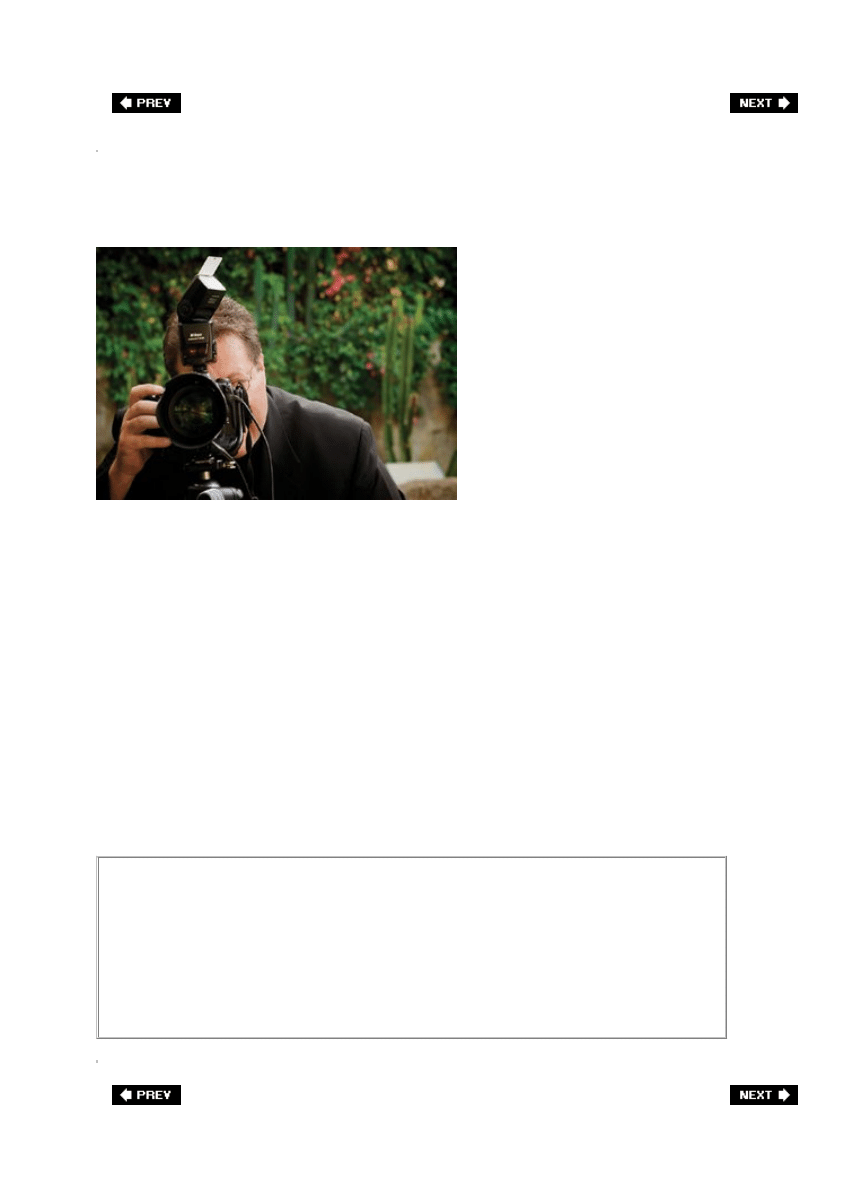
your light is properly balanced. Here's a shot of me taken while shooting a recent wedding.
Notice the flash doesn't fire straight into the wedding party's faces. Instead, the head is
rotated to the right (or left) and tilted 45°, so the flash fills in the shadows yet doesn't have
that harsh look you'd get by aiming the flash straight at your subjects. As long as you're not
more than 8 or 10 feet away from your subject, don't worrythe flash will still be effective,
even though it's not aiming straight on.
Another Cool Flash Tip
Here's another tip that will make your flash seem less "flashy" when shooting
outdoors: use your camera's flash exposure compensation button and change the
flash exposure compensation to 1 (it works the same way regular exposure
compensation works, but for flash exposures). Your flash will still help lift out the
shadows, but now without being so obvious.

Keep Backup Memory Cards on You
It's not unusual for a pro wedding photographer to shoot 750 shots in one wedding, covering
the four major parts of a wedding (the pre-wedding shots, the ceremony, the formals, and
the reception), so it's likely you'll be shooting a similar amount (maybe less, maybe more,
but it will be literally hundreds of shots). The last thing you want to happen is to run out of
film (in other wordsyou don't want to fill up your digital camera's memory card unless you
have an empty backup card ready to step right in so you can keep shooting). The trick here is
to keep a spare backup memory card physically on you at all times. Keep one right there in
your pocket (or purse) so the moment your card reads full, you're just seconds away from
continuing your shoot. It's a natural law of wedding photography that your memory card will
become full at the most crucial moment of the ceremony, and if you have to stop to go find
your backup card (in your camera bag across the room, in the car, or in the reception hall),
you're going to miss the most important shot of the day (I learned this the hard way). So
always keep a backup physically on you, so you're only 10 seconds away from shooting
again.
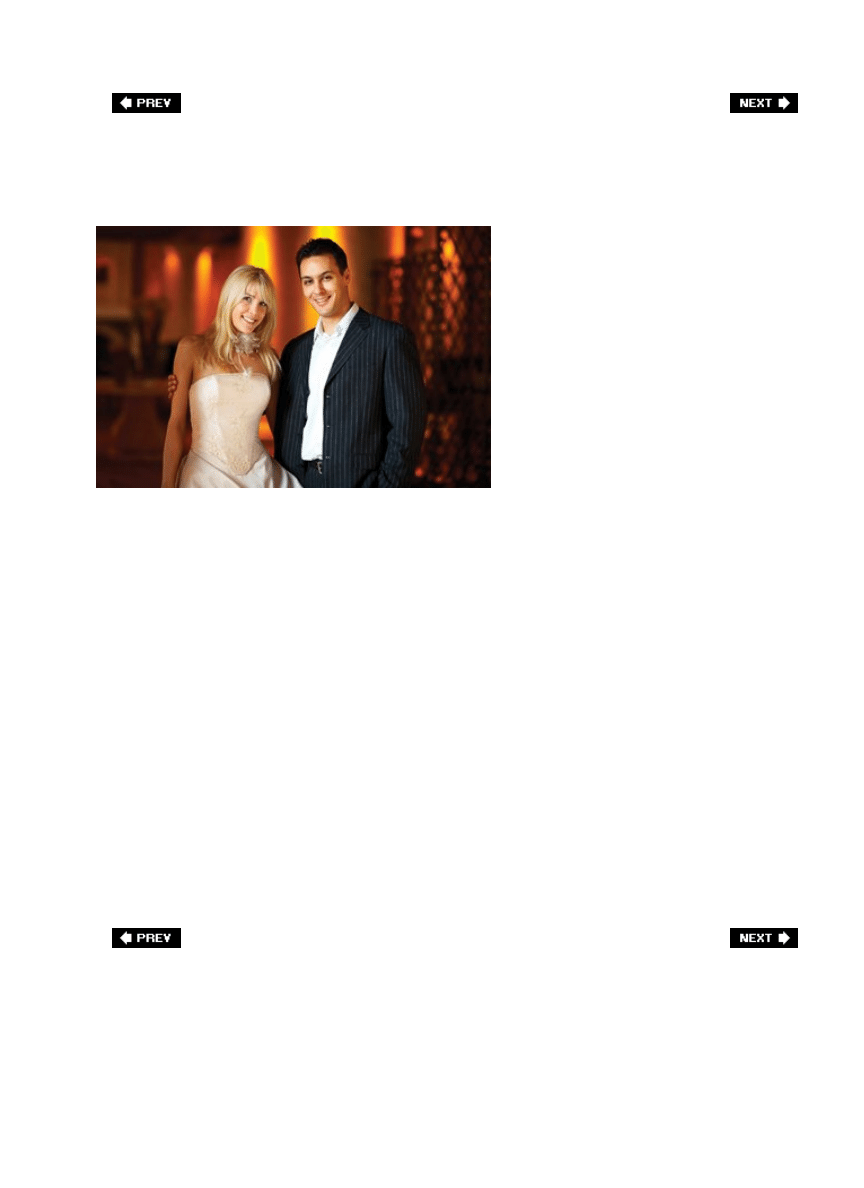
Formals: Who to Shoot First
©ISTOCKPHOTO
After the ceremony, in most cases you'll shoot the formal portraits of the bride and groom
posed with everyone from bridesmaids to grandparents. The hard part is rounding up all the
people you'll need to shoot with the bride and groom at the exact time you need them. This
can take 30 minutes or three hoursit's up to you and how organized you are. Here's a tip to
make things move as quickly as possible: gather everyone that will appear in any shot
together right from the start. While they're all sitting there, shoot the formal bride and groom
portraits first (you'll see why in just a moment). Once you've got those out of the way, shoot
the largest groups of people (the huge family portraits), and then once you're done with a
group (like the grandparents for example), send them off to the reception. So, in shortstart
with everyone, and then as you shoot them, release them to go to the reception until you're
left with just the bride and groom again. If you don't do it this way, you'll wind up standing
around for long periods of time waiting for Uncle Arnie, who's somewhere in the reception
hall. The reason you shoot the bride and groom first is that the pressure to get the bride and
groom to the reception hall increases exponentially as time goes by, because generally they
hold the meal until the bride and groom have arrived. So, everyone is sitting in the reception
hall waiting on youthe photographer. You then wind up rushing the most important portraits
of them all (the ones the couple will actually buytheir formal portraits). Make your life
easystart big, then get small.
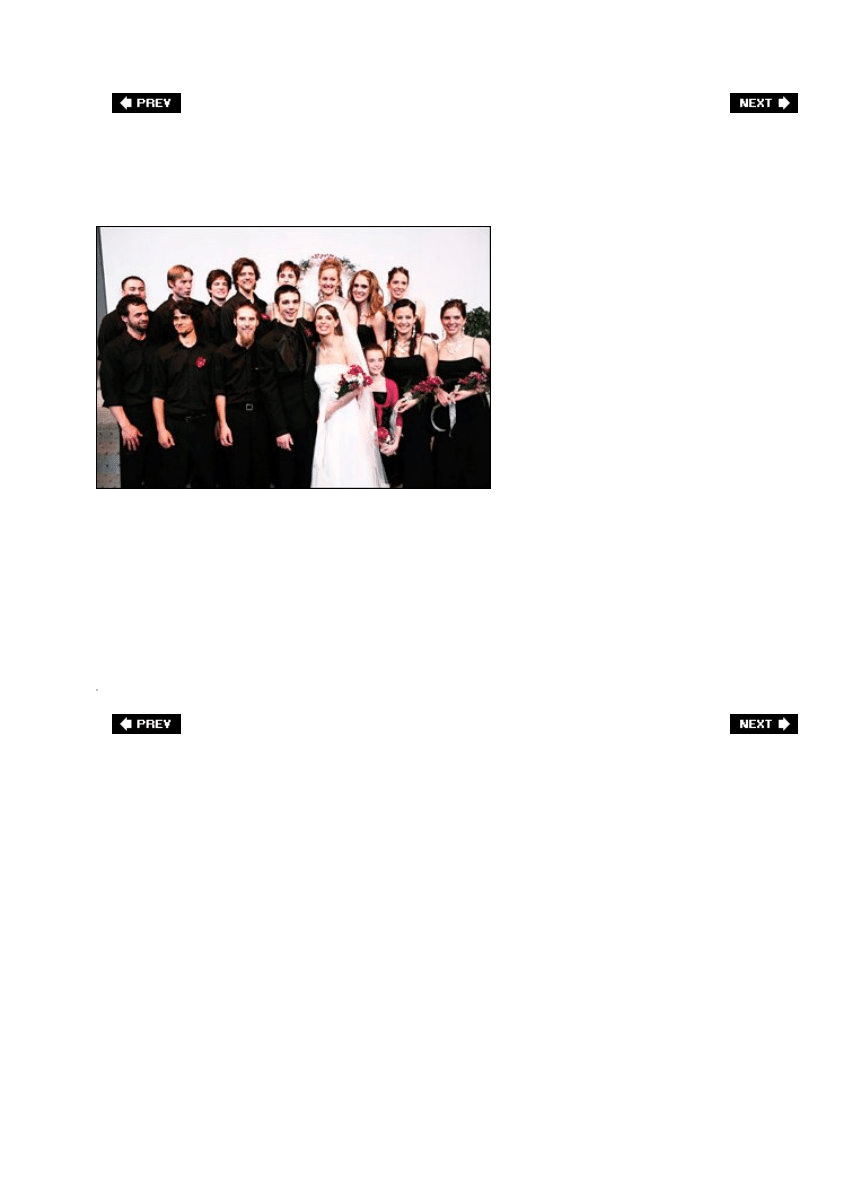
Formals: Where to Aim
©ISTOCKPHOTO/KEVIN RUSS
When shooting large groups for the formal portraits, you'll want to make sure that you use an
aperture setting that keeps everyone in focus. Try f/11 for a reasonable depth of field for
groups. Now, where do you focus? If you have more than one row of people deep, the old
rule (which still stands true today) is to focus on the eyes of the people in the front row. You
have more depth behind than in front, so make sure you focus on them, and the rest should
be okay, but if that front row is out of focus, the whole shot is a bust.
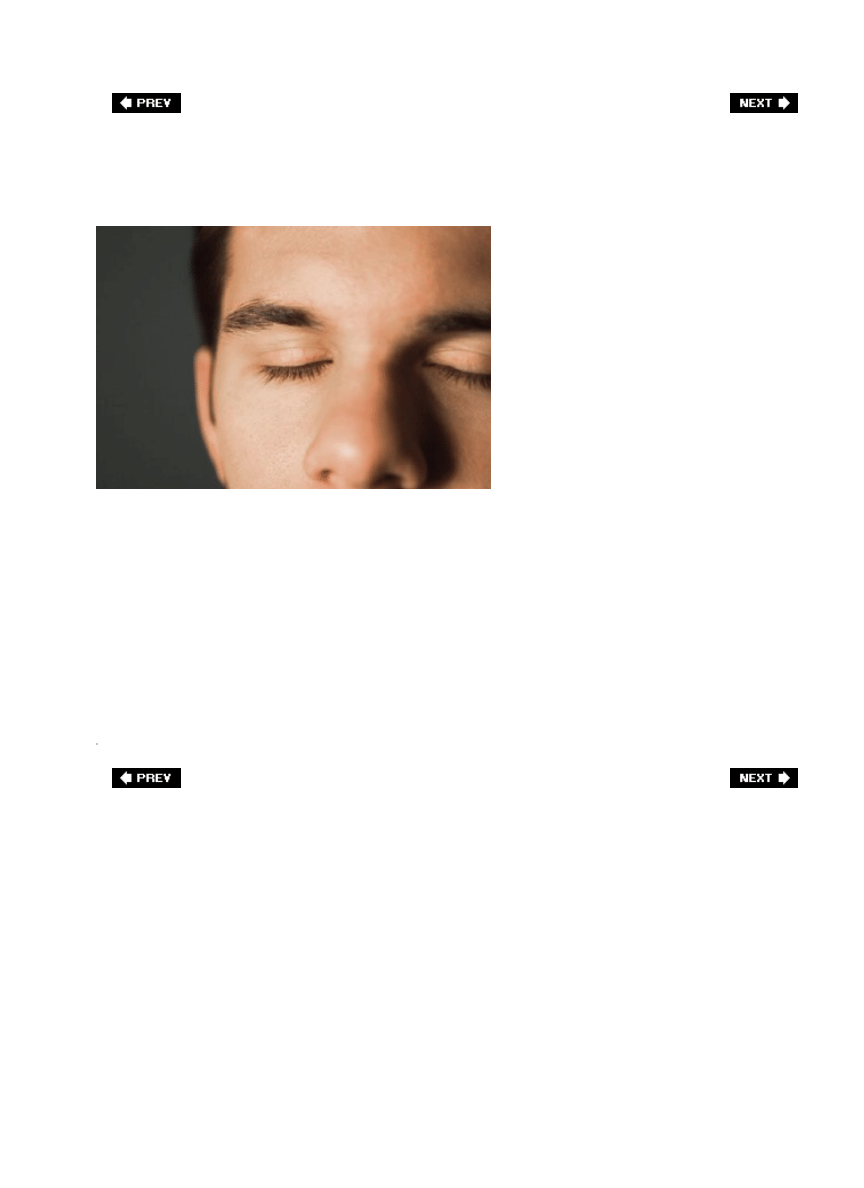
The Trick to Keeping Them from Blinking
©ISTOCKPHOTO/NICK SCHLAX
If you shoot a group of five people or more, it's almost guaranteed that one or more people
will have their eyes shut. It's another natural law of wedding photography, but you're not
going to have to worry about that very much, because you're about to learn a great trick that
will eliminate most, if not all, instances of people blinking or having their eyes closed. When
you're ready to shoot the shot, have everybody close their eyes, and then on the count of
three have them all open their eyes and smile. Then, wait one more count before you take
your shot. When I'm shooting these groups, here's what I say, "Okay, everybody close your
eyes. Now open them on 3-2-1...open!" Then I wait one count after they open their eyes
before I take the shot. It works wonders.
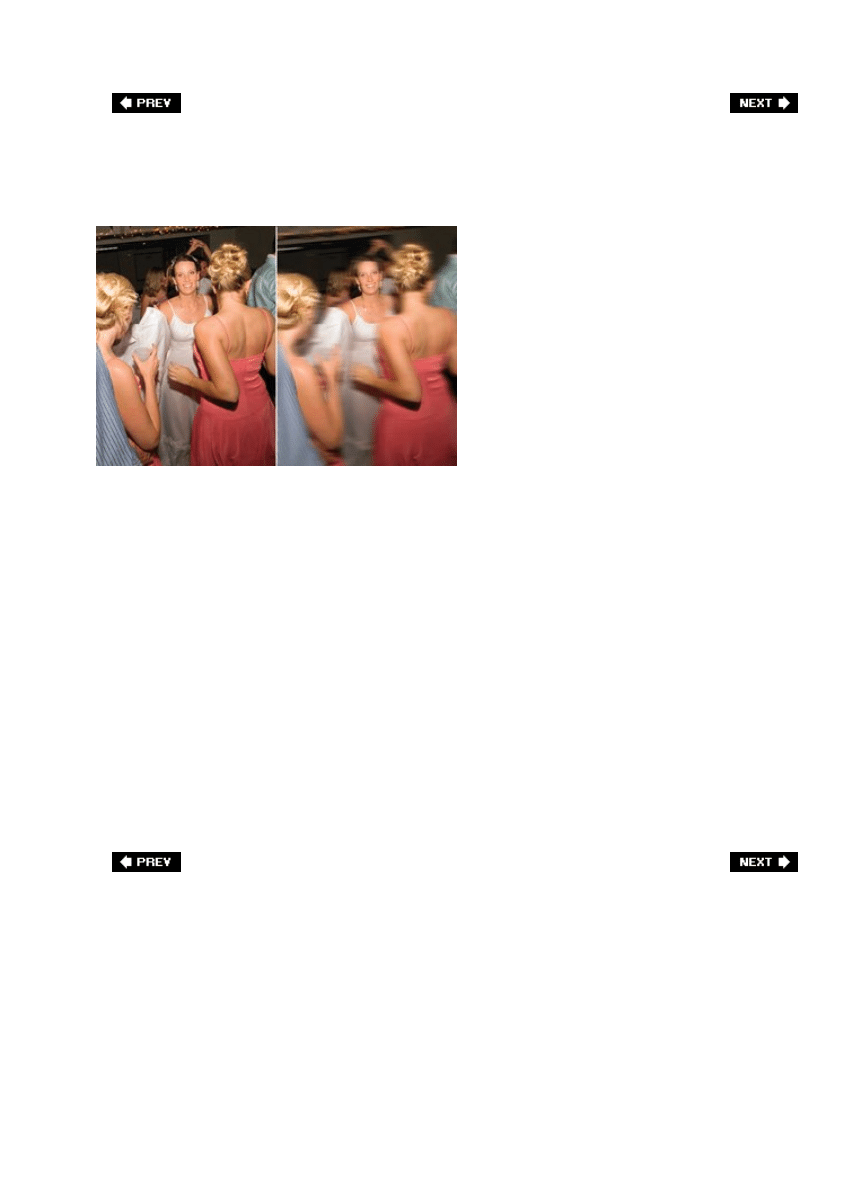
Reception Photos: Making Them Dance
SCOTT KELBY
There's a problem with taking photos of people dancing. If you shoot them with a flash (and
most likely you will), it will freeze their movement, so they'll look like they're just standing
still, but in somewhat awkward poses. It still amazes me how people doing a line dance can
be pictured as people in a police lineupthe camera just doesn't capture motionunless you tell
it to. There are really two techniques: the first is in the camera. It's called panning, where
you take the camera and follow the movement of one of the people dancing (usually the
bride, groom, a bridesmaid, or a groomsman), while using a slow shutter speed so the rest of
the people have a motion blur, which makes them look like (you guessed it) they're dancing.
If you didn't remember to employ this technique during your reception shoot, then you can
add this motion blur in Photoshop. The first step is to duplicate the Background layer. Then
go under the Filter menu, under Blur, and choose Motion Blur. Set the Angle to 0°, then
increase the Distance until things look like they're really moving. The last step is to get the
Eraser tool, choose a really big soft-edged brush (like the soft round 200-pixel brush) and
erase over the person you're focusing on (like the bride, etc.) so that person appears in
focus, while everyone else is dancing and moving around having a good time.
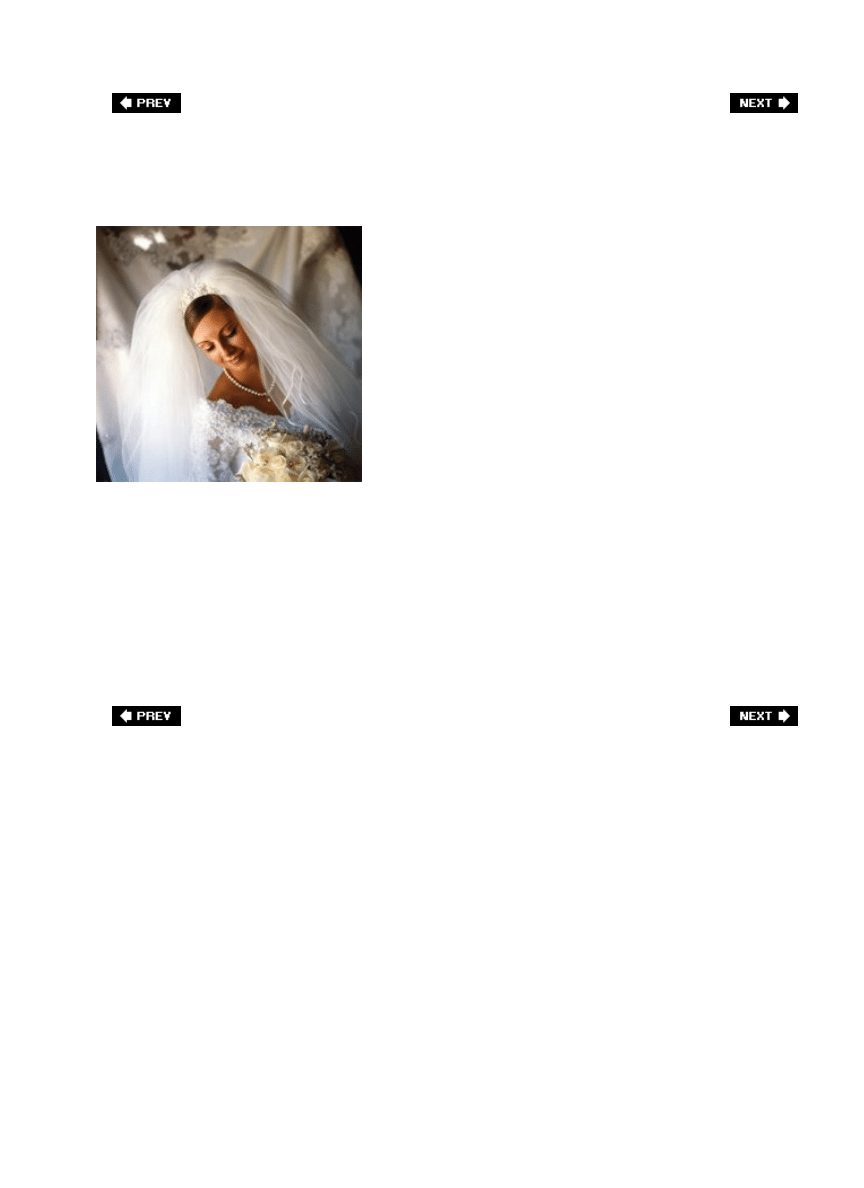
Your Main Job: Follow the Bride
©ISTOCKPHOTO/ELIANET ORTIZ
The main focus at any wedding is the bride, so make darn sure your main focus at the pre-
wedding, the ceremony, the formals, and the reception is the bride. Follow the bride just like
you would follow the quarterback if you were shooting a football game. Especially if you're
going to be selling these photos as it will be the bride (either directly or indirectly) that will
be buying the prints. So make darn sure that she's the clear star of the show (photos of Uncle
Arnie at the reception don't sell well, if you get my drift).
Formals: How High to Position Your Camera
©ISTOCKPHOTO/DAMIR SPANIC
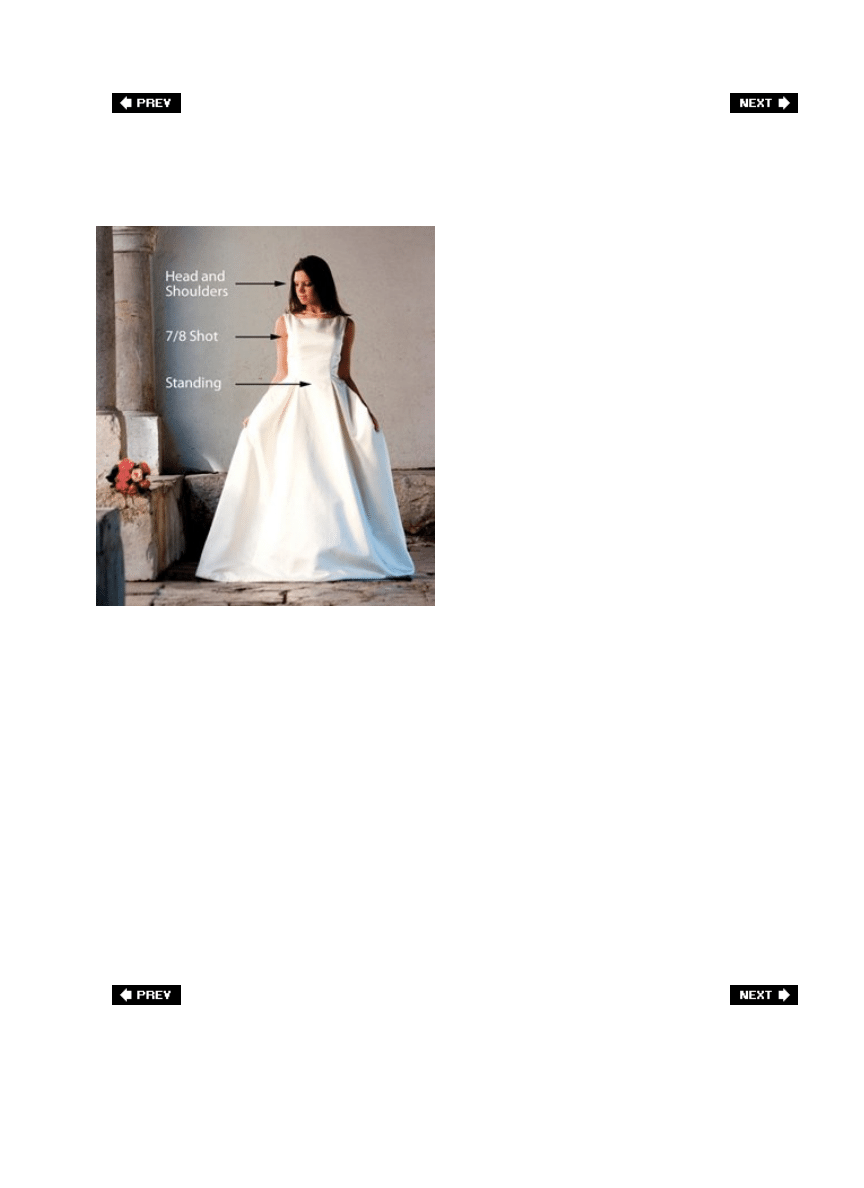
When you're shooting your formal shots, the height that you position the camera is actually
very important, because if it's not positioned correctly, your subject's body can look distorted
or some parts can look larger than normal (in general, this is just not good stuff). So, finding
the right height for professional portraits is critical. Here are a few guidelines to help you get
the pro look:
Standing, Full-Length Portrait: Position your camera (on your tripod) at the bride's waist
height (yes, you'll have to squat down/bend over, etc., but the final result will be worth it).
Keep your lens straight (don't aim up towards the bride's face).
7/8 Shots (from the Calf Up): Position your camera (on your tripod) at the bride's chest level
and shoot with your lens straight from there.
Head and Shoulders Shots: Position your camera (on your tripod) either at the bride's eye
level or slightly above.
Formals: Don't Cut Off Joints
©ISTOCKPHOTO
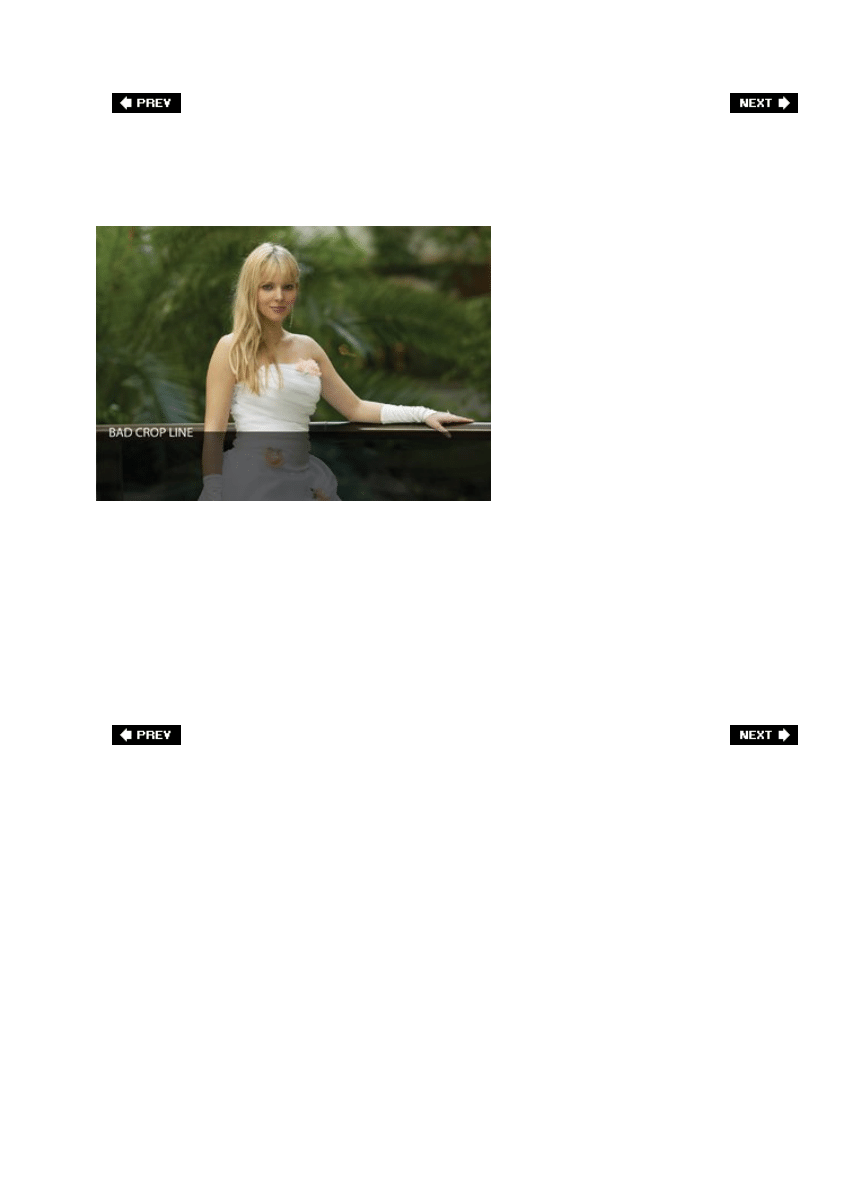
When you're framing your formals in your viewfinder, for a more professional look, be careful
not to cut off anyone at the joints (in other words, don't let the bottom of the frame cut
anyone off at the elbow or knee. On the side of the frame, don't cut anyone off at the wrist or
elbow either). Basically, stay away from the joints. If you have to crop an arm or leg off, try
to do it as close to the middle of the arm or leg as possible, staying clear of the joints. 'Nuf
said.
Formals: Build Off the Bride and Groom
©ISTOCKPHOTO/KEVIN RUSS
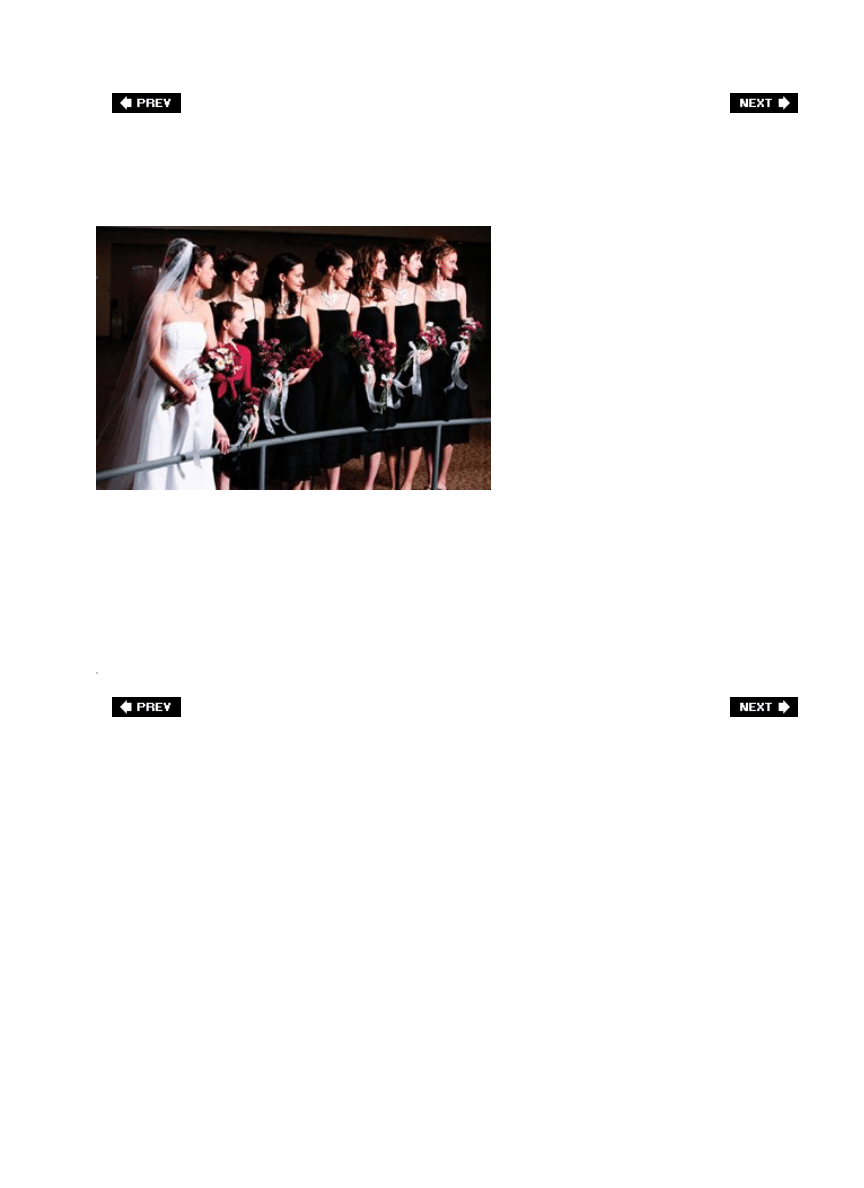
There's a popular format for creating all your formalshave the bride and groom in the center,
and have them stay put. They don't moveinstead you have groups of other people
(bridesmaids, groomsmen, the best man, maid of honor, parents, grandparents, etc.) move
in and out around them. Use the bride and groom as building blocks and everything will be
much easier (well, as far as posing your large groups goes anyway).
Formals: The Trick to Great Backgrounds
©ISTOCKPHOTO/PHIL DATE
In formal portraits, the backgrounds are just thatbackgrounds. And the key to a great
background is using a very simple one. The simpler, the better. So don't look for an outdoor
shot with a waterfall, 36 different kinds of plant life, and flowers blossoming from hanging
vines, etc. Look for simplicity or it will greatly distract from your portraits, and give your
formals an uncomfortable look (yet nobody will know why). Plus, if for any reason you have
to retouch the background later in Photoshop, the less busy the background, the easier your
retouch will be.
Background Tip
Here's another good tip: vary your background for your formals. It may not seem
like a big deal at the time, but when you see the same background over and over
and over again in the final wedding album, it can become really tedious. Once
you've shot a few sets on one background, if there's another simple background
nearby, try it in order to keep the album from looking like a cookie cutter.
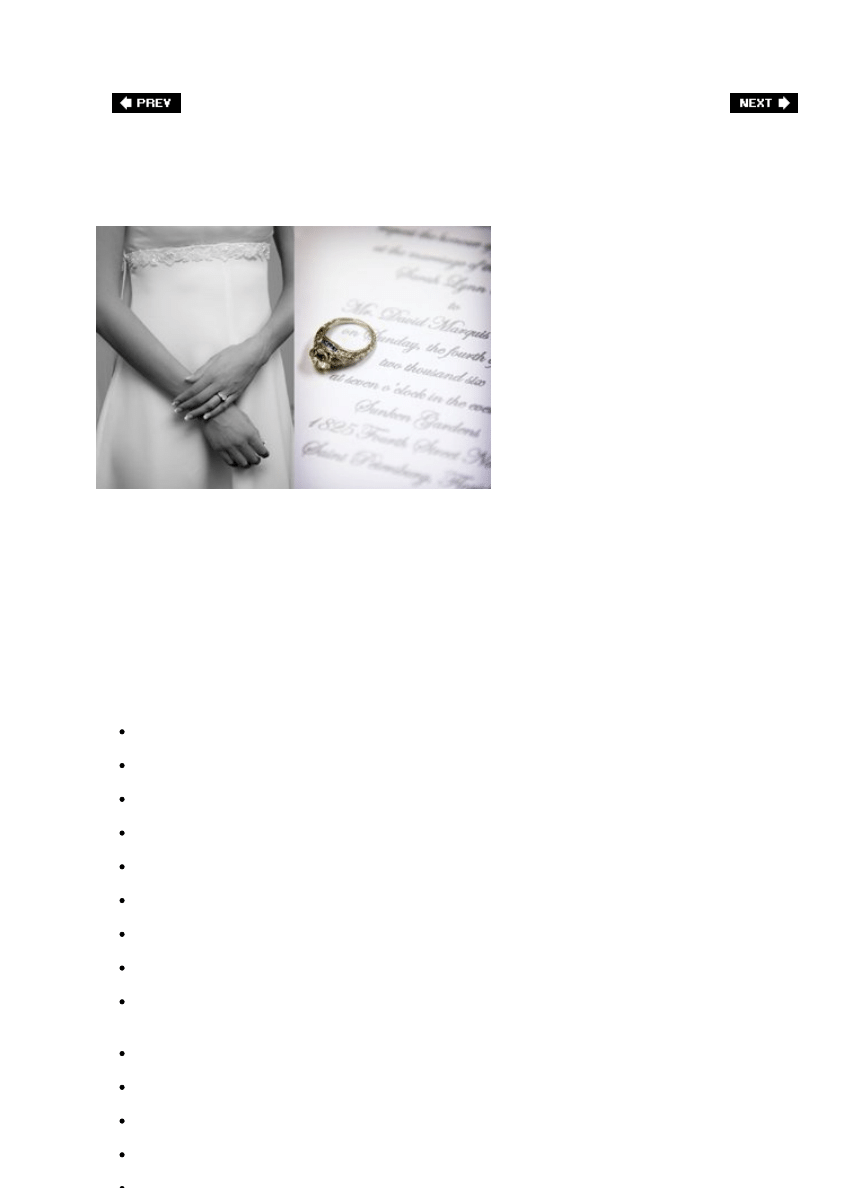
Shooting the Details (& Which Ones to Shoot)
SCOTT KELBY
The photojournalism style of wedding photography is very big right now (where you tell the
story of the wedding in photos as if you were covering it for a newspaper or magazine). One
of the cornerstone elements of this technique is to make sure to photographically capture the
tiny details of the wedding, especially behind the scenes before the wedding. Here's a list of
things you might want to capture (shoot), which can either stand alone in the wedding album
or be used as backgrounds for other photos:
The bride's shoes
The bride's dress hanging on a hanger
The bride's tiara, necklace, etc.
The wedding invitation
The sheet music played at the wedding
The guestbook (once a few people have signed it)
Their champagne glasses
Name cards at the reception
Their wedding rings (perhaps posed on the invitation with some rose petals casually
placed nearby)
The airline tickets for their honeymoon
The sheet music, or CD jewel case, to the music for their first dance
The groom's boutonniere
The bride's bouquet

Any fine detail in her dress
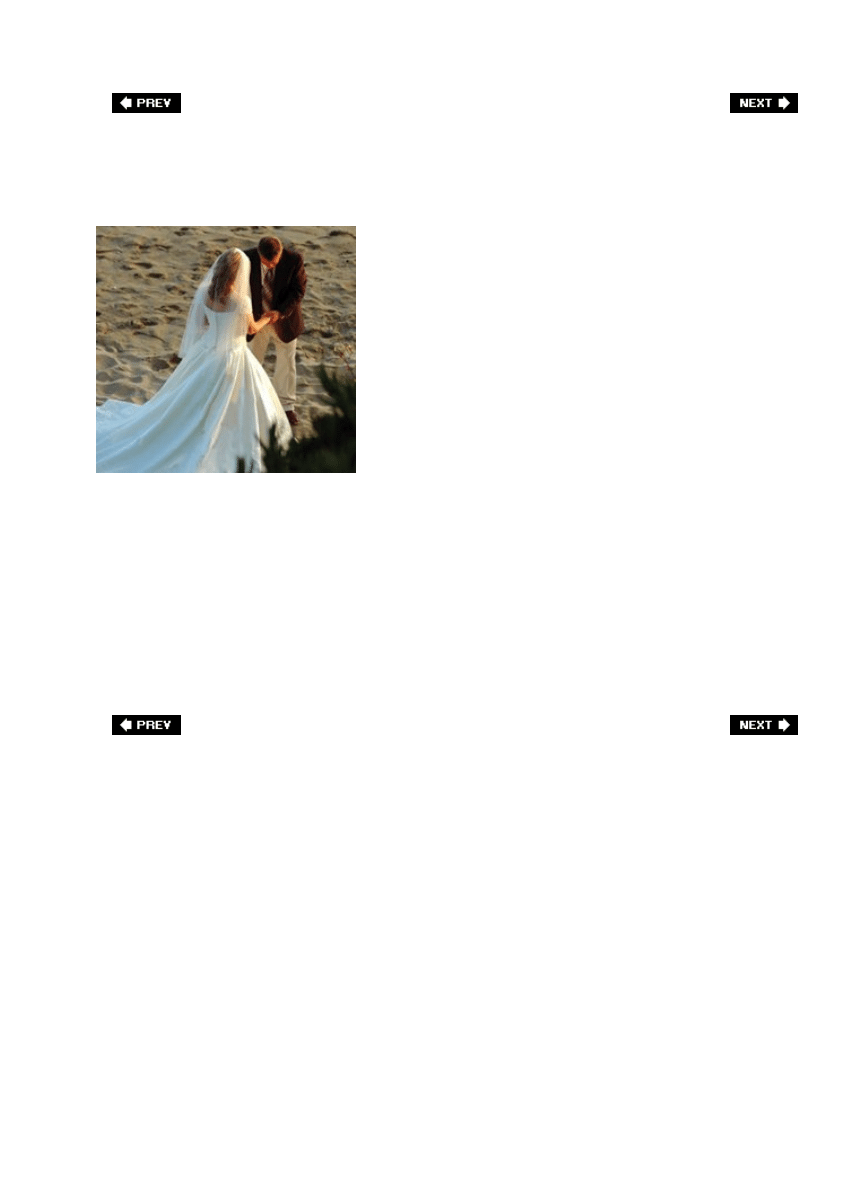
Change Your Vantage Point to Add Interest
©ISTOCKPHOTO/ROBERT DEAL
Want to create a shot everyone will remember? Shoot it from a high vantage point (look for a
second story window you can shoot down from, or a balcony on the second floor, a bridge,
etc.). If you can't find an existing high vantage point, then you can always create your own
by bringing (or borrowing) a ladder to shoot from. Of course, be careful, because being on a
ladder with expensive camera equipment is the stuff Hollywood comedies are made of. This
high vantage point trick is ideal for shooting bridesmaids, groomsmen, and even the bride
and groom, as shown here.
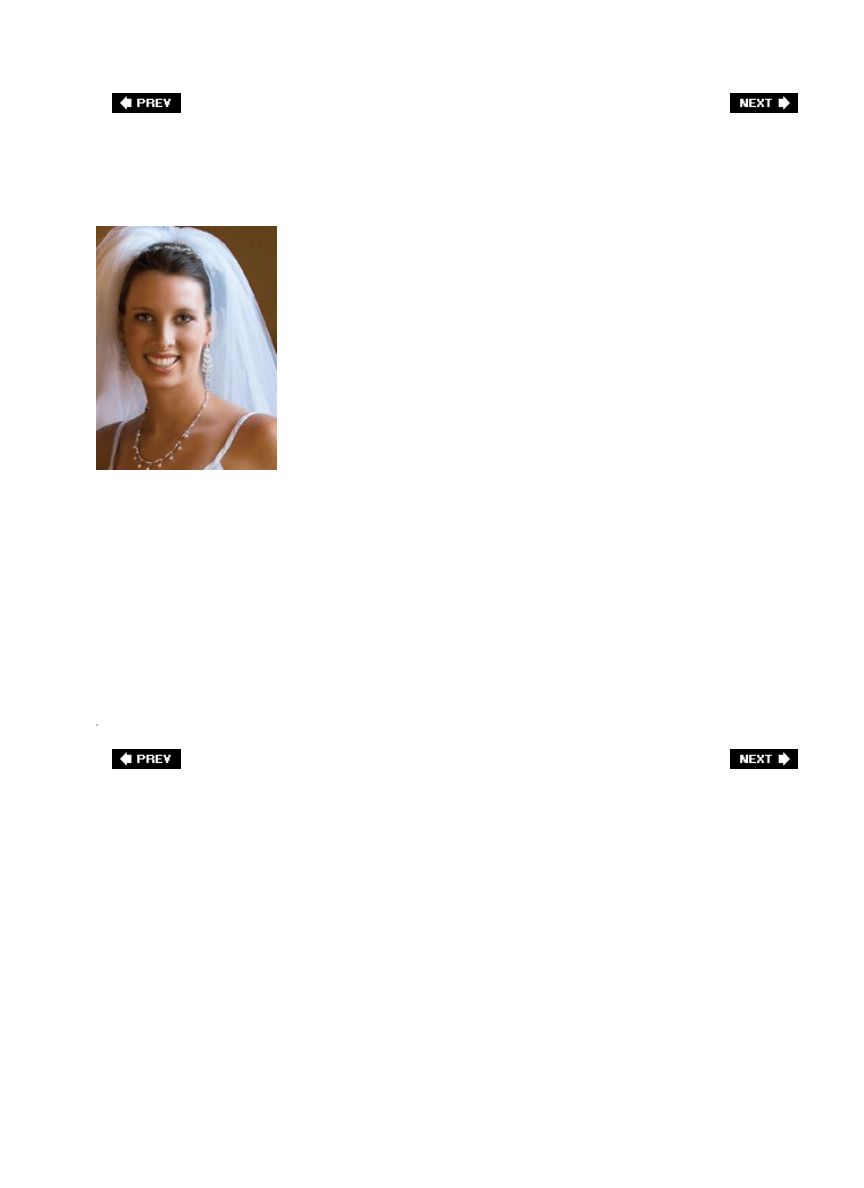
Finding That Perfect Bridal Light
SCOTT KELBY
At most weddings there is a spot with really spectacular light just waiting for you to walk
over and find it, but once you find it, you have to know how to use it. That light, of course, is
natural light coming in through a window (it's hard to make a photo look bad in that light).
Look for a window that doesn't have direct sunlight (a window facing north usually works well
to provide some soft, diffused light). So, once you find this wonderful natural side light
coming in from a window, where do you place the bride? Ideally, about 6 to 8 feet from the
window, so the light falls evenly and softly upon her (almost sounds like a song, doesn't it?).
This is a great spot for shooting some pre-wedding shots of the bride alone, the bride with
her mother, and the bride with her father.

How to Pose the Bride with Other People
SCOTT KELBY
When you're posing other people with the bride, including the groom, to create the level of
closeness you'll want in your photos, be sure to position the heads of the bride and the other
person very close to each other. This doesn't sound like it would be a problem, until you
actually start posing people. When they fall into what feels like a natural pose, they leave
way too much room between their head and the bride's head. While this may look perfectly
natural in person, the photos will lack a closeness that will be really obvious. I've seen this
again and again, and I constantly have to remind people, even the groom, to move their
head in very close to the bride. To them, it just feels unnatural being that close while posing,
but if they don't do it, your shots will look stiff and unnatural. Keep an eye out for this on
your next wedding shoot and you'll be amazed at how the level of closeness between your
subjects goes up, giving you much more powerful images.
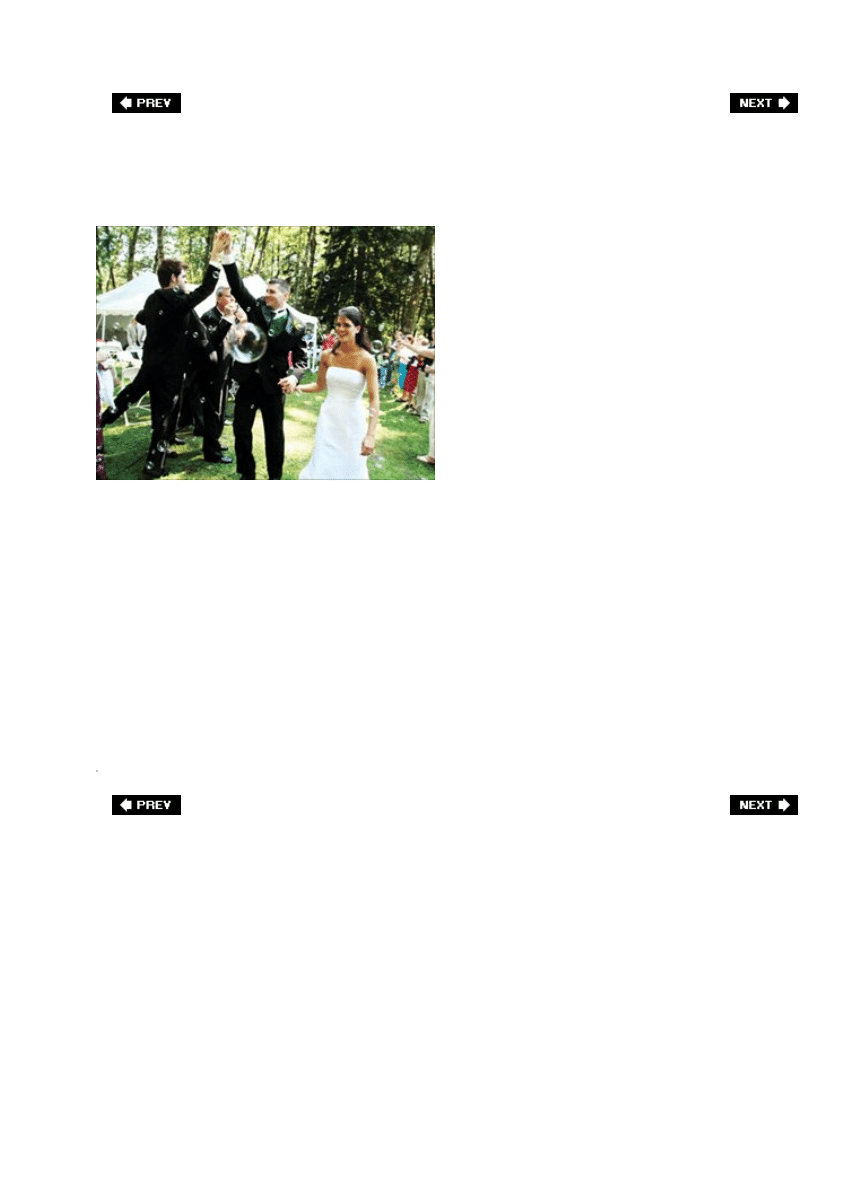
What to Shoot with a Wide-Angle Lens
©ISTOCKPHOTO/KEVIN RUSS
At weddings, there are three things you're definitely going to want to shoot with a wide-angle
lens. One is the rice throwing (of course, they don't actually throw rice anymore). You'll want
to shoot this with a wide-angle lens so you get the bride, groom, andjust as importantthe
crowd throwing the rice (or rice byproduct) behind and around them. The other thing you'll
want a wide-angle lens for is shooting the interior of the church. The bride is going to expect
a photo that takes it all in and your wide-angle lens will be your Get Out of Jail Free card
when it comes to covering this all-important shot. Lastly, you'll want your wide-angle lens for
shooting the bouquet toss and garter toss, so you can get both the tosser and the anxious
crowd waiting to capture the prize (so to speak). Go wide, shoot from in front of the bride,
and you'll get it all in one shot (but don't just take one shotthis is where a burst of shots will
pay off).
Back Up Your Photos Onsite
A wedding happens once. You don't get a redo, so make sure that backing up your photos on
location is a part of your workflow. If you fill a memory card, and pop in a new one, the next
thing you should be doing is backing up that full card to a hard drive. I recommend either the
Epson P-2000 or P-4000 (shown above), both of which enable you to pop a CompactFlash
card directly into the unit and back up your photos onto it without having a computer nearby.
I keep a P-2000 in my camera bag, and as soon as I fill a card, I pop it into the P-2000 and
hit the copy button. In just a few minutes, my memory card (with those irreplaceable photos)
is backed up. Also, as soon as I return to my studio, I immediately copy all the photos onto a
removable hard drive, so now I have two backups of the wedding photos. This backing up is
so importantwithout a backup, you're placing a lot of faith in those memory cards. Imagine
how you'd feel having to tell a bride and groom that your memory card somehow became
corrupted and you lost the shots of their ceremony. You can sidestep that crisis by making
one or two simple backups.
Scott's Gear Finder
The Epson P-2000 (40-GB hard drive) sells for
around $499.
The Epson P-4000 (80-GB hard drive) sells for
around $660.
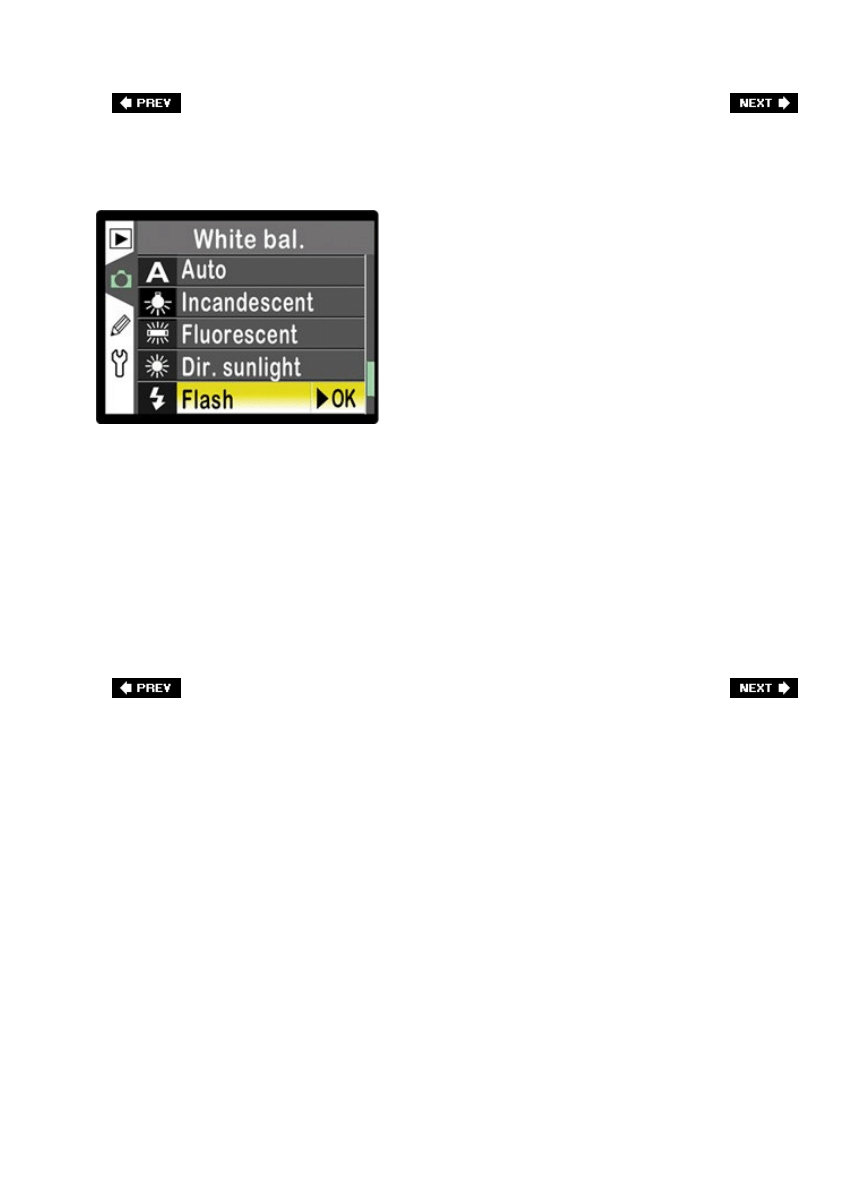
If Shooting JPEGs, Use a Preset White Balance
If you're shooting with your digital camera set to RAW format, you don't need to worry about
the white balance (leave it set at Auto White Balance, you can always change it later, in
Photoshop), but if you're like many pro wedding photographers, you're shooting in JPEG Fine
format (so you can take more shots and write to the memory card faster). If that's the case,
then you're better off choosing a preset white balance in the camera that matches the
lighting situation you're shooting in (that way, the overall color of your photo looks balanced
for the light). If you don't set the right white balance, your photos can look too yellow or too
blue. Luckily, choosing a white balance is easier than you'd think, and it will save you loads
of time later when you're processing your photos in Photoshop. Just go to the menu on your
digital camera, scroll to the white balance control and choose Incandescent if you're shooting
in a standard reception hall, or Daylight if you're shooting an outdoor wedding. If you're
using a flash, set your white balance to Flash. It's that easy to get your color in line.

Chapter Four. Shooting Landscapes
Like a Pro
Pro Tips for Capturing the Wonder of Nature
[View full size image]
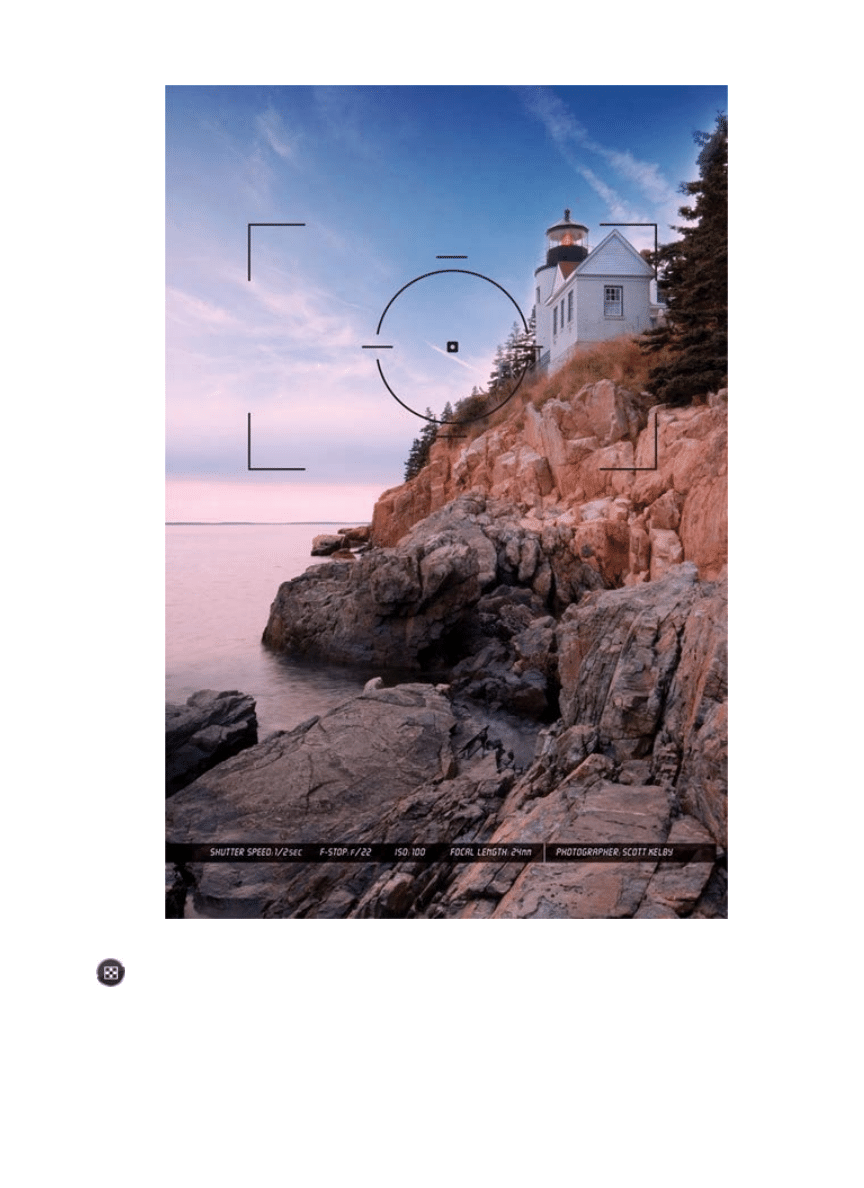
If you ever get to shoot in some truly amazing outdoor locations, like the Grand Canyon
or Yosemite National Park, it's really a very humbling photographic experience. The reason
why is you're looking at this amazing vista, at the sheer grandeur of it all, and it looks so awe
inspiring you'd figure a chimp could even take a great photo of it. I mean, it's just so
spectacular, how could you mess it up? Then you set up your tripod, look in your viewfinder,
and it happensyou begin to silently sob. You're sobbing because you bought all this expensive
camera gear, with multiple camera bodies and lenses that cost more than a Toyota Prius
hybrid, you've got more filters than a Ritz Camera store, and your camera bag weighs
approximately 54 lbs. You saved all year, took your two-week vacation from work, bought
round-trip airfare, and rented a huge SUV big enough to haul you, your family, and all your
expensive gear out into the sweltering summer heat of the canyon. Now you're looking

through your viewfinder and what you see doesn't look half as good as the stinkin' postcards
in the park's gift shop that sell for $1.25 each. Tears begin to stream down your face as you
realize that you're not going to get the shot you came for. And whose fault is all this? Ansel
Adamsthat's who. He screwed up the Grand Canyon, Yosemite, and a dozen other locations
for us all. But even though we're not Ansel Adams, we can surely get better photos than the
ones in the gift shop, right? Well, it starts with reading this chapter. Hey, it's a start.
The Golden Rule of Landscape Photography
SCOTT KELBY
There's a golden rule of landscape photography, and you can follow every tip in this chapter,
but without strictly following this rule, you'll never get the results the top pros do. As a
landscape photographer, you can only shoot two times a day: (1) dawn. You can shoot about
15 to 30 minutes before sunrise, and then from 30 minutes to an hour (depending on how
harsh the light becomes) afterward. The only other time you can shoot is: (2) dusk. You can
shoot from 15 to 30 minutes before sunset, and up to 30 minutes afterward. Why only these
two times? Because that's the rule. Okay, there's more to it than that. These are the only
times of day when you get the soft, warm light and soft shadows that give professional
quality lighting for landscapes. How stringent is this rule? I'll never forget the time I was
doing a Q&A session for professional photographers. The other instructor was legendary
National Geographic photographer Joe McNally. A man in the crowd asked Joe, "Can you
really only shoot at dawn and dusk?" Joe quietly took his tripod and beat that man to death.
Okay, that's an exaggeration, but what Joe said has always stuck with me. He said that
today's photo editors (at the big magazines) feel so strongly about this that they won't even
consider looking at any of his, or any other photographer's, landscape work if it's not shot at
dawn or dusk. He also said that if he takes them a shot and says, "Look, it wasn't taken
during those magic hours, but the shot is amazing," they'll still refuse to even look at it. The
point is, professional landscape photographers shoot at those two times of day, and only
those two times. If you want pro results, those are the only times you'll be shooting, too.
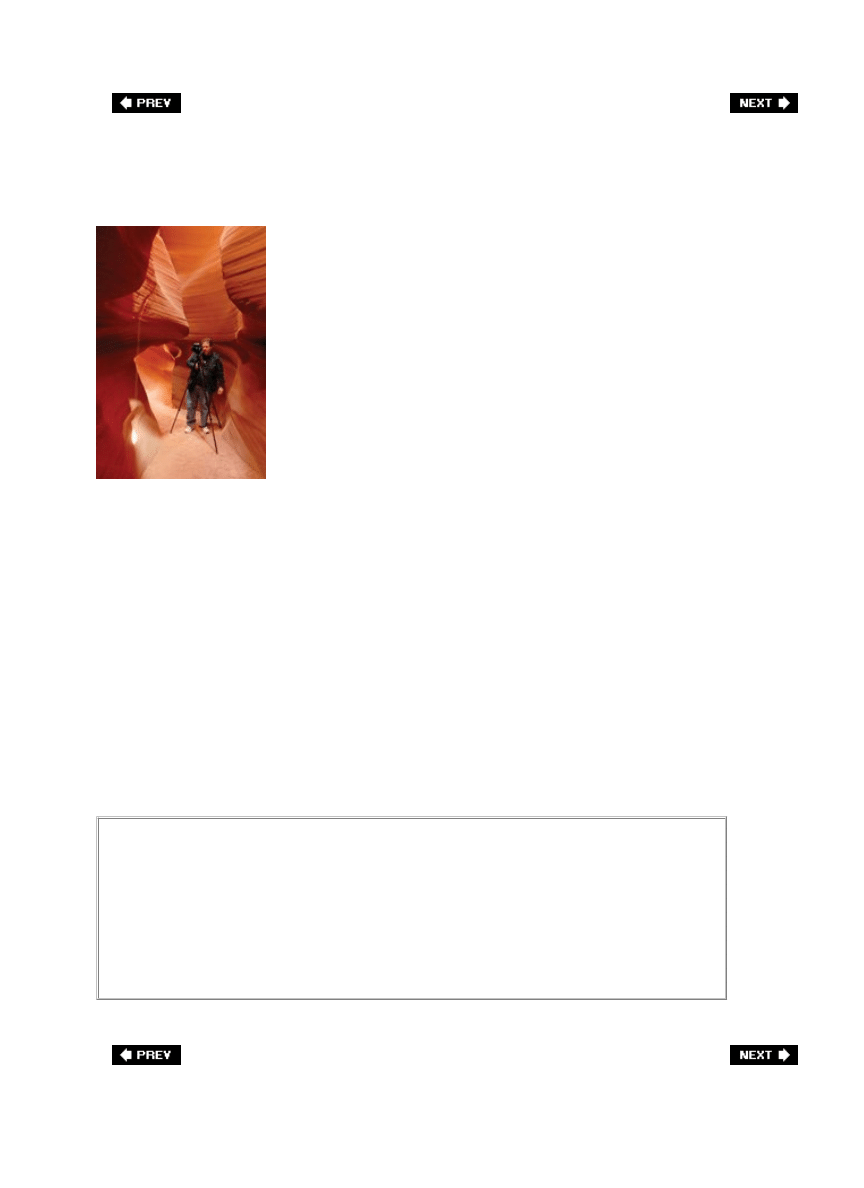
Become Married to Your Tripod
BILL FORTNEY
Okay, so now you know that as a pro landscape shooter your life is going to be like this: you
get up before dawn, and you miss dinner about every evening (remember, there's no shame
in coming to dinner late). If you're okay with all that, then it's time to tell you the other harsh
realitysince you'll be shooting in low light all the time, you'll be shooting on a tripod all the
time. Every time. Always. There is no hand-holding in the professional landscape
photography world. Now, I must warn you, you will sometimes find landscape photographers
out there at dawn some mornings shooting the same thing you are, and they're hand-holding
their cameras. They don't know it yet, but once they open their photos in Photoshop, they are
going to have the blurriest, best-lit, out-of-focus shots you've ever seen. Now, what can you
do to help these poor hapless souls? Quietly, take your tripod and beat them to death. Hey,
it's what Joe McNally would do. (Kidding. Kind of.)
Tripods: The Carbon Fiber Advantage
The hottest thing right now in tripods is carbon fiber. Tripods made with carbon
fiber have two distinct advantages: (1) they're much lighter in weight than
conventional metal tripods without giving up any strength or stability, and (2)
carbon fiber doesn't resonate like metal, so you have less chance of vibration.
However, there's a downside: as you might expect, they're not cheap.
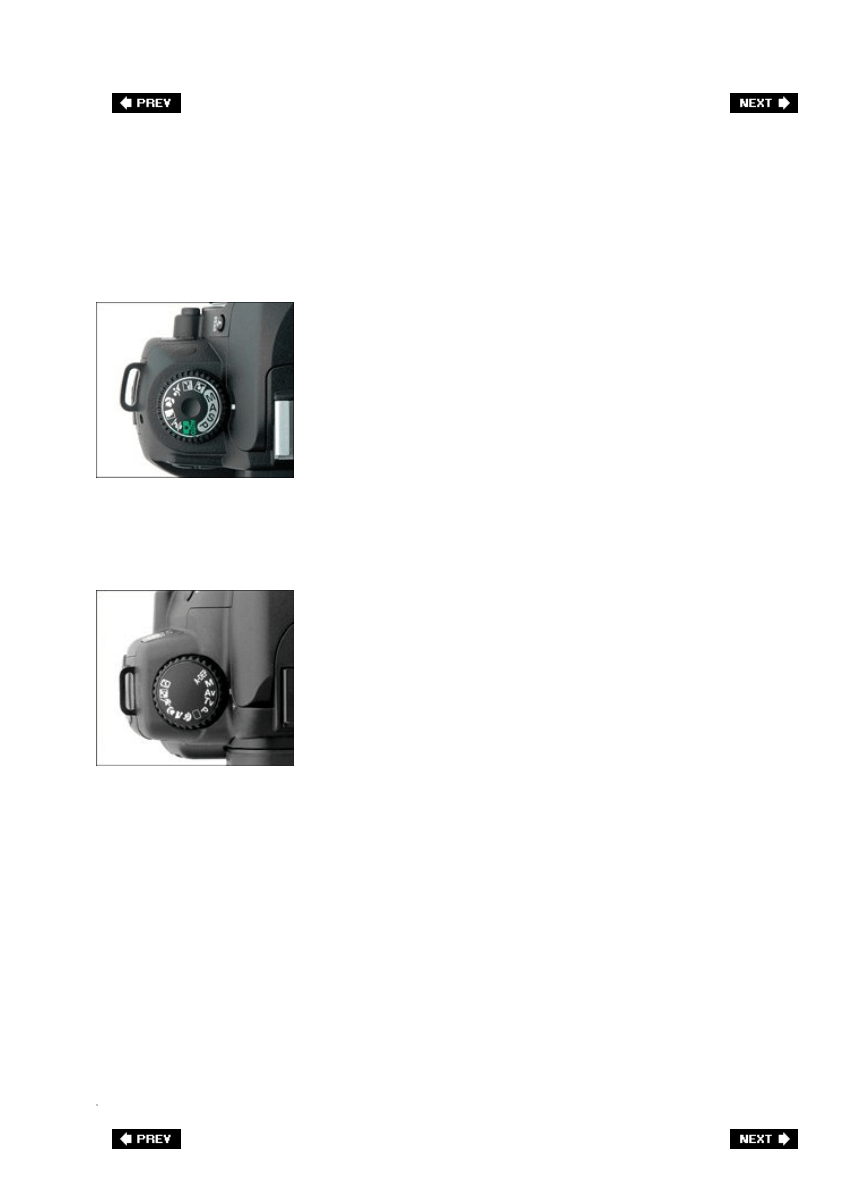
Shoot in Aperture Priority Mode
Nikon
Canon
The shooting mode of pro outdoor photographers is aperture priority mode (that's the little A
or Av on your digital camera's mode dial). The reason why this mode is so popular is that it
lets you decide how to creatively present the photo. Here's what I mean: Let's say you're
shooting a tiger with a telephoto zoom lens and you decide you want the tiger (who's in the
foreground of the shot) to be in focus, but you want the background out of focus. With
aperture priority mode, it's easyset your aperture to the smallest number your lens will allow
(for example, f/2.8, f/4, f/5.6, etc.) and then focus on the tiger. That's it. The camera (and
the telephoto lens) does the restyou get a sharp photo of the tiger and the background is
totally out of focus. So, you just learned one of the three aperture trickslow numbers (and a
zoom lens) leave your subject in the foreground in focus, while the background goes out of
focus. Now, what do you do if you want the tiger and the background to both be in focus (you
want to see the tiger and his surroundings clearly)? You can move your aperture to either f/8
or f/11. These two settings work great when you just want to capture the scene as your eye
sees it (without the creative touch of putting the background majorly out of focus). Far away
backgrounds (way behind the tiger) will be a little bit out of focus, but not much. That's the
second trick of aperture priority mode. The third trick is which aperture to use when you want
as much as possible in focus (the foreground, the middle, the backgroundeverything): just
choose the highest number your lens will allow (f/22, f/36, etc.).
Composing Great Landscapes
SCOTT KELBY
The next time you pick up a great travel magazine that features landscape photography or
look at some of the work from the masters in digital landscape photography, like David
Muench, Moose Peterson, Stephen Johnson, and John Shaw, take a moment to study some of
their wonderful, sweeping images. One thing you'll find that most have in common is that
these landscape shots have three distinct things: (1) a foreground. If shooting a sunset, the
shot doesn't start in the waterit starts on the beach. The beach is the foreground. (2) They
have a middle ground. In the case of a sunset shot, this would be either the ocean reflecting
the sun, or in some cases it can be the sun itself. And lastly, (3) it has a background. In the
sunset case, the clouds and the sky. All three elements are there, and you need all three to
make a really compelling landscape shot. The next time you're out shooting, ask yourself,
"Where's my foreground?" (because that's the one most amateurs seem to forgettheir shots
are all middle and background). Keeping all three in mind when shooting will help you tell
your story, lead the eye, and give your landscape shots more depth.
Another Advantage of Shooting at Dawn
Another advantage of shooting at dawn (rather than at sunset) is that water (in
ponds, lakes, bays, etc.) is more still at dawn because there's usually less wind in
the morning than in the late afternoon. So, if you're looking for that glassy
mirror-like reflection in the lake, you've got a much better shot at getting that
effect at dawn than you do at dusk.
The Trick to Shooting Waterfalls
©ISTOCKPHOTO/THIERRY MAFFEIS
Want to get that silky waterfall or that stream effect you see in those pro photos? The secret
is leaving your shutter open (for at least a second or two), so the water moves while
everything else (the rocks and trees around the waterfall or stream) remains still. Here's
what you do: switch your digital camera to shutter priority mode (the S or Tv on your
camera's mode dial), and set the shutter speed to 1 or 2 full seconds. Now, even if you're
shooting this waterfall on a bit of an overcast day, leaving your shutter open for a few
seconds will let way too much light in, and all you'll get is a solid white, completely blown-out
photo. That's why the pros do one of two things: (1) they shoot these waterfalls at or before
sunrise, or just after sunset, when there is much less light. Or they (2) use a stop-down filter.
This is a special darkening filter that screws onto your lens that is so dark it shuts out most of
the light coming into your camera. That way, you can leave the shutter open for a few
seconds. Such little light comes in that it doesn't totally blow out your photo, and you wind
up with a properly exposed photo with lots of glorious silky water. Now, if you don't have a
stop-down filter and you run across a waterfall or stream that's deep in the woods (and deep
in the shade), you can still get the effect by trying this: put your camera on a tripod, go to
aperture priority mode, and set your aperture to the biggest number your lens will allow
(probably either f/22 or f/36). This leaves your shutter open longer than usual (but that's
okay, you're in deep shade, right?), and you'll get that same silky-looking water.
A Tip for Shooting Forests
©ISTOCKPHOTO/SIMON OXLEY
Want a great tip for shooting forest scenes? Don't include the ground in your shots. That's
right, the ground in the forest is often surprisingly messy (with dead branches, and leaves,
and a real cluttered look) and that's why so many pro forest shots don't include the groundit
distracts from the beauty of the trees. So, easy enoughframe your shots so they don't include
the ground, and you're shooting better forest shots right off the bat. Now, if the ground looks
good, then by all means include it, but if it's a mess, you've got a way to save the shot.
Here's another forest shooting tip: overcast days are great for shooting forests because it's
difficult to get a decent forest shot in bright, harsh sun. However, there is one exception to
this rule: if there's "atmosphere" (fog or mist) in the forest on bright days, the sun rays
cutting through the fog or mist can be spectacular.
This Isn't a Forest Tip. It's for Waterfalls
So why is this tip here instead of on the waterfalls page? I ran out of room on that
page. The tip is this: when shooting waterfalls, if you don't have a stop-down
filter, then you can try putting your polarizing filter on instead. This serves two
purposes: (1) it cuts the reflections in the waterfall and on the rocks, and (2)
since it darkens, it can eat up about two stops of light for you, so you can shoot
longer exposures with it than you could without it. Also, choosing slower shutter
speeds exaggerates the silky water effect, so try a few different shutter speeds (4
seconds, 6 seconds, 10 seconds, etc.) and see which one gives you the best effect
for what you're currently shooting.
Where to Put the Horizon Line
SCOTT KELBY
When it comes to the question of "Where do I place the horizon?" the answer is pretty easy.
Don't take the amateur route and always place the horizon in the dead center of the photo, or
your landscape shots will always look like snapshots. Instead, decide which thing you want to
emphasizethe sky or the ground. If you have a great-looking sky, then put your horizon at
the bottom third of your photo (which will give you much more emphasis on the sky). If the
ground looks interesting, then make that the star of your photo and place the horizon at the
top third of your photo. This puts the emphasis on the ground, and most importantly, either
one of these methods will keep your horizon out of the center, which will give your shots
more depth and interest.
Really Boring Sky? Break the Rule
If you're shooting a landscape shot with a sky where nothing's really happening,
you can break the 1/3 from the top horizon line rule and eliminate as much of the
sky from view as possible. Make it 7/8 ground and 1/8 sky, so the attention is
totally off the sky, and onto the more interesting foreground.
Getting More Interesting Mountain Shots
SCOTT KELBY
One theme you'll see again and again throughout this book is to shoot from angles we don't
see every day. For example, if your subject is mountains, don't shoot them from the road at
the bottom of the mountain. This is exactly how we see mountains every day when we drive
by them on the interstate, so if you shoot them like that (from the ground looking up), you'll
create shots that look very normal and average. If you want to create mountain shots that
have real interest, give people a view they don't normally seeshoot from up high. Either drive
up as high as you can on the mountain, or hike up as high as is safe, then set up your
camera and shoot down on or across the mountains. (This is the same theory as not shooting
down on flowers. We don't shoot down on flowers because that's the view we normally have
of them. In turn, we don't shoot up at mountains, because we always see them from that
same view. It's boring, regular, and doesn't show your viewer something they haven't seen a
hundred times before.)

The Trick for Warmer Sunrises and Sunsets
Here's a trick I picked up from Bill Fortney for getting even warmer sunrises and sunsets. For
Nikon shooters, go to your camera's menu and choose Daylight as your white balance. Press
the right arrow button to get the Fine-tune screen, dial in 3 (as shown above), and click OK.
This does an amazing job of warming these types of photos. If you're a Canon shooter, go to
www.scottkelbybooks.com/warmbal
for complete step-by-step instructions on how to set the
white balance for Canon cameras. Note : Don't forget to turn this setting off when you're not
shooting sunrises or sunsets. Okay, it wouldn't be the worst thing in the world (it won't ruin
all your subsequent shots), but your world will be a little warmer.

Turn on "The Blinkies" to Keep More Detail
Okay, they're technically not called "the blinkies" (that's our nickname for them), they're
actually called highlight warnings (or highlight alerts) and having this turned on, and
adjusting for it, is a critical part of getting properly exposed landscape shots. This warning
shows exactly which parts of your photo have been overexposed to the point that there's no
detail in those areas at all. You'll be amazed at how often this happens. For example, even on
an overcast day, clouds can blow out (turn solid white with no detail) easily, so we keep our
camera's highlight warning turned on. Here's how it works: When the highlight warning is
turned on and you look at the shot in your LCD monitor, those blown out areas will start to
blink like a slow strobe light. Now, these blinkies aren't always badfor example, if you shoot a
shot where the sun is clearly visible, it's going to have the blinkies (I don't mean sunlight, I
mean the red ball of the sun). There's not much detail on the suface of the sun, so I'd let that
go. However, if your clouds have the blinkies, that's a different story. Probably the quickest
way to adjust for this is to use your camera's exposure compensation control (covered on the
next page). For now, let's focus on making sure your highlight warning (blinkies) is turned
on. If you have a Nikon camera, press the playback button so you can see the photos on your
memory card. Now, push the right arrow button until the word Highlight appears below your
photo on the LCD monitor. If you have a Canon camera (like a 20D, 30D, or a Rebel), press
the playback button to view your images and then press the Info button to see the blinkies.

How to Avoid the Dreaded Blinkies
If you look on your camera's LCD monitor and you see the blinkies appearing in an area
that's important to you (like in the clouds, or in someone's white shirt, or in the snow, etc.),
then you can use your digital camera's exposure compensation control. Basically, you're
going to lower the exposure until the blinkies go away. It usually takes a few test shots (trial
and error) to find out how much you have to back down, but normally this only takes a few
seconds. Here's how it works:
Nikon: Press the exposure compensation button that appears just behind your shutter button
(as shown above). Then move the command dial until your exposure compensation reads 1/3
(that's minus 1/3 of a stop). Now take the same shot again and see if the blinkies are gone.
If they're not, do the same thing, but lower the amount another 1/3, so it reads 2/3 of a stop,
and so on, until the blinkies are gone.
Canon: Turn the mode dial to any creative zone mode except manual, then set the exposure
compensation by turning the quick control dial on the back of the camera and using the
settings mentioned above.
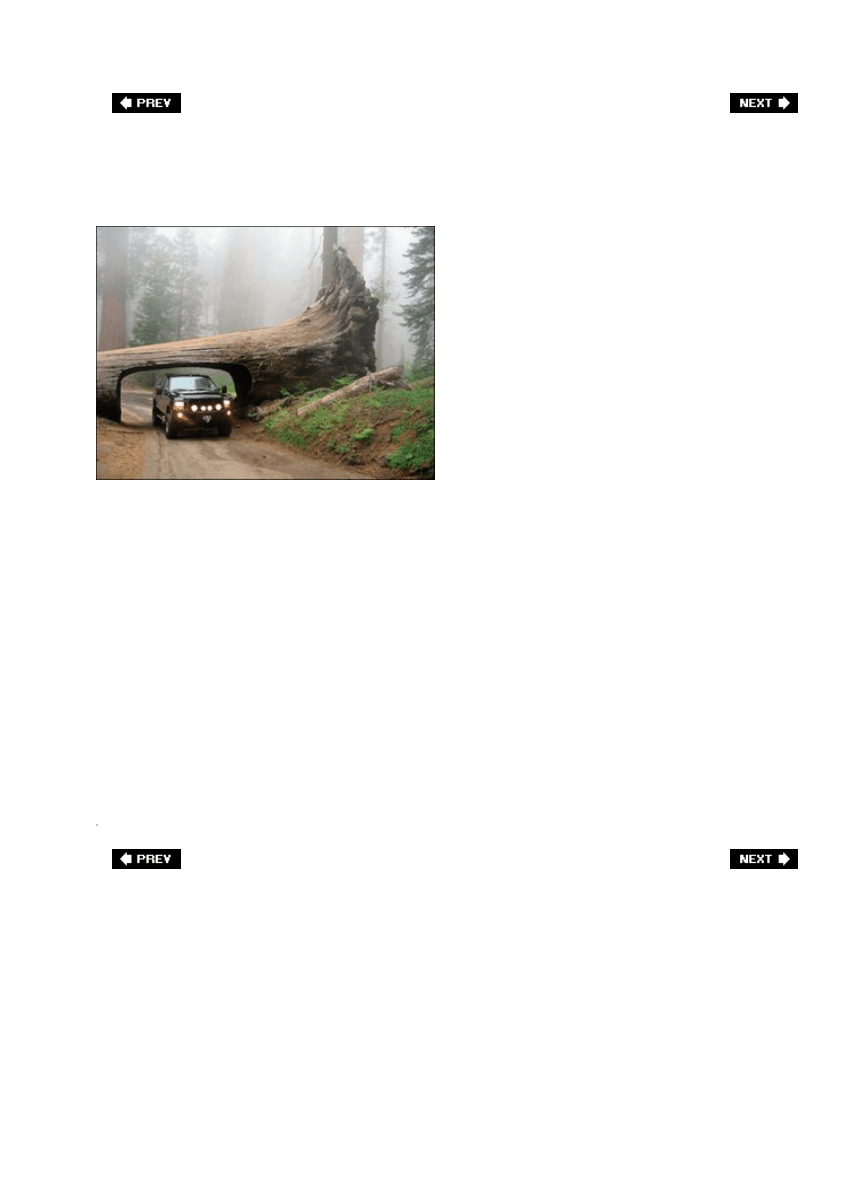
How to Show Size
©ISTOCKPHOTO/JAN PAUL SCHRAGE
If you've ever had a chance to photograph something like the California redwood trees or a
huge rock formation out in Utah's Monument Valley, you've probably been disappointed that
when you looked at those photos later, you lost all sense of their size. In person, those
redwoods were wider around than a truck. In your photos, they could've been the regular
pines in your backyard, because they lost their sense of size. That's why, when trying to show
the size of an object, you need something in that shot to give the object a sense of scale.
That's why many photographers prefer to shoot mountains with people in the scene (hikers,
climbers, etc.) because it instantly gives you a frame of referencea sense of scale that lets the
viewer immediately have a visual gauge as to how large a mountain, or a redwood, or the
world's largest pine cone really is. So, the next time you want to show the sheer size of
something, simply add a person to your shot and you've got an instant frame of reference
everyone can identify with. It'll make your shots that much stronger. (Note : By the way, this
also works for things that are very small. Put the object in someone's hands, and it instantly
tells the story.)
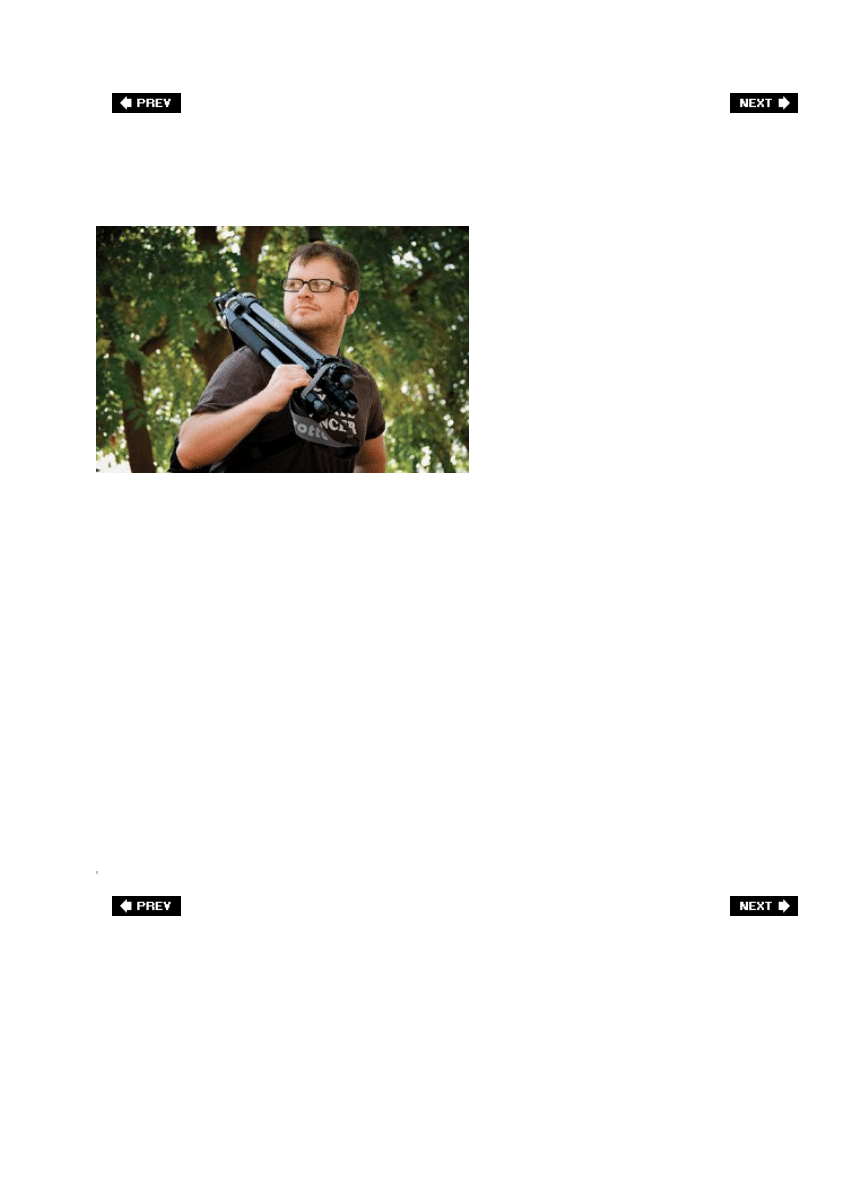
Don't Set Up Your Tripod. Not Yet
SCOTT KELBY
Okay, so you walk up on a scene (a landscape, a mountain range, a waterfall, etc.) and you
set up your tripod and start shooting. What are the chances that you just happened to walk
up on the perfect angle to shoot your subject? Pretty slim. But that's what most people
dothey walk up on a scene, set up their tripod right where they're standing, and they start
shooting. It's no big surprise that they wind up with the same shot everybody else gotthe
"walk up" shot. Don't fall into this trapbefore you set up your tripod, take a moment and
simply walk around. View your subject from different angles, and chances are (in fact, it's
almost guaranteed) that you'll find a more interesting perspective in just a minute or two.
Also, hand-hold your camera and look through the viewfinder to test your angle out. Once
you've found the perfect angle (and not just the most convenient one), you can then set up
your tripod and start shooting. Now the odds are in your favor for getting a better than
average take on your subject. This is one of the big secrets the pros use every day (legendary
landscape photographer John Shaw has been teaching this concept for years)they don't take
the walk-up shot. They first survey the scene, look for the best angle, the best view, the
interesting vantage point, and then (and only then) they set up their tripod. It sounds like a
little thing (surveying the scene before you set up), but it's the little things that set the pros
apart.
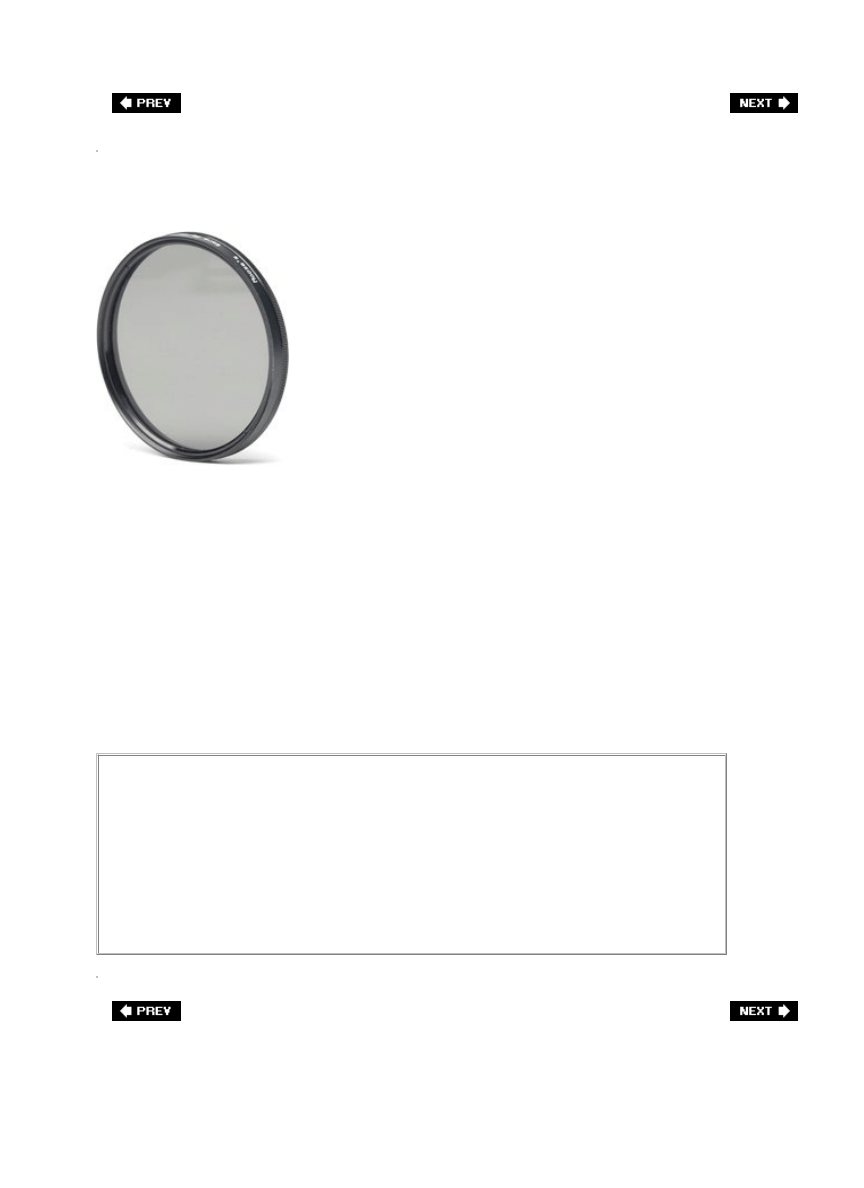
The Trick to Getting Richer Colors
One tool the pros use to get richer, more vivid colors is the polarizing filter. Of all the add-
ons used by landscape pros, the polarizing filter is probably the most essential. This filter
screws onto the end of your lens and it basically does two things: (1) it cuts the reflections in
your photo big time (especially in water, on rocks, or on any reflective surface), and (2) it
can often add more rich blues into your skies by darkening them and generally giving you
more saturated colors throughout (and who doesn't want that?). Two tips: (1) polarizers
have the most effect when you're shooting at a 90° angle from the sun, so if the sun is in
front of you or behind you, they don't work all that well, and (2) you'll use the rotating ring
on the filter to vary the amount (and angle) of polar ization (it's also helpful so you can
choose to remove reflections from either your sky or the ground). Once you see for yourself
the difference a polarizing filter makes, you'll say something along the lines of, "Ahhhh, so
that's how they do it."
Polarizing Tip
If there's a lens the polarizing filter doesn't love, it's the super-wide-angle lens
(like a 12mm or 10.5mm, etc.). Because the field of view is so wide, the sky
winds up having uneven shades of blue, and because of that, many pros avoid
using polarizers with super-wide-angle lenses. Also, when it comes to polarizers,
it pays to buy a good onethat way it will be truly color balanced. It doesn't pay to
scrimp here.
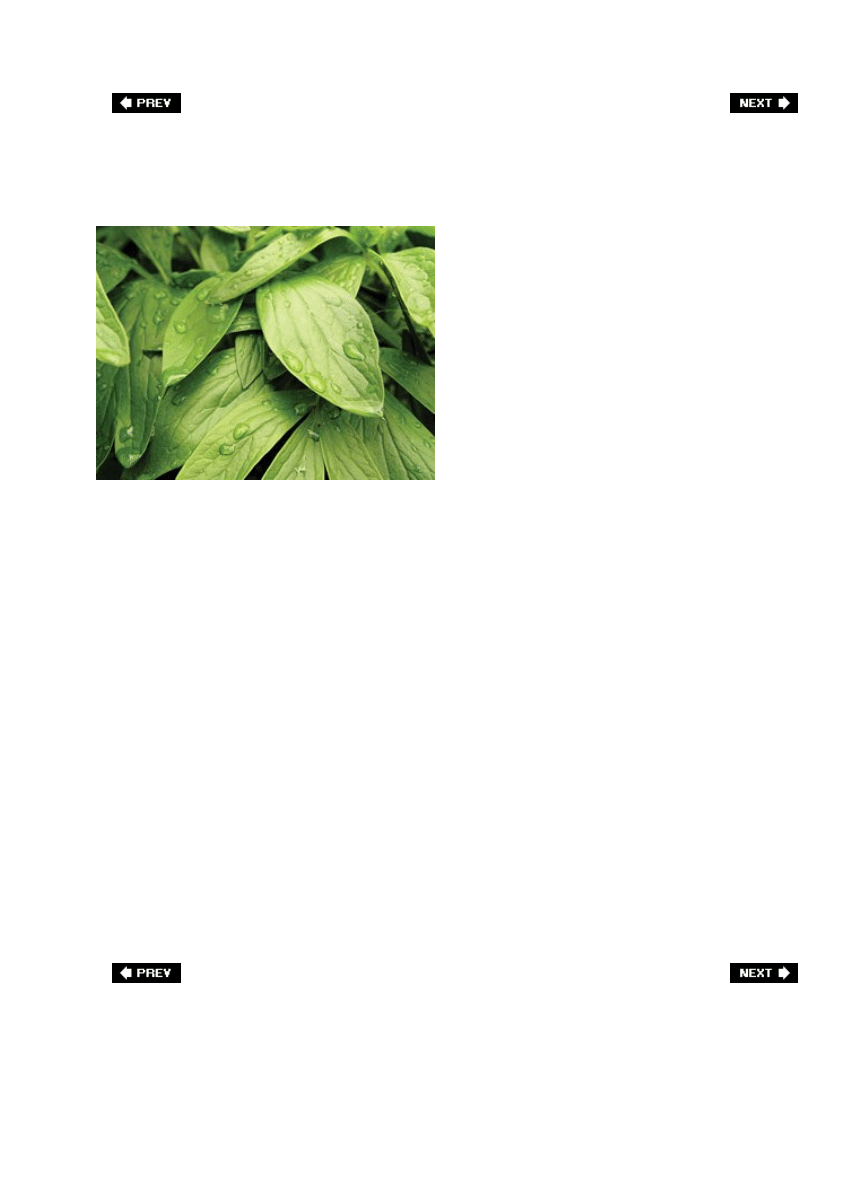
What to Shoot in Bad Weather
©ISTOCKPHOTO/DUNCAN WALKER
Okay, so you're thinking that it's an overcast or drizzly day, and you're going to spend the
day inside working on your photos in Photoshop. That's not the worst idea in the world, but
you'll miss some great shooting opportunities, like:
Right after a rain, while it's still cloudy and dark, is the perfect time to shoot foliage,
forests (the green leaves look more saturated and alive, even leaves on the ground look
good, plus the water droplets on the leaves and flowers add interest), mossy rivers, and
waterfalls (you can use slower shutter speeds while the sun is buried behind the
overcast rain clouds).
1.
If it's storming, there's a good chance that right after the rain stops, and the clouds
break, and the sun peeks through, there's a very dramatic shot coming. It may only last
a couple of minutes, and it will either start storming again or clear up and just get really
sunny (an outdoor photographer's enemy), so be ready for those few magical moments
between storms. They're worth waiting for.
2.
Before the storm "lets loose," you can get some really amazing skies, with angry clouds
and sometimes colorful light or strong light beams. Most people miss these shots, so be
ready (just don't shoot in the rain, to protect you and your gear).
3.
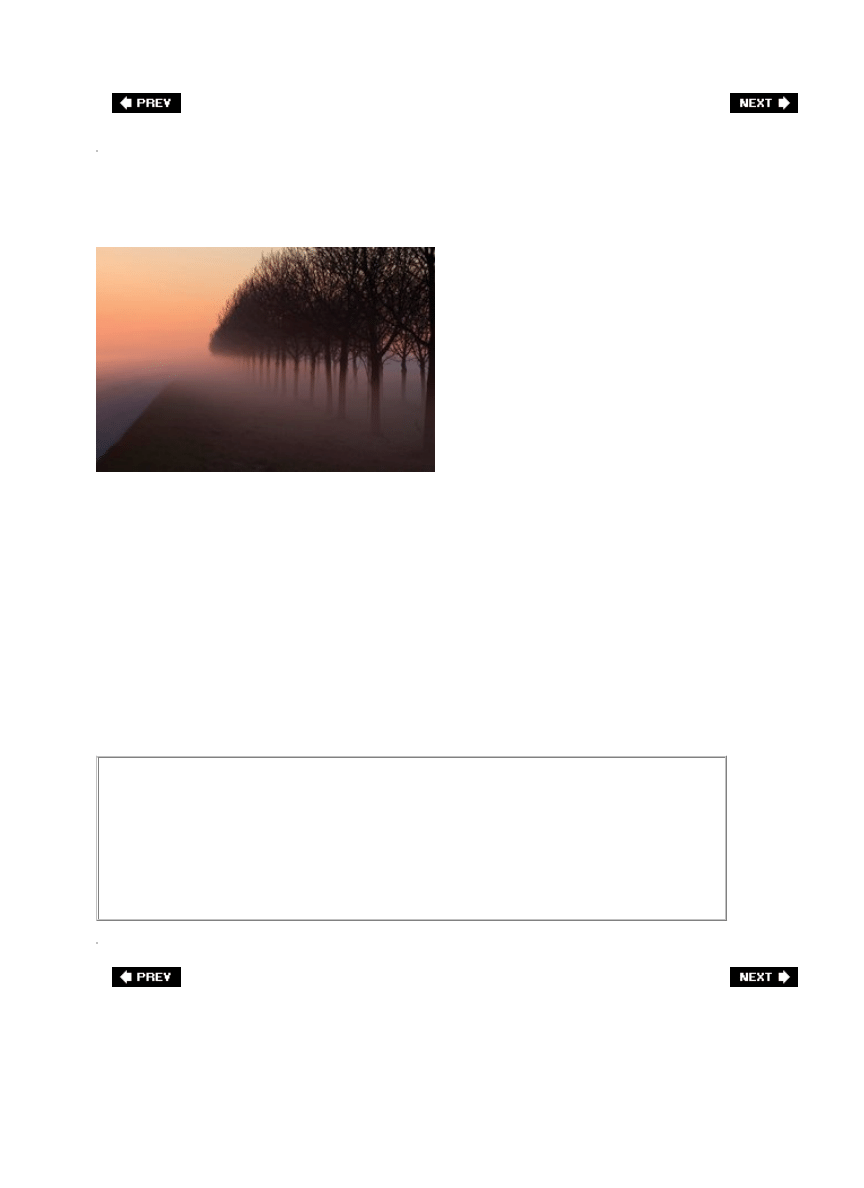
Atmosphere Is Your Friend
©ISTOCKPHOTO/FRED DE GROOT
Besides just keeping us here on earth, the atmosphere (low-hanging clouds or fog) can make
for some really interesting landscape photos (we're talking soft, diffused light heaven). In
fact, some of my personal favorite shots are taken when the fog rolls in between mountains
(but of course, you need to shoot this from above the fog on a higher mountaintop). I've shot
horses on the beach with the fog rolling in and it creates almost a Hollywood fantasy effect
that looks great on film (digital film, anyway). Also, beams of light in the forest, beaming
through moisture in the air, or through thick fog, can be just amazing. Get up early (or miss
dinner) to make the most of these atmospheric effects.
Protect Your Gear Tip
Fog and moisture are fancy names for water, and digital cameras flat out do not
like water, so make sure your gear is not getting silently soaked. You can buy rain
gear for your camera from B&H, but in a pinch, use the shower cap from your
hotel room and put it around your camerait's not pretty, but it works.
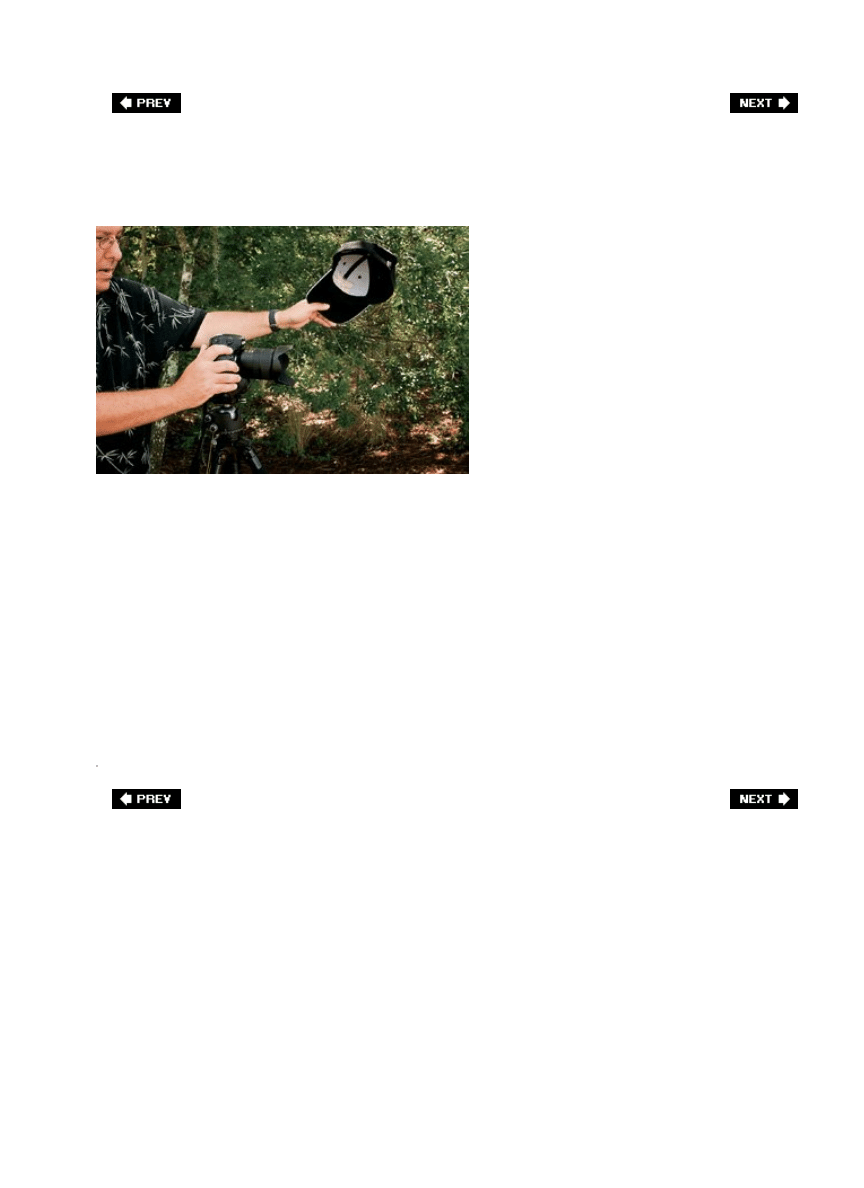
Getting Rid of Lens FlareThe Manual Way
MATT KLOSKOWSKI
Another great reason to wear a baseball cap when you shoot (besides the two obvious
reasons: [1] it protects you from the harmful rays of the sun, and [2] it looks cool) is to help
eliminate (or at the very least, reduce) lens flare. If you're using a lens hood on your camera,
that can certainly help, but I've found that often it alone is not enough. That's where your
ballcap comes injust take it off and position it above the right or left top side of your lens
(depending on where the sun is positioned). Then look through your camera's viewfinder to
see (1) right where to position your ballcap so it blocks the lens flare from the sun (it's easier
than you think), and (2) to make sure your ballcap doesn't show up in your photo (I've had
more than one photo with the edge of a ballcap in the frame. I guess that's why they make
Photoshopto remove silly stuff like that). I'm still surprised how well this totally manual
technique for removing lens flare works.
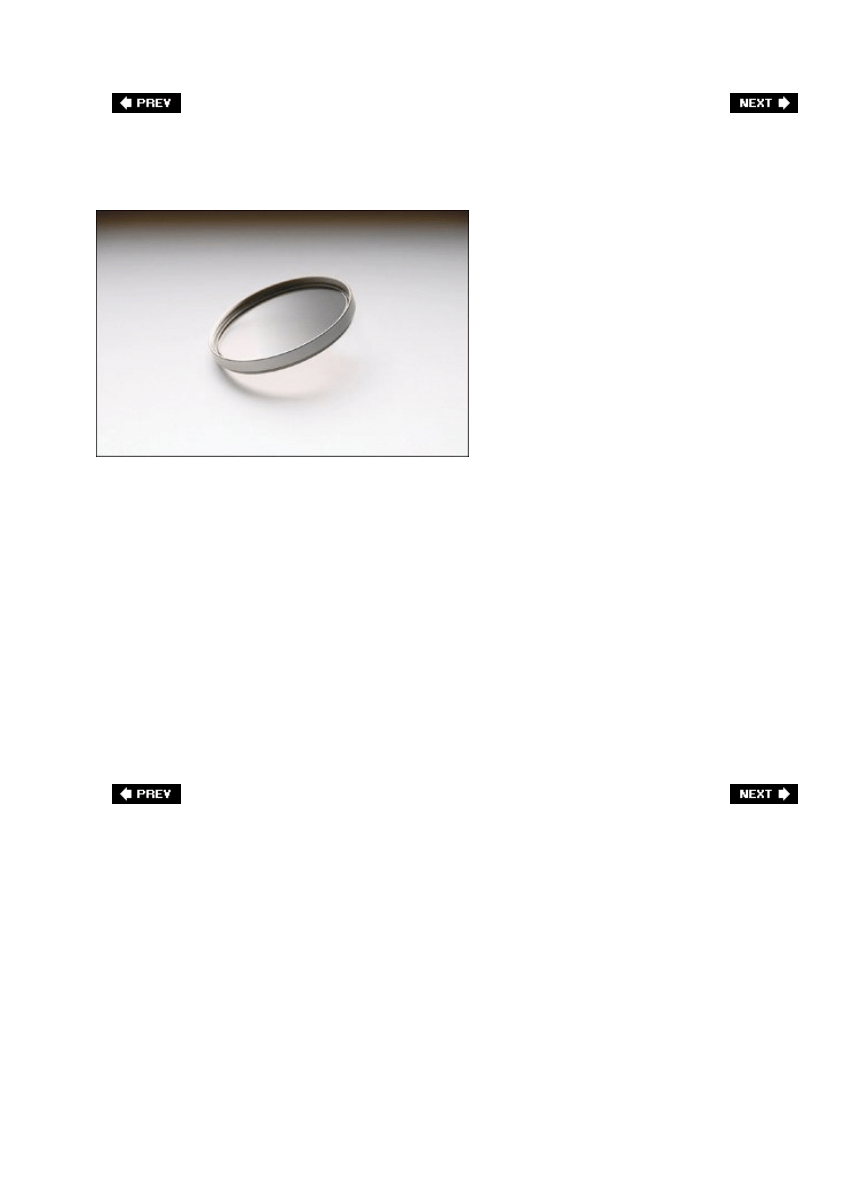
The Landscape Photographer's Secret Weapon
So, earlier you learned about the polarizer and how essential that filter is. This filter, the
neutral density gradient filter, isn't necessarily essential but it is the secret weapon of
professional landscape photographers. It lets them balance the exposure between the ground
and the sky to capture a range of exposure which, without it, their camera could never pull
off (it's either going to expose for the ground or for the sky, but not both at the same time).
For example, let's say you're shooting a landscape at sunset. If you expose for the sky, the
sky will look great but the ground will be way too dark. If you expose for the ground, then
the sky will be way too light. So, how do you get both the sky and the ground to look right?
With a neutral density gradient filter (a filter that's dark at the top and smoothly graduates
down to transparent at the bottom). What this essentially does is darken the sky (which
would have been overexposed), while leaving the ground untouched, but the brilliance of it is
the gradientit moves from darkening (at the top of the filter) and then graduates smoothly
down to transparent (on the ground). That way it only darkens the sky, but it does so in a
way that makes the top of the sky darker, and then your sky gradually becomes lighter until
the filter has no effect at all by the time it reaches the ground. The result is a photo where
both the sky and ground look properly exposed.

Keeping Your Horizons Straight
There is nothing that looks worse than a crooked horizon line. It's like when you don't get the
fleshtone color right in a photoit just jumps out at people (and people can't resist pointing
this out. It doesn't matter if you've taken a photo with composition that would make Ansel
Adams proud, they'll immediately say, "Your photo's crooked"). A great way to avoid this is
with a double levela simple little gizmo that slides into your flash hot shoe (that little bracket
on the top of your camera where you'd attach an external flash). This double level gizmo has
a mini-version of the bubble level you'd find at Home Depot and it lets you clearly see, in an
instant, if your camera is level (and thus, your horizon line). The double level version works
whether your camera is shooting in portrait or landscape orientation and is worth its weight
in gold (of course, that's not saying very much, because I doubt the thing weighs even one
ounce, but you get my drift). As luck would have it, they're more expensive than they should
bebetween $25 and $75but still very worth it.
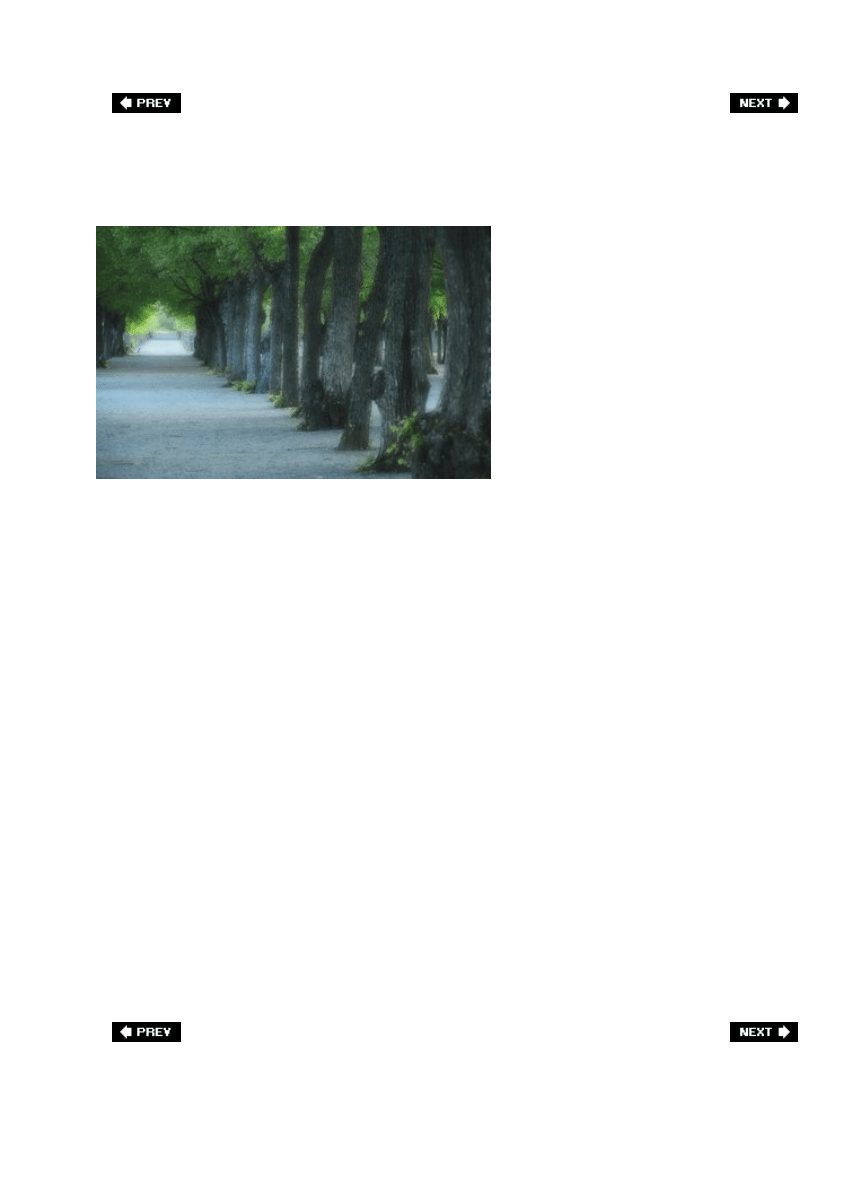
Shooting on Cloudy Days
SCOTT KELBY
This is another one of those things that may initially illicit a "Duh" response, but I've been out
shooting with more photographers than I can think of who didn't think of this simple concept
when shooting on gray, overcast daysshoot to avoid the sky. I know, it sounds silly when
you're reading it here, but I've heard it time and time again, "Ah, the sky is so gray today,
I'm not going to shoot." Baloney. Just take shots that limit the amount of visible sky. That
way, if you make a tonal adjustment later in Photoshop (that's a fancy way of saying, "I'm
going to make the sky look bluer than it really was on that gray, overcast day"), you won't
have to work very hard. This just happened on my last shoot, where we'd have 20 minutes of
blue sky and then an hour and a half of gray, overcast sky. I just really limited the amount of
sky in my photos (I was shooting urban city photos), and then it took just seconds to fix in
Photoshop. Here's what I did:
Step One.
I opened one of the photos where the sky looked nice and blue, then took the
Eyedropper tool (I), and clicked on the blue sky to make that my Foreground
color.
Step Two.
I then opened a photo with small amounts of gray, overcast sky and with the
Magic Wand tool (W) clicked in the sky to select it (which took all of two
seconds).
Step Three. I added a new blank layer above my Background layer and filled the selection
with my Foreground color. That's itmy gray sky was blue.
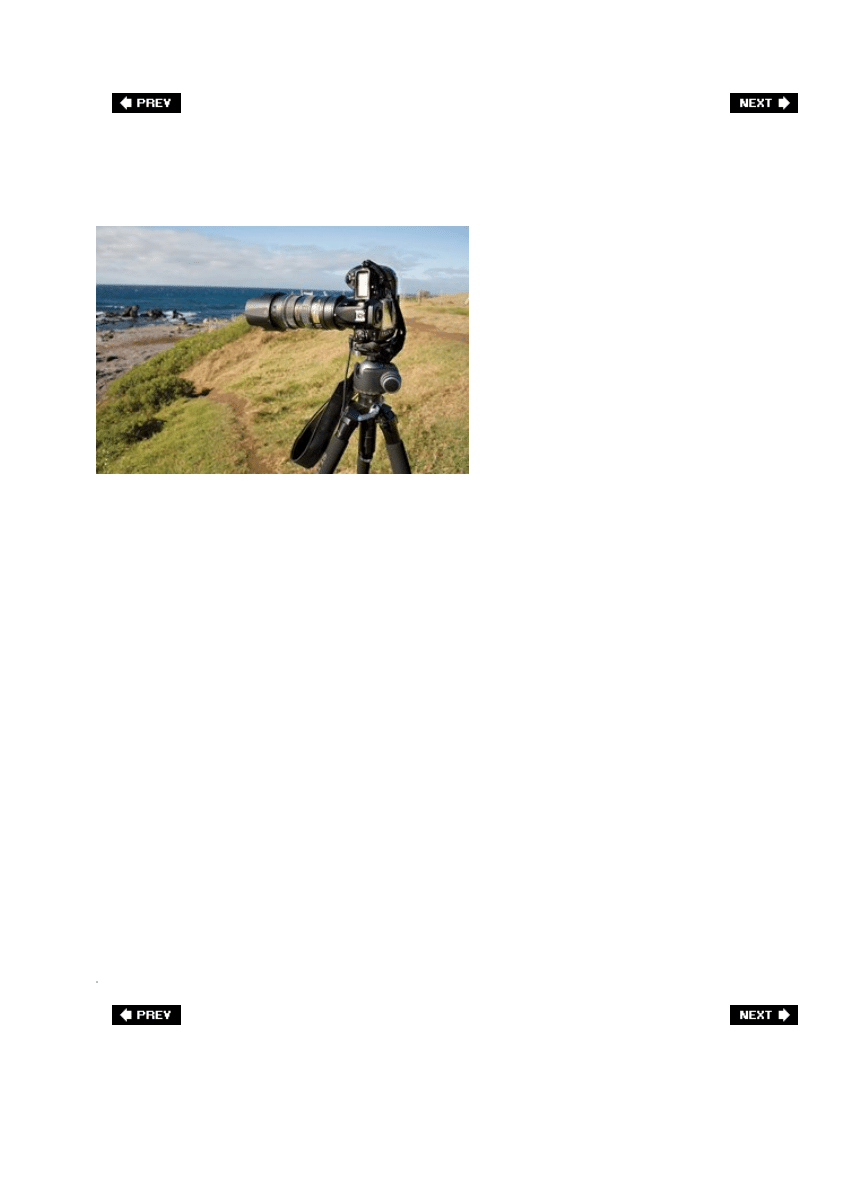
Tips for Shooting Panoramas, Part 1
RANDY HUFFORD
There is something so fascinating about what happens when you stitch together five or six (or
more) landscape photos into one long, single image. It's as close as you can get (with a
photograph anyway) to recreating the experience of being there. However, when it comes to
creating these panoramic images, it can be either a piece of cake or a huge nightmare, and
it's almost entirely based on how you shoot the panorama in the first place. Do it right and
Photoshop will stitch the whole thing together for you with little or no input from you at all.
Do it wrong and you'll be working your butt off for hours to try to get your pano together,
and Photoshop will mock you every step of the way. Now, although this will take more than
one page to describe, shooting panos right is easyyou just have to follow the rules that make
it easy to assemble the separate photos into one seamless image in Photoshop. Here we go:
1. Shoot your pano on a tripod. If you don't, you'll pay.
2. Shoot vertically (in portrait orientation) rather than horizontally (in landscape
orientation). It'll take more shots to cover the same area, but you'll have less edge
distortion and a better looking pano for your extra effort.
3. Switch your camera's white balance to Cloudy. If you leave it set to Auto, your white
balance may (will) change between segments, which is bad, bad, bad.
4. There's morego to the next page...
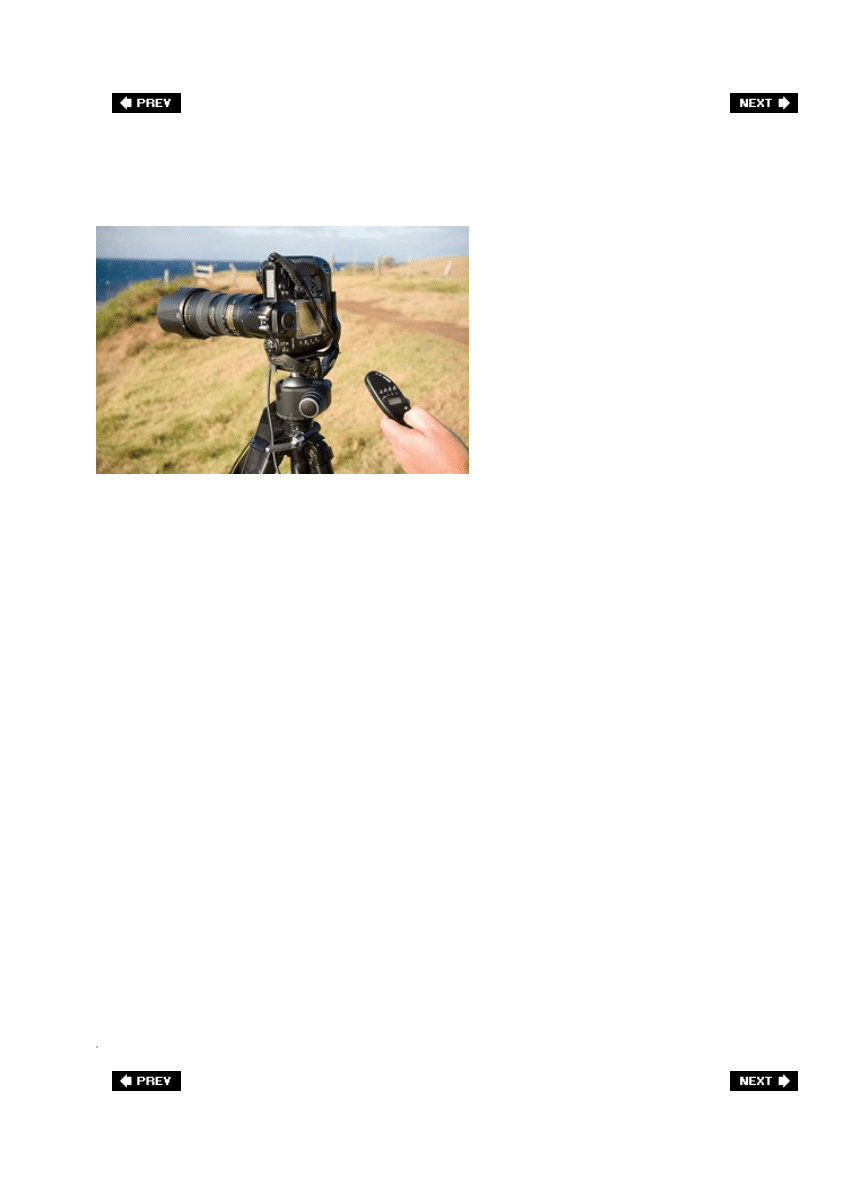
Tips for Shooting Panoramas, Part 2
RANDY HUFFORD
5.
Press your shutter button halfway down to set your exposure, then look in your
viewfinder and make note of the f-stop and shutter speed. Now switch your camera to
manual mode and dial in that f-stop and shutter speed. If you don't, and you shoot in an
auto exposure mode of any kind, your exposure may (will) change for one or more of
the segments, and this will drive you insane when working in Photoshop.
6.
Once you focus on the first segment, turn off auto focus for your lens. That way, your
camera doesn't refocus as you shoot the different segments, which would be (will be)
very bad.
7.
Before you shoot your first segment, shoot one shot with your finger in front of the
lensthat way you'll know where your pano starts. Do it again after the last shot.
8.
Overlap each segment by 2025%. That's right, make sure that about 1/4 of your first
shot appears in the second shot. Each segment needs to overlap by at least 20% so
Photoshop's stitching software can match things up. This is very important.
9.
Shoot fairly quicklyespecially if clouds are moving behind your landscape. Don't be
lollygagging for two minutes between each shot. Git 'er done, or something could
change (lighting, clouds, etc.) in your pano, which will really mess things up.
10. Use a shutter release, or at the very least a self timer, so you don't have any camera
movement as you're shooting each segment. Nothing's worse than one segment that is
blurry.
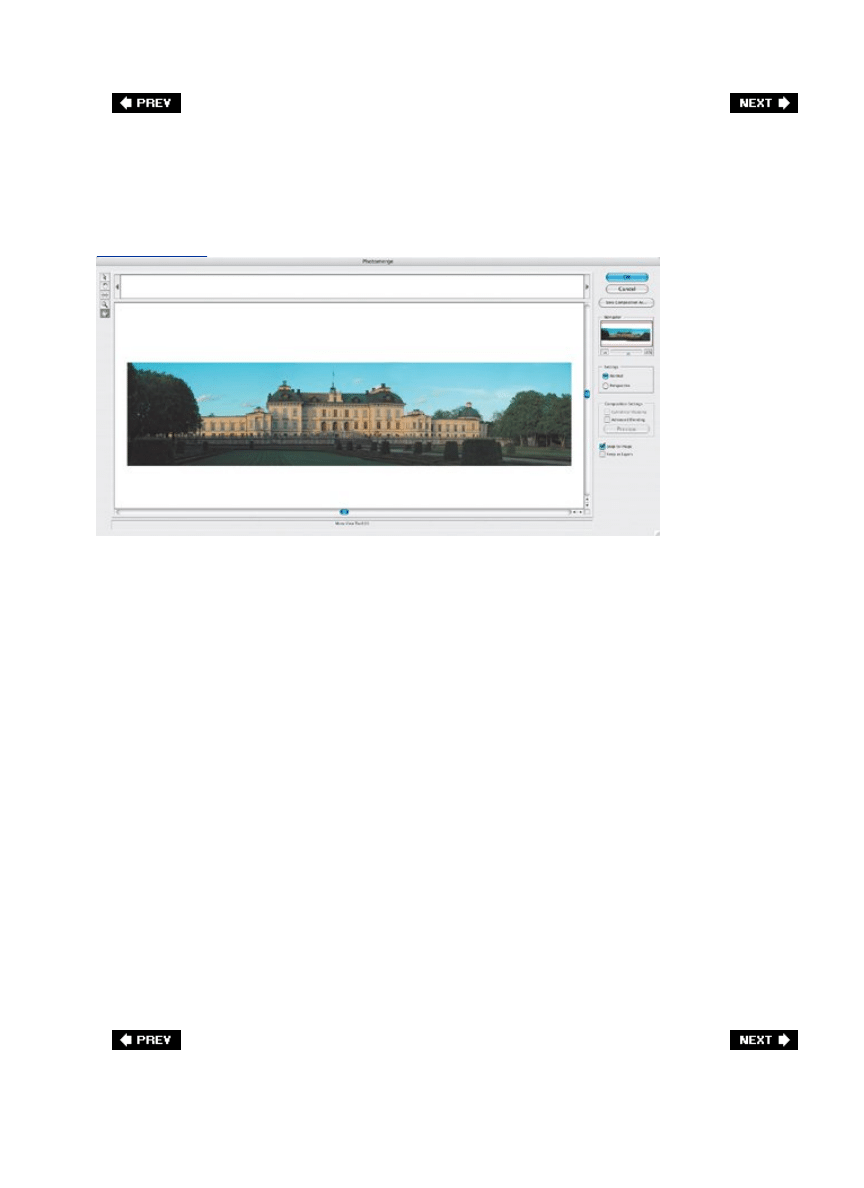
Tips for Shooting Panoramas, Part 3
[View full size image]
SCOTT KELBY
Now, if you followed the rules set out on the previous two pages, the rest is easy:
Step
One.
Open Photoshop and then open all the photo segments (so all the photo segments
are open at the same time).
Step
Two.
Go under Photoshop's File menu, under Automate, and choose Photomerge.
Step
Three.
In the resulting dialog, from the Use pop-up menu, choose Open Files. Make sure the
Attempt to Automatically Arrange Source Images checkbox is turned on, and then
click OK.
Step
Four.
When the main Photomerge dialog appears, it will stitch the photos together into one
seamless panorama (well, as long as you followed the rules laid out earlier). If you
see a small seam at the top, between two segments, go ahead and click OK
anywaychances are it will be gone when the final image is created. If for some
reason it's not, use the Clone Stamp tool (S) to cover it by pressing-and-holding the
Option key (PC: Alt key) and clicking nearby in an area of sky that looks similar to
sample that area. Then, choose a soft-edged brush from the Brush Picker and clone
(paint) over the little seam to hide it.
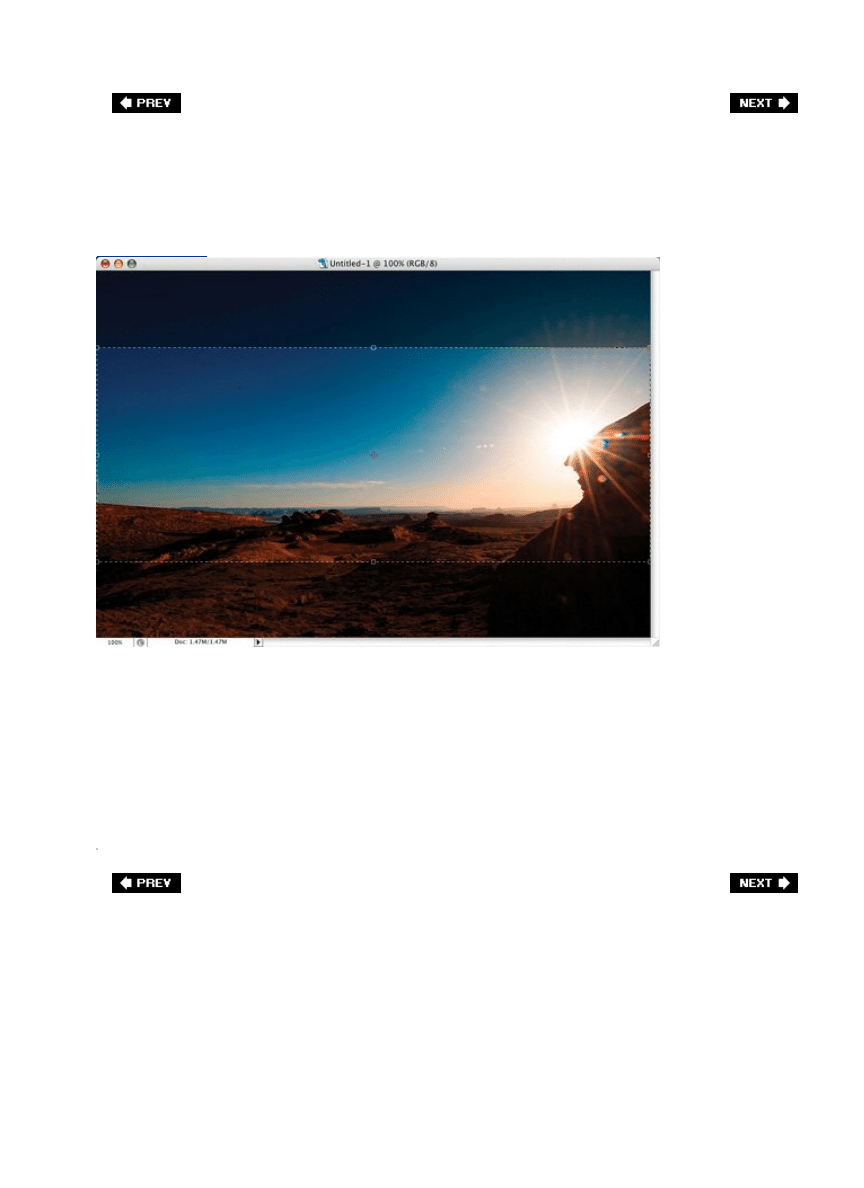
Faking Panoramas
[View full size image]
SCOTT KELBY
If you have Photoshop or Photoshop Elements, there's a great way to create a fake
panoramacrop the photo so it becomes a panorama. Just get the Crop tool (C) and click-and-
drag so it selects just the center of your photo (as shown above), cropping off the top and
bottom. Then press Return (PC: Enter) and the top and bottom are cropped away, leaving
you with a wide panoramic crop of your original photo. Hey, don't knock it until you've tried
it.
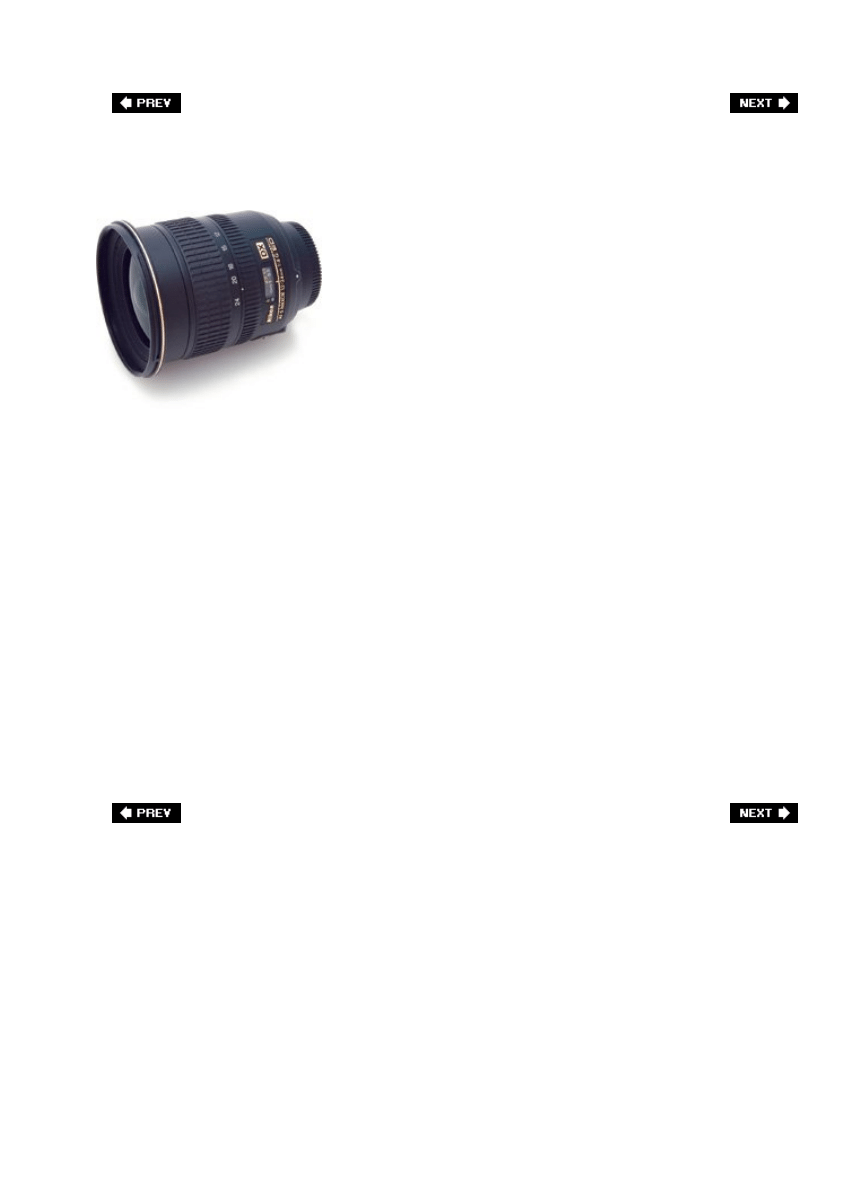
Why You Need a Wide-Angle Lens
If you're shooting landscapes, you've probably come back from a shoot more than once and
been disappointed that the incredible vista you saw in person didn't transfer to your photos.
It's really tough to create a 2D photo (which is what still photos aretwo-dimensional) that has
the depth and feeling of being there. That's why I recommend one of two things:
Don't try to capture it all. That's right, use a zoom lens and deliberately capture just a
portion of the scene that suggests the whole. These can often be much more powerful
than trying to fit everything into one photo, which often can lead to a photo without a
clear subject, and with distracting images and backgrounds. This is why I often shoot
with a 70200mm lensto get in tight on a portion of the scene.
1.
Buy a super-wide-angle lens. Not a fish-eye lensa super-wide-angle lens (like a 12mm).
If you're trying to capture it all, a super-wide-angle (sometimes called ultra-wide-angle)
lens is often just the trick you need to take in the big picture. My favorite outdoor lens is
my 1224mm zoom lens (which is also a good sports shooting lens by the way). I must
admit, I rarely use the 24mm end, because I use this lens when I'm trying to get "the
big picture," so I use the 12mm end most of the time. You'll love what it does to clouds,
almost giving them a sense of movement along the edges.
2.
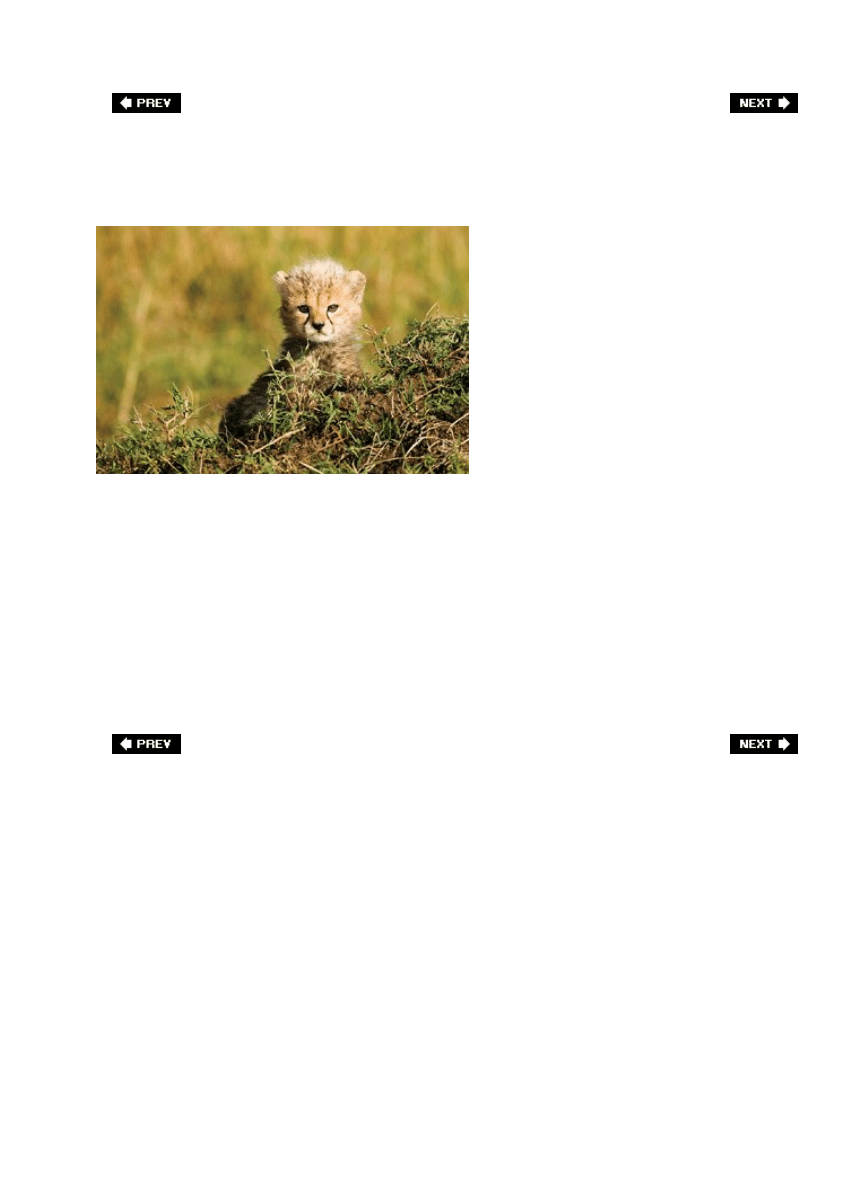
Shooting Wildlife? Aim at Their Eyes
PEGGY GUENZEL
Okay, that headline doesn't sound great when you say it out loud (it sounds like we're
actually shooting wildlife with a gun, rather than taking photos), but it's right on the money.
When you're shooting wildlife photography, your point of focus needs to be the animal's eyes.
If they're not in focus, it doesn't matter what else is. Oftentimes you'll be capturing wildlife in
motion (or in flight, as the case may be), and that's where it's especially important to make
certain the eyes are in focus. If you're using a panning technique (where you follow the
moving animal with your lens), make sure your focal point is the eyes. Everything else can be
blurred, but keep those eyes tack sharp and you'll have a winner.

Don't Crop Wildlife in Motion Too Close
PEGGY GUENZEL
If you're shooting wildlife, when you're composing the image, don't frame it so close that the
animal has nowhere to go. In other words, give the animal some space in front of the
direction it's going for a much stronger compositionone that tells a story. If you crop in too
tight and don't leave room for the animal to exit the frame, it's almost like trapping them in
your shot, and the photo will look uncomfortable to the viewer. When you're composing in
the viewfinder, leave some extra space to "run" in front of your subject, and your photo will
be that much stronger for it.
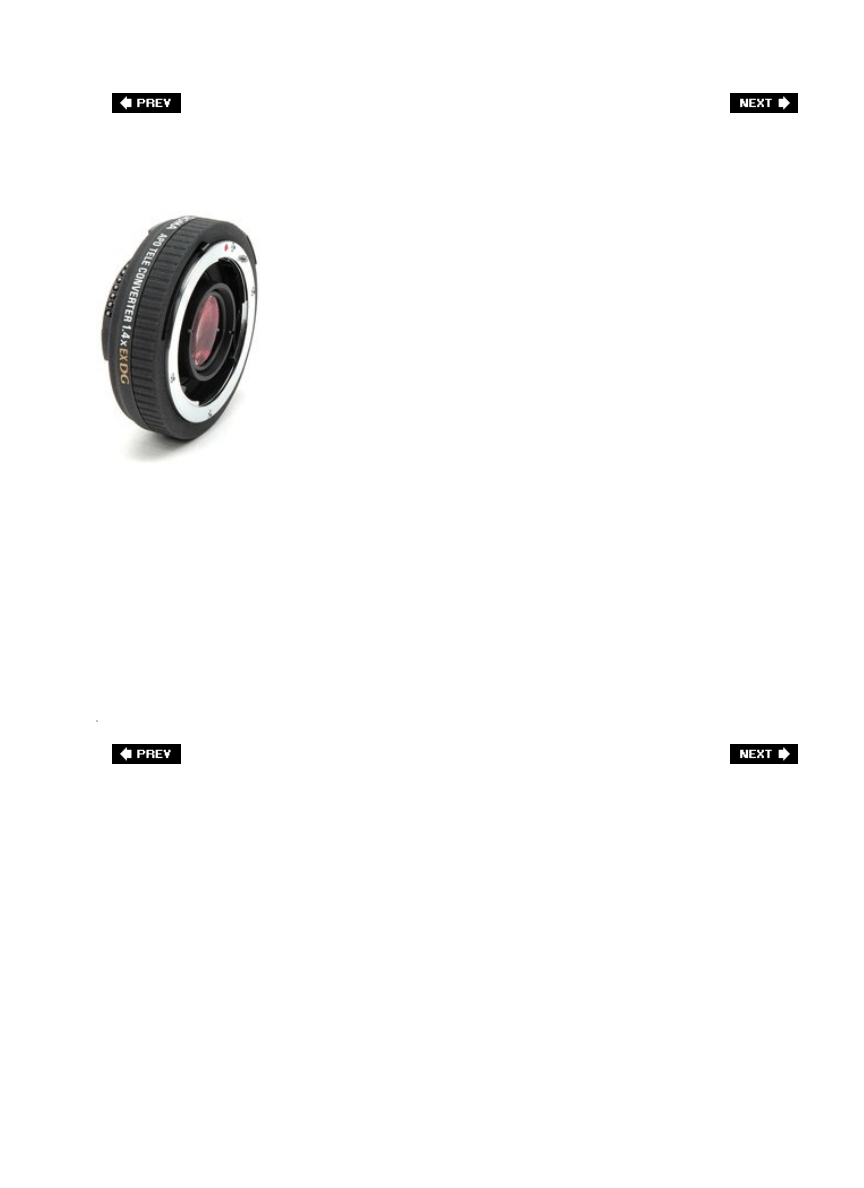
Shooting Wildlife? Get in Really Tight
There is a phenomenon that happens when shooting wildlife that doesn't seem to happen
when shooting anything else. However close your subject looks in your view-finder, when you
see the actual photo it seems only half as close as you remember. It's crazy, but it's
consistentit always looks much farther away than you hoped. So, when it comes to shooting
wildlife, you want to get in incredibly tight. That's why the pros shoot with those giant
400mm and larger lenses. But if your budget doesn't allow for that (I know mine doesn't),
you can cheat and use a teleconverter (also sometimes called a tele-extender). These
basically extend the reach of your current telephoto (or zoom) lens by magnifying them. So if
you have a 200mm telephoto (or zoom) lens (which is already equivalent to around a 300mm
thanks to digital), and add a 1.4x or 2x teleconverter, you instantly have the equivalent of a
450mm or 600mm traditional telephoto lens. A Canon 1.4x teleconverter runs around $275,
and a Nikon 2x teleconverter runs around $300 (make sure you check to see that the
teleconverter you buy works with your current lensget it to match your make and model).
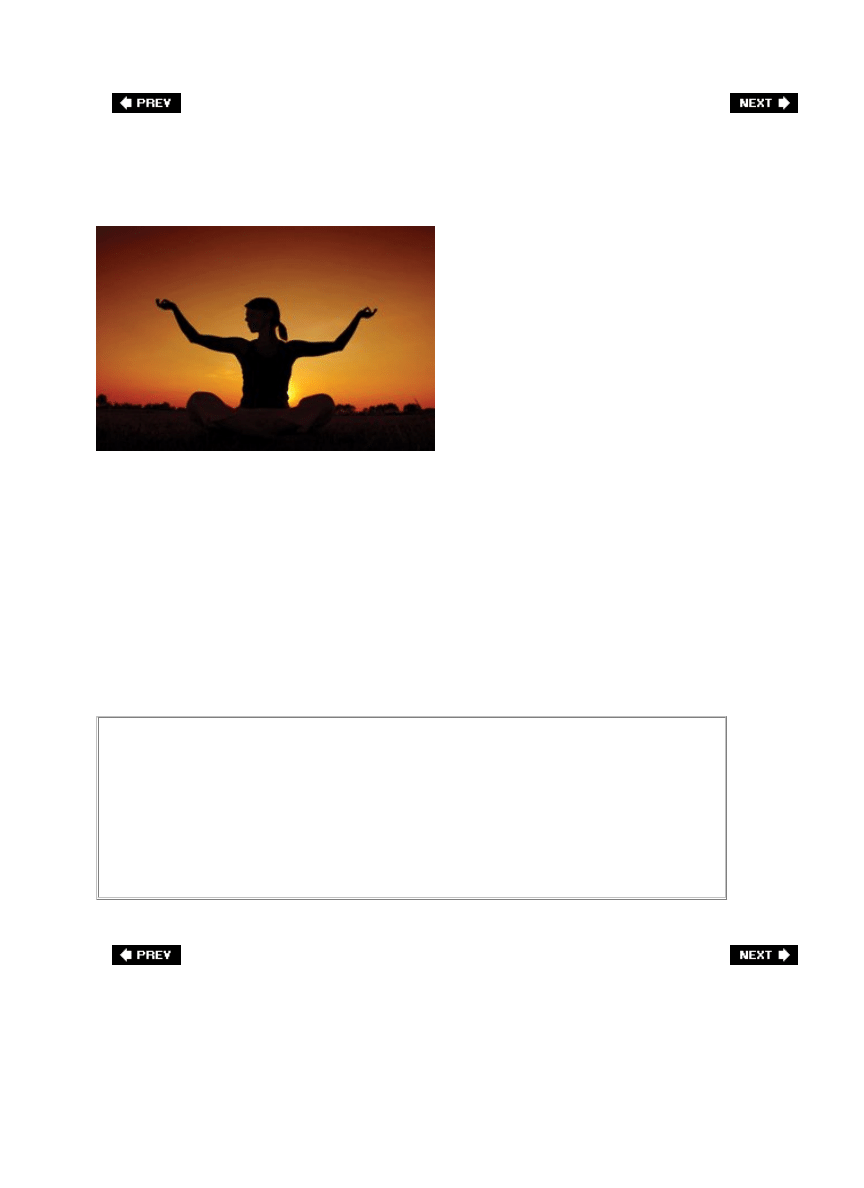
What to Shoot at Sunset
©ISTOCKPHOTO/ANDRZEJ BURAK
Besides just shooting the sunset itself, another great subject to shoot at sunset is silhouettes.
There are two basic rules to shooting silhouettes: (1) make sure the subject (or the object)
you're silhouetting is easily recognizable. I see lots of silhouette snapshots where my first
thought is, "What is that thing?" Keep the object simple, and it will work much better. (2)
Position your subject directly in front of the setting sun, so the sun is covered and helps
outline your silhouette, then expose for the sky (this will pretty much make certain that your
subject will appear in a black silhouette).
Silhouette Tip
Keep an eye on lens flare when you're shooting silhouettes because you're
basically shooting into the sun. You'll see a lot of classic silhouettes where the sun
is peeking around the subject just a tiny bit, and that's okay if you like that effect,
but make sure it doesn't reveal too much detail in your subjectthey should remain
black.

Chapter Five. Shooting Sports Like a Pro
Better Bring Your Checkbook
[View full size image]
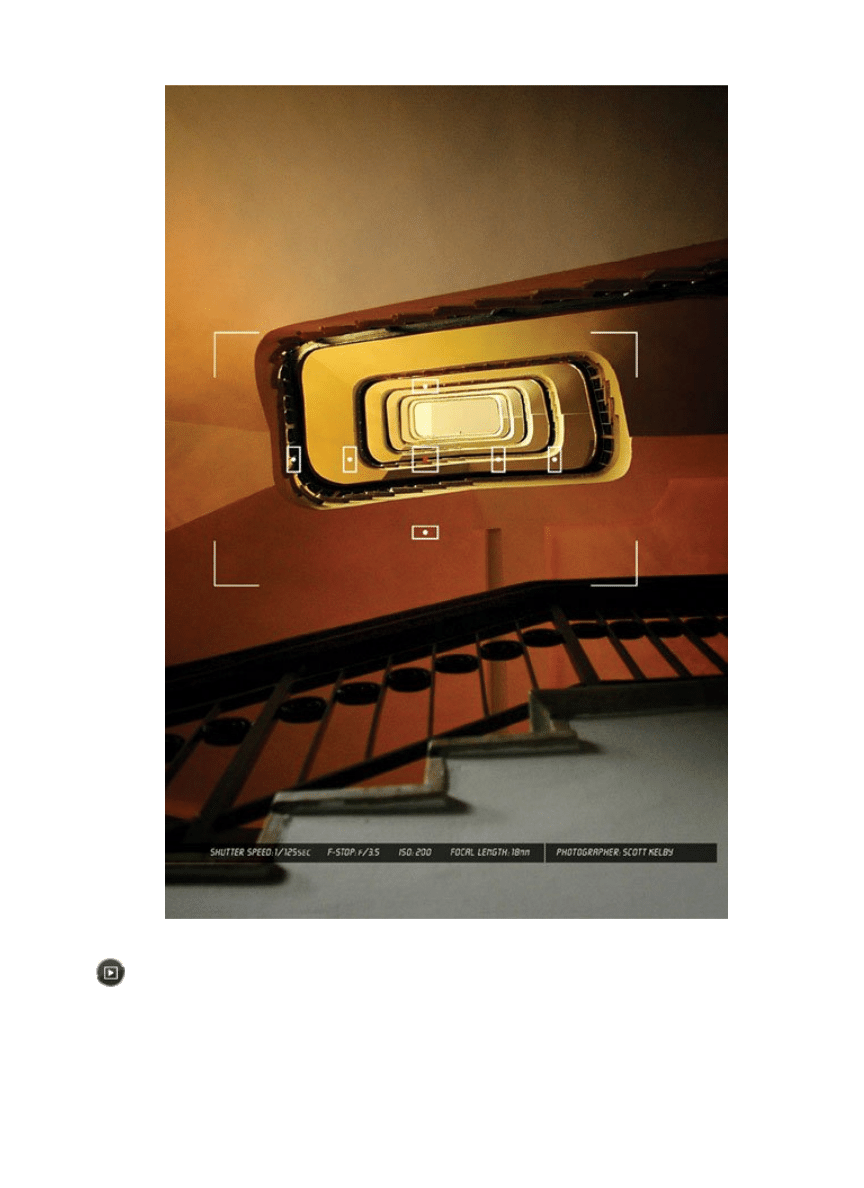
This is the one chapter in the book where you have a choice. Do you want to get much
better at shooting sports using the tips the pros use, but pretty much use your own existing
gear? Or, do you want to seriously shoot sports for a living? Here's why I mention this: we're
going to conduct a brief, totally scientific test which will quickly determine which path you
should take. Ready? Let's begin. Question 1: This book retails for $19.99. When you turned
the book over to look at the price, how did you react? You thought: (a) $19.99, that's cheap
enoughI think I'll buy it; (b) I dunno, it's $19.99I hope this is worth it; (c) $19.99, that's
pretty steep, but I really need to learn this stuff; or (d) $19.99! $19.99! I can't believe
they're charging $19.99! Well, I'm not happy about it, but I have to have this book. Answer:
If you answered a, b, c, or d, you're not ready to enter the world of professional sports
photography, because professional sports photographers spend so much on their equipment

that they would never even think of looking at the price of anything. Ever. They see
something they want and they just take it to the checkout counter and buy it, never
questioning its price, because they figure they've spent so much on their photography
equipment, there's no way any book, or flat screen TV, or luxury car could ever cost anything
close. So what are we mere mortals to do? We use the tricks in this chapter to get better
shots with what we've got. Of course, a few accessories wouldn't hurt, right?
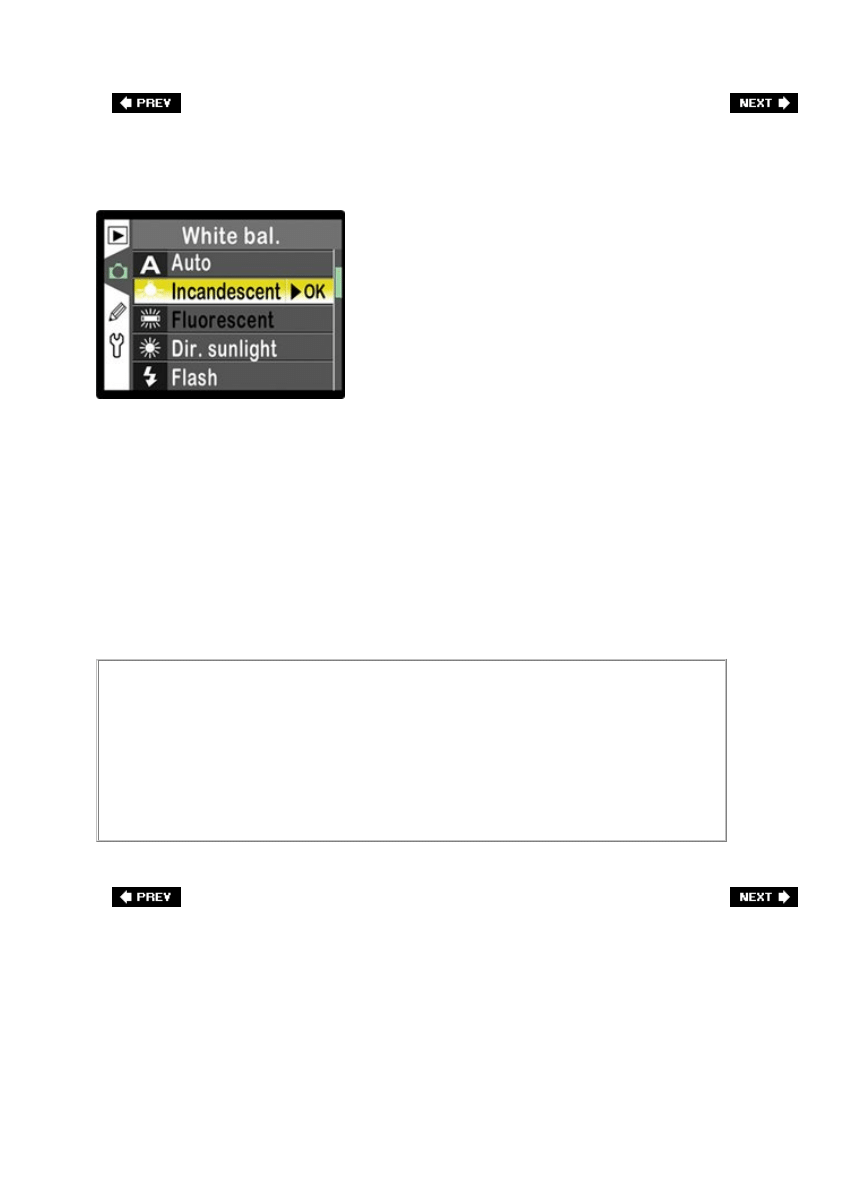
Set Your White Balance for Indoor Sports
If you're going to be shooting sports indoors, you can count on your photos having a yellow
or green tint, caused by the indoor lighting used at most indoor events. You can save yourself
a lot of Photoshop editing down the road if you change your white balance to either
Fluorescent or Tungsten/Incandescent now, in the camera. (Set it at Fluorescent and do a
test shot, then take a look at your test shot in your LCD monitor. If the overall color looks too
yellow or green, then try Tungsten/Indcandescent. See the Nikon menu above.) By doing
this, you're off setting the yellow or green tint you would have had, which will keep you from
pulling your hair out later. If you're shooting in RAW format, you can always reset the white
balance later in your RAW processing software. But by setting the correct white balance in
the camera, at least you'll see your photos in the proper color temperature when you view
them in the LCD monitor on the back of your camera.
Don't Use Color Filters
Your first thought might be to add a screw-on color balance filter to your lens to
off set the indoor color cast, but don't do it. When you're shooting sports, you're
already going to be challenged by lower than ideal lighting situations, and adding
a filter takes away even more light. You're better off using a custom white balance
setting because it only affects the color of light, not the amount.

Shoot at a 1/640 Sec. Shutter Speed or Faster
©ISTOCKPHOTO/JASEN LEATHERS
With sports photography, most of the time you're going to want to stop the action, and to do
that you'll have to switch to shutter priority mode (or manual mode if you're comfortable with
it), and then shoot at a speed of at least 1/640 of a second (or faster) to stop the motion and
keep your image sharp. The slowest you can generally get away with is 1/500 of a second,
but that's iffy. Go with 1/640 or higher for better results (there are times when you're going
to intentionally want to shoot at slower speeds so you can blur parts of the photo to
exaggerate the movement and speed, but for most situations, you'll want to freeze the
motion with a faster shutter speed like we're using here).
Pro Sports Shooting Is Dang Expensive
©ISTOCKPHOTO
Of all the photographic professions, professional sports photography is probably the most
expensive, so if you think you want to go this route, better bring your checkbook. The main
reason it's so expensive is because many sporting events are held indoors (or in domed
stadiums) or at night, so you'll need the most expensive (fastest) lenses money can buy
(well, only if you want to compete at a professional level). For example, you're going to need
some long telephoto lenses (ideally 400mm or 600mm) and since you'll generally be shooting
in lower-light situations, they'll need to be f/2.8 to f/4 lenses. If you haven't priced quality
400mm f/2.8 lenses, they're around $6,600. Each. You'll also need more than one camera
body, and more than one external flash. Plus a couple of monopodsone or two to hold your
long heavy lenses, and one to strap your flash units (which cost around $600 apiece) to.
Also, to be competitive (with the pro shooters), you're going to need a camera body that
shoots around 8 frames per second (which means as a Canon shooter, you're going to spend
around $6,900 for an EOS 1DS Mark II or for a Nikon shooter, you're going to spend around
$4,700 for a D2Xs). By the time you add up two camera bodies, a handful of flashes, some
long, expensive lenses, monopods, teleconverters, lots of very fast memory cards (plan on
shooting around 900 photos for a typical baseball or football game), you're in the $30,000
and up range, just for starters. It helps if you were a doctor or lawyer first (it doesn't make
you a better sports photographer, but it helps you pay for your gear).
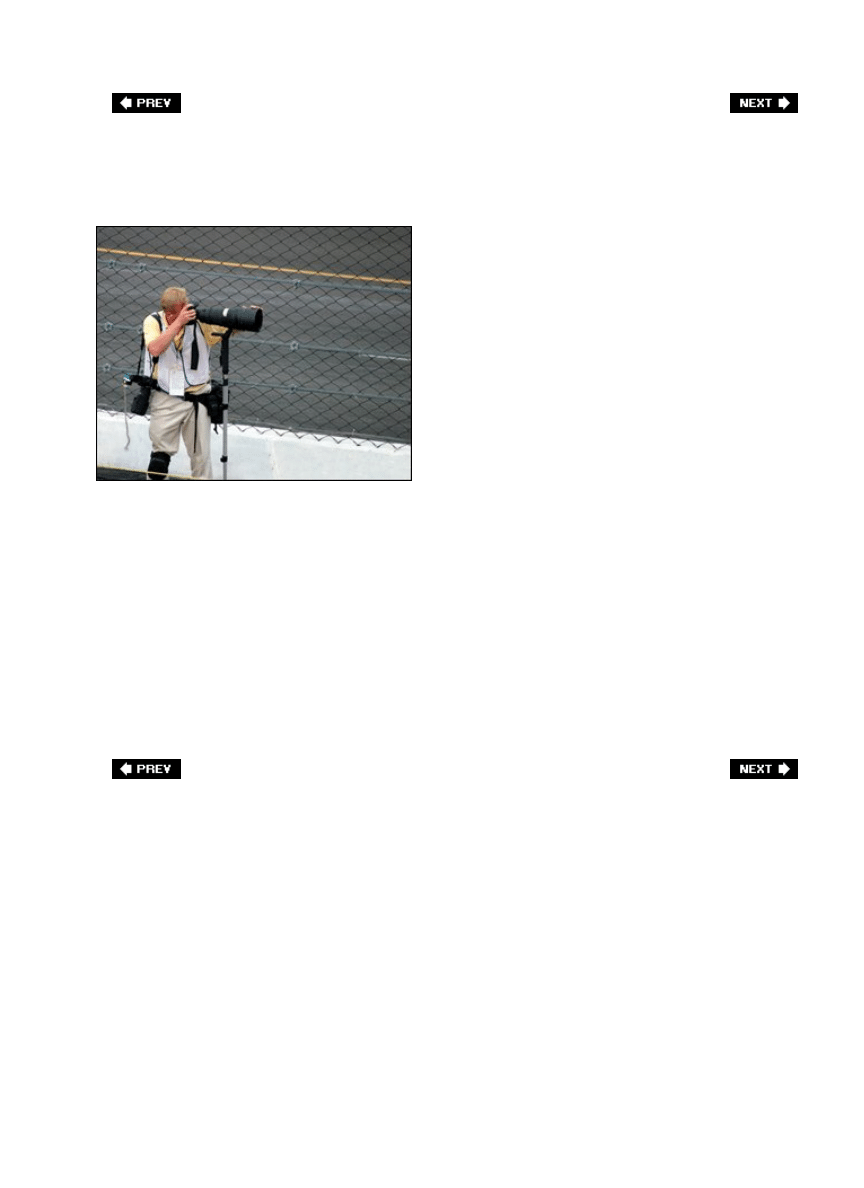
Don't Plan on Changing Lenses
©ISTOCKPHOTO/ANTONIO HARRISON
Now, don't read this headline to mean you only need one lens for sports photography. It
means just what it says, don't plan on changing lensesplan on changing cameras. That's
right, if you're really into sports photography, you'll miss "the shot" if you have to change
lenses. That's why the pros have multiple camera bodies hanging around their necksso they
can change from a wide-angle lens to a 400mm telephoto in an instant. If they didn't do this,
while they were changing lenses, the guy next to them would be getting "the shot" (which
winds up on the cover of the magazine). If you want to compete with the big boys, you'll be
hanging more than one camera body around your neck so you're ready to catch the shot with
a moment's notice. I told you this digital sports photography thing was expensive.
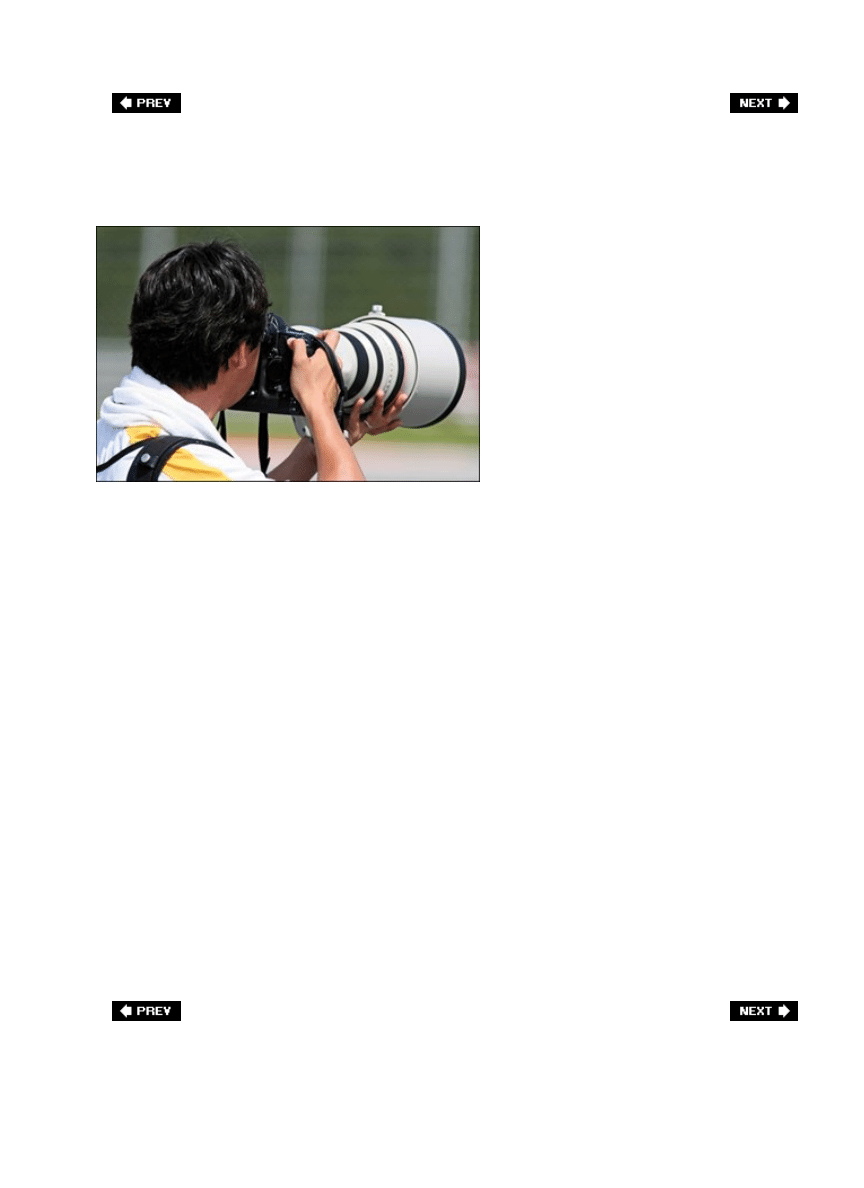
Which Lenses to Use
©ISTOCKPHOTO/TAN KIAN KHOON
When you're shooting sports, carrying a load of lenses and a big camera bag (even a camera
backpack) will strain your back and just add to your frustration. Instead, go light with just
two lenses:
A wide-angle lens (like a 1224mm zoom). You'll need these wide angles to capture full
stadium shots, full court shots, close-up group shots, etc.
1.
A 300mm or 400mm telephoto lens (or a 200400mm zoom). You'll be better off if you
can spring for a VR (Vibration Reduction for Nikon cameras) or an IS (Image
Stabilization for Canon cameras) lens, because you'll be able to hand-hold more shots in
the lower lights of indoor events or nighttime events.
2.
Again, you're not going to want to change lenses, so ideally you'd put one lens on one
camera body, and one lens on the other. The only other thing you'll need to carry (besides
extra memory cards and a backup battery) is a 1.4x teleconverter to get you even closer to
the action (these magnify the amount of zoom, turning a 300mm telephoto into a 450mm).
Note : Some pros advise against 2x teleconverters because they feel 2x photos are not as
sharp and you lose up to two f-stops of light, making it harder to get the fast shutter speeds
you need. To move all this stuff around with the greatest of ease, try a Tenba or Domke
photo vest, or at the very least, keep your extra gear in a photo waist pack rather than a
camera bag or backpack. You'll thank me later.

Pre-Focus to Get the Shot
©ISTOCKPHOTO/GALINA BARSKAYA
If you're covering an event where you have a pretty good idea where the action is going to
happen (for example, you're covering baseball and you know the runner on second base is
headed to third, or you're covering snowboarding and you know approximately where the
snowboarder is going to land), pre-focus on that spot, so when it happens, all you have to do
is press the shutter button. You can start by leaving auto focus on, and then focus on the spot
where you expect the action to occur, then switch your lens to manual focus and leave the
focus alone (it's set). Now you can pretty much relax and watch the event unfold. When the
runner (jumper, skier, etc.) gets near your pre-focused point, just aim back to that area and
fireknowing the focus is locked onto that point. No waiting for auto focus to either get, or
miss, the focus. You're good to gojust fire away.
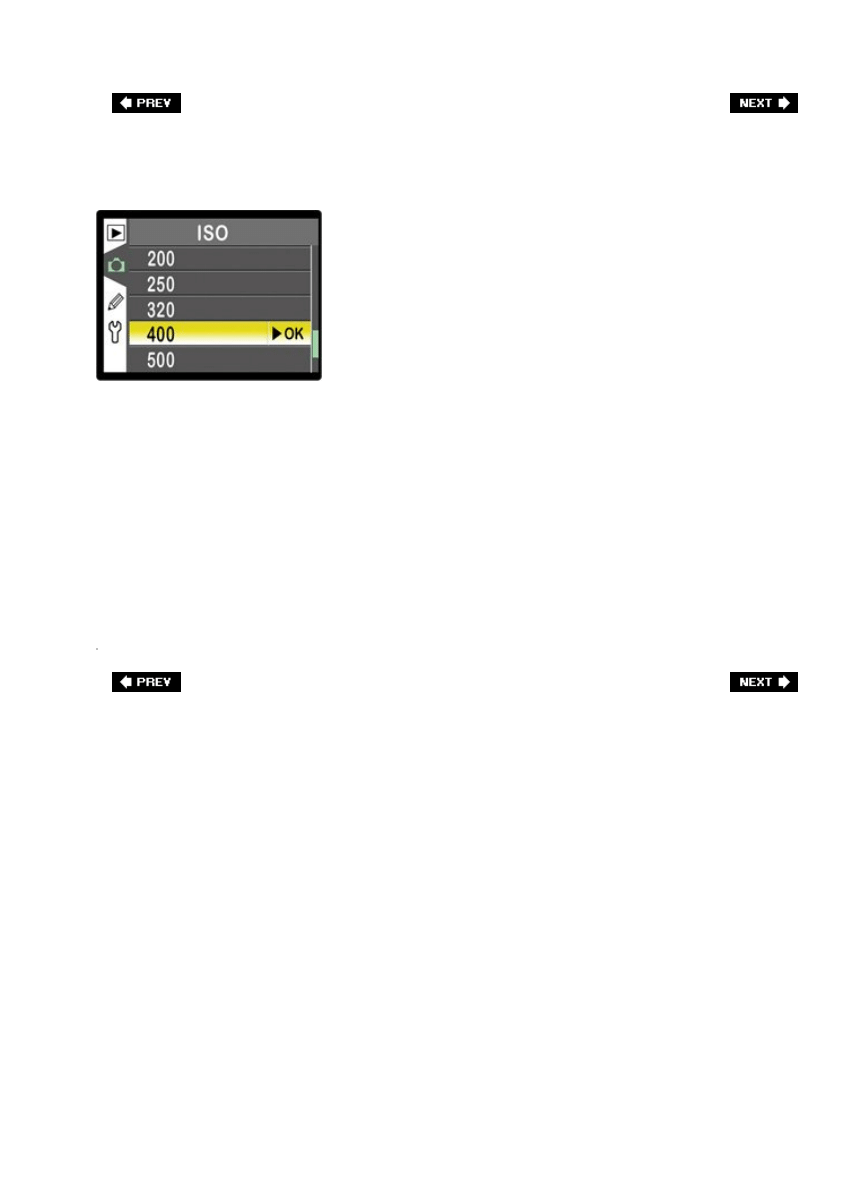
Raise Your ISO to Get the Speed You Need
Ideally, you'd have a super-fast long lens (like an f/2.8 or f/4, right?) for your sports
shooting, but those cost a bundle. So, how are you going to shoot sports with your f/5.6
zoom lens? By raising the ISO, that's how (see Nikon menu above). You can get away with
400 or 800 for most decent quality digital SLRs these days (the Canons, Nikons, etc.). That
should give you the 1/640 sec. or higher speed you need to freeze the motion of sports
without too much visible noise. Now, if there's enough light where you're shooting so you
don't need to raise the ISOdon't do it. Preferably, you'll leave your ISO at 100 or 200 (or
whatever the lowest ISO is that your camera allows), but in situations where your lens just
isn't fast enough (which will probably be the case when shooting indoors with f/5.6 lenses,
which are fairly common), you'll have no choice but to raise the ISO. You do that in the menu
on the back of your camera (as shown here). Luckily, you can usually get away with an f/5.6
lens when shooting in daylight, but as soon as you move indoors, you're probably going to
have to raise your ISO to get enough shutter speed to freeze the action. That's why fast
lenses (f/2.8 and f/4) are so important to pro sports shooters.
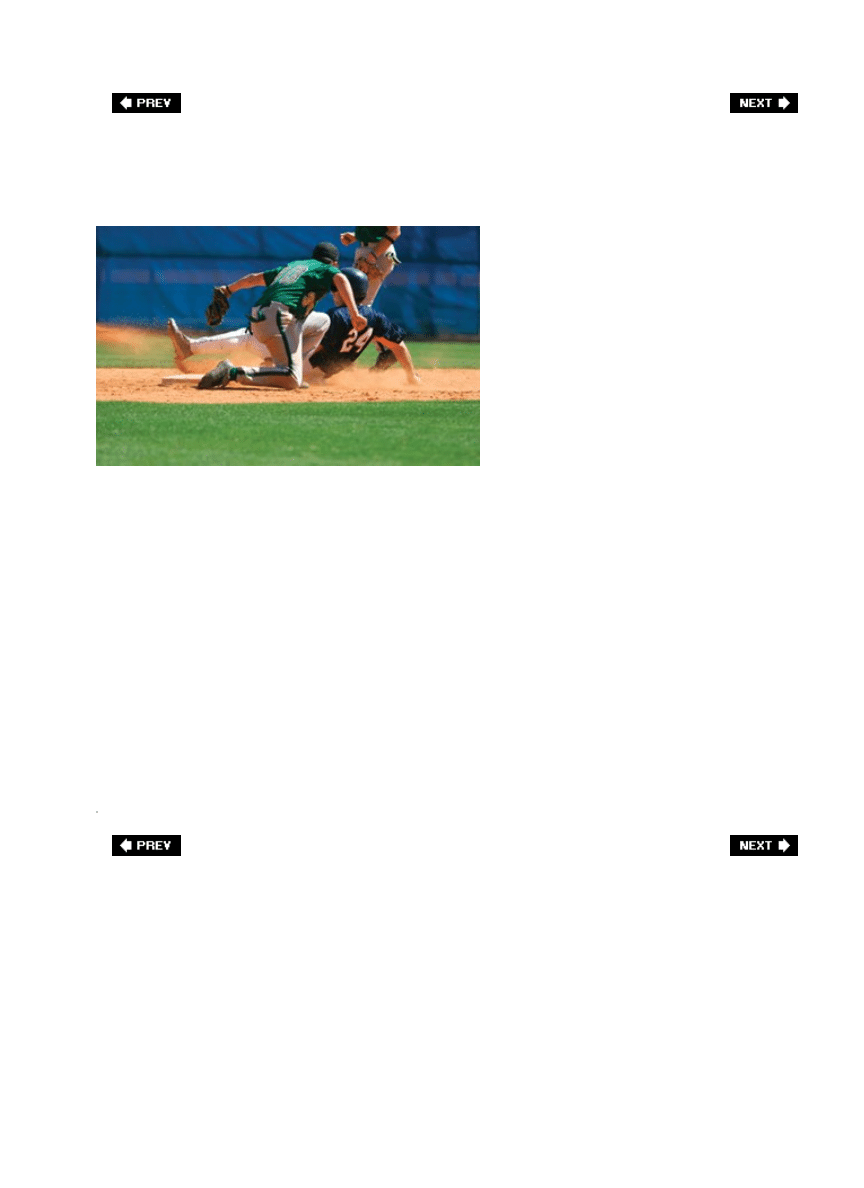
The Pros Know the Game
©ISTOCKPHOTO/ROB FRIEDMAN
If you know the game you're shooting (for example, if you're a baseball fanatic and you're
shooting a baseball game), you're going to get better shots than the next guy because you're
going to know where the next play is likely to unfold. This is a huge advantage in sports
shooting, and being able to anticipate when and where the big moment will unfold can make
all the difference in getting "the shot." The key is you have to watch the game while you're
shooting, so you can see the play unfolding and be ready to aim where you feel the action
will take place. You won't always be right, but you'll be right enough that you'll get the shot
more often than not. So, what if you're assigned to shoot a game you don't know well? Go to
Blockbuster and rent some videos, go to the magazine store and buy some magazines on the
topic, and study how the pros that cover that sport are shooting itfind out who the stars are
in that sport and make sure you follow them (after all, the stars are most likely to be
involved in the big plays, right?). It basically comes down to this: if you know the game,
you're putting yourself in the best position to get "the shot." If you don't know the game, the
only way you'll get "the shot" is by sheer luck. That's not a good career strategy.
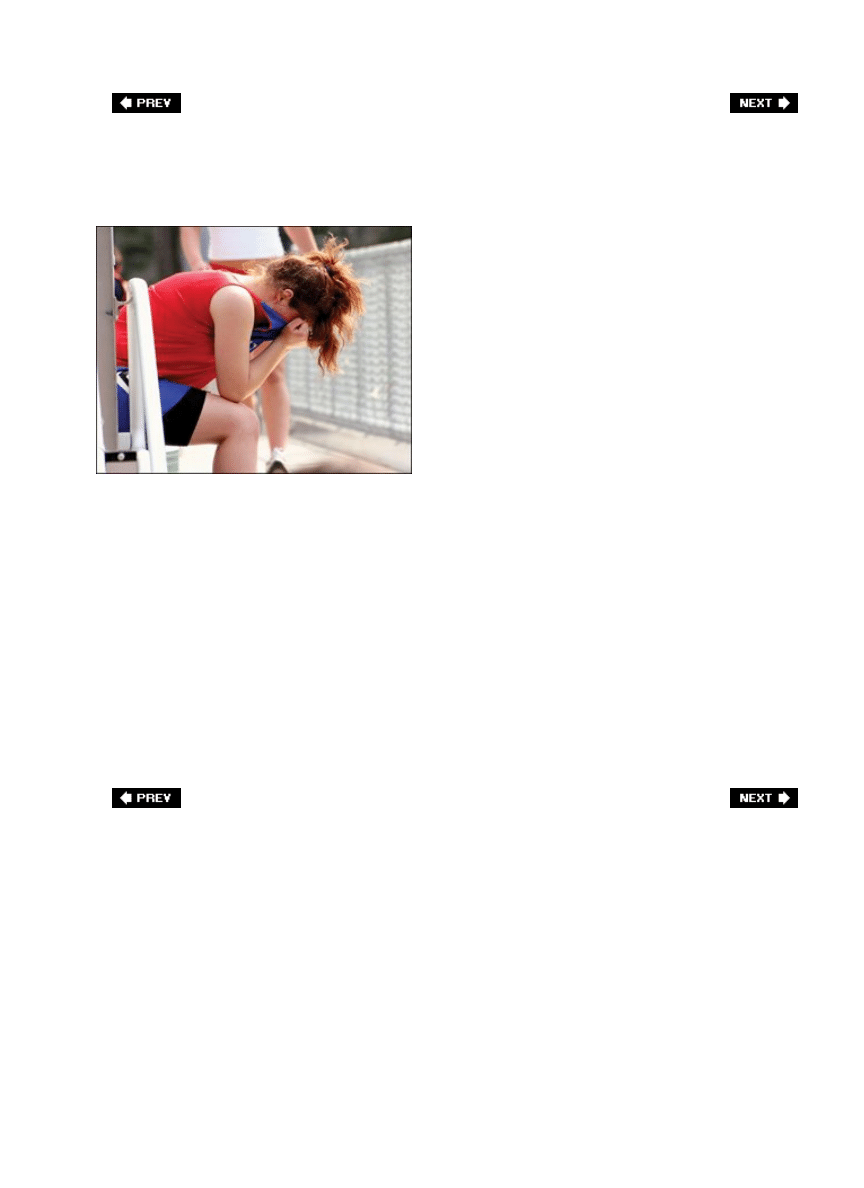
Don't Always Focus on the Winner
©ISTOCKPHOTO/JAMES BOULETTE
In sports photography (and in sports in general), it's only natural to follow the winner. If
someone scores a critical point, you'll be capturing shots of the athlete that made the big
score, right? If a team wins, you'll be shooting shots of the winning team celebrating. But if
you follow that tradition of covering only the winner, you might miss some of the most
dramatic shots with the most powerful story-telling angle, which are the expressions and
reactions of the loser or the losing team. This is especially important if you just missed the
action playquickly switch to the reaction of the guy who missed the ball, or didn't block the
shot, or missed the goal, etc. Sometimes their reactions are more fascinating than those of
the person who makes the shot. Next time, try catching the expression of the golfer who
missed the putt (or the golfer who lost because her opponent just sank a 40 footer), and see
if it doesn't elicit as much or more emotion as a shot of the winner.
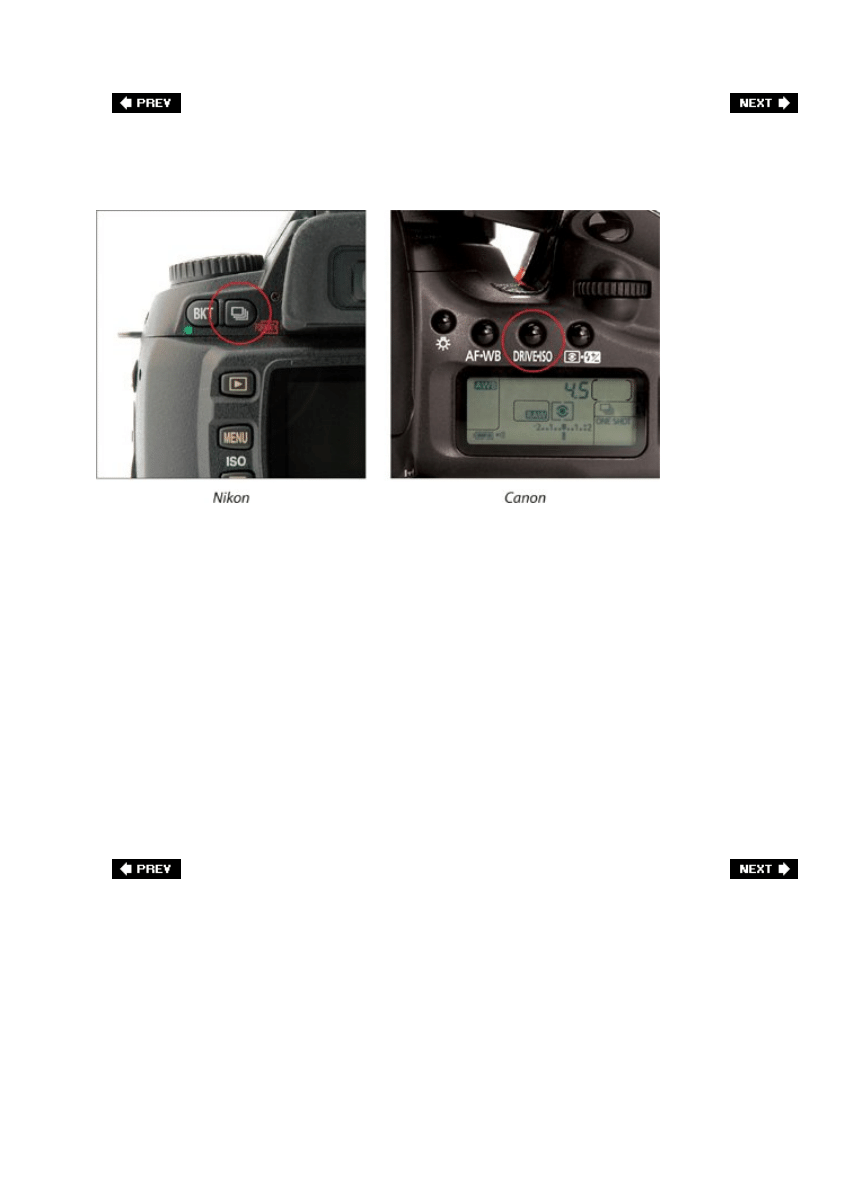
Shooting in Burst Mode
Much of the shooting you'll be doing in sports photography will require you to take bursts of
shots (four or more shots per second) in order to make sure you get the shot while a play is
in motion. So, you'll need to set your camera to shoot multiple shots while you hold down the
shutter button (this is called burst mode on some digital cameras). By default, most cameras
shoot one frame at a time, so you'll have to switch this burst mode on.
On Nikon cameras, you can switch the camera's mode to continuous (where holding down the
shutter release takes multiple photos) by holding down the shooting mode button (found to
the left of the viewfinder) and rotating the main command dial until you see an icon of a
stack of photos in the top right of the camera's LCD monitor.
On Canon cameras, press the Drive•ISO button (which appears just in front of the LCD panel
on the top-right side of the camera), then rotate the main dial (just behind the shutter
release button) until you see an icon that looks like a stack of photos on the right side of the
LCD panel. If you have a 30D, you can switch to high-speed continuous shooting mode by
rotating the main dial until you see an H next to the stack of photos icon.
Now, you can simply hold down the shutter button to fire multiple shots.
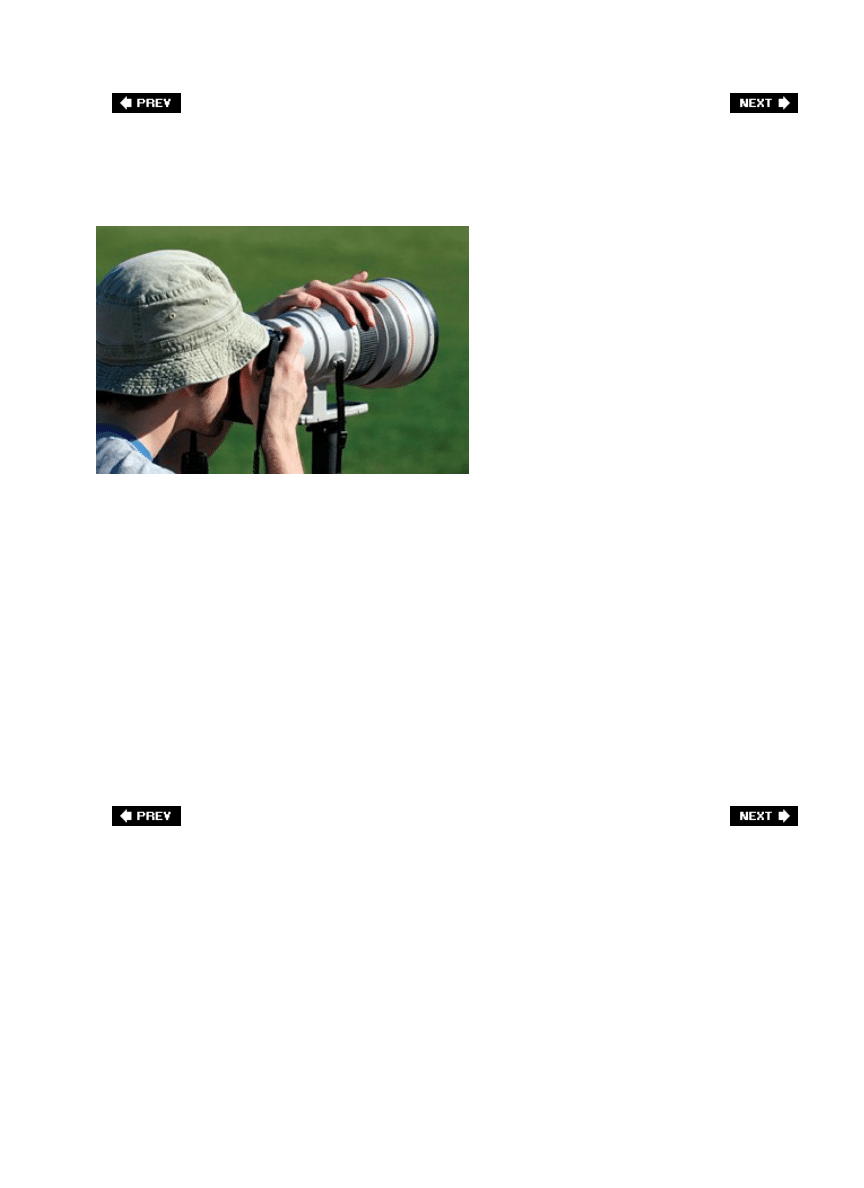
Stability for Shooting Sports
©ISTOCKPHOTO/TOMASZ SZYMANSKI
Sports photographers don't generally use tripods for a number of reasons: (1) they're not
mobile enough for the style of fast-action shooting that typifies sports photography, (2) many
professional sports won't allow the use of tripods, and (3) having a tripod set up near the
playing field (in football, basketball, etc.) has the potential to injure a player. That's why
sports shooters, especially those shooting with long lenses, use monopods instead. These
one-legged versions of tripods generally wind up supporting those long lenses (the lens
attaches directly to the monopod itself for support and to keep the lens and camera still
during the low-light situations many sporting events are played under). Monopods are easy
to move (or to quickly move out of the way if need be), and many professional sports that
have banned tripods allow monopods. The carbon fiber monopods are the most popular today
because, while they can hold a lot of weight, the carbon fiber makes them surprisingly
lightweight. Now, not surprisingly, they're not cheap (nothing in sports photography is).
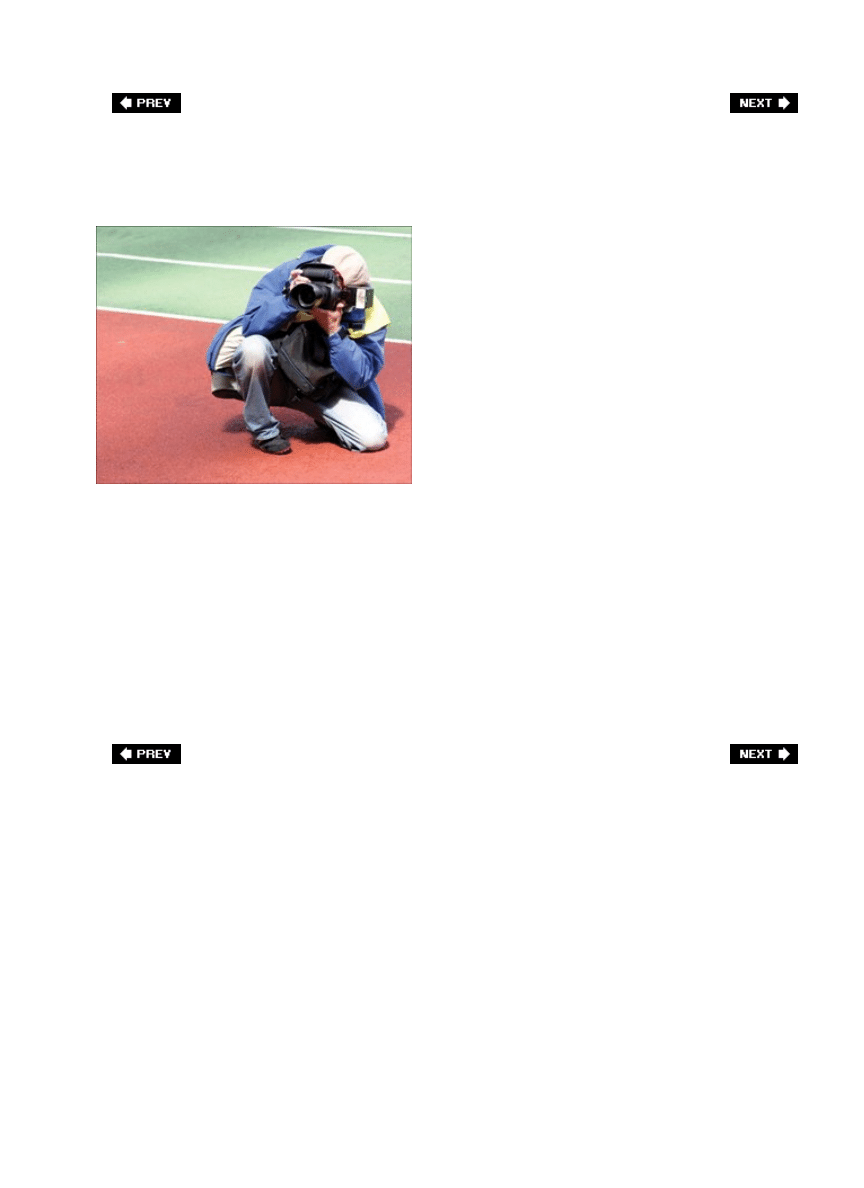
Shoot Vertically for More Impact
©ISTOCKPHOTO/GAVIN MACVICAR
Much of pro sports photography is shot vertically because it's easier to fill the frame with
your subject (plus, it's ideal for magazine covers, ads, etc.). Just turn the camera sideways,
get in tight (with your long lens) and make the magic happen (so to speak). This particularly
holds true if you're shooting a single athlete, rather than two or more, where a horizontal
shot might work best, but when it comes to shooting a single subject, your best bet is to go
vertical. That being said, if you want to really cover your bases (like the way I worked that
sports metaphor in there), shoot both as much as possible. As my tech editor Bill Fortney
says, "The editor will always ask for the orientation you didn't shoot."
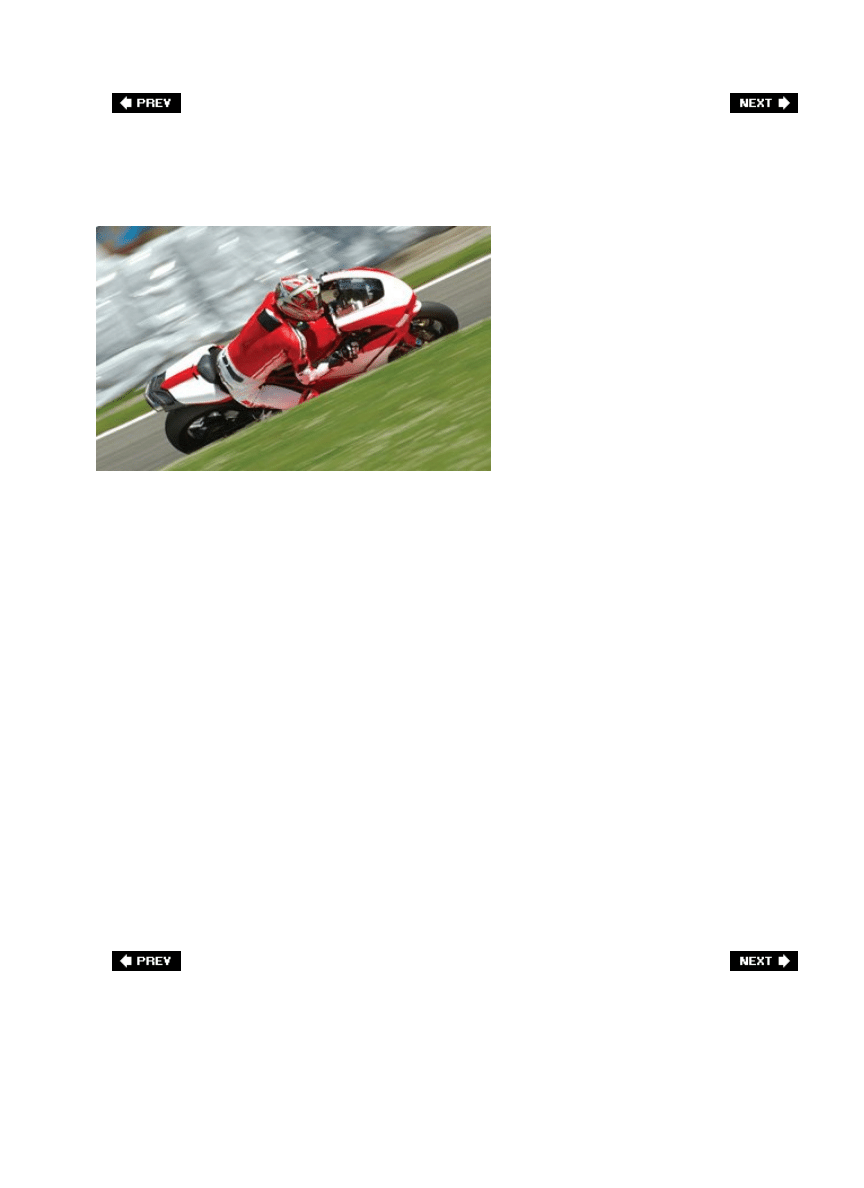
Pan to Show Motion
©ISTOCKPHOTO/ANDREA LEONE
For this entire chapter we've been talking about using super-fast shutter speeds to freeze the
motion of sporting events, but there are times when it's more dramatic to emphasize the
motion and let parts of the photo become intentionally blurry from movement. There are
three keys to this technique:
Use a slow shutter speedideally, either 1/30 of a second or 1/60 of a second. So, switch
to shutter priority mode (using the mode dial on the top of your digital camera) and set
the shutter speed accordingly.
1.
Pan right along with your subjectfollowing them with your camera. Believe it or not, it's
the camera's motion that creates the blurring background, because you're trying to
move (pan) right along with the athlete so they remain sharp while everything around
them appears blurred.
2.
Use continuous shooting (burst) mode for your best chance to capture a sharp
shotcapturing multiple shots per second really pays off here.
3.
One important thing to remember: Don't stop panning when the athlete leaves your
framecontinue panning for a couple of seconds afterwards to get a smooth release.
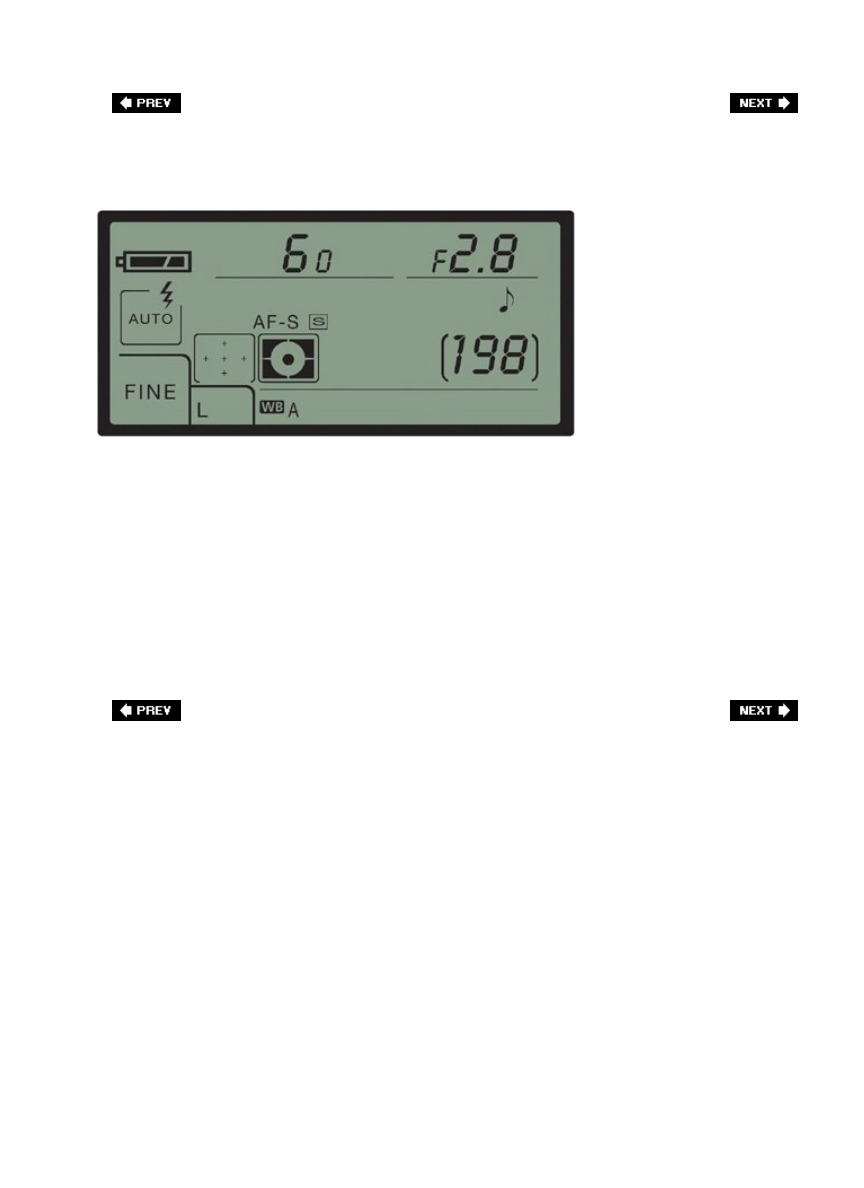
Shoot Wide Open
By shooting wide open, I mean shoot as close to your wide open aperture as possible (so if
you have an f/2.8 lens, shoot at f/2.8 or one stop up). This will pay off in two ways:
1. This will blur the background, creating a more dramatic, dynamic, and uncluttered photo
of your subject. Busy backgrounds are a problem when shooting sports, and shooting
with a telephoto lens at such a wide open aperture gives you a very shallow depth of field
(meaning your subject in the foreground is in focus, while the background is out of
focus).
2. You'll be able to shoot at faster shutter speeds, which will greatly help when shooting
indoors under artificial low-light situations.
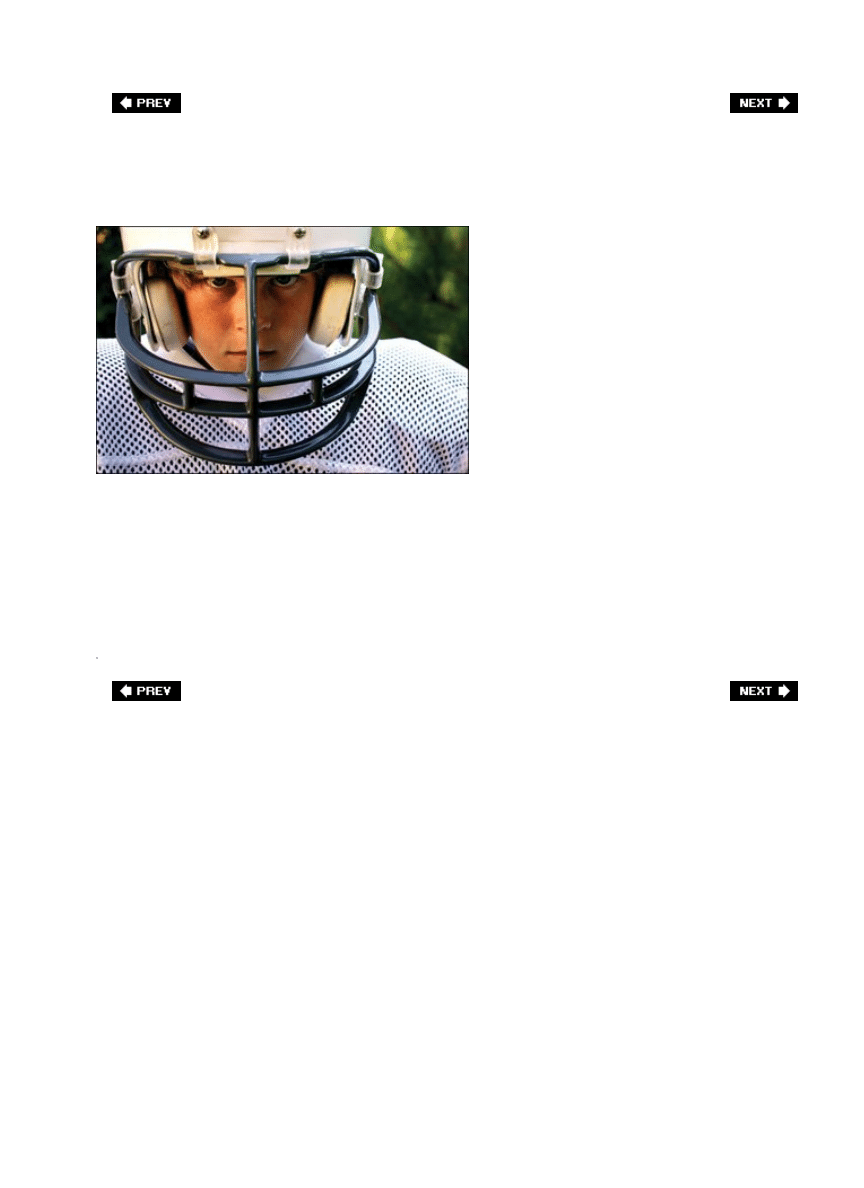
Go for the Face
©ISTOCKPHOTO/SUZANNE TUCKER
When you're shooting athletes, what's the most important thing to capture? Generally, it's
their face. It's their facial expressions that tell the story, and it's their faces that people want
to see. So if you're not capturing that, you're missing "the shot." Don't worry about shooting
close-ups of their hands, or the ball, or their feet kicking up dirt, etc. Want a photo that's
going to capture the imagination of your viewer? Then go for the face. It's the "money shot"!
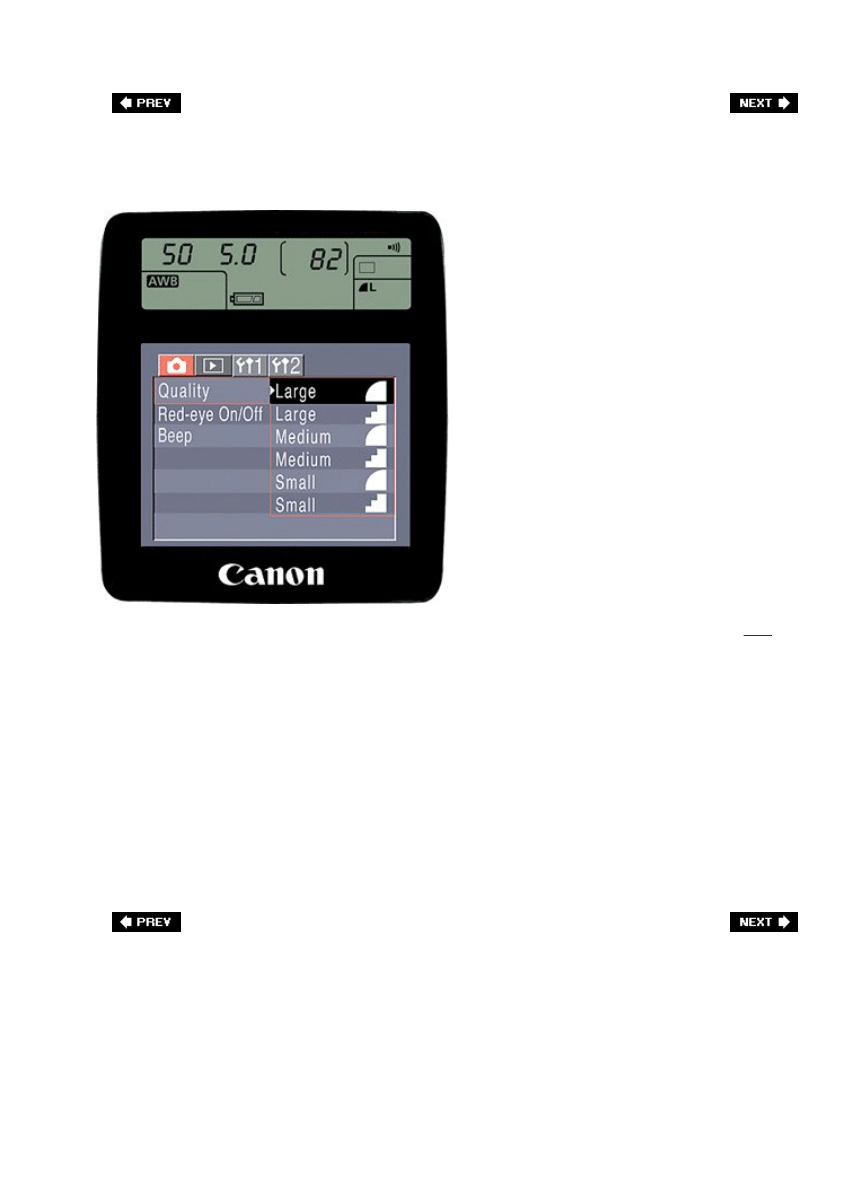
RAW or JPEG for Sports Shooters?
Because of the fact that much of sports photography is taken in burst mode (see page
103
)
and the fact that you only have so much memory space in your camera's multiple-shot buffer,
the larger the photos you take, the quicker that buffer will become full. When it's full, you're
done shootin' (well, at least until it has time to write the shots to your memory card, which
empties the buffer again). That's why many pro sports photographers choose to shoot in
JPEG format rather than RAW. It's because JPEG files are considerably smaller in file size so
more of them fit in the buffer (plus, since they're smaller, they write to your memory card
faster, so you can effectively shoot more uninterrupted shots in JPEG format vs. RAW
format). Now, there are some purists who feel so strongly about shooting in RAW for every
occasion (including shots of their kid's birthday party at Chuck E. Cheese) that reading about
anyone advocating any file format other than RAW sends them scrambling into a tower with a
high-powered rifle to pick off pedestrians. To them, I just say, "Remember, RAW is a file
format. Not a religion." (By the way, I know a popular Sports Illustrated magazine shooter
who now sets his cameras to shoot RAW+JPEG, which captures both file formats at the same
time. Just thought you'd like to know.)
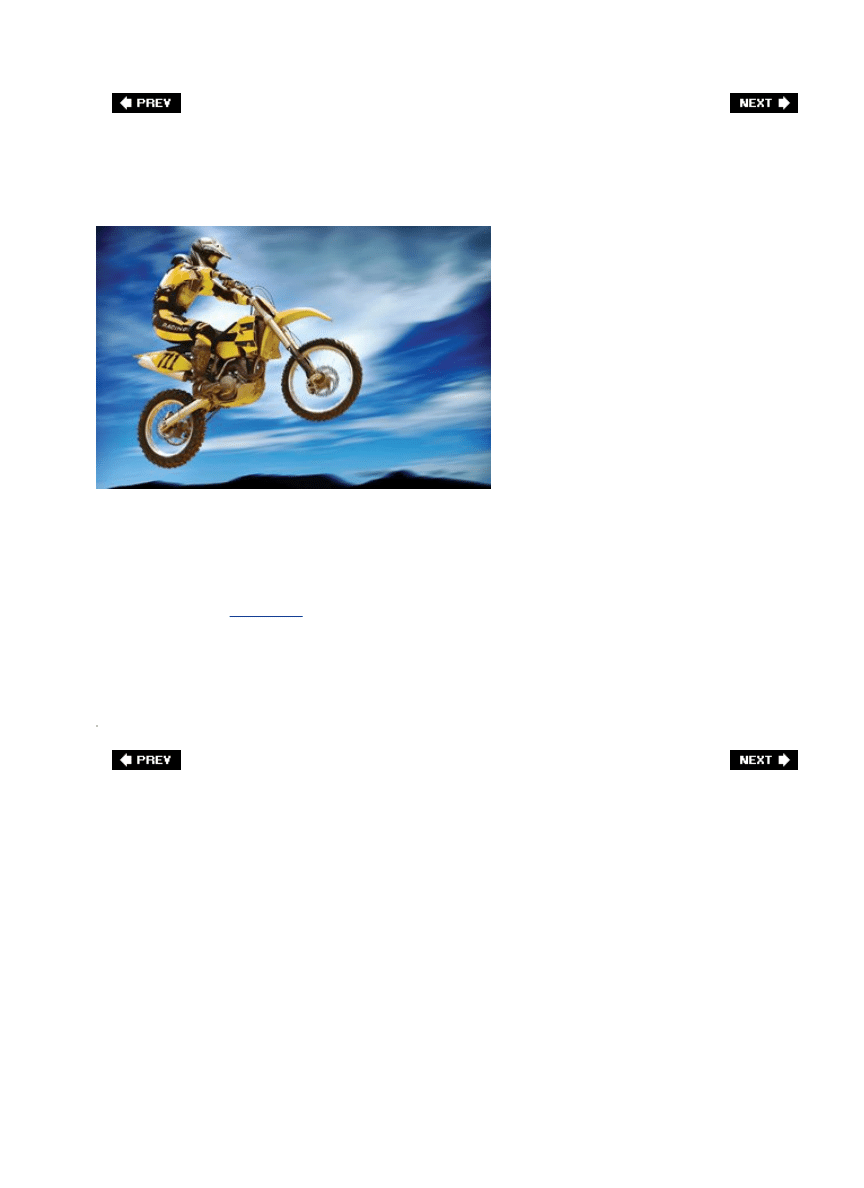
Composing for Sports
©ISTOCKPHOTO/GLENN JENKINSON
When composing your sports images, use the same technique we talked about earlier in
shooting wildlife (
Chapter 4
)give your athlete somewhere to go. Don't compose the shot so
your athlete is running out of the frame, compose it so there's room in front of the athlete to
move to continue his visual story, so the athlete (like the wildlife) doesn't look boxed in. It's
as uncomfortable a look for sports as it is for wildlife, so when you're composing, be sure to
leave some running room (i.e., for a shot of an athlete running left, compose the shot with
him on the far right side of the frame. That way, he visually has room to run). This simple
compositional trick will make a big difference on the impact of the final image.

Chapter Six. Shooting People Like a Pro
Tips for Making People Look Their Very Best
[View full size image]
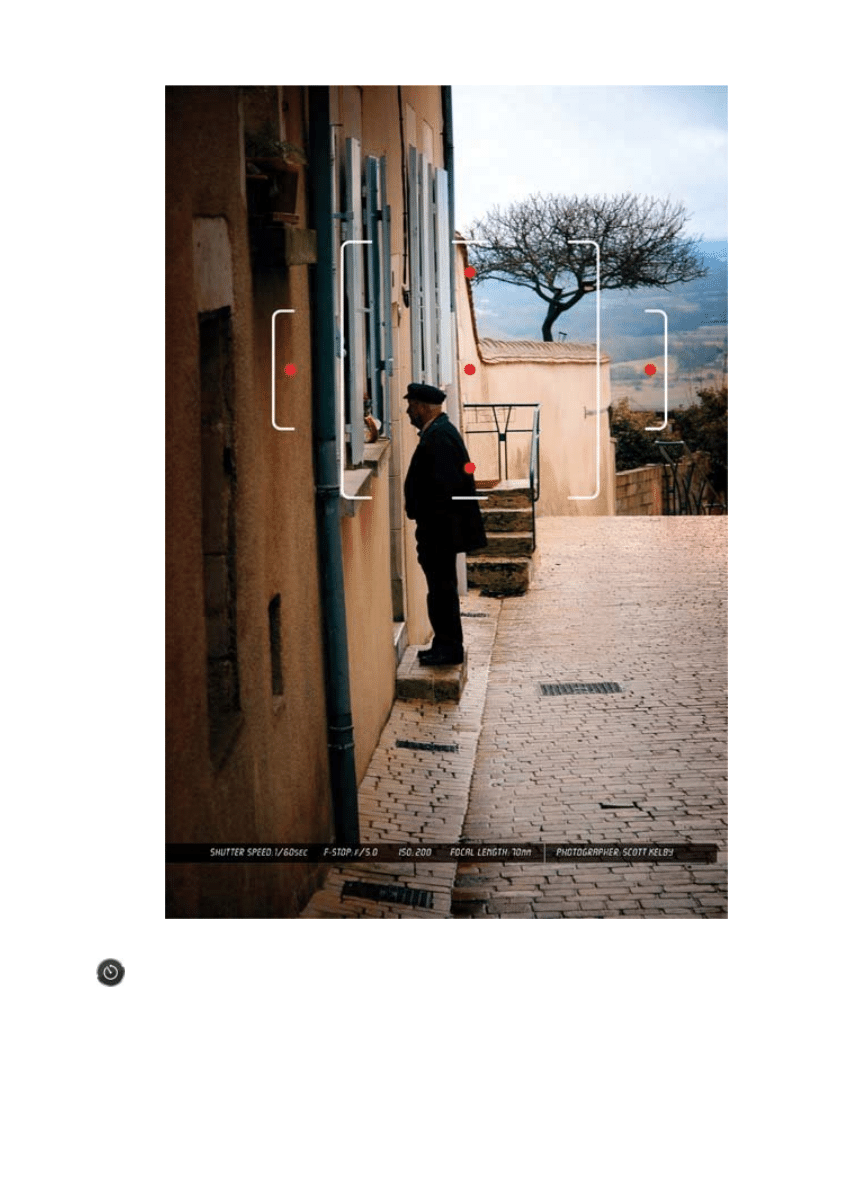
Now, the subhead above says this chapter is how to make people look their very best,
and that is kind of misleading because it's really about making your photos of people look
better. If you've got some really ugly looking people in your photos, there's not much you or
I can do to help these poor souls. They've been hit with the ugly stick, and they don't make a
digital camera that will make these people, who didn't have a date for the prom, suddenly
look like Jessica Biel or Matthew McConaughey (who, not coincidentally, were chosen as the
Sexiest Woman Alive and Sexiest Man Alive by People magazine, just in case you cared). By
the way, although I did not make this year's cut, if you read my bio at the beginning of this
book, you learned that I was among People magazine's top 50 sexiest picks back in 2004.
This surprises many people, including my wife, as she has no recollection of this whatsoever,
but I'm actually thankful for that because she has also completely erased any memory of my

brief but highly publicized affair with Angelina Jolie while we were filming the movie Taking
Lives in Toronto. But I digress. Now this chapter isn't so much about studio portrait
techniques, because if you're shooting in a studio, then you're a professional photographer
and, honestly, this chapter (and this book for that matter) really isn't for you. This is really
for getting better outdoor, or candid, or posed shots that are supposed to look candid, but
really aren't, but you can tell they are because they're posed. Are you taking all this down?
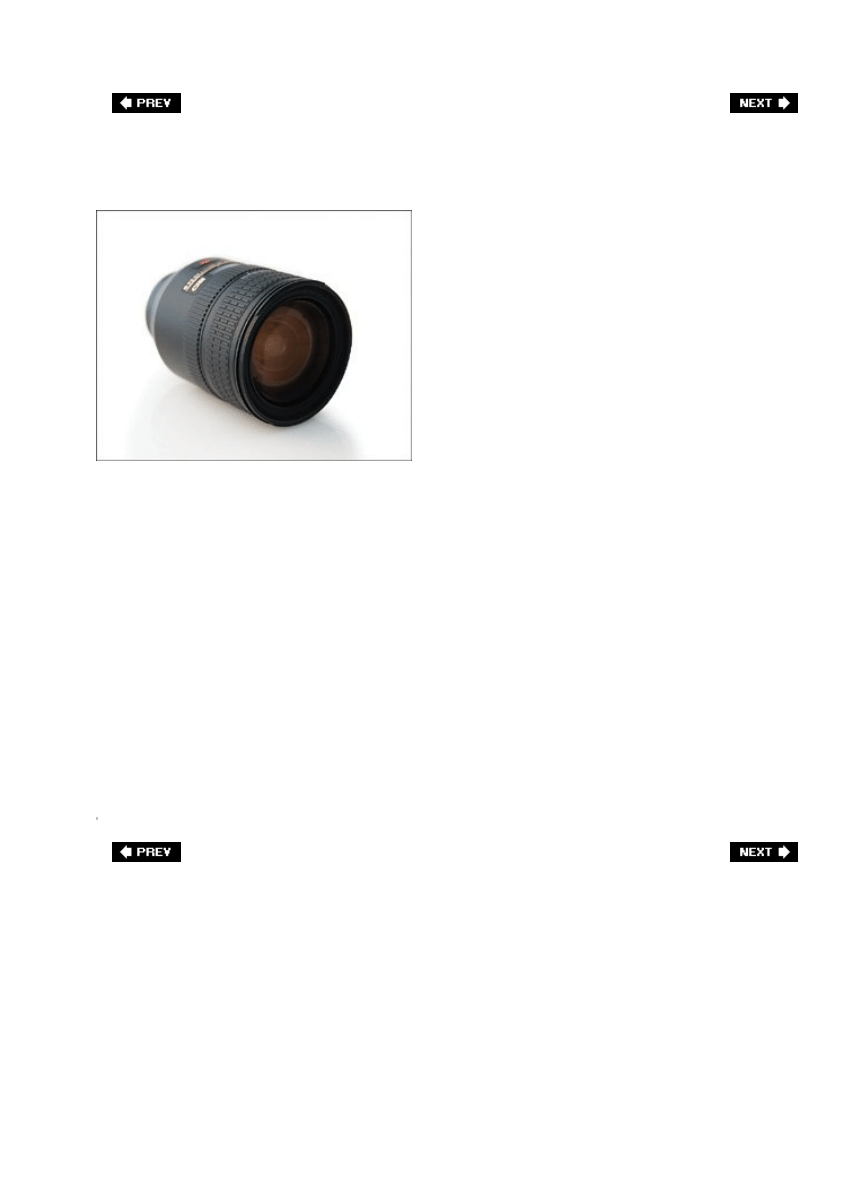
The Best Lens for Portrait Photography
There are not many aspects of photography that have a specific focal length you should try to
shoot with, but luckily portrait photography is one of them. Most pros shoot portraits with a
short zoom lens, and one of their favorite focal lengths is the 85100mm range. In fact,
telephoto lenses in the 85100mm range are often called portrait lenses because they let you
shoot from a good working distance (10 to 12 feet from your subject, giving you and your
subject some breathing room, while letting you still fill the frame with your subject), but
more importantly, shooting with focal lengths between 85mm and 100mm eliminates the
unflattering facial distortion wide-angle lenses are notorious for, while avoiding the
compression long telephoto lenses give. Some portrait pros swear that the 85mm focal length
is the portrait sweet spot, and others swear by 100mm, but that's the kind of thing pros
debate in online forums all day long (and you can try both with your zoom lens and choose
the one you like best, because they both give a pleasing perspective for portraits), so I won't
take up that battle here. (Note: Both Nikon and Canon make 28105mm zooms that are ideal
for portraits because you can choose 85mm, 100mm, or anything between the two.) Another
reason these short zoom lenses are ideal is because you won't have to pick up your tripod
and move it (or your model) each time you need to slightly recompose the shot. So, get
yourself a zoom lens that covers the 85100mm range, and you're good to go. By the way, the
lens shown here is a 24120mm zoom, so this lens would do the trick because with it you can
choose any zoom focal length between 85mm and 100mm (the sweet spots for portraits).

Which Aperture to Use
SCOTT KELBY
One thing I love about portrait photography is that a lot of the decisions are made for you
(like which lens/focal length to use), so you can focus on the harder parts of portrait
photographyensuring that you have great light and capturing the personality of your subject.
So, now that you know which lens to use, believe it or not (and this is very rare), there is a
special aperture (f-stop) that seems to work best for most portrait photography. When it
comes to portraits, f/11 is the ticket because it provides great sharpness and depth on the
face (and isn't that what portraits are all about?), which gives you a great overall look for
most portrait photography (now, I say "most" because there are some artistic reasons why
you might want to try a different aperture if you're trying to get a special effect, but for the
most part you can choose aperture priority mode, set your aperture at f/11, and then worry
about the really important stuffthe lighting, capturing your subject's personality, how much
to bill your client, etc.).

Using Seamless Backgrounds
©ISTOCKPHOTO/TOBIAS LAUCHENAUER
Backgrounds provide quite a challenge for portrait photographers because they generally get
in the way of the portrait photographer's goalcapturing the personality, the drama, the soul
(if you will) of the person they're shooting. That's why so many portrait photographers shoot
their subjects on as plain a background as possible. In the studio, perhaps the least
expensive option is to use a seamless backgroundthese are very inexpensive because they're
made of paper. That's right, it's just a big giant roll of paper, and a standard size (53"x36")
will only run you about $25. That ain't bad for a professional studio background (you can find
these backgrounds at your local camera store). Some photographers tape it to the wall,
others nail it to the wall, but the best option is probably to buy an inexpensive stand that
holds the roll up for you (you can get a decent one for around $70). Now, which colors should
you use? For starters, stick with black (for dramatic portraits) or white (for everything else).
The nice thing about a white seamless background is that it usually appears as a shade of
gray. To make it really appear white like the one above, you'll have to aim one or more lights
at the background or the light from your flashes will fall enough, giving you a gray back-
round. Gray is not a bad background color (in fact, it's very popular), but if you're really
going for white, make sure to position one or two lights behind your subject, aiming at the
background itself. If you go with a black seamless background, you may need an extra light
to backlight your subject (especially if they have dark hair), so they stand out against the
black.

Using Canvas or Muslin Backgrounds
©ISTOCKPHOTO/FLOYD ANDERSON
Canvas or muslin backgrounds aren't quite as cheapI mean as inexpensiveas seamless rolls,
but they're inexpensive enough that you should consider using one as a formal background,
as well (a decent canvas background only runs around $120). These backgrounds are
seamless too, and I'd recommend buying one (at least to start) that's kind of neutral, like
one that's mostly gray or mostly brown. These backgrounds add texture to your photo
without distracting from the subject, and they're very popular for use in everything from
formal business portraits to engagement photos. Again, an inexpensive stand will pay for
itself in no time (they start at around $70), and you'll be amazed at how quickly you can
change the look of your background by repositioning your lighting.
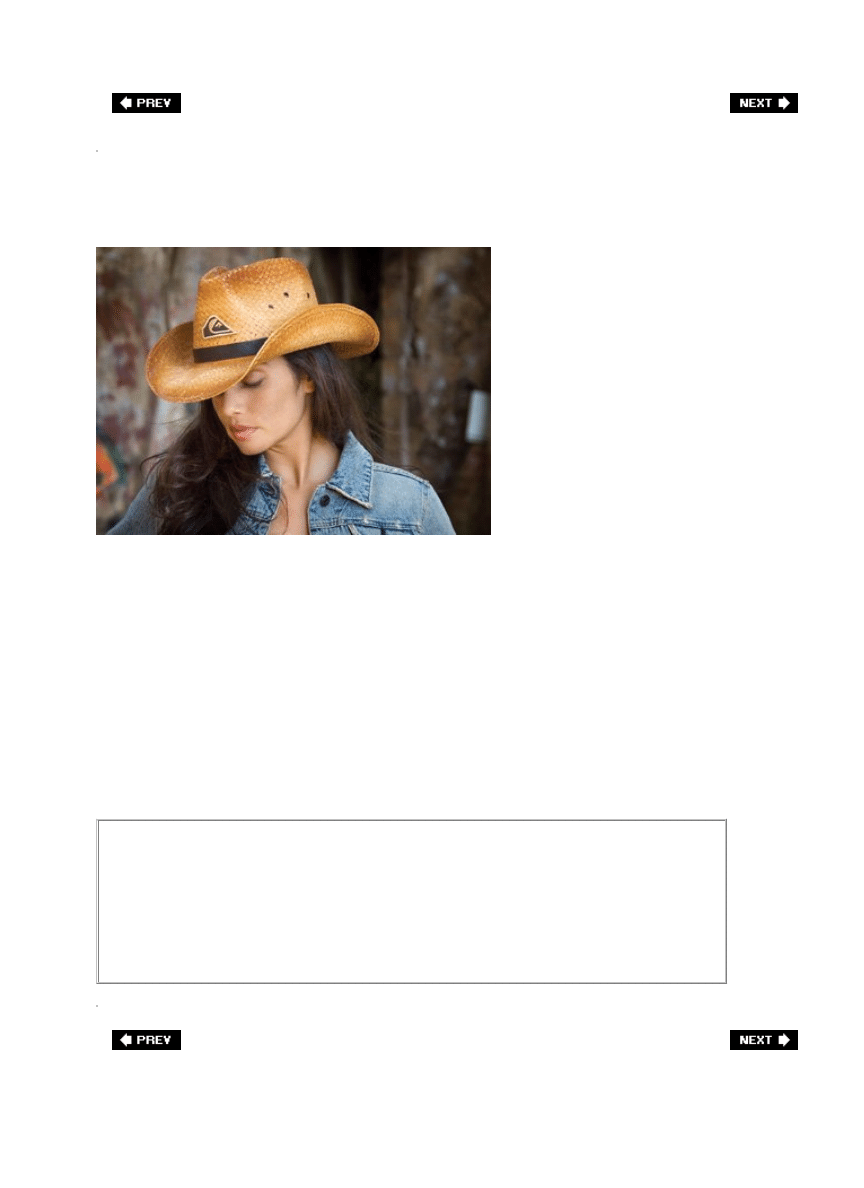
The Right Background Outdoors
SCOTT KELBY
When shooting portraits outdoors, you're not going to be able to use a muslin background or
seamless paper (did I even have to say that?), and because of that you have to think about
your background even more. The background rule for shooting portraits outdoors is to keep
the background as simple as possible. The simpler the background, the stronger your portrait
will be, so position your subject where the least possible amount of activity is going on
behind them. Here's where you might want to break the f/11 rule, so you can throw the
background out of focus by using an aperture like f/2.8 or f/4 with the portrait focal length
you like best. Remember, when it comes to portrait backgrounds outdoors, less is more.
The Background Lighting Rule
When it comes to backgrounds, there's another simple rule you can follow that
will keep you out of trouble. When you're choosing a simple background to shoot
on, make sure your background is no brighter than your subject (in fact, darker is
better because a dark subject on a bright background rarely works).
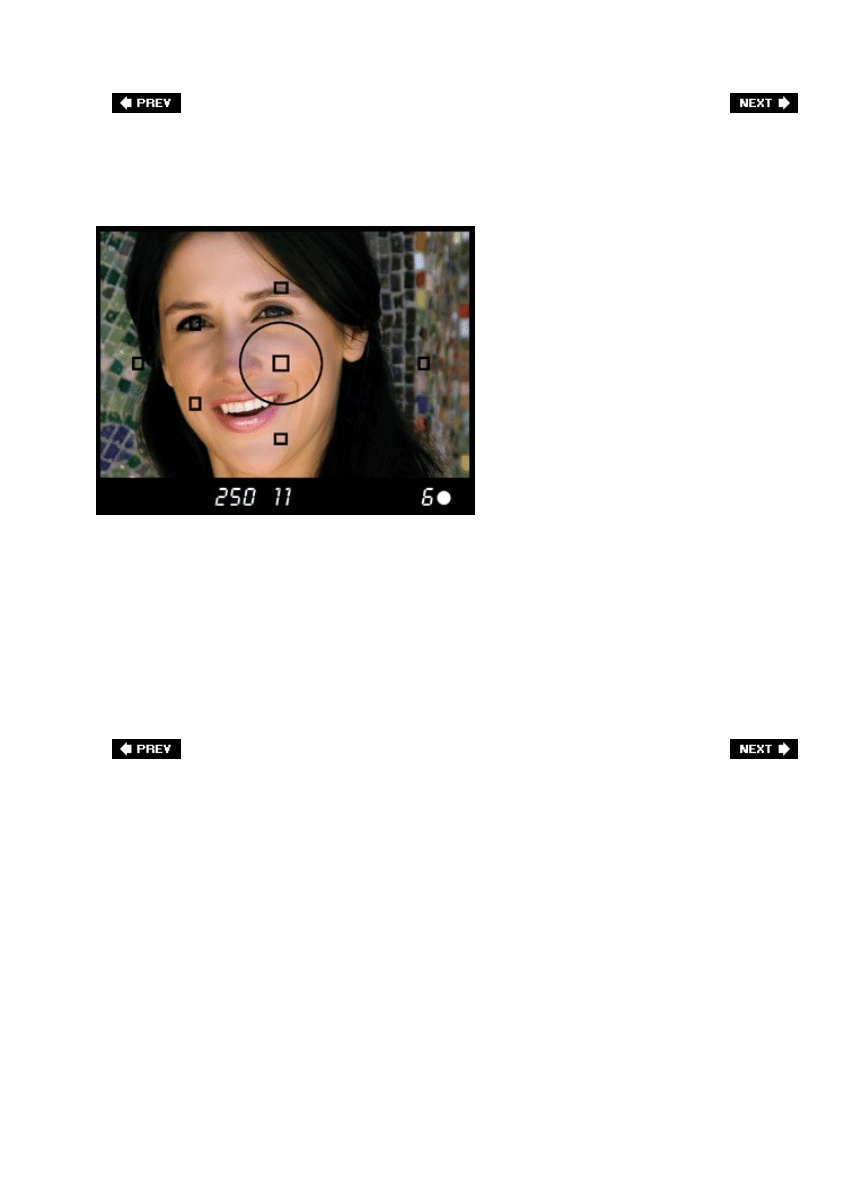
Where to Focus
SCOTT KELBY
Over the years, there have been conflicting thoughts as to where the optimal place is to focus
your camera when shooting portraits (the cheek, the tip of the nose, the hairline, etc.).
Luckily, today the consensus is fairly clear (you'll still find some cheek holdouts here and
there, but don't let them throw you): focus directly on the subject's eyes. By shooting at f/11
and focusing on the eyes, this will give you a nice level of sharpness throughout the face (and
most importantly, the eyes will be tack sharp, and in portraits that is absolutely critical).
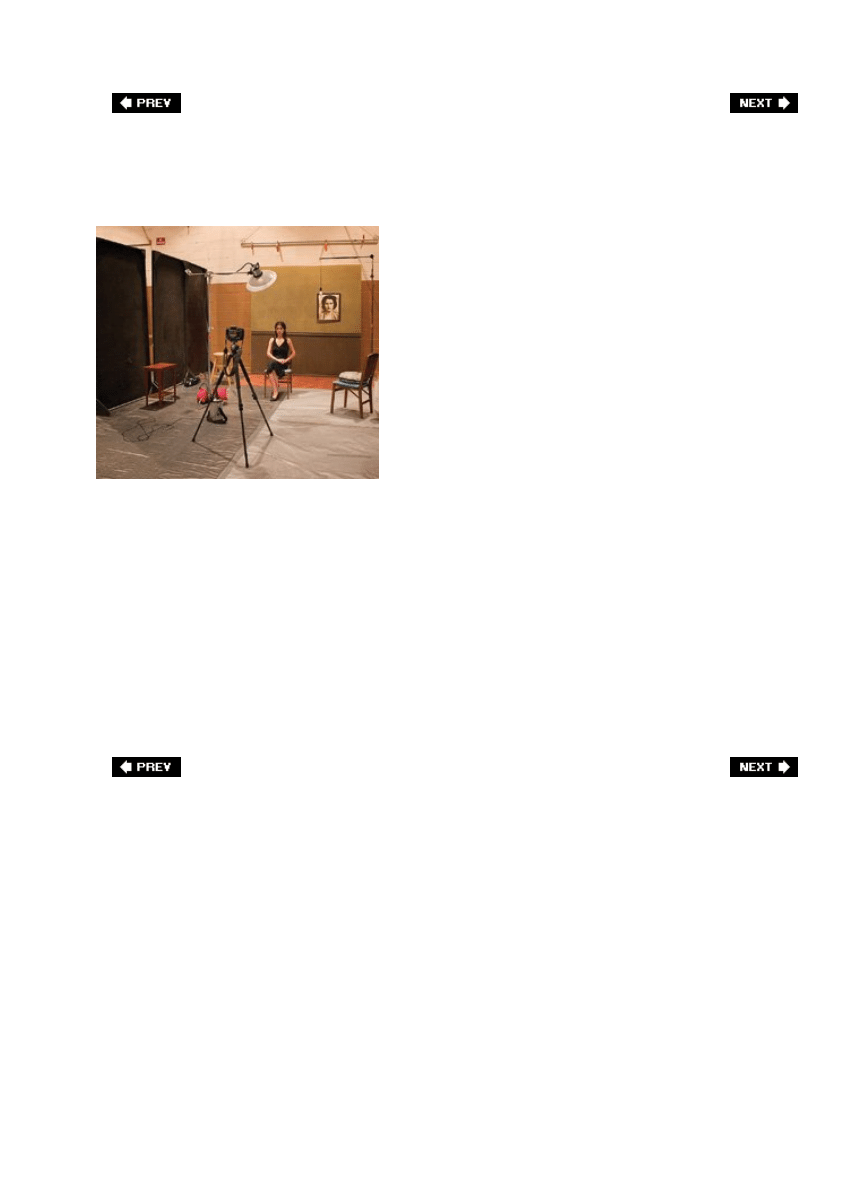
Where to Position Your Camera
JOEY LIPOVETSKY
Portraits generally look best when you position your camera at the subject's eye level, so set
your tripod up so you're shooting level with their eyes. This is particularly important when
shooting childrendon't shoot down on children (just like you don't shoot down on flowers), or
you'll wind up with some very disappointing shots. So, with kids, you're either going to raise
them up to your eye level (on a tall seat) or you're going to lower your tripod down to their
eye level and shoot on your knees (I knowthe indignities we have to suffer for our craft and
all that...). Also, now that you're at the right height, about how far back should you position
your tripod from your subject? Your focal length will pretty much dictate that for you, but if
you're about 8 to10 feet from your subject you'll be in good shape.

Positioning Your Subject in the Frame
SCOTT KELBY
If you're shooting portraits outdoors, especially candid portraits or editorial style shots,
there's a rule that many pros use about where to position the subject's eyes in the
frameposition them 1/3 of the way down from the top of the frame. This is another one of
those tricks that gives your portraits more visual interest, and it's easy enough to do since
you just compose the shot so your subject's eyes are 1/3 of the way down from the top.

Tip for Framing Portraits
SCOTT KELBY
If you're looking for another tip for great portrait shots, try zooming in close so your subject's
face fills the entire frame. Also try zooming in close enough so that either the top of the head
or the sides (the ears) actually extend outside the frame.
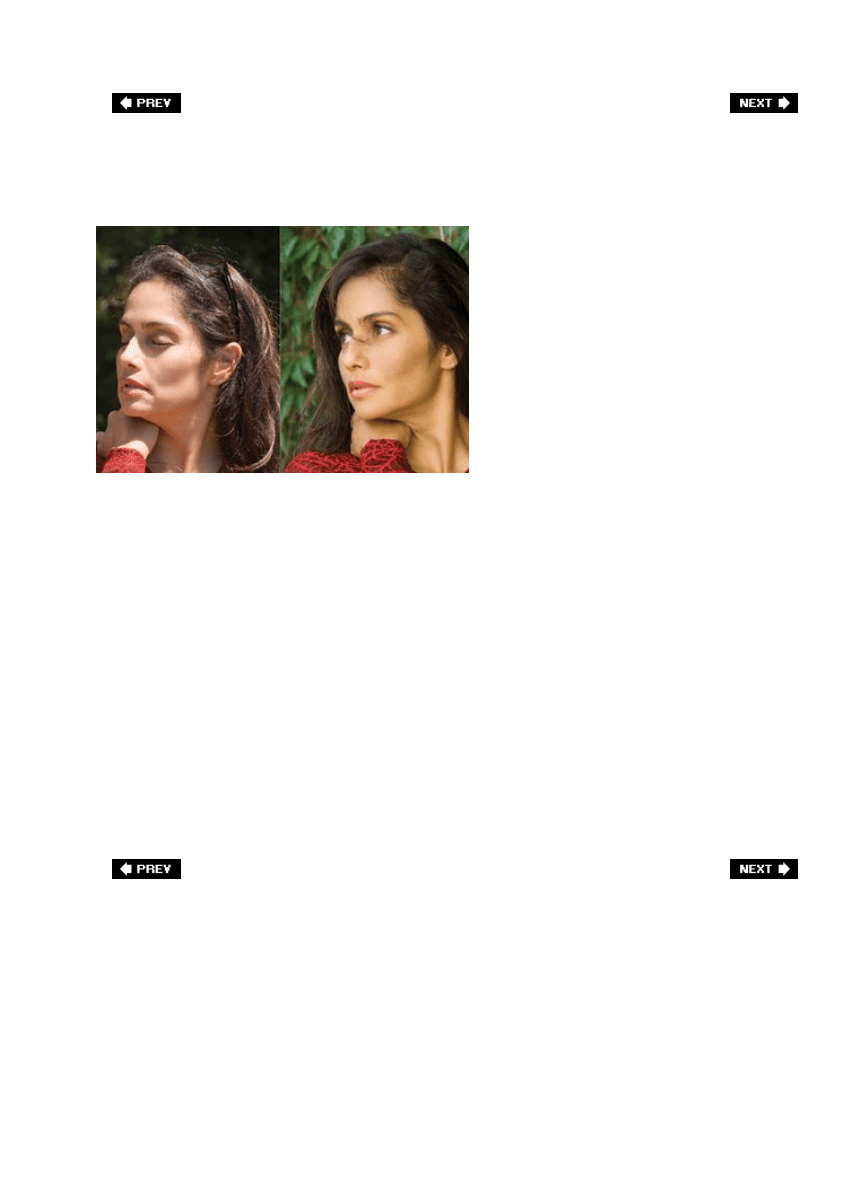
Getting Great Light Outdoors
SCOTT KELBY
Although there's plenty of light for shooting portraits outdoors in the middle of the day, most
of that light is very direct and will wind up casting hard, unflattering shadows on your
subject's face (not to mention that your subject will usually be squinting, sweating, or both).
So, how do you get great outdoor portraits at two o'clock in the afternoon? It's easymove
your subject into the shade, where the light is softer, and the shadows are less prominent
and much softer. Now, don't move into a cavejust move to a shady area near the direct
sunlight (typical places include under a large tree, under the overhang of a building or house,
on the porch of a house, under an umbrella, etc.). Just find a place you'd normally go to get
out of the sun on a hot day, and you're ready to get portraits where your subject isn't
squinting, and the light is soft and flattering. The photos above perfectly demonstrate the
advantage of doing this. The shot on the left was taken in direct sunlight and the shot on the
right, of the same model in a similar pose, was taken one minute later less than 30 feet away
but in open shade. Notice how much softer and warmer the light is, how vibrant the color is,
and how much better the same model looks. All I did was move her into the shade. It makes
that big a difference.
Getting Great Light Indoors
SCOTT KELBY
What's the pros' trick for getting great portrait light indoors without setting up some
extensive studio lighting? Use the best light ever creatednatural light. This is such wonderful
light that many pros insist on using nothing but natural light for their portraits. To take
advantage of this wonderful light source, just position your subject beside a window in your
house, office, studio, etc., that doesn't get direct light. The most ideal window light is a
north-facing window, but any window getting nice, soft, non-direct sunlight will work. If the
window is dirty, that's even better because it helps diffuse the light and makes it even softer.
If the only window you have gets direct light, try using sheers (thin curtains that are almost
see-throughyou find these in hotel rooms quite often, and they make great light diffusers).
You can position your subject standing or sitting, but to keep the light from looking flat, make
sure your subject is getting side light from the windownot direct light. The soft shadows on
the other side of the face will enhance the portrait and give it depth and interest.
Don't Forget the Shower Curtain Trick
That's itdon't forget the frosted shower curtain trick you learned in
Chapter 2
. It
can work wonderfully well here too, and although your subject may think you're a
little lame for pinning up a frosted shower curtain, the people who look at their
portrait will only think, "What soft, magical lightingyour photographer must be a
genius" (or something along those lines).

Taking Great Photos of Newborn Babies
SCOTT KELBY
By now you've probably heard how hard it is to photograph babies. That may be true, but
newborn babies usually have a distinct advantagethey're asleep. That's right, newborns
spend most of their days sleeping, so getting great shots of them is easier than you'd
thinkbut you have to put them in the right setting or everyone who looks at the photos will
say something along the lines of, "Aw, too bad she was asleep." Generally, people like babies
to be wide awake and smiling in photos, but there's a very popular brand of newborn
photography where the baby and mom (or dad) are sharing a quiet moment, and it really
sets the stage for a touching portrait. I saw this first-hand when David Ziser (the world-class
wedding and portrait photographer) spent one evening photographing my newborn daughter,
Kira. Now, David had a huge advantage because my daughter just happens to be the cutest
little baby in the whole wide world, but he did stack the deck in his favor with a simple, but
extremely effective, techniquehe had my wife and I both wear long-sleeved black turtleneck
shirts (you can find these at Target). Then, he photographed Kira as my wife held her in her
arms (I took a turn as well). David shot very tight (zoomed in), so what you basically got
was a sweet little baby resting peacefully in her mother's (and father's) arms. You can use a
diffused flash (more on this in
Chapter 3
), or you can use soft natural light from a side
window.
Great Sunset Portraits
©ISTOCKPHOTO/KEVIN RUSS
Everyone wants to shoot portraits at sunset because the sky is so gorgeous, but the problem
generally is that (a) your subject either comes out as a silhouette because the sunset is
behind them, or (b) you use a flash and your subject looks washed out. Here's how to get
great portraits at sunset without washing out your subject: start by turning off your flash and
aim at the sky. Then hold your shutter button halfway down to take an exposure reading
from the sky, and while still holding the shutter button halfway down (or you can turn on the
exposure lock button on your digital camera), recompose the shot by aiming at your subject,
but now turn the flash on and reveal your subject with the light of the flash. This way, your
subject gets fill flash, but the sky behind them still looks great. It's an old trick, but it's still
around because it works so well.
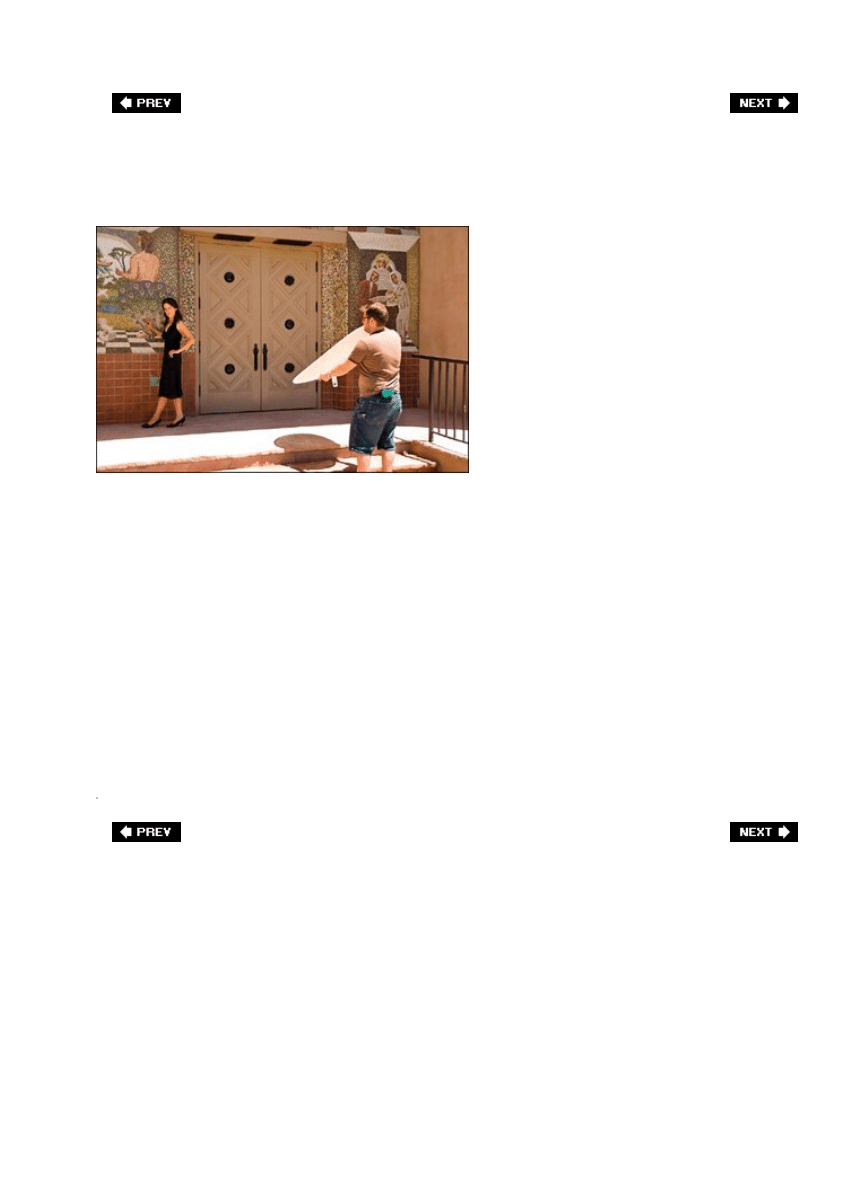
Better Natural-Light Portraits with Reflectors
SCOTT KELBY
If you're going to be shooting portraits using glorious, wonderful natural light, there's
something you probably ought to pick up that will make your portraits that much betterone
(preferably two) collapsible reflectors (I choose collapsible reflectors because they take up
virtually no storage space when you're not using them). These aren't just for big-time pros
because they just don't cost that much, but they do wonders for opening up the shadows in
your portraits and making the most of that marvelous natural light. You simply use these to
reflect (or bounce) the natural light from the window back into the shadow areas in your
subject.
I use the Photoflex 22" circular collapsible reflectors with gold on one side (if you want the
light you reflect to look warmer) and silver on the other side (for a cooler reflected light).
They sell for around $37 each. I told you they didn't cost much, but the results are golden (or
silver, as the case may be).

Chapter Seven. Avoiding Problems Like
a Pro
How to Avoid Digital Headaches
[View full size image]
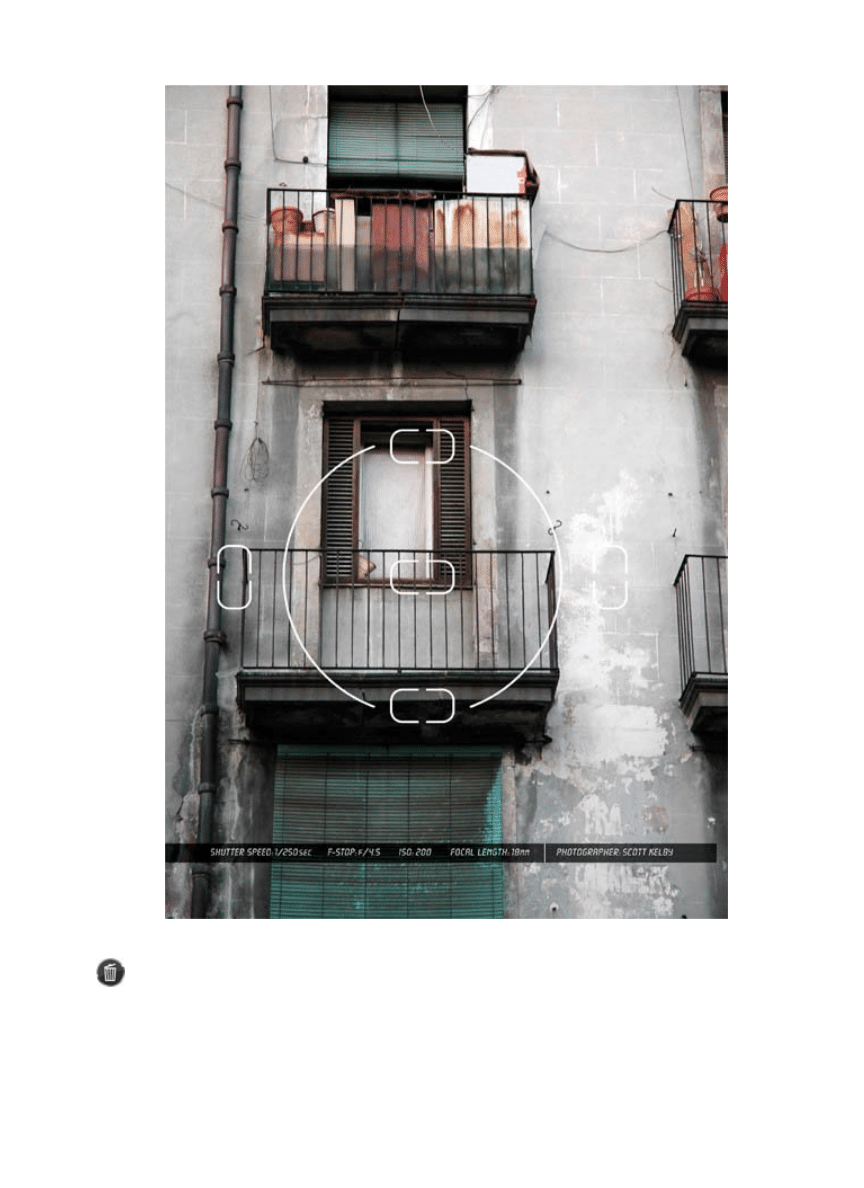
Pros are out shooting every day. And when I say out, if they're studio photographers
they're actually usually shooting indoors, so in that case, of course I mean they're out
shooting in the studio. Stick with me here, will ya? Anyway, these pros are out shooting
every day, while most of the rest of us only get to shoot when our wives let us. I mean, we
only get to shoot on certain occasions (like when our wives are out of town), so although we
run across digital problems when we're shooting, since we won't have to deal with them
again until our wives fly to Minnesota to visit their parents, we just let them slide. The pros
don't because they have to deal with these things every day (meaning their in-laws live in the
same town they do), so the way they keep from having migraine headaches the size of the
Shuttle's booster rockets is by figuring out clever ways to deal with them on the spot. So, this
chapter is kind of a shortcut because you're going to get the benefits of years of other

people's headaches, but you're going to get to fix them right now, sidestepping one of the
real downsides of shooting digital, and that primarily is having to shoot your cousin Earl's
wedding (see, you should have listened to your wife when she told you not to get that long
lens). Now, you may have noticed that I've been referring to wives as if all photographers
were men, and clearly that's not the case. It's just that I am a man (a masculine, mannish,
manly man) and therefore it would be silly for me to say, "My husband didn't want me to go
shooting that day," when you know darn well he wouldn't mind. Waitthat's not what I meant.
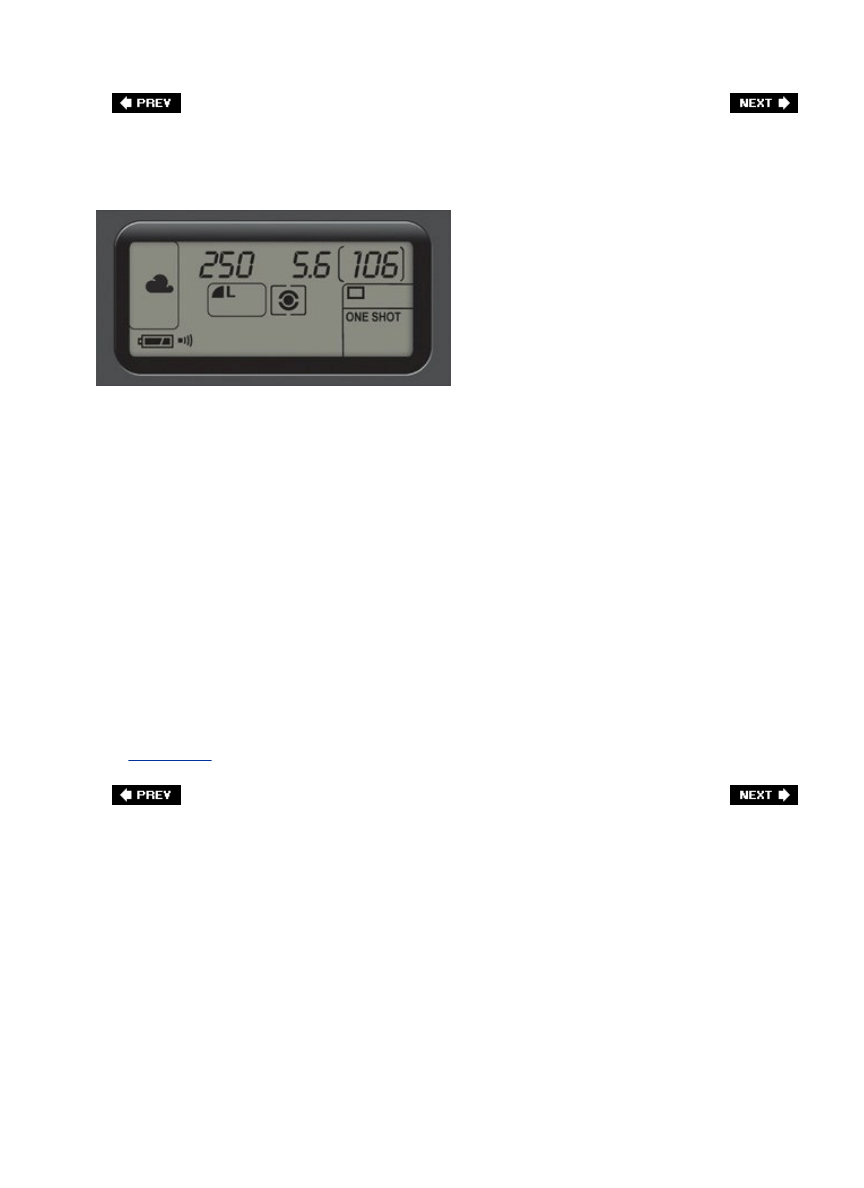
Pro Tips to Avoid White Balance Problems
White balance problems often happen when you shoot indoors under fluorescent,
incandescent, or just "them regular ol' light bulbs." Of course, you don't generally find out
about them until you open the photos later on your computer and all the shots have either a
yellowish, or greenish, or blueish color cast. By default, your camera is set to Auto White
Balance, which works pretty well outdoors, but generally doesn't work worth a darn indoors.
The pros use three methods to avoid white balance problems when they shoot: (1) they go
into the camera and choose a preset white balance setting that matches the lighting they're
shooting in (it's easier than you thinkjust go to your camera's white balance section, and
choose either Incandescent [for regular indoor lighting] or Fluorescent [for typical office
lighting]). You can choose preset white balance settings for outdoor shots as well, and you'll
get more realistic colors there too. (2) They create a custom white balance. Luckily, your
camera will do most of the work for you if you just put a neutral gray card (you can find
these at any camera store or B&H Photo) about 8 to 10 inches in front of your lens, and zoom
in/out so the card fills your frame. Then go to your camera's custom white balance menu and
set it up to measure what it sees to create a custom white balance (it's easier than it
soundsjust take a peek in your camera's manual). And, (3) They shoot in RAW format, so
they don't worry about white balance, because they can choose the white balance after the
fact, either in Adobe Photoshop's Camera Raw dialog or in their RAW processing software (if
they don't use Photoshop's RAW processor). This is just one advantage of shooting in RAW
(see
Chapter 10
for more on why RAW rocks).
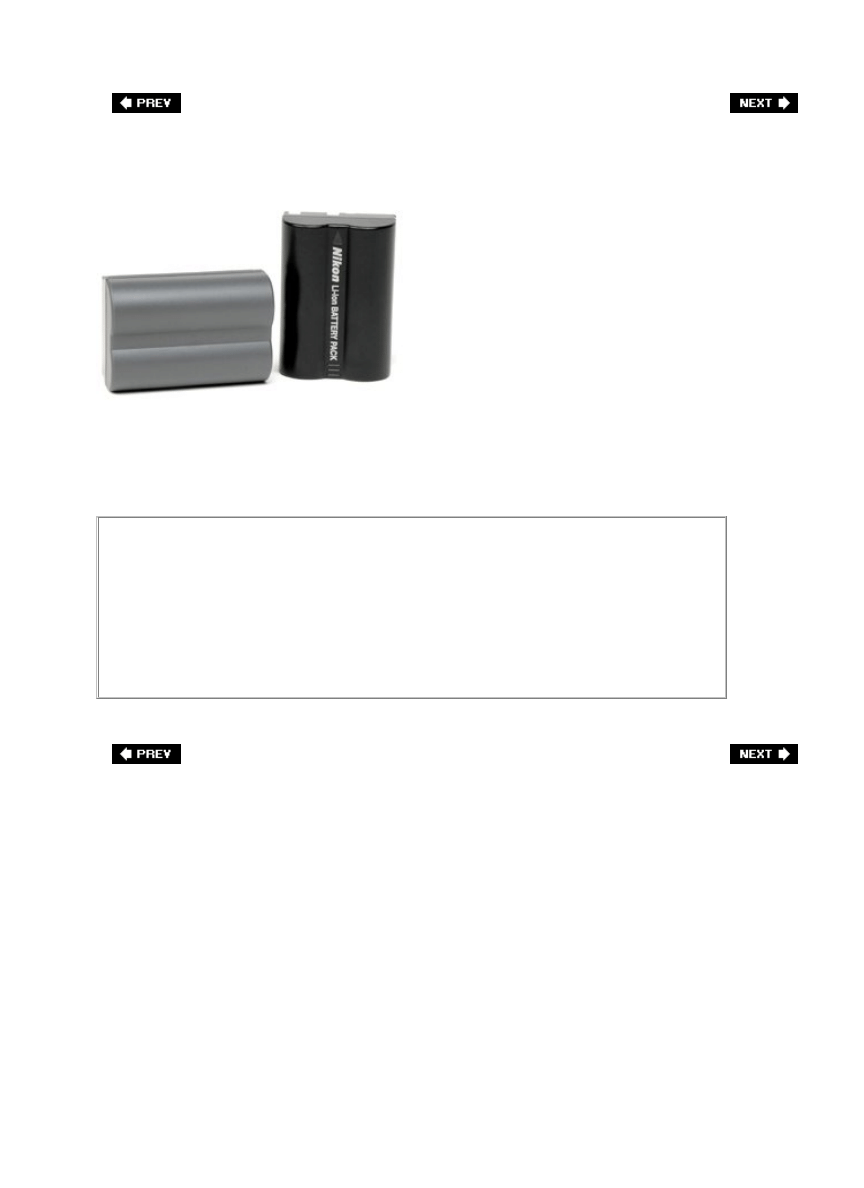
Cold Weather Shooting Means Extra Batteries
Another thing the pros have learned is that digital camera batteries don't last nearly as long
in cold weather. So if you're going out shooting in the snow, you'd better bring at least one or
two backup batteries for your camera or it could turn into a very short shoot.
Extra Batteries Are a Shoot Saver
I go out of my way to avoid using flash (I'm one of those natural light freaks), so
my batteries last a good long time, and I seldom have to change batteries during
a shoot. However, I have at least one backup battery for both of my cameras, and
although I don't use them that often, when I have needed them, they've been a
shoot saver big time. If there's a must-have accessory, it's an extra battery.
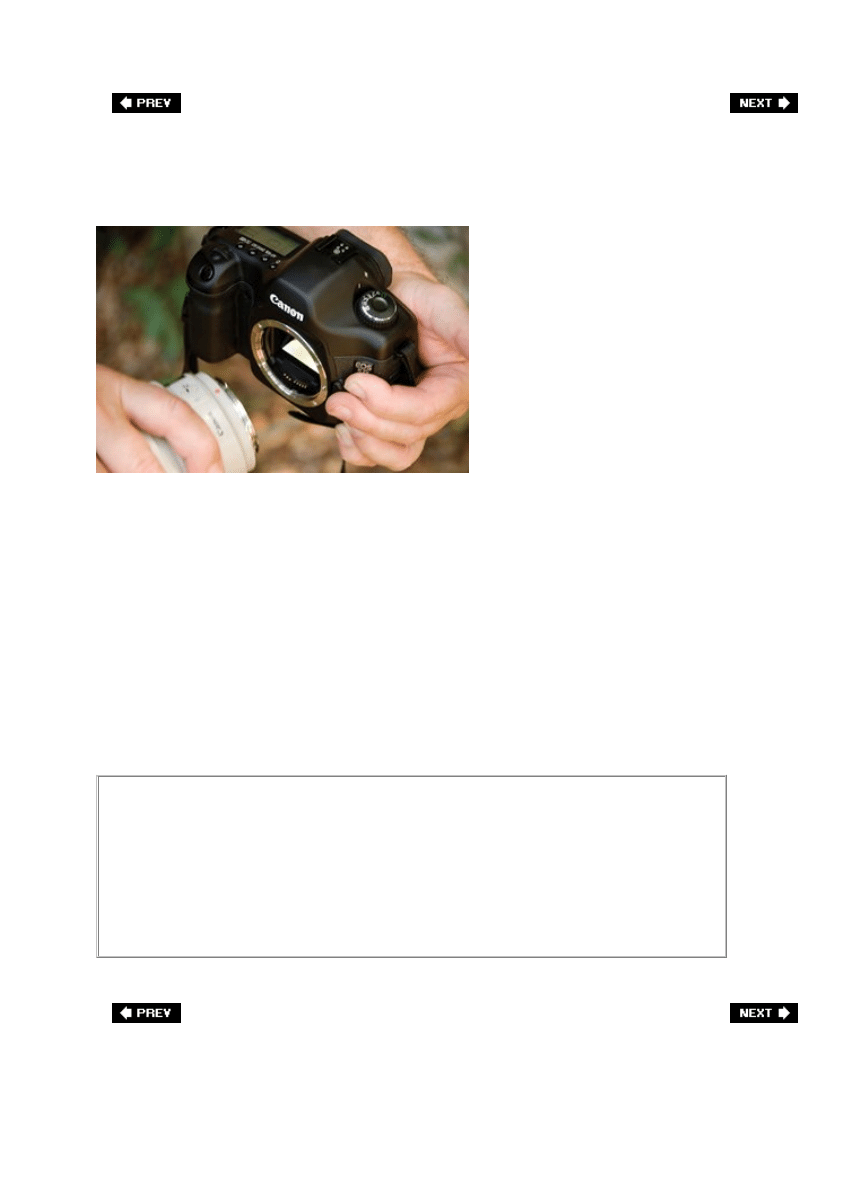
Don't Change Lenses in Dusty Weather
SCOTT KELBY
If you're shooting outdoors, take a tip from the pros and don't change lenses if you're in a
dusty environment. That's the last thing you want getting down inside your digital camera,
and although you can't sometimes see the dust swirling around you, your camera's sensors
will see it, and then so will you (when you open the photos on your computer). If you must
change lenses, try to go back to your car, or some indoor location, and switch lenses there.
Remember, it doesn't take a whole lotta dust to make your camera really miserableit's worth
the extra effort to either plan carefully for shoots in desert or sandy conditions and go with
just one lens, or to keep your car nearby so you can go inside, shut the door, and change the
lens without fear of fouling your gear.
Protect Your Gear Tip
You can buy protective gear for your camera for shooting in harsh or rainy
weather conditions. But, if you find yourself in that kind of situation without that
protection, you can do what my buddy Bill Fortney does and take a clear plastic
shower cap from the hotel you're staying at, and use it to cover your camera and
lens. It balls up right in your pocket, and it does a better job than you'd think.

Apply for Permits to Shoot with Your Tripod
[View full size image]
Many indoor locations (including museums, aquariums, public buildings, etc.) don't allow you
to shoot on a tripod, even though these locations generally have very low "museum-like"
lighting. However, in some cases you can apply for a free permit to shoot on a tripodsuch as
the one shown above from New York's Metropolitan Museum of Artyou just have to ask in
advance. I've had a number of instances where, by asking in advance, they would let me
come in before or after hours to shoot when nobody's there (alleviating their fear that
someone might trip on my tripod and sue them). Sometimes government buildings or
museums will let you apply for a permit so you can shoot during their regular open hours,
but often they'll have you come before or after hours, which I actually prefer. So, usually it's
just me and a security guard shooting at five o'clock in the morning or nine o'clock at night,
but at least I've got a stable shooting platform, I'm getting sharp shots because I'm on a
tripod, and I don't have to worry about anyone tripping over my tripod, shooting their flash
while I'm trying to shoot, or rushing me to get out of the way.
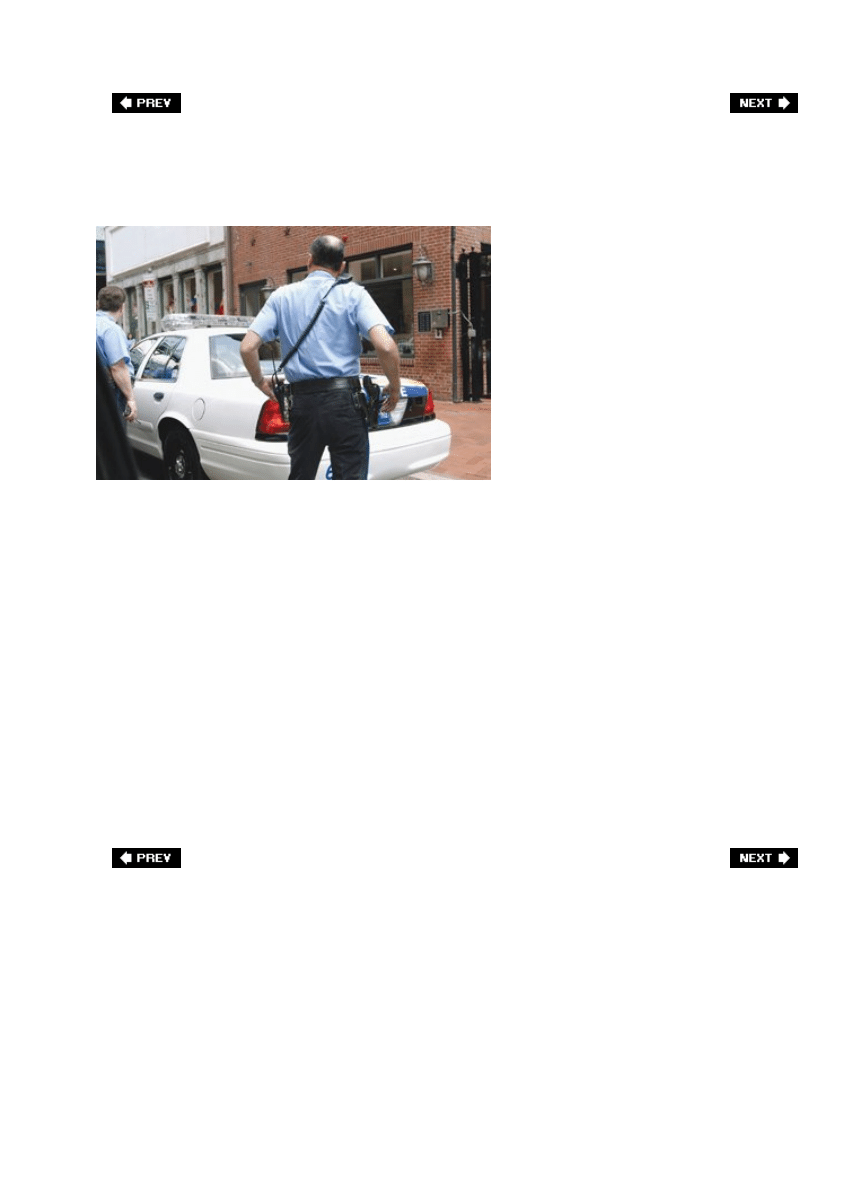
Be Careful What You Shoot
©ISTOCKPHOTO/NANCY LOUIE
Especially since September 11th in the U.S., people can sometimes get freaky when they see
someone shooting photos outside their building (which is common in downtown areas), and
they're particularly touchy outside state and federal buildings. Recently, a photographer I
know was shooting in a downtown area, and when he pulled his eye away from his viewfinder
he was surrounded by three security guards. He didn't realize the building he was shooting
was a federal building (it just looked like a fascinating old building to him), and the guards
wanted to confiscate his camera's memory card. Luckily, he was able to convince the guards
to let him just delete the photos from his card right in front of them, but if he hadn't, the
police would have been involved within minutes (it was a federal building, after all).
However, building security for corporations can be very aggressive as well (I've heard stories
there, too), so just take a little care when shooting in downtown areas and be prepared to
delete shots off your card if necessary. Also, as a general rule, in the U.S. and in other
countries, you're taking your chances any time you shoot government buildings, airports,
military bases, terrorist training camps, nuclear missile silos, Russian sub bases, etc.
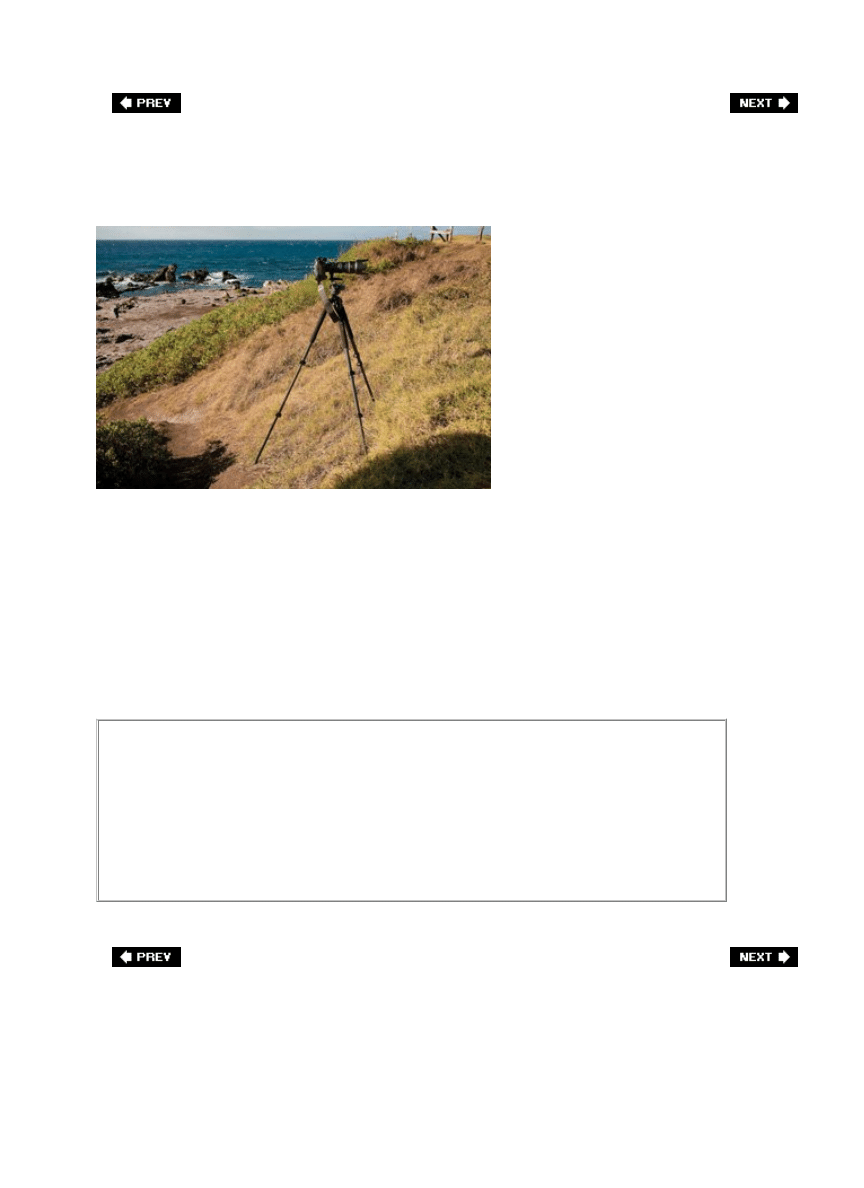
A Tip for Shooting on an Incline
RANDY HUFFORD
If you find yourself shooting on an incline with your tripod, here's a tip that can save your
camera from instant death. Let's say you're shooting on a rock or on the side of a hill. Your
tripod has three legsplace only one facing you. That way, if the camera starts to tip back, the
single leg acts like an anchor and keeps it from falling. If the two-legged side is on the
ground, with a single leg on the rock or hillside, your camera will topple right over.
Tip for More Stable Shooting on a Tripod
When you're shooting on a tripod, depending on the terrain, you don't always
wind up extending your tripod's legs all the waysometimes you just extend one
set of legs and not both. If that's the case, the pros extend the top ones (the legs
nearest the camera) first, because they're thicker and provide more stability and
balance than the thinner lower legs.
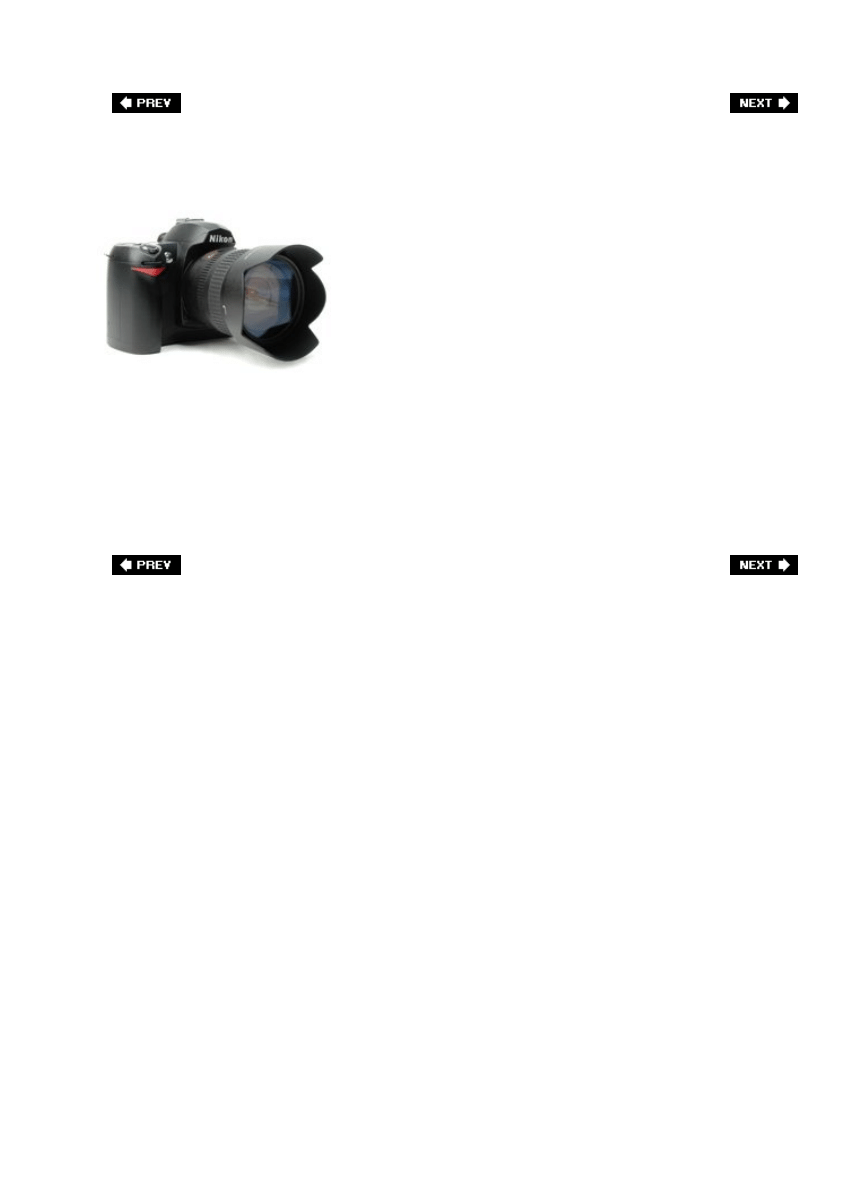
The Other Reason Pros Use a Lens Hood
The lens hood that comes with most good-quality lenses these days is designed to reduce or
eliminate the lens flare that can creep into your lens when shooting outdoors in daylight, but
pros keep a lens hood on even indoors (basically they keep it on all the time) for another
reasonit protects the lens. Think about itthe glass end of your lens is pretty much flush to the
end of the lens barrel, and if it comes in contact with anything that's not really, really soft, it
can get scratched, cracked, or just fingerprinted or dirty. However, when you put a lens hood
on the end, it puts a buffer between the glass and the scary world around it. It can save your
lens if you drop it or knock it into someone or something.

Keeping Your Lens Out of Trouble
If you're going to be using good-quality lenses with your digital camera, then I highly
recommend buying a UV filter for each lens. Although the UV part doesn't do all that much (it
filters out UV rays to some extent, which makes your photos look better to some small
extent), the real reason to use one is to protect your lens (specifically, the glass on your lens,
which can get scratched easily or break if you drop it). Although this "buy a UV filter/don't
buy one" controversy is heavily debated on the Web, I can tell you from personal experience
it saved one of my lenses from certain death. I was out on location, and while changing
lenses I somehow lost my grip and my lens crashed to the ground, glass first. My filter was
severely damaged, but once I unscrewed it and took a look at my lens, it was totally
unscathed. The filter took all the damage, and it's much cheaper to buy a new filter than it is
to replace an expensive lens. So, while a UV filter might not do all that much for your photos,
it does a lot for your peace of mind.

Back Up Your Photos in the Field
When you're out shooting, as soon as you fill up a memory card, back it up to a portable
external hard drive (ideally, you'd like a portable drive that lets you pop in your memory card
and copy it onto the drive without having to be connected to a computer). That way, you've
backed up your digital negatives right there on the spot. Here's how I use this workflow: let's
say I do an early morning shoot (the 5:00 a.m. sort). As soon as I'm done with my shoot
(around 7:00 a.m.), when I get back to my car, I pop my memory card out of the camera,
pop it into my Epson P-4000, and start copying the card over. Then, while it's still copying, I
put the P-4000 back into its carrying case, and then back into my camera bag. By the time I
get to the breakfast restaurant (a yummy breakfast is a critical part of the early morning
shoot), the photos are copied onto the hard drive. Right after I place my breakfast order with
the server, I break out my P-4000 and start seeing if the morning shoot yielded any
"keepers" in the P-4000's huge LCD window. That way, not only do I have a solid backup, but
I also get a preview of how my morning shoot went.
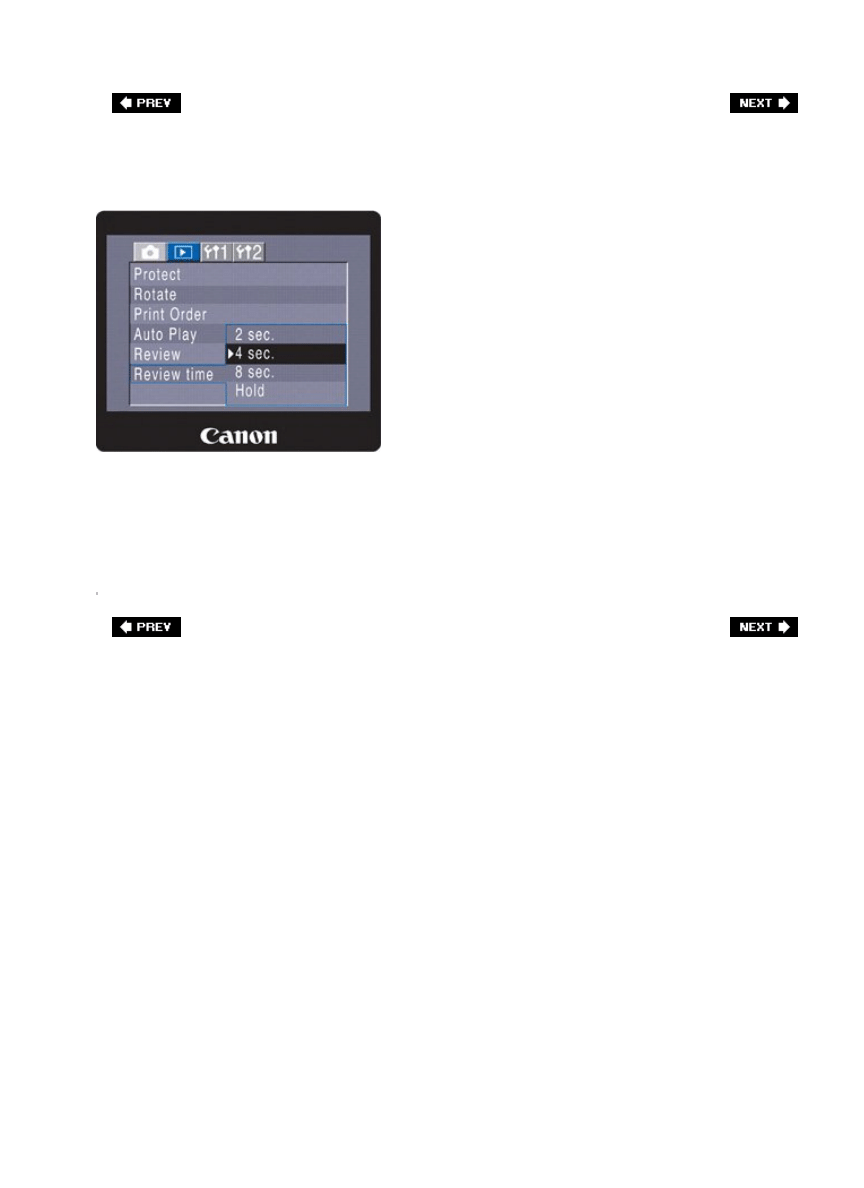
Limit Your LCD Time to Save Battery Life
One of the biggest drains on battery life is the color LCD monitor on the back of your digital
camera. Although it's a very important part of digital photography, using it too often can
really drain your battery, but here's something that can helplower the number of seconds
that your LCD displays right after you take the shot. After all, if you need to see a shot you
just took again, you can just press the playback button on the back of your camera and it will
reappear. Also, limit your chimping (admiring your photos on the LCD monitor or showing
them off to others while making "Oooh! Oooh!" sounds).
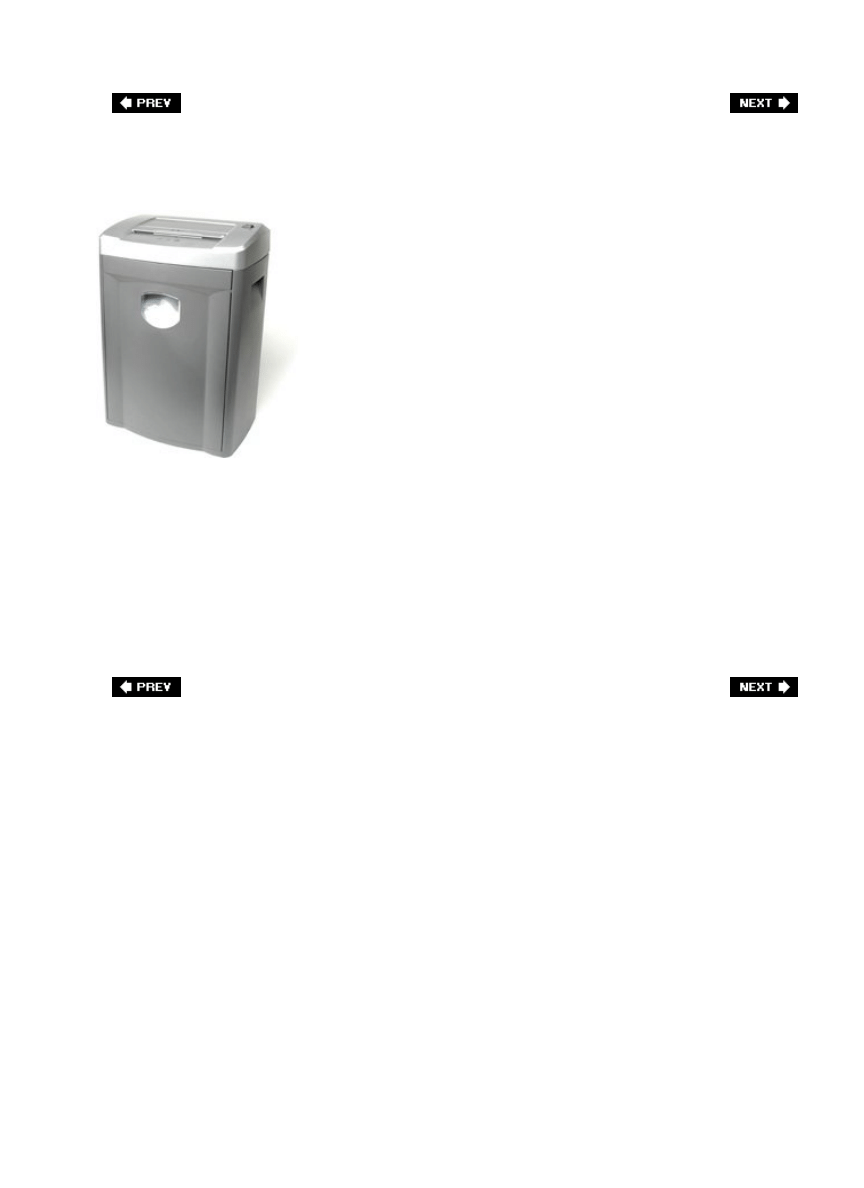
Be Careful When Throwing Out CDs/DVDs
Be careful when throwing away old CDs or DVDs with photos on them. One thing the pros
have learned (some the hard way) is that if you just throw a CD or DVD of photos away,
there's a chance those photos might "come back from the grave" and reappear where you
least expect them, like on the Web, or on a stock photo site, or...wherever. These days, old
CDs often attract unwelcome attention in a landfill because trollers are looking for credit card
numbers, personal information, etc., and if they find anything of value (including your
photos), they may find a way to use (or abuse) them. How do you protect yourself against
this? Buy a serious shredderone that will shred CDs/DVDs (like the Fellowes PC70-2CD, which
will shred just about anything on earth)and shred your CDs so they're unusable by just about
anybody. It doesn't seem like a big threat until you see someone else selling your work.

Bracket If You're Not Sure About Exposure
In a tricky lighting situation, or a situation where you've just got to get the correct exposure
for the shot, the pros make use of the camera's built-in exposure bracketing feature. This
basically sets up your camera to shoot multiple versions (as many as five, if you like) of your
current scene using different exposures (some lighter, some darker) with the idea that one of
them will be just right. It starts by using the suggested exposure reading taken by your
camera (which your camera believes is the correct exposure, by the way, but it can
sometimes be fooled in tricky lighting situations), then it creates another image that is
slightly underexposed, and another slightly overexposed (so you've bracketed both ends of
the original exposure). This greatly increases your odds of getting the perfect exposure, and
since digital film is freehey, why not, right? You turn on bracketing right on the camera itself.
For Nikon digital cameras, there's a bracketing button to the left of the viewfinder (it says
"BKT" on the button). On Canons (like the 20D or 30D), you have to turn on bracketing from
the menu itself.
Bracketing Tip
If you're shooting in RAW, bracketing becomes much less important because you
have so much control after the fact (in your RAW conversion software), and
because you can make as many copies, with different exposures, as you'd like.
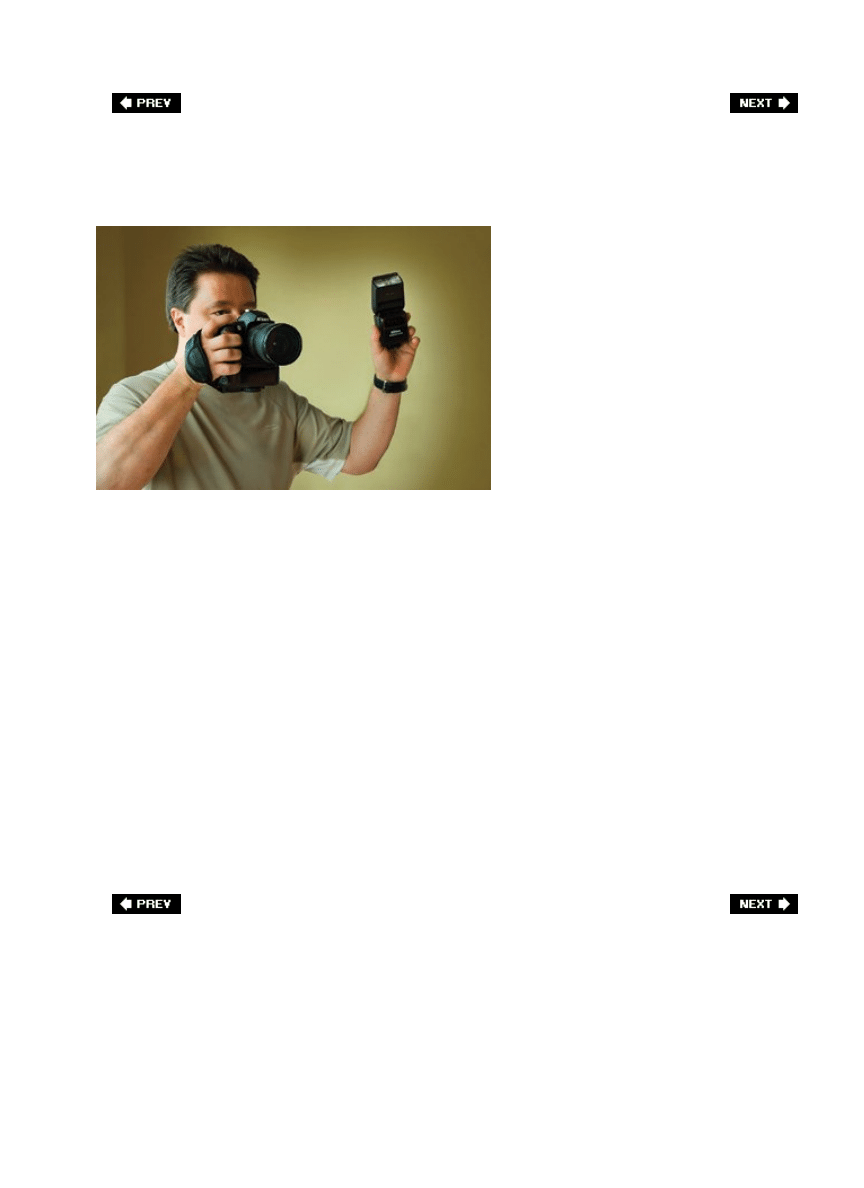
Avoid Red Eye
SCOTT KELBY
Without going into all the technical (and physiological) reasons why people in our photos
often get "red eye" when we use a flash, let's just look at how to avoid it. The main culprit is
your camera's pop-up flash, which sits right above your lens and is an almost automatic
recipe for red eye. The easy fix (the one the pros use anyway) is to either get that flash
(ideally) off the camera and hold it a couple of feet away from the lens, or at the very least
up much higher away from the lens, to reduce the chance for red eye. Another method is to
bounce your flash off the ceiling, which is a great cure for red eye. Of course, all of these
require you to have a separate external flash unit (and not just your camera's built-in pop-up
flash). If you can't spring for an external flash, there are a few other popular strategies when
you have no choice but to use your built-in pop-up flash: (1) turn on some room lights, if
possible. It lets your subject's pupils contract, and that causes less red eye than shooting in
complete darkness. (2) If your camera has a red-eye reduction mode (where it sends a
preemptive flash, which causes your subject's pupils to quickly contract, before it fires the
main flash), that sometimes reduces red eye. (3) Ask your subject to look slightly away from
the lens and that will certainly help, plus (4) moving your camera closer to your subject can
also help reduce the dreaded red eye.
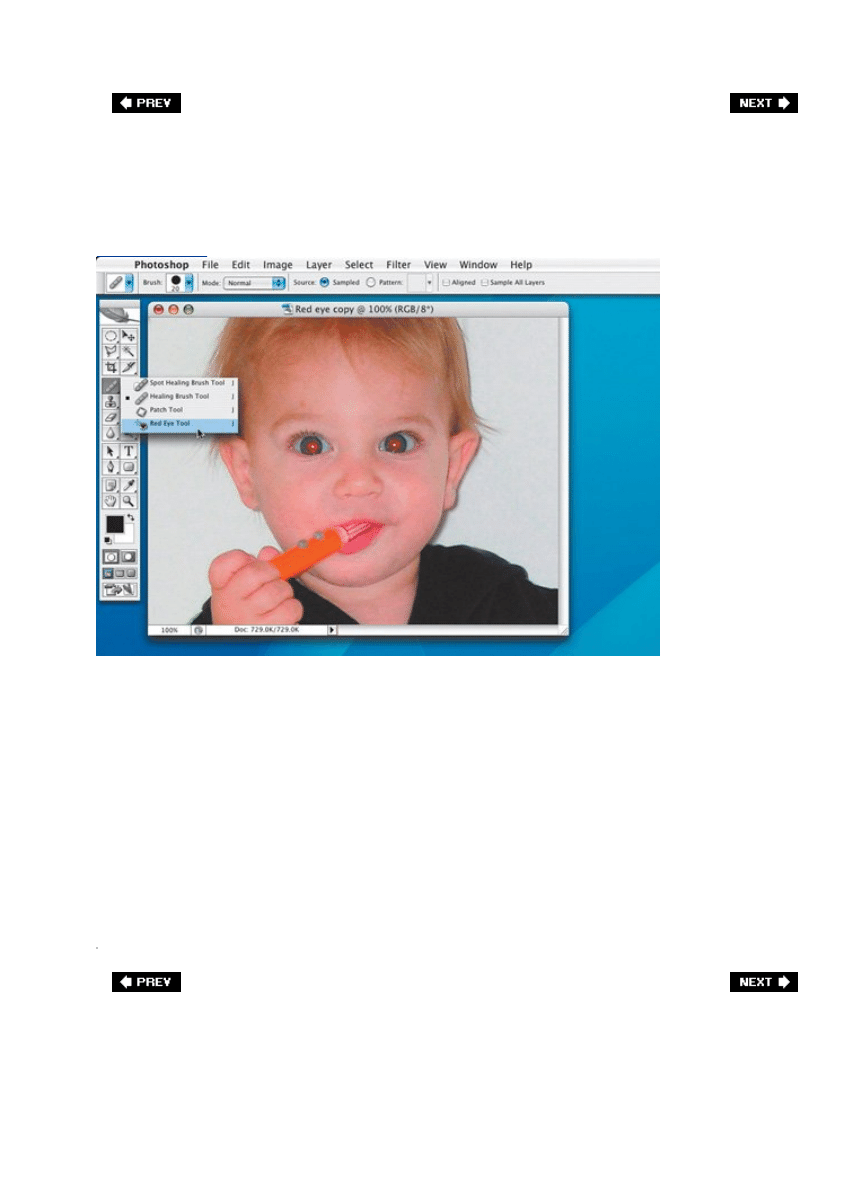
Remove Red Eye
[View full size image]
DAVE MOSER
Okay, let's say you forgot to try one of the strategies on the previous page and you wind up
with an important photo that has red eye. Luckily, it's easier than ever to get rid of red eye.
Whether you're using Adobe Photoshop CS2 or Photoshop Elements (the consumer version of
Photoshop), you can use the Red Eye tool to quickly get rid of red eye. Here's how they work.
Open the photo in Photoshop CS2 (or Photoshop Elements), then get the Red Eye tool (it's in
the Toolbox on the left side), and simply click directly on the red area in one of the eyes.
That's itit does the rest. Then do the other eye. Not too shabby, eh? If clicking directly on the
red part of the eye is too hard (the person is standing kind of far away so their eyes are kind
of a small target), then just take the tool and click-and-drag a rectangle around the whole
eye area, and when you release the mouse button, it will do its thing. Either way you do it,
that red eye is going to be gone in seconds. Just another reason why I love Photoshop.

Chapter Eight. Taking Advantage of
Digital Like a Pro
It's More Than Just a Replacement for Film
[View full size image]
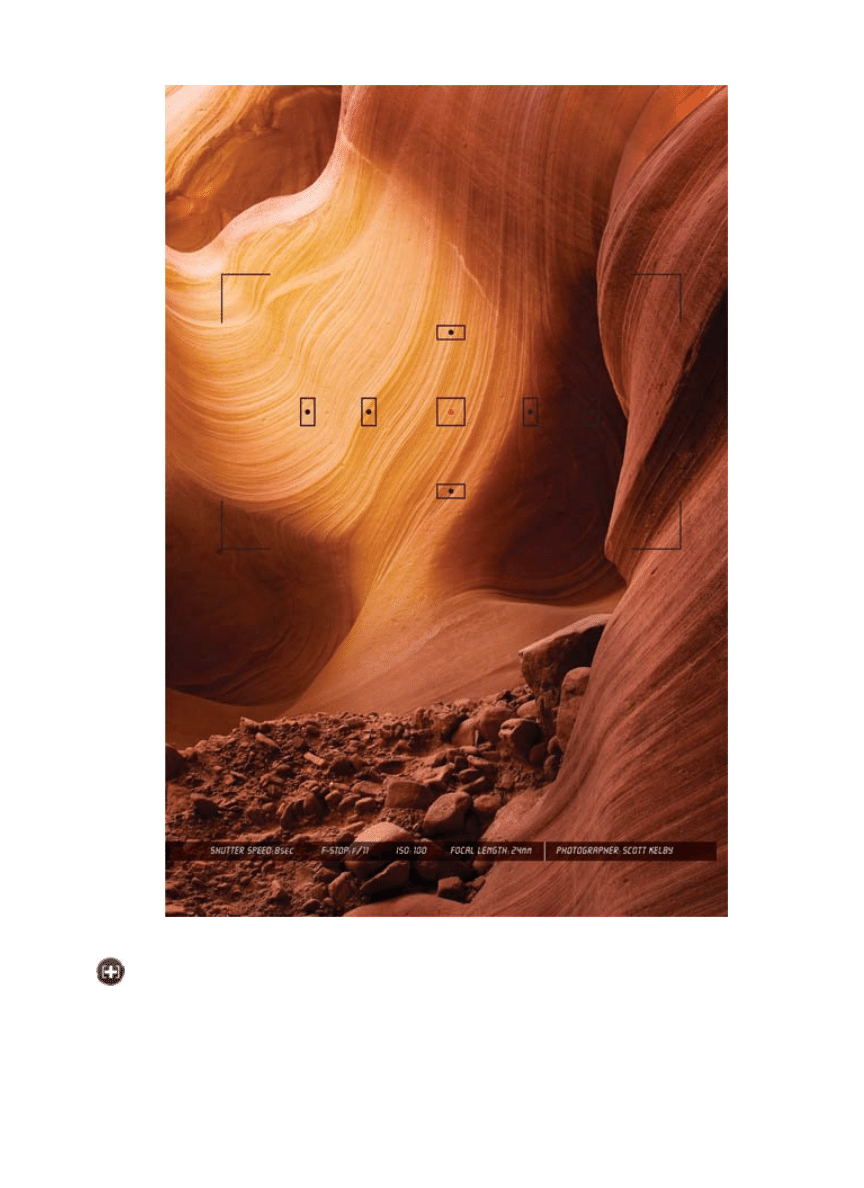
I added this chapter to the book for a very important reasonI constantly run into people
who treat their digital camera like a film camera that comes with free film. These people
(freaks) don't realize that digital is much more than just a new type of "free-film camera" and
digital cameras offer advantages that we (they, them, us, etc.) never had in film cameras.
So, that's what I tried to do in this chaptershow how the pros take advantage of digital
cameras to get the most out of their investment. Now, these pros have to squeeze every
advantage out of their cameras for two reasons: (1) they have to monetize the results. They
paid a lot of money for these tools for their business, and they have to have a verifiable
means of tracking their ROI (return on investment). And (2) they have to be able to make
enough money to pay both alimony and child support, because their spouses left them
shortly after they went digital, because now they spend all their free time playing around

with their photos in Adobe Photoshop. Hey, it's an easy trap to fall into, and I've been known
to spend an hour or two in Photoshop myself. But that doesn't mean I've turned my back on
my wife and child. I mean, wife and two children. My two boys. I mean, my son and
daughter, right? Little what's-her-name? And of course, my son Gerald. Er, Jordan. That's
itJordan. Great little boy, too. What's he now, six? Nine! No kidding, he's nine already? Boy,
they sure do grow up fast.
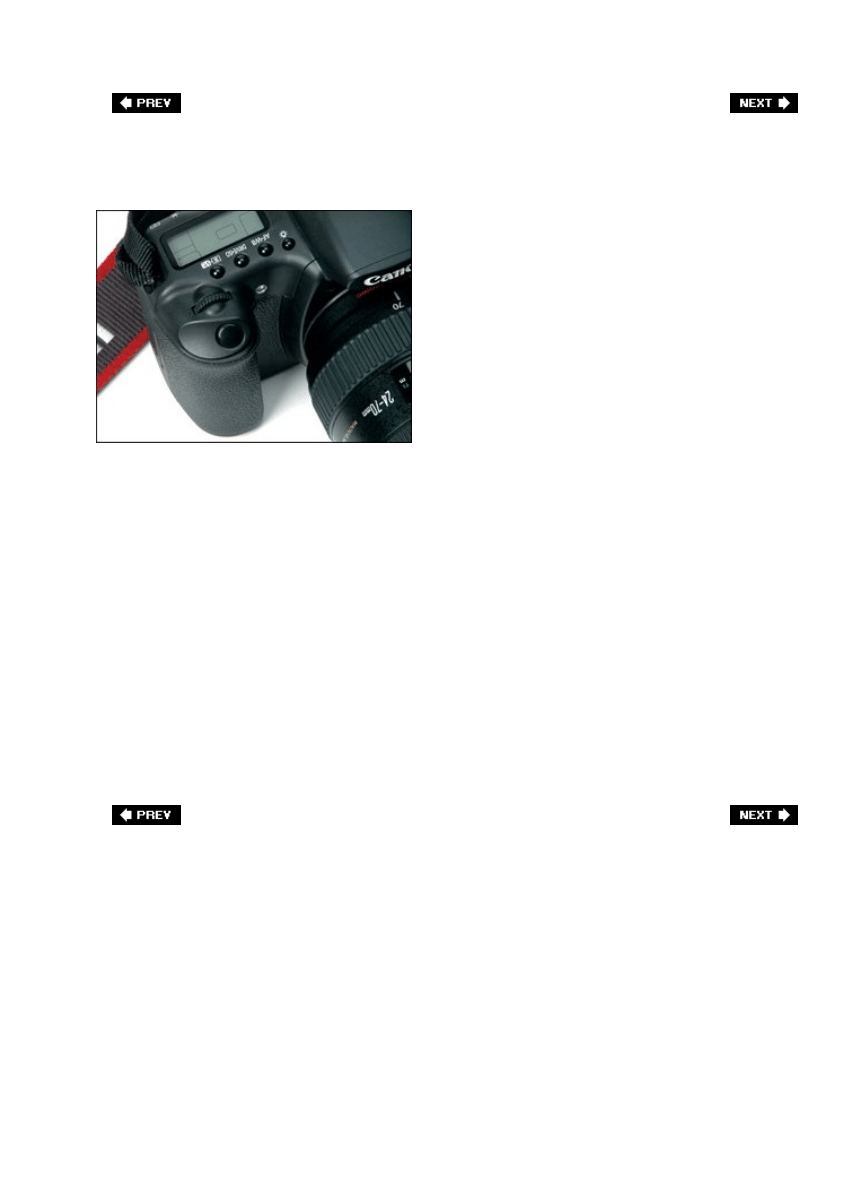
Level the Playing Field: Press That Button
Will digital photography really get you better photos? Absolutely. There are two huge
advantages digital brings (if you take advantage of them), so I'm covering both of them on
these first two pages. The first isfilm is free. In the days of traditional film cameras, every
time I pressed the shutter, I heard in my head "22¢." Each time I clicked off a shot, it cost
me around 22¢. So whenever I considered taking a shot, I would consciously (or
subconsciously) think, "Is this shot worth 22¢?" Of course, I wouldn't know for days (when
the film came back from the processing lab), but it always made me pause. Now I can push
the shutter again and again and again, and in my head I just see a smiley face instead. Why?
Because I'm insane. But besides that, it's because once you've bought your memory card,
film is free. This really levels the playing field with professional photographers, because this
has always been a huge advantage they had over the amateurs. The pros had a budget for
film, so if they were shooting a portrait, they'd shoot literally hundreds of photos to get "the
shot." Amateurs would shoot, maybe, a roll of 24. Maybe 36. So, here's a pro photographer
shooting hundreds of shots vs. an amateur shooting 36. Who had the best chance of getting
the shot? Exactly. Now, jump ahead to digital. It's portrait timethe pro will shoot hundreds of
shots, right? Now, so can you, and it doesn't cost you a dime. When you shoot "with wild
abandon" (as my friend Vincent Versace always says), you level the playing field. Your
chances of getting "the shot" go way, way up, so fire away.
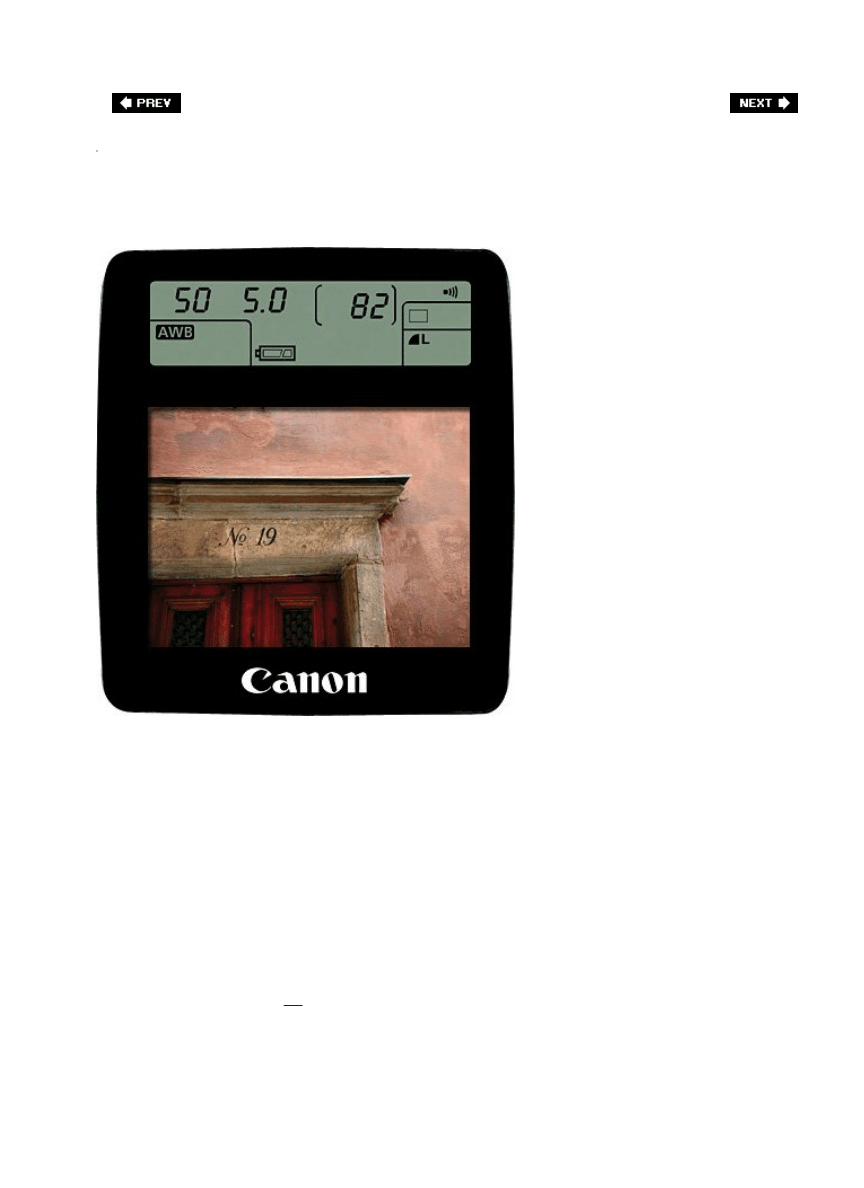
Put the LCD Monitor to Work
SCOTT KELBY
The second thing that levels the playing field is that now, with the LCD monitor on the back
of your camera, you can see if you "got the shot." And by "got the shot," I mean you can tell
if your color is in the ballpark, if your subject blinked when the photo was taken, if your flash
actually firedthat sort of thing (I'm not trying to trivialize themthese are huge advantages).
But because the LCD monitor is so small, it can also fool you. Everything looks in focus when
it's 2" tall on the monitor. When you open that photo later in Photoshop, you might find out
that the key shot from your shoot is horribly out of focus (or your camera focused on the
wrong object, so the background is in sharp focus, but your subject is blurry). This actually
happens quite often because (all together now) everything looks in focus on an LCD monitor.
To really take advantage of the LCD monitor for focus, you'll need to zoom in and see if it's
really in focus (see page
17
for how to zoom in).

The LCD Monitor Challenge
Another way the LCD monitor will make you a better photographer is through
instant creative feedback. If you take your shot, look at the LCD, and what you
see disappoints you, then it challenges you to come up with something better. It
makes you work the shot, try new angles, get more creative, and experiment until
you finally see on the monitor what you set out to capture in the first place.
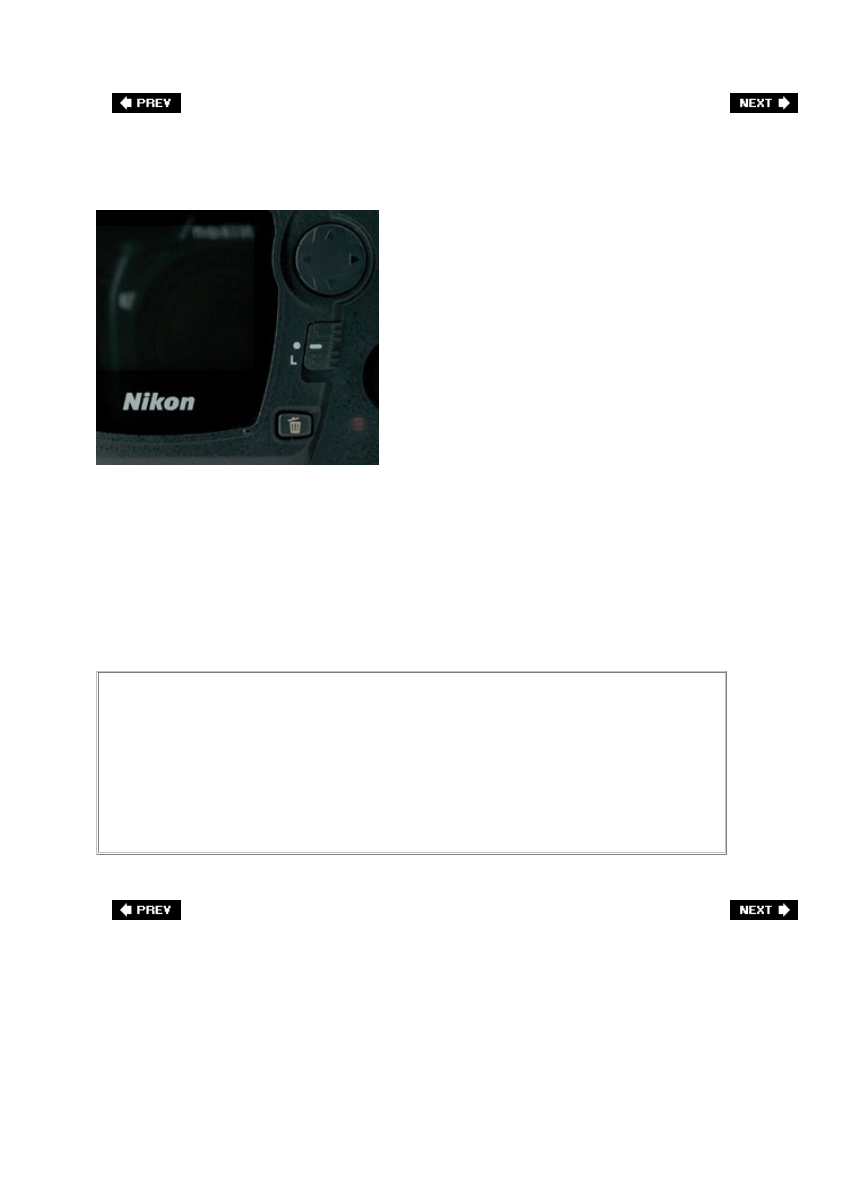
Edit as You Shoot to Get More Keepers
One of the tricks the pros use to keep an efficient workflow, and to keep from unnecessarily
filling up their memory cards, is to edit out the bad shots as they go. If they take a shot and
look on the LCD monitor and see that it's grossly underexposed, overex-posed, has tons of
blinkies, is clearly out of focus, or is just plain badly composed, they delete it right there on
the spot. If you do this as well, later, when you download your photos into your computer,
you're only looking at shots that actually have a chance of being a keeper. Plus, you can take
more shots per card, because the bad ones have been erased to make room for more
potential good shots.
The Hidden "Edit as You Go" Advantage
You may think this is silly (at first), but if you edit out all the really bad shots,
when you finally do download and start looking at them, you'll feel better as a
photographer. That's because you'll be looking at a better group of photos from
the very start. The really bad shots have already been deleted, so when you start
looking at the day's take, you'll think to yourself, "Hey, these aren't too bad."

Take Advantage of the Blinkies
SCOTT KELBY
I know I mentioned this earlier, but it bears repeating. Turning on your highlight warning (or
highlight alert, the strobe-like flashing you see on your LCD monitor which shows the parts of
your photo that are totally blown out and have no detail) and looking for the "blinkies" will
yield you more keepersno doubt. So, what do you do when you see the blinkies? Use your
camera's exposure compensation control to back down the exposure a 1/3 stop and shoot the
same photo again. If you still see the blinkies, take it down another 1/3 stop and shoot it
again. Keep shooting until the blinkies go away. Note : Some things will always have
blinkieslike the sunand that's okay. What you want to be concerned about is specifically
"blinkies that matter" (blinkies in parts of the photo that you care about). A reflection of the
sun on the chrome bumper of a car is an okay situation to let blinkies live. However, blinkies
blinking on the forehead of your subject is not acceptable. Also, when looking at the LCD
monitor, keep an eye on the overall exposure of the photodon't let it get way underexposed
just to stop a tiny blinky somewhere. Here's how to adjust using exposure compensation:
Nikon: Press the exposure compensation button just behind the shutter button, then move
the command dial to the left until it reads 1/3 in the viewfinder readout.
Canon: Turn the mode dial to any creative zone mode except manual, then set the exposure
compensation by turning the quick control dial on the back of the camera.
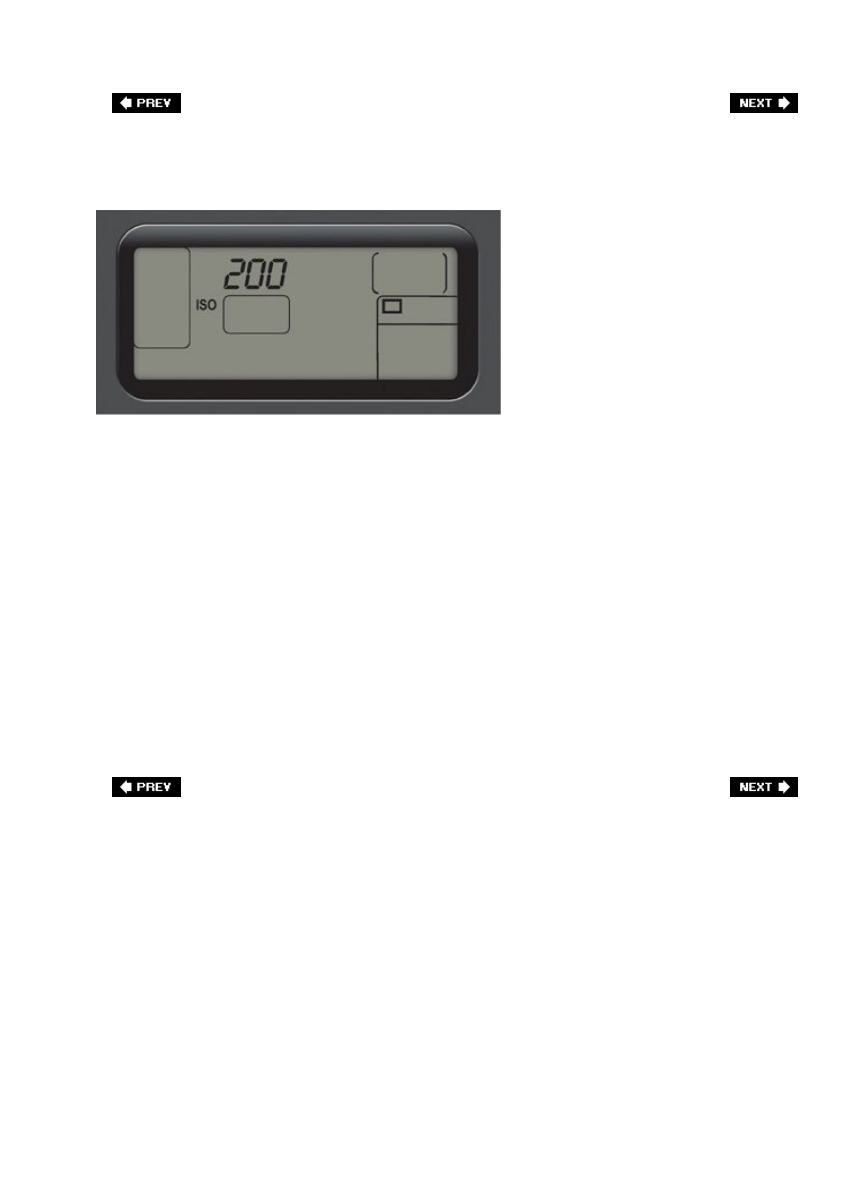
Change Your ISO on the Fly
A huge advantage of digital is that you can change the ISO anytime the scene dictates it.
With traditional film, that was impossible. Well, it wasn't impossible, it was just incredibly
expensive, because to change the ISO (film speed) you actually had to change film. So, for
example, let's say you're shooting the outside of a church with a brand new roll of ISO 200
film (36 exposures), and you crank out four or five shots. You walk inside, and it's very dark,
and they won't allow you to set up a tripod (which isn't unusual for a church). If you needed
to switch to ISO 800 film, you'd need to pop out the 36-exposure roll (basically sacrificing 31
unexposed shots to the film gods), as you pop in a new roll of ISO 800. So you crank off 17
shots, and then you're back outside. Whoopsyou've got ISO 800 film in, and it's a sunshiny
day. Time to switch film again (and sacrifice 19 more shots). See where this is going? But
with digital, you can take advantage of on-the-fly ISO switching. You shoot at ISO 200
outside, then walk inside, change the ISO on your camera to 800, and crank out a few more.
Maybe try a few at ISO 400 to see if you can get away with it. Maybe a few shots at 1600 just
for kicks, then you walk out the door and change the ISO back to 200. All without ever
changing film (because, after all, there is no filmwe're digital). Take advantage of this power
to shoot hand-held in low-light situations where a tripod is off limits. For the least noise
possible, we try to shoot at the lowest ISO possible, but when the right situation presents
itself, take advantage of this big digital advantage to "get the shot."
No Penalty Fee for Experimenting
SCOTT KELBY
In the days of traditional film, the only people who could really afford to experiment were
pros (or wealthy amateurs), because both the film and processing cost money, and
experimenting was just thattaking a chance with money. Now, with digital, not only can you
see the results of your experiment instantly (on your LCD monitor), but you can see the full-
size results on your computer, and best of allit doesn't cost a dime. Got a crazy idea? Try it.
Want to shoot a subject from a really wild angle? Do it. Want to try something that's never
been done before? Go for it. Now there's nothing holding you back from trying something
new (except, of course, the intense humiliation that comes with experiencing utter and
complete failure, but there's nothing digital can do to help you deal with that. Well, not yet
anyway).

Don't Cram Too Much on One Card
One thing a lot of pros do to help avoid disaster is to not try to cram all their photos on one
huge memory card, especially when shooting for a paying client. Here's why: Let's say you're
shooting a wedding and you want to capture everything on one 8-GB card, so you don't have
to switch cards. That's cool, as long as the card doesn't go bad (but sadly my friend, cards do
go badnot often, but it happens. It's a sobering fact of digital photography, but remember
that traditional film can go bad as wellthere is no "never fails" film). So, if you get back to
your studio and find that your 8-gig card took a fatal dive, every photo from that wedding
may be gone forever. You might as well just sit by the phone and wait for their lawyer to call.
That's why many pros avoid the huge-capacity cards, and instead of using one huge 8-GB
card, they use four 2-GB cards. That way, if the unthinkable happens, they only lose one
card, and just one set of photos. With any luck, you can save the job with the 6 GB of photos
you have on the other three cards, and avoid a really harrowing conversation with "the
attorney representing the bride and groom."
Shooting RAW? Leave a Little Room on That Memory Card
A word of warning: If you're shooting in RAW format, don't use up every shot on
your memory card (leave one or two unshot) because you could potentially
corrupt the entire card and lose all your shots. It happens because some RAW
shots take more room on the card than others, but your camera calculates how
many shots are left based on an average size, not actual size. So, don't chance
itleave one or two unshot.

Take Advantage of Poster-Sized Printing
[View full size image]
You don't have to have a large-format printer to output large-format prints, because today
there are loads of professional, reputable color labs that will print stunning, full-color, poster-
sized prints (16x20", 20x30", etc.) for much less than you'd think. In fact, you can use some
of the online services and upload your digital image, and they output and ship right to your
door crisp, wonderful 20x30" poster-sized prints for as little as $23. That's just incredible.
They do all the work, and before you know it, you're holding some amazingly large prints at
amazingly low prices. By the way, the process is so much easier than most people think, and
once you do one, you'll get hooked. So will your clients.

Where to "Go Big!"
Here are a couple of services that I use for large-format prints:
Shutterfly.com (one of the biggest and the best)
Kodak (big prints from a trusted name)
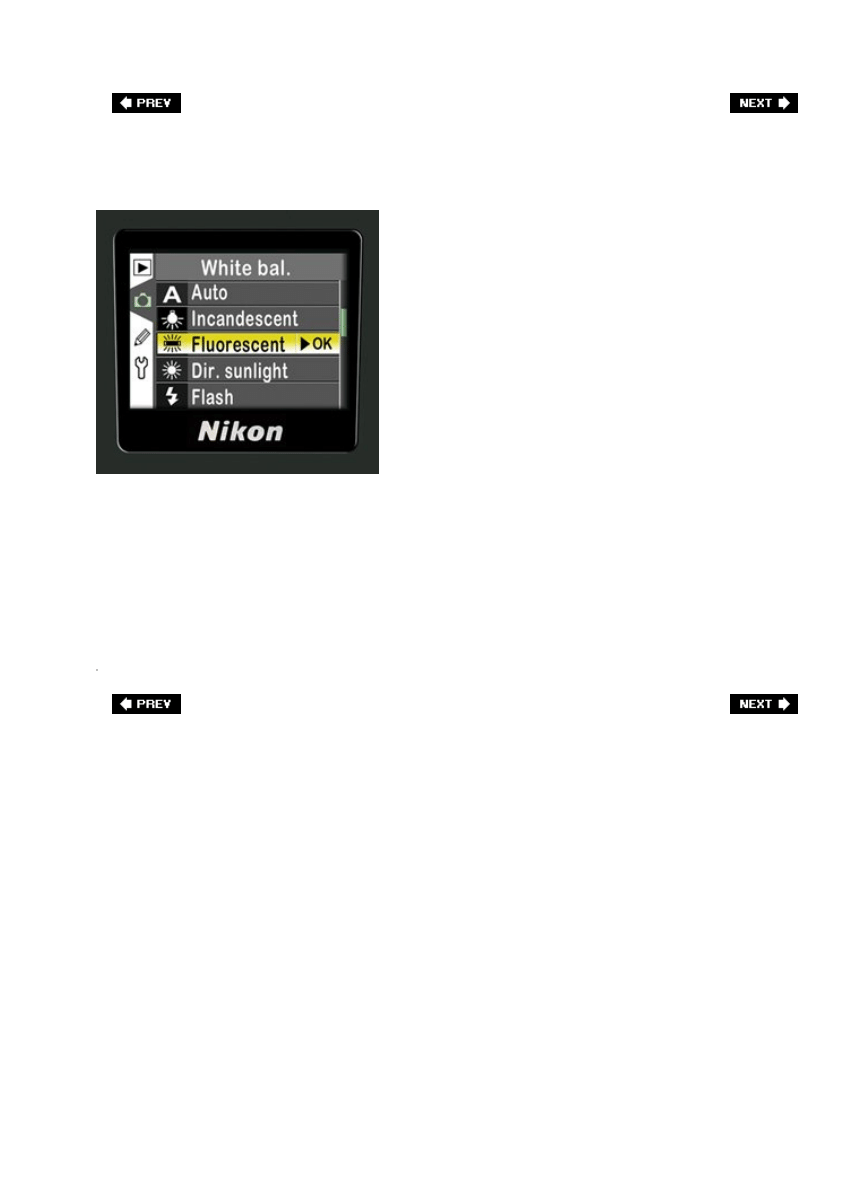
You Can Make One Film Fit All
Here's another advantage digital has over traditional film, and if you take advantage of it,
you'll save yourself loads of time later in Photoshop, and that is to set the right white
balance. In the old days, with traditional film, if you ran into a problem lighting situation (like
shooting under indoor fluorescent lights in an office or retail environment), you had to either
switch to film that was balanced for shooting under fluorescent light or you had to add a
special filter to your lens to off set the color cast created by those lights. Even though today's
digital cameras let you choose a preset white balance for the lighting you're shooting in, most
amateurs just leave their cameras set to Auto White Balance because it's easier. But the pros
know that although they can fix it later in Photoshop, it's easier for them to get the shot right
by changing just one little setting.
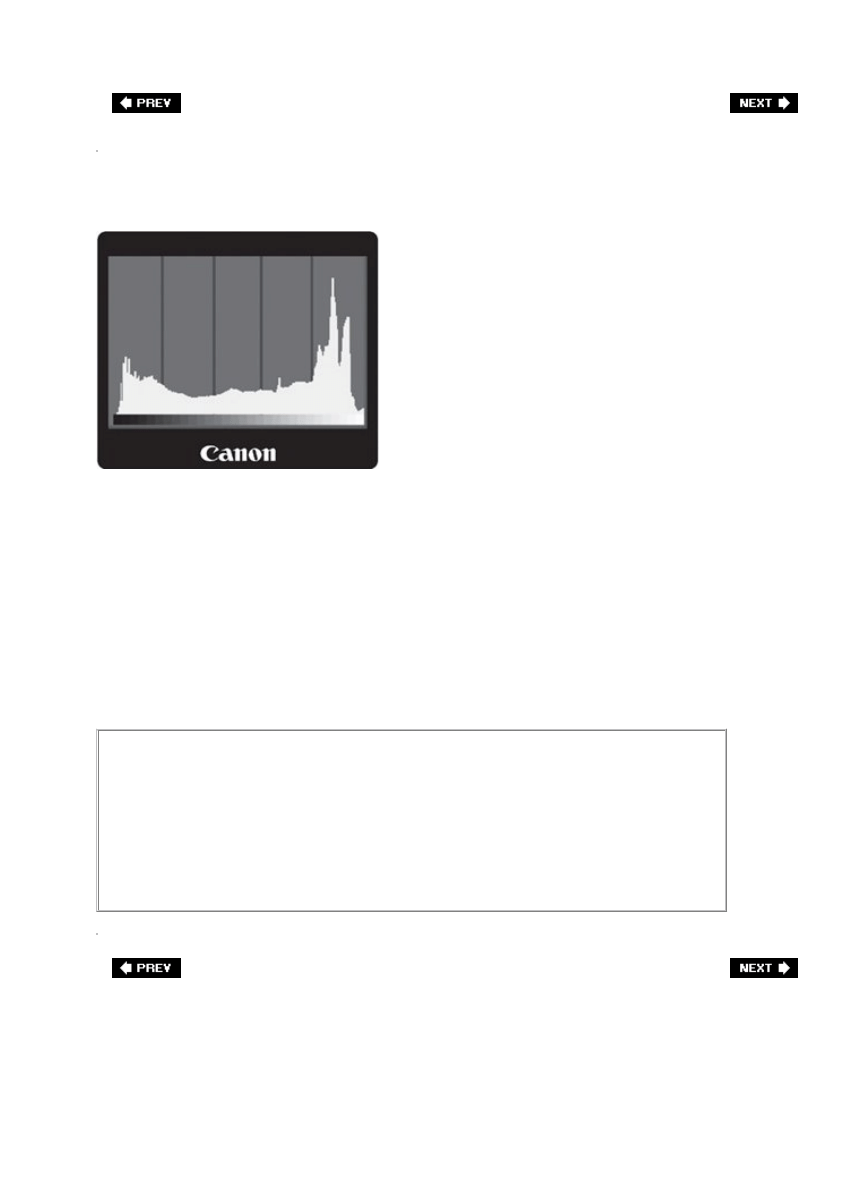
Is It Better to Underexpose or Overexpose?
There have been some theories bouncing around a few of the photography forums on the
Web that claim that you should underexpose by a stop for digital photography. First off, let
me say this: your goal (my goal, our common goal) is to get the proper exposure. That's our
goal. Always. But if that's not possible, if given a choice between overexposing (a photo
that's a bit too light) and underexposing (a photo that's a bit too dark), go with
overexposingyou'll have less noise. That's because noise is most prevalent in the shadows,
and if you have to lighten an underexposed photo, in Photoshop (see tip below) you're
lightening (increasing) the noise in the photo. That's why it's better to shoot lighter
(overexposed), because darkening a photo doesn't increase noise the way lightening it does.
So, if you'd rather have one than the otheroverexpose (but again, or goal is to do neither.
That's why we bought these fancy cameras with their highly advanced metering systems).
What to Use Photoshop For
If you're shooting in RAW, then you're going to use Photoshop to process your
RAW photos, but once you leave Camera Raw and you're in the regular part of
Photoshop, the idea is to use Photoshop to finish your photosnot fix them. You
want to spend your Photoshop time being creative and having fun, not fixing
things you should have done correctly in the camera.

Keep from Accidentally Erasing Memory Cards
This is a small tip, but one that can save your hide when you're out shooting in the field. If
you keep your spare memory cards in a card holder (and for the sake of your cards, I hope
you do), there's a simple routine the pros use to keep track of which cards are full and which
cards are empty and available for quick use. They turn the full cards backwards in the case
(with the labels facing inward), so they can instantly tell which cards are available for use
(the ones with the labels visible) and which ones are full. The next time you're shooting in a
fast-paced environment (like a wedding shoot or a sporting event), you'll be glad you
adopted this system.

Chapter Nine. Taking Travel & City Life
Shots Like a Pro
Tips for Urban Shooting
[View full size image]
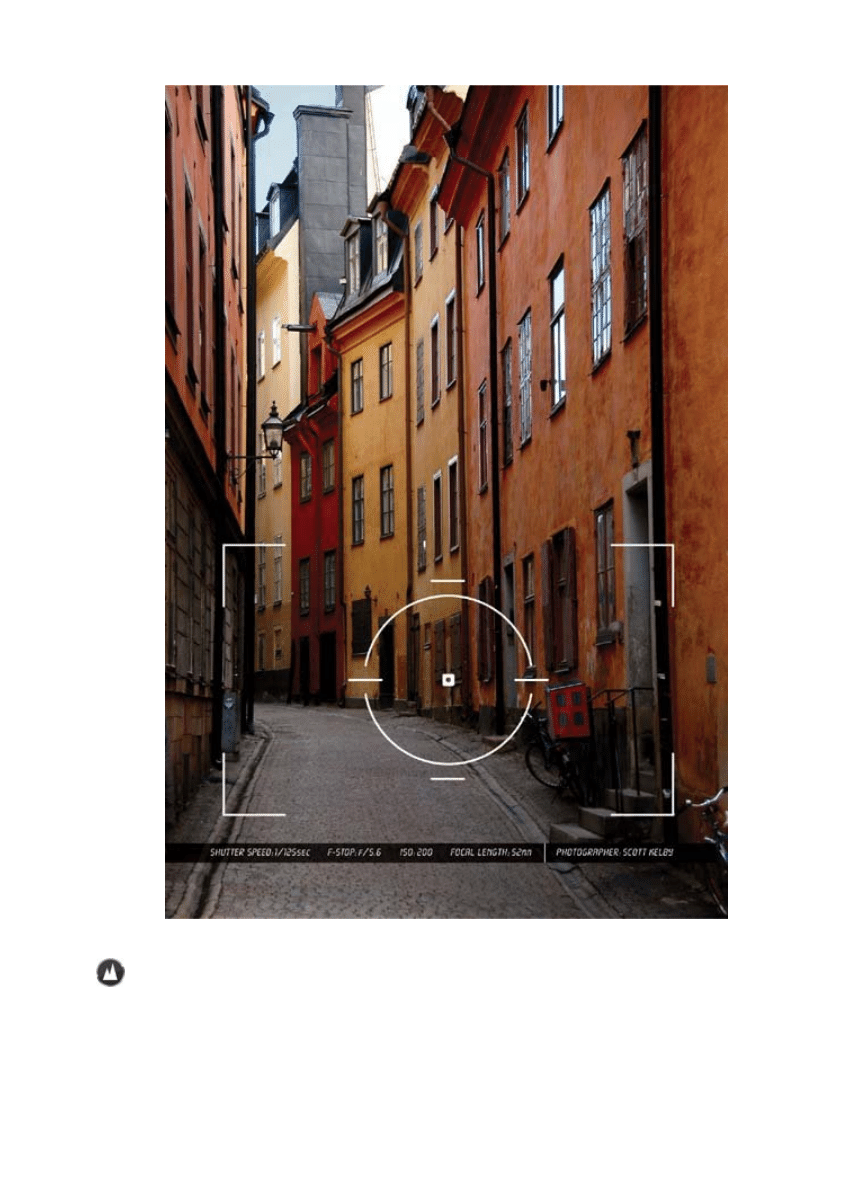
Ya know what there's not a whole lot of? Professional travel photographers. Ya know
why? It's because there are not a whole lot of travel magazines. I mean there's Condé Nast
Traveler , and National Geographic Traveler (one of my personal favorites), and Travel &
Leisure , and well...I'm sure there are a couple more, but the thing is, there's not like a whole
bunch of them. But just because the market's tight for jobs in the professional travel
photographer market, that doesn't mean we don't want to take travel and city life shots like
we're trying to compete, right? Well, that's what this chapter is all abouttips on beating the
living crap out of a couple of those pro travel photographers, so they're in the hospital for a
while so we can snag some of their assignments. It's the law of the jungle, and shooting in
the jungle sounds like fun, except for the fact that some smug pro travel photographer
already has the gig. Or did he just fall (was pushed?) off the side of a mountain in Trinidad

and all his expensive gear went right along with him? What a shame. I wonder who'll cover
that assignment to shoot the sand dunes in Namibia? Hey, what the heckI'll do it (see, that's
the spirit behind this chapterjumping in and taking over when one of your photographic
comrades has a series of unexplained accidents while shooting on location). Hey look, I'm
obviously kidding here, and I'm not actually recommending on any level that you learn the
techniques in this chapter so you'll be ready for a last-minute pro assignment, but
heyaccidents do happen, right?
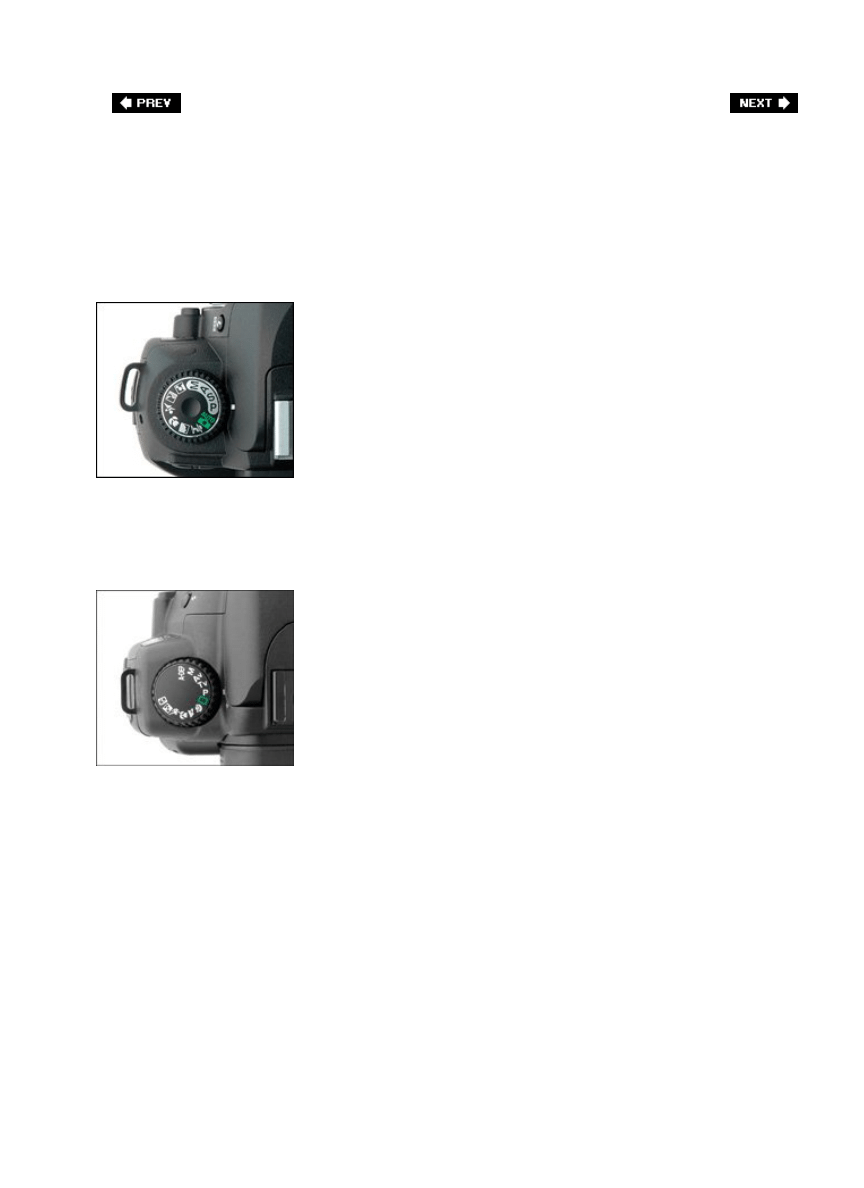
How to Be Ready for "The Shot"
Nikon
Canon
When you're shooting urban (city) or travel photography, you're looking for "the shot." My
buddy Dave calls it "the money shot." You know, that shot where you turn the corner and
something fascinating, amazing, or [insert your own adjective here] happens and you just
happen to be there with a camera to record it. It happened to me in Barcelona when I walked
by an alley and saw a man sitting in the dead center of the alley, facing the alley wall,
reading a book. It was an incredibly compelling photo (so much so that many people have
asked me if it was posed). So, how do you stay ready to catch a photo that just appears on
the scene (or maybe drives by in a car)? You shoot in a mode that lets you concentrate on
one thinggetting the shot. That's right, when you're walking the city streets, you shoot in
program mode. I know, I know, this goes against all sacred rules of professional
photography, except the one that says getting the shot is more important than the mode you
shoot it in. So, switch your digital camera's mode dial to program mode (which sets both the
aperture and shutter speed for you, without popping up the annoying on-camera flash every
two seconds like auto mode does) and get the shot. Now, if you get to a scene that isn't
changing for a few minutes, you can always switch back to aperture priority (or manual)
mode and take creative control of your shot, but for quickly getting the shot as you roam
through the city, there's no more practical mode than program. Note: Nikon's program mode
has a feature called Flexible Program Mode, which lets you change either the shutter speed or
aperture setting while the camera automatically changes the opposite setting to keep the
same exposure. If you don't touch either dial, it does all the work for you. Sweet!

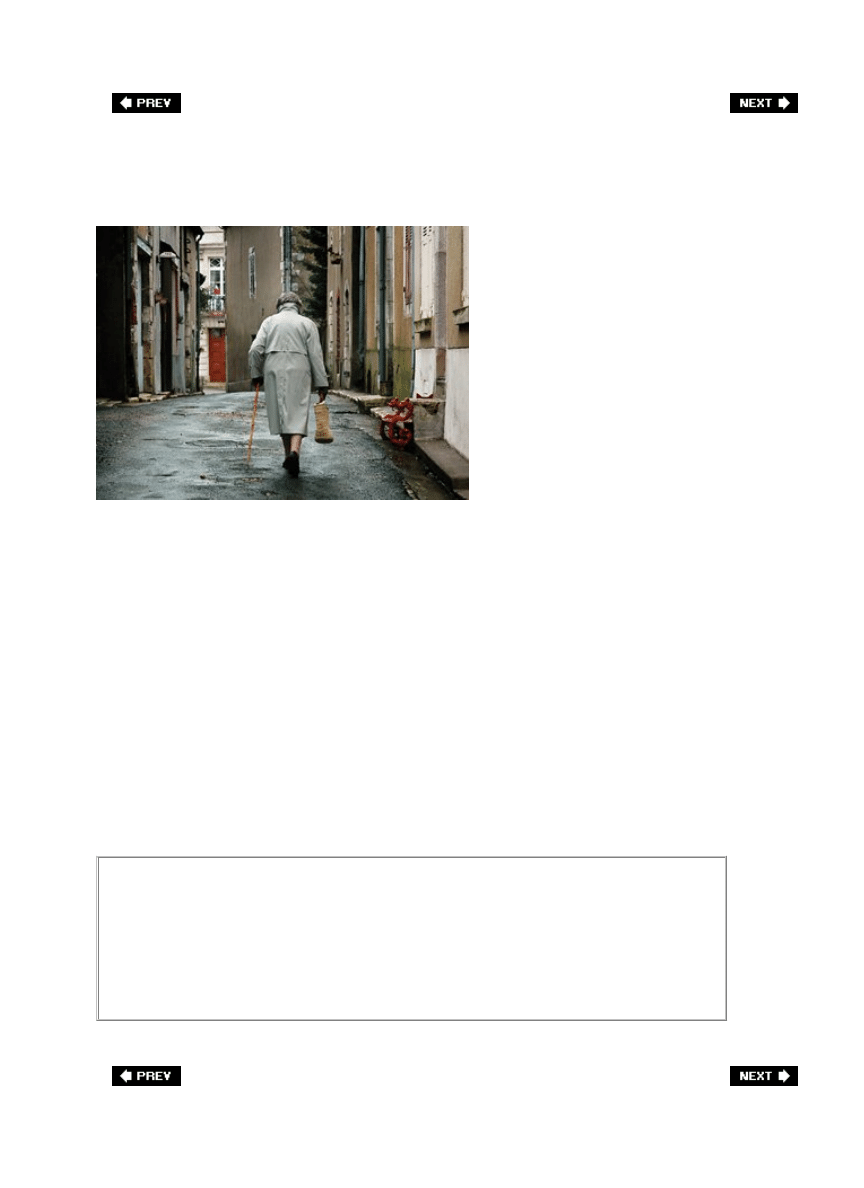
Shoot Kids and Old People. It Can't Miss
SCOTT KELBY
The next time you pick up a travel magazine, take a look at what's in the photos they
publish. I can save you the trouble. Their travel photos have two main people themes: old
people and children. Now, when I say old people, I don't mean people in their late 50s. I
mean really old people, and by that I specifically mean old, wrinkly, craggy-looking women
whose skin looks like shoe leather, and old, hobbly, crusty men with a cane wearing hats that
haven't been washed since the Korean War. As for kids, the younger the better (but skip the
babies). As long as you shoot them on uncomplicated, simple backgrounds, kids make
incredibly compelling additions to your urban and travel pics (that's why the magazines love
them). Also, if you get either age group to pose for you, make sure you spend some time
talking with them before you start shootingit can go a long way toward loosening them up,
which will give you more natural looking poses and expressions (plus, they'll probably let you
shoot longer after you've built up a little rapport).
What Not to Shoot
Okay, so kids and old people are "in." What's out? Crowd shots. They're just
about useless (you won't even put 'em in your own travel album). Shoot an empty
street first thing in the morning, or shoot two people together, but skip the
crowds.
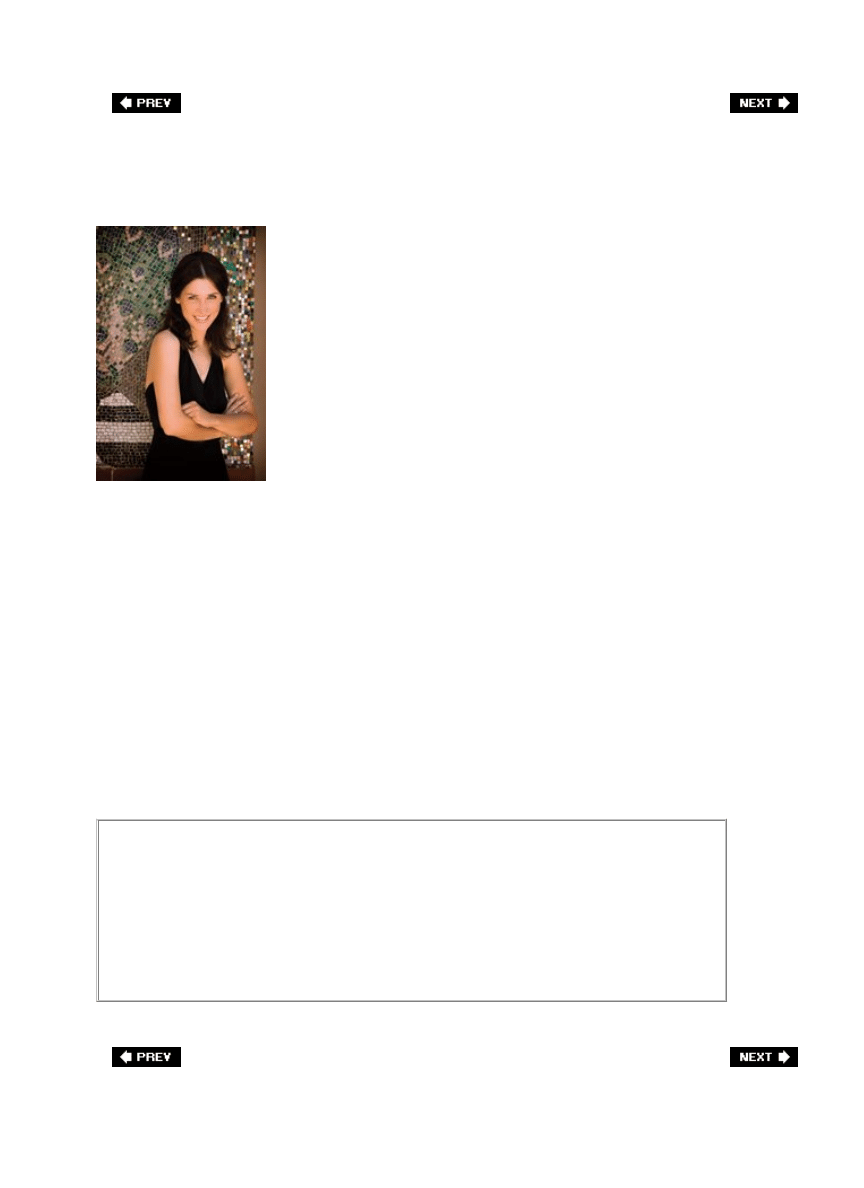
Hire a Model (It's Cheaper Than You'd Think)
SCOTT KELBY
How do the pros get those amazing shots of people in exotic locales? One of their tricks is to
hire a local model (especially if they're shooting to sell the photos to a stock photo agency).
Now, before you turn the page because you think hiring a model is out of your budget, it's
usually cheaper than you'd think (well, unless you were thinking it's really, really cheap).
Here's a real world example: I hired a professional model recently for a shoot out in New
Mexico, and the going rate was $15 per hour, plus I had to provide her prints from the shoot
for her portfolio. Some models new to the business will work for free in exchange for you
making prints for their portfolio (the term for this in the business is TFP, which stands for
"Time For Prints," [they are trading their time for your prints]), so ask your prospective
model if they do TFP. If they look at you and ask, "Does that mean Tampa Free Press?" you
should probably find another model.
Get That Model Release!
If you've hired a model, make absolutely certain that you get your model to sign a
model release, which enables you to use those shots for commercial work. You
can find some sample model releases online (I believe the PPA [Professional
Photographers of America] has downloadable release forms available for its
members), and having one could make all the difference in the world.
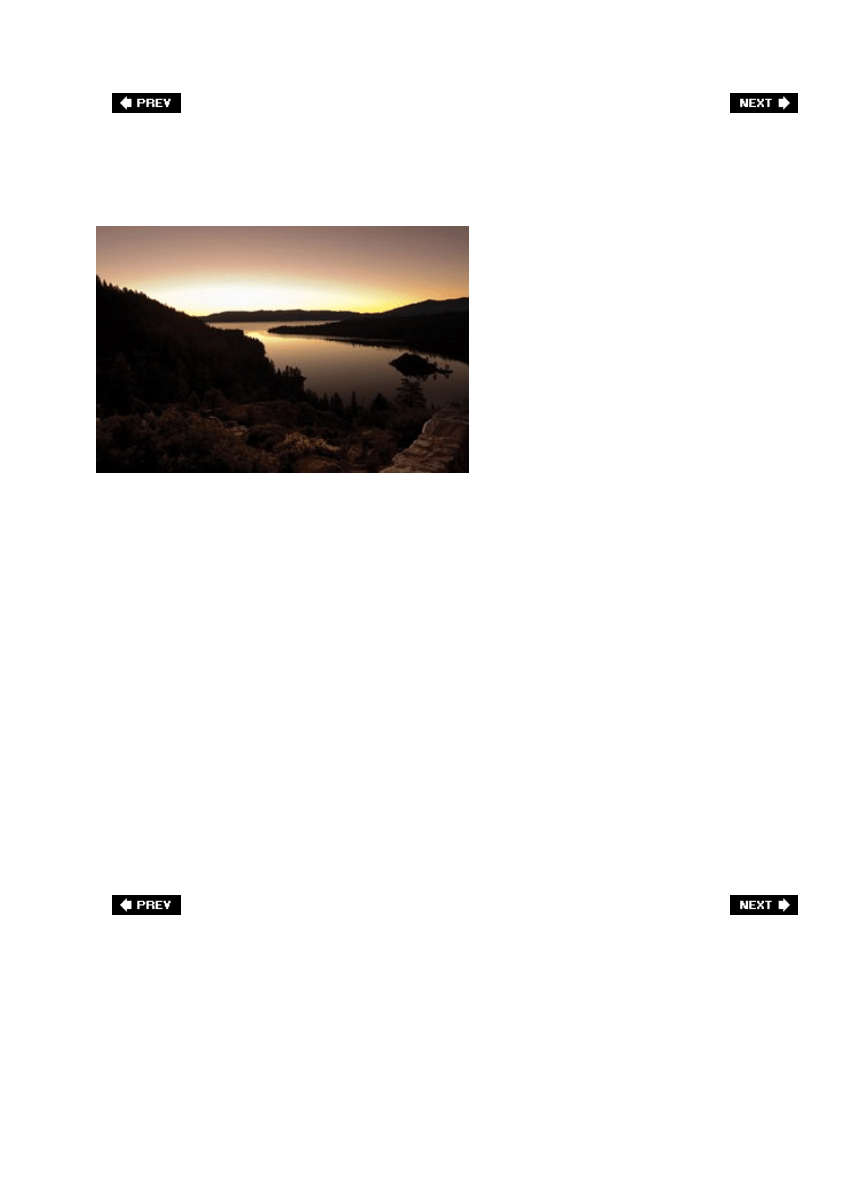
What Time to Shoot
SCOTT KELBY
Many pros prefer to shoot urban and travel shots at dawn for a couple of reasons: (1) the
light is perfect. That's right, the same golden, magical light that looks great for landscape
shots looks great for shooting in the city, too. And (2) the streets are usually empty, so
there's little distraction for your architecture shots, cathedral shots, or charming little streets
and alleys. You only have a limited time to shoot before the sun gets too light in the sky (and
the lighting turns harsh) and the streets start to fill with traffic, so get set up before sunup
and, of course, shoot on a tripod. Another great time to shoot is at dusk. The lighting will
once again be golden, and the only major downside is that the streets won't be empty. There
are still some decent opportunities to shoot urban and people shots during the day, because
cities often have lots of open shade (sometimes courtesy of the tall buildings in downtown
areas). So unlike the landscape photographer, you can often get away with shooting all day,
especially if it's an overcast or cloudy day (remember, if the sky is gray, try to avoid
including much sky in your photos). Afternoon is a perfect time to shoot charming doorways
(in the shade), windows, kids playing in the parkpretty much anything you can find in decent
open shade. So, to recap: the best time is probably morning. Second best is dusk, but you
can still get away with shooting in open shade during the day, and there's often plenty of it,
so fire away (so to speak).
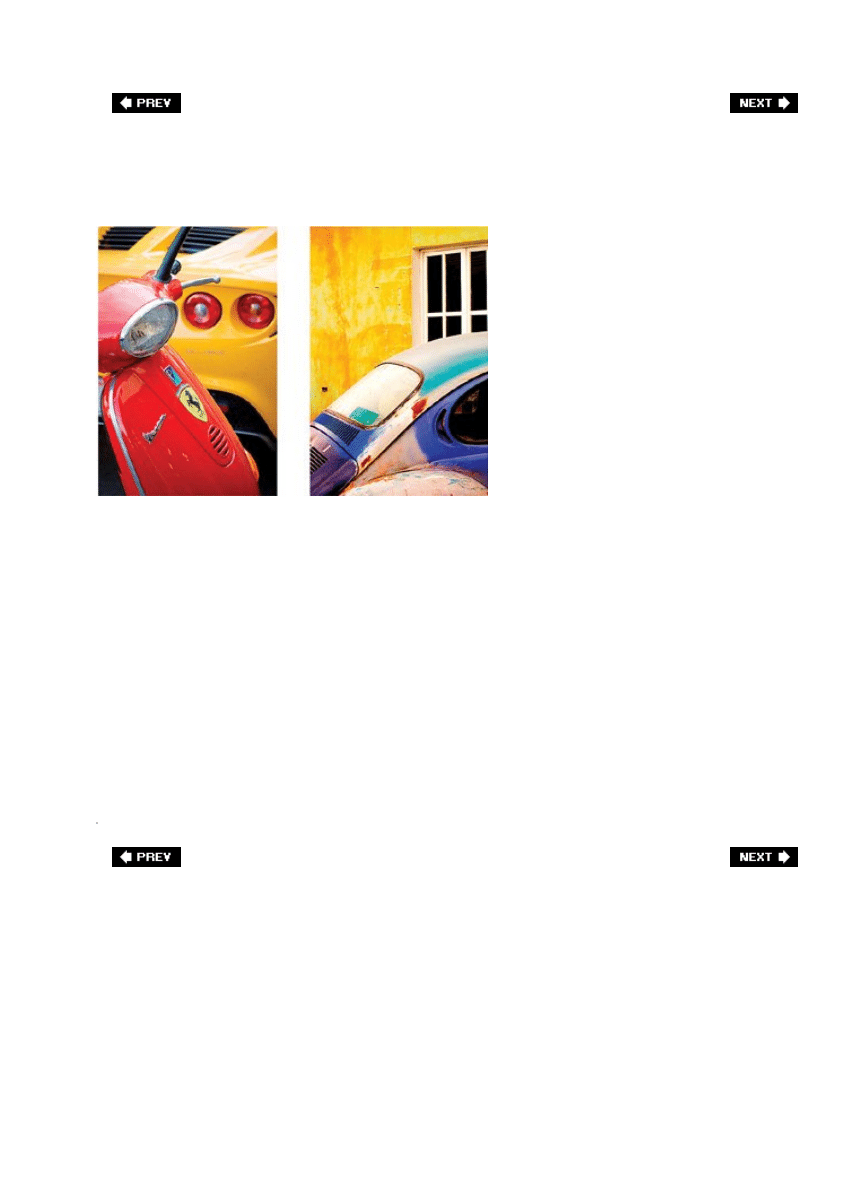
Look for Bold, Vivid Colors
SCOTT KELBY
One of the things to keep an eye out for when you're shooting urban and travel shots are the
bold, vivid colors of the city. You'll often find brilliantly colored walls, doors, (shots with a
bold-color wall with a contrasting colored door), shops, signs, cars, and bikes. One of my
favorite urban shots was of a bright red Vespa scooter parked directly behind a bright yellow
Lotus sports car. It almost looked set up for me, and I took dozens of shots of it because the
colors were just so vivid, and so perfectly matched. Keep your eyes peeled for brightly
painted walls (especially wonderful if you find someone working in front of the wall, or
waiting patiently for a bus with the colorful wall in the background, or a bright yellow car
parked in front of a bright blue wall). If you're looking for these colorful combinations while
you're out exploring, you'll be surprised at how often they'll reveal themselves to you. By the
way, I know I'm beating a dead horse here, but these colors will look richer and have more
depth in (you guessed it) great light, which generally occurs (you know it) around dawn and
dusk. Just remember, the next best thing to those two is open shade.

Shooting Travel? Visit PhotoSecrets.com First
[View full size image]
If you're looking to find the shots everybody else misses (in other words, you don't want
shots that are too touristy), before you leave on your trip visit PhotoSecrets.com. This site is
a big help because they list, city by city, some of the best locations to get "the shot." Best of
all, they give you photo examples of the shots you can take from each location, so you can
see before you go if it's the kind of shot you're looking to get. Although the site is primarily to
promote their complete list of books on the topic, they do share a number of great shoot
locations and photos on the site, so it's definitely worth a look to see if they have some free
tips on the city you're heading for.

Don't Try to Capture It All: Shoot the Details
SCOTT KELBY
I've heard a lot of photographers complain about the results of their urban shooting, and
much of the time it's because they try to capture too much. What I mean by that is that they
try to capture the entirety of a majestic building or the grandeur of a magnificent cathedral,
but even with an ultra-wide-angle lens this is very, very hard to pull off. That's why the pros
shoot details instead. For example, instead of shooting to capture the entire cathedral at
Notre Dame in Paris, instead capture details that suggest the wholeshoot the doors, a
window, a spire, a gargoyle, the pigeons gathered on the steps, or an interesting
architectural element of the church, rather than trying to capture the entire structure at once.
Let your photo suggest the height, or suggest the craftsmanship, and the mind's eye will fill
in the blanks. By shooting just the details, you can engage in some very compelling
storytelling, where a piece is often stronger than the whole. After all, if you want a photo of
the entire cathedral, you can just buy one from the dozen or so gift shops just steps away.
Instead, show your impression, your view, and your take on Notre Dame. Give this a try the
next time you're out shooting in a city and see if you're not infinitely more pleased with your
results.
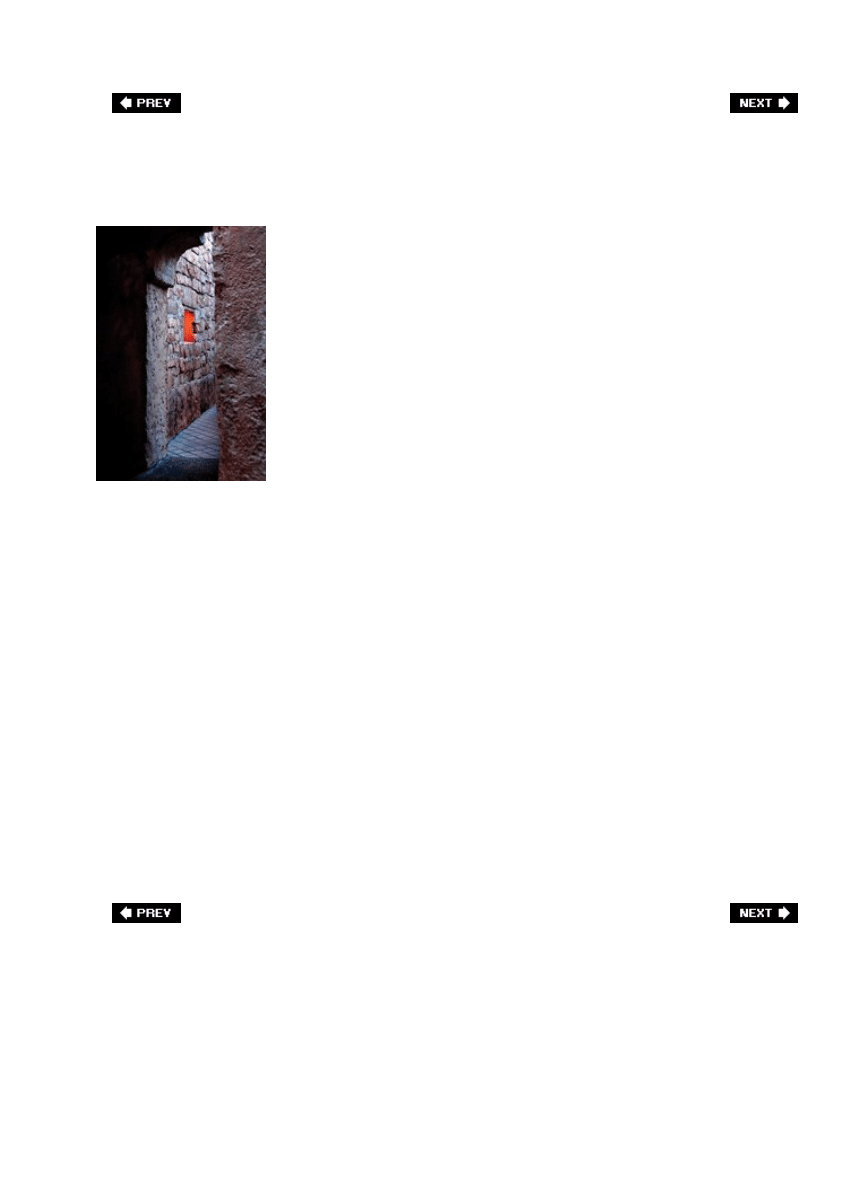
The Best Shot May Be Just Three Feet Away
SCOTT KELBY
My good friend Bill Fortney said it best, "The biggest impediment to photographers getting
great shots is the fact that they don't move. The best shot, the best view, and the best angle
is sometimes just 3 feet from where they're standingbut they just don't movethey walk up,
set up, and start shooting." It's so true (that's why I also made reference to this non-moving
phenomenon in the landscape chapter). Once you find that fascinating detail, that vividly
colored wall, that unique scenewalk around. Be on the lookout for other more interesting
views of your subject and shoot it from there as well. Besides just moving left and right, you
can present a different view by simply changing your shooting height: stand on a chair, squat
down, lie on the ground and shoot up, climb up a flight of stairs and shoot down on the
scene, etc. Remember, the best shot of your entire trip may be waiting there just 3 feet to
your left (or 3 feet up). Note: The shot shown above is proof of this concept. It was taken in
Morocco. Well, Disney's version of it anyway (at Disney's Epcot Center in Florida). If you were
to walk 3 feet to the left (which is the shot I saw first), you'd see an outdoor courtyard full of
park visitors eating dinner. But when I stepped 3 feet to the right, it hid the baskets of food
and Coca-Cola cups and gave me this more authentic-looking view. By the way, that orange
light through the open window is coming from a Disney gift shop. Another few feet to the
right, and you'd see some stuffed Mickey Mouse dolls.

Shoot the Signs. You'll Thank Yourself Later
SCOTT KELBY
Want to save yourself from a lot of headaches? When you're out shooting a cathedral, or a
stadium, or a building, etc., take one extra shotshoot the sign. That's right, later on you may
be scrambling to find out the name of that amazing church you shot, and without a lot of
research, you may be out of luck. That is, unless you took a shot of the sign that has the
name of the church (or building, bridge, etc.). This has saved me on more than one occasion,
and if you ever wind up selling the photos, you will absolutely need this info (stock agencies
generally won't accept "Pretty Church in Cologne" as a saleable name for an image). Shoot
the sign and you'll thank yourself later.
Tripod Wisdom
When it comes to tripods, it's like my buddy Bill Fortney says, "There are two
types of tripods: those that are easy to carry and good ones." Even with the
advent of carbon fiber, if your tripod feels really lightweight, it's a lightweight.
Spend the extra money and get a kick-butt tripodyou'll never regret it.
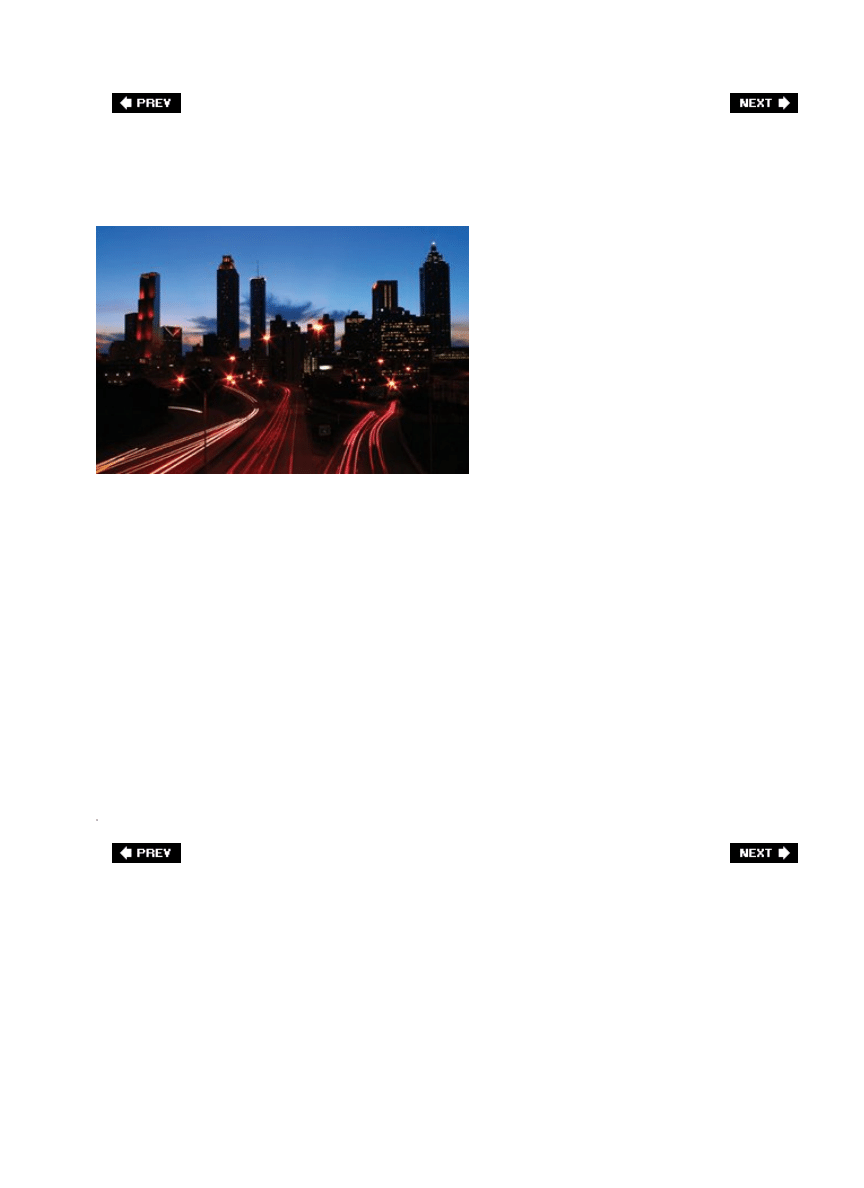
Showing Movement in the City
©ISTOCKPHOTO/TODD SMITH
If you want to show the hustle and bustle of a busy city, there's a simple trick that will do
just thatslow down your shutter speed and let the people and traffic create motion trails
within your image. It's easy (as long as you've got a tripod, which is absolutely required for
this effect)just switch your camera's mode to shutter priority and set the shutter speed at
either 1/16, 1/8, or 1/4 of a second (you can go longer if you have low enough light that it
doesn't blow the highlights out in your photo). Then press the shutter, stand back, and in less
than a second the motion of the city will reveal itself as the buildings, statues, lights, and
signs stay still, but everything else has motion trails around it. If you're shooting at night,
you can really have a blast with motion. Try to find a high vantage point (like from a hotel
room window, or on a bridge, etc.) where you have a good view of traffic. Then put your
camera on a tripod (an absolute must for this effect to work), go to shutter priority mode, set
your exposure to 30 seconds, and take a shot. Thirty seconds later, you'll see long laser-like
streaks of red lines (taillights and brake lights) and white lines (from the headlights), and
you'll have an amazingly cool image that most folks won't get.
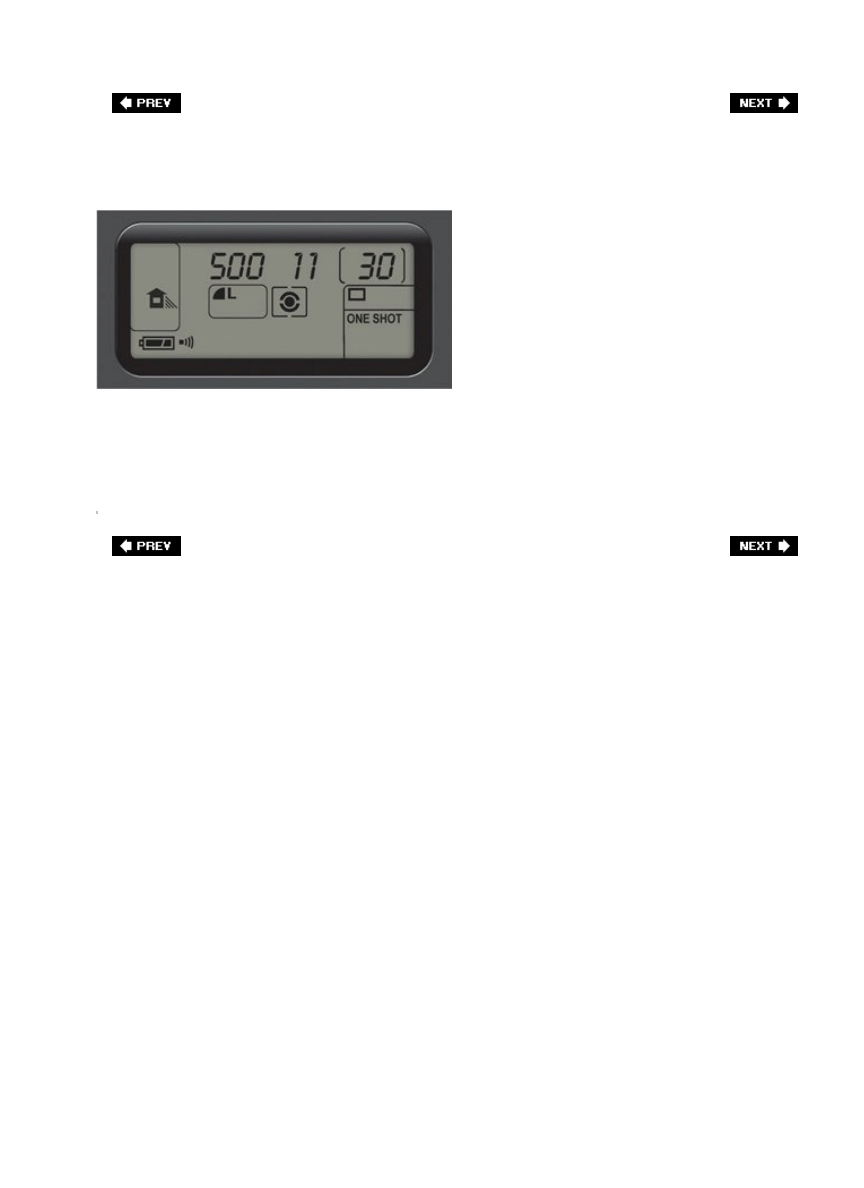
Use an Aperture That Takes It All In
When you're shooting in a city, unless you're shooting an object close up (where you
intentionally want the background out of focus), chances are you want as much of the city in
focus as possible, right? That's why an f-stop like f/11 works great in a city. It keeps pretty
much everything in focus, as long as you don't set your focus on the closest thing in the
framethe rule of thumb is to focus on something about 1/3 of the way into the scene you're
trying to capture.
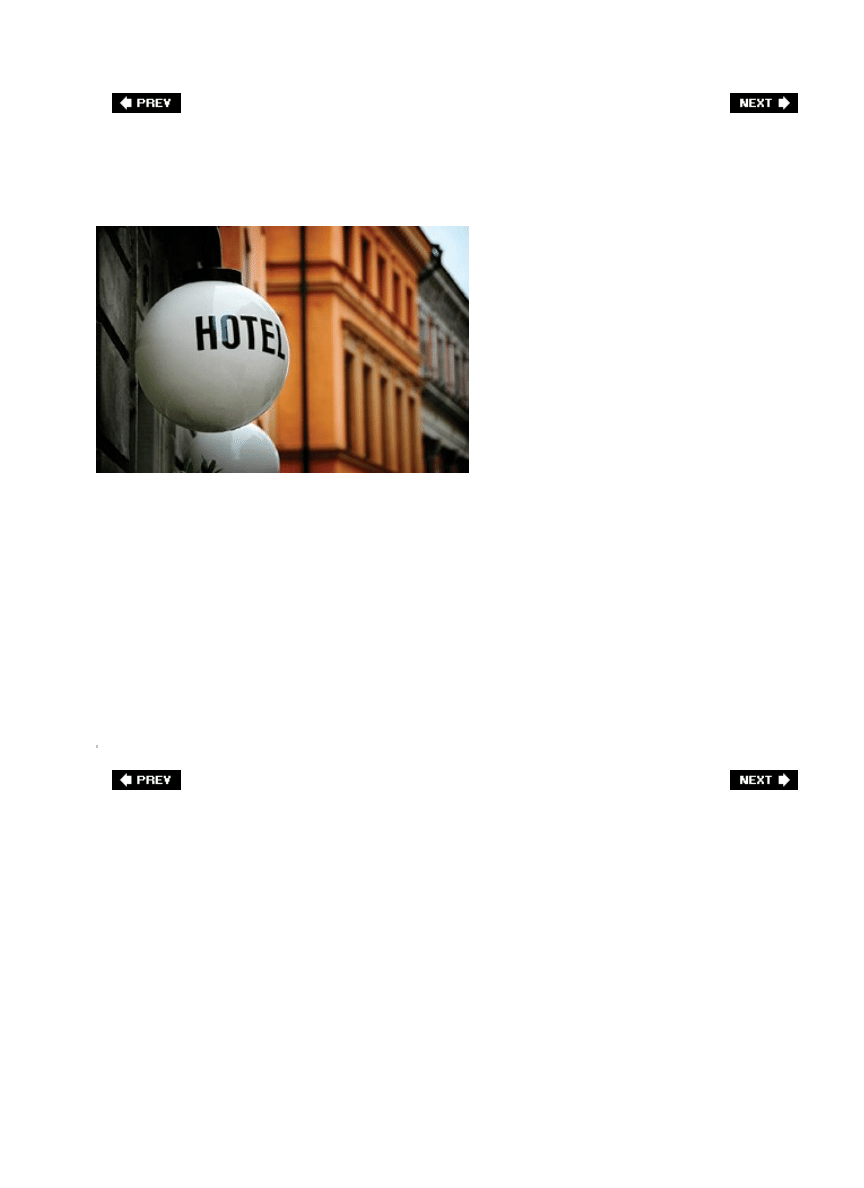
For Maximum Impact, Look for Simplicity
SCOTT KELBY
The single thing that probably kills more properly exposed city life photographs than
anything else is clutterall the distracting background items, foreground items, and just
general stuff that gets in the way. So, one of the big secrets to creating powerful and
dramatic urban and travel shots is to strive for simplicity. Look for simplicity in your
backgrounds, in your people shots, in your architectural elements, in every aspectthe simpler
the surroundings, the more powerful the impact. Go out shooting with that very goal in mind.
Look for the absence of distraction. Look for the absence of clutter and noise, watch for
distracting elements that sneak into the top and sides of your frame, and create some photos
that have great impactnot because of what they have, but because of what they don't
havelots of junk.
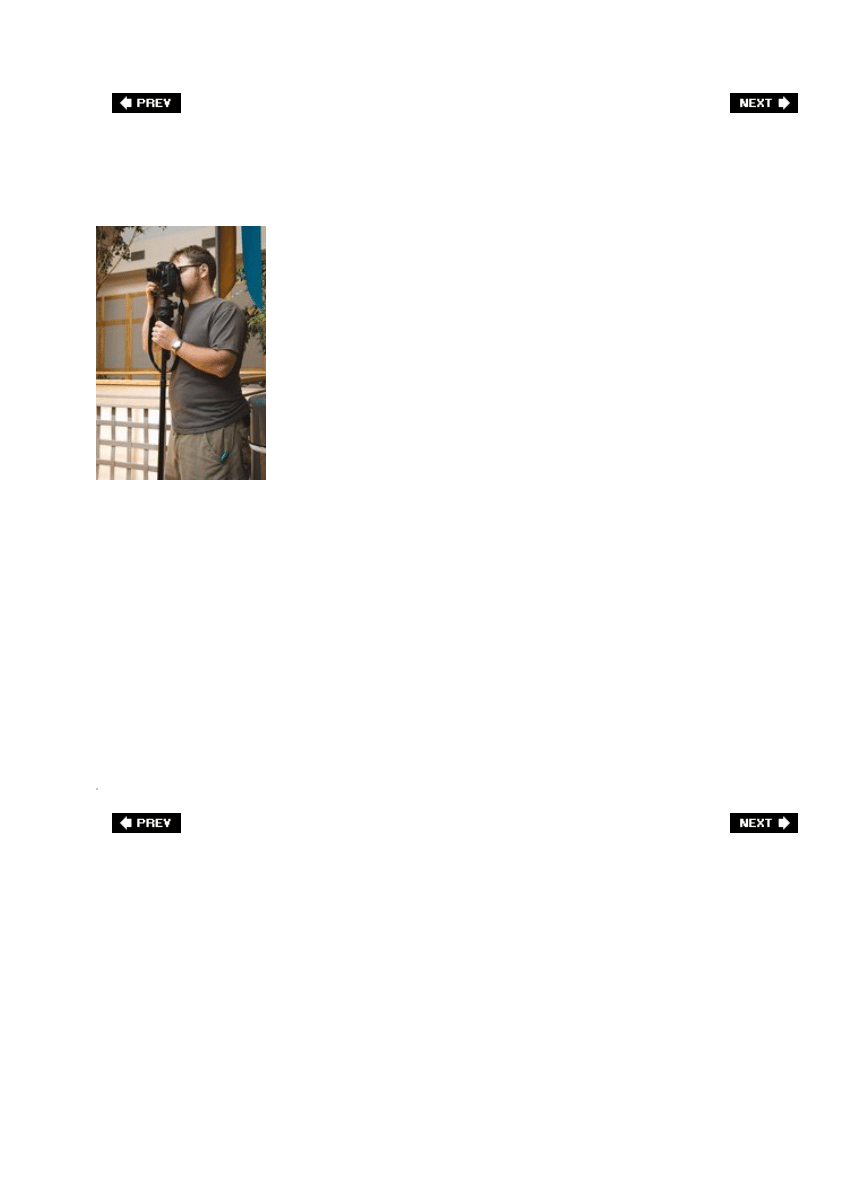
The Monopod Scam
SCOTT KELBY
Now, a lot of places simply won't let you set up a tripod indoors (for example, try to set up a
tripod in someplace like Grand Central Station. You can count the seconds before security
arrives). However, here's the weird thing: while many places have a strict policy on tripods,
they don't have a policy on monopods (a one-legged version of a tripod, often used for long-
lens sports photography. Although they're not quite as stable as a good tripod, they're way
more stable than hand-holding). So, the scam is this: if they say anything to you about
shooting on a monopod, you can always counter with, "Hey, this isn't a tripod." It often stops
them dead in their tracks. One reason they let you get away with a monopod is simply
because they don't take up much space, and since there are no extended legs, there's
nothing really for anyone to trip on (a concern for many building interiors, museums, etc.).
So, if you know the indoor environment you're planning to shoot doesn't allow tripods, see if
you can pull the old monopod scam. My guess isyou'll float right by 'em.

What to Do When It's Been "Shot to Death"
©ISTOCKPHOTO/ARKADIUSZ LATKO
So, you're standing in front of the Eiffel Tower (or the Lincoln Memorial, or the Golden Gate
Bridge, etc.any touristy landmark that's been shot to death). You know you have to shoot it
(if you go to Paris and don't come back with at least one shot of the Eiffel Tower, friends and
family members may beat you within an inch of your life with their bare hands), but you
know it's been shot to death. There are a million postcards with the shot you're about to take.
So what do you do to show your touristy landmark in a different way? Of course, the obvious
thing (you'll find in every photography book) is to shoot it from a different angle. Frankly, I'd
like to see an angle of the Eiffel Tower that hasn't been shot. But since, in many cases, that
angle just doesn't exist, what do you do next? Try thisshoot the landmark in weather it's not
normally seen in. That's rightshoot it when nobody else would want to shoot it. Shoot it in a
storm, shoot it when it's covered in snow, shoot it when a storm is clearing, shoot it when the
sky is just plain weird. Since the landmark doesn't change, shoot it when its surroundings are
changing to get that shot that you just don't see every day. Here's another idea: Try shooting
it from a difficult place to shoot from (in other words, shoot it from some view or vantage
point that would be too much bother for most folks to consider. Find that "pain in the butt"
viewpoint, and chances are you'll pretty much be shooting it there alone). Hey, it's worth a
shot. (Get it? Worth a shot? Ah, forget it.)

Including the Moon and Keeping Detail
©ISTOCKPHOTO
This sounds like it would be easya nighttime city skyline with a crisp detailed moon in the
background, but most people wind up with a totally overexposed bright white circle, rather
than the detailed moon shot they were hoping for. That's because it's just about impossible to
get both the city (which takes a long exposure) and a detailed shot of the moon (which takes
a very short exposure because it's actually quite bright) in the same shot. So, what
photographers have been doing for years is creating multiple exposures (two images
captured in the same frame). Now, there are some digital cameras today that let you create
double exposures, but it's just as easy to take two separate photosone of the city, one of the
moonand combine them later in Photoshop. First, start with your nighttime city skyline. Use a
wide-angle lens (maybe an 18mm or 24mm), put your camera on a tripod (an absolute
must), set your camera to aperture priority mode, choose f/11 as your f-stop, and your
camera will choose the shutter speed for you (which may be as little as 20 or 30 seconds or
as long as several minutes, depending on how dark the city is), then take the city skyline
shot. Now switch to your longest telephoto (or zoom) lens (ideally 200mm or more). Switch
to full manual mode, and set your aperture to f/11 and your shutter speed to 1/250 of a
second. Zoom in as tight as you can get on the moon, so there's nothing but black sky and
moon in your shot (this is criticalno clouds, buildings, etc.), then take the shot. Now add the
moon to your city skyline in Adobe Photoshop (visit
www.scottkelbybooks.com/moon
to see
my step-by-step Photoshop tutorial on how to do this).

Shooting Fireworks
©ISTOCKPHOTO/PHILIPPE MAITZ
This is another one that throws a lot of people (one of my best friends, who didn't get a
single crisp fireworks shot on the Fourth of July, made me include this tip just for him and the
thousands of other digital shooters that share his pain). For starters, you'll need to shoot
fireworks with your camera on a tripod, because you're going to need a slow enough shutter
speed to capture the falling light trails, which is what you're really after. Also, this is where
using a cable release really pays off, because you'll need to see the rocket's trajectory to
know when to push the shutter buttonif you're looking in the viewfinder instead, it will be
more of a hit or miss proposition. Next, use a zoom lens (ideally a 200mm or more) so you
can get in tight and capture just the fireworks themselves. If you want fireworks and the
background (like fireworks over Cinderella's Castle at Disney World), then use a wider lens.
Now, I recommend shooting in full manual mode, because you just set two settings and
you're good to go: (1) set the shutter speed to 4 seconds, and (2) set the aperture to f/11.
Fire a test shot and look in the LCD monitor to see if you like the results. If it overexposes,
lower the shutter speed to 3 seconds, then check the results again. Tip: If your camera has
bulb mode (where the shutter stays open as long as you hold the shutter release button
down), this works greathold the shutter button down when the rocket bursts, then release
when the light trails start to fade. (By the way, most Canon and Nikon digital SLRs have bulb
mode.) The rest is timingbecause now you've got the exposure and sharpness covered.

Chapter Ten. How to Print Like a Pro and
Other Cool Stuff
After All, It's All About the Print!
[View full size image]
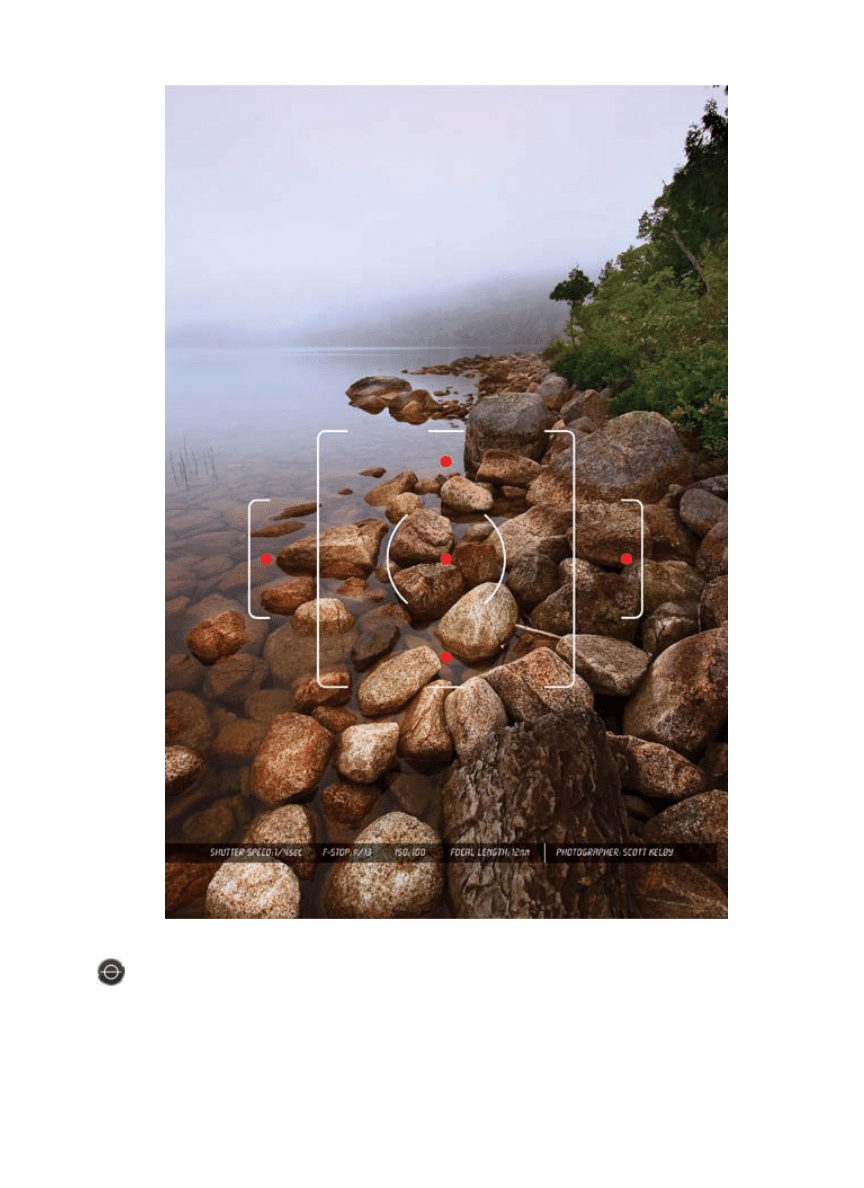
This is a great chapter to read if you're a doctor, because you're going to want a great
printer, and you're going to want big prints (at least 13x19", right?), and that means you're
probably going to need to spend some money, and nobody spends money like doctors. Ya
know why? It's because people always get sick or get hurt. Why just the other day this
photographer was in Trinidad shooting and the next thing you know he tumbles down this
hillside and winds up in the hospital (I know that last sentence made it sound like he finally
stopped tumbling when he hit the wall of the hospital, but that was misleadinghe actually
was stopped by hitting a large llama grazing at the bottom of the hill, but luckily it was a
pretty sharp llama, and she was able to summon an ambulance for him, but not before the
llama put all his camera gear on eBay. Hey, I said she was pretty sharp). Anyway, who do
you think is going to show up at the hospital to help this unfortunate accident victim? That's

righta doctor. And is this doctor going to fix this photographer for free? I doubt it. The doctor
is going to get paid handsomely from the insurance carrier that covers the travel
photographer. So what's this doctor going to do with the money? He's going to go on eBay
and get a great deal on some camera gear. He'll probably save thousands. Now, what's he
going to do with the savings? Buy a 13x19" printer. See, this is the wonder of market-driven
economies and why we should all sell our camera equipment and go to medical school,
because within a few years we'll all be able to buy some really nice gear.
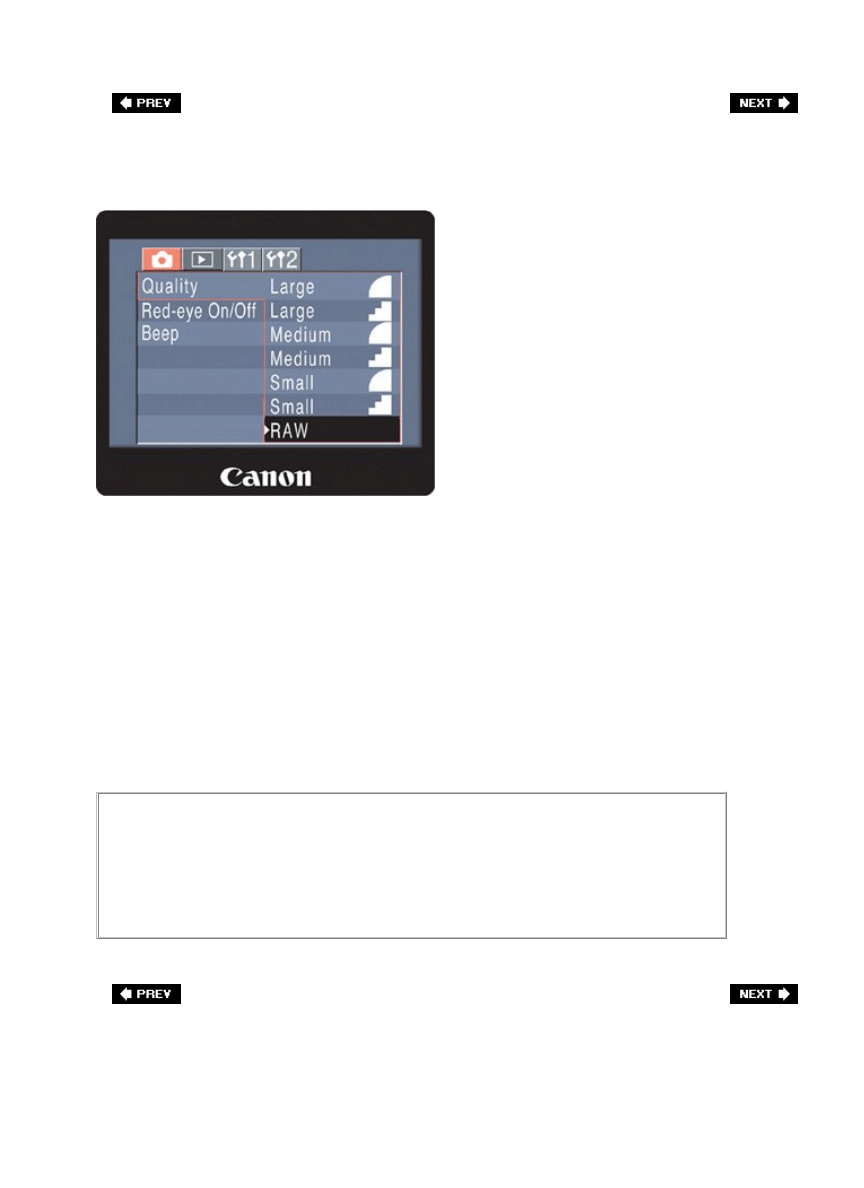
The Advantages of Shooting in RAW
I've mentioned shooting in RAW several times in the book, but I haven't talked that much
about it. RAW is an image quality mode, and most professionals today agree that RAW gives
you two big advantages over the JPEG-quality images: (1) it provides the highest possible
image quality because the photos are not compressed (JPEG files are compressed to a
smaller file size by throwing away some of the original data), and (2) the images are just as
they were captured by your camera's sensors, and no in-camera processing is done (when
you shoot JPEGs your camera actually does some color correction, sharpening, etc., to make
the JPEGs look good). When you shoot in RAW, your camera doesn't do any of this automatic
correctionyou get to do it yourself (including making white balance, exposure, shadow, and
other decisions after the shot has been taken) either in Adobe Photoshop or in your camera
manufacturer's RAW processing software. Pros love the control this gives them because they
can process (and experiment with) RAW images themselves, and best of all they never
damage the original (the RAW digital negative).
The Downside of Shooting in RAW
There are really only two: (1) RAW files are larger in size, so you'll fit about 1/3
fewer photos on your memory card, and (2) since RAW files are much larger in
file size, it takes longer to do any editing with them in Photoshop.
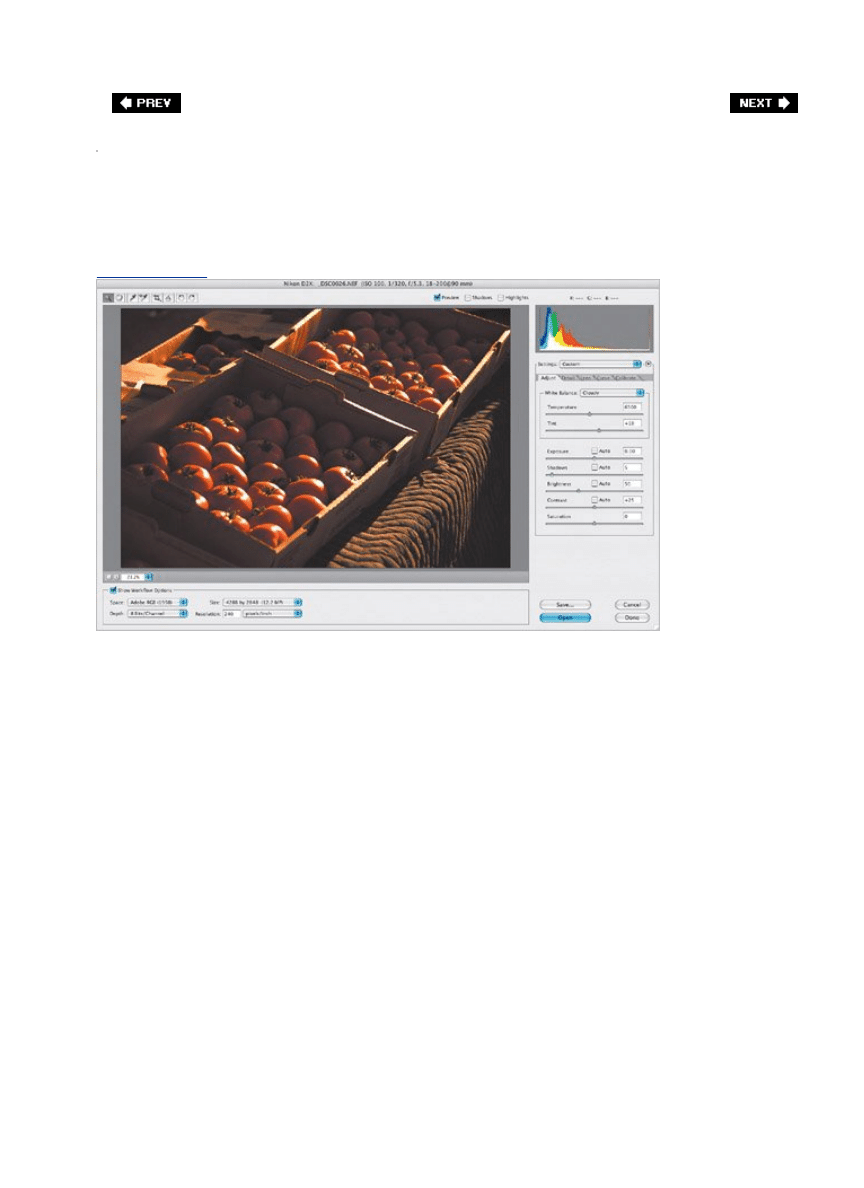
How to Process RAW Photos in Photoshop
[View full size image]
SCOTT KELBY
Once you import RAW photos onto your computer, if you open them in Adobe Photoshop, a
totally different dialog appears (like the one shown above). This is a RAW processing window
called Adobe Camera Raw, and it was developed by Thomas Knoll, the same man who
originally developed Adobe Photoshop in the first place. Adobe Camera Raw is pretty
brilliantly designed. It lets you simply and easily process your RAW photo by choosing
whichever white balance setting you'd like, and by choosing your exposure, shadow, and
midtone settings, along with about a dozen or more other adjustments, so you can tweak
your photo just the way you want to (and even fix exposure and lens problems) before you
enter regular Photoshop for retouching and finishing touches. And best of allit never changes
your original RAW photo, so you can always create new prints from your digital negative
anytime you want. Don't forgetthis special dialog only appears when you set your camera to
shoot in RAW quality mode.

Where to Learn More About RAW
If you want to learn more about processing your RAW photos in Adobe Photoshop,
I have three suggestions: (1) Ben Willmore's Photoshop Training DVD called
Photoshop CS2 Mastering Camera Raw , from
www.photoshopvideos.com
, (2) my
book, The Photoshop Book for Digital Photographers
, which has an entire chapter
on processing RAW images step by step, or (3) Bruce Fraser's book, Real World
Camera Raw .
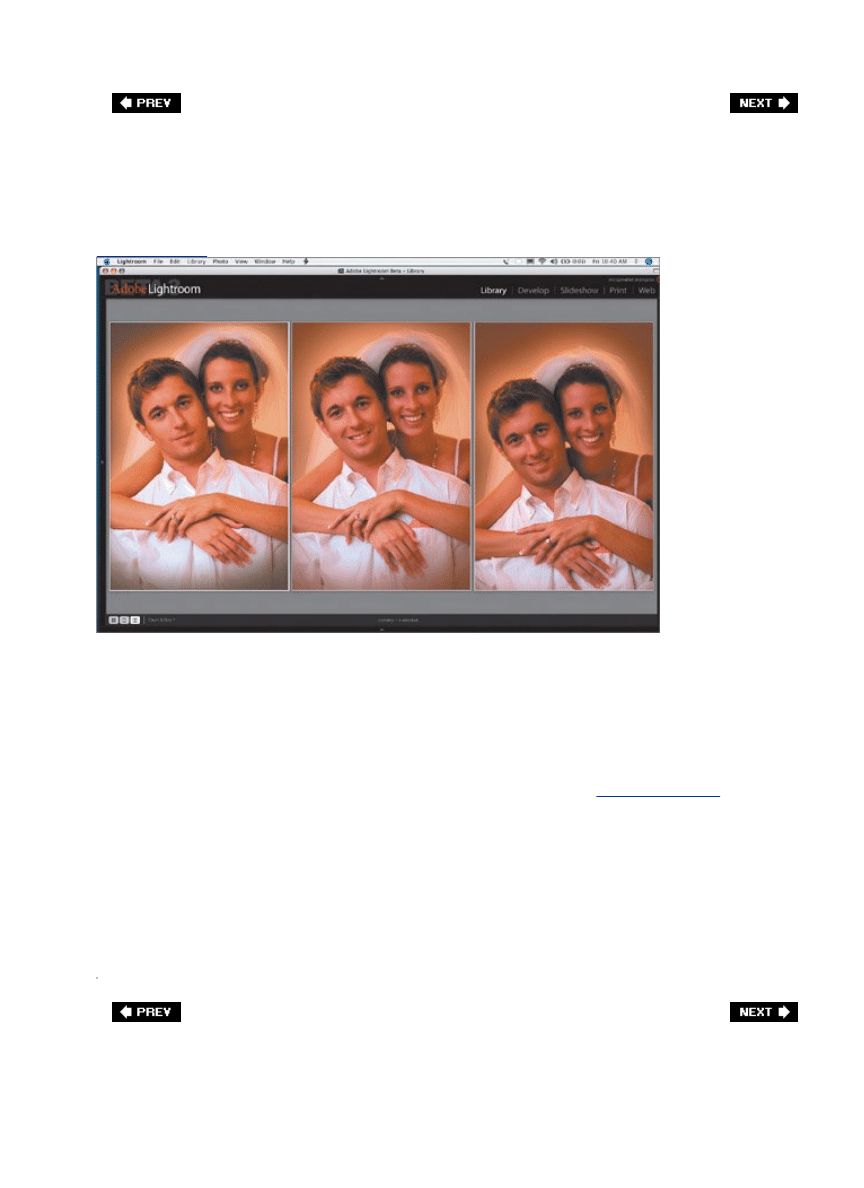
Compare Your LCD to Your Computer Monitor
[View full size image]
SCOTT KELBY
Once you've filled up a memory card with photos from your latest shoot, go ahead and open
them on your computer in whatever software package you use to view and organize your
photos (I use Adobe Lightroom, which is a new software application from Adobe especially
designed for professional photographers. You can find out more at
www.adobe.com
), and
then keep your camera nearby. Once you've got your photos opened on your computer, grab
your camera and start comparing how the photos on your camera's LCD monitor look
compared to the photos you're now seeing on your computer screen. This will give you a
quick idea of how close your digital camera's LCD monitor is to what reality is, and that can
be a big help when you're out shooting. For example, if you learn that your LCD makes
everything look cooler than it really is on your computer screen (where you'll ultimately be
editing your photos), then you know you don't have to worry about adding a warming filter to
your lens to warm up your photos. If the LCD is too dark (compared to your computer screen
and/or printer), then you know you need to shoot a little lighter for reality. Try this and you'll
be amazed at how knowing how "true" your LCD is can improve your photography.
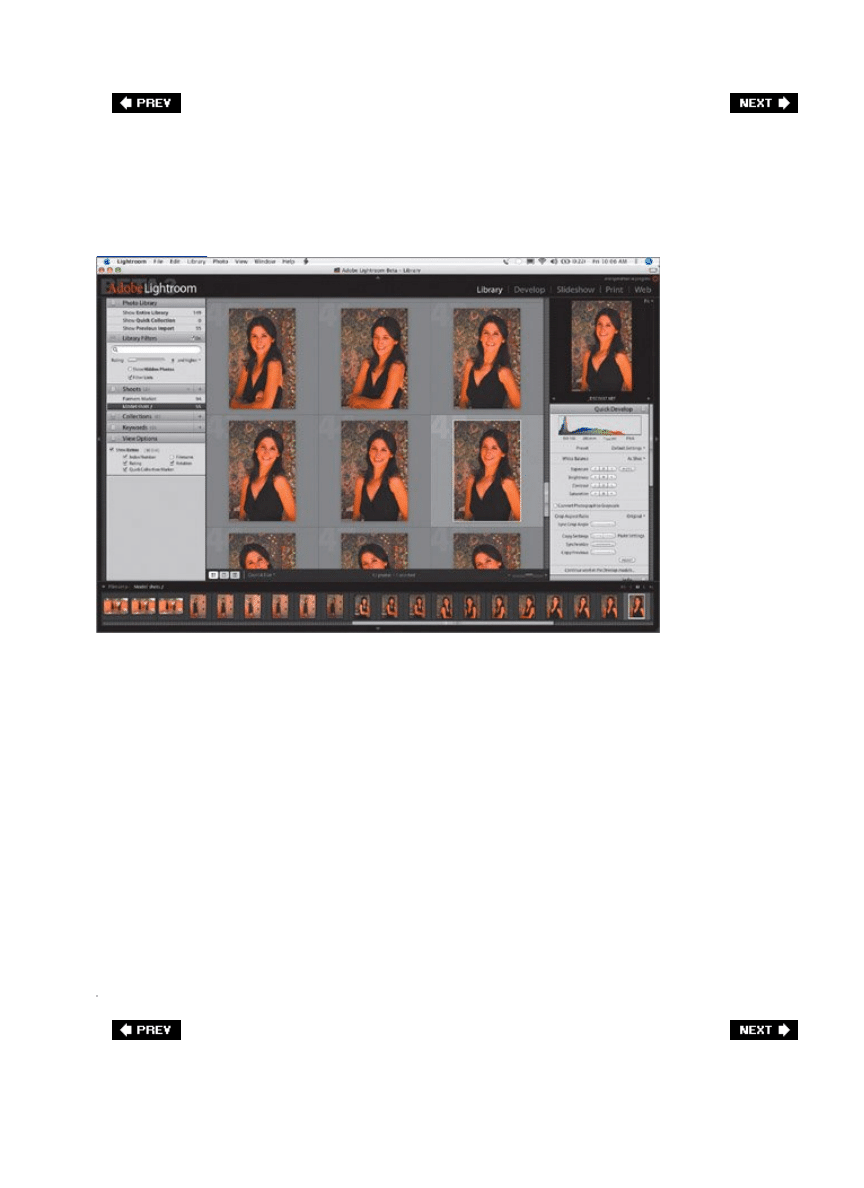
Organizing Your Photos with Lightroom
[View full size image]
SCOTT KELBY
Although I use Adobe Photoshop for all the serious retouching and high-end tweaking of my
photographic work, I use a new product from Adobe called Adobe Lightroom for managing
and organizing my thousands of digital photos, processing my RAW photos, creating
onscreen slide shows, and printing out multi-photo spreads. This is an application designed
from the ground up for photographers, is available for both Macintosh and Windows users,
and it only costs a fraction of what Photoshop costs. Now, it certainly doesn't replace
Photoshop, because it doesn't really allow for any retouching (removing spots, or wrinkles, or
age spots and wrinkles, whitening teeth, or any one of a hundred things we do in Photoshop
to make people look their very best), nor does it create the amazing special effects, cool
layouts, and the myriad of things that only Photoshop can do, but then Lightroom isn't
supposed to do all those thingsit's for organizing and viewing your photos, and it does that
pretty brilliantly I might add. If you get serious about this whole digital photography thing
(and if you bought this book, you're getting serious), I recommend you check out
Lightroomespecially because if you actually go and buy it, I get a cash kickback from Adobe.
I'm kidding of course, but I wish I weren't.
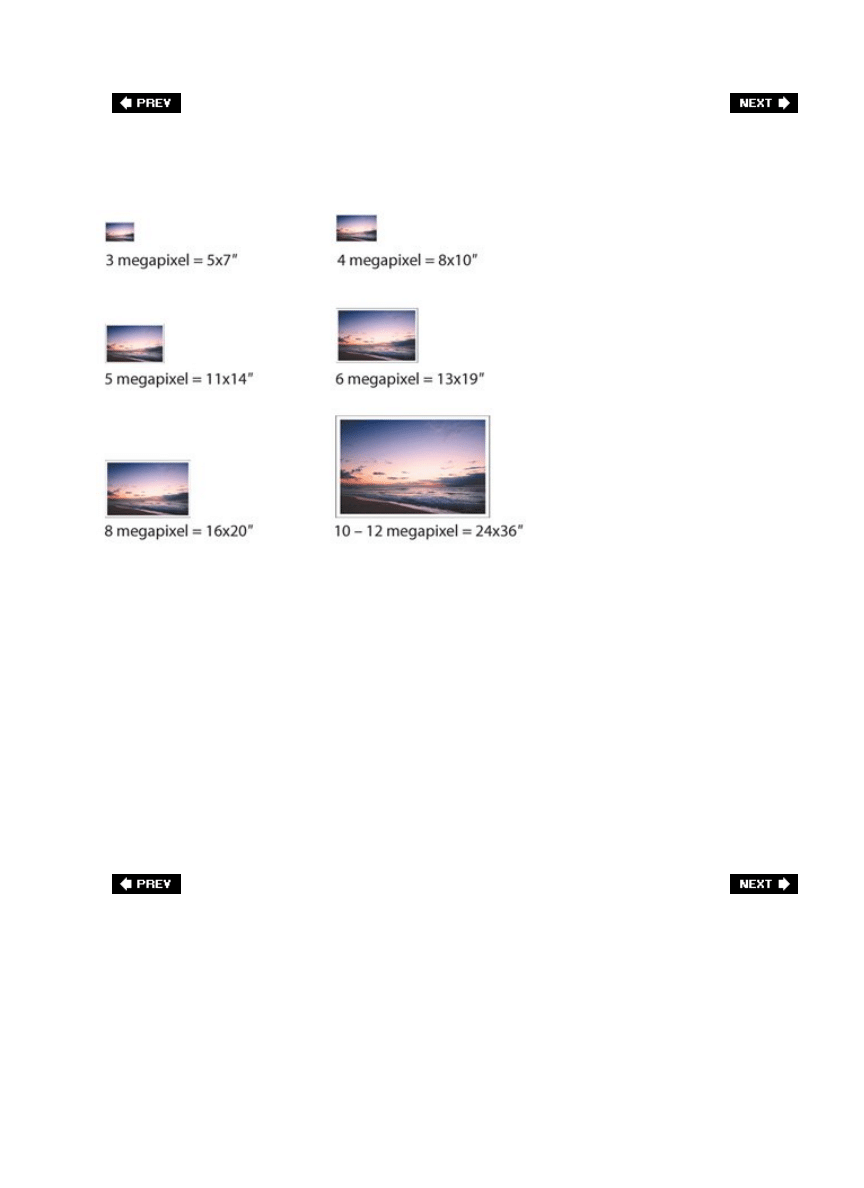
How Many More Megapixels Do You Need?
There's a ton of confusion (also known as marketing hype) around megapixels, and many
people truly believe that megapixels have to do with image qualitythe higher the number of
megapixels, the better the quality. Unfortunately, that's not true. So, if you were using that
as an excuse to buy a new camera, that's not going to float with me (although your spouse
may buy that line). Here's what megapixels really mean: how large can I print my final
photograph? That's it. If you're not going to print anything larger than 8x10", then a 5-
megapixel camera is absolutely all you need. In fact, it's really more than you need, but since
5 megapixels is about as few megapixels as you can buy these days, we'll leave it at that. If
you want to routinely print 13x19" color prints, then you only need a 6-megapixel camera (I
know, this is hard to swallow after years of thinking you needed 10 megapixels or more). So,
what are today's 10- and 12-megapixel cameras for? Suckers. (Okay, not really, but you
knew I was going to say that.) Actually, 10- and 12-megapixel cameras are for pros who
need to print 24x36" poster-sized prints. If that's you, then it's time to pony up, but if you're
not routinely printing poster-sized prints, a 6-megapixel camera is all most people will really
ever need, so put away your checkbook. Hey, don't blame me. I'm trying to save you some
money so you can buy some decent lenses and a fancy tripod.

Printing Lab-Quality 8x10s
At some point, after putting all these techniques to use, you're going to want prints, and
today many pro photographers create their own prints. Personally, I only use Epson printers,
and about every other pro I know uses Epson printers as well, because they've become the
standard for professional quality color and black-and-white inkjet printing. Now, before I
start making recommendations as to which Epson printer to buy, I want you to know up front
that the only reason I'm telling you this is because it's exactly what I'd tell any friend who
asked. I don't get a kickback or cut from Epson. They have no idea I'm telling you this, so if
you tell them, "Hey, Scott said I should buy an Epson," they'll say something along the lines
of, "Scott who?" I personally have three Epson printers, and I love them dearly for three
main reasons:
They work pretty flawlessly most of the time, but if I do run into a bump along the way,
they have live 24-hour tech support, which is actually quite good.
1.
They not only sell the printers, but the paper as well, and I love their paper.
2.
The output is absolutely stunning. The quality prints that come out of my Epson printers
still amaze me.
3.
For printing borderless 4x6s, 5x7s, and 8x10s, I use (and highly recommend) the Epson
Stylus Photo R800. It costs about $399. Worth every penny.

Printing Lab-Quality 13x19" Prints
A popular print size with pro photographers is the 13x19" large print, and the Epson Stylus
Photo R2400 is the king of this realm. I've never seen another printer even touch it, except
for maybe the R2200 it replaced. Its color output is really stunning, but where the R2400
really kills is when you print black-and-white prints. You'll lose your mind. Plus, the R2400
uses Epson's UltraChrome K3 archival-quality inks, so your prints are going to last longer
than you will by a long shot. Of course, besides the 13x19" prints, it also does all of the
smaller sizes as well (Epson claims it does 11x14s in less than two minutes, but I can't swear
to this because once I printed my first borderless 13x19" print, that was the last time I
wanted to print an 11x14", and you'll probably feel the same "bigger is better" way I do,
too). This is as in love with a printer as I've ever become. It costs around $850, which, for
what it does, is a bargain.
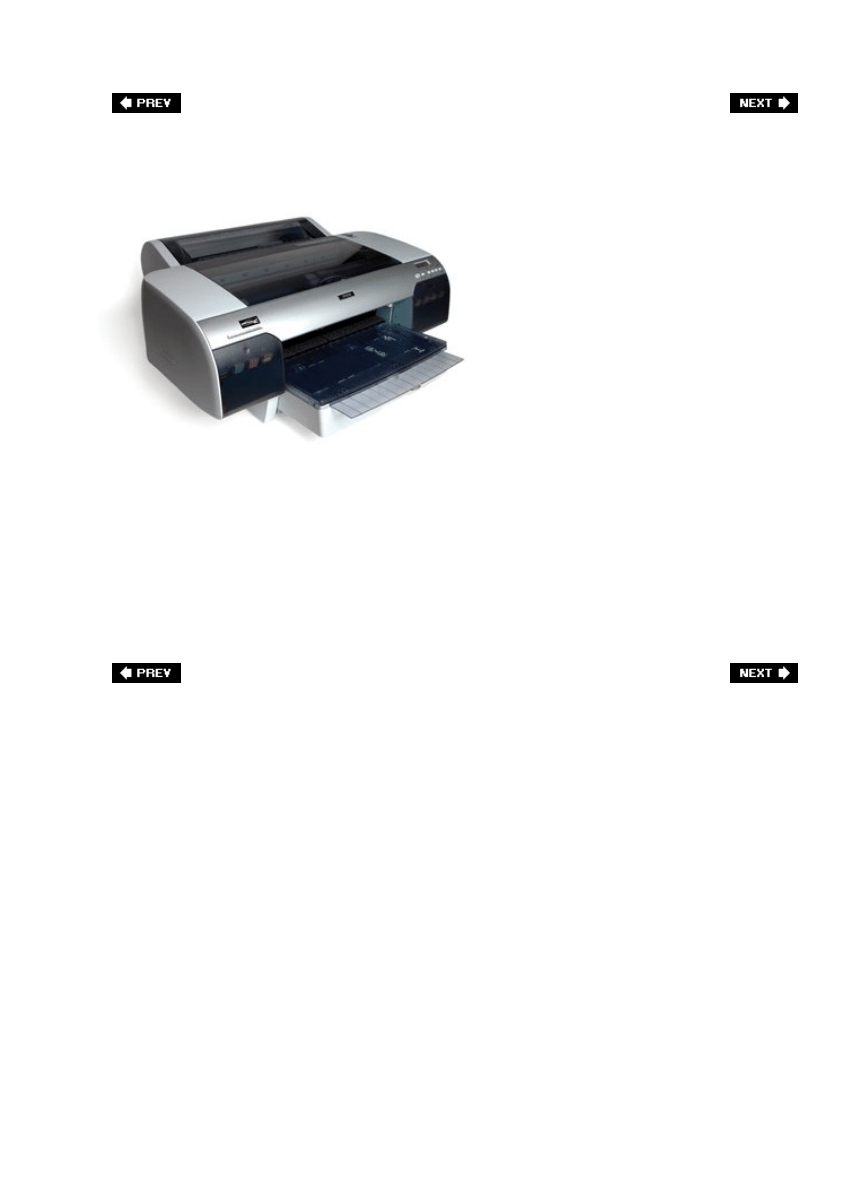
Printing 16x20sThe Pros' Top Choice
Pros who sell their prints know that the bigger the print, the bigger the paycheck, and maybe
that's why so many favor the 16x20" large print format, and the printer for that is Epson's
Stylus Pro 4800. Although it technically prints 17" by as wide as you want to go, the size
everybody's trying to hit is that 16x20" sweet spot, and the 4800 does it wonderfully well,
but be forewarnedat this point, Epson doesn't make 16x20" paper (which totally baffles me
since that's the size preferred by most pros). There are, though, other paper manufacturers
(like Red River Paper) who make 16x20" paper that is designed to be used with the 4800, so
unless you like cutting down larger-sized paper to 16x20", you might want to consider that.
Other than that cutting chore (which may or may not bother youit bugs the heck out of me
personally, but that's just me), the 4800 is a dream machine.

Which Paper Should You Print On?
[View full size image]
If you're getting an Epson printer, then you definitely want to print on Epson paper (with only
that Red River Paper exception I mentioned for the 4800). Epson paper not only works best
on Epson printers, sometimes it's the only paper that will work (for example, one time when I
was in a bind, I tried some HP paper. It didn't work at allthe paper went through the printer
and ink came out, but it looked like...well, let's just say it didn't work and leave it at that).
So, which papers do I recommend? Here they are:
Epson Velvet Fine Art Paper: This is a cotton paper with a matte coating that looks like
watercolor paper and has a wonderful texture that gives your photos almost a painted feel.
Clients love the feel of this paper and it's usually the first thing they notice.
Epson Premium Luster Photo Paper: This is probably my all-around favorite paper (and a
favorite with many pros) because, although it definitely has a sheen to it, it does so without
being overly glossy. It's that perfect paper between glossy and matte.
Epson Enhanced Matte Paper: This is a great paper for black-and-white prints, and it has
both a nice texture and finish that gives a surprisingly crisp detail.
All of these papers are available directly from Epson.com, but I also often find these at my
local CompUSA in sizes up to 13x19".
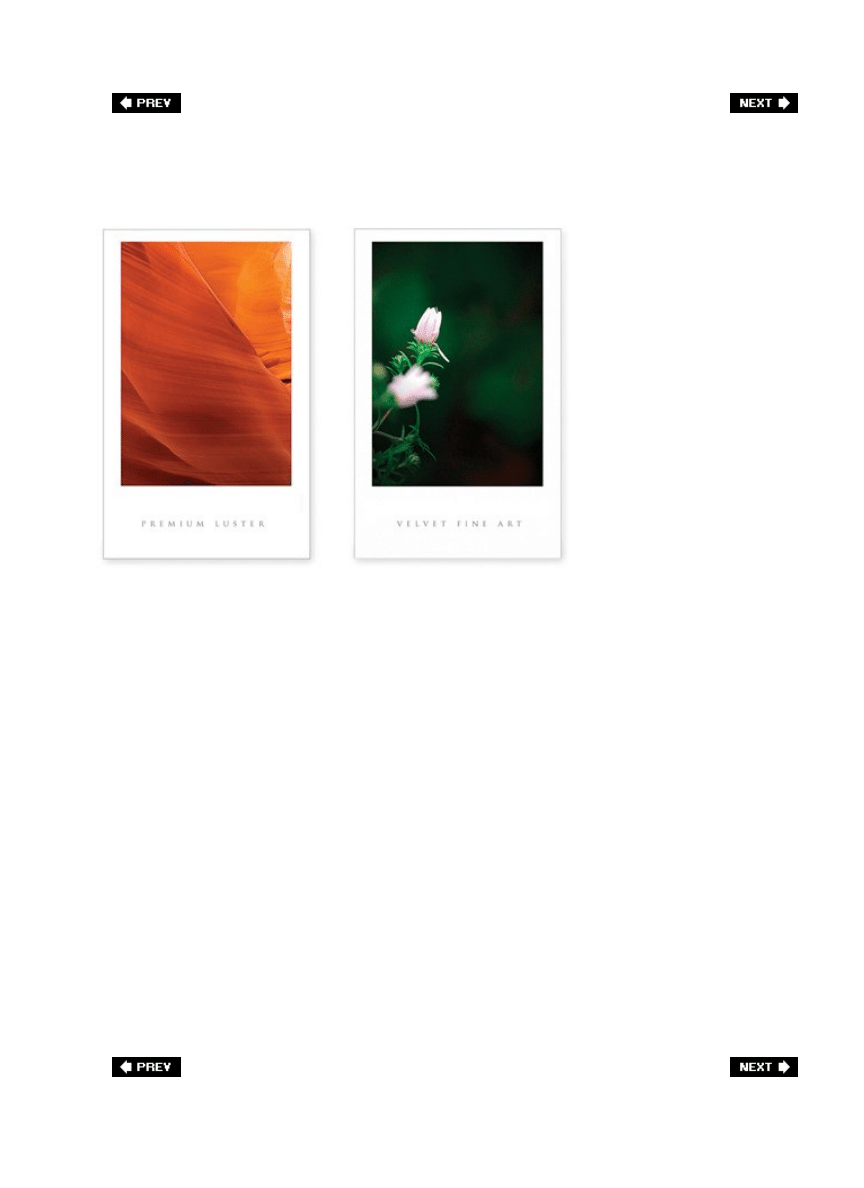
What Determines Which Paper You Use?
SCOTT KELBY
So, how do you know which paper to use? Believe it or not, there's an easy waythe paper you
choose to print on is determined by one thing: the subject matter of your photo.
For example, if you're printing things of a softer nature, like flowers, birds, landscapes,
waterfalls, or any type of image where you want a softer feel, try a textured paper like
Epson's Velvet Fine Art Paper (provided you are printing to an Epson printer), which works
wonderfully well for these types of images. This is your choice any time you want that "artsy"
feel to your photography, and it also works well when your photo isn't tack sharp. Try it for
black-and-white photography, too (especially on Epson's R2400), when you want extra
texture and depth.
For serious portrait work, architecture, city life, travel, and finely detailed landscape shots,
try Epson's Premium Luster Photo Paper. Anything with lots of detail looks great on this
paper, and it really makes your colors vivid. So, when the shot has lots of detail and
sharpness, lots of color, and you need it to "pop," this is the ticket for sharp, crisp prints.
Epson's Enhanced Matte Paper is a nice choice for black-and-white photos. Enhanced Matte
Paper minimizes reflections so photos look especially good behind glass (they pick up a little
of the shine that's missing in all matte finishes), so if you're thinking of framing your prints,
you won't be disappointed with the final result. However, this isn't an acid-free paper, so
printing color photos on it is dicey because they may warm over time.
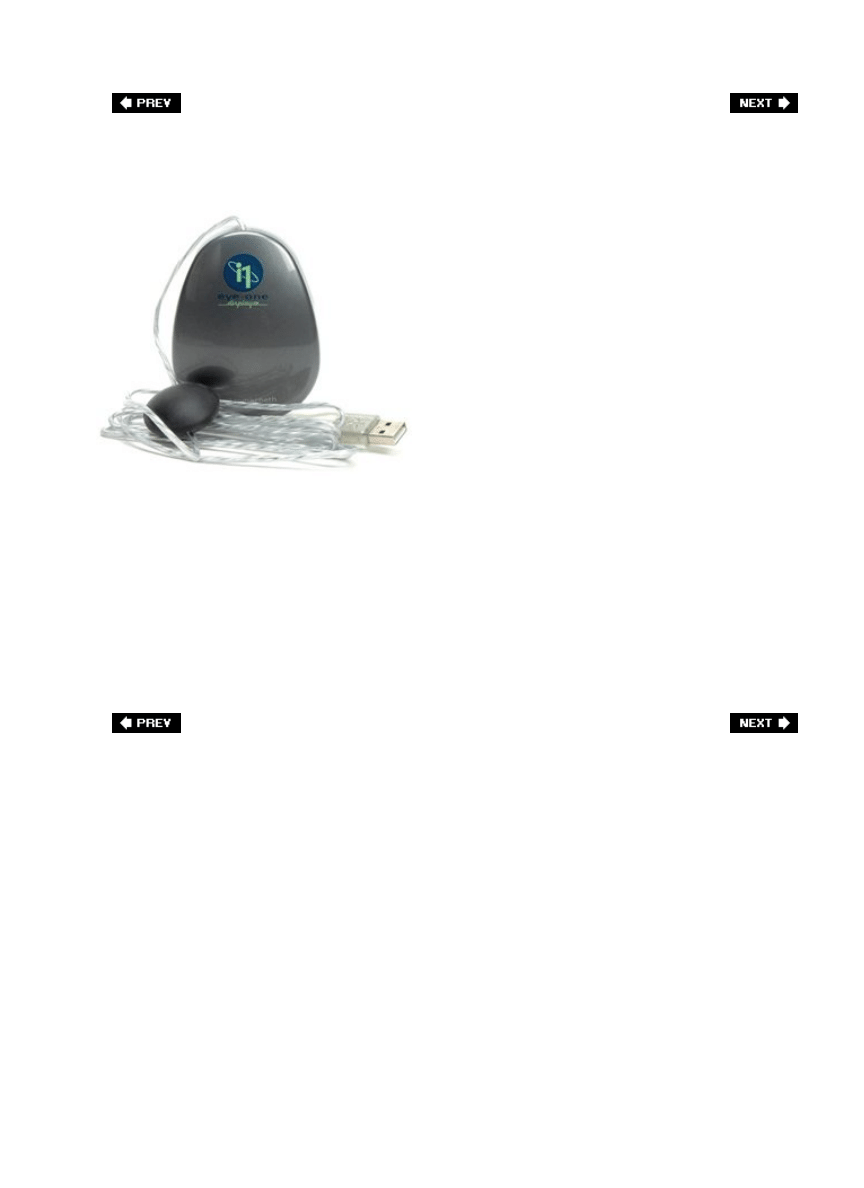
Getting Your Monitor to Match Your Printer
Color management (the art of getting your color inkjet prints to match what you see on your
monitor) has gotten dramatically easier in recent years, but the key to getting a color
management system to work is getting your monitor color calibrated. A few years ago, this
was a costly and time-consuming process usually only undertaken by paid consultants, but
now anybody can do it because (1) it's very affordable now, and (2) it pretty much does all
the calibrating work automatically while you just sit there and munch on a donut (you don't
have to eat a donut, but it doesn't hurt). Probably the most popular monitor calibrator in use
by pros these days is the Eye-One Display 2 from GretagMacbeth (recently purchased by X-
Rite). It sells for around $230, and that's pretty much all that stands in the way of having
your monitor match your prints. Well, that and downloading the free color profiles for the
paper you're printing on (more on that on the next page).

Download the Color Profiles for Your Paper
[View full size image]
If you buy Epson papers (or any of the major name-brand professional inkjet papers), you'll
definitely want to go to Epson's (or your paper manufacturer's) website, go to their
downloads page for your particular inkjet printer, and download their free color profiles for
the exact paper you'll be printing to. Once you install these free color profiles (they install
with just a double-click), when you go to Photoshop to print your photo, you can choose the
exact printer and paper combination you'll be printing to. This gives you the best possible
results (and color fidelity) for your particular paper and printer. The pros do this every time
and it makes a huge difference in the quality of their prints.
Tip for More Predictable Color
Your printer has a color management system, and Photoshop has one, too.
Having two color management systems going at the same time is a guaranteed
recipe for bad color. So, if you're printing from Photoshop, you should definitely
turn off the color management system for your printer and use Photoshop's
instead (in other words, let Photoshop determine the right colors).

Selling Your Photos as "Stock" Online
[View full size image]
Selling photos to a stock agency is a dream of many photographers (pros included), but
generally only the best of the best get this opportunity. Until now. Now you can start selling
royalty-free stock photography today thanks to iStockphoto.com, which is a community of
photographers all around the world who sell their photos online as stock (which means you
give the rights to other people to buy, download, and use your photos in brochures, ads,
websites, flyers, and other collateral material graphic designers and Web designers create for
their clients). The great thing is anybody that follows their guidelines can upload their own
photos and start selling them right away as part of iStockphoto's huge database of images.
Now, you only get paid on how many people actually buy your photo, and since the photos
sell for $1 (for small size), $3 (for medium size), and $5 (for full-page), you're going to need
to move a lot of photos to make this a business. But let me tell you this, there are
photographers who make their living (and their Porsche payments) strictly from what they
sell on iStockphoto.com, because iStock-photo is used by about a bazillion people around the
world. Needless to say, the better quality your work is, and the more popular the subjects
are, the more your images will get downloaded. How popular has iStockphoto.com become?
Well, Getty Images, one of the world's leading and most respected providers of high-quality
stock images, recently bought them outif that gives you any idea.
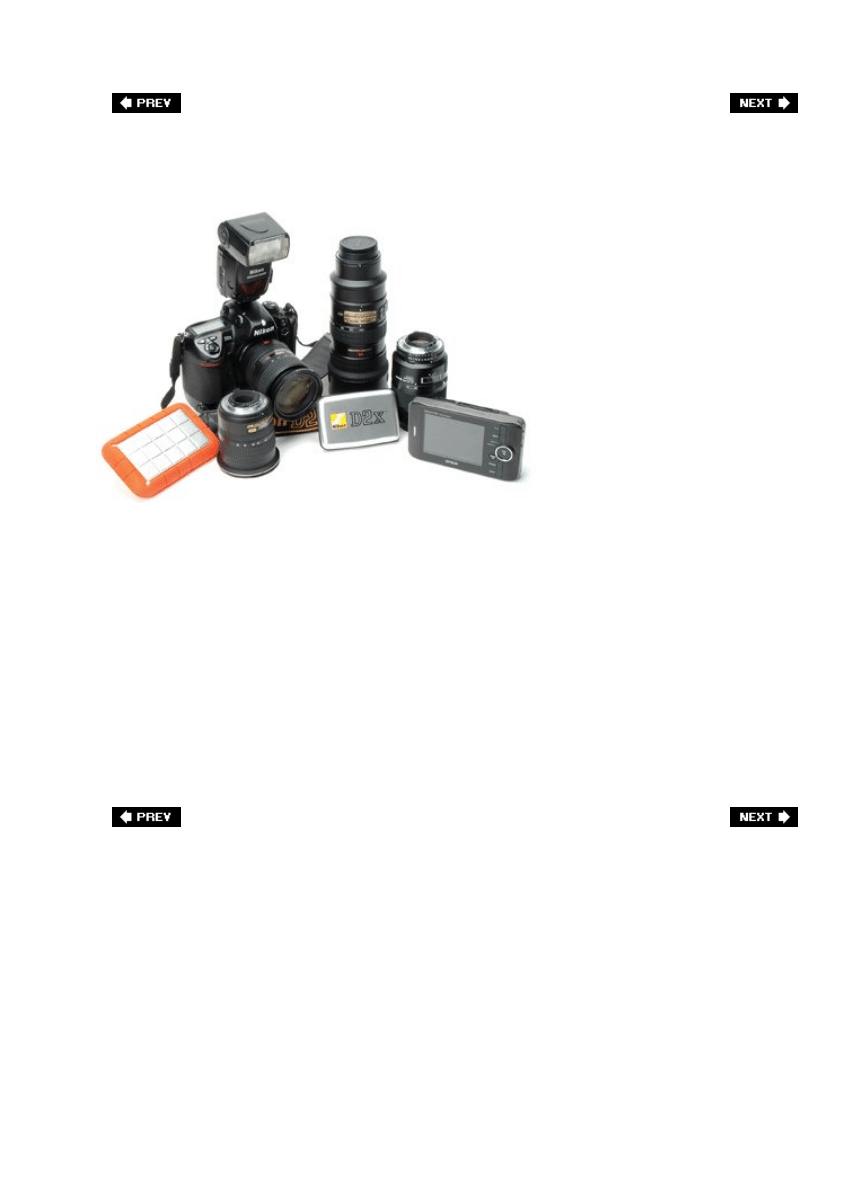
A Quick Peek at My Gear
For those interested in what kind of photo gear I use, here's a quick look: my main camera is
a Nikon D2X and my backup camera body is a Nikon D200. I carry three lenses with me when
I'm shooting: a Nikon 1224mm f/4 wide-angle zoom, a 70200mm VR f/2.8 zoom, and a
24120mm VR f/3.5 zoom. I also have a 70180mm f/4.5 macro zoom lens. I use polarizers,
split neutral gradient filters, and UV filters. That's it.
I use a Nikon SB800 external flash and I have both an Epson P-2000 and P-4000, and an 80-
GB LaCie Rugged All-Terrain Hard Drive (as my second backup drive, because I either carry
the P-2000 or the P-4000, but not both at the same time).
I use a Slik carbon fiber tripod, and a Really Right Stuff BH-55 ballhead (the mother of all
ballheads, if you ask me). I use five SanDisk Extreme III CompactFlash memory cards (three
4-GB and two 2-GB cards). Lastly, I lug all this gear around in two ways: on most days I pull
(it rolls) a Lowepro Pro Roller 1, but when I want to travel light I use a Lowepro Stealth
Reporter D200 AW Shoulder Bag, which works great!
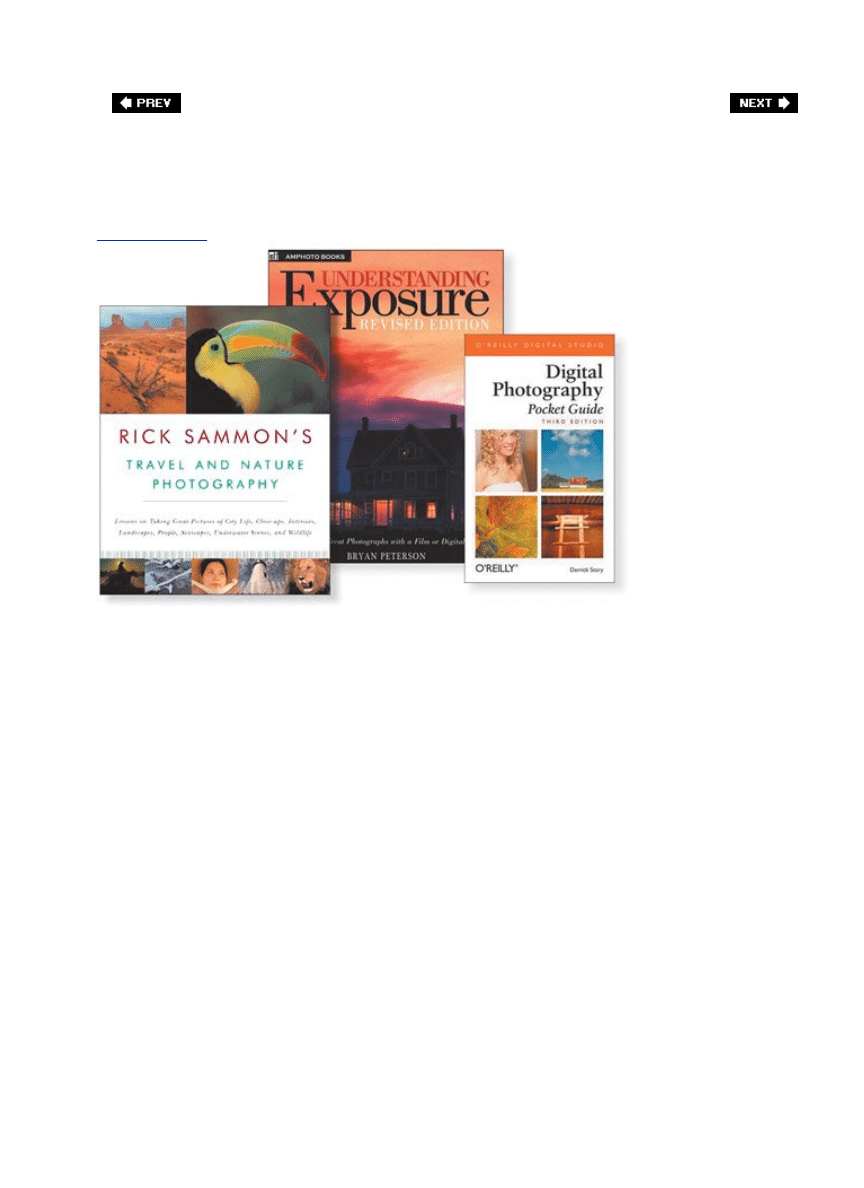
Some Books I Personally Recommend
[View full size image]
I hope this book has ignited your passion to learn more about the craft of photography, and if
that's the case, here are some books I recommend (in no particular order):
Understanding Exposure: How to Shoot Great Photographs with a Film or Digital Camera
by Bryan Peterson
1.
Rick Sammon's Travel and Nature Photography
by Rick Sammon
2.
Digital Photography Pocket Guide, Third Edition
by Derrick Story
3.
Bill Fortney's Great Photography Workshop by
Bill Fortney
4.
Rick Sammon's Complete Guide to Digital Photography: 107 Lessons on Taking, Making,
Editing, Storing, Printing, and Sharing Better Digital Images
by Rick Sammon
5.
If you just love great photography, here are some photo books I recommend:
America From 500 Feet! by Bill and Wesley Fortney
1.
Golden Poppies of California: In Celebration of Our State Flower
by George Lepp
2.
Flying Flowers by Rick Sammon
3.
Window Seat: The Art of Digital Photography and Creative Thinking
by Julieanne Kost
4.
Through the Lens: National Geographic's Greatest Photographs,
edited by Leah
Bendavid Val
5.


Learn from Me on Adobe® Photoshop® TV
[View full size image]
If you want to learn more about Adobe Photoshop and how to process and edit your digital
photos, then check out Adobe® Photoshop® TV (
www.photoshoptv.com
). It's a 30-minute
weekly video show that I co-host with my friends (and fellow Photo-shop gurus), Dave Cross
and Matt Kloskowski. Each week we give you the latest tips, step-by-step tutorials, Photoshop
news, and lots of other cool stuff (like prizes and contests). Adobe® Photoshop® TV is free,
and you can watch it right there on our web-site or you can download it and watch it on your
computer or your iPod (as a video podcast). In fact, you can subscribe to the show for free,
and each Monday the show will be automatically downloaded to your computer, so you can
watch it at your leisure. Here's how to subscribe:
Whether you're running Windows or Mac OSX, launch Apple's iTunes software (it's free
for Mac or PC) and go to the iTunes Music Store.
1.
Click on the Podcasts link on the left side of the iTunes Music Store page.
2.
In the Search field on the left side of the Podcast page, type in "Photoshop" and press
the Return (PC: Enter) key on your keyboard.
3.
In a couple of seconds, you'll find Photoshop TV. Click on it, and then press the
Subscribe button. That's ityou're subscribed. Now you can watch it from right within the
iTunes window (at any size you'd like), or you can download it to your video iPod and
watch it there.
4.


Chapter Eleven. Photo Recipes to Help
You Get "The Shot"
The Simple IngredientsThat Make It All ComeTogether
[View full size image]

Hey, it's the end of the book, and now is as good a time as any to let you in on a secret.
There's really no way in hell we're going to get those really magical shots (like you see in
magazines such as Outdoor Photographer or Shutterbug ). That's because when we get out to
that prime shooting location at the crack of dawn to hopefully capture one of these once-in-a-
lifetime shots, carrying so much gear that our chiropractors are on speed dial, we'll soon find
that it's too latethere are already a dozen or so photographers set up there waiting for that
magical light, too. Since they were there first, the only spot left on that tiny plateau is behind
them, and every shot you take is going to have some, if not all, of their camera gear fully in
your frame ruining any possible chance of you getting "the shot". But this chapter is all about
recipes for getting the shot, and I've got a special recipe for this very situation. Just as the
golden light appears over the horizon, you quietly slide your foot inside one of their tripod

legs, then quickly pull your foot back, toppling over their entire rig, and as their thousands of
dollars of gear begins to crash violently to the ground, you deftly press the cable release on
your camera and capture that amazing vista as the sound of broken glass echoes off the
canyon walls. Ahh, that my friends is the magical sound of you getting "the shot". If you hear
the faint sound of sobbing in the distance, it all becomes that much sweeter. Enjoy.
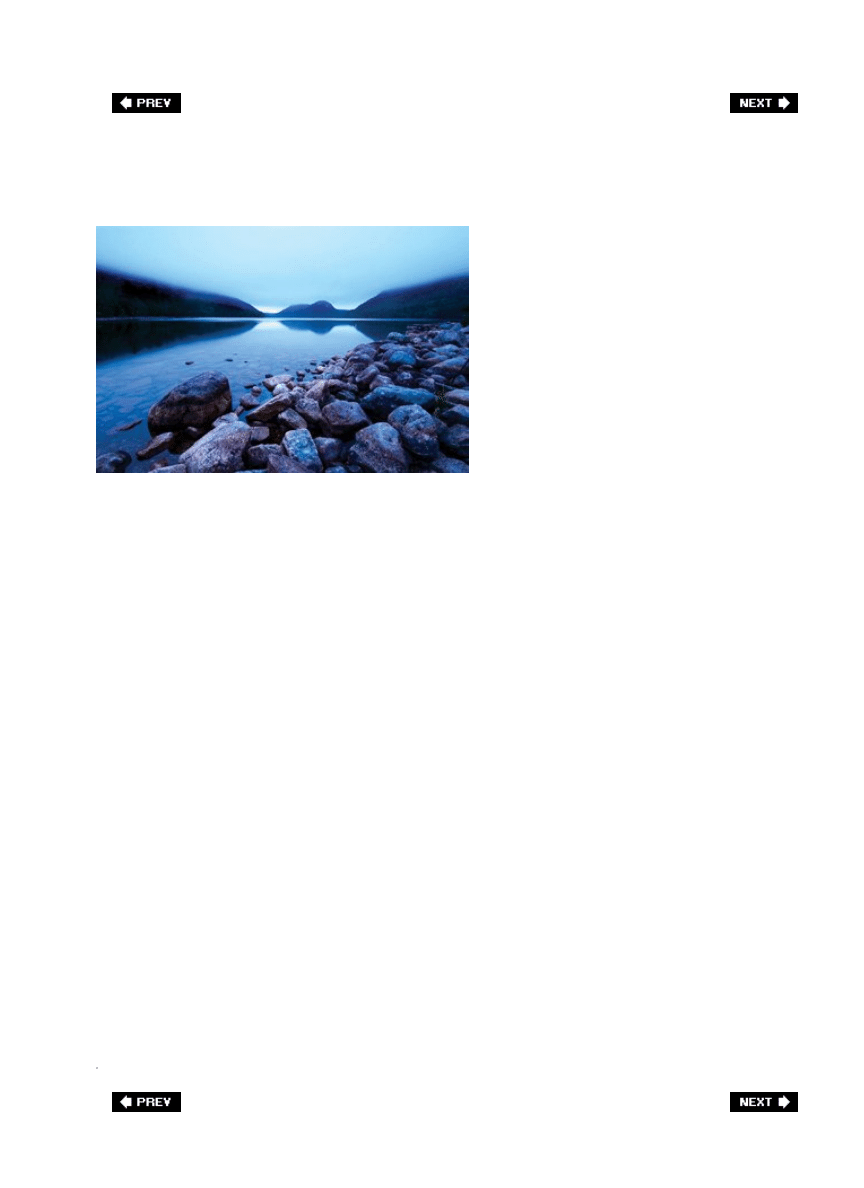
The Recipe for Getting This Type of Shot
SCOTT KELBY
Characteristics of this type of shot: the water is very still; you can see through the water
because there's very little reflection; the overall tone is blueish; the lighting and shadows are
very soft; you get a full sweeping view.
This type of light doesn't happen at 5:30 p.m.you have to get up early and be in place
ready to shoot at 5:30 a.m., right before the sun comes up.
1.
To get really still water, you also have to shoot at dawn. If you shoot this same scene at
sunset, the winds will have picked up and the water won't be as smooth.
2.
Set up your tripod without extending the legs, so your lens is close to the rocks for a
low, more interesting angle (remember, most point-and-shooters would have shot it
standing upthe average viewpoint we usually see, which would be boring).
3.
To remove some of the reflection from the water and see some of those rocks, you'll
need to screw on a polarizing filter and rotate the filter around until, like magic, the
reflection disappears (that's rightpolarizing filters are not just for skies).
4.
Use a wide-angle lens to give the shot its "vastness". If you have an 1880mm zoom, set
it at 18mm (the widest setting for that lens).
5.
Use aperture priority mode and choose an f-stop like f/22 to give you good sharpness
throughout the entire photo, from the rocks to the mountains.
6.
To further enhance that "blue morning" effect, if you're shooting in JPEG, change your
white balance to Fluorescent, take a test shot, then look at the results in your LCD
monitor. If you're shooting RAW, you can choose your white balance later in Photoshop.
7.
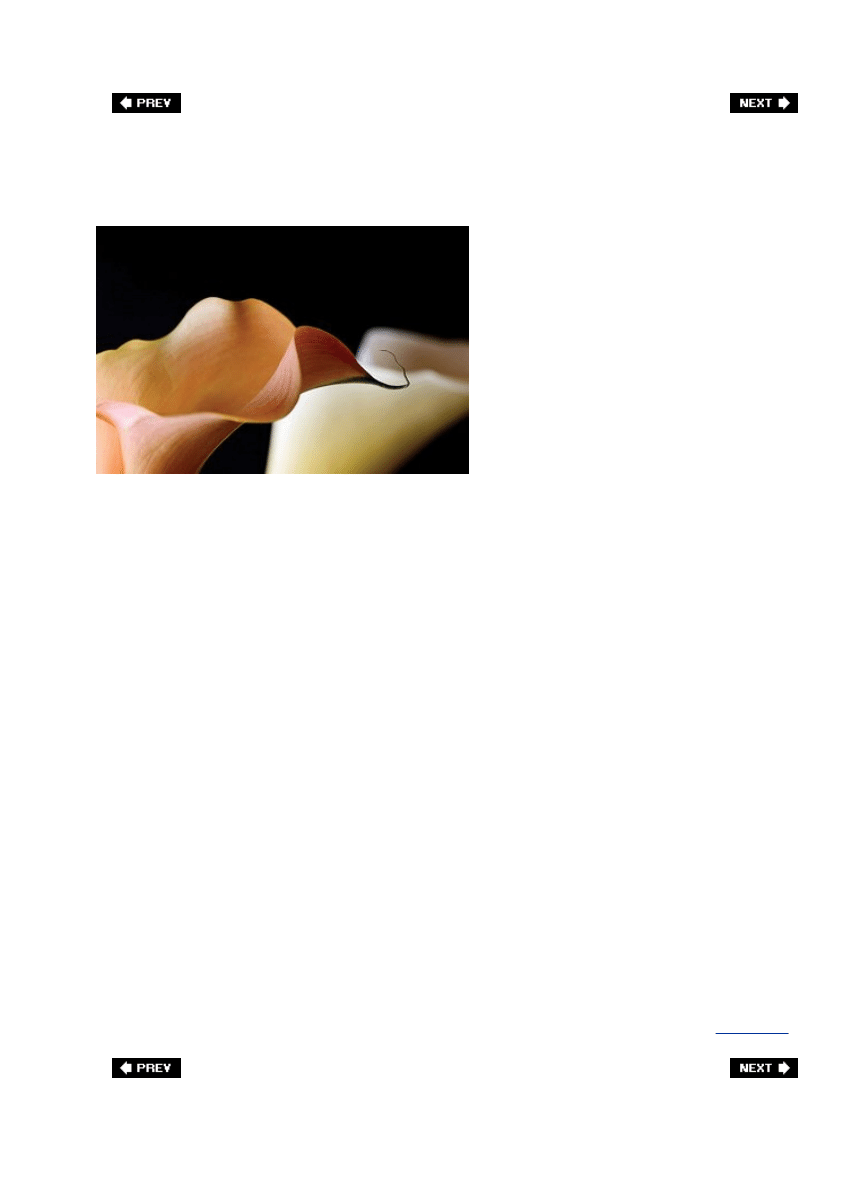
The Recipe for Getting This Type of Shot
SCOTT KELBY
Characteristics of this type of shot: soft, natural light; shot on a black background, very
close to the subject. This type of shot is easier than it looks.
You need a black background behind your flowers. These were sitting in a vase, with
black poster board placed about 3 feet behind them. You can use black velvet (which
works even better than what was used here) that you buy from the local fabric store.
1.
You have to set up your tripod's height so it's level with the flowers. You don't want to
shoot down on themyou want to shoot them at eye level, so put the vase on a table so
they're up high enough, then position your tripod at the same height.
2.
Use natural light. These were positioned about 4 feet from an open window that wasn't
getting direct light. Don't shoot straight into the window, shoot from the side so your
flowers are getting side lighting.
3.
Use a macro or close-up lens to get this close to the flowers. When you use a macro (or
close-up lens), the depth of field is very shallow automatically, so the flower(s) in the
background will already be blurry, and that's what you want.
4.
The f-stop was f/5.6, which again gives you maximum sharpness on the object closest
to the camera, and everything behind will be blurry. It was shot in aperture priority
mode (which is an ideal mode for controlling your depth of field). When shooting with a
macro lens, the depth of field is much more shallow.
5.
To get super sharp, you need to be super still; use the mirror lock-up trick in
Chapter 1
.
6.

The Recipe for Getting This Type of Shot
SCOTT KELBY
Characteristics of this type of shot: your subject fills the frame from side-to-side; no
visible sky; great contrast of color; interesting placement of subject.
The star of this shot is really the contrasting colorsotherwise it would just be another
"rowboat in the water" shot. There were dozens of boats in the harbor that day, but this
one was the only one with such great contrasting colors. The white and salmon color
against that blue water creates lots of visual interest through color.
1.
To get this wonderful light and the soft shadows, there are only two times of day you
can shooteither at dawn or dusk. This was taken at dusk, and that's why the colors are
so vivid (the colors are vivid because the sun isn't washing them out).
2.
To get this close to the boat, you either have to be in another boat or on the dock with a
long lens, which is the case here. Put on your longest zoom lens and zoom in so that the
boat almost fills the width of the frame.
3.
You must use a tripod to get a shot like this for two reasons: (a) it's dusk so the light is
low and you really can't hand-hold and get a sharp photo, and (b) you're using a long
lens. The further you're zoomed in, the more any tiny vibration will be exaggerated and
your photos will be blurry. You've gotta use a tripod for shots in low light with a zoom.
4.
The other key to getting a shot like this is composition. By putting the boat up top,
rather than dead center, it creates loads of visual interest and draws your eye right to
the subject.
5.
The Recipe for Getting This Type of Shot
SCOTT KELBY
Characteristics of this type of shot: fascinating color; high contrast between the car and
the background; the composition of the shot tells a story.
This is one of those city life shots, and the best way to get them is to be ready for them
to happen. As I mentioned in
Chapter 9
, when you're in a city, be ready for any shot by
shooting in program mode. The flash won't pop up on you (ruining the shot), but you
can basically point and shoot. This unexpected shot happened when I was walking back
to my hotel in Stockholm, Sweden. It was graduation day for Stockholm's high school
students, and many were riding around town in convertibles and open bed trucks
cheering, waving Swedish flags, and celebrating their achievement. I had my camera
over my shoulder and some incredibly delicious fries in my hands (it's a long story).
Anyway, while carefully balancing my fries (so as not to lose a single delicious strand),
this car pulled up beside me. My camera was in program mode, so with my one free
hand I held up the cameraclickand got the shot. Had I been in aperture priority mode
(my usual shooting mode), I would have missed it while setting the aperture because a
split-second later the car drove away.
1.
By including just a little of the driver's arm, passenger's arm, and flag, the photo tells a
story: What were they doing? Why were they carrying flags? Where are they going?
However, an even better composition would have a little more room showing on the left
side, in front of the car, so the car had somewhere to go.
2.
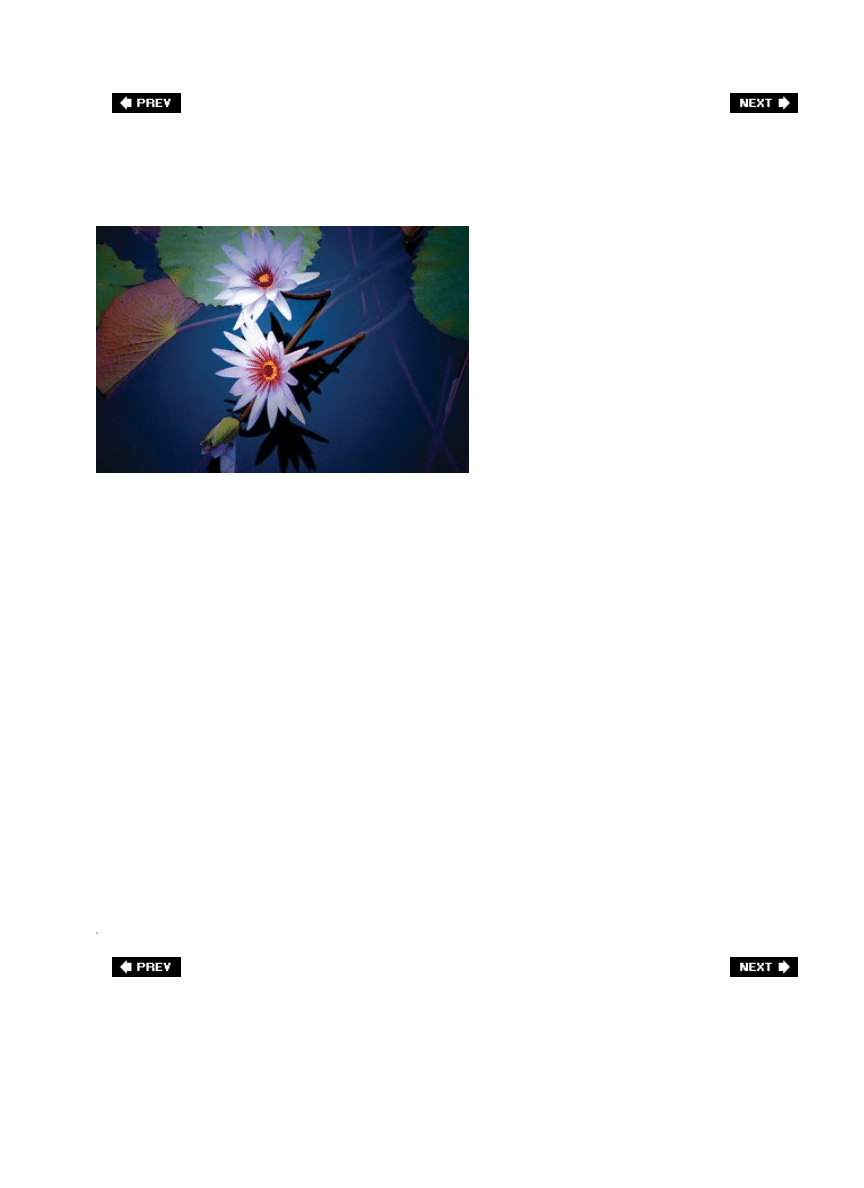
The Recipe for Getting This Type of Shot
SCOTT KELBY
Characteristics of this type of shot: still water; close-up shot of the flower, but obviously
not a macro shot; fairly soft light, but well-defined shadows.
This type of shot is taken in open shade (by that, I mean the water was in the shadows,
under some sort of cover). That's why the shadows are pretty well definedenough light
was getting under the shade that the shadows were maintained. Look for open shade
(or cloudy days where white puffy clouds act as your softbox, diffusing the light) to get
shots like this, where the colors are vibrant and the light is still soft.
1.
Use as long a zoom lens as you have to get the flowers to fill the frame as much as
possible. In this case, I used a 300mm zoom, but this was a rare instance when I didn't
have a tripod with me, and you generally can't hand-hold a 300mm lens steady enough
to get a sharp photo, so I improvised. I shot this from a bridge overlooking a small
pond, so I rested the lens on the handrail of the bridge to steady the camera and lens
and it worked perfectly. In a pinch, rest your camera (or lens) on anything stable.
2.
Everything in the shot is at the same depth (there is really no foreground or
backgroundit's all at the same distance from the camera), so an f-stop like f/11 works
well for shots like this when you want everything at the same distance in focus.
3.
The Recipe for Getting This Type of Shot
SCOTT KELBY
Characteristics of this type of shot: you're shooting a well-known subject (this lone tree in
Zion National Park) in harsh direct light; it has surprisingly warm colors for a shot taken in
noon-day sun.
Sometimes you have to take the shot in less than ideal lighting situations (I was passing
through Zion on my way to another shoot, so I could either take the shot in bad light or
not take it at all). In cases like this, pull out your polarizing filter and rotate until it adds
more blue to the lifeless sky.
1.
Make a composition decision that will make the shot interesting. Point-and-shooters
would center the tree. You want to either: (a) make the rock below the tree have the
most emphasis in the frame, or (b) make the sky above the tree have the most
emphasis. (In the shot shown here, I made the rocks below the tree have more
importance in the frame, but I shot it both wayssome with lots of blue sky above the
tree, with the tree way down low in the frame, and then some like this, with the tree
near the top, with lots of rock below it. I went with the rock shot, because I felt it was
more interesting than the blue, cloudless sky.)
2.
Shoot in aperture priority mode and set your f-stop to f/11, which is a great f-stop when
you want a really sharp shot and you're not trying to put any part of the photo visibly
out of focus. It's kind of the no-brainer f-stop. So is f/8.
3.

The Recipe for Getting This Type of Shot
SCOTT KELBY
Characteristics of this type of shot: soft, directional light; visual interest through the
composition; no flash used so skin tones look natural.
Set your subjects up about 6 to 8 feet from an open window with natural light coming
in. The key is to make sure the light coming in through that window isn't direct sunlight,
so the light is softnot harsh beams of light. Don't use flash. Let the natural light do all
the work.
1.
Put your camera on a tripod. Although there is natural light, the light is lower than
you'd think, and for maximum sharpness you want your camera on a tripod.
2.
Position your subjects so the light comes in from one side (in the photo above, the light
is coming from a window to the right of the bride).
3.
Focus on the subject's eyes (in this case, the bride) because if her eyes aren't in focus,
the shot goes in the trash.
4.
Shoot in aperture priority mode with your f-stop at f/11, which is great for portraits.
5.
By not positioning the father and bride in the dead center of the photo, it makes the
portrait that much stronger and more visually appealing. Kick them over to the left or
right a little bit, so they don't look dead center.
6.
The glow around them was added in Photoshop. To see this Photoshop technique step-
by-step, visit
www.scottkelbybooks.com/glow
.
7.
The Recipe for Getting This Type of Shot
SCOTT KELBY
Characteristics of this type of shot: smooth, silky water; dramatic skies; sharp detail from
front to back; contrast of color in the sky and the water.
To get a shot like this, with the silky water look, requires a number of things. First
among them is you have to shoot it in very, very low light (before the sun comes up or
well after it goes downthis shot was taken more than one hour after sunset) because
you have to leave the shutter open long enough (10 seconds or more) so the waves can
wash in and out while your shutter is openthat's what gives it the silky look. Normally,
leaving your shutter open for 10 or more seconds will totally blow out your sky. That's
why you do it well after sunsetso there's little light in the skybut don't worry, the long
exposure will capture what little light is there, giving you a shot like the one above. If
you have a neutral density gradient filter, you can also use this so you don't have to
wait quite as late to shoot, because it darkens just the sky for you.
1.
Set your camera to shutter priority mode, set your exposure to 10 seconds, and try a
test shot to see if the ground is light enough (the sky won't be the problem). Your
camera will automatically choose your f-stop in shutter priority mode.
2.
If your camera has a feature called long exposure noise reduction, turn it on before you
take your shot and it will help reduce noise in your shadow areas.
3.
Shoot low by setting up your tripod very low to the ground (don't extend the legs), and
use either a cable release or your camera's self timer to reduce camera shake.
4.
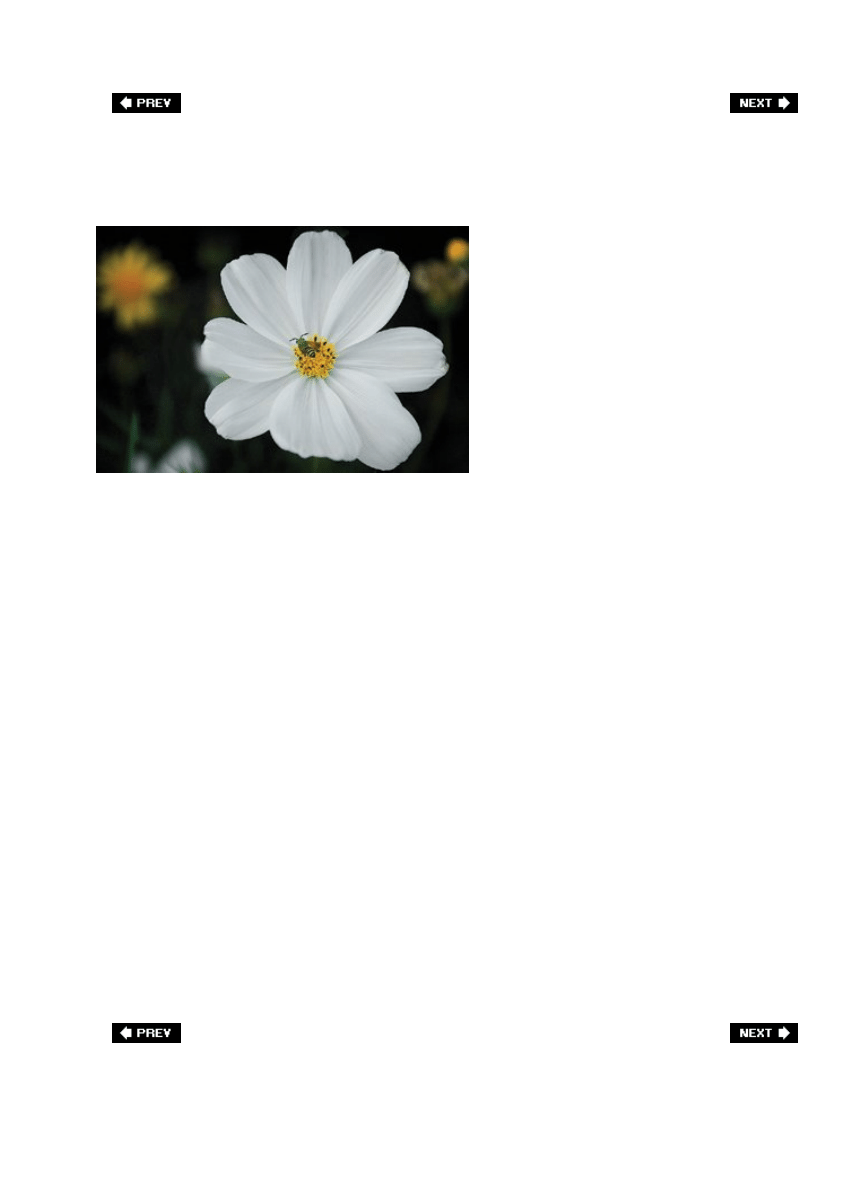
The Recipe for Getting This Type of Shot
SCOTT KELBY
Characteristics of this type of shot: flower fills the frame; the background is out of focus;
contrasting colors; visual interest through composition.
Shoot with a zoom lensuse your longest zoom to get in tight and get the flower to fill
the frame. This was shot with a 200mm lens, and the flower was actually a few feet
away in a garden.
1.
Shoot at flower level. Set up your tripod so you are level with the flower (remember,
don't shoot down on flowers), which requires you to squat down (knee pads are great
for getting shots like thisI wish I had remembered mine that day).
2.
Shoot in aperture priority mode and use the smallest number f-stop your lens will allow
(in this case, on this particular lens, it was f/5.6) to keep the flower in focus but the
background out of focus.
3.
Now, bee patient (okay, that was lame). Actually, I saw bees flying around from flower
to flower, so I sat there with my camera focused on the flower until a bee actually
landed on the flower. Then all I had to do was press the shutter button.
4.
The shot was taken in natural light, but it looks fairly soft because the sun had tucked
behind some white fluffy clouds, which are great for flower shots because it diffuses the
harsh direct light. I didn't set up my tripod until the sun actually went into a large bank
of clouds, so patience (for the right light, and for the bee to land) pays off.
5.
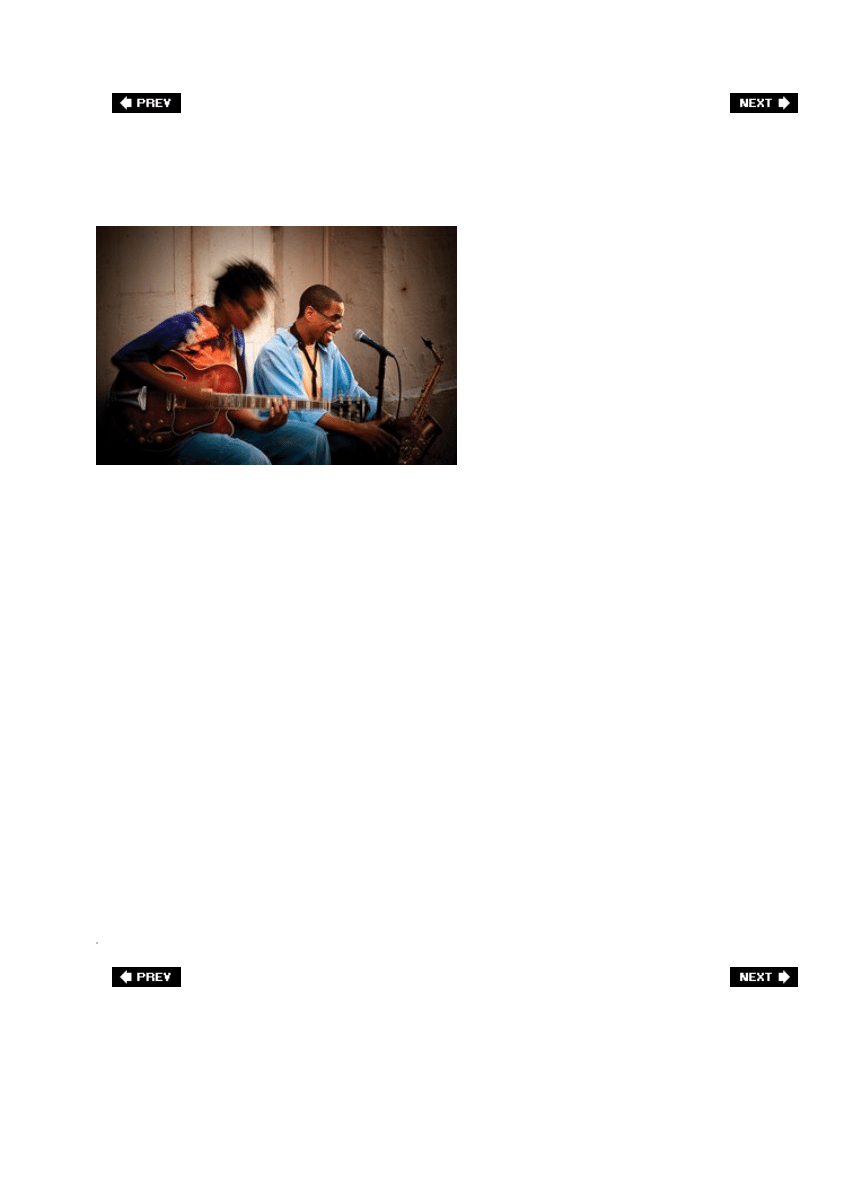
The Recipe for Getting This Type of Shot
SCOTT KELBY
Characteristics of this type of shot: nice light; vivid colors; soft shadows; motion, which
adds excitement and interest to the photo.
To get motion in the shot, you have to shoot with a slower shutter speed. Set your mode
to shutter priority and choose 1/8 of a second or slower, so your shutter is open long
enough to capture any movement as a blur. With this slow of a shutter speed, you'll
need to be on a tripod so the rest of the photo remains sharp.
1.
To get the rich, vivid colors and soft light, you'll need to shoot a shot like this in the late
afternoon when the sun is low in the sky, or in open shade, and this shot had a little of
both. If you look closely, you'll see the sunlight is coming from the right (as seen on the
singer's face) and that adds some dramatic lighting, but because this was taken
downtown on the side of a building that was already mostly in the shade, the light is
very soft. By the way, you'd think direct sunlight would make the colors more vivid, but
it usually does just the oppositeit washes the colors out.
2.
You can shoot a shot like this in aperture priority mode, choose a play-it-safe f-stop like
f/11, and in the low light of the late afternoon/early evening your camera will
automatically choose a slow enough shutter speed for you that will exaggerate any
motion in the shot.
3.
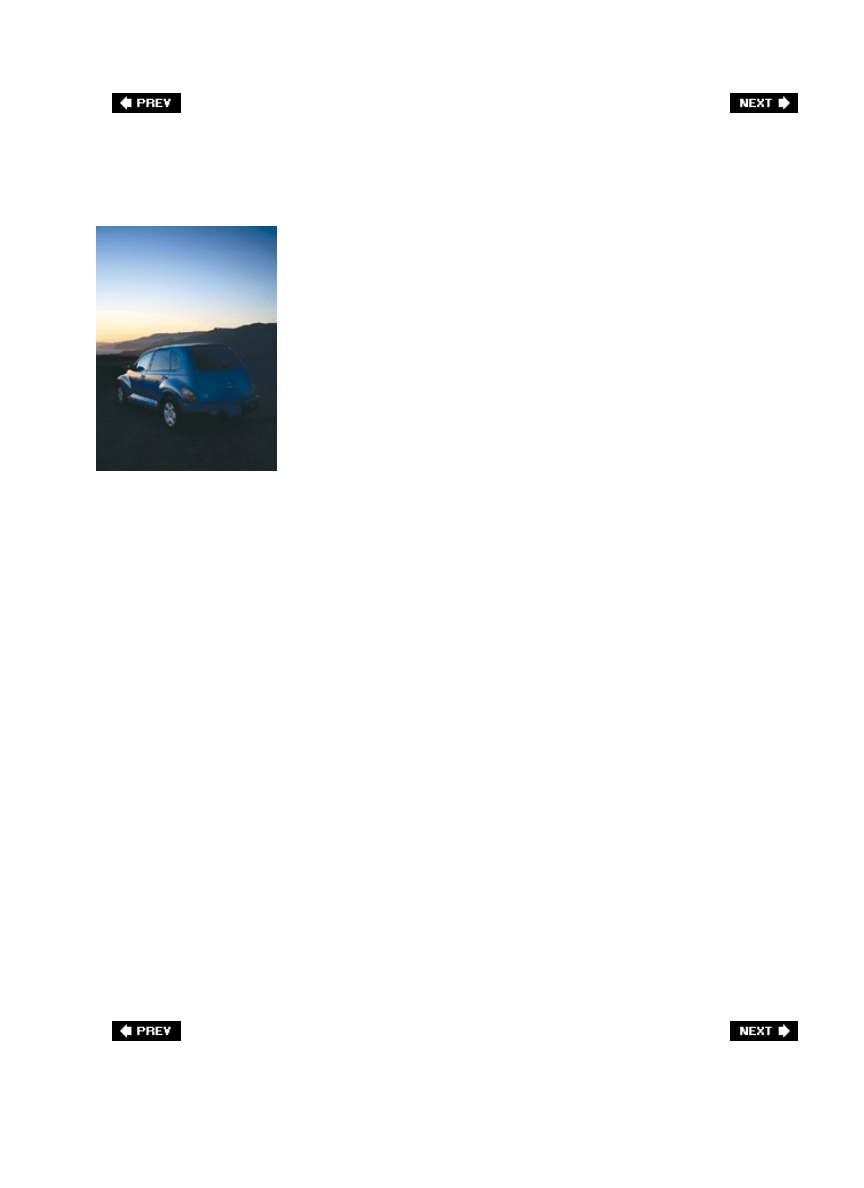
The Recipe for Getting This Type of Shot
SCOTT KELBY
Characteristics of this type of shot: perfect light reflected on the side of the car; beautiful
color in the sky; it's a sunset shot that's not just about the sunset.
Shoot with a wide-angle lens, and turn your camera vertical (portrait orientation) to
capture both the subject (in this case, a car) and enough of the sky to make the shot
visually appealing. This was taken with a 24120mm wide-angle lens, with the lens
length at 24mm.
1.
To get a shot like this, once again you have two choices: (a) shoot at dawn, or (b) shoot
at dusk (this particular shot was taken at dusk, just after the sun dipped into the ocean
in the Marin Headlands overlooking San Francisco).
2.
In lighting this low, you'll have to shoot on a tripod to get a sharp photo.
3.
Compose the shot with your subject (the car) at the bottom of the frame to add visual
interest, rather than centering the car in the frame which would give this more of a
snapshot feel.
4.
The rest is just positioning your camera to make the most of the reflection on the side of
the car. The beautiful light is really doing all the workyou're just waiting for the right
moment to press the shutter release (actually, you're better off in this low light either
using a cable release or your camera's self timer to reduce camera shake and give you a
sharper photo).
5.
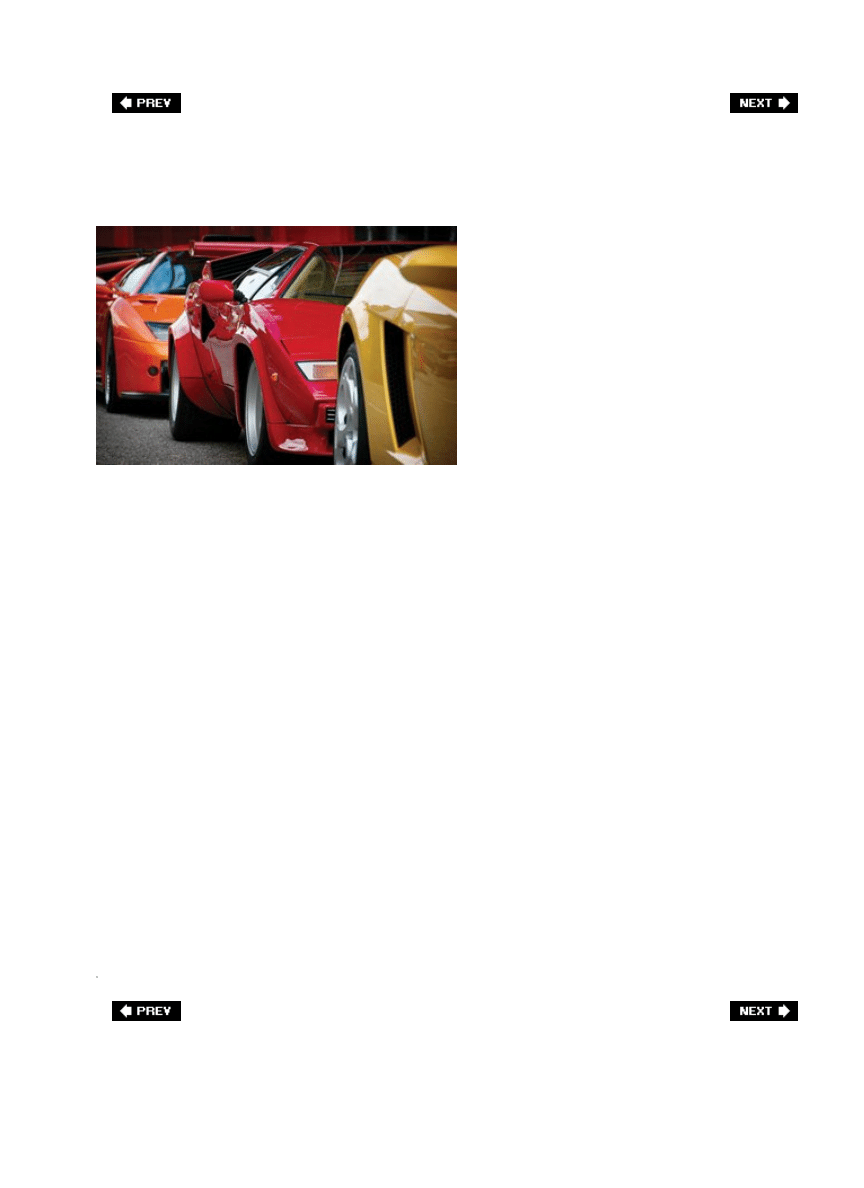
The Recipe for Getting This Type of Shot
SCOTT KELBY
Characteristics of this type of shot: interesting point of view; great contrast of colors;
interesting composition.
To get a shot like this, you need a very low angle to shoot from, and that's what really
makes the shot interestingthe angle isn't one you'd see very often because your average
photographer would take the shot standing up (in fact, I was surrounded by
photographers doing just that. Just in case you were wondering, this shot was taken
outside a Lamborghini dealer located in a downtown area). To get this shot, which was
hand-held, I sat in the middle of the street while my buddy looked out for cars.
1.
To get the red car in the center in sharp focus and make the other cars softer in focus,
shoot in aperture priority mode, choose a low number f-stop (in this case, it was f/5.6),
and shoot with a zoom lens (this was taken with an 18200mm zoom, with the lens at
180mm). The reason the yellow car in front is out of focus is because of how depth of
field works: 1/3 of the area in front of your focus area (the red car) will be out of focus,
and 2/3 of the area behind your focus area will be out of focus.
2.
Another thing that makes this photo work (besides the interesting angle of view) is the
close-up view of the cars, leaving more of the story (the rest of the cars) out of view.
3.
The rest is just the luck of coming across a row of brightly-colored Lamborghinis on an
overcast day.
4.
The Recipe for Getting This Type of Shot
SCOTT KELBY
Characteristics of this type of shot: colors; visual interest inside the window; composition
that shows details.
The key to this shot is composition in the viewfinder. Don't try to capture the whole
building or the entire wall. What makes this shot interesting is that you're not trying to
capture everything you're just showing one detail of the building, which suggests the
whole. Plus, by getting in close, it begs the question: "What's inside that window? Who
put those things there? What's in those blue boxes?" It makes the viewer think. Also,
the window isn't dead centerit's off to the left, which adds to the visual interest.
1.
To capture a window in a city life shot like this, you're going to need a zoom lens (this
was shot with an 18200mm zoom, with the length around 100mm).
2.
You can shoot this in program mode and have the camera do all the work (as I
mentioned earlier in the book, I often shoot in program mode while shooting city life so
I can quickly get the shot without having to make any adjustments to the camera).
3.
A polarizing filter will help you see through the glass by reducing glare.
4.
City life is usually hard to capture with a tripod, because the shooting is often
spontaneous and if you set up a tripod in a downtown area, the only spontaneous thing
that will probably happen these days is the response of the security guards, so it's often
best to hand-hold your shots.
5.
The Recipe for Getting This Type of Shot
SCOTT KELBY
Characteristics of this type of shot: the classic sunset shot, but not shot in the classic
snapshot way.
Use the widest wide-angle lens you've got (this was taken with a 1224mm zoom, with
the length set at 12mm for maximum wideness).
1.
What makes this work is the fact that the horizon line isn't dead center (and sadly, dead
center is where amateurs work so hard to get the horizon line). When shooting a shot
like this, make your choice between these two: (a) you want to emphasize the beach, or
(b) you want to emphasize the sky. In most cases, since you're shooting a sunset after
all, make the sky the star of the show by putting the horizon line in the lower third of
the frame (as shown above). Now, most people shooting sunsets don't include the beach
at allthey're attracted to the sun and the horizon, so their sunset shots are usually made
up of just sea and sky, but by including a little bit of beach, it helps lead the eye and tell
the story.
2.
It doesn't much matter which shooting mode you use, because there's no important
object to focus onyou pretty much want it all in focus, so you can use program mode or
aperture priority mode with your f-stop set to anything from f/8 to f/16 and everything
will look sharp from front to back.
3.
I know I've beat this to death, but you're shooting in low light; it's tripod time.
4.

Index
[
A
] [
B
] [
C
] [
D
] [
E
] [
F
] [
G
] [
H
] [
I
] [
J
] [
K
] [
L
] [
M
] [
N
] [
O
] [
P
] [
R
] [
S
] [
T
] [
U
] [
V
] [
W
] [
X
] [
Z
]

Index
[
A
] [
B
] [
C
] [
D
] [
E
] [
F
] [
G
] [
H
] [
I
] [
J
] [
K
] [
L
] [
M
] [
N
] [
O
] [
P
] [
R
] [
S
] [
T
] [
U
] [
V
] [
W
] [
X
] [
Z
]
accessories 2nd
[See also
camera gear
; specific accessories.]
acid-free paper
Adams, Ansel 2nd
Adobe
Camera RAW 2nd 3rd
Lightroom 2nd
Photoshop [See
Photoshop
.]
Photoshop Elements [See
Photoshop Elements
.]
Adobe Photoshop TV
America From 500 Feet!
animal photos 2nd
aperture priority mode 2nd 3rd
aperture setting 2nd 3rd 4th
athlete shots
2nd 3rd
[See
sports photography
.]
atmospheric effects
Auto White Balance feature 2nd 3rd 4th
[See also
white balance
.]

Index
[
A
] [
B
] [
C
] [
D
] [
E
] [
F
] [
G
] [
H
] [
I
] [
J
] [
K
] [
L
] [
M
] [
N
] [
O
] [
P
] [
R
] [
S
] [
T
] [
U
] [
V
] [
W
] [
X
] [
Z
]
B&H Photo 2nd
baby photos
backgrounds
bright vs. dark
for city-life shots
for flowers 2nd 3rd
for portraits 2nd
for sports photos
out-of-focus 2nd 3rd
using shower curtain for 2nd
backups, photo 2nd
ballcaps
ballheads
baseball caps
batteries 2nd
Bill Fortney's Great Photography Workshop
black backgrounds 2nd
black-and-white photos 2nd 3rd 4th
blinkies 2nd 3rd
blinking
"blue morning" effect
blurry photos
and low-light situations
and shutter speed
and wind
checking LCD monitor for 2nd
intentionally
sharpening
bracketing, exposure
bridal light
bride-and-groom shots 2nd 3rd 4th 5th
[See also
wedding photos
.]
bubble levels
budget, camera gear
bulb mode
burst mode 2nd 3rd

Index
[
A
] [
B
] [
C
] [
D
] [
E
] [
F
] [
G
] [
H
] [
I
] [
J
] [
K
] [
L
] [
M
] [
N
] [
O
] [
P
] [
R
] [
S
] [
T
] [
U
] [
V
] [
W
] [
X
] [
Z
]
cable release 2nd
calibration, monitor
camera gear
[See also
cameras
.]
author's
budget considerations
for sports photography
protecting 2nd 3rd 4th
recommended source for
Camera Raw 2nd 3rd
[See also
RAW format
.]
camera shake
and cable release 2nd
and continuous shooting mode
and ISO setting
and mirror lock-up
and self timer 2nd
and shutter speed
cameras
[See also
digital cameras
.]
digital vs. film 2nd 3rd 4th
hand-holding 2nd
most popular
self timers for 2nd 3rd 4th
steadying 2nd
[See also
tripods
.]
candid shots
Canon cameras
and bracketing
and bulb mode
and burst mode
and exposure compensation 2nd
and highlight warnings
and white balance
for sports photography
lenses for 2nd 3rd
popularity of
teleconverter for
Canon Close-Up Lens
canvas backgrounds
car shots 2nd 3rd
carbon fiber monopods
carbon fiber tripods 2nd
card holders, memory
CDs, shredding
Channels palette (Photoshop)
children, shooting 2nd 3rd
churches, shooting in
city shots 2nd 3rd 4th 5th
[See also
urban shooting
.]
Clone Stamp tool (Photoshop)
close-up lenses 2nd 3rd 4th
cloudy-day shots
collapsible reflectors

color casts 2nd
color contrasts 2nd 3rd 4th
color filters
color management 2nd
color printers 2nd 3rd
color profiles 2nd
CompactFlash cards
composing
flower shots 2nd
formal shots 2nd
landscapes 2nd
portraits 2nd
silhouettes
sports shots 2nd
wildlife shots
CompUSA
Condé Nast Traveler
continuous shooting mode
[See also
burst mode
.]
contrasting colors 2nd 3rd 4th
Crop tool (Photoshop)
Cross, Dave
crowd shots

Index
[
A
] [
B
] [
C
] [
D
] [
E
] [
F
] [
G
] [
H
] [
I
] [
J
] [
K
] [
L
] [
M
] [
N
] [
O
] [
P
] [
R
] [
S
] [
T
] [
U
] [
V
] [
W
] [
X
] [
Z
]
darkening filters 2nd
darkroom tools, software
dawn, shooting at 2nd 3rd
Death Grip
depth of field
details, shooting 2nd
diffused lighting 2nd
digital cameras
and ISO setting
and megapixels
batteries for 2nd
built-in flash for 2nd
exposure bracketing feature
most popular
quick zoom setting for
rain gear for
vs. film cameras 2nd 3rd 4th
Digital Photographers, The Photoshop Book for
Digital Photography Pocket Guide
digital SLR cameras 2nd 3rd 4th 5th
[See also
digital cameras
.]
double levels
dusk, shooting at
dusty weather, changing lenses in
DVD, Photoshop Training
DVDs, shredding

Index
[
A
] [
B
] [
C
] [
D
] [
E
] [
F
] [
G
] [
H
] [
I
] [
J
] [
K
] [
L
] [
M
] [
N
] [
O
] [
P
] [
R
] [
S
] [
T
] [
U
] [
V
] [
W
] [
X
] [
Z
]
edit-as-you-go technique
electronic-cable release
Epson
backup devices 2nd
paper 2nd 3rd
printers
Eraser tool (Photoshop)
EXIF data
exposure bracketing
exposure compensation control 2nd
exposure, over- vs. under-
external flash units 2nd 3rd
Eye-One Display
Eyedropper tool (Photoshop)
eyes
aiming at
avoiding closed
correcting red
focusing on
positioning in frame

Index
[
A
] [
B
] [
C
] [
D
] [
E
] [
F
] [
G
] [
H
] [
I
] [
J
] [
K
] [
L
] [
M
] [
N
] [
O
] [
P
] [
R
] [
S
] [
T
] [
U
] [
V
] [
W
] [
X
] [
Z
]
f-stop 2nd
family portraits
Fellowes shredders
fill flash 2nd
film cameras 2nd 3rd 4th 5th
film speed 2nd
[See also
ISO setting
.]
filters
color
darkening 2nd
Motion Blur
neutral density gradient
polarizing 2nd 3rd 4th 5th
stop-down 2nd
Unsharp Mask 2nd
UV
fireworks shots
fish-eye lenses
flash
and battery life
and red eye
external 2nd
for indoor shots
for outdoor shots
getting diffused light with
flash diffusers
flash exposure compensation
flowers
and macro lenses 2nd
faking rain on
lighting for
non-typical angles for 2nd
on black background 2nd
on white background
printer paper for
shooting outdoors
when to shoot
where to get
zooming in on 2nd
fluorescent lights 2nd
Flying Flowers
focal length
focus
and aperture priority mode
checking in LCD monitor
for city shots
for flowers
for portraits 2nd
for sports shots
for wildlife shots

fog, shooting in
Fong, Gary
forest shots 2nd
formal portraits
[See also
portraits
.]
avoiding blinking in
backgrounds for
framing
popular format for
positioning camera for
shooting sequence for
time required for
where to focus for
Fortney, Bill 2nd 3rd
Fortney, Wesley
Fraser, Bruce

Index
[
A
] [
B
] [
C
] [
D
] [
E
] [
F
] [
G
] [
H
] [
I
] [
J
] [
K
] [
L
] [
M
] [
N
] [
O
] [
P
] [
R
] [
S
] [
T
] [
U
] [
V
] [
W
] [
X
] [
Z
]
gear [See
camera gear
.]
getting "the shot"
for sports photos 2nd
for urban/travel photos 2nd
how LCD monitor helps with
recipes for
Getty Images
glass 2nd
[See also
lenses
.]
Golden Poppies of California: In Celebration of Our State Flower
2nd
government buildings, shooting in/around 2nd 3rd 4th
GretagMacbeth 2nd

Index
[
A
] [
B
] [
C
] [
D
] [
E
] [
F
] [
G
] [
H
] [
I
] [
J
] [
K
] [
L
] [
M
] [
N
] [
O
] [
P
] [
R
] [
S
] [
T
] [
U
] [
V
] [
W
] [
X
] [
Z
]
hand-held shots 2nd 3rd 4th 5th 6th
highlight warnings 2nd 3rd 4th
horizon line 2nd 3rd 4th
HP paper 2nd

Index
[
A
] [
B
] [
C
] [
D
] [
E
] [
F
] [
G
] [
H
] [
I
] [
J
] [
K
] [
L
] [
M
] [
N
] [
O
] [
P
] [
R
] [
S
] [
T
] [
U
] [
V
] [
W
] [
X
] [
Z
]
image quality 2nd
Image Stabilization lenses 2nd 3rd 4th
incandescent lights 2nd 3rd 4th 5th 6th
inkjet printers 2nd 3rd 4th 5th 6th
IS lenses 2nd 3rd 4th
ISO setting 2nd 3rd 4th 5th 6th 7th 8th
iStockphoto.com 2nd

Index
[
A
] [
B
] [
C
] [
D
] [
E
] [
F
] [
G
] [
H
] [
I
] [
J
] [
K
] [
L
] [
M
] [
N
] [
O
] [
P
] [
R
] [
S
] [
T
] [
U
] [
V
] [
W
] [
X
] [
Z
]
Johnson, Stephen 2nd
JPEG format 2nd 3rd 4th 5th 6th 7th 8th

Index
[
A
] [
B
] [
C
] [
D
] [
E
] [
F
] [
G
] [
H
] [
I
] [
J
] [
K
] [
L
] [
M
] [
N
] [
O
] [
P
] [
R
] [
S
] [
T
] [
U
] [
V
] [
W
] [
X
] [
Z
]
Kloskowski, Matt 2nd
knee pads 2nd
Knoll, Thomas 2nd
Kodak 2nd
Kost, Julieanne 2nd

Index
[
A
] [
B
] [
C
] [
D
] [
E
] [
F
] [
G
] [
H
] [
I
] [
J
] [
K
] [
L
] [
M
] [
N
] [
O
] [
P
] [
R
] [
S
] [
T
] [
U
] [
V
] [
W
] [
X
] [
Z
]
ladder, shooting from 2nd
landscape photographers 2nd 3rd 4th
landscape photography 2nd
and aperture priority mode 2nd 3rd 4th
and exposure compensation 2nd
and highlight warnings 2nd
and neutral density gradient filter 2nd
and polarizing filters 2nd 3rd 4th
and tripods 2nd 3rd 4th 5th 6th
and wide-angle lenses 2nd
avoiding crooked horizon in 2nd
composing shots for 2nd
getting richer colors in 2nd
golden rule of 2nd
hand-holding camera for 2nd
lighting considerations 2nd 3rd 4th
masters of 2nd
non-typical angles for 2nd 3rd 4th
panoramas 2nd
placing horizon in 2nd
printer paper for 2nd
showing size in 2nd
weather considerations 2nd 3rd 4th
large-format prints 2nd 3rd 4th
LCD monitor
and battery life 2nd
and blinkies 2nd 3rd 4th 5th 6th
and edit-as-you-go technique 2nd
and white balance 2nd 3rd 4th
checking focus in 2nd 3rd 4th
checking lighting in 2nd
comparing with computer monitor 2nd
pros and cons of 2nd
lens flare 2nd 3rd 4th 5th 6th
lens hoods 2nd 3rd 4th
lenses 2nd
and dusty weather 2nd
and photo sharpness 2nd
close-up/macro 2nd 3rd 4th 5th 6th 7th 8th
fish-eye 2nd
for portraits 2nd
for sports photography 2nd 3rd 4th
Image Stabilization 2nd 3rd 4th
polarizing filters for 2nd 3rd 4th 5th 6th 7th 8th 9th 10th
protecting 2nd 3rd 4th 5th 6th 7th 8th
quality considerations 2nd
sweet spot for 2nd
telephoto [See
telephoto lenses
.]
Vibration Reduction [See
VR lenses
.]

wide-angle 2nd 3rd 4th
zoom [See
zoom lenses
.]
Lepp, George
lighting
[See also
low-light photography
.]
and backgrounds
and exposure bracketing
avoiding harsh
diffused 2nd
for brides
for flowers
for landscapes 2nd
for portraits 2nd
natural [See
natural light
.]
studio
Lightroom 2nd
Lightsphere-II
Lipovetsky, Joel
low-light photography
and continuous shooting mode
and IS lenses 2nd
and ISO setting 2nd 3rd
and VR lenses 2nd
LumiQuest

Index
[
A
] [
B
] [
C
] [
D
] [
E
] [
F
] [
G
] [
H
] [
I
] [
J
] [
K
] [
L
] [
M
] [
N
] [
O
] [
P
] [
R
] [
S
] [
T
] [
U
] [
V
] [
W
] [
X
] [
Z
]
macro lenses 2nd 3rd 4th
macro, shooting 2nd
Magic Wand tool (Photoshop)
McNally, Joe
megapixels
memory cards
and RAW format 2nd
and sports photos 2nd
and wedding photos 2nd 3rd
avoiding accidental erasure of
backing up 2nd
holder for
size considerations
mirror lock-up
model releases
models, hiring
monitor calibration
monopods 2nd 3rd
moon shoots
Motion Blur filter (Photoshop)
motion shots 2nd 3rd 4th
motion trails
mountain shots 2nd
mounting board
Muench, David
multi-photo spreads
museums, shooting in 2nd
muslin backgrounds

Index
[
A
] [
B
] [
C
] [
D
] [
E
] [
F
] [
G
] [
H
] [
I
] [
J
] [
K
] [
L
] [
M
] [
N
] [
O
] [
P
] [
R
] [
S
] [
T
] [
U
] [
V
] [
W
] [
X
] [
Z
]
National Geographic 2nd
National Geographic Traveler
natural light
for flowers 2nd 3rd 4th
for portraits 2nd 3rd 4th 5th
neutral density gradient filter
newborn photography
Nikon cameras
and bulb mode
and burst mode 2nd
and Canon Close-Up Lens
and exposure compensation 2nd
and highlight warnings
and VR lenses
and white balance
bracketing button
Flexible Program Mode
for sports photography
popularity of
teleconverter for
noise 2nd
Noise Ninja

Index
[
A
] [
B
] [
C
] [
D
] [
E
] [
F
] [
G
] [
H
] [
I
] [
J
] [
K
] [
L
] [
M
] [
N
] [
O
] [
P
] [
R
] [
S
] [
T
] [
U
] [
V
] [
W
] [
X
] [
Z
]
old people, shooting
out-of-focus backgrounds 2nd 3rd
Outdoor Photographer
outdoor shots
[See also
landscape photography
;
travel photos
.]
and aperture priority mode
and lens flare
and white balance 2nd
and wide-angle lenses
at weddings
backgrounds for 2nd
in bad weather
in dusty weather
lighting for 2nd
of people 2nd 3rd
on windy days
using flash for
overexposed photos

Index
[
A
] [
B
] [
C
] [
D
] [
E
] [
F
] [
G
] [
H
] [
I
] [
J
] [
K
] [
L
] [
M
] [
N
] [
O
] [
P
] [
R
] [
S
] [
T
] [
U
] [
V
] [
W
] [
X
] [
Z
]
panning
panoramas
paper backgrounds
paper, printer 2nd 3rd
people, shooting
[See also
portraits
.]
Peterson, Bryan
Peterson, Moose 2nd
photo recipes
photo shoots 2nd 3rd
[See also
shooting
.]
Photoflex reflectors
photographers, professional 2nd 3rd 4th 5th
photography
[See also
shooting
.]
digital vs. film 2nd 3rd 4th
equipment [See
camera gear
.]
flower 2nd
[See also
flowers
.]
landscape
[See also
landscape photography
.]
low-light [See
low-light photography
.]
outdoor [See
outdoor shots
.]
portrait
[See also
portraits
.]
problems
recommended books on
sports
[See also
sports photography
.]
travel
[See also
travel photos
.]
wedding
[See also
wedding photos
.]
wildlife
photojournalism
Photomerge feature (Photoshop)
photos
backing up
combining 2nd
correcting red eye in
getting sharp [See
sharp photos
.]
organizing
panoramic
printing [See
printing
.]
selling
sharpening after the fact
PhotoSecrets.com
Photoshop
and Camera Raw 2nd 3rd
changing white balance in 2nd
Channels palette
Clone Stamp tool
color management system
combining photos in
correcting red eye in
creating panoramas in
Crop tool
Eraser tool

Eyedropper tool
Magic Wand tool
making tonal adjustments in
Motion Blur filter
Photomerge feature
processing RAW photos in
sharpening photos in
Training DVD
Unsharp Mask filter 2nd
viewing EXIF data in
vs. Lightroom
weekly video show
Photoshop Book for Digital Photographers, The
Photoshop Elements 2nd 3rd
PictureCode.com
point-and-shoot cameras
polarizing filters 2nd 3rd 4th 5th
portrait lenses
portraits
[See also
formal portraits
.]
and aperture setting
and collapsible reflectors
and focal length
at sunset
avoiding shadows in
backgrounds for
best lens for
lighting for 2nd
positioning camera for
positioning subject for
printer paper for
shooting sequence for group
where to focus for
zooming in for
poster board
poster-sized printing 2nd
printer paper 2nd 3rd
printers 2nd
printing
and megapixels
and monitor calibration
borderless prints 2nd
multi-photo spreads
poster-sized 2nd
with archival-quality inks
product recommendations 2nd
professional photographers 2nd 3rd 4th 5th

Index
[
A
] [
B
] [
C
] [
D
] [
E
] [
F
] [
G
] [
H
] [
I
] [
J
] [
K
] [
L
] [
M
] [
N
] [
O
] [
P
] [
R
] [
S
] [
T
] [
U
] [
V
] [
W
] [
X
] [
Z
]
rain
protecting gear from 2nd
shooting in
simulating
RAW format
and exposure bracketing
and memory cards 2nd
and Photoshop 2nd 3rd
and sports photography
and white balance 2nd
pros and cons of
recommended books on
vs. JPEG 2nd
Real World Camera Raw
reception photos, wedding
recipes, photo
red eye
Red Eye tool (Photoshop)
Red River Paper 2nd
reflectors 2nd
release forms, model
Rick Sammon's Complete Guide to Digital Photography
Rick Sammon's Travel and Nature Photography

Index
[
A
] [
B
] [
C
] [
D
] [
E
] [
F
] [
G
] [
H
] [
I
] [
J
] [
K
] [
L
] [
M
] [
N
] [
O
] [
P
] [
R
] [
S
] [
T
] [
U
] [
V
] [
W
] [
X
] [
Z
]
Sammon, Rick
scottkelbybooks.com
seamless backgrounds 2nd
security issues 2nd
self timers 2nd 3rd 4th
shadows 2nd 3rd 4th
sharp photos
and aperture setting
and cable release
and hand-held cameras 2nd
and IS lenses
and ISO setting
and lens quality
and mirror lock-up
and self timers
and tripods 2nd
and VR lenses
importance of
zooming in to check for
sharpening tools
Shaw, John 2nd
shooting
at dawn/dusk 2nd 3rd
athletes 2nd 3rd
cars 2nd 3rd
children 2nd 3rd
crowds
dance photos
details 2nd
fireworks
flowers 2nd 3rd 4th
[See also
flowers
.]
forests/trees 2nd 3rd
from high vantage point
getting permits for
in bad weather
in bright sunlight
in burst mode 2nd
in churches
in cold weather
in dusty weather
in fog
in low-light conditions [See
low-light photography
.]
in museums 2nd
in RAW format 2nd
in urban areas 2nd
in windy weather
in/around government buildings 2nd
landscapes
[See also
landscape photography
.]
moon

motion shots 2nd 3rd 4th
mountains 2nd
on cloudy days
on inclines
outdoors [See
outdoor shots
.]
panoramas
people 2nd 3rd 4th
[See also
portraits
.]
real-life vs. by-the-book
signs
silhouettes 2nd
sky [See
sky
.]
sports
[See also
sports photography
.]
sunrises/sunsets 2nd 3rd 4th 5th
"the shot." [See
getting "the shot"
.]
touristy landmarks
water 2nd 3rd
waterfalls 2nd 3rd
weddings
[See also
wedding photos
.]
wildlife 2nd
shower caps
shower curtains 2nd 3rd
shredders
shutter priority mode 2nd 3rd 4th
shutter speed 2nd 3rd 4th 5th
Shutterbug
Shutterfly
signs, shooting
silhouettes 2nd
skin tones
sky
adjusting in Photoshop
capturing pre-storm
emphasizing/de-emphasizing
exposure considerations
limiting amount of
photo recipes 2nd 3rd
slide shows
SLR cameras 2nd 3rd 4th 5th
Soft Screen Diffuser
software darkroom tools
sports photography
and aperture setting
and burst mode 2nd
and color filters
and ISO setting
and RAW vs. JPEG format
and shutter speed 2nd 3rd
and tripods
and white balance
backgrounds for
camera gear required for
composing shots 2nd
emphasizing motion in
learning the game
lenses for 2nd
pre-focusing shots
professional
story-telling with
using multiple cameras for
vertical vs. horizontal shots

stock-photo agencies
stop-action photos
stop-down filters 2nd
stormy weather, shooting in
Story, Derrick
studio lighting
sunrise shots
sunset portraits
sunset shots 2nd 3rd 4th 5th
super-wide-angle lenses 2nd
sweet spot, lens

Index
[
A
] [
B
] [
C
] [
D
] [
E
] [
F
] [
G
] [
H
] [
I
] [
J
] [
K
] [
L
] [
M
] [
N
] [
O
] [
P
] [
R
] [
S
] [
T
] [
U
] [
V
] [
W
] [
X
] [
Z
]
tack-sharp photos 2nd
teleconverters 2nd 3rd
telephoto lenses
and aperture priority mode
and portrait photography
and sports photography 2nd
and teleconverters 2nd
quality considerations
turning into macro lenses
textured paper
TFP
"the shot." [See
getting "the shot"
.]
Through the Lens: National Geographic's Greatest Photographs
tight shots
timers, self 2nd 3rd 4th
touristy landmarks
Travel & Leisure
travel magazines 2nd 3rd
travel photographers
travel photos
backgrounds for
capturing details in
getting "the shot," 2nd
importance of color in
main themes for
non-typical angles for 2nd
of signs
of touristy landmarks
printer paper for
showing movement in
simplicity in
when to shoot
tree shots 2nd
tripod heads
tripods
[See also
monopods
.]
alternatives to 2nd
and fireworks shots
and ISO setting
and landscape photography 2nd 3rd
and macro lenses
and motion trails
and panoramas
and portraits
and sports photography
and tack-sharp photos
and VR/IS lenses
ballheads for
carbon fiber
cost considerations

getting permits to use
light vs. heavy
using on inclines
vs. monopods
TV show Photoshop
two-element close-up diopters

Index
[
A
] [
B
] [
C
] [
D
] [
E
] [
F
] [
G
] [
H
] [
I
] [
J
] [
K
] [
L
] [
M
] [
N
] [
O
] [
P
] [
R
] [
S
] [
T
] [
U
] [
V
] [
W
] [
X
] [
Z
]
ultra-wide-angle lenses
underexposed photos
Understanding Exposure: How to Shoot Great Photographs with a Film or Digital Camera
Unsharp Mask filter (Photoshop) 2nd
urban shooting
backgrounds for
capturing details in
getting "the shot," 2nd
importance of color in
non-typical angles for 2nd
simplicity in
when to do
UV filters

Index
[
A
] [
B
] [
C
] [
D
] [
E
] [
F
] [
G
] [
H
] [
I
] [
J
] [
K
] [
L
] [
M
] [
N
] [
O
] [
P
] [
R
] [
S
] [
T
] [
U
] [
V
] [
W
] [
X
] [
Z
]
Val, Leah Brendavid
VR lenses 2nd 3rd

Index
[
A
] [
B
] [
C
] [
D
] [
E
] [
F
] [
G
] [
H
] [
I
] [
J
] [
K
] [
L
] [
M
] [
N
] [
O
] [
P
] [
R
] [
S
] [
T
] [
U
] [
V
] [
W
] [
X
] [
Z
]
walk up shots
waterfall shots 2nd 3rd
wedding photos
avoiding closed eyes in
backgrounds for
backing up
bouquet/garter toss
ceremony
changing vantage point for
detail shots
formals 2nd
[See also
formal portraits
.]
format considerations
importance of bride in
lighting conditions for 2nd
memory cards for 2nd 3rd
outdoor shots
photojournalism technique for
posing bride with others in
pre-wedding shots
reception
rice throwing
typical number of shots for
using flash for
using wide-angle lens for
white background
for flowers
for portraits
using shower curtain for 2nd
white balance
and JPEG format
and panoramas
and RAW format
and sports photos
and sunrise/sunset shots
avoiding problems with 2nd
fixing in Photoshop 2nd
wide-angle lenses 2nd 3rd 4th
wildlife photos 2nd
Willmore, Ben
wind, shooting flowers in
Window Seat: The Art of Digital Photography and Creative Thinking
wireless remotes 2nd

Index
[
A
] [
B
] [
C
] [
D
] [
E
] [
F
] [
G
] [
H
] [
I
] [
J
] [
K
] [
L
] [
M
] [
N
] [
O
] [
P
] [
R
] [
S
] [
T
] [
U
] [
V
] [
W
] [
X
] [
Z
]
X-Rite

Index
[
A
] [
B
] [
C
] [
D
] [
E
] [
F
] [
G
] [
H
] [
I
] [
J
] [
K
] [
L
] [
M
] [
N
] [
O
] [
P
] [
R
] [
S
] [
T
] [
U
] [
V
] [
W
] [
X
] [
Z
]
Ziser, David
zoom button
zoom lenses
and aperture priority mode
and flower photography 2nd
and landscape photography
and portrait photography
and wildlife shots
extending reach of
quality considerations
turning into macro lenses 2nd
Wyszukiwarka
Podobne podstrony:
The Digital Photography Book Scott Kelby Volume 2
The Digital Photography Book Scott Kelby Volume 3
Digital Photography The Digital Darkroom
The Dirty Truth?out The Cloud And The Digital Age
Installing the Digital Sc
[Photography Ebook] digital photography hacks
Stephenson, Neal Dreams and Nightmares of the Digital Age
Digital Photography Course
Exploring Digital Photography
(ebook PDF) The Necronomicon Spell Book
Sara Reinke Tiralainn 04 Book of Dragons Volume 02
The Family Reunion Book II
irving washington the art of book making
The Organic Chemistry of Drug Synthesis VOLUME 1 DANIEL LEDNICER
The Incubus Agenda RJ Scott
Ellen Datlow (ed) Omni 04 The 4th Omni Book of Science Fiction
The pet bubble book(1)
The Third Kingdom RJ Scott
więcej podobnych podstron