Shuttle Tatting Without A Teacher (8)
to make light colored stitches (sińce the loop around the left hand is formed with the light thread) - and picots!
Picots aren’t actually stitches - they are merely spaces between stitches. Work five double stitches then move your left thumb along the left-hand loop - about a quarter inch beyond the last double stitch. Hołd it with your thumbnail. Work another double stitch; lift your thumb. You’ll see a space between the last two double stitches.
Fig.. 13

Slide the last DS (double stitch) up against the previous one. The thread in the space forms a smali loop - this is called a picot (pronounced - pe ko).
Fig. 14

Now make another four DS (double stitch or stitches), then a picot (sometimes abbreviated as P or indicated
with a smali dash - or dashes---) then five DS, a P
then another five DS.
You will discover, as you are working, that the loop on the left hand gets smaller and smaller (this is because it is this thread which is making all the DS). Lengthen it by pulling on this loop thread which is to the left of your thumb and first finger (nearest your body) while holding the DS between thumb and first finger with your left hand. This will make the loop larger but shorten the shuttle thread so you will probably have to unwind the shuttle thread a couple of turns.
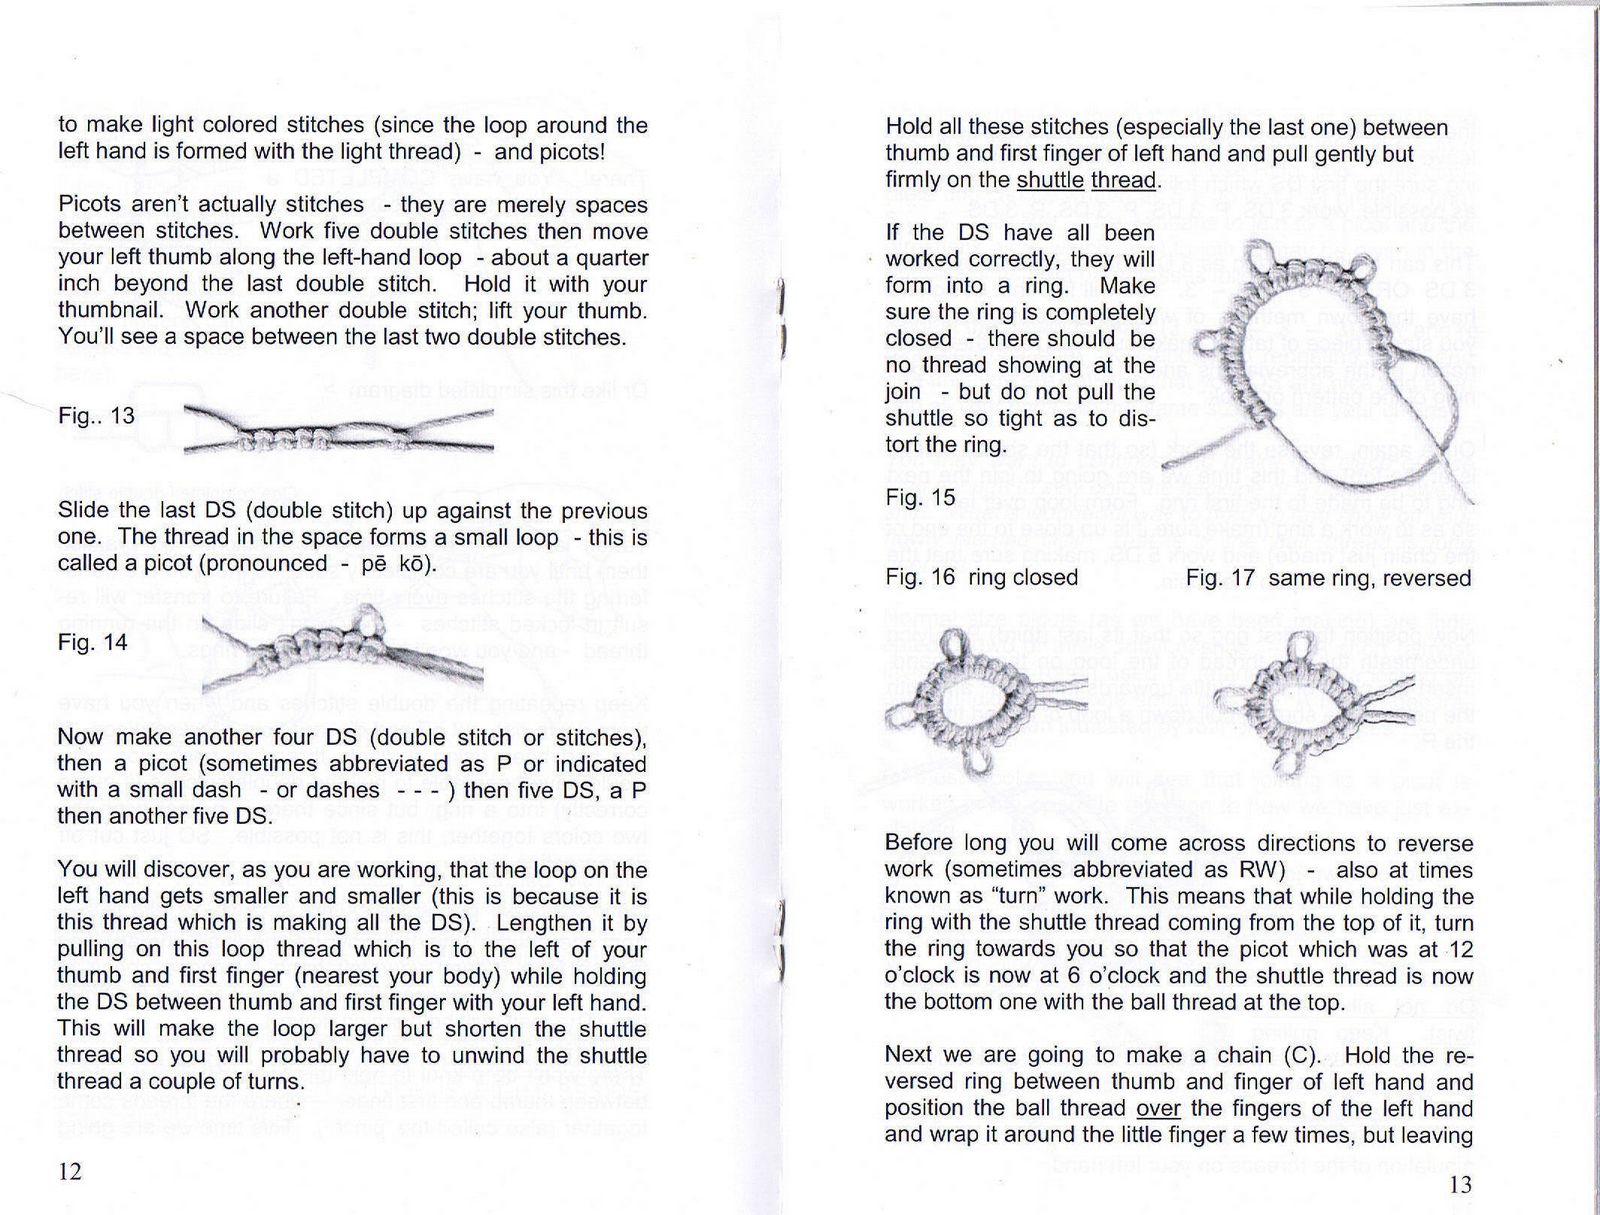
Hołd all these stitches (especially the last one) between thumb and first finger of left hand and puli gently but firmly on the shuttle thread.
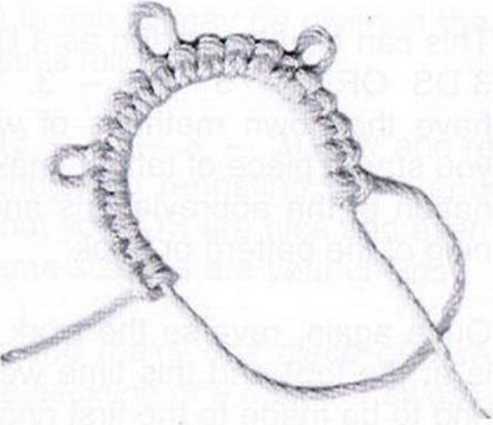
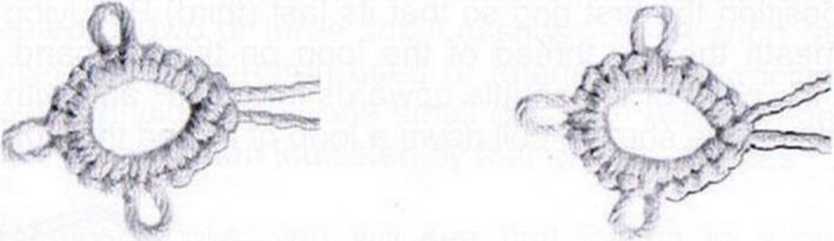
Fig. 17 same ring, reversed
If the DS have all been worked correctly, they will form into a ring. Make surę the ring is completely closed - there should be no thread showing at the join - but do not puli the shuttle so tight as to dis-tort the ring.
Fig. 15
Fig. 16 ring closed
Before long you will come across directions to reverse work (sometimes abbreviated as RW) - also at times known as “tum” work. This means that while holding the ring with the shuttle thread coming from the top of it, tum the ring towards you so that the picot which was at 12 o’clock is now at 6 o’clock and the shuttle thread is now the bottom one with the bali thread at the top.
Next we are going to make a chain (C). Hołd the re-versed ring between thumb and finger of left hand and position the bali thread over the fingers of the left hand and wrap it around the little finger a few times, but leaving
13
Wyszukiwarka
Podobne podstrony:
Shuttle Tatting Without A Teacher (8) to make light colored stitches (sińce the ioop around the left
Shuttle Tatting Without A Teacher (10) I urge you to try both ways. I have great faith that you will
Shuttle Tatting Without A Teacher (4) or points. If a shuttle without a hook or point is to be used,
Shuttle Tatting Without A Teacher (9) the ‘loop’ loose enough to raise the middle finger and also le
Shuttle Tatting Without A Teacher (9) the ‘loop’ loose enough to raise the middle finger and also le
Shuttle Tatting Without A Teacher (10) I urge you to try both ways. I have great faith that you will
Shuttle Tatting Without A Teacher (14) WE have discussed and demonstrated what is consid-ered to be
Shuttle Tatting Without A Teacher (2) From Betty Alderson: I taught myself to tat over 50 years ago
Shuttle Tatting Without A Teacher (11) The smali motif on which we will be working is for practice p
więcej podobnych podstron