Shuttle Tatting Without A Teacher (9)
the ‘loop’ loose enough to raise the middle finger and also leave a 'working' space as when making a ring (R). Mak-ing surę the first DS which follows is as close up to the R as possible, work 3 DS, P, 3 DS, P, 3 DS, P, 3 DS.
This can also be written as 3 DS, 3 P separated by 3 DS, 3 DS OR 3 -- 3 -- 3 -- 3. You will find that designers have their own methods of writing directions so before you start a piece of tatting, make surę you read the expla-nation of the abbreviations and/or symbols at the begin-ning of the pattern or book.
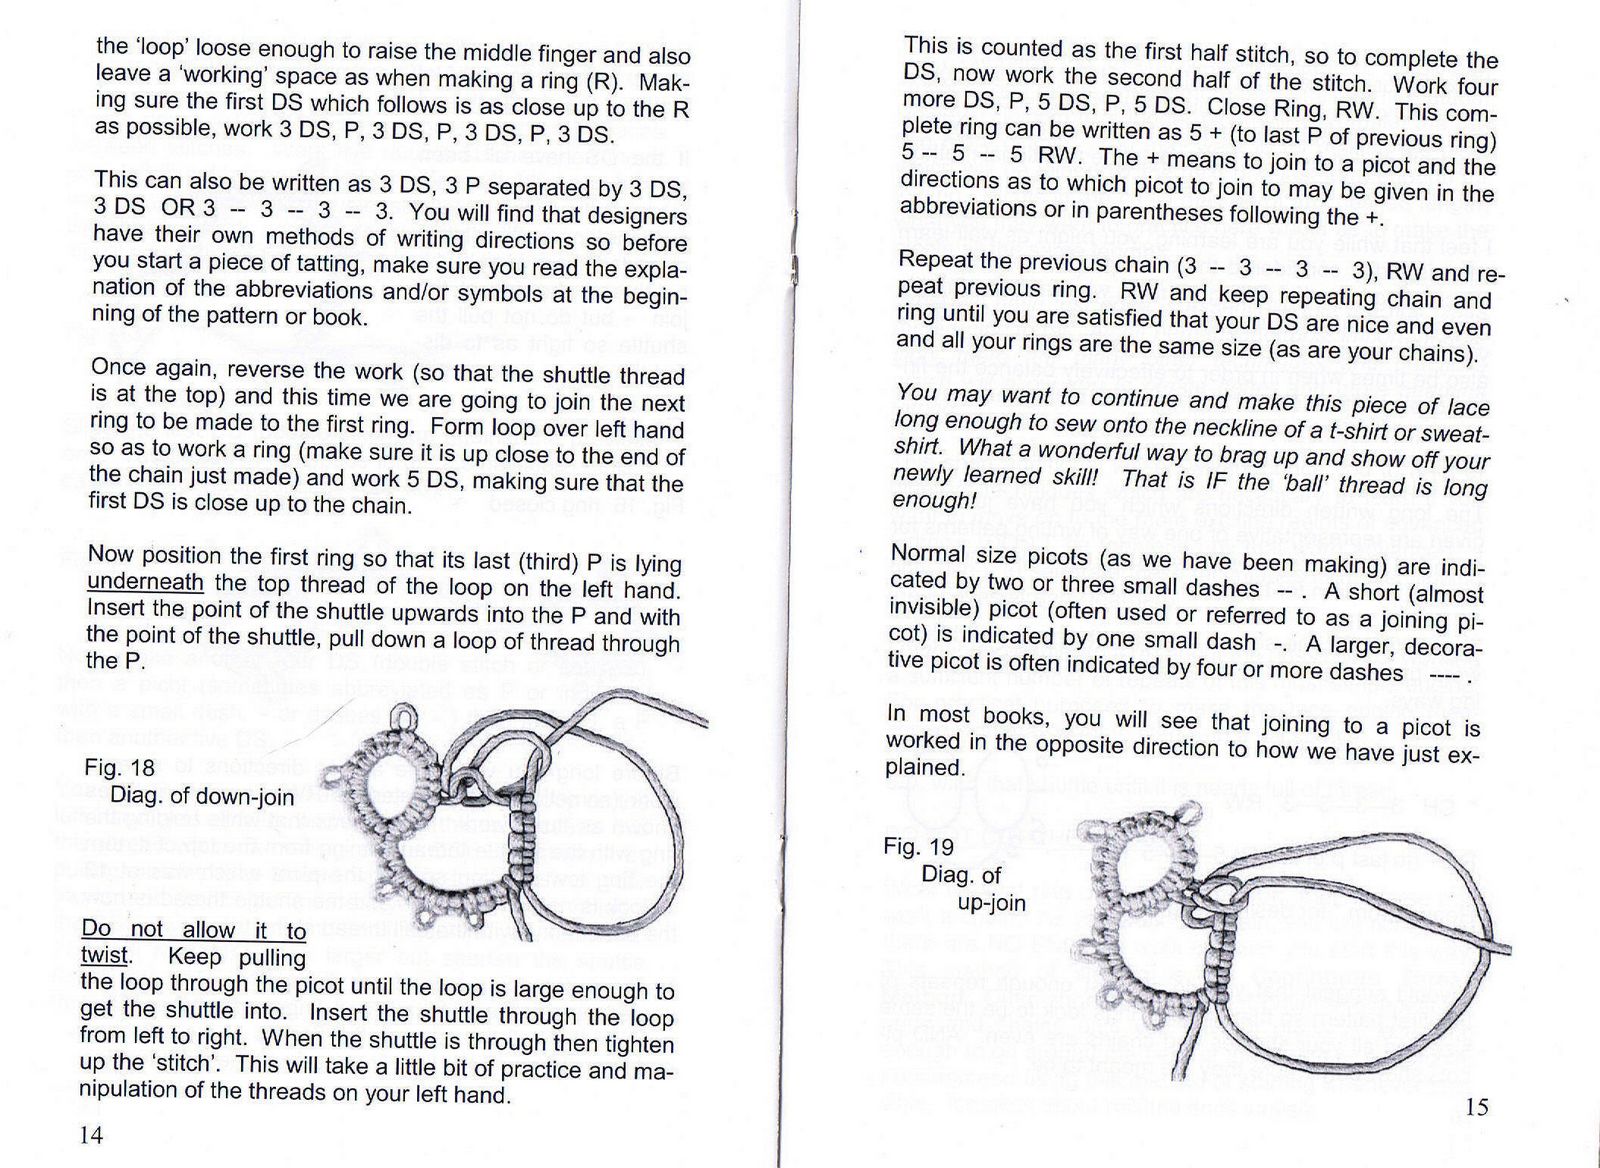
Once again, reverse the work (so that the shuttle thread is at the top) and this time we are going to join the next ring to be madę to the first ring. Form loop over left hand so as to work a ring (make surę it is up close to the end of the chain just madę) and work 5 DS, making surę that the first DS is close up to the chain.
Now position the first ring so that its last (third) P is lying underneath the top thread of the loop on the left hand. Insert the point of the shuttle upwards into the P and with the point of the shuttle, puli down a loop of thread through the P.

the loop through the picot until the loop is large enough to get the shuttle into. Insert the shuttle through the loop from left to right. When the shuttle is through then tighten up the ‘stitch’. This will take a little bit of practice and ma-nipulation of the threads on your left hand.
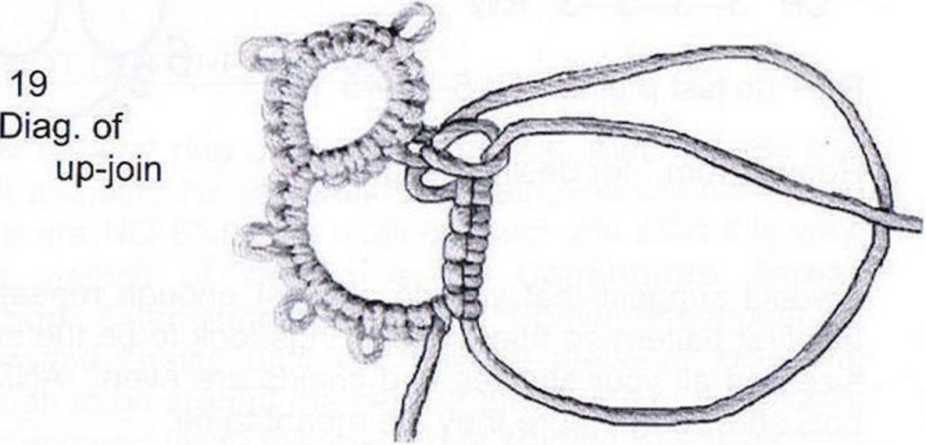
This is counted as the first half stitch, so to complete the DS, now work the second half of the stitch. Work four morę DS, P, 5 DS, P, 5 DS. Close Ring, RW. This complete ring can be written as 5 + (to last P of previous ring)
5 -- 5 - 5 RW. The + means to join to a picot and the directions as to which picot to join to may be given in the abbreviations or in parentheses following the +.
Repeat the previous chain (3 - 3 -- 3 -- 3), RW and re-peat previous ring. RW and keep repeating chain and ring until you are satisfied that your DS are nice and even and all your rings are the same size (as are your chains).
You may want to continue and make this piece of lace long enough to sew onto the neckline of a t-shirt or sweat-shirt. What a wonderful way to brag up and show off your newly learned skill! That is IF the ‘bali’ thread is long enough!
Normal size picots (as we have been making) are indi-cated by two or three smali dashes -- . A short (almost invisible) picot (often used or referred to as a joining picot) is indicated by one smali dash -. A larger, decora-tive picot is often indicated by four or morę dashes — .
In most books, you will see that joining to a picot is worked in the opposite direction to how we have just ex-plained.
Fig.
15
Wyszukiwarka
Podobne podstrony:
Shuttle Tatting Without A Teacher (9) the ‘loop’ loose enough to raise the middle finger and also le
Shuttle Tatting Without A Teacher (6) the loop which was formed over the fingers of your right hand.
Shuttle Tatting Without A Teacher (8) to make light colored stitches (sińce the loop around the left
Shuttle Tatting Without A Teacher (11) The smali motif on which we will be working is for practice p
Shuttle Tatting Without A Teacher (12) bali end) through the smali loop. Puli on the short end comin
Shuttle Tatting Without A Teacher (13) and chain you have just tatted) when the front side of the ri
Shuttle Tatting Without A Teacher (14) WE have discussed and demonstrated what is consid-ered to be
więcej podobnych podstron