Button Objects
T
his chapter is devoted to those lovable buttons that
invite users to initiate action and make choices with a
single click of the mouse button. In this category fall the
standard system-looking buttons with labels on them as well
as radio buttons and checkboxes. For such workhorses of the
HTML form, these objects have a limited vocabulary of
properties, methods, and event handlers.
I group together the button, submit, and reset objects for
an important reason: they look alike yet they are intended for
very different purposes. It is important to know when to use
which button — especially in the case of the button and
submit objects. Many a newcomer get the two confused and
wind up with scripting error headaches. That shouldn’t
happen to you by the time you’ve finished this chapter.
The Button Object, Submit Object,
and Reset Object
Properties
Methods
Event Handlers
name
click()
onClick=
type
handleEvent()
onMouseDown=
value
onMouseUp=
Syntax
Creating a button:
<FORM>
<INPUT
TYPE=”button” | “submit” | “reset”
NAME=”
buttonName”
VALUE=”labelText”
[onClick=”handlerTextOrFunction”]
[onMouseDown=”handlerTextOrFunction”]
[onMouseUp=”handlerTextOrFunction”] >
</FORM>
23
23
C H A P T E R
✦ ✦ ✦ ✦
In This Chapter
Triggering action
from a user’s click of
a button
Assigning hidden
values to radio and
checkbox buttons
Distinguishing
between radio button
families and their
individual buttons
✦ ✦ ✦ ✦
458
Part III ✦ JavaScript Object and Language Reference
Accessing button object properties or methods:
[window.] document.formName.buttonName.property |
method([parameters])
[window.] document.formName.elements[index].property |
method([parameters])
[window.] document.forms[index].buttonName.property |
method([parameters])
[window.] document.forms[index].elements[index].property |
method([parameters])
About these objects
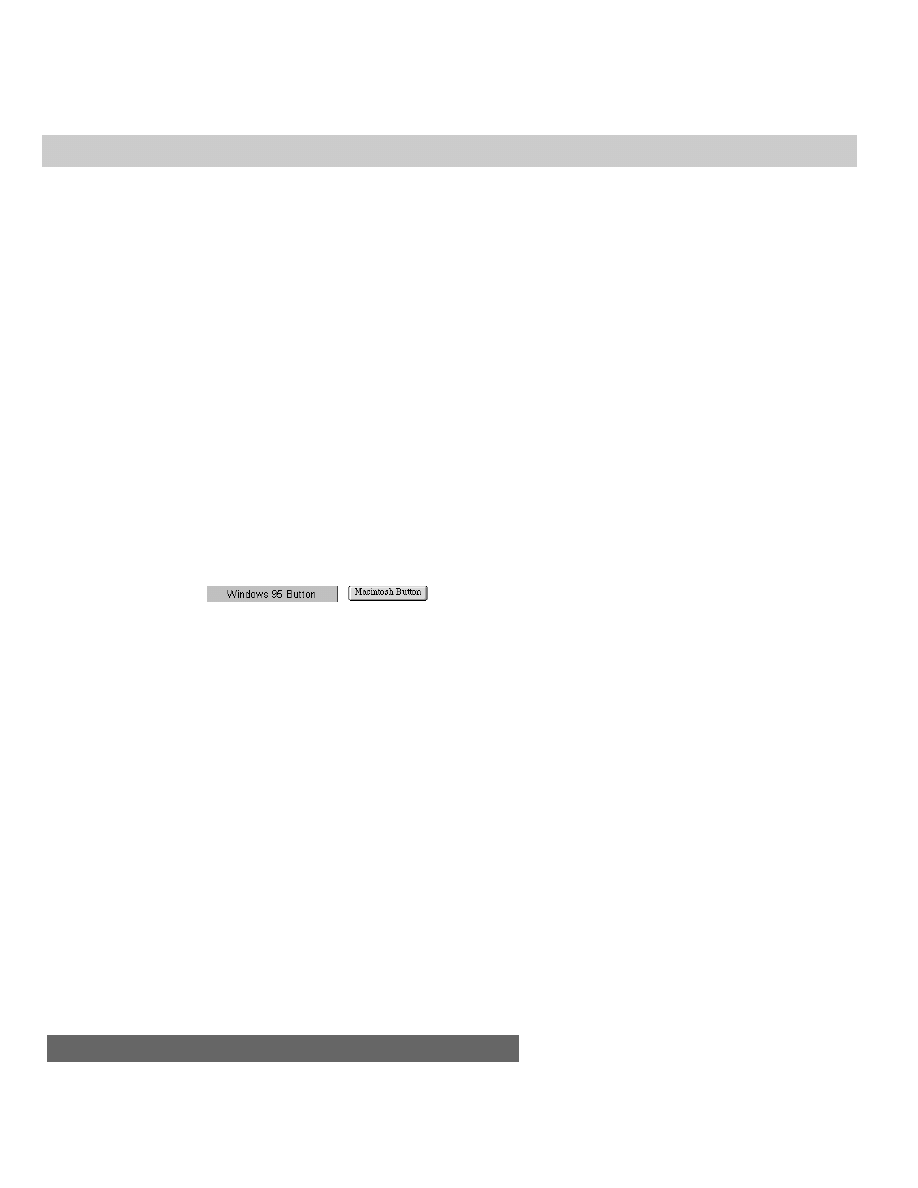
Button objects generate standard, pushbutton-style user interface elements on
the page, depending on the operating system on which the particular browser
runs. Figure 23-1 shows examples of a typical button in both the Windows 95 and
Macintosh versions for Navigator 4. The precise look also varies with browser
version and supplier. In the early days, the browsers called upon the operating
systems to generate these standard interface elements. In more recent versions,
the browsers define their own look, albeit still different for each operating system.
Figure 23-1: Comparison of the button object in Navigator 4 for the Windows 95 (left)
and Macintosh (right) operating systems
The only visual characteristic of a button controlled by the HTML page author
is the text that appears on the button. That label text is the parameter to the
VALUE
attribute of the button’s definition. The width of the button on the screen is
calculated for you, based on the width of the button’s label text. Always give
careful thought to the label you assign to a button. Because a button initiates some
action, make sure that the verb in the label clearly defines what happens when you
click it. Also take cues from experienced user interface designers who craft
operating system and commercial software buttons: Be concise. If you find your
button labels going longer than two or three words, reconsider the design of your
page so the user can clearly understand the purpose of any button from a shorter
label. Like most user interface elements, JavaScript automatically draws buttons
left-aligned on the page. For earlier browsers not fitted with element positioning,
you can surround a button’s
<INPUT>
definition with the
<DIV ALIGN=”where”>...
</DIV>
tags to have them align center or right, if you prefer. However, Navigator 4
and Internet Explorer 4 offer the best solution by letting you specify the precise
coordinates of the top-left corner of the button. This kind of positioning still does
not address the cross-platform problem of laying out form elements with a uniform
look on all operating systems, because one may be wider or taller than another —
topographical features not under control of style sheets or JavaScript. Therefore,
unless you branch the layout properties of your form elements according to
operating system (and then test the appearance on the ones you’re concerned

459
Chapter 23 ✦ Button Objects
about), precise positioning of buttons against other objects or images is difficult or
impossible to guarantee.
Buttons in the Windows environment follow their normal behavior in that they
indicate the focus with highlighted button-label text. You cannot control the focus
or blur of a button via JavaScript as you can for a text object. Buttons are also
highlighted according to the conventions of the host operating system, and you
cannot override these conventions with scripting commands.
The lone button object event handler that works on all browser versions is one
that responds to a user clicking the pointer atop the mouse: the
onClick=
event
handler. Virtually all action surrounding a button object comes from this event
handler. You will rarely need to extract property values or invoke the
click()
method ( particularly because the method does not work correctly, even in
Navigator 3). Navigator 4 and Internet Explorer 4 add events for the components of
a click: mouseDown and mouseUp.
Two special variants of the JavaScript button object are the
submit and reset
button objects. With their heritages going back to early incarnations of HTML,
these two button types perform special operations on their own. The submit-style
button automatically sends the data within the same form object to the URL listed
in the
ACTION
attribute of the
<FORM>
definition. The
METHOD
attribute dictates the
format in which the button sends the data. Therefore, you don’t have to script this
action if your HTML page is communicating with a CGI program on the server.
If the form’s
ACTION
attribute is set to a
mailto:
URL, you must provide the
page visitor with a Submit button to carry out the action. It is also helpful to set
the form’s
ENCTYPE
attribute to
text/plain
so that the form data arrives in a
more readable form than the normal encoded name-value pairs. See “E-Mailing
forms” in Chapter 21 for details about submitting form content via e-mail.
The partner of the Submit button is the Reset button. It, too, has special
features. A click of this button type restores all elements within the form to their
default values. That goes for text objects, radio button groups, checkboxes, and
selection lists. The most common application of the button is to clear entry fields
of the last data entered by the user.
All that distinguishes these three types of buttons from each other in the
<INPUT>
element definition is the parameter of the
TYPE
attribute. For buttons not
intended to send data to a server, use the
“button”
style. Reserve
“submit”
and
“reset”
for their special CGI-related powers.
If you want an image to behave like a button, consider either associating a link
with an image (see the discussion on the link object in Chapter 17) or creating a
client-side image map (see the area object discussion in Chapter 18).
Probably the biggest mistake scripters make with these buttons is using a
Submit button to do the work of a plain button. Because they look alike and the
submit type of input element has a longer tradition than the button, it is easy to
confuse the two. But if all you want is to display a button that initiates client-side
script execution, use a plain button. The Submit button will attempt to submit the
form. If no
ACTION
attribute is set, then the page reloads, and all previous
processing and field entries are erased. The plain button does its job quietly
without reloading the page (unless the script intentionally does so).
460
Part III ✦ JavaScript Object and Language Reference
Properties
name
Value: String
Gettable: Yes
Settable: Yes
Nav2
Nav3
Nav4
IE3/J1
IE3/J2
IE4/J3
Compatibility
✔
✔
✔
✔
✔
✔
A button’s name is fixed in the
<INPUT>
definition’s
NAME
attribute and cannot
be adjusted via scripting except in newer browsers. You may need to retrieve this
property in a general-purpose function handler called by multiple buttons in a
document. The function can test for a button name and perform the necessary
statements for that button. If you change the name of the object, even a soft reload
or window resize will restore its original name.
Example
buttonName = document.forms[0].elements[3].name // 4th element is a
button
Related Items:
name
property of all form elements.
type
Value: String
Gettable: Yes
Settable: No
Nav2
Nav3
Nav4
IE3/J1
IE3/J2
IE4/J3
Compatibility
✔
✔
✔
The precise value of the
type
property echoes the setting of the
TYPE
attribute
of the
<INPUT>
tag that defined the object: button; submit; or reset.
value
Value: String
Gettable: Yes
Settable: Yes
461
Chapter 23 ✦ Button Objects
Nav2
Nav3
Nav4
IE3/J1
IE3/J2
IE4/J3
Compatibility
✔
✔
✔
✔
✔
✔
A button’s visible label is determined by the
VALUE
attribute of the
<INPUT>
element’s definition. The value property reveals that text. A strong convention
exists that assigns the words “Submit” and “Reset” to their respective button-style
labels. As long as the purpose of either button is clear, you can assign whatever
label you like to any of the button objects in the
<INPUT>
definitions. Unlike button
(and other object) names, the
VALUE
attribute can be more than one word.
You can modify this text on the fly in a script, but some cautions apply. Except
for Internet Explorer 4’s extraordinary redrawing behavior, all other browsers do
not resize the width of the button to accommodate a new name that is longer or
shorter than the original. Moreover, any soft reload or resize of the window
restores the original label. Internet Explorer 4, however, resizes the button and
reflows the page to meet the new space needs; the new label survives a window
resizing, but not a soft reload of the page.
Example
In the following excerpt, the statement toggles the label of a button from “Play”
to “Stop”:
btn = document.forms[0].controlButton
btn.value = (btn.value == “Play”) ? “Stop” : “Play”
Related Items:
value
property of text object.
Methods
click()
Returns: Nothing.
Nav2
Nav3
Nav4
IE3/J1
IE3/J2
IE4/J3
Compatibility
✔
✔
✔
✔
✔
✔
A button’s
click()
method should replicate, via scripting, the human action of
clicking that button. Unfortunately, this method was broken in Navigator 2 and was
still unreliable in Navigator 3. Don’t bother trying to include it in your repertoire
unless you can test the results thoroughly on all platforms that your page visitors
will be using.
462
Part III ✦ JavaScript Object and Language Reference
Example
document.forms[0].sender.click()// sender is the name of a Submit-style
button
Related Items:
onClick=
event handler.
handleEvent(
event)
Returns: Nothing.
Nav2
Nav3
Nav4
IE3/J1
IE3/J2
IE4/J3
Compatibility
✔
See the discussion of the
window.handleEvent()
method in Chapter 14 and
the event object in Chapter 33 for details on this ubiquitous form element method.
Event handlers
onClick=
Nav2
Nav3
Nav4
IE3/J1
IE3/J2
IE4/J3
Compatibility
✔
✔
✔
✔
✔
✔
Virtually all button action takes place in response to the
onClick=
event
handler. A click is defined as a press and release of the mouse button while the
screen pointer rests atop the button. The event goes to the button only after the
user releases the mouse button, and no events go to the button while the user
holds the mouse button down.
For a Submit button, you should probably omit the
onClick=
event handler and
allow the form’s
onSubmit=
event handler to take care of last minute data-entry
validation before sending the form. By triggering validation with the
onSubmit=
event handler, your scripts can cancel the submission if something is not right (see
the form object discussion in Chapter 21).
Example
In Listing 23-1, I demonstrate not only the
onClick=
event handler of a button
but also how you may need to extract a particular button’s name or value
properties from a general-purpose function that services multiple buttons. In this
case, each button passes its own object as a parameter to the
displayTeam()
function. The function then displays the results in an alert dialog box. A
production environment would probably use a more complex
if...else
decision
463
Chapter 23 ✦ Button Objects
tree to perform more sophisticated actions based on the button clicked (or in
Navigator 4 and Internet Explorer 4, it would use a
switch
construction on the
btn.value
expression).
Listing 23-1: Three Buttons Sharing One Function
<HTML>
<HEAD>
<TITLE>Button Click</TITLE>
<SCRIPT LANGUAGE="JavaScript">
function displayTeam(btn) {
if (btn.value == "Abbott") {alert("Abbott & Costello")}
if (btn.value == "Rowan") {alert("Rowan & Martin")}
if (btn.value == "Martin") {alert("Martin & Lewis")}
}
</SCRIPT>
</HEAD>
<BODY>
Click on your favorite half of a popular comedy team:<P>
<FORM>
<INPUT TYPE="button" VALUE="Abbott" onClick="displayTeam(this)">
<INPUT TYPE="button" VALUE="Rowan" onClick="displayTeam(this)">
<INPUT TYPE="button" VALUE="Martin" onClick="displayTeam(this)">
</FORM>
</BODY>
</HTML>
Related Items:
button.onMouseDown=
event handler;
button.onMouseUp=
event
handler;
form.submit=
event handler.
onMouseDown=
onMouseUp=
Nav2
Nav3
Nav4
IE3/J1
IE3/J2
IE4/J3
Compatibility
✔
✔
More recent browsers add event handlers for the components of a click event:
the
onMouseDown=
and
onMouseUp=
event handlers. These events fire in addition
to the
onClick=
event handler.
The system-level buttons provided by the operating system perform their
change of appearance while a button is being pressed. Therefore, trapping for the
components of a click action won’t help you in changing the button’s appearance
464
Part III ✦ JavaScript Object and Language Reference
via scripting. Remember that a user can roll the cursor off the button while the
button is still down. When the cursor leaves the region of the button, the button’s
appearance returns to its unpressed look, but any setting you make with the
onMouseDown=
event handler won’t undo itself with an
onMouseUp=
counterpart,
even after the user releases the mouse button elsewhere. On the other hand, if you
can precache a click-on and click-off sound, you can use these events to fire the
respective sounds in response to the mouse button action.
Related Items:
button.onClick=
event handler.
Checkbox Object
Properties
Methods
Event Handlers
checked
click()
onClick=
defaultChecked
handleEvent()
onMouseDown=
name
onMouseUp=
type
value
Syntax
Creating a checkbox:
<FORM>
<INPUT
TYPE=”checkbox”
NAME=”boxName”
VALUE=”buttonValue”
[CHECKED]
[onClick=”handlerTextOrFunction”]
[onMouseDown=”handlerTextOrFunction”]
[onMouseUp=”handlerTextOrFunction”] >
buttonText
</FORM>
Accessing checkbox properties or methods:
[window.] document.formName.boxName.property |
method([parameters])
[window.] document.formName.elements[index].property |
method([parameters])
[window.] document.forms[index].boxName.property |
method([parameters])

465
Chapter 23 ✦ Button Objects
[window.] document.forms[index].elements[index].property |
method([parameters])
About this object
Checkboxes have a very specific purpose in modern graphical user interfaces:
to toggle between “on” and “off” settings. As with a checkbox on a printed form, a
mark in the box indicates that the label text is true or should be included for the
individual who made that mark. When the box is unchecked or empty, the text is
false or should not be included. If two or more checkboxes are physically grouped
together, they should have no interaction: Each is an independent setting (see the
discussion on the radio object for interrelated buttons).
I make these user interface points at the outset because, in order to present a
user interface in your HTML pages consistent with the user’s expectations based
on exposure to other programs, you must use checkbox objects only for on-off
choices that the user makes. Using a checkbox as an action button that, say,
navigates to another URL is not good form. Just as they do in a Windows or Mac
dialog box, users make settings with checkboxes and radio buttons and initiate
action by clicking a standard button or image map.
That’s not to say that a checkbox object cannot perform some limited action in
response to a user’s click, but such actions are typically related to the context of
the checkbox button’s label text. For example, in some Windows and Macintosh
dialog boxes, turning on a checkbox may activate a bunch of otherwise inactive
settings elsewhere in the same dialog box. Although Navigator 4 doesn’t provide
you with such advanced graphical powers for HTML, there may be other ways to
turn a click of a checkbox into a meaningful action. For example, in a two-frame
window, a checkbox in one frame may control whether the viewer is an advanced
user. If so, the content in the other frame may be more detailed. Toggling the
checkbox changes the complexity level of a document showing in the other frame
(using different URLs for each level). The bottom line, then, is that you should use
checkboxes for toggling between on-off settings. Use regular button objects for
initiating processing.
In the
<INPUT>
definition for a checkbox, you can preset the checkbox to be
checked when the page appears. Add the constant
CHECKED
attribute to the
definition. If you omit this attribute, the default, unchecked appearance rules. As
for the checkbox label text, its definition lies outside the
<INPUT>
tag. If you look
at the way checkboxes behave in HTML browsers, this location makes sense: The
label is not an active part of the checkbox (as it typically is in Windows and
Macintosh user interfaces, where clicking the label is the same as clicking the box).
Naming a checkbox can be an important part of the object definition, depending
on how you plan to use the information in your script or document. For forms
whose content goes to a CGI program on the server, you must word the box name
as needed for use by the CGI program, so the program can parse the form data and
extract the setting of the checkbox. For JavaScript client-side use, you can assign
not only a name that describes the button, but also a value useful to your script
for making
if...else
decisions or for assembling strings that are eventually
displayed in a window or frame.
466
Part III ✦ JavaScript Object and Language Reference
Properties
checked
Value: Boolean
Gettable: Yes
Settable: Yes
Nav2
Nav3
Nav4
IE3/J1
IE3/J2
IE4/J3
Compatibility
✔
✔
✔
✔
✔
✔
The simplest property of a checkbox reveals (or lets you set) whether or not a
checkbox is checked. The value is true for a checked box and false for an
unchecked box. To check a box via a script, simply assign true to the checkbox’s
checked
property:
document.forms[0].boxName.checked = true
Setting the
checked
property from a script does not trigger a click event for the
checkbox object.
There may be instances in which one checkbox should automatically check
another checkbox elsewhere in the same or other form of the document. To
accomplish this task, create an
onClick=
event handler for the one checkbox and
build a statement similar to the preceding one to set the other related checkbox to
true
. Don’t get too carried away with this feature, however: For a group of
interrelated, mutually exclusive choices, use a group of radio buttons instead.
If your page design requires that a checkbox be checked when the page loads,
don’t bother trying to script this checking action. Simply add the one-word
CHECKED
attribute to the
<INPUT>
definition. Because the
checked
property is a
Boolean value, you can use its results as an argument for an
if
clause, as shown in
the next example.
Example
The simple example in Listing 23-2 passes the entire form object to the
JavaScript function. The function, in turn, extracts the
checked
value of the form’s
checkbox object (
checkThis.checked
) and uses its Boolean value as the test
result for the
if...else
construction.
Listing 23-2: The checked Property as a Conditional
<HTML>
<HEAD>
<TITLE>Checkbox Inspector</TITLE>
<SCRIPT LANGUAGE="JavaScript">
function inspectBox(form) {
if (form.checkThis.checked) {
alert("The box is checked.")
} else {
alert("The box is not checked at the moment.")
467
Chapter 23 ✦ Button Objects
}
}
</SCRIPT>
</HEAD>
<BODY>
<FORM>
<INPUT TYPE="checkbox" NAME="checkThis">Check here<P>
<INPUT TYPE="button" NAME="boxChecker" VALUE="Inspect Box"
onClick="inspectBox(this.form)">
</FORM>
</BODY>
</HTML>
Related Items:
value
property;
defaultChecked
property.
defaultChecked
Value: Boolean
Gettable: Yes
Settable: No
Nav2
Nav3
Nav4
IE3/J1
IE3/J2
IE4/J3
Compatibility
✔
✔
✔
✔
✔
✔
If you add the
CHECKED
attribute to the
<INPUT>
definition for a checkbox, the
defaultChecked
property for that object is true; otherwise, the property is
false. Having access to this property enables your scripts to examine checkboxes
to see if they have been adjusted ( presumably by the user, if your script does not
set properties).
Example
The function in Listing 23-3 (this fragment is not in the CD-ROM listings) is
designed to compare the current setting of a checkbox against its default value.
The
if
construction compares the current status of the box against its default
status. Both are Boolean values, so they can be compared against each other. If the
current and default settings don’t match, the function goes on to handle the case
in which the current setting is other than the default.
Listing 23-3: Examining the defaultChecked Property
function compareBrowser(thisBox) {
if (thisBox.checked != thisBox.defaultChecked) {
// statements about using a different set of HTML pages
}
}

468
Part III ✦ JavaScript Object and Language Reference
Related Items:
checked
property;
value
property.
name
Value: String
Gettable: Yes
Settable: No
Nav2
Nav3
Nav4
IE3/J1
IE3/J2
IE4/J3
Compatibility
✔
✔
✔
✔
✔
✔
Unless a page design submits a form’s data to a server for CGI program
execution, the primary importance of a checkbox’s name is to help you identify it
in scripted references to its properties or methods. Be as descriptive as you can
with the name, so that the name immediately invokes the vision of the checkbox.
Example
Listing 23-2 shows how a checkbox’s name is used in a function’s reference to
the object. Although the name in this particular listing,
checkThis
, is not exactly a
work of fine literature, it’s better than generic names such as
myBox
.
Related Items:
name
property of all form elements.
type
Value: “checkbox”
Gettable: Yes
Settable: No
Nav2
Nav3
Nav4
IE3/J1
IE3/J2
IE4/J3
Compatibility
✔
✔
✔
Use the
type
property to help you identify a checkbox object from an unknown
group of form elements.
Related Items:
form.elements
property.
value
Value: String
Gettable: Yes
Settable: No

469
Chapter 23 ✦ Button Objects
Nav2
Nav3
Nav4
IE3/J1
IE3/J2
IE4/J3
Compatibility
✔
✔
✔
✔
✔
✔
A checkbox object’s
value
property is a string of any text you want to associate
with the box. Note that the checkbox’s
value
property is not the label, as it is for a
regular button, but hidden text associated with the checkbox. For instance, the
label you attach to a checkbox may not be worded in a way that is useful to your
script. But if you place that useful wording in the
VALUE
attribute of the checkbox
definition, you can extract that string via the
value
property.
When a checkbox object’s data is submitted to a CGI program, the
value
property is sent as part of the
name=value
pair if the box is checked (nothing
about the checkbox is sent if the box is unchecked). If you omit the
VALUE
attribute in your definition, the property always yields the string “on,” which is
submitted to a CGI program when the box is checked. From the JavaScript side,
don’t confuse this string with the on and off settings of the checkbox: Use the
checked
property to determine a checkbox’s status.
Example
The scenario for the skeleton HTML page in Listing 23-4 is a form with a
checkbox whose selection determines which of two actions to follow for
submission to the server. When the user clicks the Submit button, a JavaScript
function examines the checkbox’s
checked
property. If the property is true (the
button is checked), the script sets the
action
property for the entire form to the
content of the
value
property — thus influencing where the form goes on the
server side. If you try this listing on your computer, you will receive error
messages about being unable to locate a file with the name
primaryURL
or
alternateURL
because those files don’t exist. The names and the error message
come from the submission process for this demonstration.
Listing 23-4: Adjusting a CGI Submission Action
<HTML>
<HEAD>
<TITLE>Checkbox Submission</TITLE>
<SCRIPT LANGUAGE="JavaScript">
function setAction(form) {
if (form.checkThis.checked) {
form.action = form.checkThis.value
} else {
form.action = "primaryURL"
}
return true
}
</SCRIPT>
</HEAD>
(continued)
470
Part III ✦ JavaScript Object and Language Reference
Listing 23-4 (continued)
<BODY>
<FORM METHOD="POST">
<INPUT TYPE="checkbox" NAME="checkThis" VALUE="alternateURL">Use
alternate<P>
<INPUT TYPE="submit" NAME="boxChecker" onClick="return
setAction(this.form)">
</FORM>
</BODY>
</HTML>
Related Items:
checked
property.
Methods
click()
Returns: Nothing.
Nav2
Nav3
Nav4
IE3/J1
IE3/J2
IE4/J3
Compatibility
✔
✔
✔
✔
✔
✔
The intention of the
click()
method is to enact, via script, the physical act of
checking a checkbox ( but without triggering the
onClick=
event handler).
Unfortunately, this method does not work in Navigator 2 or 3 as expected. Even if it
worked flawlessly, your scripts are better served by setting the
checked
property
so that you know exactly what the setting of the box is at any time.
Related Items:
onClick=
event handler;
checked
property.
handleEvent(
event)
Returns: Nothing.
Nav2
Nav3
Nav4
IE3/J1
IE3/J2
IE4/J3
Compatibility
✔
See the discussion of the
window.handleEvent()
method in Chapter 14 and
the event object in Chapter 33 for details on this ubiquitous form element method.
471
Chapter 23 ✦ Button Objects
Event handlers
onClick=
Nav2
Nav3
Nav4
IE3/J1
IE3/J2
IE4/J3
Compatibility
✔
✔
✔
✔
✔
✔
Because users click checkboxes, they have an event handler for the click event.
Use this event handler only when you want your page (or variable values hidden
from view) to respond in some way to the action of clicking a checkbox. Most user
actions, as mentioned earlier, are initiated by clicking standard buttons rather than
checkboxes, so be careful not to overuse event handlers in checkboxes.
Example
The page in Listing 23-5 shows how to trap the
click
event in one checkbox to
influence the setting in another. Here, the assumption is that if your computer has
a mouse, in all likelihood it also has a mouse port. Therefore, an
onClick=
event
handler in the Mouse checkbox calls a function to set the Mouse Port checkbox to
true whenever the Mouse checkbox is set to true. But unchecking the Mouse
checkbox does not influence the Mouse Port checkbox — perhaps you’re using a
laptop’s touch pad, even though the computer has a mouse port.
Listing 23-5: A Checkbox and an onClick= Event Handler
<HTML>
<HEAD>
<TITLE>Checkbox Event Handler</TITLE>
<SCRIPT LANGUAGE="JavaScript">
function setPort(form) {
if (form.mouse.checked) {
form.mousePort.checked = true
}
}
</SCRIPT>
</HEAD>
<BODY>
<FORM>
<H3>Check all accessories for your computer:</H3>
<INPUT TYPE="checkbox" NAME="colorMonitor" >Color Monitor<P>
<INPUT TYPE="checkbox" NAME="mouse"
onClick="setPort(this.form)">Mouse<P>
(continued)

472
Part III ✦ JavaScript Object and Language Reference
Listing 23-5 (continued)
<INPUT TYPE="checkbox" NAME="mousePort" >Mouse Port<P>
<INPUT TYPE="checkbox" NAME="modem" >Modem<P>
<INPUT TYPE="checkbox" NAME="keyboard" >Keyboard<P>
</FORM>
</BODY>
</HTML>
onMouseDown=
onMouseUp=
Nav2
Nav3
Nav4
IE3/J1
IE3/J2
IE4/J3
Compatibility
✔
✔
More recent browsers add event handlers for the components of a click event:
the
onMouseDown=
and
onMouseUp=
event handlers. These events fire in addition
to the
onClick=
event handler. See the discussion of these events for the button
object earlier in this chapter for application ideas.
Related Items:
checkbox.onClick=
event handler.
Radio Object
Properties
Methods
Event Handlers
checked
click()
onClick=
defaultChecked
handleEvent()
onMouseDown=
length
onMouseUp=
name
type
value
Syntax
Creating a radio object:
<FORM>

473
Chapter 23 ✦ Button Objects
<INPUT
TYPE=”radio”
NAME=”buttonGroupName”
[VALUE=”buttonValue”]
[CHECKED]
[onClick=”handlerTextOrFunction”]>
buttonText
</FORM>
Accessing radio object properties or methods:
[window.] document.formName.buttonGroupName[index].property |
method([parameters])
[window.] document.forms[index].buttonGroupName.property |
method([parameters])
About this object
A radio button object is an unusual one within the body of JavaScript
applications. In every other case of form elements, one object equals one visual
element on the screen. But a radio object actually consists of a group of radio
buttons. Because of the nature of radio buttons — a mutually exclusive choice
among two or more selections — a group always has multiple visual elements. All
buttons in the group share the same name — which is how JavaScript knows to
group buttons together and to let the clicking of a button deselect any other
selected button within the group. Beyond that, however, each button can have
unique properties, such as its
value
or
checked
property.
JavaScript uses an array syntax to enable you to access information about an
individual button within the button group. Let’s look at an example of defining a
button group and see how to reference each button. This button group lets the
user select a favorite member of the Three Stooges:
<FORM>
<B>Select your favorite Stooge:</B><P>
<INPUT TYPE=”radio” NAME=”stooges” VALUE=”Moe Howard” CHECKED>Moe
<INPUT TYPE=”radio” NAME=”stooges” VALUE=”Larry Fine” >Larry
<INPUT TYPE=”radio” NAME=”stooges” VALUE=”Curly Howard” >Curly
<INPUT TYPE=”radio” NAME=”stooges” VALUE=”Shemp Howard” >Shemp
</FORM>
When this group displays on the page, the first radio button is preselected for
the user (all radio button groups should have one button already selected as a
default value). Only one of the six properties contained by a radio button object
( length) applies to the entire group. However, the other five properties apply to
individual buttons within the group. To access any button, use an array index
value as part of the button group name. For example
firstBtnValue = document.forms[0].stooges[0].value // “Moe Howard”
secondBtnValue = document.forms[0].stooges[1].value // “Larry Fine”
474
Part III ✦ JavaScript Object and Language Reference
Any time you access the
checked
,
defaultChecked
,
type
, or
value
property,
you must point to a specific button within the group according to its order in the
array. The order depends on the sequence in which the individual buttons are
defined in the HTML document.
Supplying a
VALUE
attribute to a radio button can be very important in your
script. Although the text label for a button is defined outside the
<INPUT>
tag, the
VALUE
attribute lets you store any string in the button’s hip pocket. In the earlier
example, the radio button labels were just first names, whereas the value
properties were set in the definition to the full names of the actors. The values
could have been anything that the script needed, such as birth dates, shoe sizes,
URLs, or the first names again ( because a script would have no way to retrieve the
labels otherwise). The point is that the
VALUE
attribute should contain whatever
string the script needs to derive from the selection made by the user. The
VALUE
attribute contents are also what is sent to a CGI program on a server in a submit
action for the form.
How you decide to orient a group of buttons on the screen is entirely up to your
design and the real estate available within your document. You can string them in
a horizontal row (as shown earlier), place
<BR>
tags after each one to form a
column, or do so after every other button to form a double column. Numeric order
within the array is determined only by the order in which the buttons are defined
in the document, not by where they appear. To determine which radio button of a
group is checked before doing processing based on that choice, you need to
construct a repeat loop to cycle through the buttons in the group (shown in the
next example). For each button, your script examines the
checked
property.
To be Navigator 2–friendly, be sure to always specify an
onClick=
event handler
to every radio button (even if
onClick=””
). This action overrides a bug that
causes index values to be reversed among buttons in a group.
Properties
checked
Value: Boolean
Gettable: Yes
Settable: Yes
Nav2
Nav3
Nav4
IE3/J1
IE3/J2
IE4/J3
Compatibility
✔
✔
✔
✔
✔
✔
Only one radio button in a group can be highlighted (checked) at a time (the
browser takes care of highlighting and unhighlighting buttons in a group for you).
That one button’s
checked
property is set to true, whereas all others in the group
are set to false.
Beginning with Navigator 3, you can safely set the
checked
property of a radio
button. By setting the
checked
property of one button in a group to true, all other
buttons automatically uncheck themselves.
Note

475
Chapter 23 ✦ Button Objects
Example
In Listing 23-6, I use a repeat loop in a function to look through all buttons in the
Stooges group in search of the checked button. When the loop finds the one whose
checked
property is true, it returns the value of the index. In one instance, I use
that index value to then extract the
value
property for display in the alert dialog
box; in the other instance, I use the value to help determine which button in the
group is next in line to have its
checked
property set to true.
Listing 23-6: Finding the Selected Button in a Radio Group
<HTML>
<HEAD>
<TITLE>Extracting Highlighted Radio Button</TITLE>
<SCRIPT LANGUAGE="JavaScript">
function getSelectedButton(buttonGroup){
for (var i = 0; i < buttonGroup.length; i++) {
if (buttonGroup[i].checked) {
return i
}
}
return 0
}
function fullName(form) {
var i = getSelectedButton(form.stooges)
alert("You chose " + form.stooges[i].value + ".")
}
function cycle(form) {
var i = getSelectedButton(form.stooges)
if (i+1 == form.stooges.length) {
form.stooges[0].checked = true
} else {
form.stooges[i+1].checked = true
}
}
</SCRIPT>
</HEAD>
<BODY>
<FORM>
<B>Select your favorite Stooge:</B><P>
<INPUT TYPE="radio" NAME="stooges" VALUE="Moe Howard" CHECKED>Moe
<INPUT TYPE="radio" NAME="stooges" VALUE="Larry Fine" >Larry
<INPUT TYPE="radio" NAME="stooges" VALUE="Curly Howard" >Curly
<INPUT TYPE="radio" NAME="stooges" VALUE="Shemp Howard" >Shemp<P>
<INPUT TYPE="button" NAME="Viewer" VALUE="View Full Name..."
onClick="fullName(this.form)"><P>
<INPUT TYPE="button" NAME="Cycler" VALUE="Cycle Buttons"
onClick="cycle(this.form)">
</FORM>
</BODY>
</HTML>
476
Part III ✦ JavaScript Object and Language Reference
Related Items:
defaultChecked
property.
defaultChecked
Value: Boolean
Gettable: Yes
Settable: No
Nav2
Nav3
Nav4
IE3/J1
IE3/J2
IE4/J3
Compatibility
✔
✔
✔
✔
✔
✔
If you add the
CHECKED
attribute to the
<INPUT>
definition for a radio button,
the
defaultChecked
property for that object is true; otherwise, the property is
false. Having access to this property enables your scripts to examine individual
radio buttons to see if they have been adjusted ( presumably by the user, if your
script does not perform automatic clicking).
Example
In the script fragment of Listing 23-7 (not among the CD-ROM files), a function is
passed a form containing the Stooges radio buttons. The goal is to see, in as
general a way as possible (supplying the radio group name where needed), if
the user changed the default setting. Looping through each of the radio buttons,
you look for the one whose
CHECKED
attribute was set in the
<INPUT>
definition.
With that index value (
i
) in hand, you then look to see if that entry is still
checked. If not (notice the
!
negation operator), you display an alert dialog box
about the change.
Listing 23-7: Has a Radio Button Changed?
function groupChanged(form) {
for (var i = 0; i < form.stooges.length; i++) {
if (form.stooges[i].defaultChecked) {
if (!form.stooges[i].checked) {
alert("This radio group has been changed.")
}
}
}
}
Related Items:
checked
property;
value
property.
length
Value: Integer
Gettable: Yes
Settable: No
477
Chapter 23 ✦ Button Objects
Nav2
Nav3
Nav4
IE3/J1
IE3/J2
IE4/J3
Compatibility
✔
✔
✔
✔
✔
✔
A radio button group has length — the number of individual radio buttons
defined for that group. Attempting to retrieve the length of an individual button
yields a null value. The
length
property is valuable for establishing the maximum
range of values in a repeat loop that must cycle through every button within that
group. If you specify the
length
property to fill that value (rather than hardwiring
the value), the loop construction will be easier to maintain — as you make changes
to the number of buttons in the group during page construction, the loop adjusts
to the changes automatically.
Example
See the loop construction within the function of Listing 23-7 for one way to
apply the
length
property.
Related Items: None.
name
Value: String
Gettable: Yes
Settable: No
Nav2
Nav3
Nav4
IE3/J1
IE3/J2
IE4/J3
Compatibility
✔
✔
✔
✔
✔
✔
The
name
property, while associated with an entire radio button group, can be
read only from individual buttons in the group, such as
btnGroupName = document.forms[0].groupName[2].name
In that sense, each radio button element in a group inherits the name of the
group. Your scripts have little need to extract the
name
property of a button or
group. More often than not, you will hard-wire a button group’s name into your
script to extract other properties of individual buttons. Getting the
name
property
of an object whose name you know is obviously redundant. But understanding the
place of radio button group names in the scheme of JavaScript objects is
important for all scripters.
Related Items:
value
property.
type
Value: “radio”
Gettable: Yes
Settable: No
478
Part III ✦ JavaScript Object and Language Reference
Nav2
Nav3
Nav4
IE3/J1
IE3/J2
IE4/J3
Compatibility
✔
✔
✔
Use the
type
property to help identify a radio object from an unknown group of
form elements.
Related Items:
form.elements
property.
value
Value: String
Gettable: Yes
Settable: No
Nav2
Nav3
Nav4
IE3/J1
IE3/J2
IE4/J3
Compatibility
✔
✔
✔
✔
✔
✔
As described earlier in this chapter for the checkbox object, the
value
property
contains arbitrary information that you assign when mapping out the
<INPUT>
definition for an individual radio button. Using this property is a handy shortcut to
correlating a radio button label with detailed or related information of interest to
your script or CGI program on a server. If you like, the
value
property can contain
the same text as the label.
Example
Listing 23-6 demonstrates how a function extracts the
value
property of a radio
button to display otherwise hidden information stored with a button. In this case,
it lets the alert dialog box show the full name of the selected Stooge.
Related Items:
name
property.
Methods
click()
Returns: Nothing.
Nav2
Nav3
Nav4
IE3/J1
IE3/J2
IE4/J3
Compatibility
✔
✔
✔
✔
✔
✔
479
Chapter 23 ✦ Button Objects
The intention of the
click()
method is to enact, via a script, the physical act of
clicking a radio button. Unfortunately, this method does not work in Navigator 2
or 3. Even if it worked flawlessly, you better serve your scripts by setting the
checked
properties of all buttons in a group so that you know exactly what the
setting of the group is at any time.
Related Items:
onClick=
event handler;
checked
property.
handleEvent(
event)
Returns: Nothing.
Nav2
Nav3
Nav4
IE3/J1
IE3/J2
IE4/J3
Compatibility
✔
See the discussion of the
window.handleEvent()
method in Chapter 14 and
the event object in Chapter 33 for details on this ubiquitous form element method.
Event handlers
onClick=
Nav2
Nav3
Nav4
IE3/J1
IE3/J2
IE4/J3
Compatibility
✔
✔
✔
✔
✔
✔
Radio buttons, more than any user interface element available in HTML, are
intended for use in making choices that other objects, such as submit or standard
buttons, act upon later. You may see cases in Windows or Mac programs in which
highlighting a radio button — at most — activates or brings into view additional,
related settings. Unfortunately, you don’t have such dynamic facilities on Web
pages with most of today’s browsers.
I strongly advise you not to use scripting handlers that perform significant
actions at the click of any radio button. At best, you may want to use knowledge
about a user’s clicking of a radio button to adjust a global variable or
document.cookie
setting that influences subsequent processing. Be aware,
however, that if you script such a hidden action for one radio button in a group, you
must also script similar actions for others in the same group. That way, if a user
changes the setting back to a previous condition, the global variable is reset to the
way it was. JavaScript, however, tends to run fast enough so that a batch operation
can make such adjustments when the user clicks a more action-oriented button.

480
Part III ✦ JavaScript Object and Language Reference
Example
Every time a user clicks one of the radio buttons in Listing 23-8, he or she sets a
global variable to true or false, depending on whether the person is a Shemp lover.
This action is independent of the action taking place when the user clicks on the
View Full Name button. An
onUnload=
event handler in the
<BODY>
definition
triggers a function that displays a message to Shemp lovers just before the page
clears (click the browser’s Reload button to leave the current page prior to
reloading). Here I use an initialize function triggered by
onLoad=
so that the
current radio button selection sets the global value upon a reload.
Listing 23-8: An onClick= Event Handler for Radio Buttons
<HTML>
<HEAD>
<TITLE>Radio Button onClick Handler</TITLE>
<SCRIPT LANGUAGE="JavaScript">
var ShempOPhile = false
function initValue() {
ShempOPhile = document.forms[0].stooges[3].checked
}
function fullName(form) {
for (var i = 0; i < form.stooges.length; i++) {
if (form.stooges[i].checked) {
break
}
}
alert("You chose " + form.stooges[i].value + ".")
}
function setShemp(setting) {
ShempOPhile = setting
}
function exitMsg() {
if (ShempOPhile) {
alert("You like SHEMP?")
}
}
</SCRIPT>
</HEAD>
<BODY onLoad="initValue()" onUnload="exitMsg()">
<FORM>
<B>Select your favorite Stooge:</B><P>
<INPUT TYPE="radio" NAME="stooges" VALUE="Moe Howard" CHECKED
onClick="setShemp(false)">Moe
<INPUT TYPE="radio" NAME="stooges" VALUE="Larry Fine"
onClick="setShemp(false)">Larry
<INPUT TYPE="radio" NAME="stooges" VALUE="Curly Howard"
onClick="setShemp(false)">Curly
<INPUT TYPE="radio" NAME="stooges" VALUE="Shemp Howard"
onClick="setShemp(true)">Shemp<P>
481
Chapter 23 ✦ Button Objects
<INPUT TYPE="button" NAME="Viewer" VALUE="View Full Name..."
onClick="fullName(this.form)">
</FORM>
</BODY>
</HTML>
✦ ✦ ✦
Wyszukiwarka
Podobne podstrony:
BW ch23
Ch23 pg753 774
Ch23 turning
Ch23 Shafts
ch23
ch23
BW ch23
Ch23 Solations Brigham 10th E
Ch23 18
ch23 update
Essentials of Biology mad86161 ch23
CH23
więcej podobnych podstron