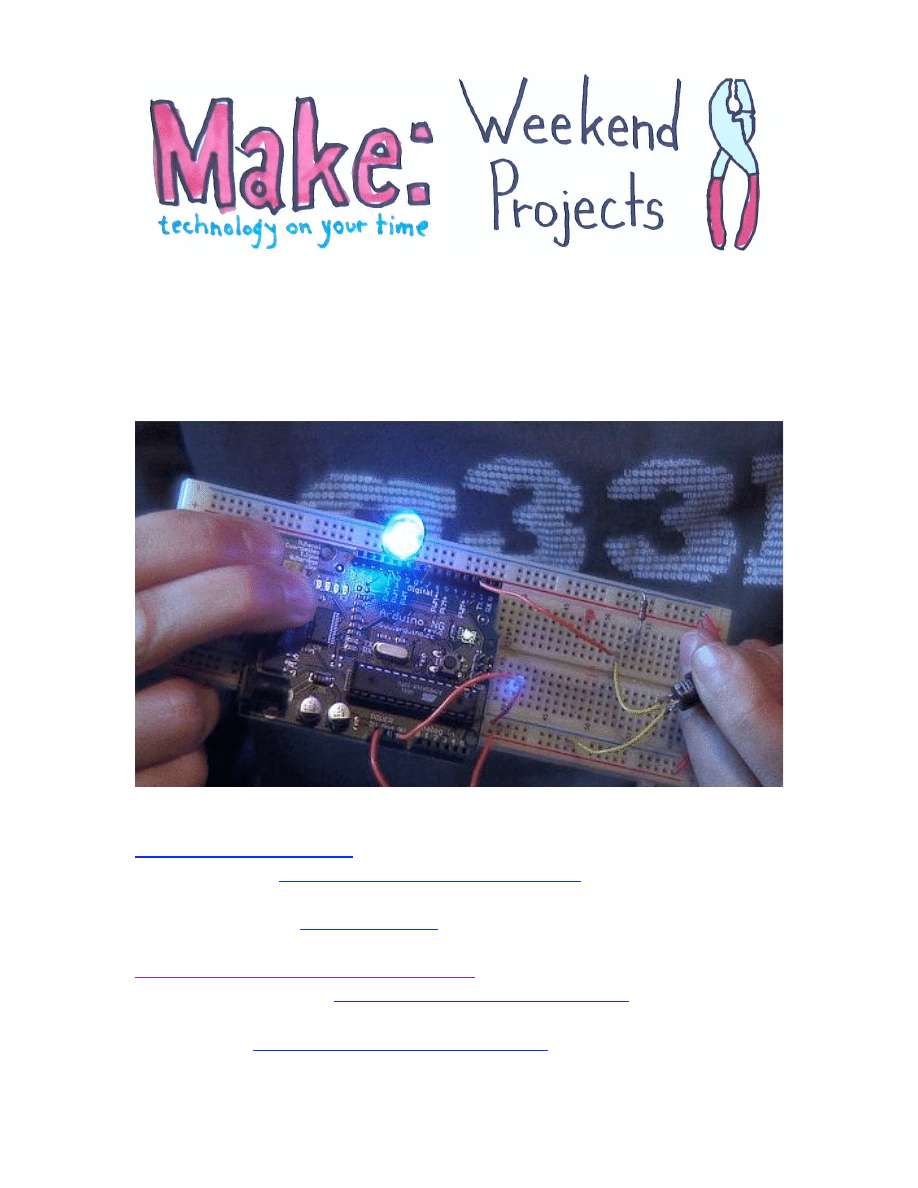
Awesome Electronics Workshop – Arduino
This week, Joe Grand and Bre Pettis bring you another Awesome
Electronics Workshop! This time you’ll learn about the open-source
microcontroller board, the Arduino, ahem, the ARRR-duino.
You can get an Arduino board in the Makezine store at
http://store.makezine.com
or you can find plans to make your own from off
the shelf parts at
http://arduino.cc/en/Main/Hardware
. Then get some
components and start playing around! You’ll want to go wander around the
Arduino website at
http://arduino.cc
and the Arduino playground where
users can share ideas and benefit from their collective research at
http://arduino.cc/cgi-bin/yabb2/YaBB.pl
. Once you’ve checked that all out,
go get your software at
http://arduino.cc/en/Main/Software
. Whatever
projects you make, take pictures of them and upload them to the Make:
Flickr pool at
http://flickr.com/groups/make/pool
or you’ll have to walk the
plank!
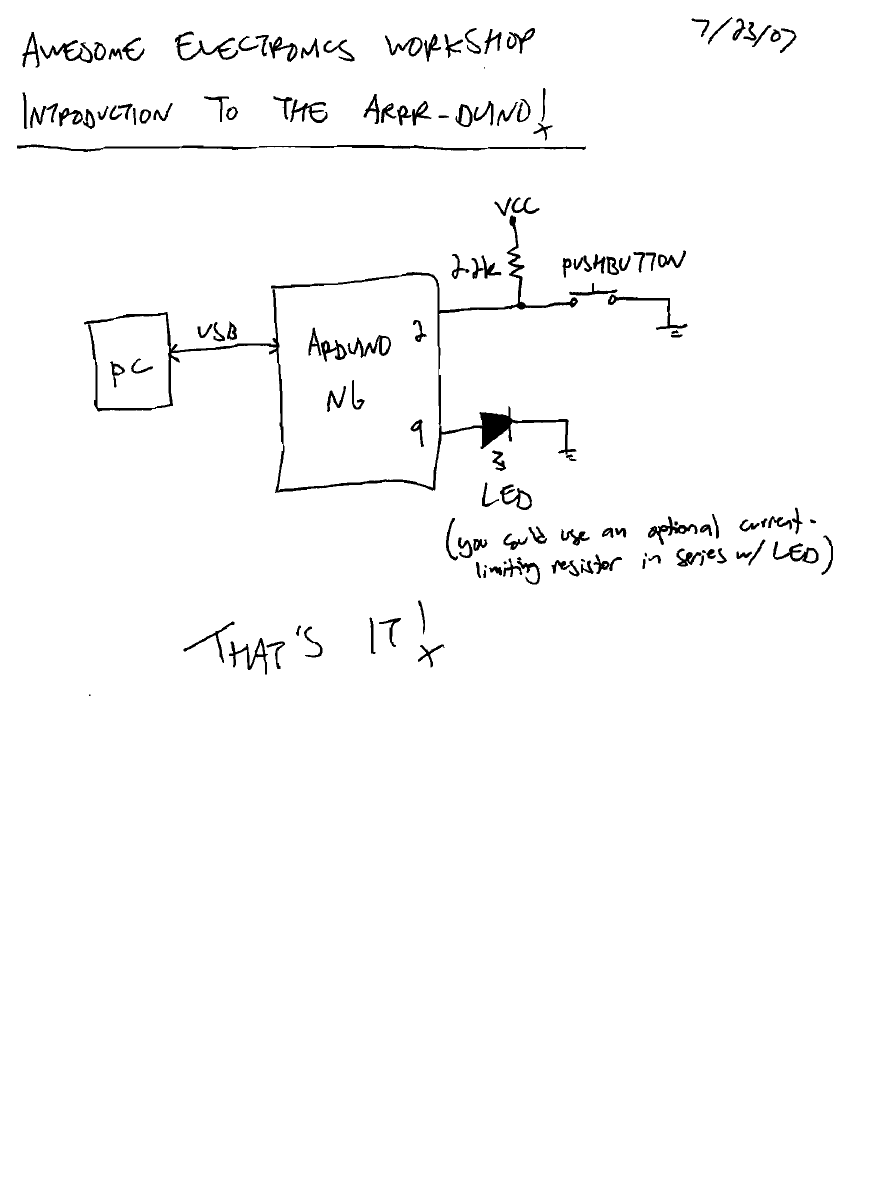

Here’s the code to make the LED throb, it’s super simple! You can also
download this from
http://imakethings.com/ziporama/arduino.zip
.
//
// MAKE Magazine Video Podcast: Weekend Projects Special Edition
// Awesome Electronics Workshop w/ Joe Grand & Bre Pettis
//
// Introduction to the Arduino
//
// When the momentary pushbutton is pressed, the brightness of
// the LED will throb smoothly between bright and off. When the
// button is released, the LED will remain off.
//
// See associated schematic for wiring diagram!
//
// Based on "Blink" and "Fading" examples included in the Arduino
// distribution package
//
int cnt = 0; // counter for our loop
int val = 0; // variable for reading the pin status
int ledPin = 9; // LED connected to PWM digital pin 9
int inputPin = 2; // Pushbutton connected to digital pin 2
void setup()
{
pinMode(ledPin, OUTPUT); // declare LED as output
pinMode(inputPin, INPUT); // declare pushbutton as input
}
void loop()
{
for(cnt = 0 ; cnt <= 255; cnt+=5) // fade in (from min to max)
{
if (digitalRead(inputPin) == LOW)
{
analogWrite(ledPin, cnt); // sets the value (range from 0 to 255)
delay(30); // waits for 30 milli seconds to see the dimming
effect
}
else
analogWrite(ledPin, 0); // turn LED off
}
for(cnt = 255; cnt >=0; cnt-=5) // fade out (from max to min)

{
if (digitalRead(inputPin) == LOW)
{
analogWrite(ledPin, cnt);
delay(30);
}
else
analogWrite(ledPin, 0); // turn LED off
}
}
Sidenote: folks have been asking about how we made the eyepatches and they are made
out of tape! Our teeth blacked out is also tape, but that only lasted for about a minute at a
time!
Document Outline
Wyszukiwarka
Podobne podstrony:
Intro to the Finite Element Method [lecture notes] Y Liu (1998) WW
8 Intro to lg socio1 LECTURE2014
4 Intro to lg morph LECTURE2014
12 Intro to origins of lg LECTURE2014
Guide to the properties and uses of detergents in biology and biochemistry
5 INTRO TO RESISTORS
Making Robots With The Arduino part 1
Bo Strath A European Identity to the historical limits of the concept
A Guide to the Law and Courts in the Empire
An Introduction to the Kabalah
Making Robots With The Arduino part 5
5A,[ To the top 3
więcej podobnych podstron