FITTING A MORTICE LATCH
If you are reading this because you are about to hang a door, please check
you have the door round the right way. See our hanging a door project first.
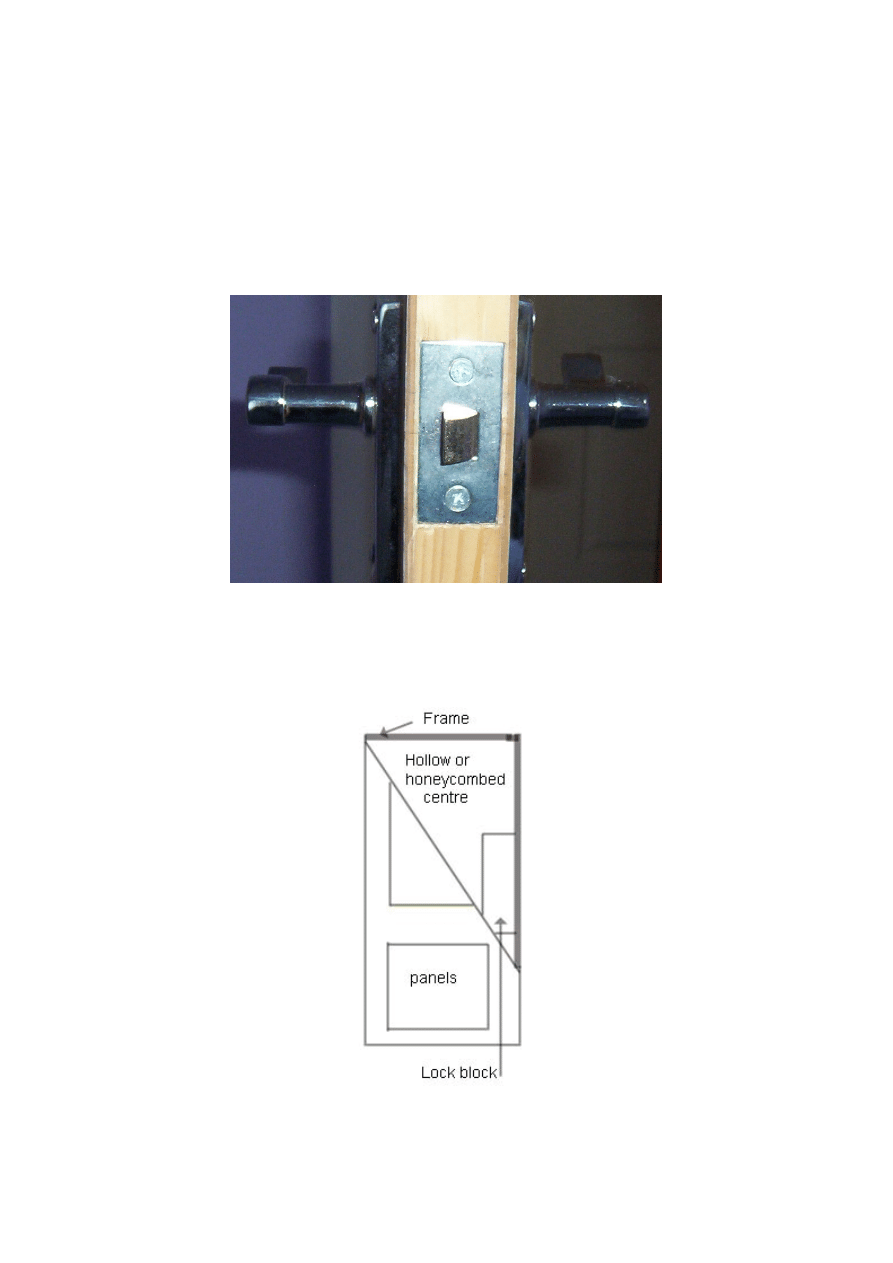
A mortice latch is the most common of door furniture being fitted to internal
and external door alike. It is simply a catch with a handle either side.
Flush doors and lightweight hollow panel doors have lock blocks fitted inside
them to allow for the lock or other door furniture you wish to fix. The cut away
picture of a door below shows the frame and lock block which usually extends
about 200mm either side (up and down) from the centre of the door.
First of all mark the position on the door where you want your handle and
using a carpenters square, draw a line around the edge and both sides of the
door, extending about 3 inches into the centre of the door. Draw the line lightly
so it can be rubbed off later before painting.
The image top right shows the line extending toward the middle of the door.
This serves as a marker for every operation while fitting a mortice latch. On
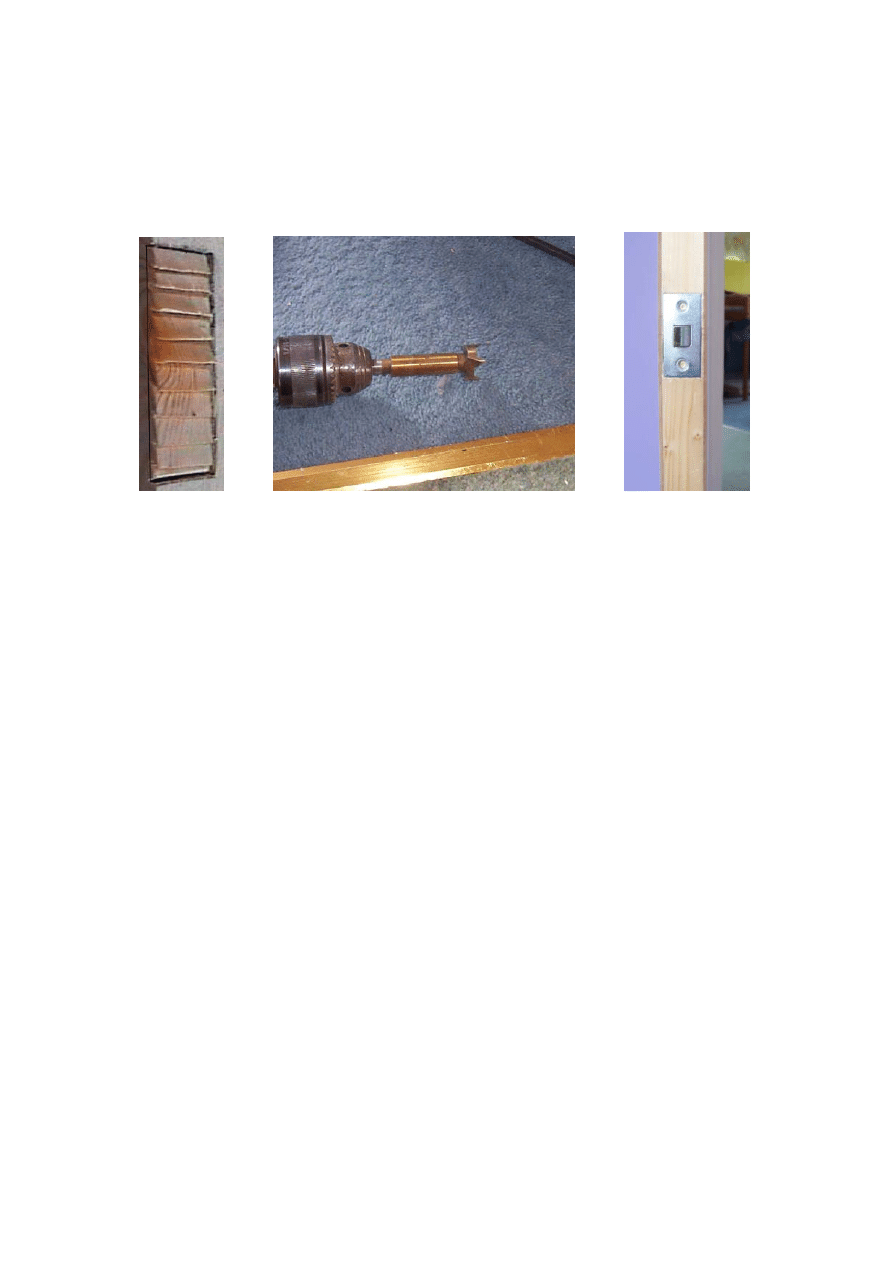
the edge of the door, mark the centre of the line. Using a suitable drill, either a
flat wood bit or an auger bit, ( The diameter of door latches varies so either
measure yours, or see the fitting instructions on the packet. Common sizes
are 18mm and 22mm) drill into the door. Keep the drill absolutely level while
you drill and if you are using a panelled door as shown above, mark your drill
bit with a piece of tape to make sure you do not drill too deeply. You can see
how to do this in our fixing to masonry project. Measure the length of the
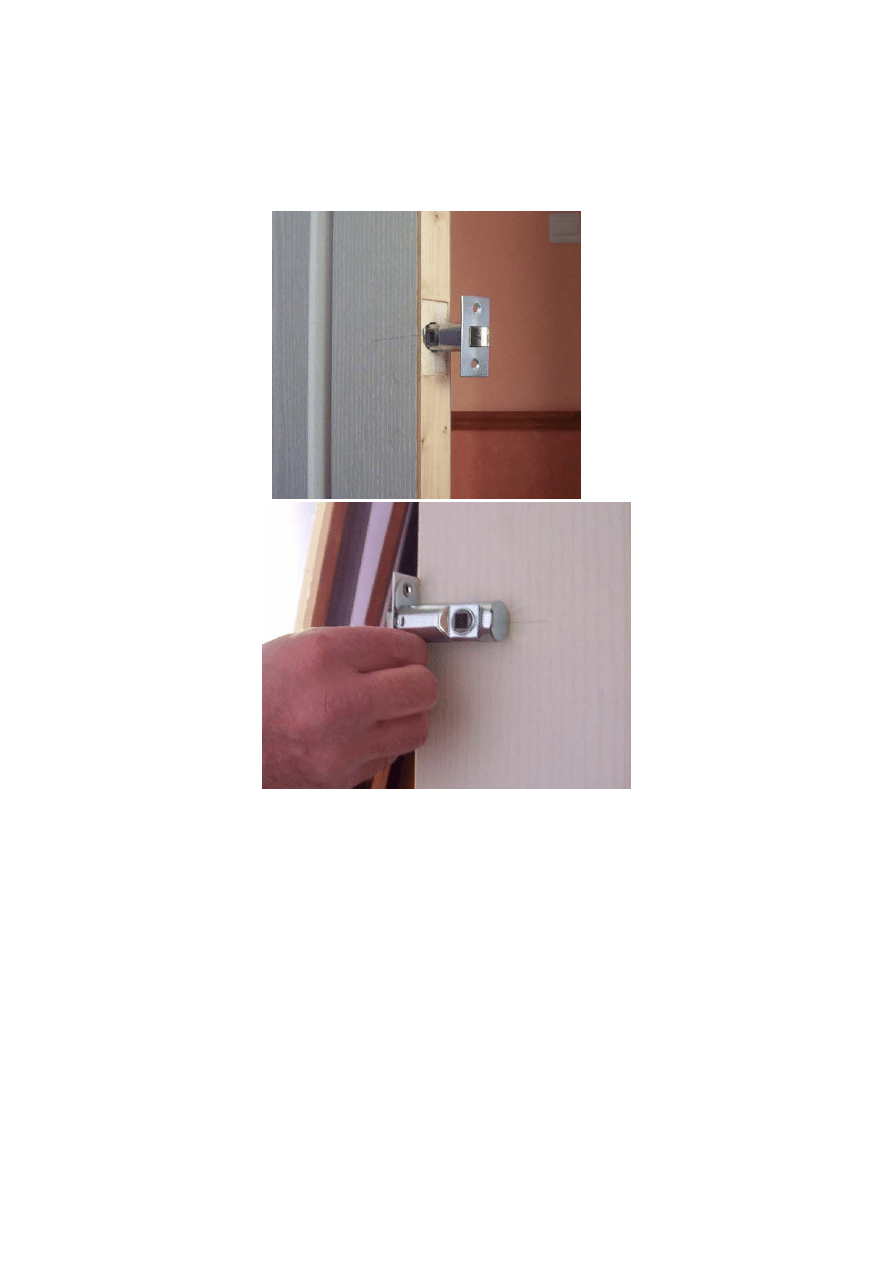
barrel of the latch, including the latch plate itself.
When you have drilled the hole, which should be a couple of mm bigger than the barrel
diameter, slide the barrel in so the latch plate sites against the edge of the door. The plate
needs to be "let into" the door edge and this is done by marking round the latch with a sharp
pencil. Pull out the barrel again and chisel out the insides of the mark you have made to the
depth of the latch plate (usually 2mm). Be very careful as you are chiselling as the latch plate
will almost always be very close to the edge of the door. Most hollow doors have a very thin
cover and it is easy to dislodge this as you cut away. The easiest, surest way to get an even
cut is to chisel the latch recess as you would a hinge while hanging a door, lots of little cuts to
the correct depth. Don't forget to leave the pencil line in place or your recess will be cut too
large.
When the recess is chiselled out, push in the barrel to fit. The latch plate on some barrels has
raised edges behind the screw holes. If they are not too deep they can be sunk into he timber
by tapping the latch plate with a mallet. The best way however is to push the latch plate into
the recess as shown above right, and mark the centre of the screw holes, then pull it out
again and drill lightly on the marks, with a 8mm wood bit. This allows the hole edges to sink
into the timber leaving the latch plate to sit absolutely flush with the edge of the door.
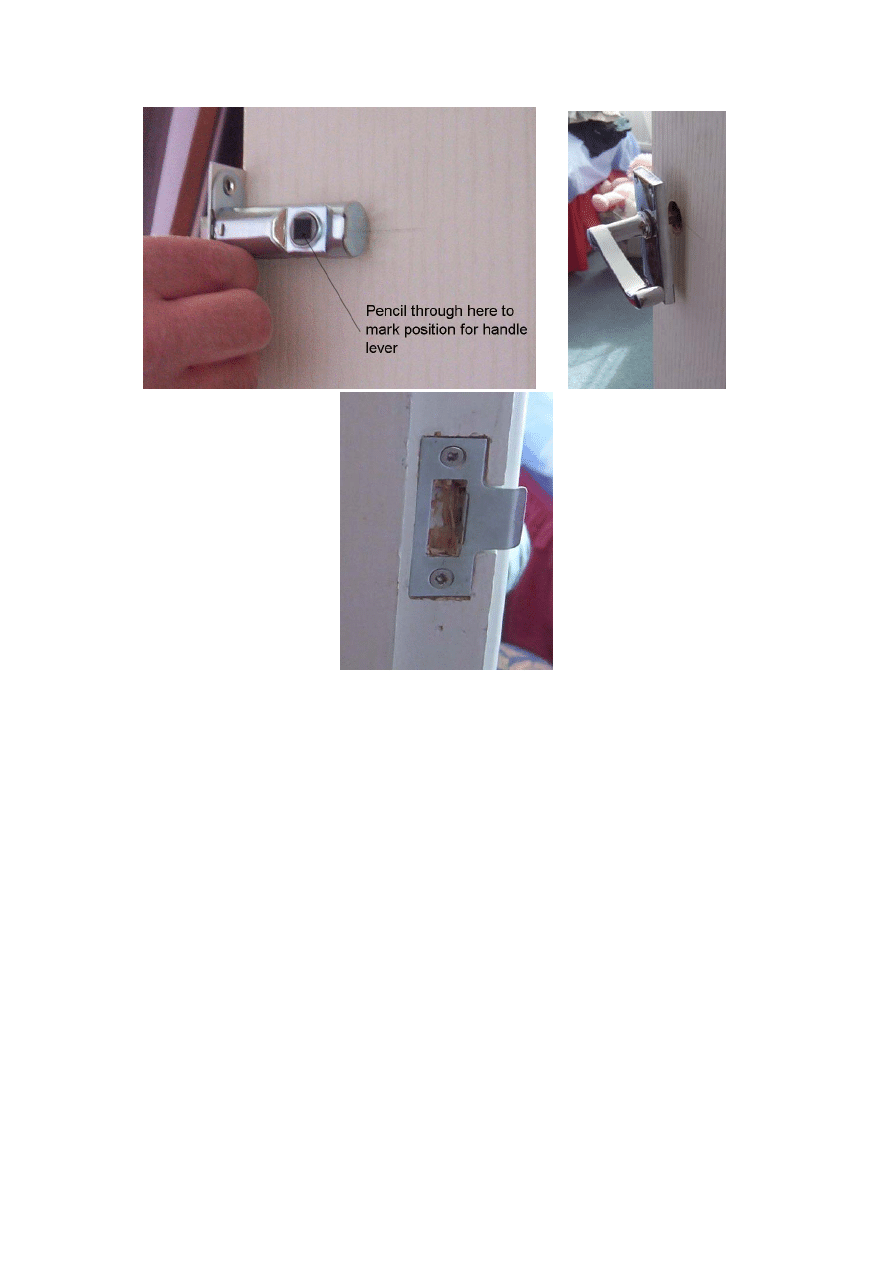
Pull the barrel out again and hold to the side of the door along the line you have marked.
Make sure the front of the latch plate is flush with the edge of the door and push your pencil
through the hole in the barrel. Do this on both side of the door.
Drill through the door, from both sides. The handle securing plates will be large enough to
cover a hole which is larger than the bar going through it and in most cases the same drill bit
can be used which weas used to drill out for the barrel. DO CHECK THIS.
When the hole is through the door, the barrel can go back in and, using pilot holes, be
screwed in. The bar is pushed through and the handles slid onto either side. Again, using pilot
holes, fix the handles. Be extra careful when fixing these handles as, more often than not, the
screws are slotted heads rather than cross heads and the driver can slip quire easily,
scratching the handle.
Now push the door into the opening of the frame. Extend the mark on the door to the front of
the frame and round into the frame. This line is also the centre of the keep which is the small
plate which catches the latch as you close the door.
Put the keep up against the frame, with the centre of the keep in the centre of the mark and
marl all round the keep with a pencil. Cut out for the keep plate justr as you did for the latch
plate. Screw the keep into position. Using a 6mm chisel, cut out the centre of the keep,
through the keep plate, to allow the catch to click in when the door is closed. The fixed keep
can be seen in the right hand image of those above.
Wyszukiwarka
Podobne podstrony:
Guard Fitting
LCD, DLP planar lighting fitting
Fitting Models
Latch Up, ESD, and Other Phenomena
Anglik Fitting tools
Studio Orders Morticia Knight
Mazda3 foot rest alloy pedals fitting instruction
LCD, DLP planar lighting fitting
Morticia Knight Arresting Behaviour
ADMINISTRACJA W POLSCE W LATCH 1944 do 1990
City Rover Immo Fitting Instructions
Fittings, photos
Morticia
7475 4 bit BISTABLE LATCH
BBP3 V1 370 Illuminated Plate Scuff fitting Mazda3 BL
(1892) Dress fitting made easy Barnes, A , L
więcej podobnych podstron