Drawing
Newsletter
April 2005
© All rights reserved.
the
1-800-427-2468
TEETH: Drawing the Skull –
Part 3
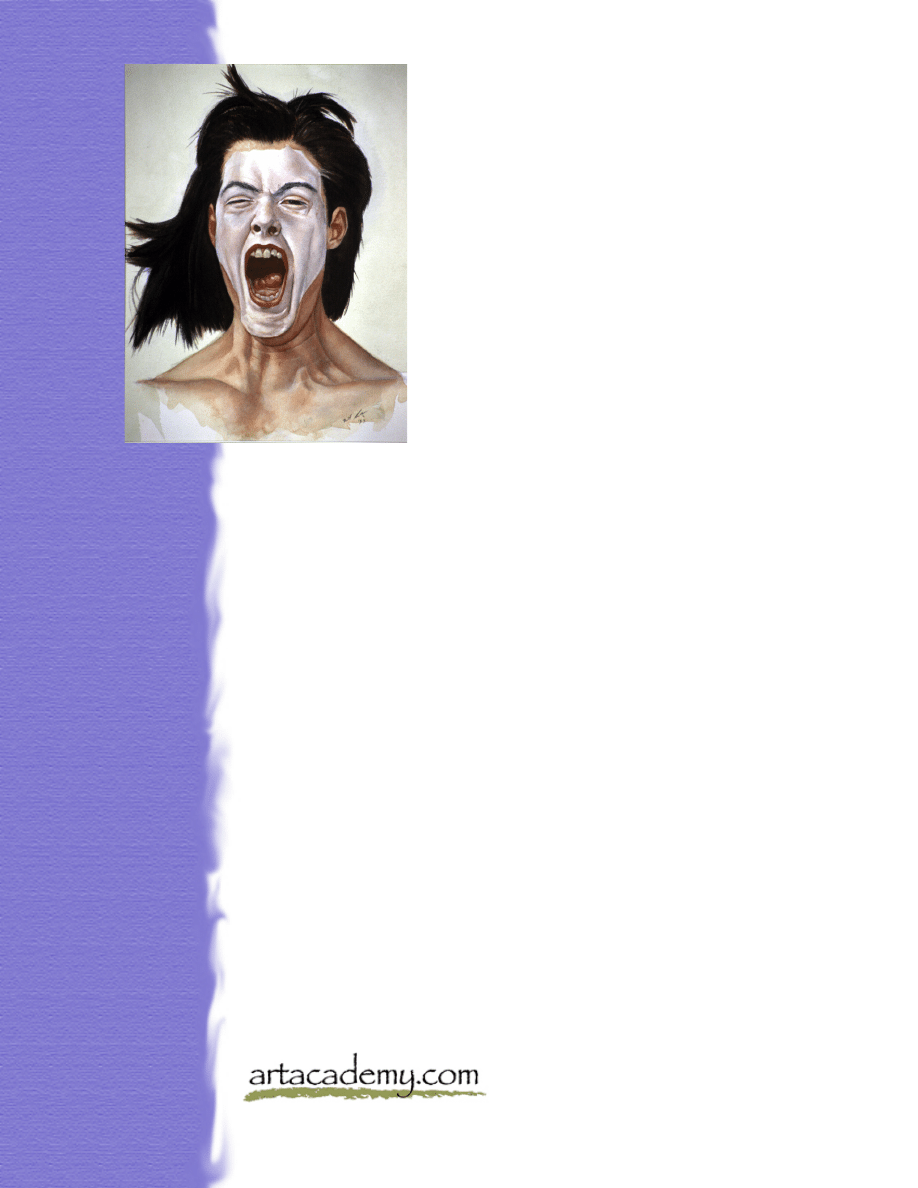
Most portraits are drawn with the mouth closed, yet rendering the face
with a slightly opened mouth allows for a greater range of expression –
from a relaxed intimacy to a raging howl. Whatever the expression, the
teeth should not be the primary focus for the viewer.
This requires two considerations: first, the teeth must be drawn correctly
and proportioned; this requires plumbing and aligning each tooth within
the facial arena. Poorly drawn teeth will draw unnecessary attention to
them. Second, teeth will invariably fall into shadow that is both cast from
the lips and the fact that the teeth are recessed into the mouth. In paint-
ing, teeth are never white. At their brightest they are a mother-of-pearl
gray. Subtlety and understatement are the keys to rendering teeth.
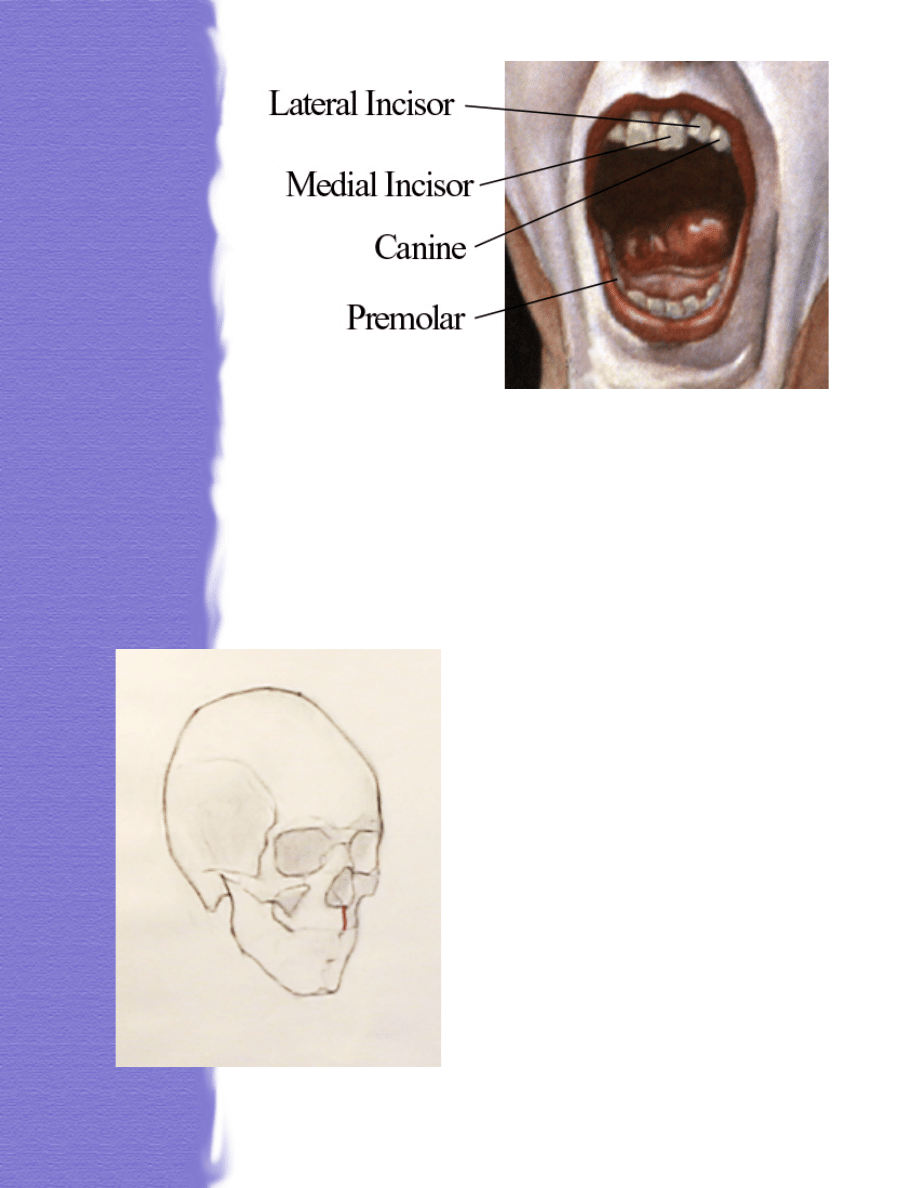
In most people the upper teeth close over the lower teeth: this is the ‘bite’.
With very few exceptions the only teeth visible in an open mouth will
be the incisors and canine teeth. The premolars will usually just peek
out from behind the cheeks. The top of the molars may subtly be seen
in the lower denture.
Natural teeth are hardly ever perfectly straight blocks. Each tooth will
have its own characteristics. The incisors are broad and chiseled –
designed to cut. Most people will have a slightly chipped medial incisor.
Look for a slightly askew lateral incisor, again,
it is a common element. The canine (eye tooth)
is generally the longest and is pointed; be care-
ful not to exaggerate it. Otherwise your portrait
will have a vampire-like effect.
When drawing from your skull (which, if you
are serious about developing your drawing skills
you really should own one) the alveolar process
must first be ascertained. The alveolar process
is the horseshoe shaped ‘denture’ that contains
the sockets for the teeth. The small measure
(the red line) from the anterior nasal spine to
the alveolar process is too small to be measured.
It must felt. As I’ve said many times, this tactile
sensibility (the ‘felt’) is a learned skill requiring
both practice and knowledge.
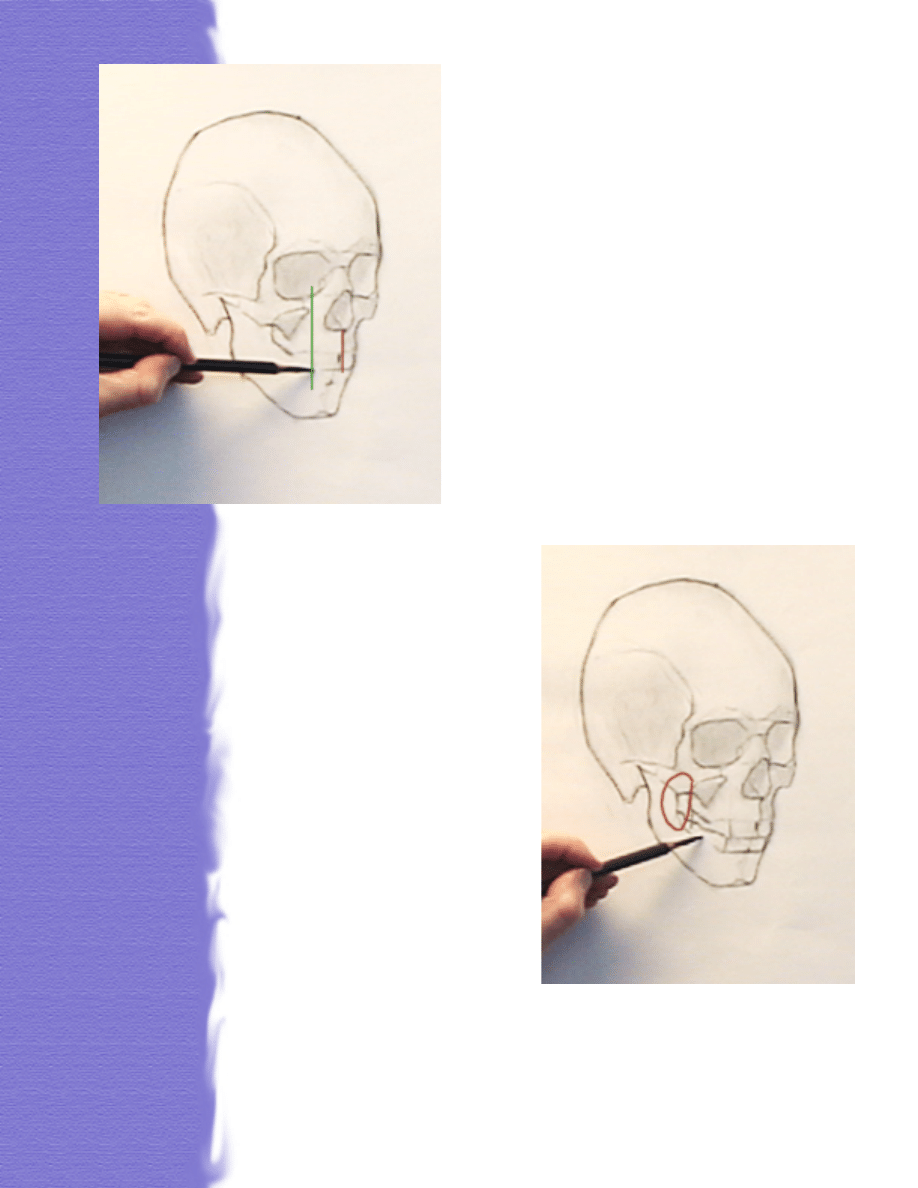
Several elements must know be established
and fixed into place. First is the lower border
of the alveolar process (the lower teeth’s gum
line). Again, feel you way down from the
upper gum line and double check by feeling
your way up from the chin’s mental process.
Second, mark the interstice where the upper
and lower medial incisive teeth meet. (The
upper teeth are usually larger than the lower.)
Third, the vertical division of the two front
medial incisors are placed by plumbing down
(the red line) from the anterior nasal spine.
Note that the vertical division of these two
front teeth are slightly to the left of the ante-
rior nasal spine. This is something to always
look for!
Fourth, the canine tooth is placed
by plumbing (green line) and
relating to either the zygomatic
process (it’s a bit to the right of it
here) or the eye socket. You are
looking for a viable landmark
that you believe is accurate.
As the teeth progress back to the
molars the interstice is always an
upwards angle until it meets the
coronoid process (circled in red).
You can almost feel the coronoid
process with you tongue – it is
just behind the wisdom teeth.
I think it best to first define the
teeth by carefully drawing the
interstice. Avoid the tooth-by-
tooth route.
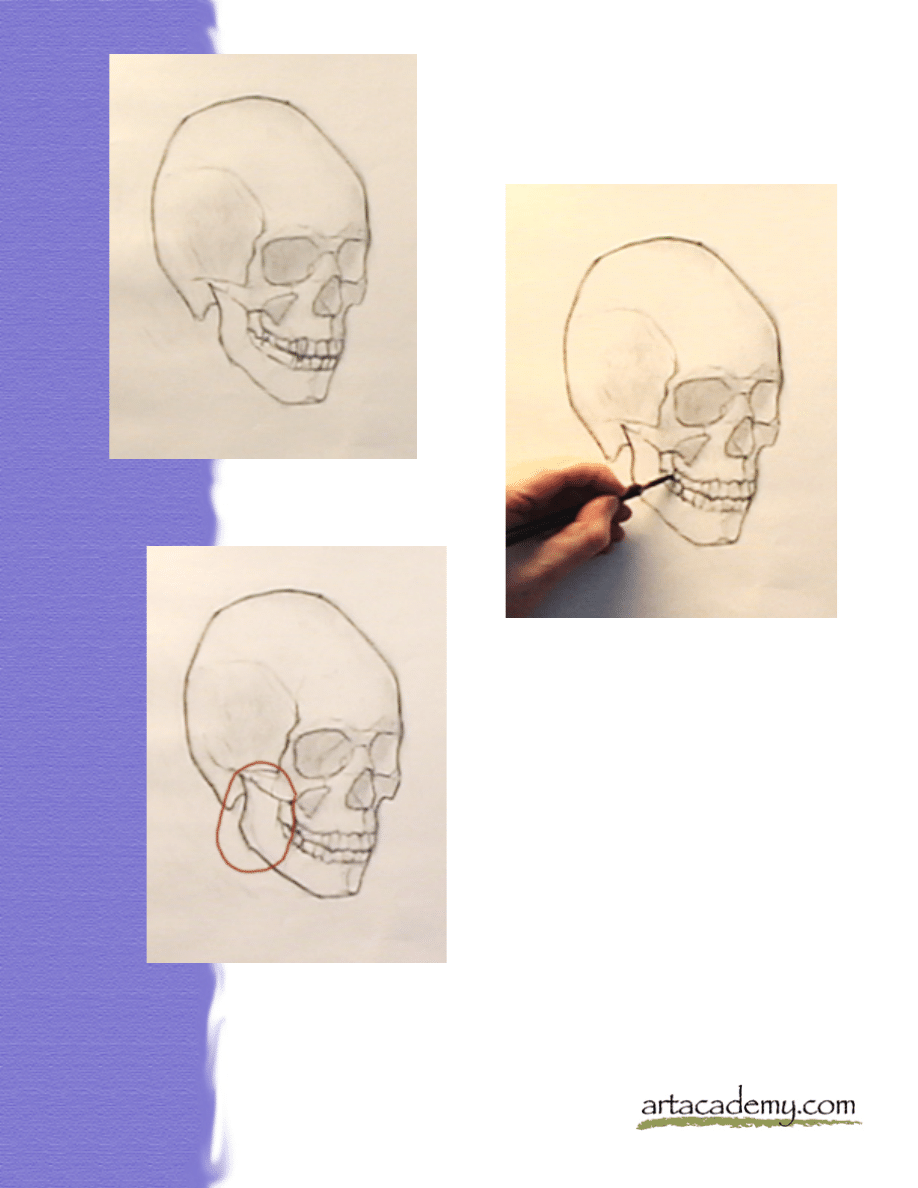
Now is the time to sketch in the individual teeth
take note of each tooth’s individual character.
Avoid what I did – don’t exaggerate the canine.
But if you do it is easily fixed.
Now that I’ve corrected the errant canine I
softened the lines of the individual teeth so
that they are subtle and read pretty much as
teeth and not as a bunch of tooths (grammar
aside). I refined and slightly darkened the
interstice which emphasizes the bite.
Throughout the drawing of this skull a
small error managed to escape my detec-
tion. The ramus (circled in red) is off.
Totally. But it is easily fixed. The hard part
is detecting your errors. Usually it is a gut
feeling that something is amiss. The quick
way to check your drawing is by looking at
its reverse image in a mirror. It’s a brutal
method, but one that always illuminates the
errors of your drawing.
Wyszukiwarka
Podobne podstrony:
Drawing the Skull Part 1
Drawing the Skull Part 2
Making Robots With The Arduino part 1
Making Robots With The Arduino part 5
9 Ask?out the underlined part of the sentence
Battlestar Galactica Survivors of the Fleet Part 1
Nugent 5ed 2002 The Government and Politics in the EU part 1
7 Ask?out the underlined part of the sentence
Making Robots With The Arduino part 2
Burne Hogarth Drawing the Human head
Making Robots With The Arduino part 3
The Golden?lf Part 1
Making Robots With The Arduino part 1
Making Robots With The Arduino part 5
Howard, Robert E Kull The Skull of Silence
David Icke The New Mark Of The Beast Part 5
więcej podobnych podstron