Copyright 2004 Eni Oken –
www.enioken.com
Page: 1
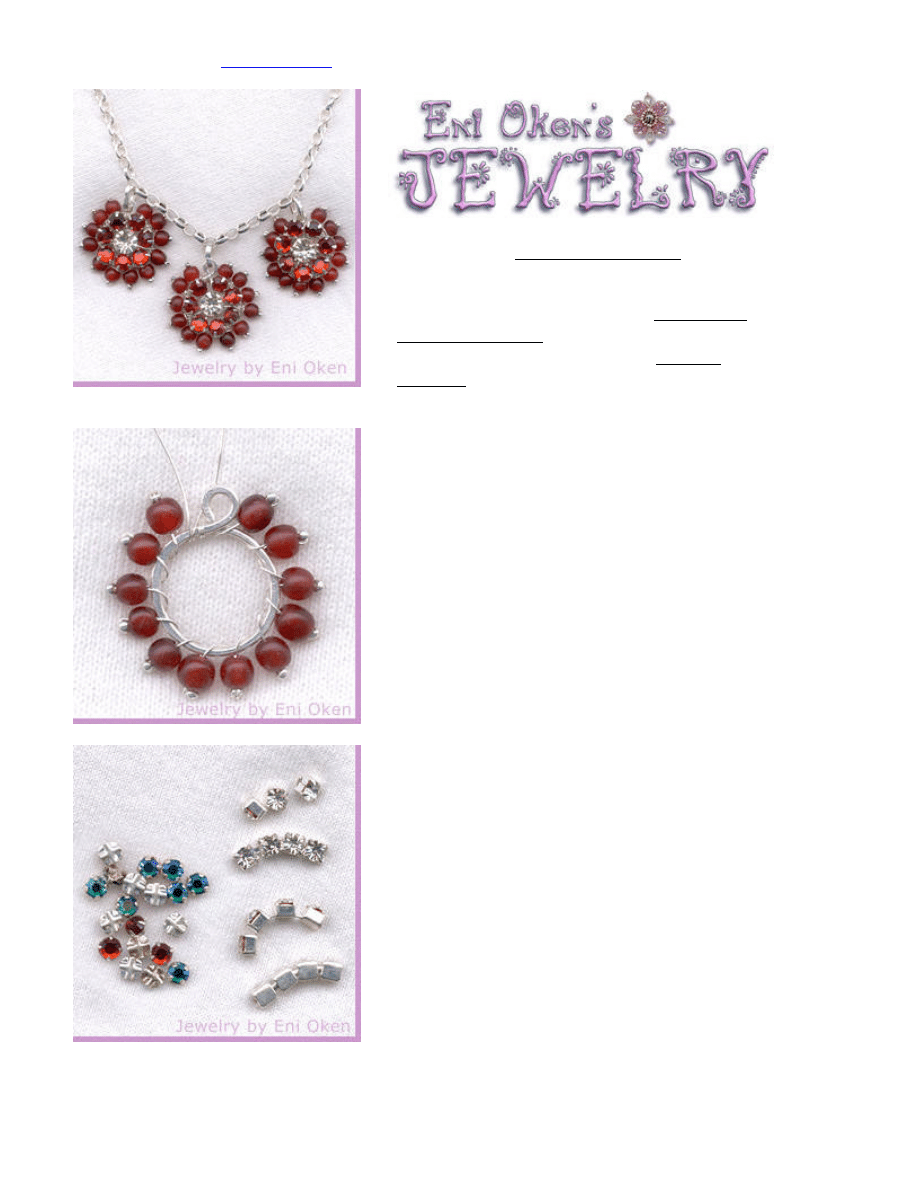
Tutorial 4: Holiday Red necklace
By Eni Oken -
www.enioken.com
This necklace is made with three small pendants,
each one a simpler version of the
Grey Rose
Montee pendant
shown in tutorial 3. I
recommend that you also see the
Orange
Circular
tutorial to understand the basic
procedure.
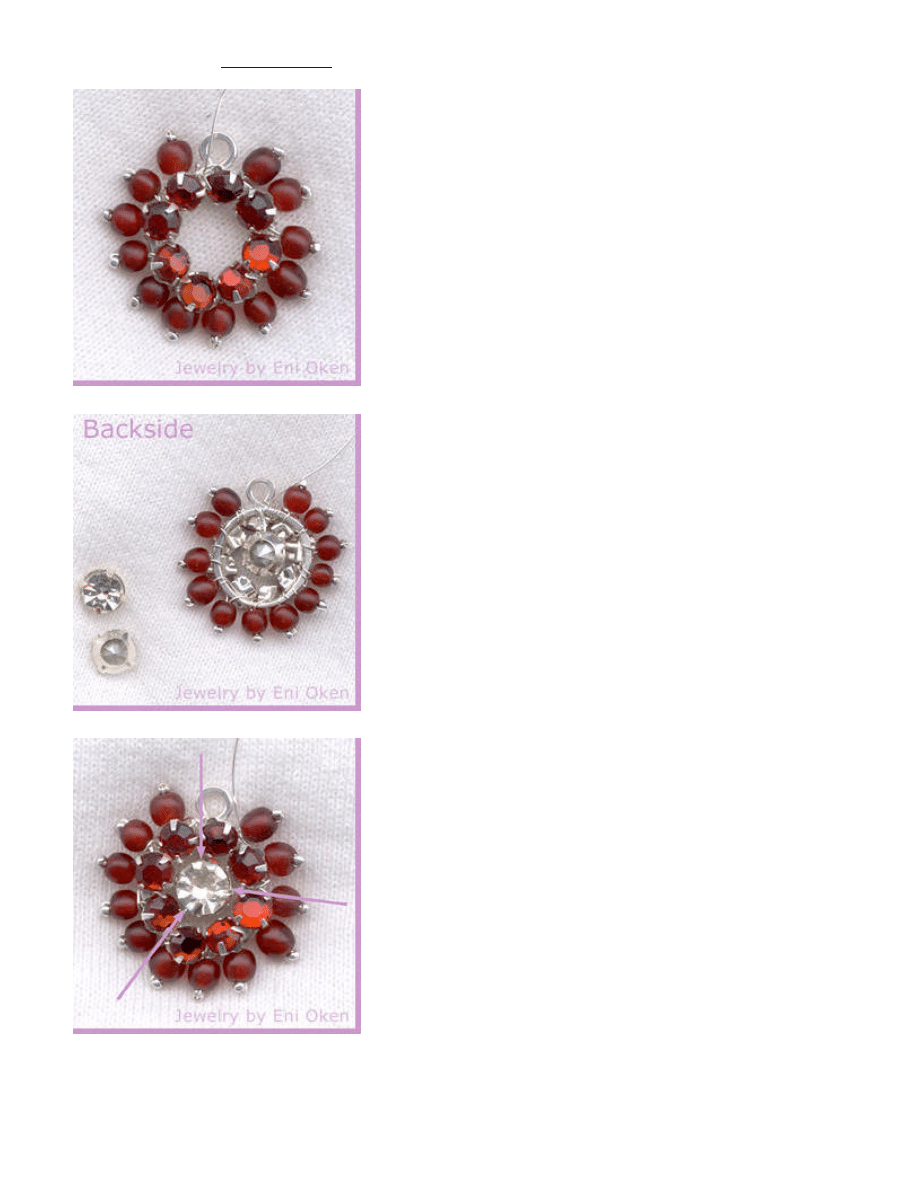
Step 1: A full circle of picots was attached to a
circular structure of about 0.5 inch in diameter
(see Orange circular pendant for more
information). One and a half feet of 28 gauge
wire is enough for this pendant, since it does
not have the fancy edging create in Tutorials 2
and 3. This pendant used African resin beads,
but you could use a garnet or carnelian as well,
combined with seed beads.
Step 2: The inside circle was made of rose
montees, which are rhinestones pronged and
attached to an cross-shaped track (shown at
left). Since these are rare to find, you can also
use rhinestones that are connected and sold by
the yard, cutting them loose from each other
(show to the right).
Copyright 2004 Eni Oken –
www.enioken.com
Page: 2
Step 3: The rose montees are attached over the
wire structure, using a simple overcast wiring.
Notice how the number of rose montees is
considerably smaller than the outer beads. There
are 12 outer beads and only 8 inner rose montees.
Step 4: The center element is a slightly larger
clear rhinestone mounted on prongs. The back
of the rhinestone is open, allowing the wire to
be slipped through it and back to the structure.
Step 5: The wire is then woven on the picots
until it reaches about one third of the perimeter
and slipped through the rhinestone again. This
is repeated about a third of the way, so that
the rhinestone is fastened three times (top and
twice at a third of the way). Notice how the
spacing is not even because the number of
inner rose montees cannot be divided equally
by 3.
Copyright 2004 Eni Oken –
www.enioken.com
Page: 3
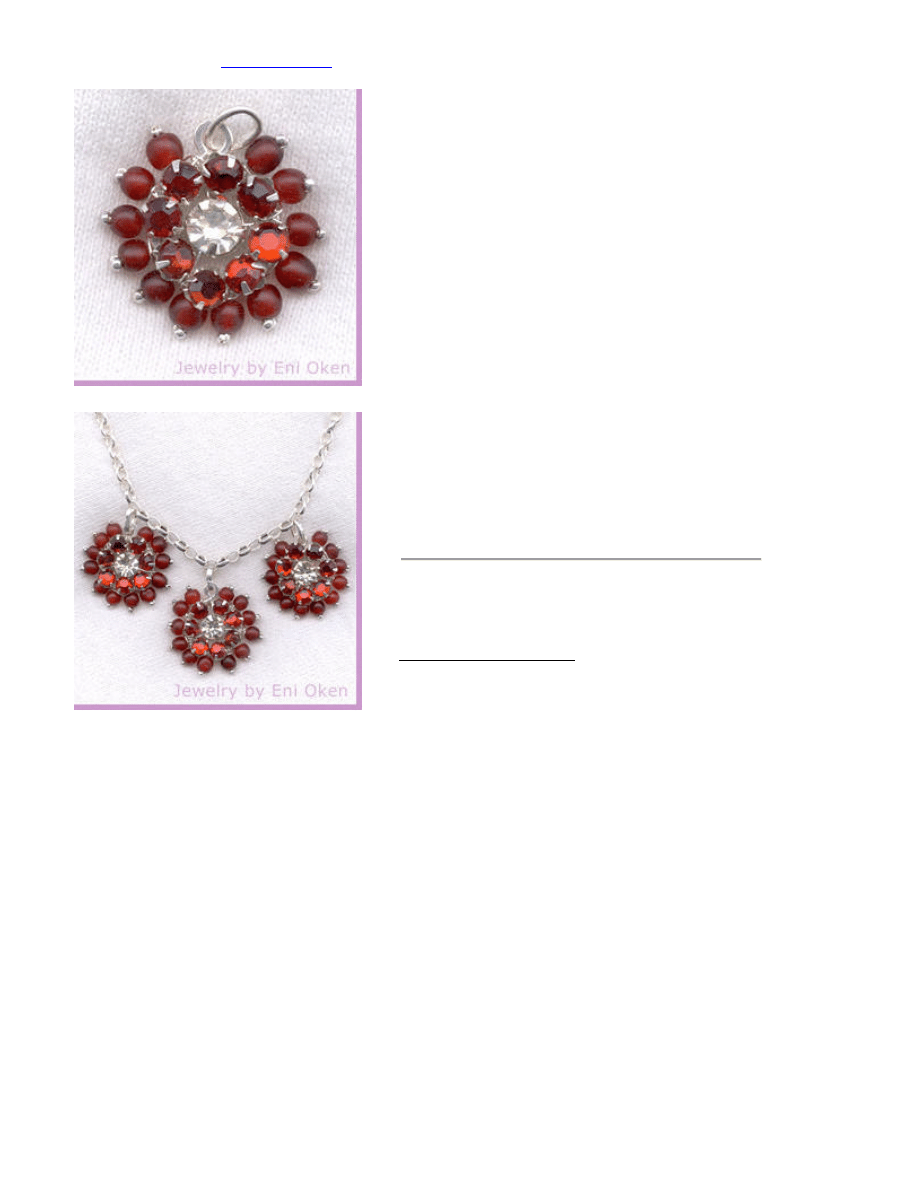
Step 6: Wrap the tail end of the wire around one
of the picots tightly and cut short. Remember to
cut towards the front of the pendant, so that there
is no chance of scratching the wearer. Add a bail
made of 18 or 16 gauge wire.
Step 7: Repeat the entire process twice,
creating another two pendants.
Add them to the front of a simple chain,
spacing out evenly. Add a clasp and you are
ready!
You are welcome to try to make necklaces
similar to this one for personal or commercial
sale. Thanks and enjoy!
Back to Techniques
Wyszukiwarka
Podobne podstrony:
Eni Oken tutorial Fat wrap bead(1)
Eni Oken tutorial orange
Eni Oken tutorial herringbone
Eni Oken tutorial briowrap
Eni Oken tutorial Finishing off leather cord
Eni Oken tutorial Grey Rose Montee Circular Pendant
beading red tube bead necklace
wyklad red list
Little Red Hen2
red hot chilli peppers
bugzilla tutorial[1]
freeRadius AD tutorial
Alignmaster tutorial by PAV1007 Nieznany
free sap tutorial on goods reciept
holidays
więcej podobnych podstron