Copyright 2004 Eni Oken –
www.enioken.com
Page: 1
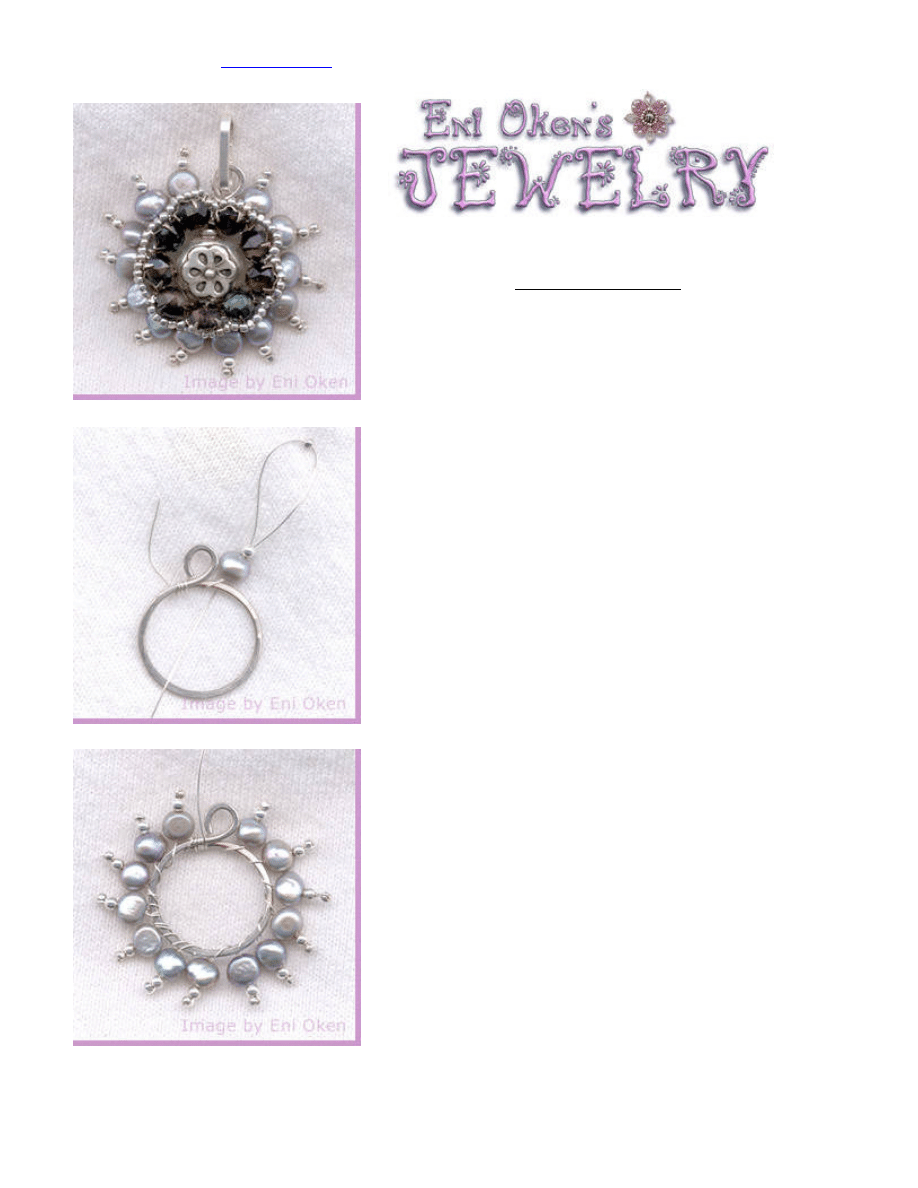
Tutorial 3: Grey Rose Montee
circular pendant
By Eni Oken -
www.enioken.com
The pendant shown here uses an extremely similar
development as the Orange Circular pendant. If
you have not seen that tutorial before, I
recommend you read it first, to understand the
basic workings.
Step 1: A circular structure with about 0.5 inch
in diameter was created by wrapping around a
dowel and flattening it with a ball peen hammer
over an anvil. Three feet of 28 gauge wire were
attached to the left side and a first "picot" was
created. Unlike the Orange pendant, this picot
uses three beads instead of two: one pearl, one
2mm round sterling silver bead and one sterling
silver seed bead. The wire is taken back only
through the round silver and pearl.
Step 2: A full circle of picots was attached to
edge of the structure. Notice that even though
this is the same technique used for the Orange
pendant, the effect of using different beads
gives it a distinct look.
Copyright 2004 Eni Oken –
www.enioken.com
Page: 2
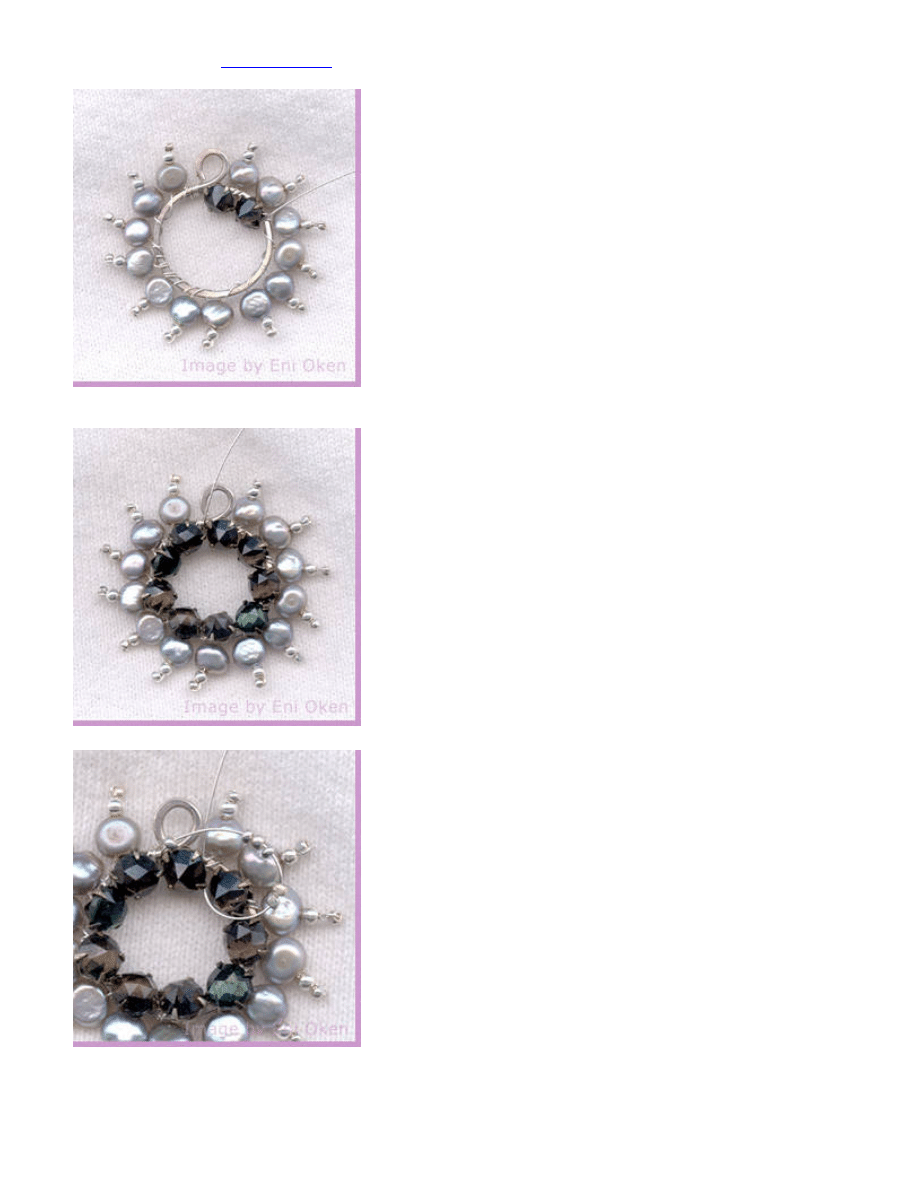
Step 3: The rose montees are attached over the wire
structure, using a simple overcast wiring. Rose
montees are rhinestones set with prongs over a
small track, allowing the wire to be threaded
underneath the stones. The rose montees used here
are a deep green and are vintage, not commonly
found.
Step 4: A full circle of rose montees is attached
around the structure. These stones are
covering partially the inner stucture, but some
of it can still be seen showing through.
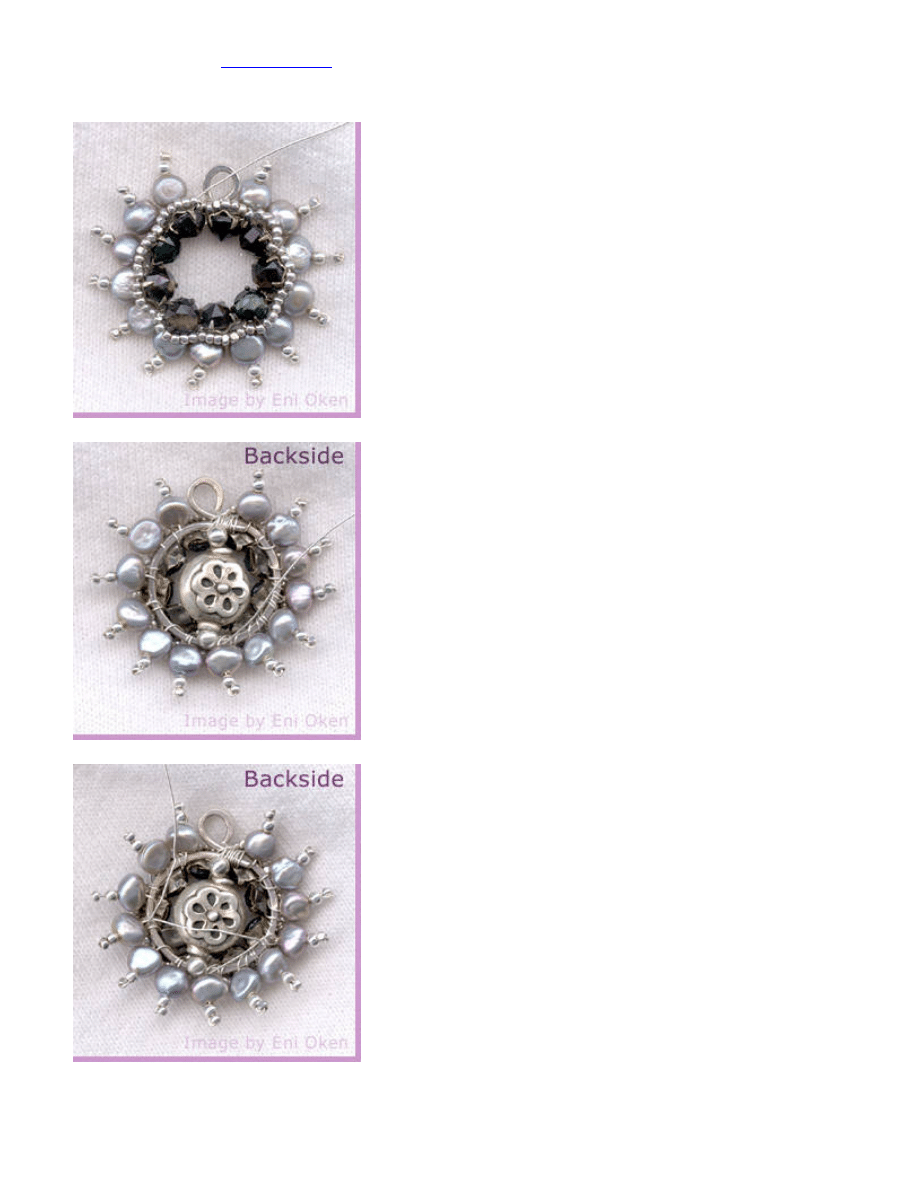
Step 5: Using the same wire, six sterling silver
charlotte seed beads are attached at a time
over the first rose montee, using the same
method as in the Orange pendant. The
backstitch goes under and up, attaching on to
the loop of the rose montee.
Copyright 2004 Eni Oken –
www.enioken.com
Page: 3
Step 6: A full circle of sterling silver seed
beads is attached over the rose montees.
Notice how now the underlaying structure is
totally covered.
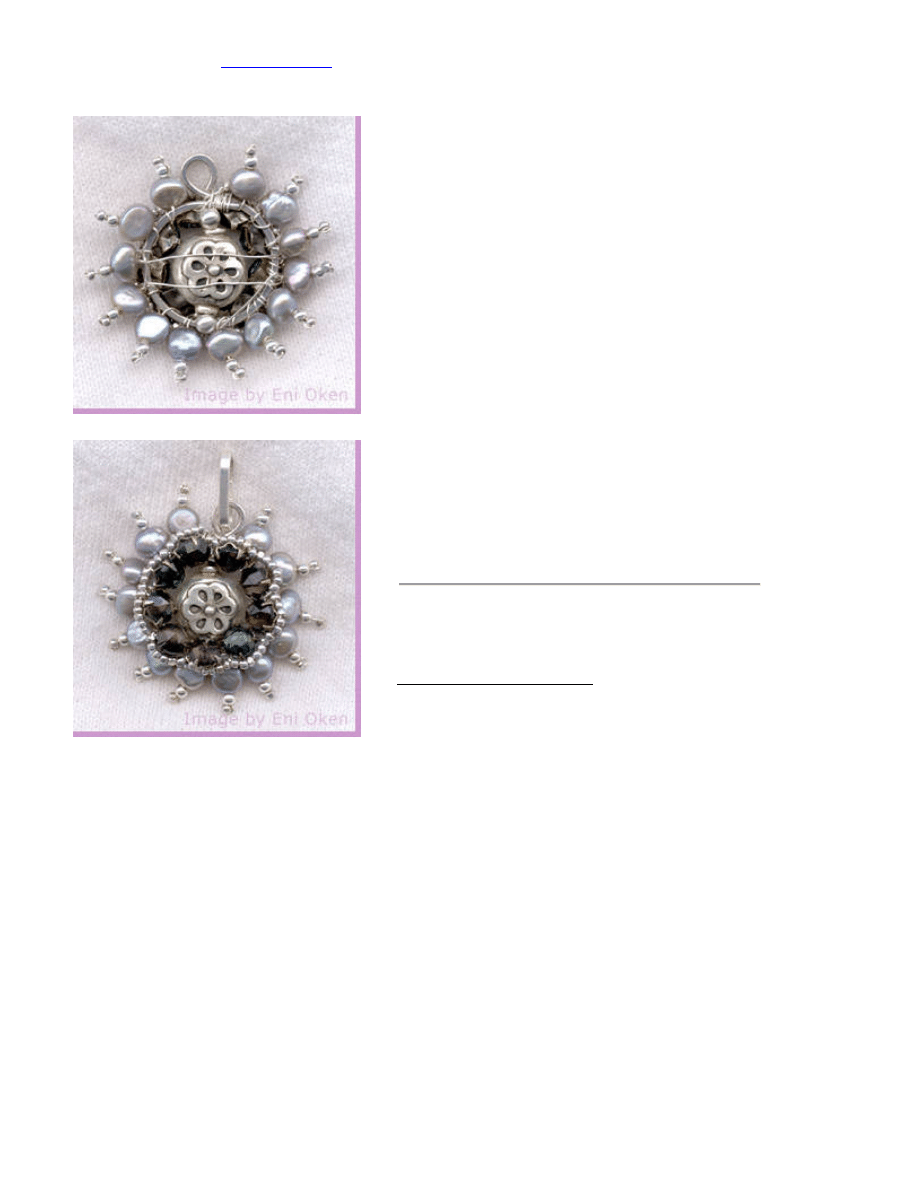
Step 7: Here comes the part that is a bit
different from the Orange pendant -- the same
wire is taken to the back and a ornate sterling
silver "Bali" bead is attached in between two
round sterling silver beads. The round sterling
silver beads make the Bali bead centered in the
pendant.
Step 8: To assure that the Bali bead will not
turn, the wire is taken across and hooked on to
the picots.
Copyright 2004 Eni Oken –
www.enioken.com
Page: 4
Step 9: The wire is taken up one step and
wrapped across the pendant again. Then it is
fastened tightly on to the structure by wrapping
4 times and trimmed.
Step 10: To finish the piece, a hand-made bail
is created with 16 gauge wire. Notice that this
type of pendant always has certain
irregularities, it's not even, but that, in my
opinion, only adds to the "hand-made" feel of
the piece.
You are welcome to try to make your pendants
similar to this one for personal or commercial
sale.
Back to Techniques
Wyszukiwarka
Podobne podstrony:
Eni Oken tutorial Holiday Red Necklace
Eni Oken tutorial Fat wrap bead(1)
Eni Oken tutorial orange
Eni Oken tutorial herringbone
Eni Oken tutorial briowrap
Eni Oken tutorial Finishing off leather cord
Circular Flat Peyote Tutorial
bugzilla tutorial[1]
freeRadius AD tutorial
Alignmaster tutorial by PAV1007 Nieznany
free sap tutorial on goods reciept
ms excel tutorial 2013
Joomla Template Tutorial
ALGORYTM, Tutoriale, Programowanie
więcej podobnych podstron