Repairing the door lock of a Citroen XM
Having trouble with those spinning locks? As usual the repair is easy once
you know how. Say goodbye to those days of climbing into the car through the
tailgate. Just follow the instructions for a full set of working locks. The same
instructions apply to both front doors and the tailgate.
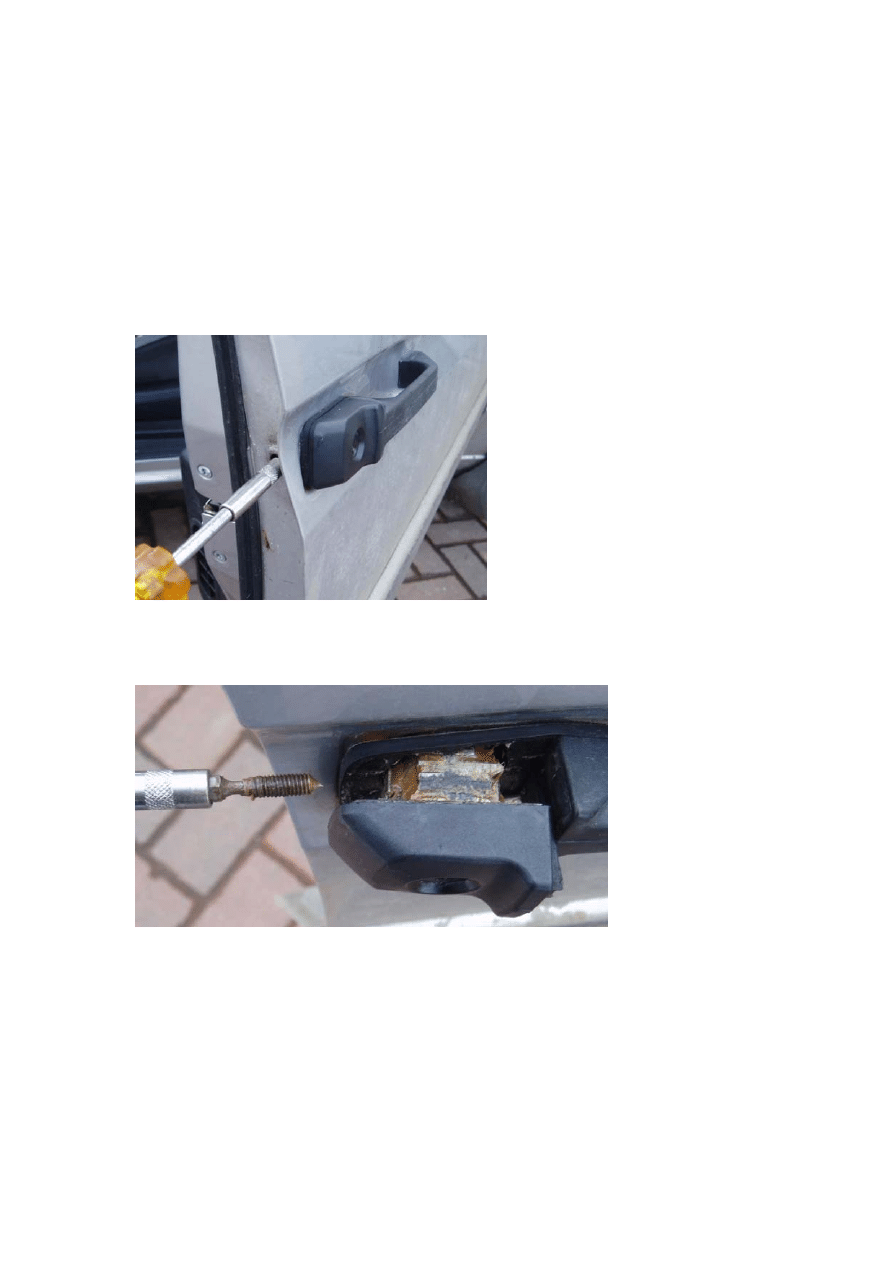
Removing the lock from the car door
Open the door to reveal the door edge. Remove the small rubber bung just
next to the door lock. Insert a 3mm allen key and remove the grub screw.
Photo1
Next, pull the lock away from the door. You may need to pull on the handle
slightly to allow the lock to come out. The black plastic surrounding the lock
may stick to the thin plastic base between the door lock and the door. Just
prise them apart with a small screwdriver.
Photo2
Next, prise the black plastic shroud off the door lock. Warning – make sure
the plastic is warm. It is brittle and will shatter if prised off when cold. There
are several points around the perimeter where the black plastic grips the
metal. Just ease them off one at a time with a small screwdriver working your
way around the edge.
Door lock repair
Page 1 of 4
©2005 Norrie
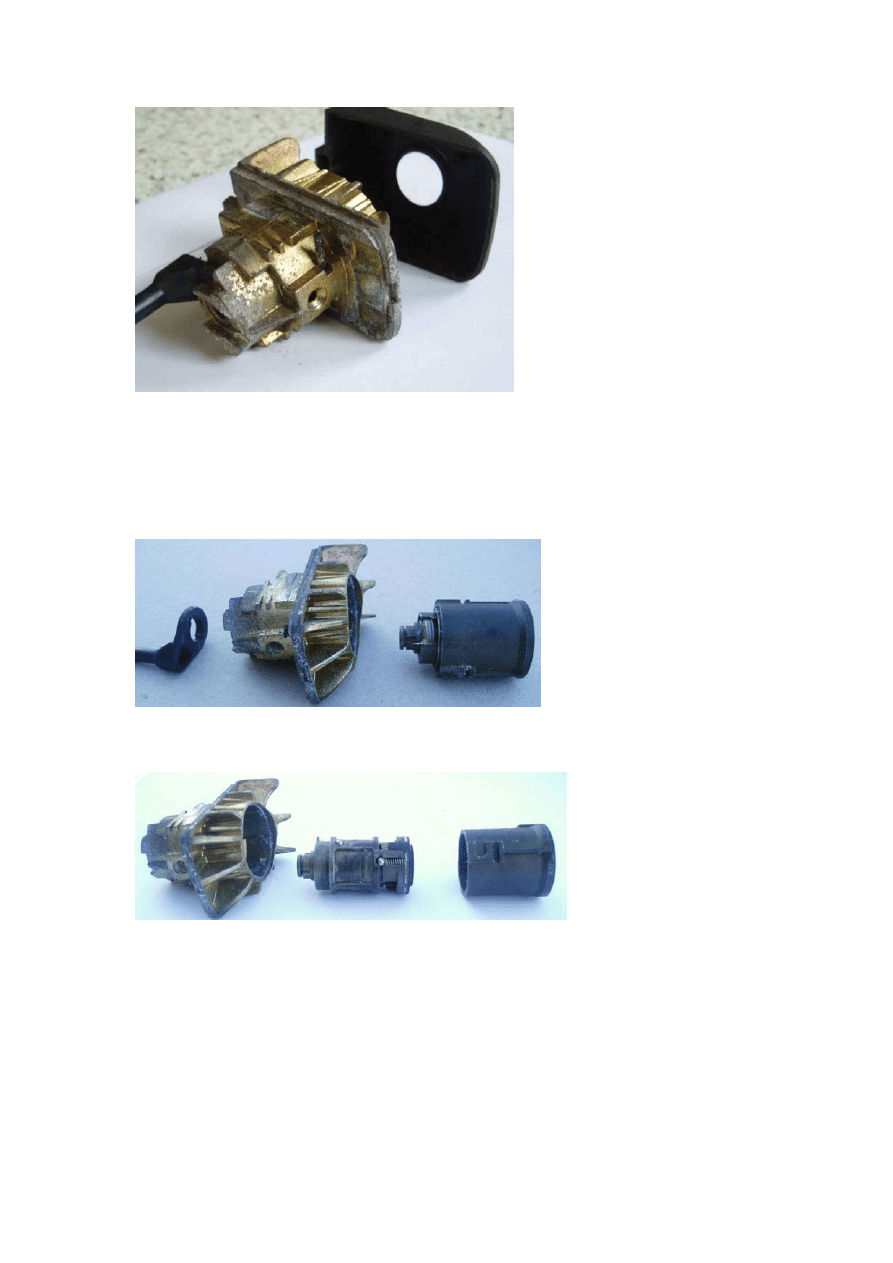
Photo3
Next, remove the little rolled dowel pin which holds the whole lock assembly
together. Punch it out with a small nail or a pin punch. Otherwise push it out
with a screwdriver until there’s enough to grab on the other side with a pair f
pliers. Then pull it free from the lock. Once out, the inside barrel of the lock
should move quite easily (depending on the extent of the corrosion) in the
direction of the hole where you put the key in.
Photo4
The black plastic lever to the left in the photograph should just pull out
sideways once the barrel is clear. The right hand assembly in the photo above
is where the main lock mechanism is located.
Photo5
Push the inner barrel assembly out of the outer barrel by pushing on the bit
where the key goes in whilst holding the outer barrel firmly.
Door lock repair
Page 2 of 4
©2005 Norrie
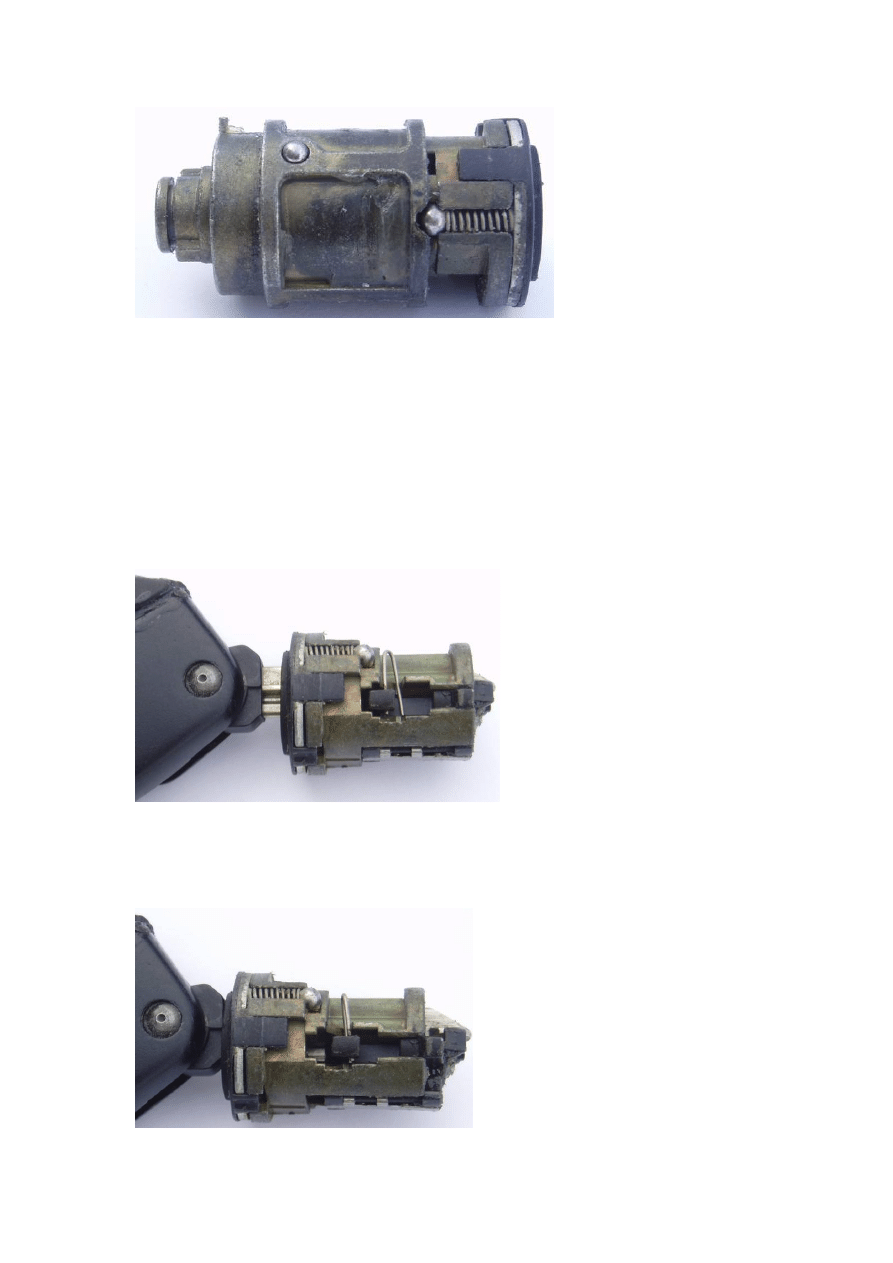
Photo6
The inner barrel is in two halves which separate very easily. The ball bearing
at the top left of the photo is one of two ball bearings which stop the barrel
rotating when anything other than the correct key is pushed into the lock. The
right hand ball bearing with the spring is the anti-theft mechanism which
allows the barrel to spin if the wrong key or a screwdriver is used instead of
the correct key.
Pull the two halves apart to reveal the tumblers. This is the part which needs
lubricating. Thoroughly cover the components in grease and/or WD40 or its
equivalent. Push the key in and out of the lock many times to release the
mechanism.
Photo7
When the key is presented to the lock it will go so far in until it meets a slight
resistance. At this point the ball bearings are still engaged and the barrel
won’t turn.
This is the condition in which you will find most locks that won’t
operate.
Photo8
Door lock repair
Page 3 of 4
©2005 Norrie

If the tumblers are well lubricated the key will pass into the lock by the last
little bit of travel. You can see the return spring in the middle of the
photograph is compressed which helps to push the key out when you
withdraw it. The very end of the key can be seen protruding through the end
of the barrel to the right. Just before the ridge at the right hand side you can
see a small square block of metal. In the lower photo the square block has
moved out of line with the ridge towards the right hand side. The hollow left
behind is the space that the two ball bearings drop into. When the two ball
bearings drop into the hollow they no longer prevent the barrel from being
turned and so the key is rotated to operate the mechanism inside the door.
Reassembly
Once the barrels are all lubricated and working it is now time to reassemble
the lock. Reassembly is the reverse of disassembly. The two ball bearings
are not diametrically opposed so there’s only one way the inner barrel can fit
into the next barrel. In the same way the next barrel can only fit into the outer
barrel in one location so you can’t get it wrong.
Photo9
When fitting the barrel assembly into the gold coloured part, make sure the
key hole (which is of centre is located to the bottom of the assembly.
Door lock repair
Page 4 of 4
©2005 Norrie
Wyszukiwarka
Podobne podstrony:
VW Passat B5 Door Lock Mechanism Repair
73 Theft Deterrent and Door Lock
73 Theft Deterrent and Door Lock
Power Door Lock Circuit
10010 HIGHLANDER TOYOTA and LEXUS door lock interface
14301 AURORA AURORA DOOR LOCK DIAGRAM
Steering lock repair
lock the door
Popular Mechanics Repairing Power Antennas
firma Com repairrrrrrrrrrkk
~lock PID
Iron Kingdoms Lock & Load Errata
Flat Roof Repairs
DOOR ENTRY SYSTEM
Popular Mechanics Repairing Composite Headlights
GunsnRoses Knockin on heavens door
Programmed repair Auxiliary heater Part C Models 124, 126 020 024 025
więcej podobnych podstron