Complex
Modeling
1
TUTORIAL 6
Complex Modeling
Learning Objectives
After completing this tutorial, you will be able to:
•
Use the new 3D modeling tools in AutoCAD 2007 for complex sculpting.
Required Competencies
Before starting this tutorial, you should have been able to:
•
Use AutoCAD at an intermediate to advanced level
•
Manipulate the UCS
•
Sweep Surfaces
•
Loft Surfaces
•
Loft Solids.
The new 3D modeling tools in AutoCAD 2007 allow you to model complex shapes that
previously were not possible to model in AutoCAD. This tutorial assumes that the user
is completely familiar with creating precise 2D sketches of arcs, lines, polylines, and
splines in any location as well as the 3D tools from previous releases.
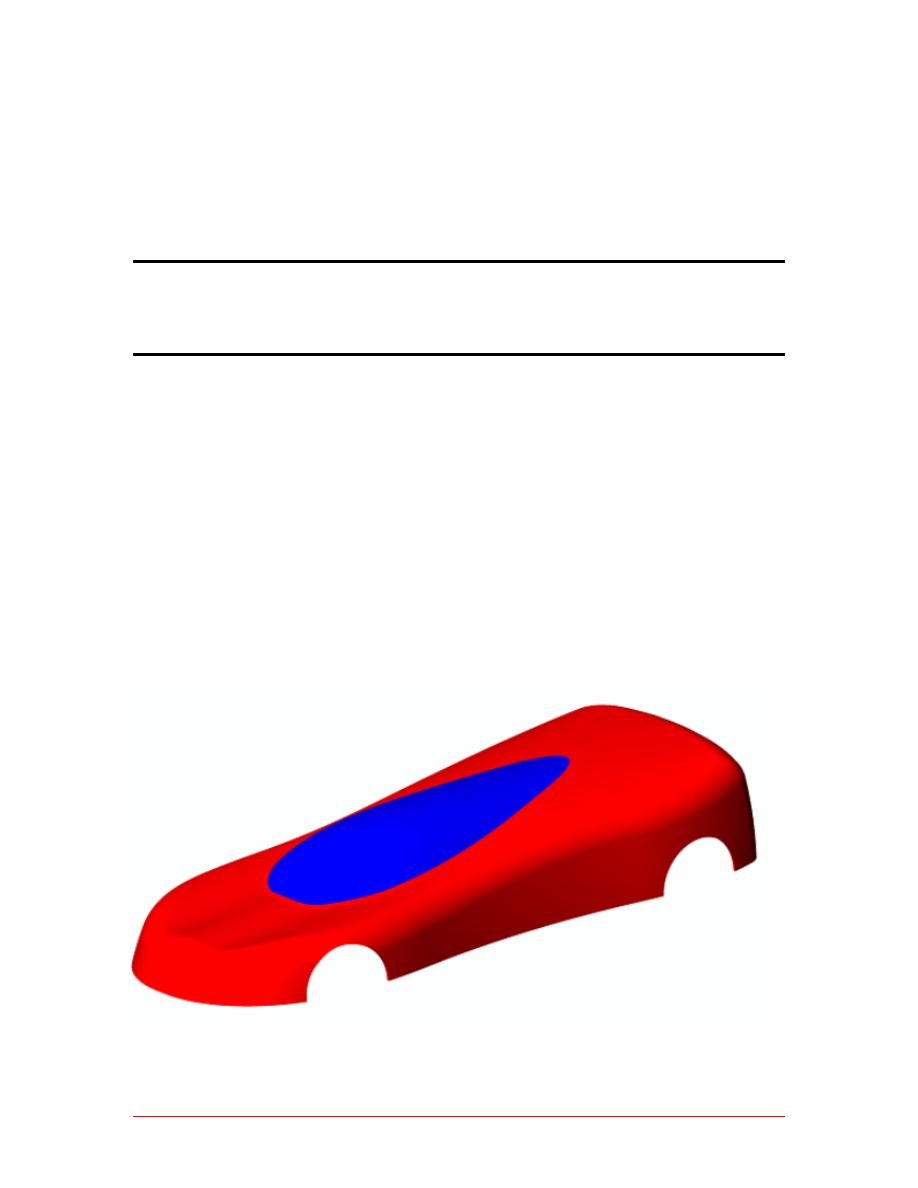
Toy Car Body
2
Tutorial 6
Copyright 2006, J.D. Mather
Pennsylvania College of Technology
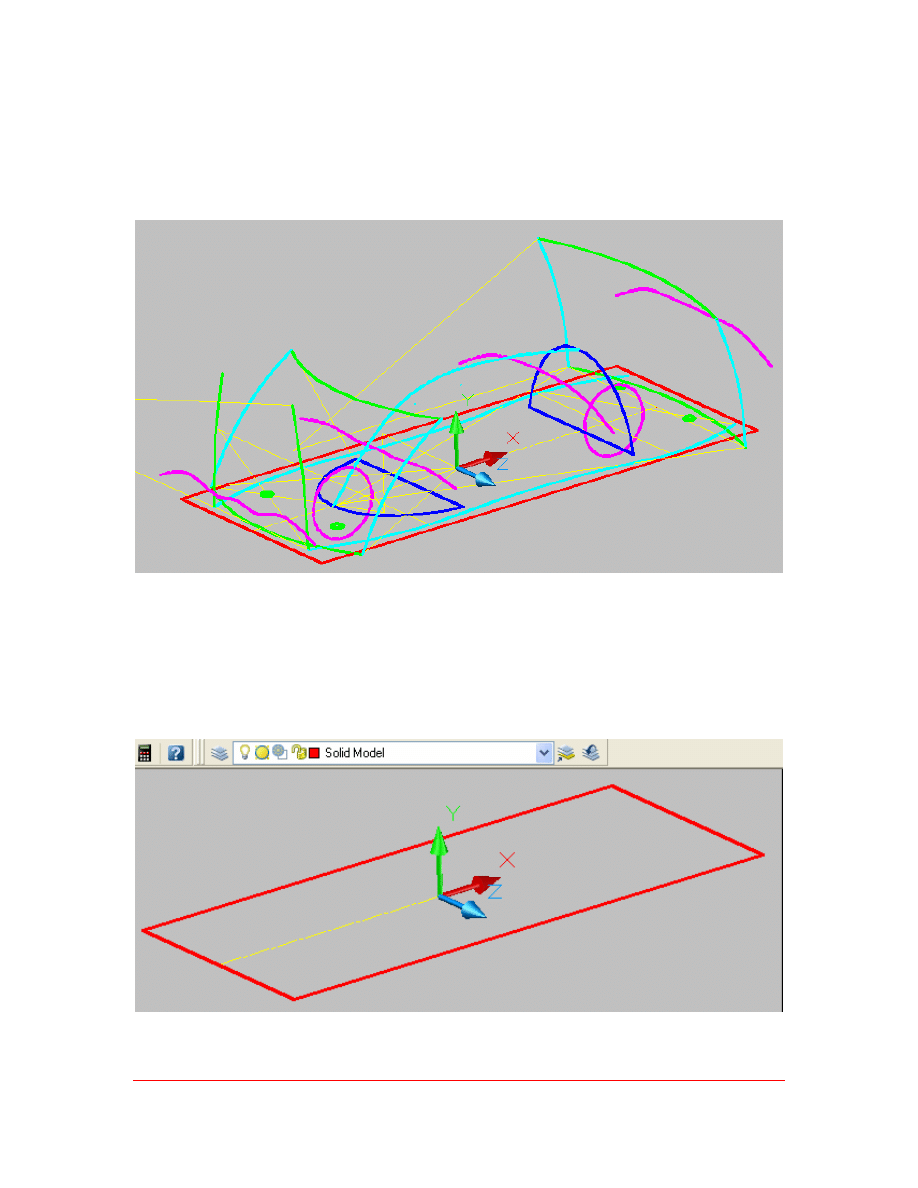
1. Open the file named Tutorial 6 Car Body.dwg. With all of the construction wires
visible it looks like a very complex file. But we will see that any one sketch is
really fairly simple.
Figure 1
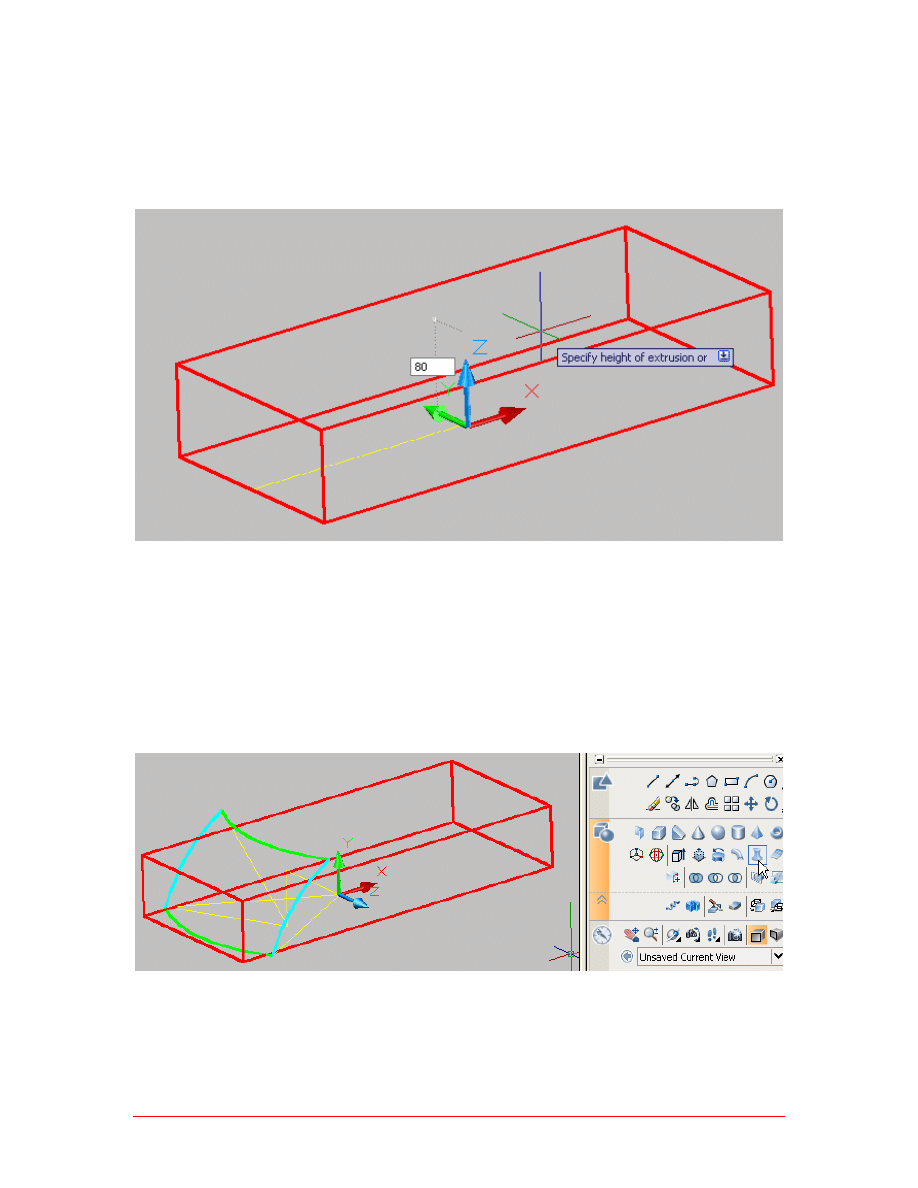
2. Turn off all of the layers except the Clay Block Sketch and the Solid Model layers.
Make the Solid Model layer the active layer. The first sketch is simply a polyline
rectangle.
Figure 2
Complex
Modeling
3
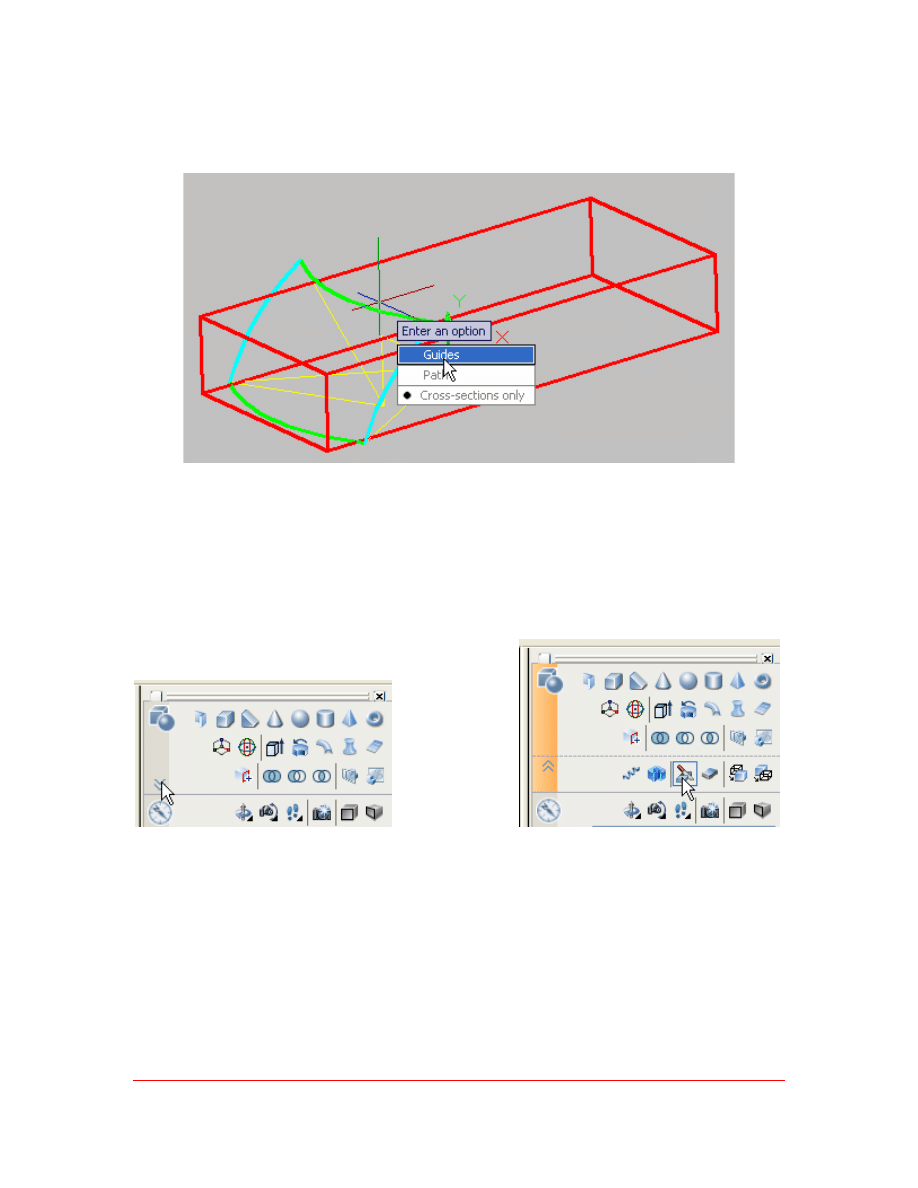
3. Set the “delobj” variable to 0 so that the sketches will not be consumed. That
way if you make a mistake you can go back to the original geometry. Extrude
the rectangle a distance of 80. Turn off the Clay Block Sketch layer.
Figure 3
4. Make the Front Profile and Front Guide Wire layers visible. If you examine these
sketches one at a time you will find that they are simply arcs of a particular angle
and radius. You might want to dimension them to be sure you fully understand
the geometry. See if you can recreate each sketch in a new file. The next step
will be to Loft a surface using the green wires as cross‐section profiles and the
cyan wires as guides.
Figure 4
4
Tutorial 6
Copyright 2006, J.D. Mather
Pennsylvania College of Technology
5. Select the two green wires as cross‐sections then Enter and click Guides and
select the two cyan wires.
Figure 5
6. After lofting the surface turn off the visibility of the Front Profile and Front
Guide Wire layers. Move you cursor into the area of the Dashboard shown in
Figure 6A and a down pointing chevron will appear. Click on this to expand the
solid modeling tools and select the Slice tool as shown in Figure 6B.
Figure
6A
Figure
6B
Complex
Modeling
5
7.
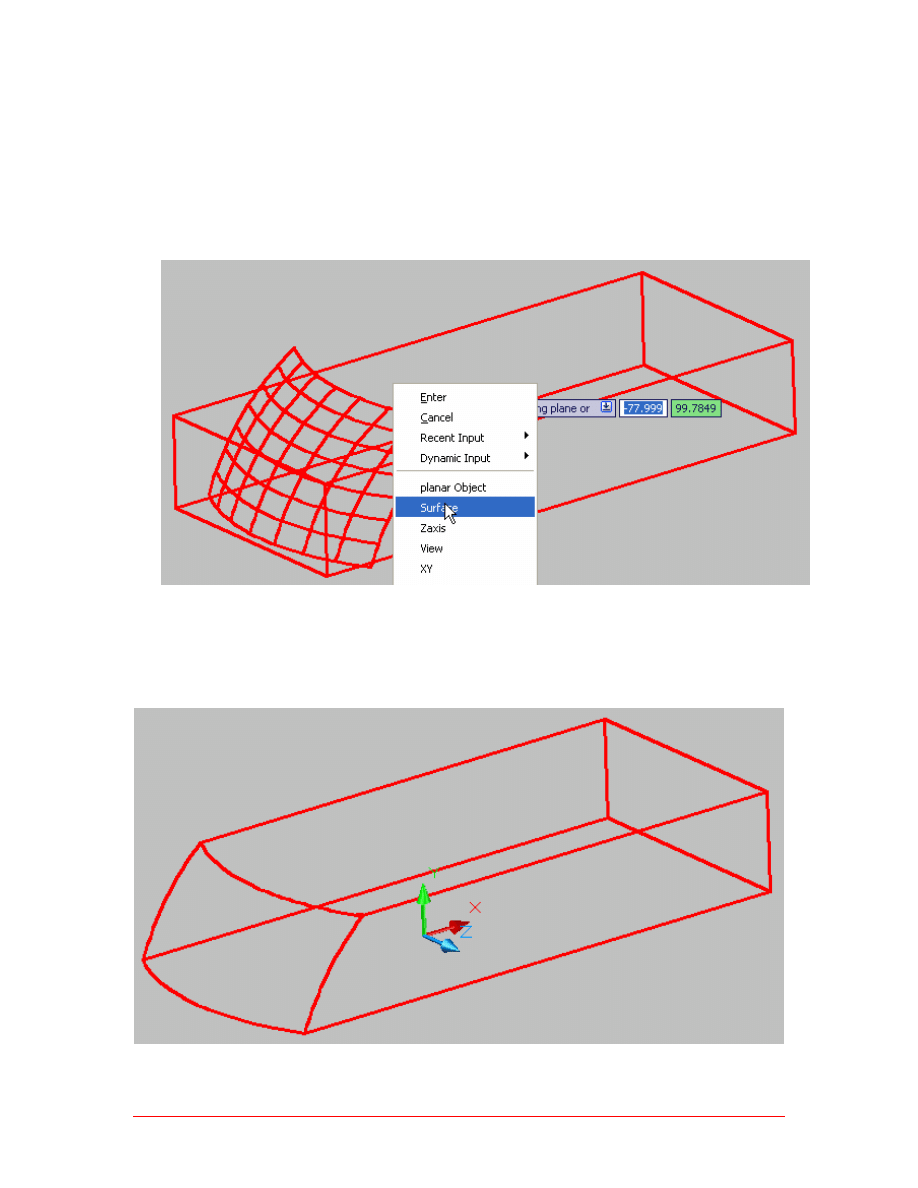
After selecting the Slice tool follow the prompts in the graphics window. First
select the solid. The press Enter and RMB select Surface from the menu and then
select the surface. If you get a warning about erasing the solid history click OK.
Finally, select the part of the solid you wish to keep – in this case the solid to the
right of the image in Figure 7.
Figure 7
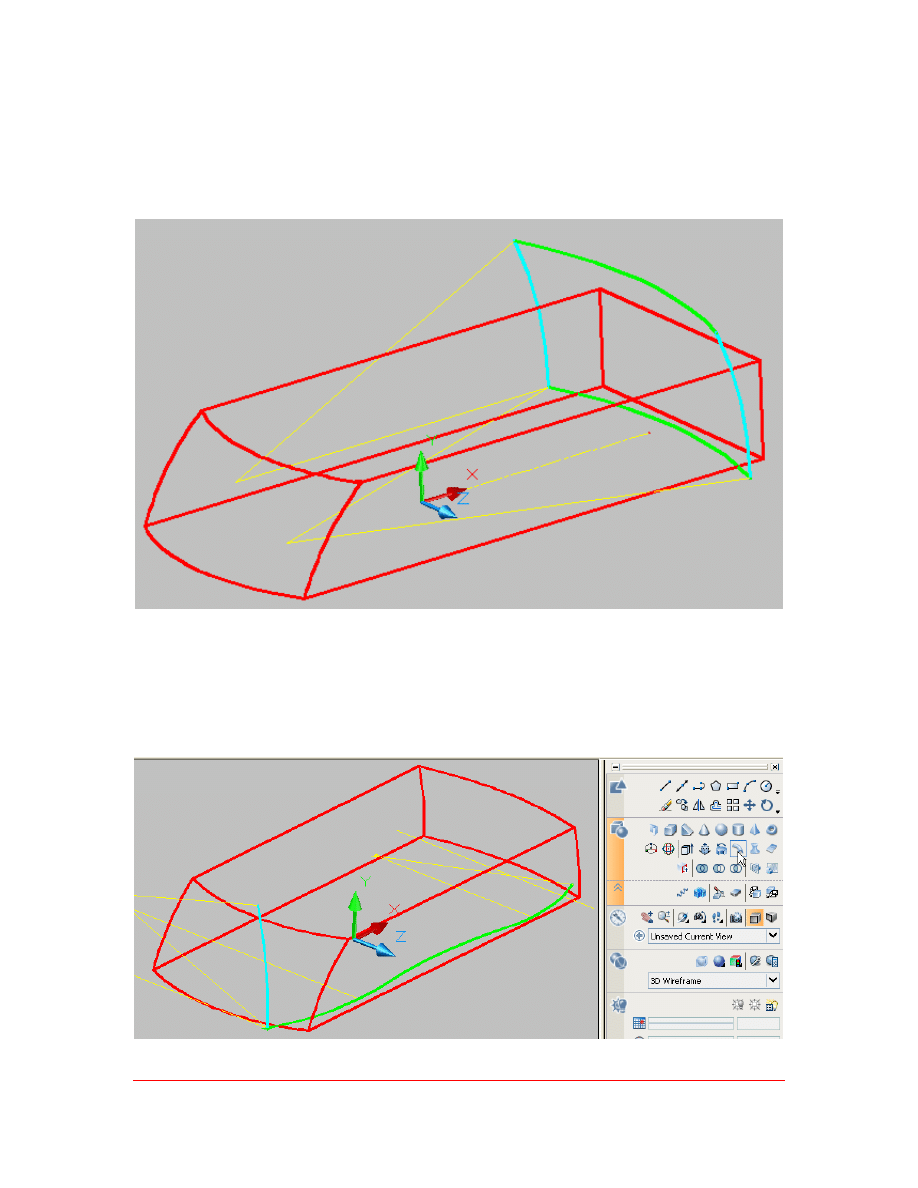
8. Move the lofted surface to the Hidden Surfaces layer (which should be turned
off). I prefer to keep all construction geometry rather than erase it.
Figure 8
6
Tutorial 6
Copyright 2006, J.D. Mather
Pennsylvania College of Technology
9. Turn on the visibility of the Back Profile and Back Guide Wire layers and repeat
the same procedures of creating a lofted surface and slicing the part, this time
keeping the solid to the left of the lofted surface. When finished turn off the
visibility of the sketch layers and move the surface to the Hidden Surfaces layer.
Figure 9
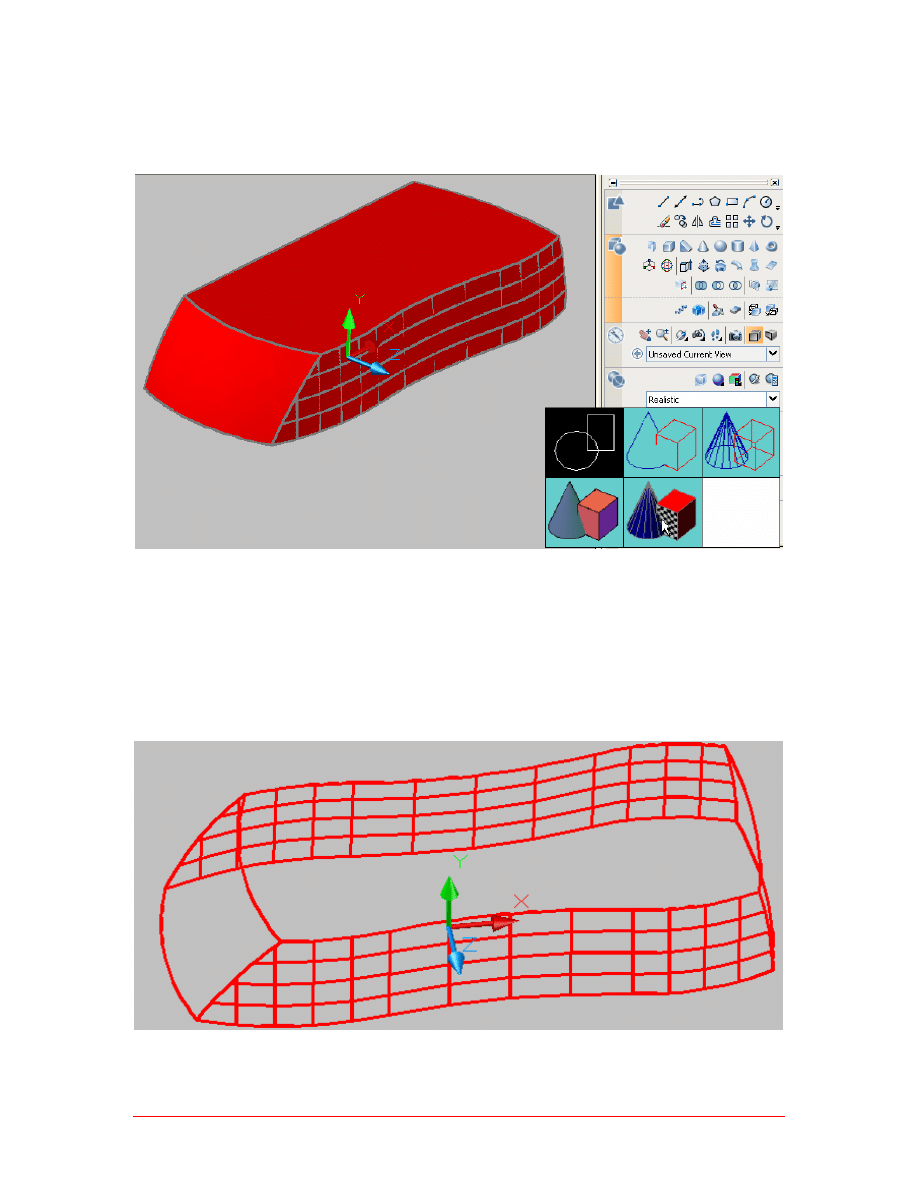
10. Make the Left Profile and the Left Sweep Path layers visible. Select the Sweep
tool from the Dashboard. Select the green profile as the object to sweep, Enter
and then RMB select Alignment No and select the cyan arc path.
Figure 10
Complex
Modeling
7
11. Slice the part as shown. From the Visual Style control panel select Realistic
shading.
Figure 11
12. Make the Right Profile and Right Sweep Path layers visible and sweep a surface
and slice the part again. (Tip: It is critically important that you select the correct
geometry as the profiles and sweep paths, otherwise your fillets are going to fail. This
points out that if something doesn’t work you should go back and try alternate methods.)
Figure 12
8
Tutorial 6
Copyright 2006, J.D. Mather
Pennsylvania College of Technology
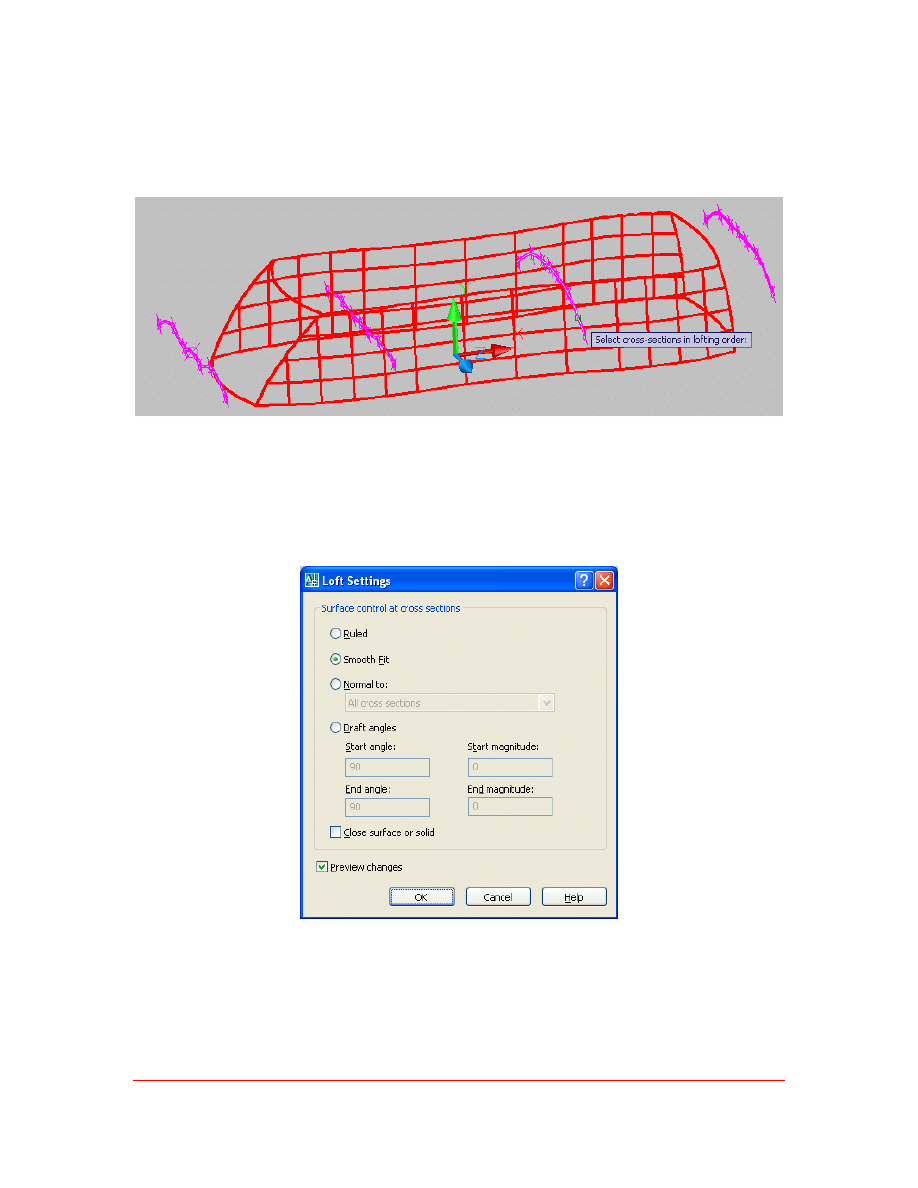
13. Make the Grill Spline, Front Quarterpanel Spline, Rear Quarterpanel Spline and
the Tail Spline layers visible. Loft a surface over these splines as cross‐sections
selecting them in order from left to right.
Figure 13
14. After selecting the four splines hit Enter for Cross‐sections Only and accept the
default settings as shown. (Tip: These splines were created across Point entities, be
careful to select the splines and not the points when creating the surface.)
Figure 14
Complex
Modeling
9
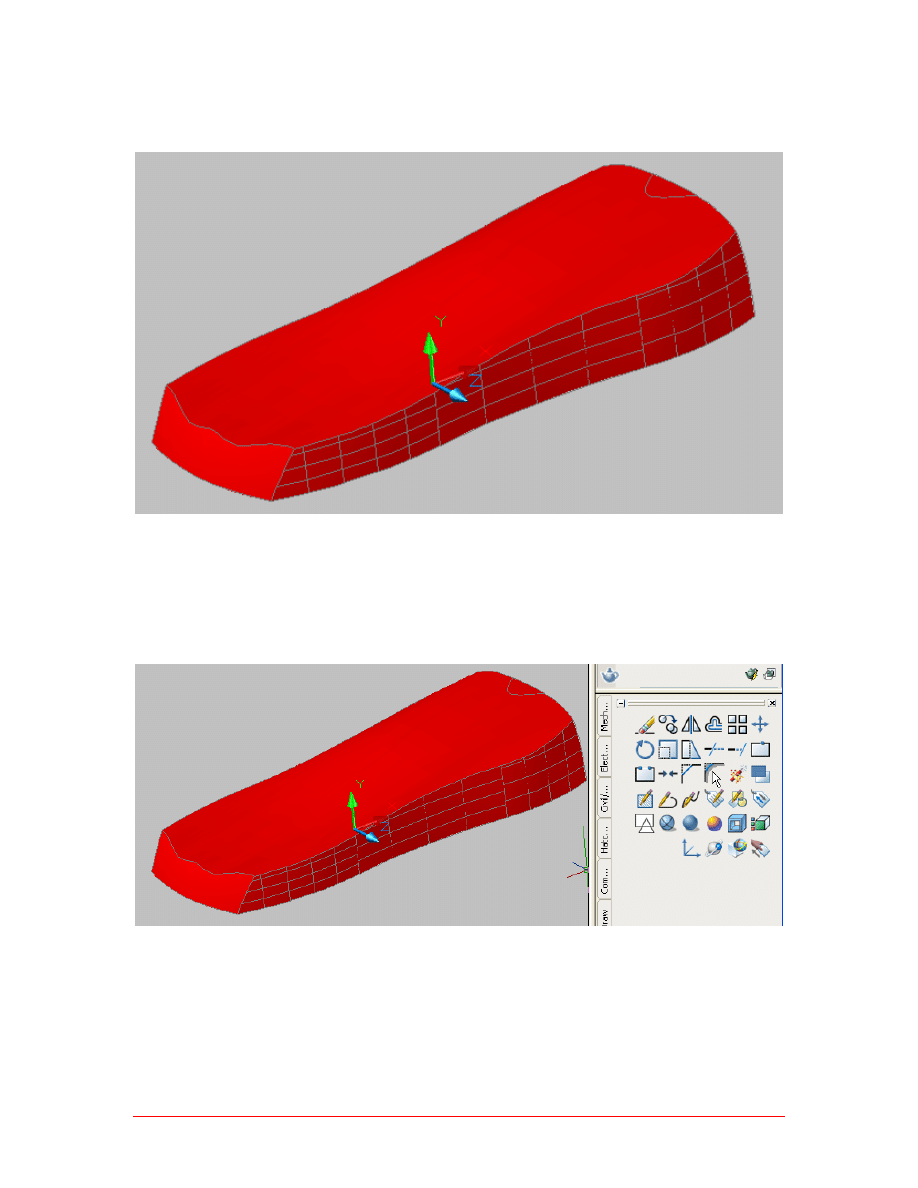
15. Use this surface to slice the solid retaining the lower portion of the solid.
Figure 15
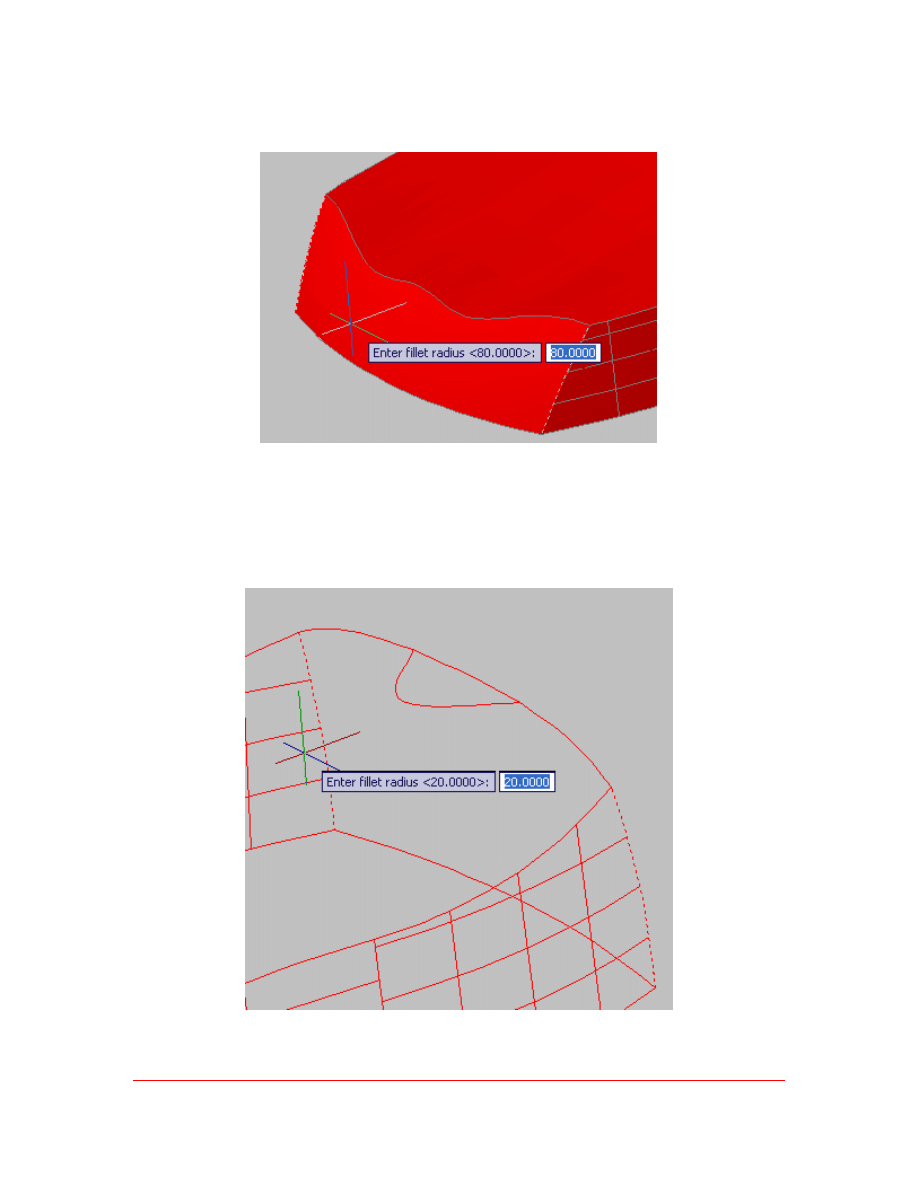
16. From the Modify Tool Pallet select the Fillet tool.
Figure 16
10
Tutorial 6
Copyright 2006, J.D. Mather
Pennsylvania College of Technology
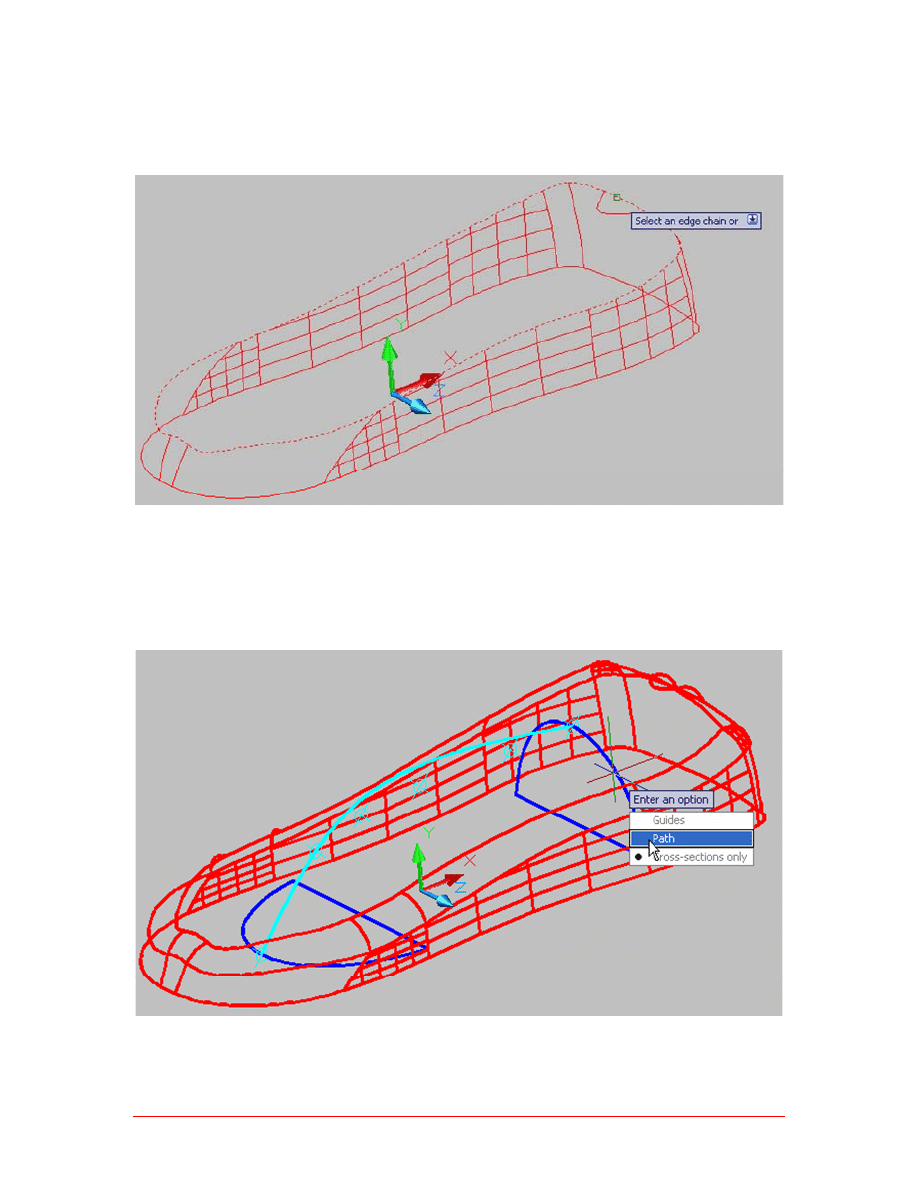
17. Fillet the two edges shown with a radius of 80mm.
Figure 17
18. Fillet the back two corners with a radius of 20mm.
Figure 18
Complex
Modeling
11
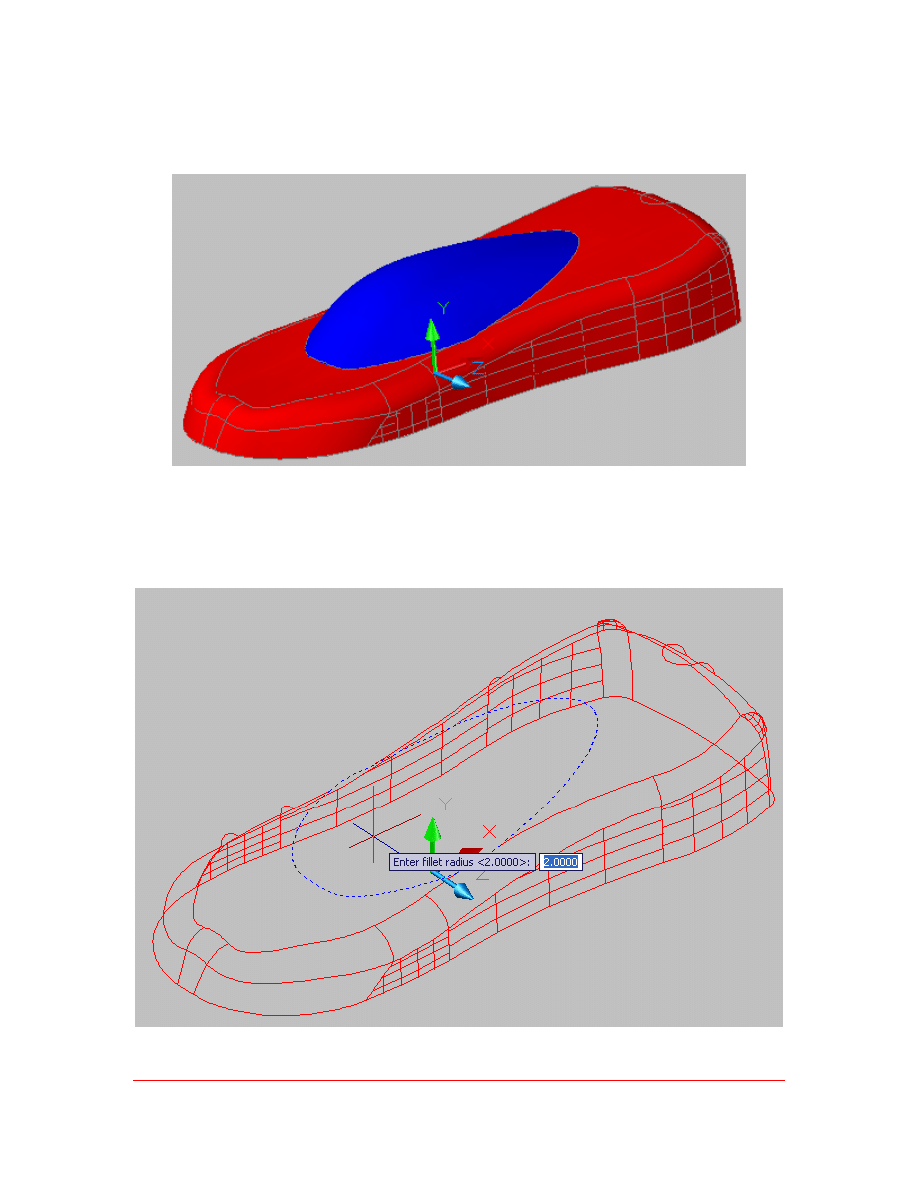
19. Radius 20 Fillet the Chain edge shown – be sure to select the short wire at the
back as indicated.
Figure 19
20. Make the Canopy Profile and the Canopy Path layers visible. Start the Loft
command and select the two blue sketches as the cross‐sections, Enter and then
RMB click Path and then select the cyan path sketch.
Figure 20
12
Tutorial 6
Copyright 2006, J.D. Mather
Pennsylvania College of Technology
21. Double click on the canopy solid just created and change the color to blue.
Union the body to the canopy.
Figure 21
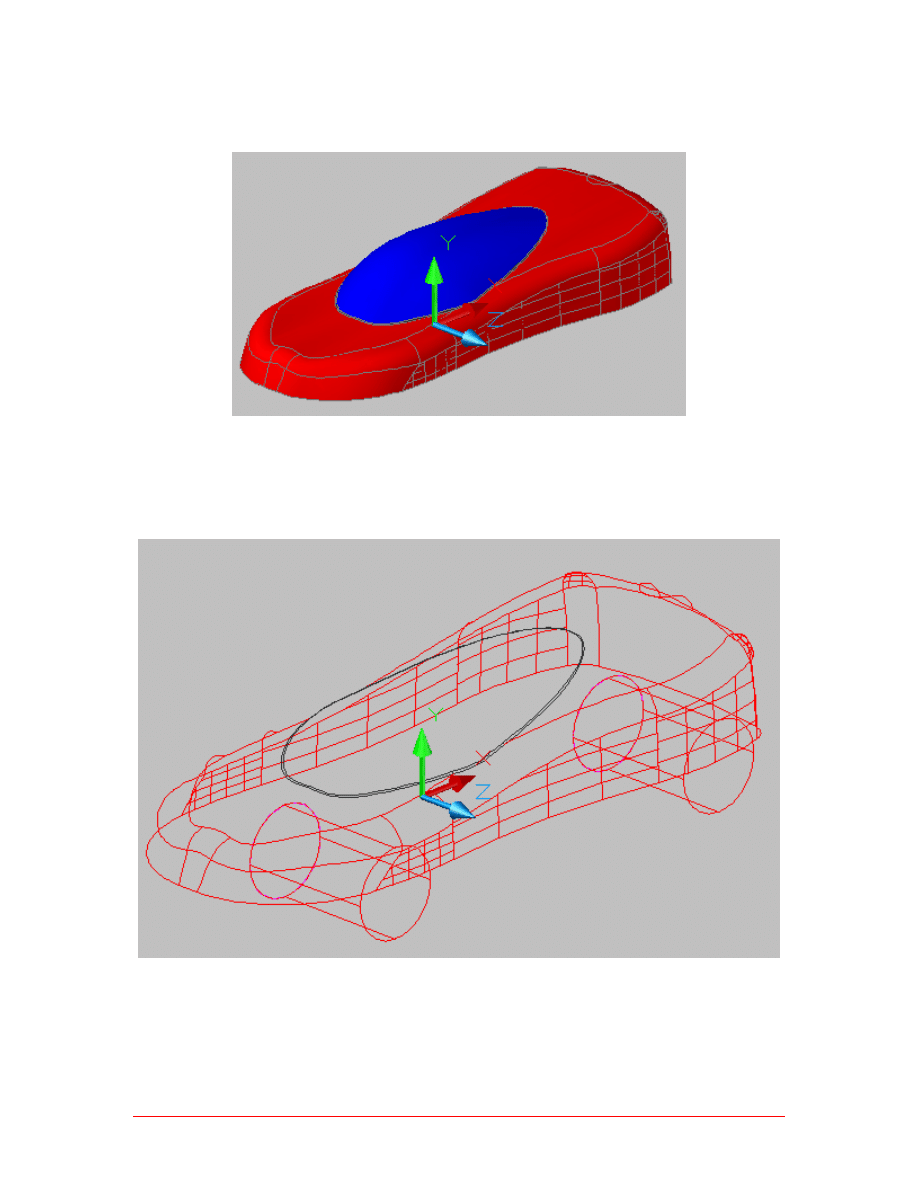
22. Add a 2mm fillet between the body and the blue canopy edge as shown.
Figure 22
Complex
Modeling
13
23. Save the file.
Figure 23
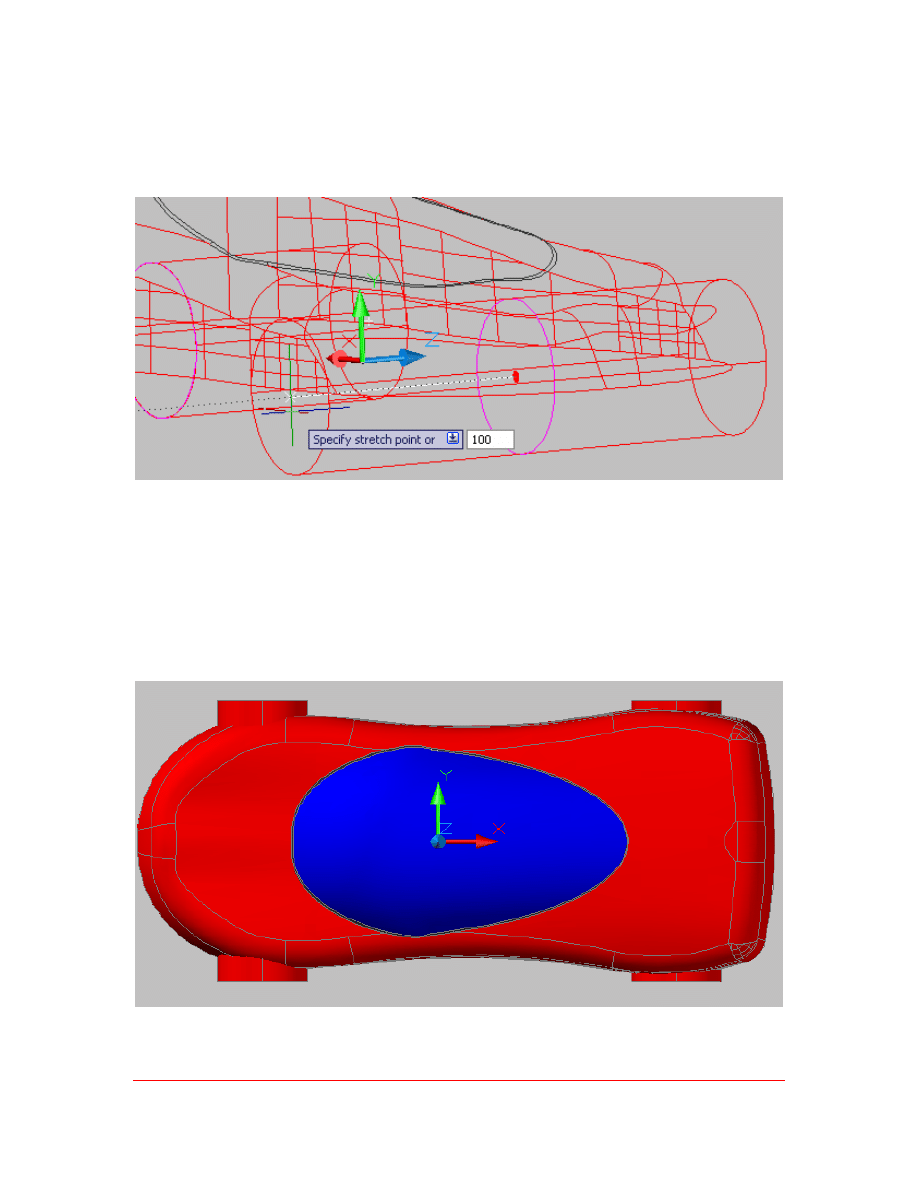
24. Make the Wheel Wells layer visible and Extrude the circles a distance of 100mm.
Do not Union or Subtract the resulting solids.
Figure 24
14
Tutorial 6
Copyright 2006, J.D. Mather
Pennsylvania College of Technology
25. Holding the Ctrl key click on the circular end face of the front cylinder. (The
original cylinder becomes difficult to see in this screen capture.) Then select the
grip to make it active and stretch the face as shown. Enter a distance of 100mm.
Figure 25
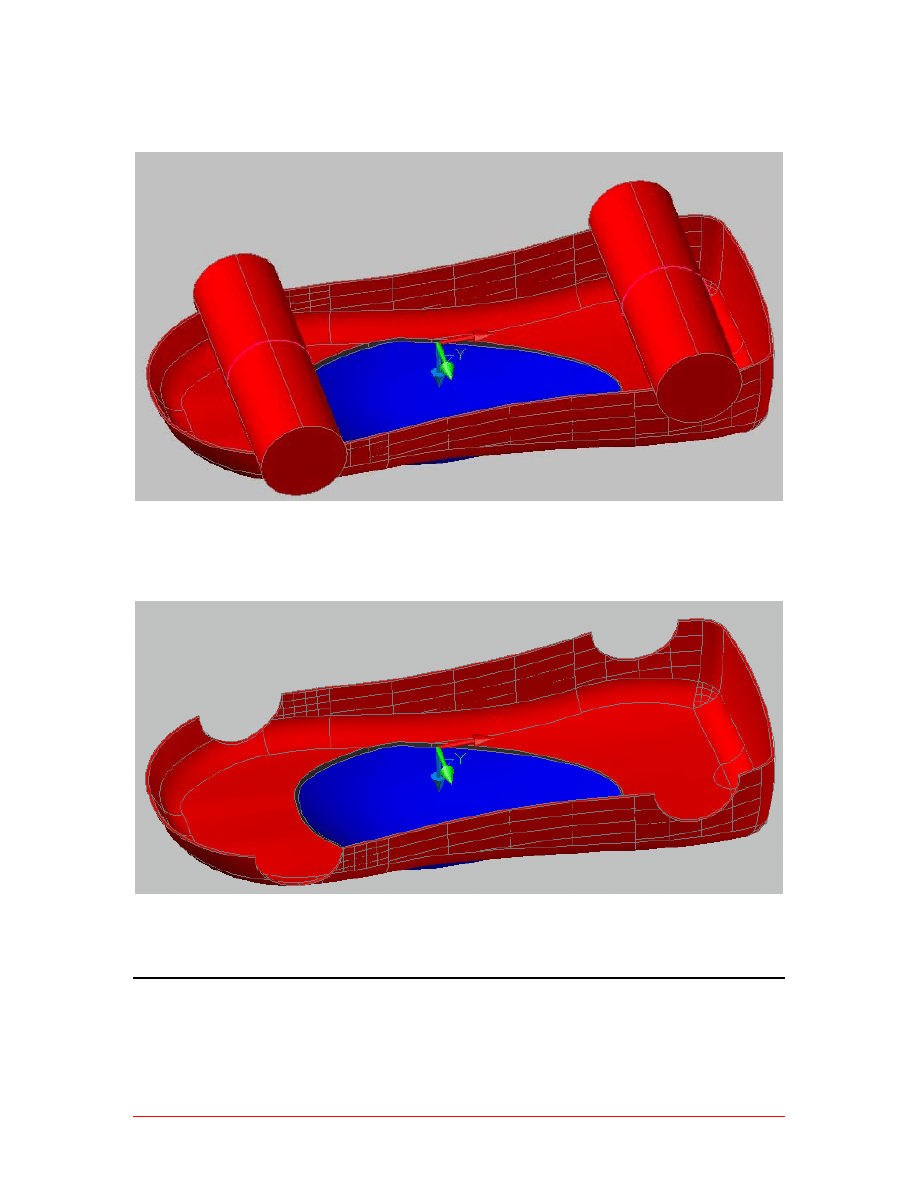
26. Repeat for the back cylinder. The model at this stage will be used in the next
tutorial will be used to create a core/cavity mold. Save the file and then Save As
with the file name Toolbody. Then close the new file and reopen the Tutorial 6
Toy Car.dwg file.
Figure 26
Complex
Modeling
15
27. Turn the part over and Shell to a thickness of 2mm removing the bottom face.
Figure 27
28. Subtract the wheel wells cylinders from the body and save the file.
Figure 28
Wyszukiwarka
Podobne podstrony:
AutoCAD 2005 PL Pierwsze kroki a25pkp(1)
AutoCAD - Kurs zaawansowany - Lekcja 09, autocad kurs, Zaawansowany
link do autocad
AutoCAD Civil 3D 2007 Stopień I ćwiczenia Procad
AutoCAd, CAD 3 wydruk
HARMONOGRAM AutoCAD GEO
AutoCAD - Kurs podstawowy - Lekcja 09, autocad kurs, Podstawowy
AutoCAD - Kurs zaawansowany - Lekcja 05, autocad kurs, Zaawansowany
AutoCAD - Kurs zaawansowany - Lekcja 11, autocad kurs, Zaawansowany
instrukcja podstawy AutoCad 1 i Nieznany
AutoCAD 2004 Pierwsze kroki
autocad lab 4
więcej podobnych podstron