Fabled Fantasy Book One
Isle of the
Cyclops
by Andrew Wright
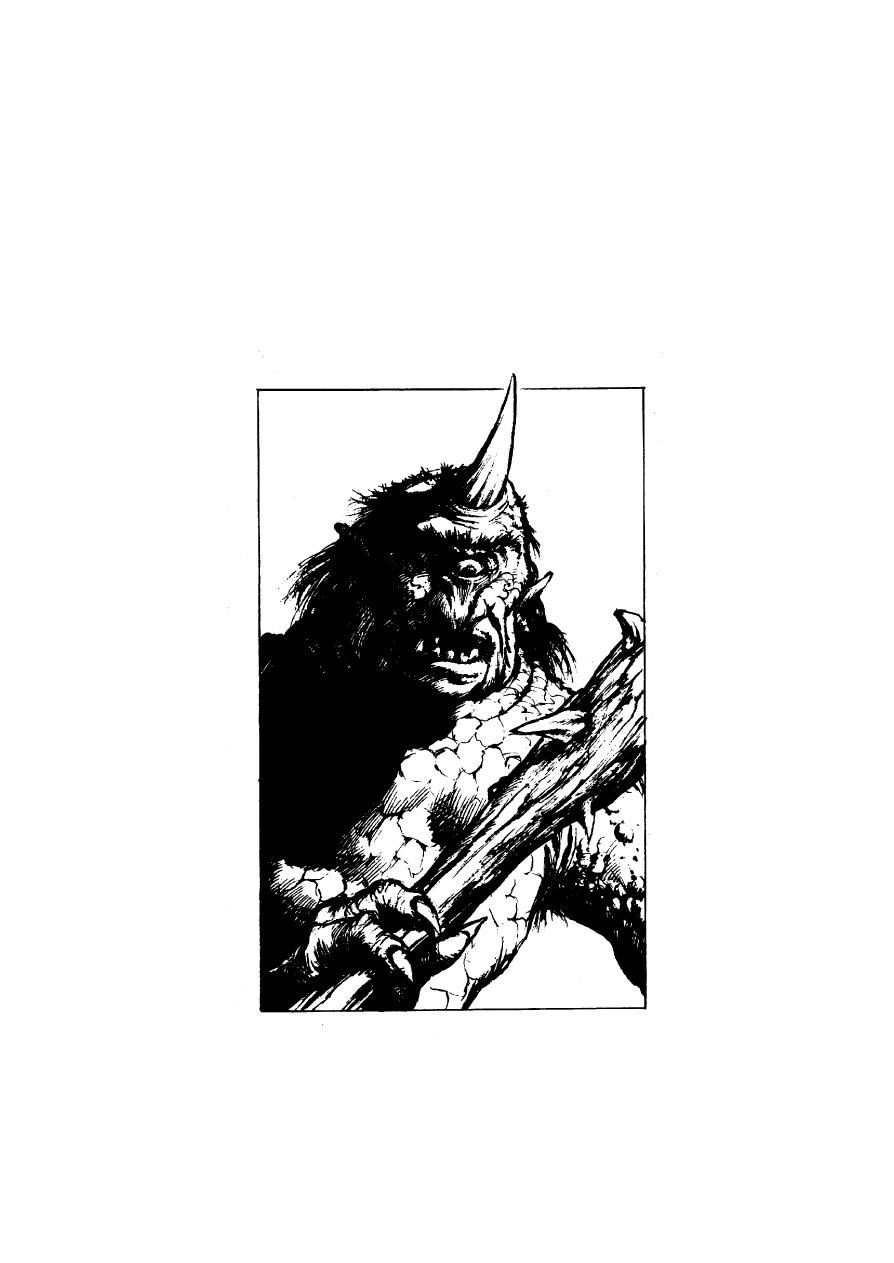
This illustration of a Cyclops is copyright © Martin McKenna, 1995, and comes from the book Curse of the Mummy which is
copyright © Jonathan Green, 1995.

Introduction
Isle of the Cyclops
is the first in a proposed series of amateur
fantasy adventure gamebooks, entitled Fabled Fantasy, given
that two of their three core values have been appropriated
from the Fabled Lands and Fighting Fantasy gamebook series.
We’ll get to the third core value in a moment.
In Isle of the Cyclops, as with any other Fabled Fantasy title,
you can explore as you please. All you need is one die, an
eraser, and a pencil.
If you have already adventured using other books in the
series, you will know your entry point to this book. Turn to
that section now.
If this is your first Fabled Fantasy book, read the rest of
the rules before turning to section 1.
Acknowledgments
It should be obvious from a glance that this work is largely a
composite based on the works of others. In style it owes a
huge debt to the Fabled Lands series of fantasy gamebooks by
Dave Morris and Jamie Thomson. In location, it is based in
the Fighting Fantasy world of Titan, outlined succinctly in the
book of the same name by Marc Gascoigne. More
specifically, it occurs in the Bird Islands, which can be found
on a map of Titan by Steve Luxton (page 13, small edition).
Lastly, in rules, it borrows extensively from the rules system
created by Per Jorner for his own excellent adventure,
Mansion of Maleficence
, a version of which can be found here:
http://user.tninet.se/~wcw454p/mansion/mansion.html
Aside from some minor augmentations, the rules system is
largely identical to Mansion of Maleficence, and so some
elements of the introduction to that adventure have been
reproduced in the various sections that follow.
Creating your Character
At the end of this adventure you will find an Adventure
Sheet, for recording details of your character, an
Adventurer’s Journal, for jotting down notes or maps about
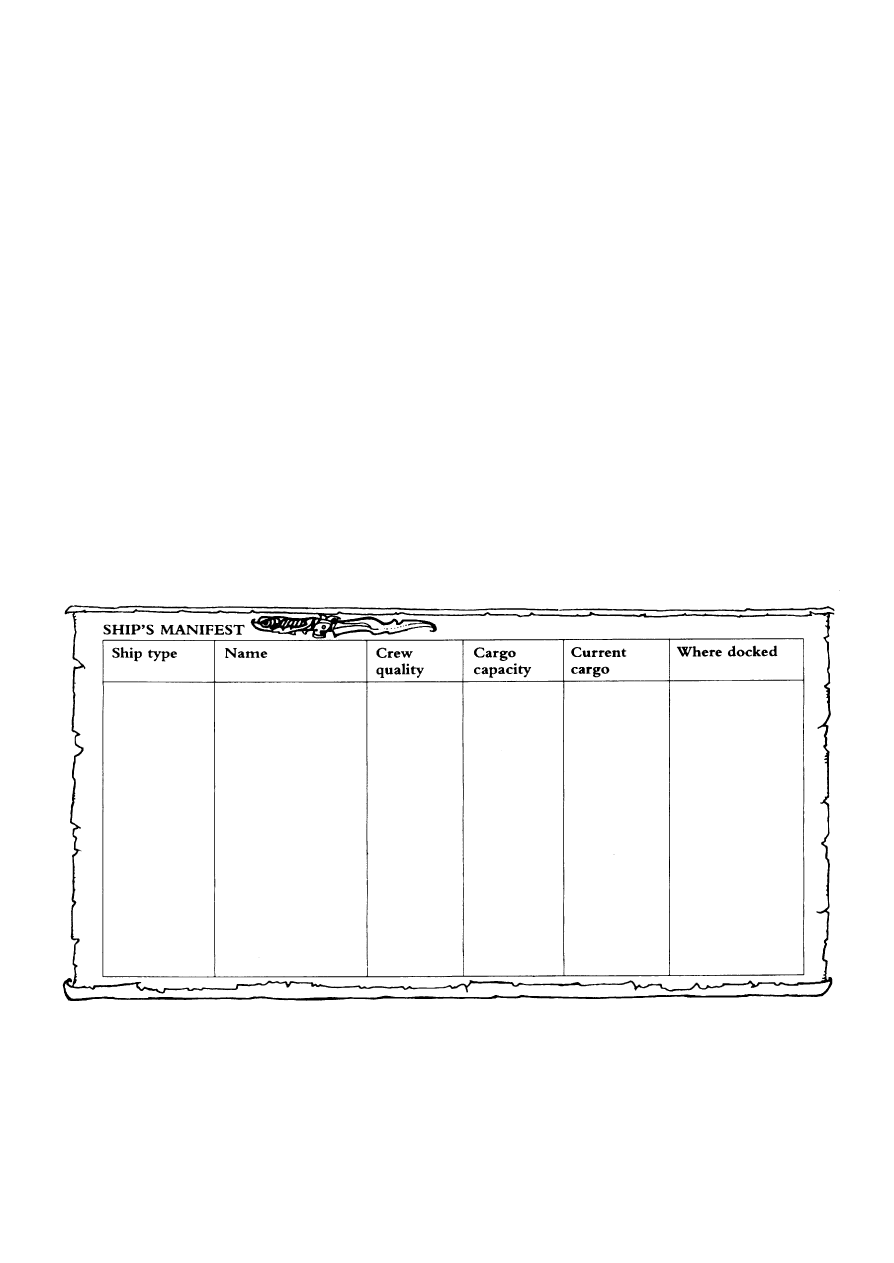
the adventure, and a Ship’s Manifest, for recording details of
any ships you acquire. You will also find four sample
characters – you can either use one of them, or create your
own character as described below.
Your character has three ability scores that must be
monitored and tested during your adventure. They are
S
KILL
, R
ESOURCE
, and V
ITALITY
.
S
KILL
is a measure of your strength and agility, your speed,
reflexes and overall athletic ability. It will be used when
performing acrobatic feats and when fighting (see below).
R
ESOURCE
is a measure of wit and speed of thought, as well
as the ability to keep your head cool and come up with
solutions to problems.
V
ITALITY
is a measure of how much damage – mental and
physical – you can take and still bounce back into action. It
is the ability score that will change the most during the
adventure and may be lost in combat or by way of accidents.
If your V
ITALITY
score ever reaches zero, then your
character has died and you must turn to the dreaded
paragraph 13.
Each ability score has a maximum value of 5 and a minimum
value of 1.
Professions
Not all adventurers are good at everything. Everyone has
some strengths and some weaknesses. Your choice of
profession determines your initial scores in the three abilities.
Priest: S
KILL
3, R
ESOURCE
4, V
ITALITY
4
Rogue: S
KILL
4, R
ESOURCE
4, V
ITALITY
3
Sorcerer: S
KILL
3, R
ESOURCE
5, V
ITALITY
3
Warrior: S
KILL
4, R
ESOURCE
3, V
ITALITY
4
Fill in the Adventure Sheet with your choice of profession
and the ability scores given for that profession.
Possessions
You can carry up to 8 possessions on your person. All
characters begin with 0 Talons in cash and a weapon, of
which you can choose the type. Note it on your Adventure
Sheet.
Possessions are always marked in bold text like this:
magic sword
. Anything marked in this way is an item,
which can be picked up and added to your list of possessions.
Remember that your are limited to carrying a total of 8
items, so if you get more than this you’ll have to cross
something off your Adventure Sheet or find somewhere to
store extra items. You can carry unlimited sums of money
however (and the local coinage are known as Talons, owing
the winged claw inscription that figures on one side of the
coin).
Using Abilities
Whenever the outcome of a situation hinges upon one of
your abilities, you’ll be told to Test your S
KILL
or R
ESOURCE
or V
ITALITY
, for example. To do this, simply roll one die. If
the result is lower than or equal to the current value of the
ability being tested, then you are successful. If the result is
greater than your current ability score, you are unsuccessful.
In addition to this, a roll of 1 is always a success, whilst a
roll of 6 is always unsuccessful.
Example:
You come across a sleeping Ogre. You are told to
Test your S
KILL
in order to sneak by him. Your current S
KILL
ability score is 3, so
you need to roll a 3 or less on one die to succeed. Unfortunately you
roll a 6! This is an automatic failure and you must turn to the
section indicated for making an unsuccessful S
KILL
roll (gulp!).
Fighting
At times you may have to battle enemies in close combat.
You will be presented with your enemy’s S
KILL
and
V
ITALITY
ability scores. To resolve a battle, Test your S
KILL
,
as well as Test the S
KILL
of that of your opponent. If you
succeed but your enemy does not, deduct 1 from its
V
ITALITY
score. If your enemy succeeds but you do not,
deduct 1 from your own V
ITALITY
score. If you both
succeed, your blows block each other and neither loses any
V
ITALITY
. Likewise, if you both fail, you both miss, and
neither loses any V
ITALITY
. Remember also that a roll of 1 is
always a success and a roll of 6 is always a failure. Repeat this

procedure until one of you has a V
ITALITY
score of zero, and
is thus dead.
In addition, if you are fighting without a weapon, such
as the one you start this adventure with, you must
temporarily deduct 1 from your S
KILL
whilst fighting, until
you acquire one.
Lastly, you may acquire armour, which is presented in
the following fashion:
Leather jerkin (1 Hit)
Chain mail hauberk (2 Hits)
Plate mail (3 Hits)
Shield (+1 Hit)
The Hit score given for a piece of armour refers to the
number of hits you may ignore during a combat. A hit is
when your V
ITALITY
is about to be reduced by 1. If you
acquire a shield (+1 Hit) (which takes up a separate
possession slot to your other armour), it adds 1 to the total
number of hits you can ignore due to any armour you are
already wearing. Thus, if you had a chain mail hauberk (2
Hits)
and a shield (+1 Hit), you could ignore 3 hits during
any combat.
Example:
You have a S
KILL
score of 4 and a V
ITALITY
score of 4, a
sword,
and a
leather jerkin (1 Hit). You are facing an enraged Ogre that
has a S
KILL
score of 4, and a V
ITALITY
score of 4.
Suppose you start by rolling a 2, and the Ogre rolls a 5. You
are successful, the Ogre is not, so he loses 1 V
ITALITY
point (his
score is now 3). Next, you roll a 1 (automatic success!), whilst the
Ogre rolls a 6 (automatic failure!). Again, the Ogre loses another
V
ITALITY
point (his score is now 2).
For the next round, both of you roll 5, which means you both
miss, and nobody loses any V
ITALITY
. You then roll a 2, whilst
the Ogre rolls a 1 (automatic success!). As you are both successful,
your blows cancel each other out, and again, nobody loses any
V
ITALITY
.
You then roll 6 (automatic failure!), whilst the Ogre rolls a 2.
This means you would have to deduct 1 V
ITALITY
point, but you
are wearing a
leather jerkin (1 Hit), so you elect that the jerkin
allows you to ignore this hit. You may not use this ability for the
rest of the fight.
For the next two rolls, you roll a 2 and a 3, whilst the Ogre
rolls two 5’s meaning that you hit him both times and his
V
ITALITY
score is now zero. The Ogre dies, slumping to the
ground, and you search his lair, looking for treasure…
Codewords, Tick-Boxes, Blessings, and Sundry Other
Mayhem
During the course of the adventure you may be required to
note down codewords and tick boxes by section numbers.
These ‘remember’ things that you have done and should not
be erased, unless specifically told to, or unless you die and are
starting again with a brand new character.
In addition, during your adventures you may also acquire
blessings, resurrection arrangements, titles, a ship and crew,
or become an initiate of a god. Space is given on your
Adventure Sheet to record all of these things, and further
information will be given in the text at the time instructing
you on what to do.
For now, onwards, to adventure!
Background
You knew that last tankard of ale was a mistake. One
minute, there you were, drinking in the dockside taverns of
the bustling city of Gummport. The next moment, you were
awakened by a bucket of sea-water hurled at your face, to
find yourself chained as a galley-slave on a black-sailed ship,
watching the coastline of Far Analand drop away to the stern
of the vessel.
‘Row, wretch!’ howled an obese Man-Orc taskmaster,
lashing your back with a blow from his spiked whip.
Days passed and the welts on your back grew longer, as
your slave-ship, the Blood Auk, headed southwards.
Captained by a furious red-faced man called Kullion the
Crab, the ship was sailing for the Blood Islands, for it was
part of the fleet of the Chaos Pirates, who flock to those
shores like seabirds to the carcass of a whale.
Fate intervened however in the form of a colossal storm
that toppled the main mast and flattened the ship. Pirate and
slave alike were swept overboard as towering waves and
howling winds tore at the timbers of the Blood Auk. Your
own chains were snapped, and you struck out through the
seething waters, grabbing onto a tangled mass of floating
debris, even as torrential monsoon rains hammered down
relentlessly from above. Before you blacked out completely,
you prayed feverishly to Hydana, God of the Sea, hoping to
escape the notice of his hungry shark-toothed attendants…
Now turn to paragraph 1.
1
You awaken on a pallet in a small hovel on the tiny isle of
Goi-Han, which forms part of the archipelago known as the
Bird Islands. You know little of these lands other than that
they lie some way off the southern coast of Far Analand.
You have been cared for by villagers who found you and
your makeshift raft snagged onto one of their crab-lines, after
the epic storm. Your clothes are in rags, you have no money,
and your only possession is a weapon that the villagers
found clutched tightly in your hands. Choose the type of
weapon
and note it down on your Adventure Sheet.
Although you are alive and indebted deeply to the
villagers for your survival, they are poor folk and can afford
to offer you little more hospitality. It is time for you to make
your own way in the world once more.
Turn to 25.
2
You slip and fall in the flooded cabin, which would be fine
ordinarily, except that the cabin currently contains a
voracious juvenile Ripper Shark that was trapped here when
the tide retreated. It scythes its way through the water,
aiming to tear your kneecaps off with its razor-sharp teeth.
Ripper Shark
S
KILL
2
V
ITALITY
1
During this fight you must subtract 1 from your S
KILL
score
as it is difficult to fight in the cramped and flooded confines
of the cabin. If your V
ITALITY
score is reduced to zero, turn
immediately to 13. If you defeat the Ripper Shark, you may
haul the sea chest out of there. Turn to 28.
3
You have discovered a potion of healing, containing
enough for two doses. If you are wounded you may drink a
dose at any time except during combat. Each dose will

restore your V
ITALITY
score to its starting level. Once the
second dose has been used up, you must cross it off your
Adventure Sheet. Note the potion of healing and its effects
on your Adventure Sheet and turn to 7.
4
There is a horrible snarl from a tangled mass of bushes as a
furry shape hurls itself at you, fangs agape. You have
disturbed an Island Hyena, a small but ferocious predator
endemic to the Bird Islands.
Island Hyena
S
KILL
3
V
ITALITY
2
If your V
ITALITY
score is reduced to zero, turn immediately
to 13. If you defeat the Island Hyena, you can add a hyena
pelt
to your Adventure Sheet if you wish. You continue on
your journey. Turn to 11.
5
Dhurz Deathsnare the Cyclops is waiting for you in the last
room, brandishing an enormous club studded with spikes.
He stands over three metres tall, with a curved horn erupting
from his forehead, just above his single enormous eye.
Behind him, hanging on hooks, you can see several festering
corpses that must be villagers from Han.
‘Beat my traps did you? No matter! More subjects for my
traps, more food for my larder!’ he chortles disturbingly,
drool running from the tusks at the corners of his mouth.
You must fight the savage fiend!
Dhurz Deathsnare
S
KILL
4
V
ITALITY
5
If you have the jeweled amulet, you may reduce Dhurz
Deathsnare’s S
KILL
by 1 for the duration of this combat, as
the jeweled amulet confounds the Cyclops’ single eye. If
your V
ITALITY
score is reduced to zero, turn immediately to
13
. If you defeat Dhurz Deathsnare, turn to 29.
6
q
If there is a tick in the box above, turn to 42 immediately. If
not, put a tick there now and read on.
You clamber down the rocky slopes to the shipwreck
below. To your amazement you see that it is the wreck of
the Blood Auk – that foul galley on which you were enslaved!
It would appear that, after you managed to escape during
the storm and drift south, the Blood Auk, crippled as it was,
wrecked itself upon the northern coastline of Goi-Han
island. You see no survivors, and the few dead bodies you do
see appear to have been mauled and nibbled by sharks, crabs,
fish, and worse.
Most of the ship is destroyed, however the cabin of the
captain, Kullion the Crab, appears relatively intact. Peering
inside, you see that the cabin is partially flooded, but
Kullion’s large sea chest lies undisturbed at the far end of the
cabin.
To see if you can successfully take the sea chest from the
cabin, Test your S
KILL
.
Successful S
KILL
test
turn to 28
Failed S
KILL
test
turn to 2
7
Finally, as proof of your deed, you cut out the enormous eye
of Dhurz Deathsnare to show the people of Han. Note the
eye of the Cyclops
on your Adventure Sheet. You must
take this, so if you already have eight possessions recorded on
your Adventure Sheet then you must discard one of them to
make room for your grisly trophy.
Also, erase the codeword Ascent from the Codewords
box on your Adventure Sheet and replace it with the
codeword Avenge.
You find a secret tunnel in Dhurz Deathsnare’s lair that
leads outside, thus negating the need to pick your way back
through the dead Cyclops’ fiendish collection of traps.
Lastly, if you used a candle to explore Dhurz
Deathsnare’s lair, it has now expired and you must cross it off
your Adventure Sheet.
Turn to 20.
8
‘Look lively, you swabs!’ bawls the mate, clutching a tankard
of watered grog in one hand. ‘Here comes the Cap’n!’
Set sail
Sea Lords of the Archipelago 70
Disembark
turn to 15
9
Dark clouds overhead erupt suddenly, spewing steaming
torrents of monsoon rain down from the heavens.
If you have a blessing of Safety from Storms, cross it off
and turn immediately to 32. If not, read on.
The ground underfoot becomes slippery and treacherous
and you are wary of falling to your death. To make matters
worse, there is the constant rumbling menace of mudslides
cavorting down the slopes, drowning all in their path in a sea
of brown ooze.
Test your S
KILL
to see if you can avoid these horrors. You
may deduct 1 from the die roll if you possess a rope.
Successful S
KILL
test
turn to 32
Failed S
KILL
test
turn to 17
10
Han market is a collection of wooden stalls on the west side
of the village square. Various odours from the sellers of dried
squid, several leather tanneries, and the lone village
blacksmith, mingle in nauseous fashion on the sea-breeze
from the south.
Armour
To buy
To sell
Leather jerkin (1 Hit)
55 Talons
45 Talons
Chain mail hauberk (2 Hits)
–
120 Talons
Plate mail (3 Hits)
–
180 Talons
Shield (+1 Hit)
25 Talons
15 Talons
Weapons (sword, axe, etc)
To buy
To sell
No S
KILL
bonus
50 Talons
40 Talons
Other items
To buy
To sell
Lantern
10 Talons
5 Talons
Candle
1 Talon
1 Talon
Rope
10 Talons
5 Talons
Hyena pelt
15 Talons
10 Talons
Items with no purchase price are not available to buy,
although if you have one you can sell it. When you have
finished shopping, turn to 25.
11
You are traversing the southern hills of Goi-Han isle. To the
south lies the village of Han, whilst to the north lurk the
mist-clad uplands of the interior.
Go south to Han
turn to 25
Go north to the centre of the island
turn to 44

12
You have discovered a lucky charm. This artifact has one
use only, after which you must cross it off your Adventure
Sheet. It will allow you to reroll any dice result once. This
does not have to be a combat roll or a Test your R
ESOURCE
roll, for example. You could also use it to reroll an
encounter result. You must abide by the second roll of the
dice however. Note the lucky charm and its properties on
your Adventure Sheet and turn to 7.
13
You are dead. If you have a resurrection deal, turn to the
section noted on your Adventure Sheet after first erasing
your current possessions, money, and any details on your
Ship’s Manifest.
If you don’t have a resurrection arranged, this is the end
and you can only start afresh with a new character. First
make sure to erase all ticks, codewords, and Adventure Sheet
details in all your Fabled Fantasy books. You can begin at 1 in
any of the books of the series.
14
q
If the box above is ticked, turn immediately to 46. If not,
read on below.
You run into an extravagantly bearded hermit, who is
conducting some form of meditational exercise under the
leafy boughs of a chamcha tree. He is a fractious fellow
however, and not given over to small talk.
‘Blasted Bamboo Apes stole my amulet,’ he mutters
darkly. ‘Can’t focus on the proper visions without it.’
If you have a jeweled amulet, tick the box above and
turn to 35. If not, the hermit eventually closes his eyes and
drifts fitfully into a trance.
Turn to 41.
15
The wharf is a barnacle-encrusted structure that lurches
haphazardly out in the bay. There is a tumbledown hut here,
advertising passage to the western isle of Sempura.
Meanwhile, fishermen of Han are unloading wicker baskets
of scuttling purple crabs from red-sailed catamarans and,
further out, a larger galleon or two roll gently at anchor with
the tide.
Go aboard your ship (if docked here)
turn to 8
Pay for passage to Sempura
turn to 47
Return to the village of Han
turn to 25
16
Don’t forget to cross the 3 Talons off your Adventure Sheet.
If you have the codeword Avenge, turn to 48
immediately. If not, read on
The locals are a gloomy bunch as their island is inhabited
by an enormous Cyclops of bloodthirsty aspect whom they
call Dhurz Deathsnare. When hungry, Dhurz Deathsnare
stalks down from his lair in the hills to carry off both
livestock and people, and there appears little that the terrified
villagers can do about it.
‘What we need is a hero,’ says one grey-bearded old-
timer. ‘Some brave soul who can track Dhurz Deathsnare
down and given him a right hiding!’
The locals, deep in their cups, look at you hopefully. If
you want to take up the quest to slay Dhurz Deathsnare,
note the codeword Ascent in the Codewords box of your
Adventure Sheet. You leave the Rope and Anchor Tavern.
Turn to 25.
17
You slip and fall on mossy scree made wet by the rain, and
go hurtling down the slope to the thorn-filled valley floor.
No sooner have you dusted yourself off however, before a
mudslide, triggered by your noisy descent, surges after you
and almost buries you alive.
Roll one die and divide the result by 2, rounding all
fractions up. The result is the number of points you lose
from your V
ITALITY
score due to your misadventures. If this
reduces your V
ITALITY
score to zero, turn immediately to
13
. If your V
ITALITY
score is still greater than zero, turn to
20
.
18
You are on the low rocky coast of northern Goi-Han. Sea
spray drifts inland in great salty plumes, pushed by winds
from the crags of the great northen isle of Kadan – a distant
murky blur on the horizon. Some way below you, on a
blasted strand, you see the wreck of a wooden galley-ship
fragmented by the tides.
Go back south into the hills
turn to 44
Investigate the wreck
turn to 6
19
From out of nowhere a rotten mango comes sailing through
the air to strike you painfully upon the cheek. Deduct 1
point from your V
ITALITY
score. If this reduces your
V
ITALITY
score to zero, turn immediately to 13. If not, read
on below.
There is a bray of hideous laughter and a sinister beast
swings down from a vine to assail you. You have been
ambushed yet again by a dreaded Bamboo Ape!
Bamboo Ape
S
KILL
2
V
ITALITY
1
If your V
ITALITY
score is reduced to zero, turn immediately
to 13. If you defeat the Bamboo Ape, you may continue on
your journey. Turn to 41.
20
If you have the codeword Ascent, turn immediately to 36.
You are wandering across the fog-strewn central
highlands of Goi-Han. To the south and east, lower hills are
visible through the murk. From the north comes the sound
of waves breaking on a ragged coastline.
Go east
turn to 23
Go south
turn to 33
Go north
turn to 18
21
You make it gingerly through the rooms and into a
antechamber that makes your blood run cold. It is festooned
with ropes, vines, and cords, each drawn taut, like enormous
cobwebs. Glinting evilly amidst them are many pieces of
sharpened and barbed blades, some big and some small, and
all fashioned from scrap metal.
To make your way through this room, you must Test
your R
ESOURCE
.
Successful R
ESOURCE
test
turn to 5
Failed R
ESOURCE
test
turn to 49
22
A trail of bones, big foot-prints, and uprooted trees, winds its
way through several valleys, thick with thorn bushes, before
arriving at a menacing looking cave at the foot of Mount

Mua Kek, the tallest part of the island. This must be the lair
of Dhurz Deathsnare!
To enter the yawning cave-mouth, you will need a light
source, such as a lantern or a candle, for it is far too dark to
pick your way through the treacherous underworld
otherwise.
Enter the cave
turn to 45
Turn back
go back to 20
23
The eastern reaches of Goi-Han are low hills of black, rocky
outcrops, whilst in the dells, cicadas drone relentlessly from
their perches amongst dense stands of bamboo and jungle
willow. A dark cloud of midges rises suddenly from a grassy
embankment up ahead.
Roll two dice:
Score 2-6
A shadow in the trees
turn to 34
Score 7-8
A lonely walk
turn to 41
Score 9-12
Footprints on the path!
turn to 14
24
You have discovered an enchanted throwing dagger called
Swiftstinger
. Immediately, before any combat, you may
throw Swiftstinger at your enemy. It will automatically hit
and kill your opponent but it has only one use, after which
you must cross it off, so use it wisely. Note Swiftstinger
and its properties on your Adventure Sheet and turn to 7.
25
If you have the codeword Avenge, turn to 48 immediately. If
not, read on.
The hamlet of Han is a small village of houses
constructed from moss-covered boulders, roofed with pale
timber. It faces a crescent-shaped bay of white sand, from
which protrudes a rotting wooden wharf.
You stand in the village square – a bare stretch of packed
ochre clay. The villagers – clad in flowing robes of blue, red,
and yellow, with leathery brown skin, and braided black hair
adorned with bone pins – eye you warily as they go about
their duties.
You can:
Visit the market
turn to 10
Visit the Rope and Anchor Tavern
turn to 30
Visit the shrine of Bakalgu
turn to 43
Visit the wharf
turn to 15
Leave Han and go north into the hills
turn to 33
26
Nudging the Bamboo Ape’s corpse with your foot, you
notice it has something entwined around its neck. With a
gasp of surprise you dislodge a beautiful glimmering jeweled
amulet
, which you may add to your Adventure Sheet if you
wish.
Turn to 41.
27
The sound of bells on the wind heralds the arrival of a small
herd of scrawny goats. Their shepherd, his face shielded by a
wide-brimmed hat, leans on a gnarled walking stick and
acknowledges your presence with a lazy wave.
Talk to the shepherd
turn to 39
Travel onwards
turn to 11
28
You retrieve the sea chest of the pirate captain Kullion the
Crab and drag it up the beach and away from the shipwreck.
Throwing open the lid, your wildest dreams are realized –
pirate treasure lies within!
The sea chest contains gold and silver coins worth 100
Talons altogether. Note these in the Money box on your
Adventure Sheet. The chest also contains a fine scimitar
(S
KILL
+1)
. This will add one to your S
KILL
score when
you use it in combat.
When you are finished here, you trek back up the beach,
towards the hills. Turn to 18.
29
Your blow is a fatal one and Dhurz Deathsnare topples
backwards onto the cavern floor. You have slain the Cyclops
of Goi-Han island!
Searching the cavern, you chance upon Dhurz
Deathsnare’s treasure hoard, stashed in a rotting cabinet made
of driftwood. It amounts to 50 Talons’ worth of coins which
you can add to the Money box on your Adventure Sheet,
and two hyena pelts, which you may take if you wish.
In addition, there is a rare artifact with magical powers.
If you are a Warrior
turn to 3
If you are a Sorcerer
turn to 24
If you are a Priest
turn to 40
If you are a Rogue
turn to 12
30
The Rope and Anchor Tavern is a smoke-blackened hall
that reeks of strong ale and charcoal. At the back of the
taproom are several dingy stalls where you can rest and
recuperate. Each night you spend here costs 1 Talon and you
may restore 1 point to your V
ITALITY
score if injured.
Leave the Rope and Anchor Tavern
turn to 25
Pay 3 Talons and buy a round of drinks
turn to 16
31
You are travelling through one rugged dell, which is tainted
by the heavy odor of rotting flesh. Up ahead, what you
thought was a boulder suddenly lurches towards you on four
stubby legs, uncurling a long tail, whilst a lizard-like head
strains forward in your direction. You have been ambushed
by a reptilian horror known as the Ora-Ora, famed for their
venomous drool. Its pink forked tongue darts in and out of
fang-lined jaws, scenting your warm blood…
Ora-Ora
S
KILL
2
V
ITALITY
3
If your V
ITALITY
score is reduced to zero, turn immediately
to 13. If you defeat the Ora-Ora, you may continue on your
journey. Turn to 20.
32
You have several close calls, but manage to see out the storm
unscathed, sheltering under a rocky overhang near the
summit of one of the larger hills.
Turn to 20.
33
The southern hills of Goi-Han are rolling sun-blasted
mounds surmounted by bleached granite boulders covered in
lichen. The shallow vales between them are grassy fields
bordered by crumbling walls of stone. Roll two dice:
Score 2-6
A deep growl
turn to 4
Score 7-8
An uninterrupted stroll
turn to 11
Score 9-12
The tinkle of bells
turn to 27

34
q
If the box above is ticked, turn immediately to 19. If it is not
ticked, tick it now, and read on.
Your walk is interrupted by a raucous chattering and a
dark squat form swings down from the trees to land lightly
on the path in front of you. You have been ambushed by a
gibbering Bamboo Ape, which bares its teeth and screeches
at you in pure malice.
Bamboo Ape
S
KILL
2
V
ITALITY
2
If your V
ITALITY
score is reduced to zero, turn immediately
to 13. If you defeat the Bamboo Ape, turn instead to 26.
35
Cross the jeweled amulet off your Adventure Sheet.
‘Much thanks!’ says the hermit as he swiftly removes it
from your possession. ‘My name is Vajra and I must say that
one good turn deserves another. Should you stray into the
lair of the dreaded Cyclops Dhurz Deathsnare, be very, very
wary! His cave is strewn with lethal traps that he spends
much of his spare time preparing.’
‘How do you know this?’ you ask Vajra.
‘He caught me once whilst I was meditating at the
summit of Mount Mua Kek and took me back to trial one of
his newer inventions. Dhurz Deathsnare became distracted
by this amulet of mine, however, and I managed to flee,
dodging the deathtraps as I did so.’
Write the codeword Aware down in the Codewords box
on your Adventure Sheet. You go to ask Vajra another
question but he is already in a trance, his eyes rolled back in
their sockets and showing only white orbs. It is time to move
on. Turn to 41.
36
You have accepted the quest to slay Dhurz Deathsnare the
Cyclops and free the people of Goi-Han from his dreadful
tyranny. If you do not wish to embark on this quest just yet,
return to 20 and make another choice there.
If you wish to begin your quest, you will have to Test
your R
ESOURCE
to see if you can track the hideous monster
to his lair.
Successful R
ESOURCE
test
turn to 22
Failed R
ESOURCE
test
go back to 20
37
Thanks to the advice of Vajra the Hermit you know to be
careful in the domain of the trap-setting Cyclops. Slowly,
you pick your way through the chambers, dodging mayhem
at every turn. Turn to 21.
38
On seeing you wearily enter the village of Han, the peasant
folk gather around you expectantly. Their quiet murmurs
turn instantly to rousing cheers of exultation as you hold
aloft the bloody eye of the Cyclops .
The eye is taken from you and nailed to a tall post in the
centre of the village square. Cross the eye of the Cyclops
off your Adventure Sheet.
There is an enormous feast that evening. Livestock are
slain and roasted on huge fires, whilst barrels of ale are carted
out from the Rope and Anchor Tavern, opened, and quickly
drained by thirsty celebrants. Village girls with orchid flowers
in their hair dance a victory circle, accompanied by young
men who beat out a rhythm on the now empty barrels of
ale.
You are proclaimed saviour of the village of Han by a
council of elders and rewarded with the only common
property these poor fisherfolk can afford – a small ship! It is
called the Wavedancer, and is a barque with a cargo capacity
of 1 unit, and an average quality crew of villagers who have
signed on to seek their fortune with you. There is currently
no cargo, and obviously it is docked at Han. Note all these
details on the Ship’s Manifest.
You awaken next morning with both a sore head and the
irrepressible lure of adventure in your veins. Where are you
bound next?
Turn to 48.
39
You ask the shepherd about the island of Goi-Han.
‘It’s a harsh place,’ says the shepherd. ‘I have to spend all
my time making sure my herd avoids the Island Hyenas!
Savage brutes they are, and a terrible nuisance to boot! I
trade their skins with the villagers. My advice to you though,
is to seek out the hermit who lives deeper in the hills. He is a
wise man, mark my words.’
He wanders off, following his herd down the hillside.
Turn to 11.
40
You have discovered a magical ring of warding (+1 Hit:
1 use only)
. This enchanted artifact has one use only, after
which you must cross it off your Adventure Sheet. It will
allow you to ignore any one hit in any one combat, similar
to that of a shield. Note the ring of warding and its
properties on your Adventure Sheet, and turn to 7.
41
These far reaches of Goi-Han are steamy and tangled with
thick undergrowth. From the heights you can glimpse the
dark bulk of the eastern isles of Morkatal and Nen-Tai.
Several faint paths lead back west to the central highlands of
this lonely island.
Head back west
turn to 44
42
qqq
The wreck of the Blood Auk still lies here on the beach,
gradually being broken up by the action of the waves. If you
wish you may search the wreckage – tick one of the boxes
above if you do so. This yields 1-6 Talons worth of coins
(roll one die and add the result to the Money box on your
Adventure Sheet). However you must deduct 1 V
ITALITY
point as you are savaged numerous times by the aggressive
purple swimmer crabs that are picking over the wreck in
search of rotting flesh. If this reduces your V
ITALITY
score to
zero, turn immediately to 13. If not, read on below.
When all the boxes have been ticked, there is nothing
left here to search for. If you are finished here, you trudge
back up the beach. Turn to 18.
43
The shrine of Bakalgu the Fear-Bringer is a cliff-face on the
northern edge of Han, adorned with sacred hand-paintings
and the tallow stubs of innumerable candles. The stench of
cheap incense prevails throughout.
The priest is a fresh-faced youth in red robes with a
tarnished iron scimitar hanging from a black tasselled sash
around his waist. He cannot initiate you into the worship of
Bakalgu, though he can offer the blessing of his sovereign
deity.

It costs 25 Talons to obtain the blessing of Bakalgu the
Fear-Bringer, or 10 Talons if your are an initiate.
If you buy the blessing, cross off the money and write
S
KILL
in the Blessings box on your Adventure Sheet. The
blessing works by allowing you to roll again when you make
a failed S
KILL
roll. This includes a S
KILL
roll during combat.
It is only good for one re-roll. When you use the blessing,
cross it off your Adventure Sheet.
You can have only one S
KILL
blessing at any time. Once
it is used up, you must return to any shrine or temple of
Bakalgu the Fear-Bringer to purchase a new one.
When you are finished here, turn to 25.
44
In central Goi-Han the misty crags rise high into drifting
banks of grey cloud, and are covered in loose ash-coloured
shale. The deep valleys are almost impenetrable due to
thorny bushes of dark green and brown hue.
Roll two dice:
Score 2-6
A foul stench
turn to 31
Score 7-8
An uneventful journey
turn to 20
Score 9-12
Thunderclouds overhead!
turn to 9
45
If you have the codeword Aware, turn immediately to 37. If
not, read on.
The cave leads to a series of shadowy chambers with very
disturbing contents. There are the corpses of villagers
impaled on spiked floor traps, split by pendulum axes,
crushed under blocks of stone, and semi-dissolved in vats of
venomous goo. It is difficult to tell what are real traps and
what are merely exhibits, and the floor itself is criss-crossed
with wires, ropes, and suspicious-looking tiles.
To see if you can pick your way carefully through these
chambers of horrors, Test your R
ESOURCE
.
Successful R
ESOURCE
test
turn to 21
Failed R
ESOURCE
test
turn to 50
46
‘Ah, the punisher of primates returns,’ says Vajra the Hermit
jocularly upon seeing you. You bow before him and he
touches you lightly on the brow. His jeweled amulet sparkles
like a miniature sun as it hangs from his neck.
‘I bless you again with thanks for the deed that you have
done for me,’ says Vajra. ‘I hope that in times of strife, calm
will descend causing storms to abate and allow you to find
your way safely forward.’
You have been blessed. Note the blessing Safety from
Storms in the Blessings box on your Adventure Sheet. The
blessing works by allowing you to ignore any one storm on
land or at sea. When you use the blessing cross it off your
Adventure Sheet.
You go to thank Vajra but he is already deeply involved
in a levitational exercise and is currently hovering cross-
legged some distance off the ground. Turn to 41.
47
Passage to the dusty and ravaged western island of Sempura
costs 10 Talons. The ferry is a rickety-looking wooden skiff,
and upon seeing you eyeing it dubiously, the ferrymaster pats
its side and proclaims: ‘Safest ship in the archipelago!
Survived five storms, four pirate attacks and just one mauling
by a deranged Kraken!’
Sail to Sempura
The Valley of Bones 50
Stay in Han
turn to 15
48
If you have the eye of the Cyclops, turn immediately to
38
. If not, read on below.
The villagers of Han welcome you with open arms as the
slayer of Dhurz Deathsnare the Cyclops. You can rest here
for as long as you like, free of charge, and you can restore
your V
ITALITY
score to its starting level if you are injured.
When you are ready to move on, return to 25 and make a
choice from the options presented there.
49
In the centre of the room you trip over a tiny thread drawn
tight across the floor. Instantly, there is the flapping sound of
all the ropes simultaneously releasing, sending blades
converging from all corners of the room onto you.
Your corpse, now resembling a pin-cushion, expires
quietly but messily to the floor…
Turn to 13.
50
You trip on a wire that sends a huge stone mallet lazily
arcing towards you. Although you evade it easily enough, it
hits a ceramic jar on its return swing. The jar shatters,
flooding the floor of the chamber with a mixture of acidic
venom taken from a reptilian beast called the Ora-Ora, and a
sulphurous-smelling liquid.
Again you dodge the mallet on the next swing, whilst
struggling to find patches of floor that are still dry and not
yet covered in toxic sludge. As a result you fail to see the
mallet swing to where the jar once was, and hit a tinder-flint
that had been jammed behind the jar.
Sparks shower onto the floor, causing the liquid from the
jar to instantly alight in a firestorm of flame and turn you,
hapless adventurer, into a charred and blackened corpse.
Turn to 13.
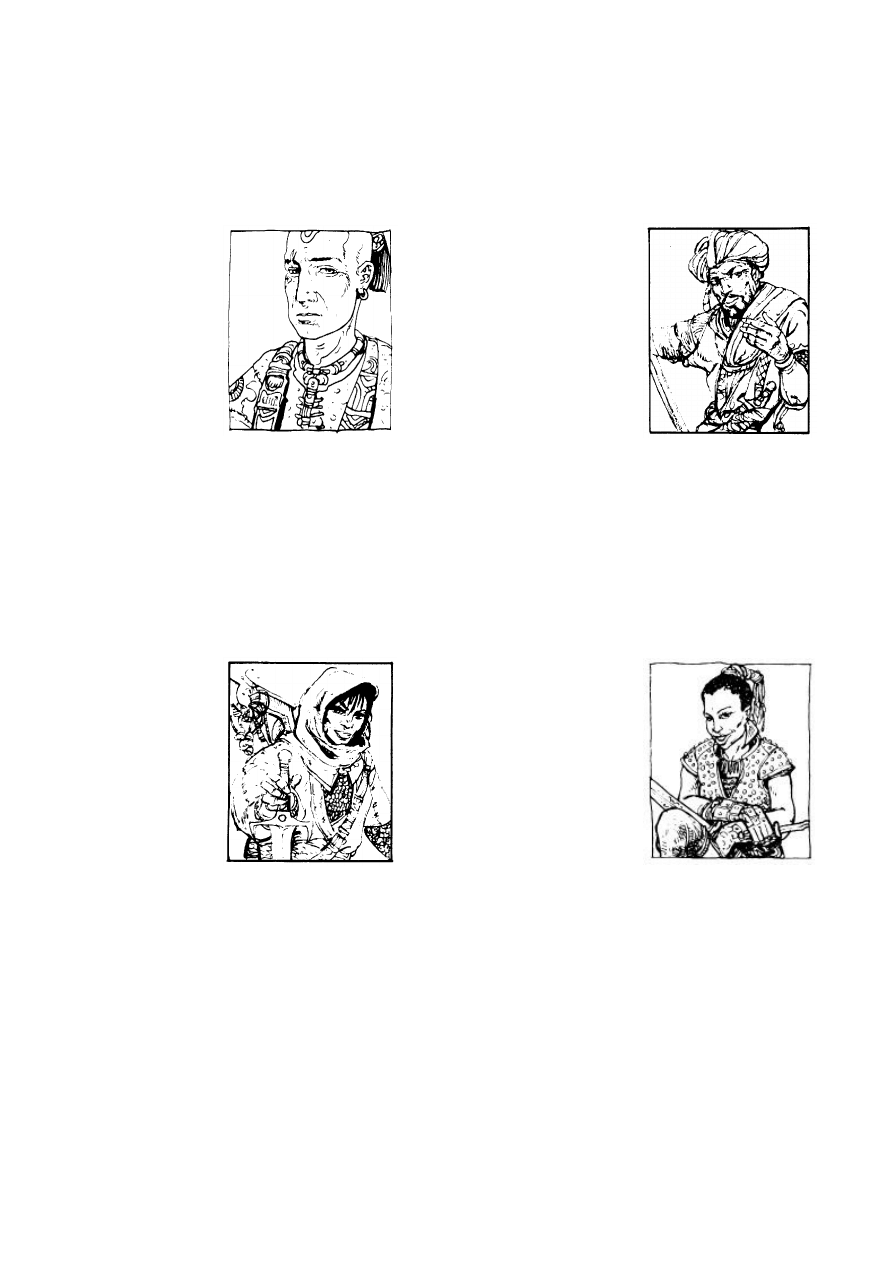
Starting characters
You can create your own character, or pick one from the following. Transfer the details of the
character you have chosen to the Adventure Sheet.
BARABAS THE FALLEN
Profession: Priest
Money: 0 Talons
S
KILL
: 3
R
ESOURCE
: 4
V
ITALITY
: 4
Possessions: club
Barabas was an initiate of one of the many monasteries
that flank Lake Libra in southern Analand, before a lapse
in faith saw him slide headlong into a life of drunkeness
and debauchery. Cast out by the disgusted priests of his
order, he fled to the exotic coastal city of Gummport in
a desperate bid to find the religious fervour he had long
since discarded in favour of feverish festivities.
MORGAI GREYCLOAK
Profession: Rogue
Money: 0 Talons
S
KILL
: 4
R
ESOURCE
: 4
V
ITALITY
: 3
Possessions: sword
The daughter of a Lendleland barbarian and an
Analander temple-girl, Morgai hails from the distant
outlander town of Puss, far beyond the Great Wall. In
her short but eventful life she has wandered the many
roads of Analand, always planning scams to liberate
wealth from those too stupid to match her sharp wits
and sharper sword. Of late however, she has washed up
in Far Analand bereft of funds and seeking a new
direction in the thriving bazaars of Gummport.
RHUNCAZ RUNECASTER
Profession: Sorcerer
Money: 0 Talons
S
KILL
: 3
R
ESOURCE
: 5
V
ITALITY
: 3
Possessions: staff
Born in that far cityport of Kharé, in the vermin-
infested lands of Kakhabad, Rhuncaz escaped from the
Sorcerer-Noble to whom he had been apprenticed, in
search of adventure. Now, after many a struggle in
Mauristatia, the Shamutanti Hills, and Analand, he has
settled down somewhat in the docksides of Gummport,
using his powers to read the fortunes of sailors,
merchants, and other gullible sorts.
TARSHAWNA THE TERRIBLE
Profession: Warrior
Money: 0 Talons
S
KILL
: 4
R
ESOURCE
: 3
V
ITALITY
: 4
Possessions: scimitar
A mercenary soldier from the distant land of Arantis, on
the continent of Allansia, it seems Tarshawna has spent
an age forging a reputation as one of the most ruthless
commanders in battle ever seen in the Old World.
However, after being the sole survivor of a bloody
ambush of her company by Lendleland horse-nomads,
she has arrived in Gummport, tired of battle, with the
simple aim of raising enough wealth to afford the long
passage back across the Western Ocean to her
homeland.
The illustrations on this page are all copyright © Russ Nicholson 1995, 1996. Tarshawna the Terrible is actually Jaluda the Black
from Fabled Lands 3: Over the Blood-Dark Sea. Morgai Greycloak and Rhuncaz Runecaster are actually Charyss Willow and Vilss
Snake-Fingers respectively, from Fabled Lands 4: The Plains of Howling Darkness. Barabas the Fallen is actually Abraxas the Seeker
from Fabled Lands 6: Lords of the Rising Sun.
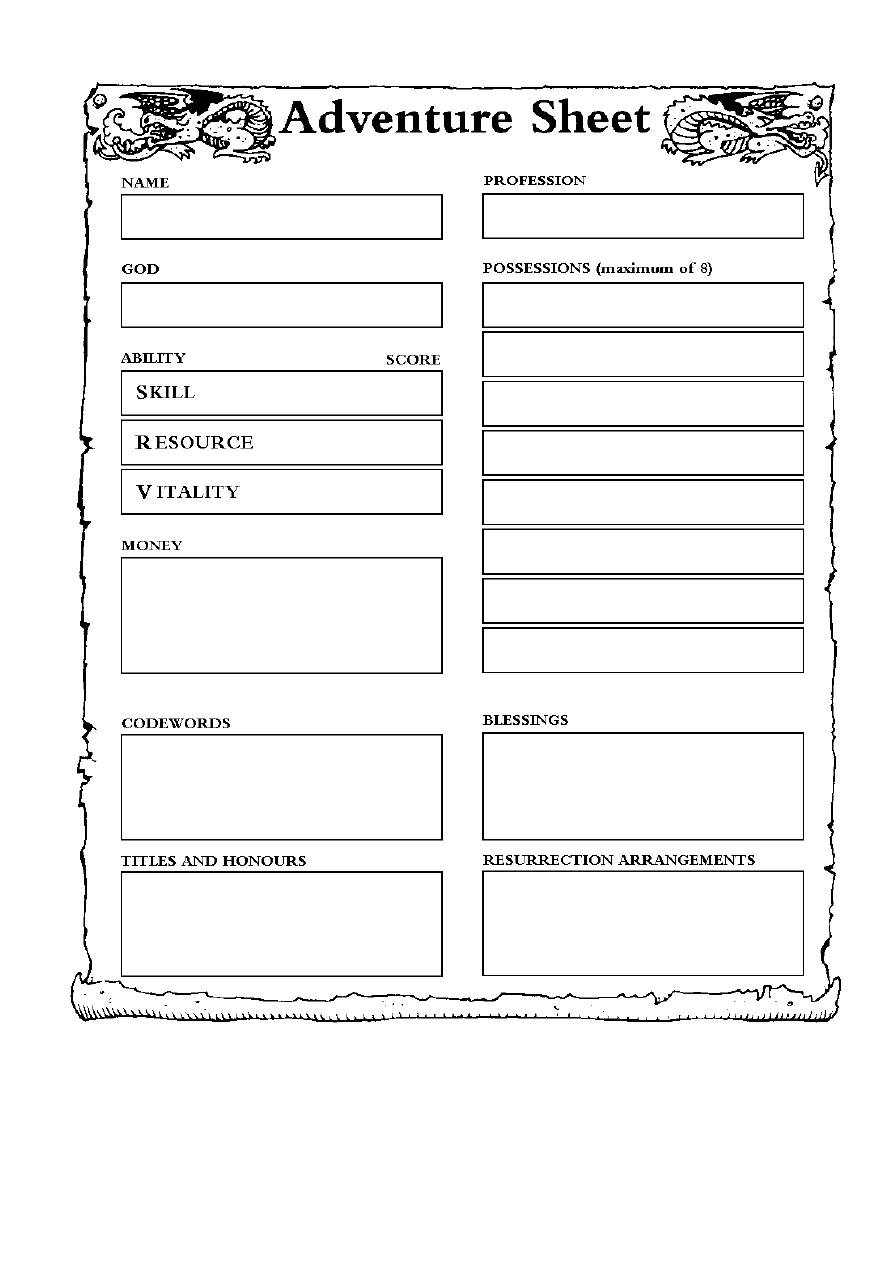
The Adventure Sheet (although altered somewhat) and the Ship’s Manifest were both originally copyright © Russ
Nicholson/Macmillan 1995, for the Fabled Lands series of fantasy gamebooks.
Adventurer’s Journal
For the keeping of notes
Wyszukiwarka
Podobne podstrony:
Roger Zelazny Isle of the Dead
Allen Wold Rikard Braeth 03 Lair of the Cyclops (v1 0)
Roger Zelazny Francis Sandow 01 Isle Of The Dead v1 0
Zelazny, Roger Isle of the Dead
the princes welcome to the isle of sky
Judith Tarr The Isle of Glass
The law of the European Union
A Behavioral Genetic Study of the Overlap Between Personality and Parenting
Pirates of the Spanish Main Smuggler's Song
Magiczne przygody kubusia puchatka 3 THE SILENTS OF THE LAMBS
An%20Analysis%20of%20the%20Data%20Obtained%20from%20Ventilat
Jacobsson G A Rare Variant of the Name of Smolensk in Old Russian 1964
OBE Gods of the Shroud Free Preview
Posterior Capsular Contracture of the Shoulder
Carol of the Bells
50 Common Birds An Illistrated Guide to 50 of the Most Common North American Birds
A practical grammar of the Latin languag
Cast Coinage of the Ming Rebels
więcej podobnych podstron