R2-D2 Instructions
Although there are of course parts for which it doesn't matter much in which order they are
assembled, because of the moving parts in some cases the order does matter. Therefor it is
recommended to build R2-D2 as described in these instructions. It is also recommended to
completely read the instructions once before starting. Some parts have holes through which
other parts are supposed to slide. If these holes appear too small, then keep cutting them
slightly larger untill everything fits smoothly.
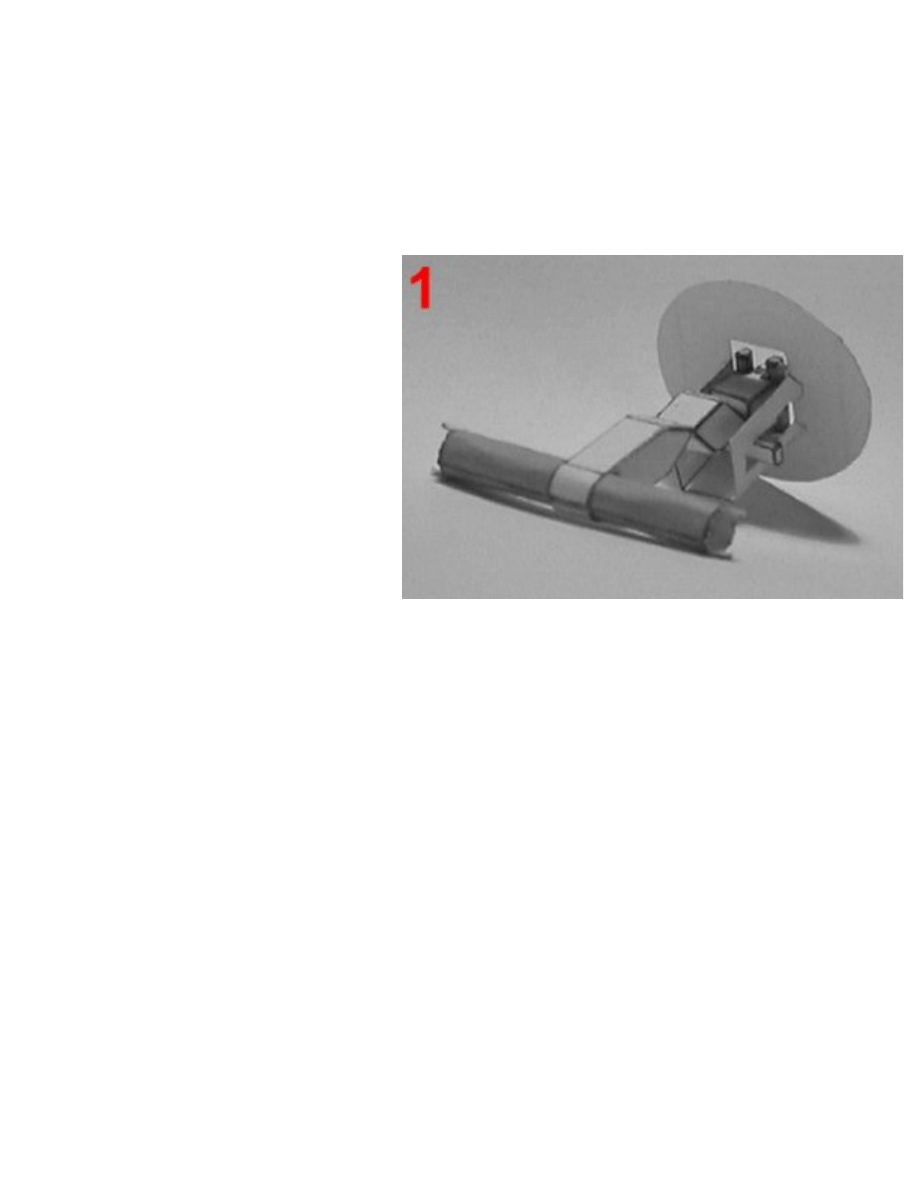
Start with parts 1 through 8. Part 1 has
two red lines; cut these through. Now fold
(or roll) all parts and glue them into
shape. Refer to picture 1 for the shapes if
necessary. Don't glue together the tabs
at the end of part 3 (where there is a
hole) yet though, because they might
need to be adjusted a bit. Now attach
part 2 to part 3, then glue part 4 onto the
small yellow strip located where part 2
connects to part 3. Part 3 should have a
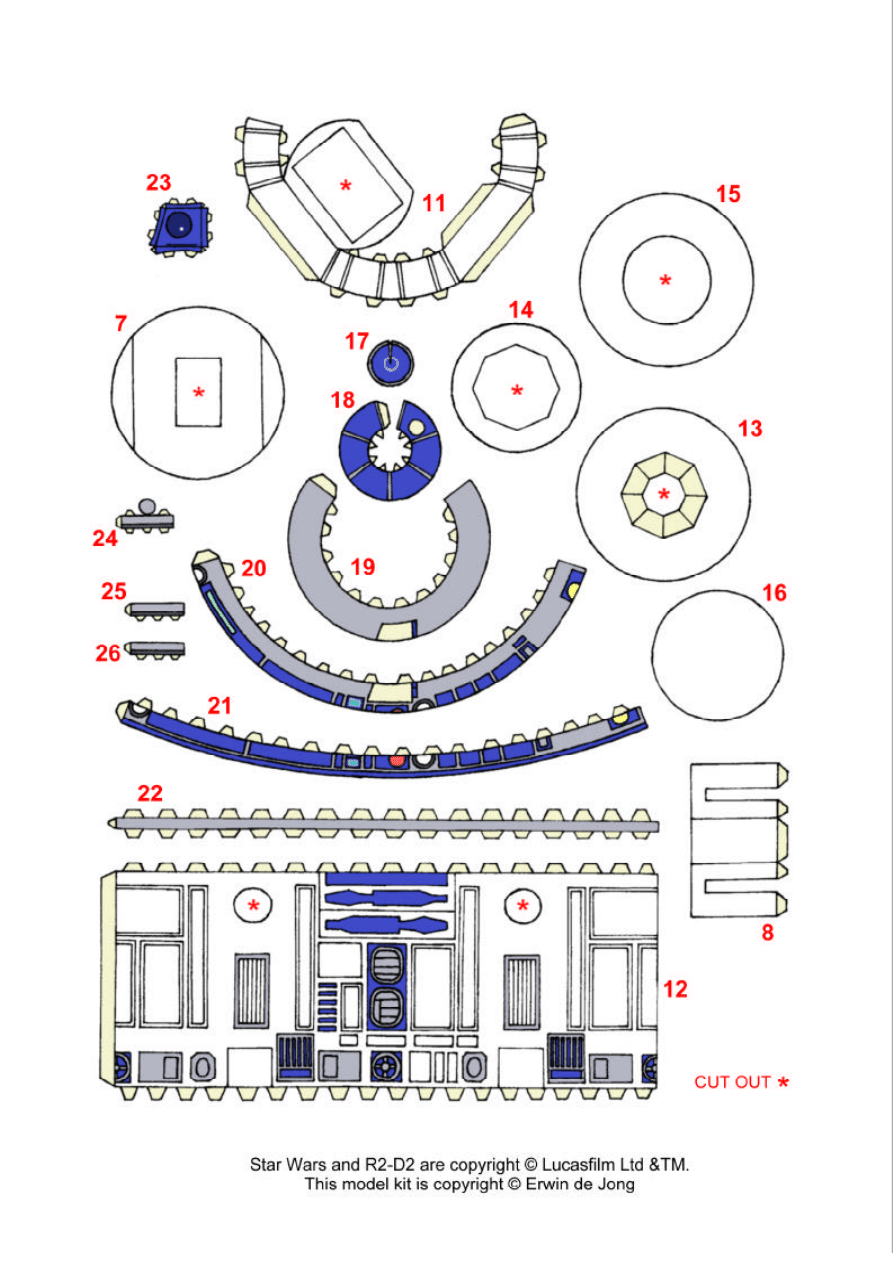
thin side, which includes a hole, and a
wider side. Glue parts 5 and 6 on the thin
side, and against the wider side. This
way they end up right above the middle
foot, as seen (although not too clearly) in picture 4 below.
Now comes a tricky part. Slide part 8 over part 3 from the direction of 2 until it is stopped by
part 4, and the glue it to part 7, aligning it in such a way that when part 3 is slid through part 7, it
goes exactly through the center. To ensure correct allignment of the flaps at the end of part 1,
the two small lips at the so far unattached end of part 2 go through the cut through red lines of
part 1, but this still leaves 2 possibilities. This is solved as follows. Part 2 can bend where it is
attached to part 3, and at a point closer the the middle. Bend part 2 so that in the middle it
points to what is UP in picture 1. (Note: bend it farther then it's bent in picture 1.) Now if the four
flaps at the ends of part 1 form a plane that is parrallel to part 7, then part 1 is attached
correctly. Otherwise, it should be turned around.
You should now have reached the point where what you have put together so far is shown in
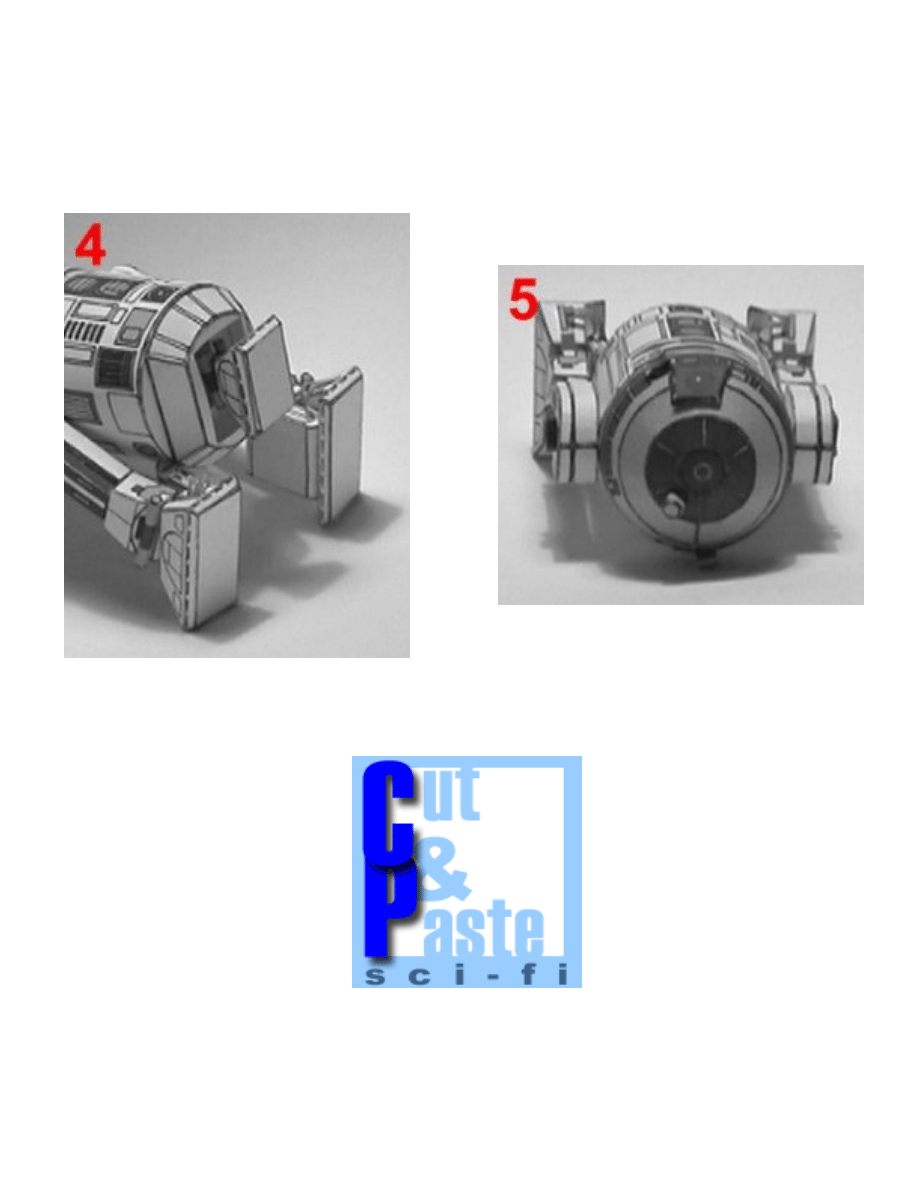
picture 1. Now continue with parts 9 and 10. Glue part 9 into a cilinder. Now glue the hole of
part 3 closed insuch a way that part 9 fits through it exactly and can still be turned around. Now
fold part 10, but don't glue it together yet. Stick part 3 through part 10 from the outside to the
inside. The slide part 9 through the hole in part 3, which is now located inside part 10. Refer to
picture 3 below, which shows how this works (it shows parts of the right leg, but the system is
the same). Now glue parts 9 and 10 to eachtother, and then finish glueing part 10 together.
Cut out part 11, fold and glue it into shape, then slid it over part 10 and attach it to part 7. Cut
out part 12. Now roll it around what you have made so far, sticking the ends of part 1 through
the holes, and glue it into a cilinder. Keep in mind that part 2 has to bend forward (it bends up
as positioned in picture 1). now attach part 7 to the bottom of part 12.
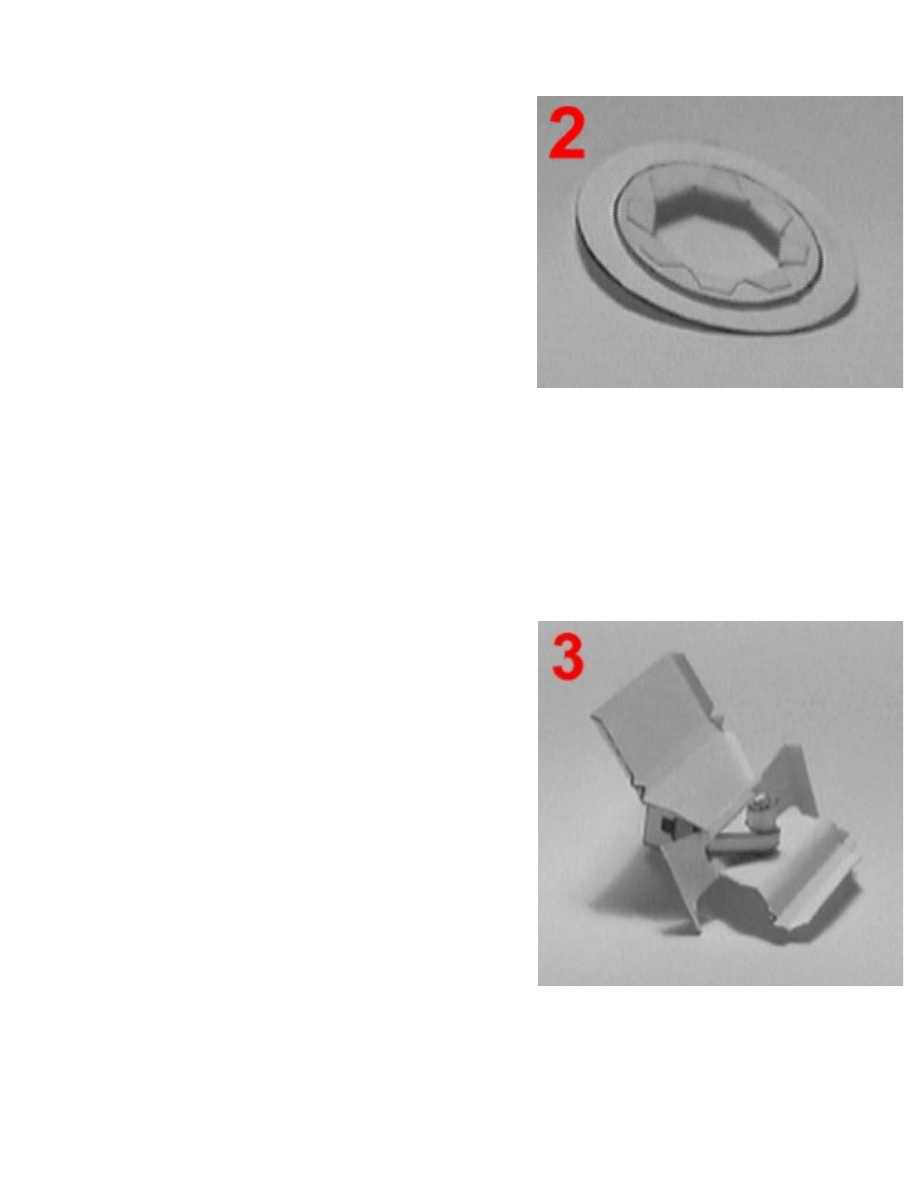
For now put the parts you finished aside and continue
with parts 13 through 16. Lay part 15 on top of part 13,
and part 14 on top of that. Now fold the flaps in the
middle of part 13 through the holes of parts 14 and 15,
and glue them on top of part 14. The result of this is
seen in picture 2. Now glue part 16 on top of part 14 as
well, to keep the flaps from coming loose. Now put this
part away for now as well.
Now cut out parts 17 through 26. Glue part 17 into a flat
cone, parts 18 through 21 each into the bottom part of a
cone, which is steeper for each part, and part 22 into a
cilinder. Now attach these part to eachother in order,
starting with part 17, and making sure the seems are aligned. Now the head of artoo is already
almost done. Glue part 23 into shape nad attach it to the head at the only place marked with a
lightyellow colour where it fits. Glue part 24 into shape and attach it to the head at the yellow
marking almost on top. Glue parts 25 and 2 otni 6shape and then glue them over the white
circles at the side of the head.
Take the part consisting of parts 13 through 16 and glue one side under the head. Glue the
other side onto part 12. You can now see that the head, which is now attached to the body, can
actually turn.
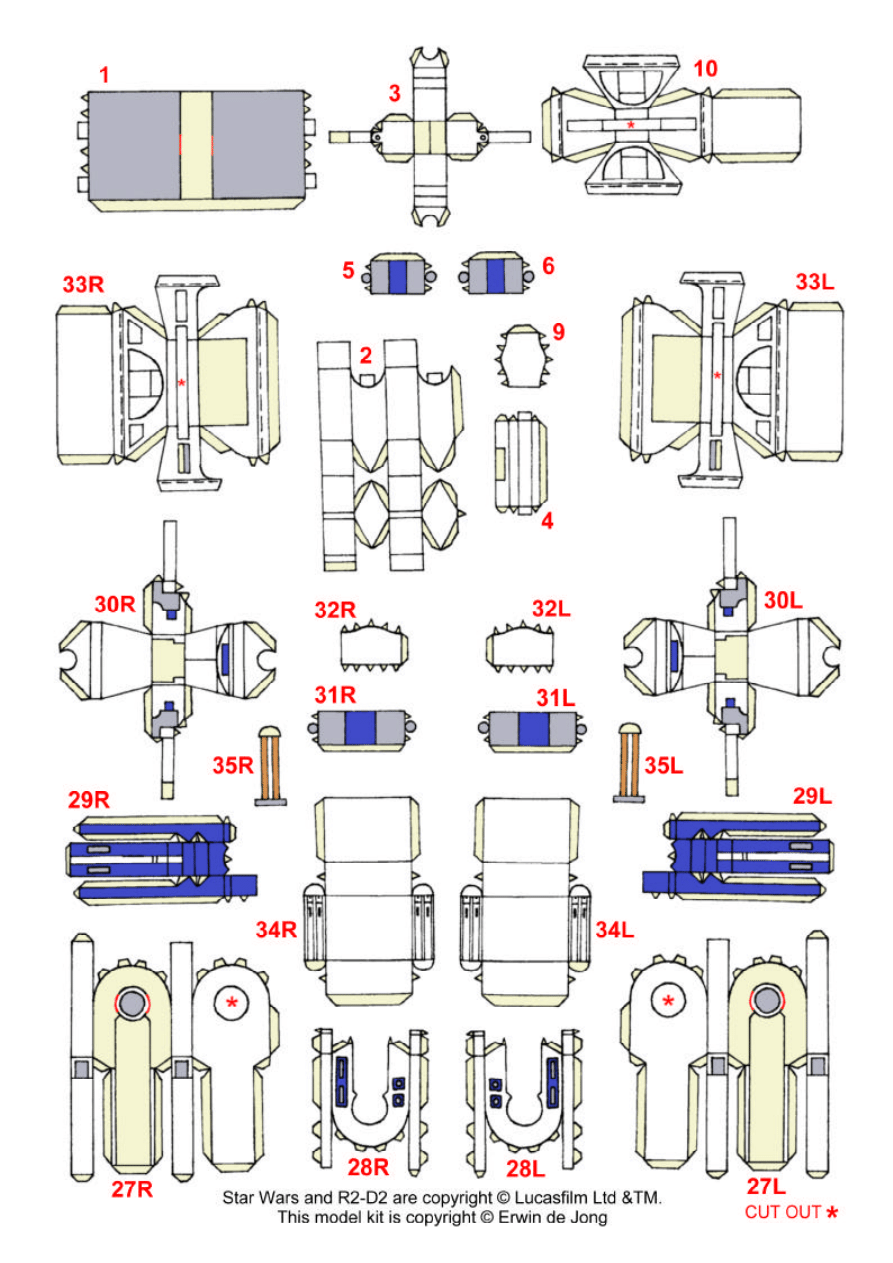
Now put the body aside again, and cut out parts 27R
through 35R. Not that the white part of part 35R should
be cut out, even though it isn't marked
*
. Cut through
the red ilnes of part 27R. Now fold and glue parts 27R,
28R and 29R into shape, and then glue them together
to form the upper part of the right leg. Now glue part
30R into shape, but like with part 3, leave the tabs at the
end near the hole loose for now. Glue part 31R into
shape and attach it to part 30R right under the blue
marking on the side. Glue part 32R into a cilinder, then
fit it through the hole of part 30R and glue the hole
closed. Remove part 32R again. Fold part 33R, then
slide part 30R though it, and reinsert part 32R into the
hole. This is shown in picture 3. Now glue parts 32R
and 33R together and finish glueing part 33R into
shape. Glue part 34R into shape and attach it to the
side of part 33R marked lightyellow. Now attach part 35R to parts 33R and 34R at the
lightyellow markings. Now glue the bottom and top parts of the right leg together.
Repeat the instructions for the right leg to make the left leg out of parts 27L through 35L. Now
attach the legs to the body, making sure that the flaps at the ends of parts one go through the
cut through red lines of parts 27R and 27L. R2-D2 is now finished.
When you move the legs backwards to get Artoo into his riding position, the third middle leg
should come out automatically. It will also be retracted again when you move back the side
legs.
Pictures 4 and 5 are simply shots of a finished R2-D2 taken from another angle than those on
the main R2-D2 page at Cut & Paste Sci-Fi. They can be used as a reference.
Star Wars, R2-D2 and C-3PO are copyright © Lucasfilm Ltd. & TM.
This model kit is copyright © Erwin de Jong
http://membersxoom.com/cutnpastesf
e-mail: eejong@sons.com
Document Outline
Wyszukiwarka
Podobne podstrony:
snowflake R2 D2 2012
R2 D2
d2 prosta w R2
d2 (3)
PM [R2] Sylabus ENG
Chopin Bourrée No 2, Op D2 No 2
wos zp r2 prawo test b odp
Lacznica D2 Kotliska id 262802 Nieznany
MP1580 r2 9w
Rozdział 9, ZiIP, ZiIP, R2, SI, Przygotowanie Produkcji, pp
IM R2 S3
wos zp r2 prawo test a odp
Egzamin 70412 Konfigurowanie zaawansowanych uslug Windows Server 2012 R2 Dillard Kurt
Installing WSUS for Configuration Manager 2012 R2
ento 2kolo R2, Studia, II rok, II rok, IV semestr, Entomologia
R2 Międzynarodowe Stosunki Polityczne
WOS wos zp r2 prawo test b odp
Teoria, R2-2
więcej podobnych podstron