Took some pics while replacing my interior trim so here's a little DIY for anyone looking for info
on the procedure. As usual, you do this on your own risk and I do not take any responsibility if you
mess up yourself or your car.
It's not difficult but you need to be careful since there are a lot of tabs/clips and stuff. Budget some
2h for the job and you'll not be stressed.
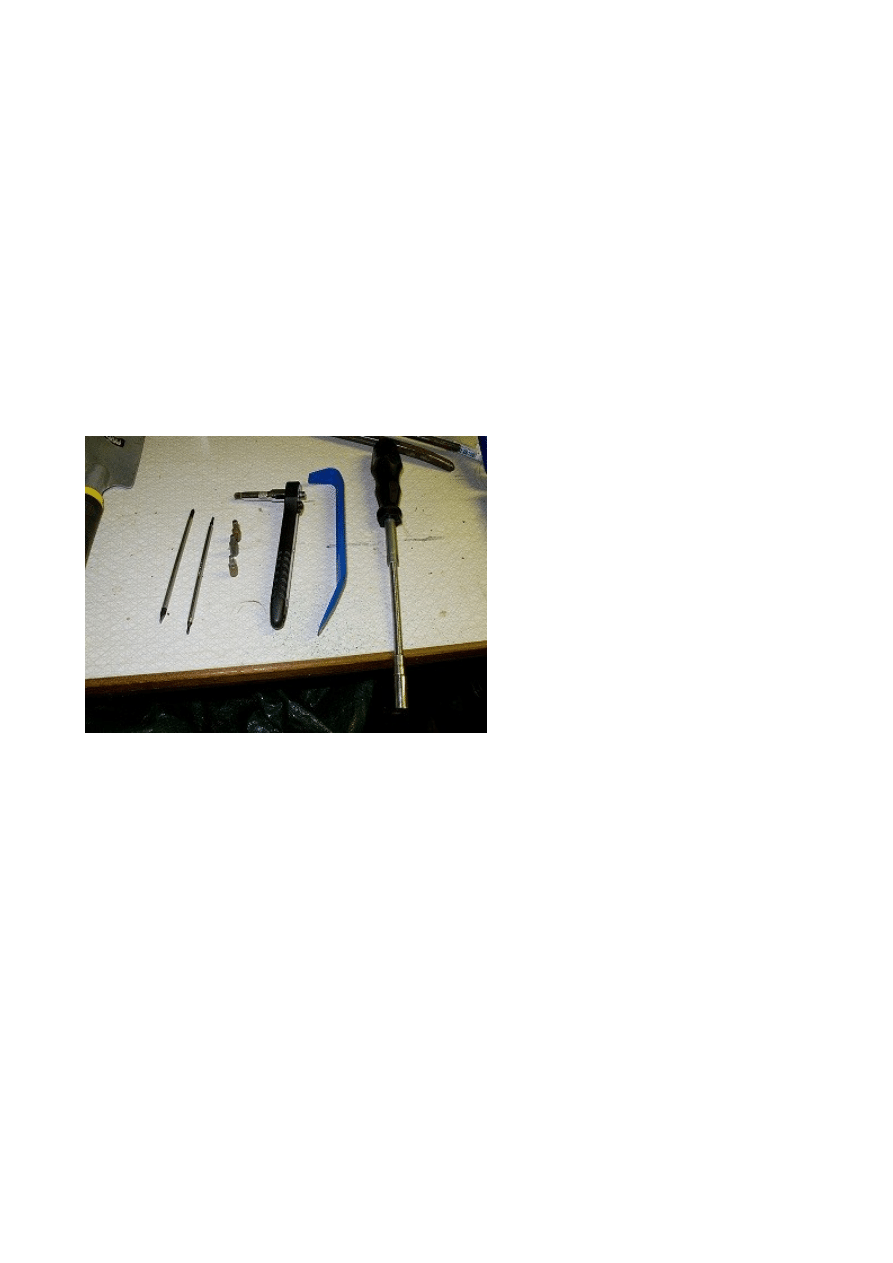
Very basic tools needed:
- Ratchet with extension
- T20 & 25 bits
- Allen 4 bit
- Some fine pointy objects. I used 2 very fine screwdrivers.
- Plastic tool for prying out trims. You can use a flat screwdriver as well but if so, make sure you
wrap it in cloth or tape.
- I used a flexible screwdriver as well at some point but you don't really need that one. Ratchet's
enough.
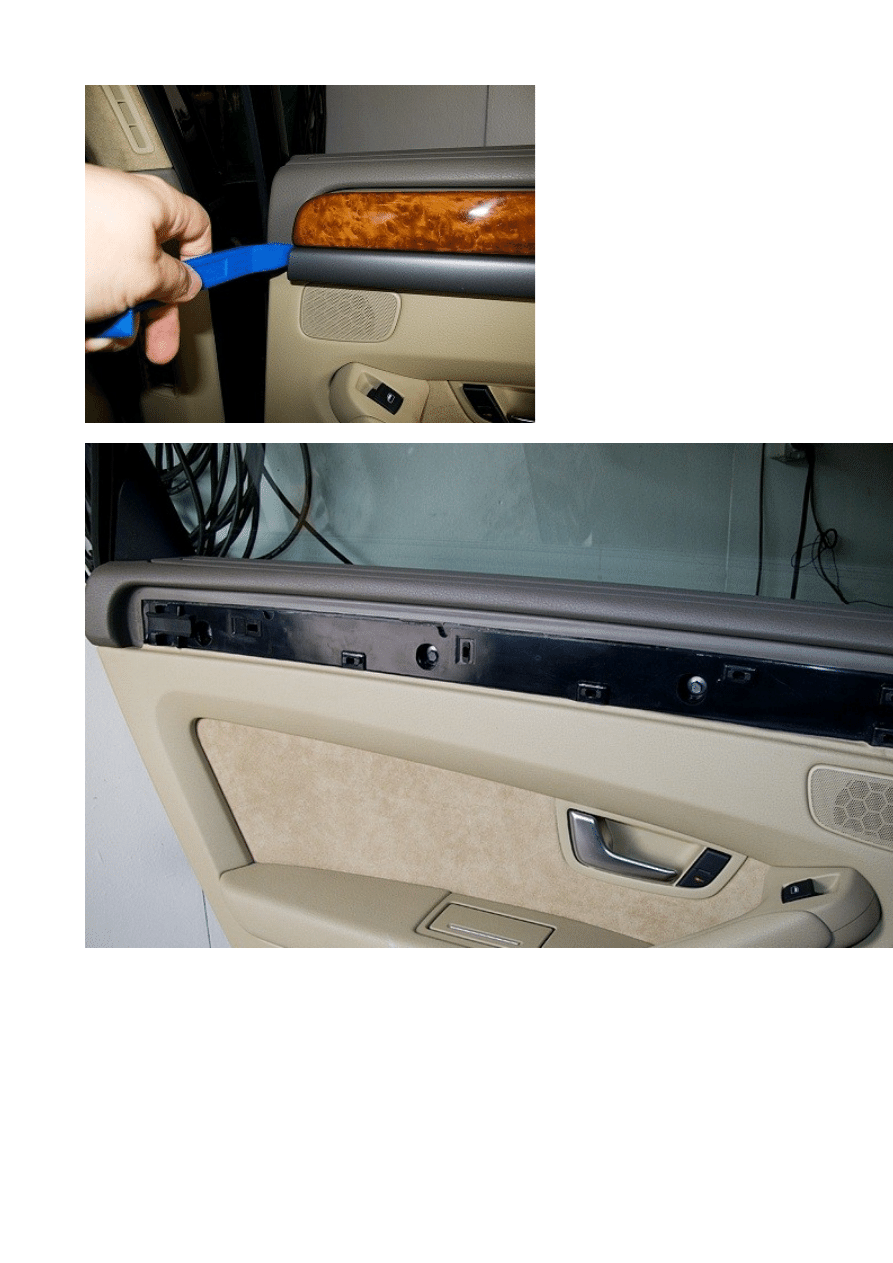
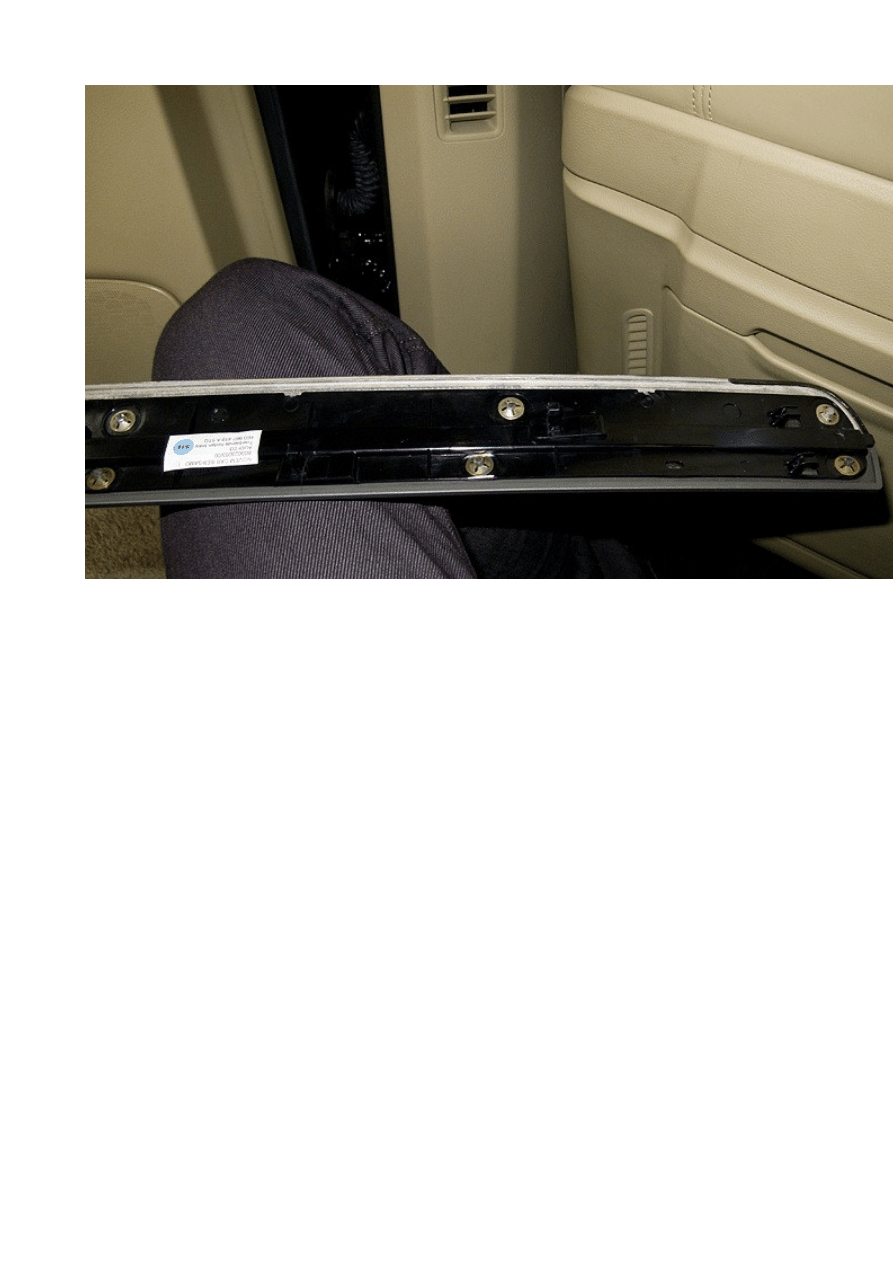
1. The doors are simple. Start from the front and pry carefully on the grey trim (it's attached to the
wood trim) and the whole thing will pop out. Use your fingers and work your way backwards. Once
you're close to the rear you need to pull it to the front and the trim will come loose. See picture of
the tabs in the rear. If any of the clips come out with the trim, put them back. Grab the new trim and
reverse.
2. The rear console is of course a little different depending on your setup. In my case it's extermely
simple. Just pry in the top corners and it will pop out. Remove and fit the new one.
As I had new vents included with my trim I replaced them as well by removing the 2 T25 screws,
removed the whole assembly and unplugged the connectors. Then press the yellowish tabs on each
side to get the AC controls loose, transfer to the new vents and then reverse the above.
NOTE: Do NOT just try to rip the connectors apart, there is always some small latch or similar
that'll do the trick. For the small ones here you need to insert a small and thin screwdriver on the
"backside" and pry a little forward and it'll come loose.

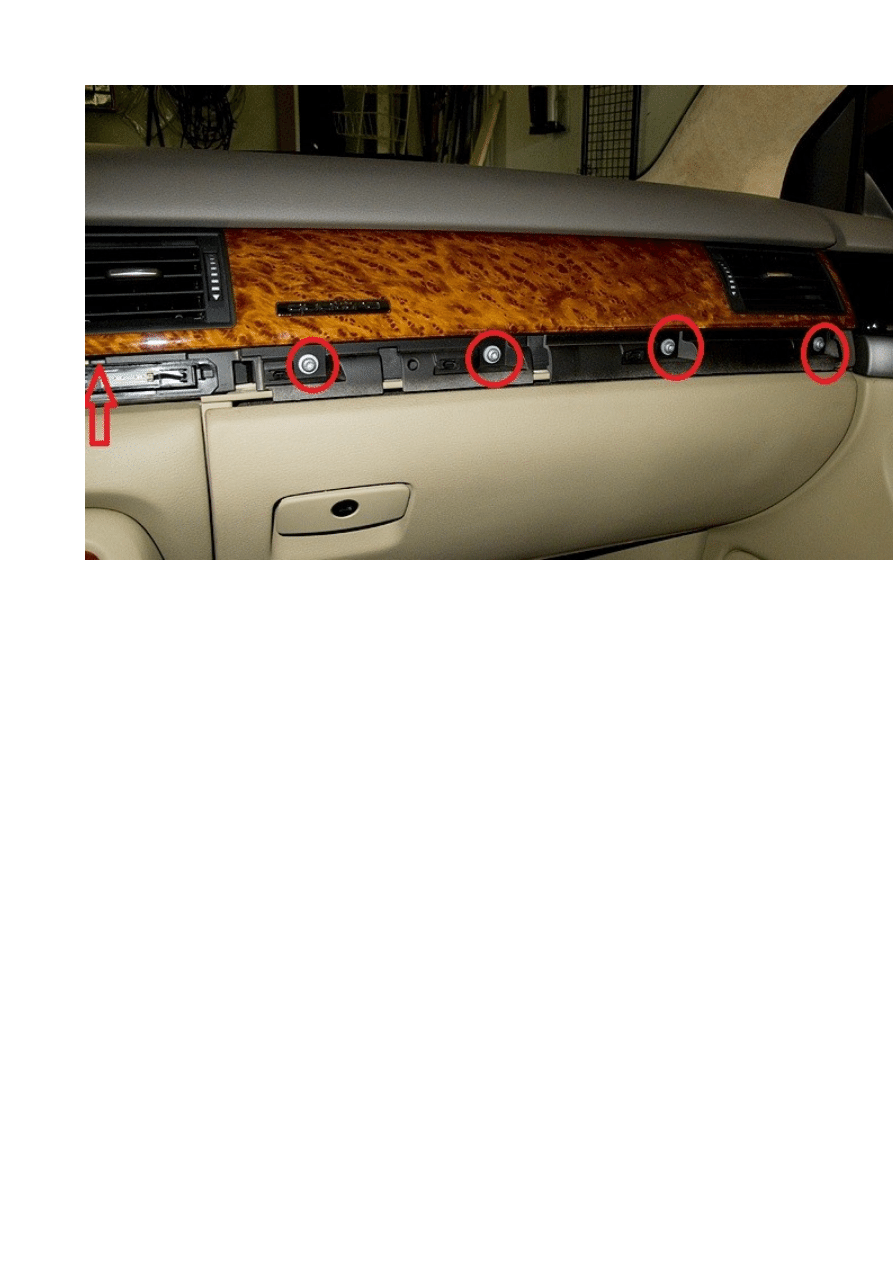
3. On to the instrument cluster trim. Push out the coin tray, grab the front and push it to the left so it
comes off. You will remove the rest later.
The grey and the wood trims are NOT attached so start with the grey ones and pry on the side to
pop it out. Work you way toward the driver side and the whole thing incl the buttons for display,
curtain etc will come out. Remove the little grey trim on driver's left hand as well. Same procedure
as above.
Remove 2xT25 screws on the right side and the 2 on the left side
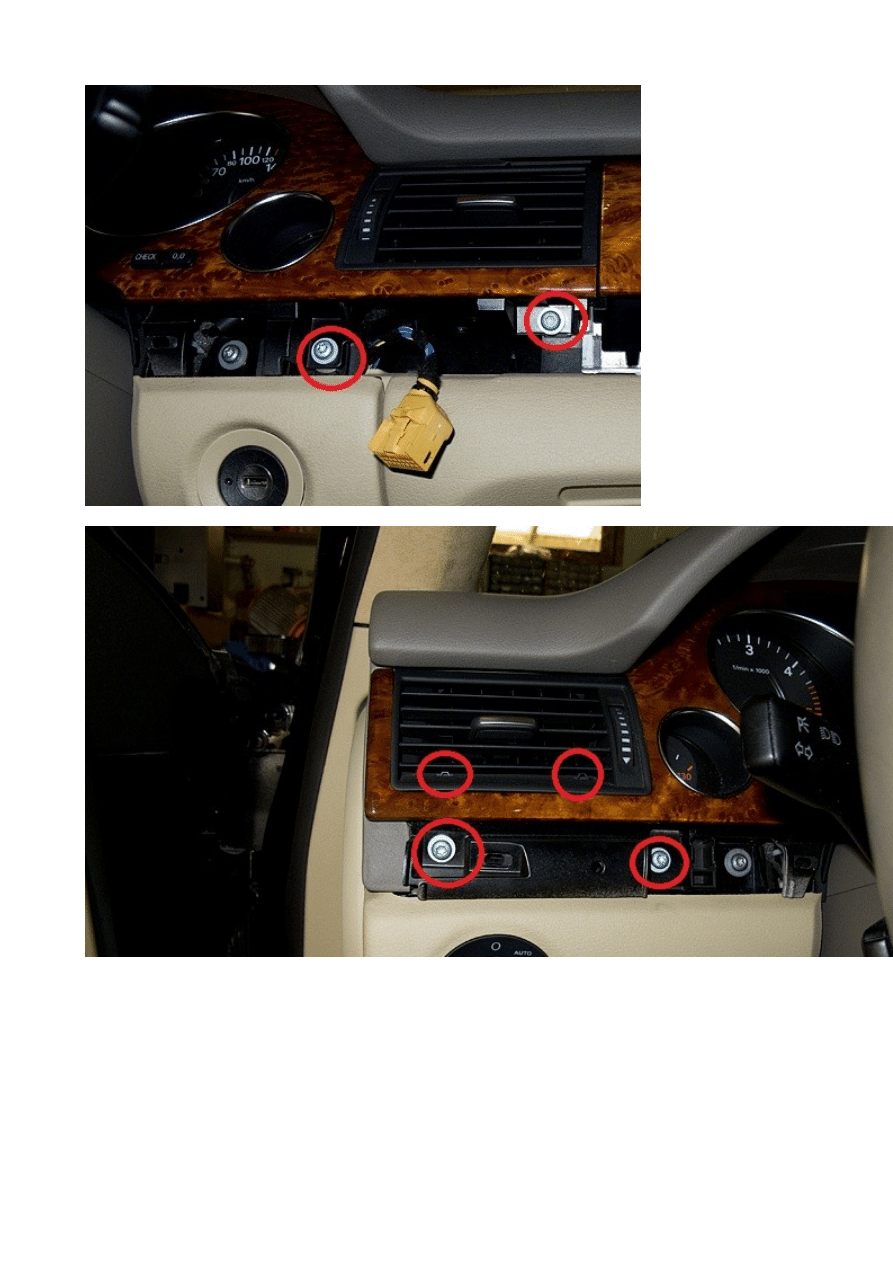
Before you can remove the trim you need to remove a hidden screw. So take some pointy tools and
lift the tabs in the vent you see circled in the picture above. Once they are up far enough you can
wiggle out the vent and behind it you will see a black allen screw that needs to be removed.
Remove the other vent as well and then you can wiggle out the trim. Put the new one in, refit the
vents and screws.
4. MMI display trim. Very simple. Screen closed, pry carefully at the bottom corners and it will pop
out. See picture how it looks.
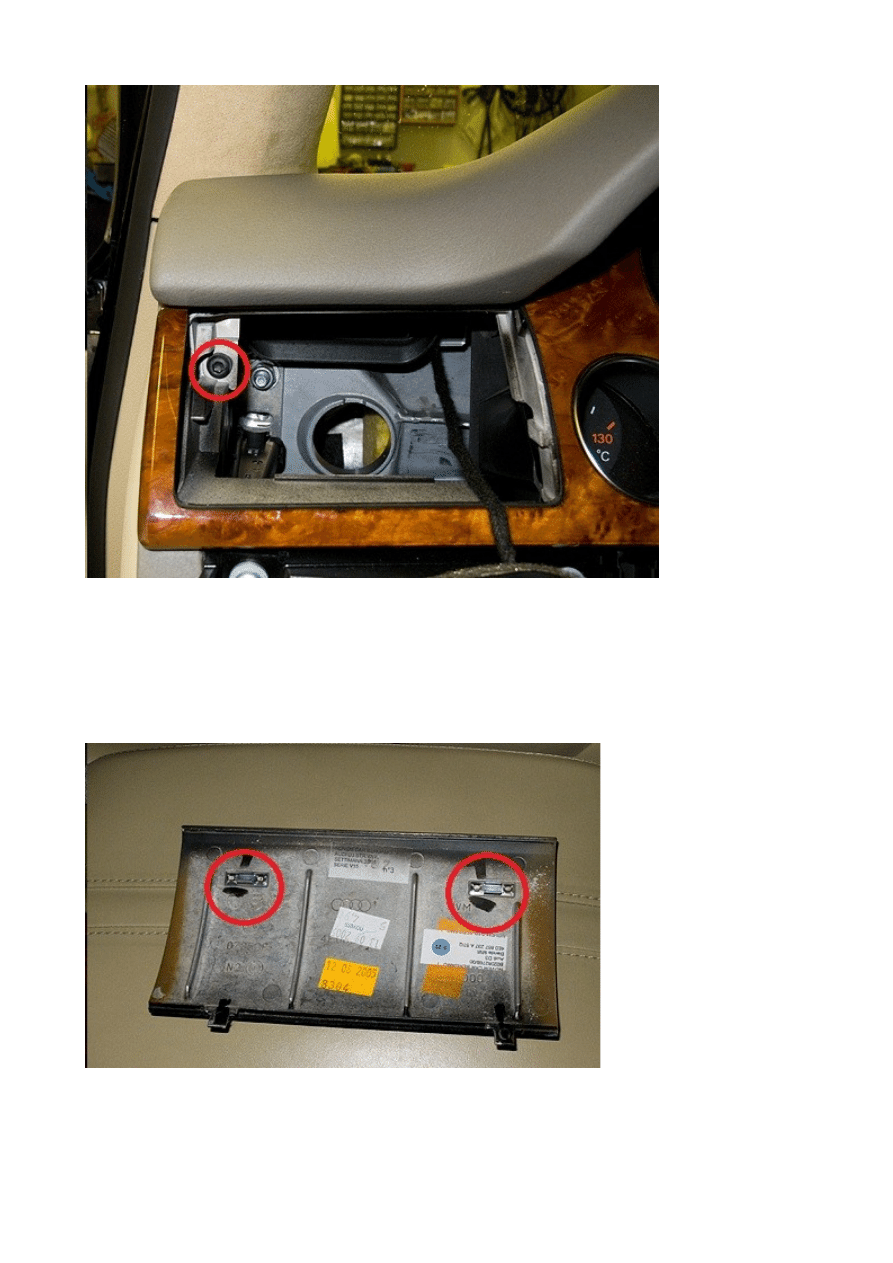
5. The one over the glove compartment: With the grey trim gone you see 5 T25 screws (leftmost
missing in pic). The leftmost one holds a clip as well for the switch panel. Remove all 5.
The coin tray needs to go as well so take a screwdriver or similar and insert it around the area of the
red arrow in the above pic. Push down on it and the tray should come out.
There is another hidden allen screw behind the right vent so remove that one as you did on the
cluster trim. Once gone you can pop out the whole trim, fit the new one and reverse the above.
6. Final one. Put the gear selector in N. Push out the ash tray to reveal a T25 screw that needs to be
removed. Grab the edge like in the pic carefully and pop it out on each side. Work you way
backwards until it comes loose. Unplug the connectors.
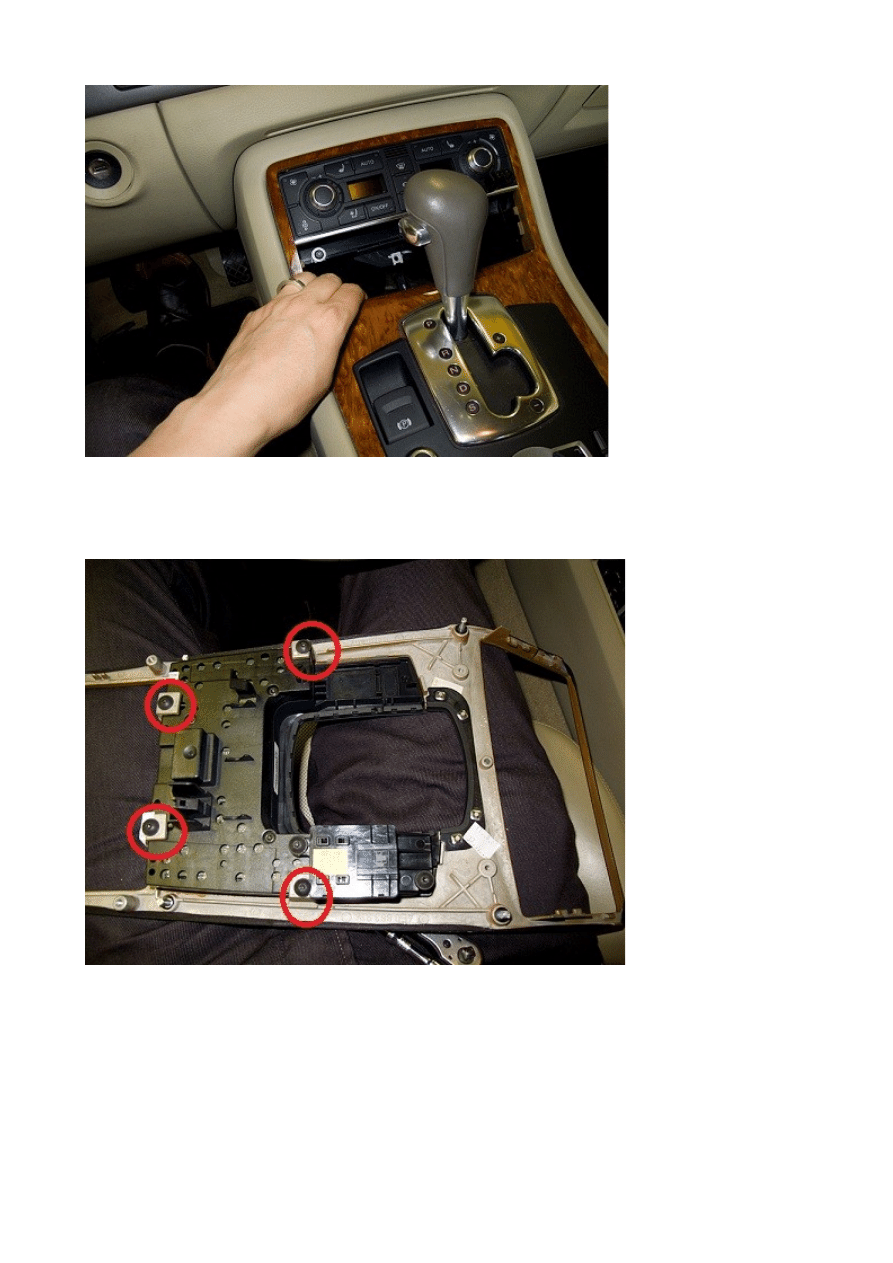
Remove the 4 T20 screws and transfer the control panel to the new trim. As you see in the pic I
removed the cup holder bin as well but it was only because the rear alu trim on the new was in
worse condition than the old one.
Fit the new trim, reverse the above and you're all set!
I got a warning on parking brake failure at first but it went away after I operated the brake once.
Anything unclear in this just shoot me an email or reply to the thread.
Wyszukiwarka
Podobne podstrony:
Jak wyciagnac konsole srodkolwa w Audi A8 D3 instrukcja
Wymiana filtra kabinowego,przeciwpylkowego Audi A8 D3 instrukcja
Naprawa uchwytu otwierania dzwi Audi A8 D3 instrukcja
Jak cyciagnac panel MMI w Audi A8 D3 instrukcja
Wymiana grila Audi A8 D3 instrukcja
Aktywacja wygodnego przełączania źródła A V i trybów radia w MMI 2G Audi A8 D3
Instrukcja postępowania ze środkami niebezpiecznymi, bhp, BHP czynniki szkodliwe, Postępowanie ze śr
Audi A8 Quick Tips (MINI Instrukcja) Audi A8 1999 ENG up by dunaj2
Audi A8 Quick Tips (MINI Instrukcja) Audi A8 ENG up by dunaj2
Audi A8
Audi A8 S8, 1994 2002
AUDI A8 4E 2003pl
D3 instrukcja tb
audi A8, Motoryzacja ciekawostki, Audi, Audi A8
6 - Pieśń ze środka miasta, ADL - dwudziestolecie
Audi A8 hybrid, od 2012
Audi A8 1997 licznik D33 opis kostek, auta, elektryka, elekt AUDI
460 Audi A8 2010 Elektronika systemu Komfort i asystent lkoalizacji Audi
więcej podobnych podstron