
CMS Design Using PHP and
jQuery
Build and improve your in-house PHP CMS by
enhancing it with jQuery
Kae Verens
BIRMINGHAM - MUMBAI

CMS Design Using PHP and jQuery
Copyright © 2010 Packt Publishing
All rights reserved. No part of this book may be reproduced, stored in a retrieval
system, or transmitted in any form or by any means, without the prior written
permission of the publisher, except in the case of brief quotations embedded in
critical articles or reviews.
Every effort has been made in the preparation of this book to ensure the accuracy
of the information presented. However, the information contained in this book is
sold without warranty, either express or implied. Neither the author, nor Packt
Publishing, and its dealers and distributors will be held liable for any damages
caused or alleged to be caused directly or indirectly by this book.
Packt Publishing has endeavored to provide trademark information about all of the
companies and products mentioned in this book by the appropriate use of capitals.
However, Packt Publishing cannot guarantee the accuracy of this information.
First published: December 2010
Production Reference: 1031210
Published by Packt Publishing Ltd.
32 Lincoln Road
Olton
Birmingham, B27 6PA, UK.
ISBN 978-1-849512-52-7
www.packtpub.com
Cover Image by Asher Wishkerman (
a.wishkerman@mpic.de
)

Credits
Author
Kae Verens
Reviewers
Tim Nolte
Paul Zabin
Acquisition Editor
Chaitanya Apte
Development Editor
Chaitanya Apte
Technical Editors
Pooja Pande
Aaron Rosario
Indexer
Hemangini Bari
Editorial Team Leader
Aanchal Kumar
Project Team Leader
Ashwin Shetty
Project Coordinators
Zainab Bagasrawala
Poorvi Nair
Proofreader
Lynda Sliwoski
Production Coordinator
Kruthika Bangera
Cover Work
Kruthika Bangera

About the Author
Kae Verens
lives in Monaghan, Ireland with his wife Bronwyn and their two kids
Jareth and Boann. He has been programming professionally for more than half his life.
Kae started writing in JavaScript in the nineties and started working on server-side
languages a few years later. After writing CGI in C and Perl, Kae switched to PHP in
2000, and has worked with it since.
Kae worked for almost ten years with Irish web development company Webworks
before branching out to form his own company KV Sites (
http://kvsites.ie/
)
a small company which provides CMS and custom software solutions, as well as
design, e-mail, and customer support.
Kae wrote the Packt book jQuery 1.3 with PHP, which has since become a part of his
company's in-house training. Outside of programming, Kae is currently planning
a book on budget clavichord design and building, and is the author of the online
instructional book Kae's Guide to Contact Juggling, available here:
http://tinyurl.
com/kae-cj-book
.
Kae is currently the secretary of the Irish PHP Users' Group,
http://php.ie/
, is the
owner of the Irish web development company kvsites.ie,
http://kvsites.ie/
, and
is the author of popular web-based file manager KFM,
http://kfm.verens.com/
.
This is Kae's second book for Packt, having written jQuery 1.3 with PHP in 2009.
In his spare time, Kae plays the guitar and piano, likes to occasionally dust the
skateboard off and mess around on it, and is studying Genbukan Ninjutsu.

Acknowledgement
I'd like to thank Packt again, for the great job the reviewers did reining in
my ramblings, for their patience when real life intruded and I wasn't always
communicative, and for their advice when the book threatened to go on for a few more
hundred pages and we had to cut out a few of the planned chapters. Overall, I think
we did a good job, and I look forward to seeing what other programmers think of it.
Everything in this book was inspired by having to do it for paying customers. When
I started building the CMS this book is based on, it was years ago and the other
available OS solutions were simply not what our customers wanted; this allowed me
the rare chance to build a CMS all the way up from the beginning, and to overcome
each of the hurdles that this presents. I've learned a lot on the way, and I hope you,
as readers, can benefit from what I've learned.
My family has had to suffer me being absent for hours every week as I ignored them
to concentrate on writing this, so I must thank Bronwyn and my kids Jareth and
Boann for their patience!
And I'd like to thank all the reviewers of the previous book—hopefully this one will
get as good a reception!

About the Reviewers
Tim Nolte
has been involved in web development since 1996. His first website
was for Davisco Foods International as a high school student at the Minnesota New
Country School in Le Sueur, MN. He has many other interests including music,
science fiction, and the outdoors. Tim now lives in the Grand Rapid, Michigan area
with his wife and daughter.
Tim began his early web development using a simple text editor. He later moved
on to using Dreamweaver and expanding his web development using PHP. Over
the years he has had the opportunity to be the developer of many non-profit and
business websites. He went on to do web application development in the wireless
telecommunications industry at iPCS Wireless, Inc. Today Tim has taken a similar
role at Ericsson Services, Inc. where he has expanded his skills and serves customers
around the globe.
Recently, Tim has had the opportunity to work with a marketing firm to redesign
their website using ExpressionEngine and jQuery, as well as give a hand with
the rebuilding of Haiti through the development of the Starfish Haiti website.
In addition to Tim's professional career, he has been able to use his time and talents
at Daybreak (
www.daybreak.tv
). He has volunteered for the role of Online Manager
at Daybreak for the past three years, where he continues to help Daybreak with their
online presence.
I thank my wife for her support during the time of reviewing this
book.

Paul Zabin
wrote his first BASIC program back in 1977 and has been hooked
ever since. Paul's favorite development platform is a combination jQuery, PHP,
and MySQL, which he uses to build Google Gadgets, show off his wife's fine art
photography, and to learn the true meaning of a JavaScript closure. Paul contributes
back to the development community by publishing Google Spreadsheet templates
that track stock portfolios, and occasionally posts articles on LinkedIn on how to get
XML stock market data from "the cloud".
Paul lives in Berkeley, California, with his very patient wife Jenna, where they tend to
a rare cactus garden. When not programming or watering the plants, he can be found
at the local farmers market or newly discovered coffee shop. Paul can be contacted
through his public profile at
http://www.linkedin.com/in/ajaxdeveloper/
.

www.PacktPub.com
Support files, eBooks, discount offers
and more
You might want to visit
www.PacktPub.com
for support files and downloads related
to your book.
Did you know that Packt offers eBook versions of every book published, with PDF
and ePub files available? You can upgrade to the eBook version at
www.PacktPub.
com
and as a print book customer, you are entitled to a discount on the eBook copy.
Get in touch with us at
service@packtpub.com
for more details.
At
www.PacktPub.com
, you can also read a collection of free technical articles, sign
up for a range of free newsletters, and receive exclusive discounts and offers on
Packt books and eBooks.
http://PacktLib.PacktPub.com
Do you need instant solutions to your IT questions? PacktLib is Packt's online digital
book library. Here, you can access, read, and search across Packt's entire library of
books.

Why Subscribe?
•
Fully searchable across every book published by Packt
•
Copy and paste, print, and bookmark content
•
On demand and accessible via web browser
Free Access for Packt account holders
If you have an account with Packt at
www.PacktPub.com
, you can use this to access
PacktLib today and view nine entirely free books. Simply use your login credentials
for immediate access.
D
o
w
nl
oa
d
fr
om
W
ow
!
eB
oo
k
<
w
w
w
.w
ow
eb
oo
k.
co
m
>


Table of Contents
[
ii
]
Chapter 3: Page Management – Part One
Listing pages in the admin area
Filling the parent selectbox asynchronously
Chapter 4: Page Management – Part Two
Rich-text editing using CKeditor
Chapter 5: Design Templates – Part One
How do themes and templates work?
Chapter 6: Design Templates – Part Two
Preparing the Filament Group Menu
Choosing a theme in the administration area
Choosing a page template in the administration area

Table of Contents
[
iii
]
Handling upgrades and database tables
Adding custom content forms to the page admin
Showing the form on the front-end
Handling the submission of the form
Chapter 9: Image Gallery Plugin
Adding a kfmget mod_rewrite rule
Chapter 10: Panels and Widgets – Part One

Table of Contents
[
iv
]
Showing panels on the front-end
Chapter 11: Panels and Widgets – Part Two
Panel page visibility – admin area code
Panel page visibility – front-end code
Chapter 12: Building an Installer
Installing the virtual machine
Creating the installer application

Preface
PHP and jQuery are two of the most famous open source frameworks used for web
development. This book will explain how to leverage their power by building a core
CMS which can be used for most projects without needing to be written, and how to
add custom plugins that can then be tailored to the individual project.
This book walks you through the creation of a CMS core, including basic page
creation and user management, followed by a plugin architecture, and example
plugins. Using the methods described in this book, you will find that you can create
distinctly different websites and web projects using one codebase, web design
templates, and custom-written plugins for any site-specific differences. Example
code and explanation is provided for the entire project.
This book describes how to use PHP, MySQL, and jQuery to build an entire CMS
from the ground up, complete with plugin architecture, user management, template-
driven site design, and an installer. Each chapter walks you through the problems
and solutions to various aspects of CMS design, with example code and explanation
provided for the chosen solutions. A plugin architecture is explained and built,
which allows you to enhance your own CMS by adding site-specific code that doesn't
involve "hacking" the core CMS.
By the end of this book, you will have developed a full CMS which can be used to
create a large variety of different site designs and capabilities.
What this book covers
Chapter 1, CMS Core Design, discusses how a content management system works,
and the various ways to administrate it, followed by code which allows a page to be
retrieved from a database based on the URL requested.

Preface
[
2
]
Chapter 2, User Management, expands on the CMS to build an administration area,
with user authentication, and finish with a user management system, including
forgotten password management, and captchas.
Chapter 3, Page Management – Part One, discusses how pages are managed in a CMS,
and will build the first half of a page management system in the administration area.
Chapter 4, Page Management – Part Two, finishes off the page management system in
this chapter, with code for rich-text editing, and file management.
Chapter 5, Design Templates – Part One, focuses on the front-end of the site by
discussing how Smarty works. We will start building a templates engine for
providing cdesign to the front-end, and a simple navigation menu.
Chapter 6, Design Templates – Part Two, improves on the navigation menu we
started in the previous chapter by adding some jQuery to it, and will finish up
the templating engine.
Chapter 7, Plugins, discusses how plugins work, and we will demonstrate this by
building a plugin to handle page comments.
Chapter 8, Forms Plugin, improves on the plugin architecture by building a forms
plugin. The improvements allow entirely new page types to be created using
plugins.
Chapter 9, Image Gallery Plugin, an image gallery plugin is created, showing how to
manage the uploading and management of images.
Chapter 10, Panels and Widgets – Part One, describes how panels and widgets work.
These allow for extremely flexible templates to be created, where non-technical
administrators can "design" their own page layouts.
Chapter 11, Panels and Widgets – Part Two, finishes up the panels system by creating a
Content Snippet widget, allowing HTML sections to be placed almost anywhere on a
page, and even select what pages they appear on.
Chapter 12, Building an Installer, shows how an installer can be created, using virtual
machines to help test the installer.
What you need for this book
• PHP 5.2
• jQuery 1.4
• jQuery-UI 1.8.

Preface
[
3
]
Most of the code will work exactly in Windows or Mac, but to match perfectly what
I've done, I recommend using Linux. In this book, I used Fedora 13 for the creation of
the CMS, and CentOS 5.2 for testing in Chapter 12, Building an Installer.
Who this book is for
If you want to see jQuery in action with PHP and MySQL code, in the context of a real
application, this is the book for you. This book is written for developers who have
written multiple scripts or websites, and want to know how to combine them all into
one package that can be used to simplify future scripts and sites. The book is aimed at
people who understand the basics of PHP and jQuery, and want to know how they can
be used effectively to create a large project that is user-friendly and flexible.
Conventions
In this book, you will find a number of styles of text that distinguish between
different kinds of information. Here are some examples of these styles, and an
explanation of their meaning.
Code words in text are shown as follows: " Create a directory
/ww.skins
in the CMS
webroot."
A block of code is set as follows:
<servlet>
<servlet-name>I18n Servlet</servlet-name>
<servlet-class>com.liferay.portal.servlet.I18nServlet</servlet
class>
<load-on-startup>2</load-on-startup>
</servlet>
When we wish to draw your attention to a particular part of a code block, the
relevant lines or items are set in bold:
<portlet>
<portlet-name>104</portlet-name>
<icon>/html/icons/update_manager.png</icon>
<struts-path>update_manager</struts-path>
<control-panel-entry-category>server</control-panel-entry-
category>
<control-panel-entry-weight>4.0</control-panel-entry-weight>
<control-panel-entry-class> com.liferay.portlet.admin.
D
o
w
nl
oa
d
fr
om
W
ow
!
eB
oo
k
<
w
w
w
.w
ow
eb
oo
k.
co
m
>
Preface
[
4
]
Any command-line input or output is written as follows:
[root@ryuk ~]# yum install VirtualBox
New terms and important words are shown in bold. Words that you see on the screen,
in menus or dialog boxes for example, appear in the text like this: "When we click on
the Users link in the menu, what we want to see is a list of the existing users".
Warnings or important notes appear in a box like this.
Tips and tricks appear like this.
Reader feedback
Feedback from our readers is always welcome. Let us know what you think about
this book—what you liked or may have disliked. Reader feedback is important for us
to develop titles that you really get the most out of.
To send us general feedback, simply send an e-mail to
feedback@packtpub.com
,
and mention the book title via the subject of your message.
If there is a book that you need and would like to see us publish, please send
us a note in the SUGGEST A TITLE form on
www.packtpub.com
or e-mail
suggest@packtpub.com
.
If there is a topic that you have expertise in and you are interested in either writing
or contributing to a book on, see our author guide on
www.packtpub.com/authors
.
Customer support
Now that you are the proud owner of a Packt book, we have a number of things to
help you to get the most from your purchase.
Downloading the example code for this book
You can download the example code files for all Packt books you have
purchased from your account at http://www.PacktPub.com. If you
purchased this book elsewhere, you can visit http://www.PacktPub.
com/support
and register to have the files e-mailed directly to you.

Preface
[
5
]
Errata
Although we have taken every care to ensure the accuracy of our content, mistakes
do happen. If you find a mistake in one of our books—maybe a mistake in the text or
the code—we would be grateful if you would report this to us. By doing so, you can
save other readers from frustration and help us improve subsequent versions of this
book. If you find any errata, please report them by visiting
http://www.packtpub.
com/support
, selecting your book, clicking on the errata submission form link, and
entering the details of your errata. Once your errata are verified, your submission
will be accepted and the errata will be uploaded on our website, or added to any list
of existing errata, under the Errata section of that title. Any existing errata can be
viewed by selecting your title from
http://www.packtpub.com/support
.
Piracy
Piracy of copyright material on the Internet is an ongoing problem across all media.
At Packt, we take the protection of our copyright and licenses very seriously. If you
come across any illegal copies of our works, in any form, on the Internet, please
provide us with the location address or website name immediately so that we can
pursue a remedy.
Please contact us at
copyright@packtpub.com
with a link to the suspected
pirated material.
We appreciate your help in protecting our authors, and our ability to bring you
valuable content.
Questions
You can contact us at
questions@packtpub.com
if you are having a problem with
any aspect of the book, and we will do our best to address it.


CMS Core Design
This chapter is an overview of how a CMS is put together.
In the chapter we will discuss topics such as:
•
How a CMS's publicly visible part (the "front-end") works
•
Various ways that the administration part (the "admin area") can be created
•
Discussion of files and database layout
•
Overview of how plugins work
We will also build enough of the basics that we can view a "hello world" page, and
detect missing pages as well.
This chapter will focus more on discussion than on practical examples, although
we'll build a simple practical example at the end.
The "core" of a CMS is its architecture. Just as the motherboard of a computer is its
most important component, without which the CPU, screen, RAM, and other parts
cannot come together, the CMS core is the "backbone" of the CMS. It's what connects
the database, browser interactions, and plugins together.
In this chapter, we will describe the various parts of that core, and over the next few
chapters we will build up that core until we have a stable piece of software, upon
which we can then start developing extensions (plugins).
If you don't want to type out the code to test it, you can download an archive of the
completed project from the Packt website at
http://www.packtpub.com/support
.
This book's CMS is based on a previously written one called WebME (Website
Management Engine), which has many more plugins written for it than are
described in this book—you can download that version of the project here:
https://code.google.com/p/webworks-webme/
.

CMS Core Design
[
8
]
The CMS's private and public areas
A CMS consists of the management area (admin area), and the publicly visible area
(front-end).
The front-end
One very interesting difference between CMS and non-CMS sites is their treatment
of a "web page".
In a non-CMS website, when you request a certain URL from the web server, the web
server sees if the requested file exists, and if it does, it returns it. Very simple.
This is because there is a very clear definition of what is a web page, and that is tied
explicitly to the URL.
http://example.com/page1.html
and
http://example.
com/page2.html
are two distinct web pages, and they correspond to the files
page1.
html
and
page2.html
in the websites document root.
In a CMS, the definition might be a bit blurred. Imagine you are in a news section
of the site at
http://example.com/news
, and this shows an overview of all news
snippets on the website. This might be defined as a page.
Now let's say you "filter" the news. Let's say there are 60 news items, and only 20 are
shown on the
/news
page. To view the next 20, you might go to
/news?page=2
.
Is that a different page? In a non-CMS site, certainly it would be, but in a database-
backed CMS, the definition of a page can be a little more blurred.
In a CMS, the URLs
/news
and
/news?page=2
may not correspond exactly to two
files on the server.
Because a CMS is database-backed, it is not necessary to have a separate physical
source file for every page. For example, there is no need to have a
/news
file at all if
the content of that page can be served through the root
/index.php
file instead.
When we create a new page in the administration area, there is a choice for the
engine to either write a physical file that it corresponds to, or simply save it in the
database.
A CMS should only be able to write to files that are in the public webspace under the
strictest circumstances.
Instead of creating web pages as files, it is better to use a "controller" to read from
a database, based on what the URL was. This reduces the need for the CMS to
have write-permissions for the publicly visible part of the site, therefore increasing
security.

Chapter 1
[
9
]
There is a popular programming pattern called MVC (Model-View-Controller),
which is very similar in principle to what a CMS of this type does.
In MVC, a "controller" is sent a request. This request is then parsed by the controller,
and any required "model" is initialized and run with any provided data. When the
model is finished, the returned data is passed through a "view" to render it in some
fashion, which is then returned to the requester.
The CMS version of this is: The website is sent a HTTP request. This request is
parsed by the CMS engine, and any required plugins are initialized and run with
the HTTP parameters. Then the plugins are finished, they return their results to the
CMS, which then renders the results using an HTML template, and sends the result
of that back to the browser.
And a real-life example: The CMS is asked for
/news?page=2
. The CMS realizes
/news
uses the "news" plugin and starts that up, passing it the "page=2" parameter.
The plugin grabs the information it needs from the database and sends its result back
to the CMS. The CMS then creates HTML by passing it all through the template, and
sends that back to the browser.
This, in a nutshell, is exactly how the public side (the front-end) of our CMS will work.
So, to rewrite this as an actual process, here is what a CMS does when it receives
a request from a browser:
1. The web server sends the request to the CMS.
2. The CMS breaks the request down into its components—the requested page
and any parameters.
3. The page is retrieved from the database or a cache.
4. If the page uses any plugins, then those plugins are run, passing them the
page content and the request parameters.
5. The resulting data is then rendered into an HTML page through the
template.
6. The browser is then sent the HTML.
This will need to be expanded on in order to develop an actual working
demonstration. In the final part of this chapter, we will demonstrate the receiving
of a request, retrieval of the page from the database, and sending that page to the
browser. This will be expanded further in later chapters when we discuss templates
and plugins.

CMS Core Design
[
10
]
The admin area
There are a number of ways that administration of the CMS's database can be done:
1. Pages could be edited "in-place". This means that the admin would log into
the public side of the site, and be presented with an only slightly different
view than the normal reader. This would allow the admin to add or edit
pages, all from the front-end.
2. Administration can be done from an entirely separate domain (
admin.
example.com
, for example), to allow the administration to be isolated from
the public site.
3. Administration can be done from a directory within the site, protected such
that only logged-in users with the right privileges can enter any of the pages.
4. The site can be administrated from a dedicated external program, such as a
program running on the desktop of the administrator.
The method most popular CMSs opt for is to administrate the site from a protected
directory in the application (option 3 in the previous list).
The choice of which method you use is a personal one. There is no single standard
that states you must do it in any particular way. I opt for choice 3 because in my
opinion, it has a number of advantages over the others:
1. Upgrading and installing the front-end and admin area are both done as part
of one single software upgrade/installation. In options 2 and 4, the admin
area is totally separate from the front-end, and upgrades will need to be
coordinated.
2. Keeping the admin area separate from the front-end allows you to have a
navigation structure or page layout which is not dependent on the front-end
template's design. Option 1 suffers if the template is constrained in any way.
3. Because the admin area is within the directory structure of the site itself, it is
accessible from anywhere that the website itself is accessible. This means that
you can administrate your website from anywhere that you have Internet
access.
In this book, we will discuss how a CMS is built with the administration kept in a
directory on the site.
For consistency, even though it is possible to write multiple administrative methods,
such as administration remotely through an RPC API as well as locally with the
directory-based administration area, it makes sense to concentrate on a single
method. This allows you to develop new features quicker, as you don’t need to
write administrative functions twice or more, and it also removes problems where a
change in an API might be corrected in one place but not another.

Chapter 1
[
11
]
Plugins
Plugins are the real power behind how a CMS does its thing. Because every site is
different, it is not practical to write a single monolithic CMS which would handle
absolutely everything, and the administration area of any site using such a CMS
would be daunting—you would have extremely complex editing areas for even the
most simple sites, to cater for all possible use cases.
Instead, the way we handle differences between sites is by using a very simple core,
and extending this with plugins.
The plugins handle anything that the core doesn't handle, and add their own
administration forms.
We will discuss how plugins work later on, but for now, let's just take a quick
overview.
There are a number of types of plugins that a site can use. The most visible are
those which change a page's "type".
A "default" or "normal" page type is one where you enter some text in the admin
area, and that is displayed exactly as entered, on the front-end.
An example of how this might be changed with a plugin is if you have a "gallery"
plugin, where you choose a directory of images in the admin area, and those images
are displayed nicely on the front-end.
In this case, the admin area should look very different from the front end.
How this case is handled in the admin area is that you open up the gallery page,
the CMS sees that the page type is "gallery" and knows that the gallery plugin has
an admin form which can be used for this page (some plugins don't), and so that
form is displayed instead of the normal page form.
On the front-end, similarly, the CMS sees that the page requested is a "gallery" type
page, and the gallery plugin has a handler for showing page data a certain way, and
so instead of simply printing the normal body text, the CMS asks the plugin what to
do and does that instead (which then displays a nice gallery of images).
A less obvious plugin might be something like a logger. In this case, the log plugin
would have a number of "triggers", each of which runs a function in the log plugin's
included files. For example, the
onstart
trigger might take a note of the start time of
the page load, and the
onfinish
trigger might then record data such as how long it
took to load the page (on the server-side), how much memory was used, how large
the page's HTML was, and so on.
D
o
w
nl
oa
d
fr
om
W
ow
!
eB
oo
k
<
w
w
w
.w
ow
eb
oo
k.
co
m
>

CMS Core Design
[
12
]
Another word for trigger is event. The words are interchangeable. An event is a
well-established word in JavaScript. It is equivalent to the idea of triggers in database
terminology. I chose to use the word trigger in this book, but they are essentially the
same.
With this in mind, we know that the 6-point page load flow that we looked at in the
The front-end section is simplistic—in truth, it's full of little trigger-checks to see when
or if plugins should be called.
Files and databases
In this section, we will discuss how the CMS files and database tables should be laid
out and named.
Directory structure
Earlier in the chapter, I gave an example URL for a news page,
http://example.
com/news
. One thing to note about this is that there is no "dot" in it. The non-CMS
examples all ended in
.html
, but there's no ".whatever" in this one.
One reason this is very good is that it is human-readable. Saying “www dot my site dot
com slash news slash the space book” is a lot easier than saying something like “www dot
my site dot com slash index dot p h p question-mark page equals 437”.
It's also useful, in that if you decide to change your site in a few years to use a totally
different CMS or even programming language, it's easier to reconcile
/news
on the
old system with
/news
on the new one than to reconcile
/index.php?id=437
with
/
default.asp?pageid=437
—especially if there are external sites that link to the old
page URL.
In the CMS we are building, we have two file reference types:
1. References such as
/news
or
/my/page
are references to pages, and will be
displayed through the CMS's front controller. They do not exist as actual
files on the system, but as entries in the database.
2. Anything with a dot in it is a reference to an actual real file, and will not be
passed to the front controller. For example, something like
/f/images/test.
jpg
or
/j/the-script.js
.
This is managed by using a web server module called
mod_rewrite
to take all HTTP
requests and parse them before they're sent to the PHP engine.

Chapter 1
[
13
]
In our CMS, we will keep the admin area in a directory called
/ww.admin
. The
reason for this is that the dot in the directory name indicates to the web server that
everything in that directory is to be referenced as an actual file, and not to be passed
to the front controller. The "ww" stands for "Webworks WebME", the name of the
original CMS that this book's project is based on. You could change this to whatever
you want. WordPress' admin area, for example, is at
/wp-admin
.
If the directory was just called
/admin
and you had a page in your CMS also called
"admin", then this would cause ambiguity that we really don't want.
Similarly, if you have a page called "about-applicationname-3.0", this would cause a
problem because the application would believe you are looking for a file.
The simplest solution is to ban all page names that have dots in them, and to
ensure that any files specific to your CMS all have dots in them. This keeps the
two strictly apart.
Another strategy is to not allow page names which are three characters or less
in length. This then allows you to use short names for your own purposes. For
example, using "/j/" to hold all your JavaScript files. Single-letter directories can be
considered bad-practice, as it can be hard to remember their purpose when there is
more than one or two of them, so whether you use
/j
and
/f
, or
/ww.javascript
and
/ww.files
is up to you.
So, application-specific root directories in the CMS should have a dot in the name,
or should be three characters or less in length, so they are easily distinguishable
from page names.
The directory structure that I use from the web root is as follows:
/ # web root
/.private # configuration directory
/ww.admin # admin area
/ww.cache # CMS caches
/f # admin-uploaded file resources
/i # CMS images
/ww.incs # CMS function libraries
/j # CMS JavaScript files
/ww.php_classes # CMS PHP class files
/ww.plugins # CMS plugins
/ww.skins # templates
There are only two files kept in the web root. All others are kept in whichever
directory makes the most sense for them.

CMS Core Design
[
14
]
The two files in the web root are:
•
index.php
—this file is the front-end controller. All page requests are passed
through this file, and it then loads up libraries, plugins, and so on, as needed.
•
.htaccess
—this file contains the
mod_rewrite
rules that tell the web server
how to parse HTTP requests, redirecting through
index.php
(or other
controllers, as we'll see later) or directly to the web server, depending on the
request.
The reason I chose to use short names for
/f
,
/i
, and
/j
, is historical—up until
recently, broadband was not widely available. Every byte counted. Therefore,
it made sense to use short names for things whenever possible. It's a very
minor optimization. The savings may seem tiny, but when you consider that
“smartphones” are becoming popular, and their bandwidth tends to be Edge or 3G,
which is much slower than standard broadband, it still makes sense to have a habit
of being concise in your directory naming schemes.
Database structure
The database structure of a simple CMS core contains only a few tables.
You need to record information about the pages of the website, and information
about users such as administrators.
If any plugins require tables, they will install those tables themselves, but the core
of a CMS should only have a few tables.
Here's what we will use for our initial table list:
•
pages—this table holds information about each page, such as name, id,
creation date, and so on.
•
user_accounts—data about users, such as e-mail address, password,
and so on.
•
groups—the groups that users can be assigned to. The only one that we will
absolutely need is "_administrator", but there are uses for this which we'll
discuss later.
For optimization purposes, we should try to make as few database queries as
possible. This will become obvious when we discuss site navigation in Chapter 3,
Page Management – Part One, where there are quite a lot of queries needed for
complex menus.

Chapter 1
[
15
]
Some CMSes record their active plugins and other settings in the database, but it is a
waste to use a database to retrieve a setting that is not likely to change very often at
all, and yet is needed on every page.
Instead, we will record details of active plugins in the config file.
The configuration file
A configuration file (config file) is needed so that the CMS knows how to connect
to the database, where the site resources are kept, and other little snippets of
information needed to "bootstrap" the site.
The config file also keeps track of little bits of information which need to be used
on every page, such as what plugins are active, what the site theme is, and other
info that is rarely changed (if ever) and yet is referred to a lot.
The config file in our CMS is kept in a directory named
/.private
, which has a
.htaccess
file in it preventing the web server from allowing any access to it from
a browser.
The reason the directory has a dot at the front, instead of the usual "ww." prefix, is
that we don't want people (even developers!) editing anything in it by hand, and
files with a dot at the front are usually hidden from normal viewing by FTP clients,
terminal views, and so on.
It's really more of a deterrent than anything else, and if you really feel the need to
edit it, you can just go right in and do that (if you have access rights, and so on).
There are two ways a configuration file can be written:
•
Parse-able format. In this form, the configuration file is opened, and any
configuration variables are extracted from it by running a script which
reads it.
•
Executable format. In this form, the configuration file is an actual PHP
script, and is loaded using
include()
or
require()
.
Using a parseable file, the CMS will be able to read the file and if there is something
wrong with it, will be able to display an error on-screen. It has the disadvantage that
it will be re-parsed every time it is loaded, whereas the executable PHP form can be
compiled and cached by an engine such as Zend, or any other accelerator you might
have installed..

CMS Core Design
[
16
]
The second form, executable, needs to be written correctly or the engine will
break, but it has the advantages that it doesn't need to be parsed every time, if an
accelerator is used, and also it allows for alternative configuration settings to be
chosen based on arbitrary conditions (for example, setting the theme to a test one if
you add
?theme=test
to the URL).
Hello World
We've discussed the basics behind how a CMS's core works. Now let's build a
simple example.
We will not bother with the admin area yet. Instead, let's quickly build up a
visible example of the front-end.
I'm not going to go very in-depth into how to create a test site—as a developer,
you've probably done it many times, so this is just a quick reminder.
Setup
First, create a database. In my example, I will use the name "cmsdb" for the database,
with the username "cmsuser" and the password "cmspass".
You can use phpMyAdmin or some other similar tool to create the database. I prefer
to do it using the MySQL console itself.
mysql> create database cmsdb;
Query OK, 1 row affected (0.00 sec)
mysql> grant all on cmsdb.* to cmsuser@localhost identified by
'cmspass';
Query OK, 0 rows affected (0.00 sec)
mysql> flush privileges;
Query OK, 0 rows affected (0.00 sec)
Now, let's set up the web environment.
Create a directory where your CMS will live. In my case, I'm using a Linux machine,
and the directory that I'm using is
/home/kae/websites/cms/
. In your case, it could
be
/Users/~yourname/httpd/site
or
D:/wwwroot/cms/
, or whatever you end up
using. In any case, create the directory. We'll call that directory the "web root" when
referencing it in the future.

Chapter 1
[
17
]
Add the site to your Apache server's
httpd.conf
file. In my case, I use virtual hosts
so that I can have a number of sites on the same machine. I'm naming this one "cms":
<VirtualHost *:80>
ServerName cms
DocumentRoot /home/kae/websites/cms
</VirtualHost>
Restart the web server after adding the domain.
Note that we will be adding to the
httpd.conf
later in this chapter. I prefer to show
things in pieces, as it is easier to explain them as they are shown.
And now, make sure that your machine knows how to reach the domain. This is easy
if you're using a proper full domain like "myexample.cms.com", but for test sites, I
generally use one-word domain names and then tell the machine that the domain is
located on the machine itself.
To do this in Linux, simply add the following line to the
/etc/hosts
file on your
laptop or desktop machine:
127.0.0.1 cms
Note that this will only work if the test server is running on the machine you are
testing from (for example, I run my test server on my laptop, therefore
127.0.0.1
is correct). If your test server is not the machine you are browsing on, you need to
change
127.0.0.1
to whatever the machine's IP address is.
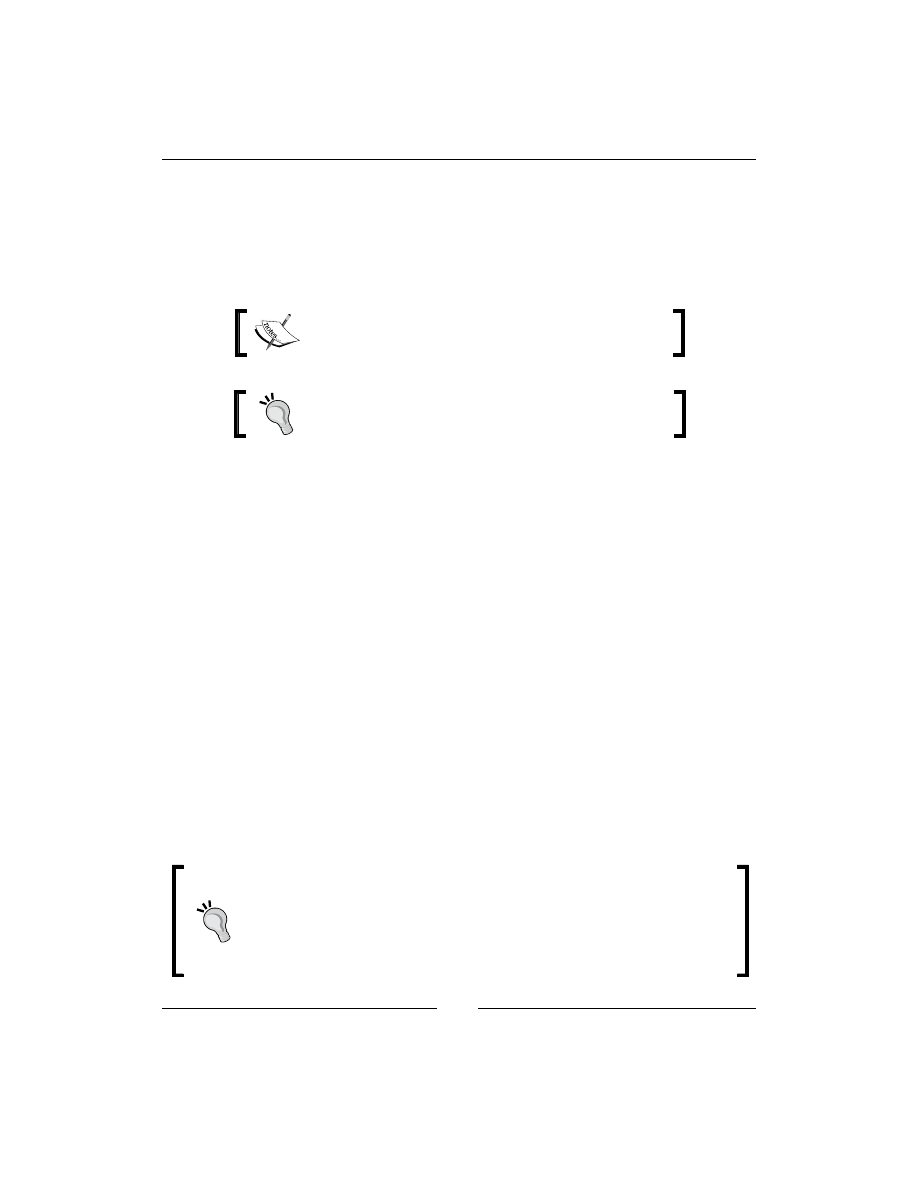
To test this, create an
index.html
file in the web root, and view it in your browser:
<html>
<body>
<em>it worked<em>
</body>
</html>
CMS Core Design
[
18
]
And here is how it looks:
If you have all of this done, then it's time to create the Hello World example.
We'll discuss writing an installer in the final chapter. This chapter is more about
"bootstrapping" your first CMS. In the meantime, we will do all of this manually.
In your web root, create a directory and call it
.private
. This directory will hold
the config file.
Create the file
.private/config.php
and add a basic config (tailored to your
own settings):
<?php
$DBVARS=array(
'username'=>'cmsuser',
'password '=>'cmspass',
'hostname'=>'localhost',
'db_name' =>'cmsdb'
);
This will be expanded throughout the book as we add new capabilities to the system.
For now, we only need database access.
Chapter 1
[
19
]
Note that I didn't put a closing ?> in that file. A common problem with
PHP (and other server-side web languages) happens if you accidentally
output empty space to the browser before you are finished outputting the
headers. As we are building a templated CMS, all output should happen
right at the end of the PHP script, when we're sure we're done compiling
the output.
If you place ?> terminators at the ends of your files, it's easy to
accidentally also place invisible break-lines (\n, \r) as well. Removing
the ?> removes that problem as well. There is no right or wrong here.
PHP is perfectly happy with files that end or don’t end with ?>, so it is up
to you whether you do so.
We don't want people looking into the
.private
directory at all, so we will add a
file,
.private/.htaccess
, to deny read-access to everyone:
order allow,deny
deny from all
Note that in order for
.htaccess
files to work, you must enable them in your
web-server's configuration.
The simplest way to do this is to set
AllowOverride
to
all
in your Apache
configuration file for the web directory, then restart the server.
An example using my own setup is as follows:
<Directory "/home/kae/websites">
Options All
AllowOverride All
Order allow,deny
Allow from all
</Directory>
You can tune this to your own needs by reading the Apache manual online.
CMS Core Design
[
20
]
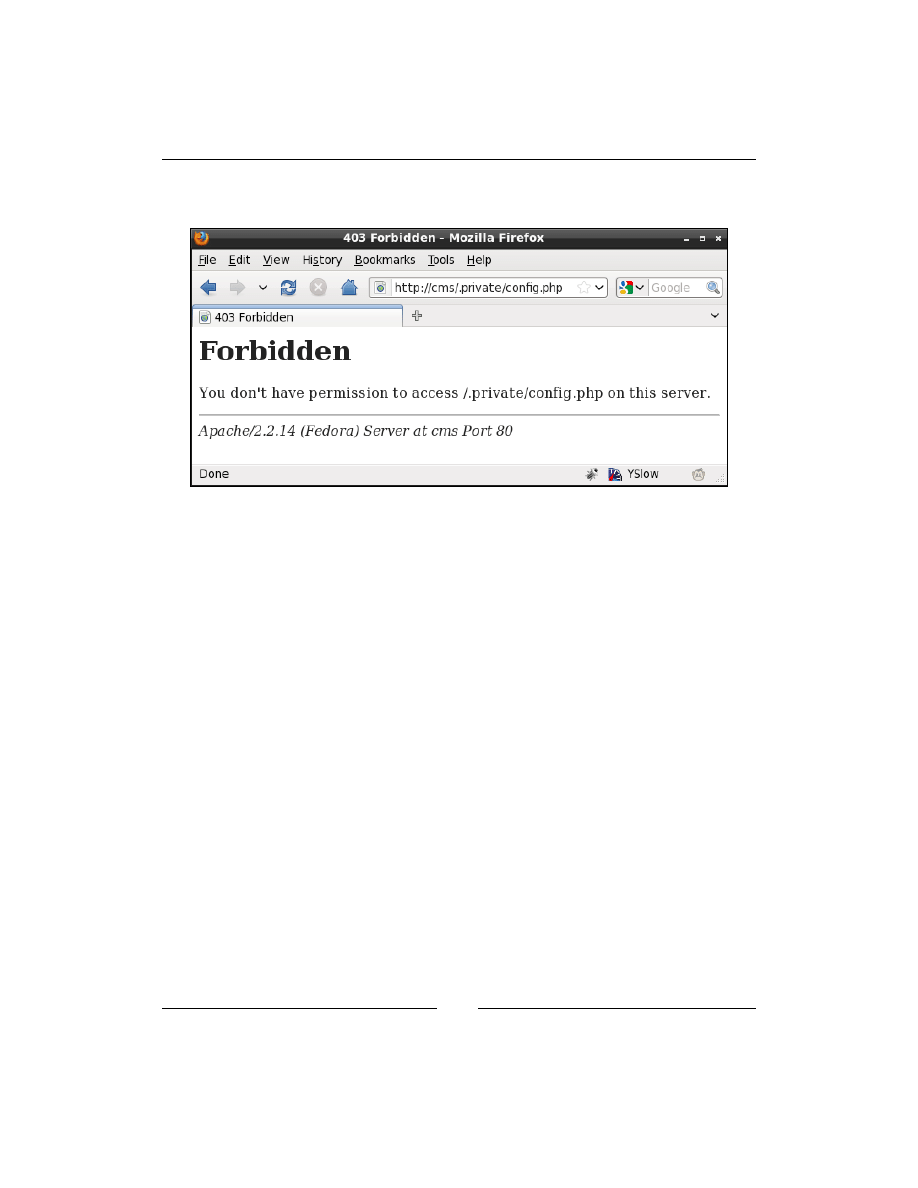
After doing this and restarting your web server, you will find that you can load up
http://cms/
but you can't load up
http://cms/.private/config.php
.
Next, let's start on the front controller.
Front controller
If you remember from what we discussed earlier, when a page is requested from the
CMS, it will go through the front-end controller, which will figure out what kind of
page it is, and render the appropriate HTML to the browser.
Note that although we are using a front controller, we are not using true MVC. True
MVC is very strict about the separation of the content, the model, and the view.
This is easy enough to manage in small coding segments, but when combining
HTML, JavaScript, PHP, and CSS, it’s a lot more tricky.
Throughout the book, we will try to keep the various parts separate, but given the
choice between complex or verbose code and simple or short code, we will opt for
the simple or short route.
Some CMSes prefer to use URLs such as
http://cms/index.php?page=432
, but
that's ugly and unreadable to the casual viewer.
We will do something similar, but disguise it such that the end-user doesn't realize
that's basically what's happening.
Chapter 1
[
21
]
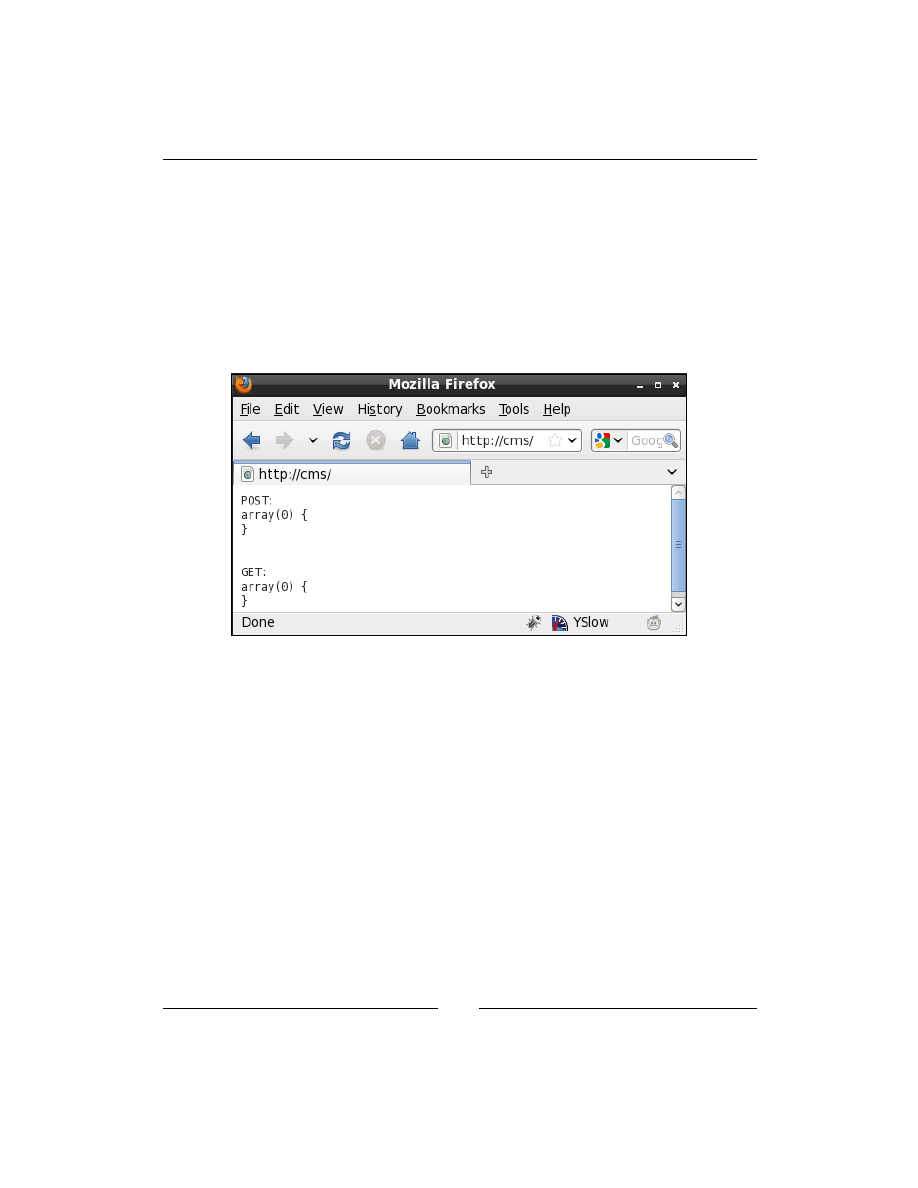
First off, delete the test
index.html
, and create this file as
index.php
:
<?php
header('Content-type: text/plain');
echo "POST:\n";
var_dump($_POST);
echo "\n\nGET:\n";
var_dump($_GET);
That displays any details that are sent to the server through
POST
or
GET
:
Now, let's do the redirect magic.
Create a
.htaccess
file in the web root:
<IfModule mod_deflate.c>
SetOutputFilter DEFLATE
</IfModule>
php_flag magic_quotes_gpc off
RewriteEngine on
RewriteRule ^([^./]{3}[^.]*)$ /index.php?page=$1 [QSA,L]
The
mod_deflate
bit compresses data as it is sent (if
mod_deflate
is installed).
We turn off "magic quotes" if they're enabled. Magic quotes are an old deprecated
trick used by early PHP versions to allow HTTP data to be used in strings on the
server without needing to properly escape them. This causes more problems than it
solves, so it is being removed from later PHP versions.
CMS Core Design
[
22
]
The rewrite section takes any page name requests which are three or more characters
in length and do not contain dots, and redirects those to
index.php
. The
QSA
part
tells Apache to also forward any query-string parts, and the
L
tells Apache that if this
rule matches, then don't process any more.
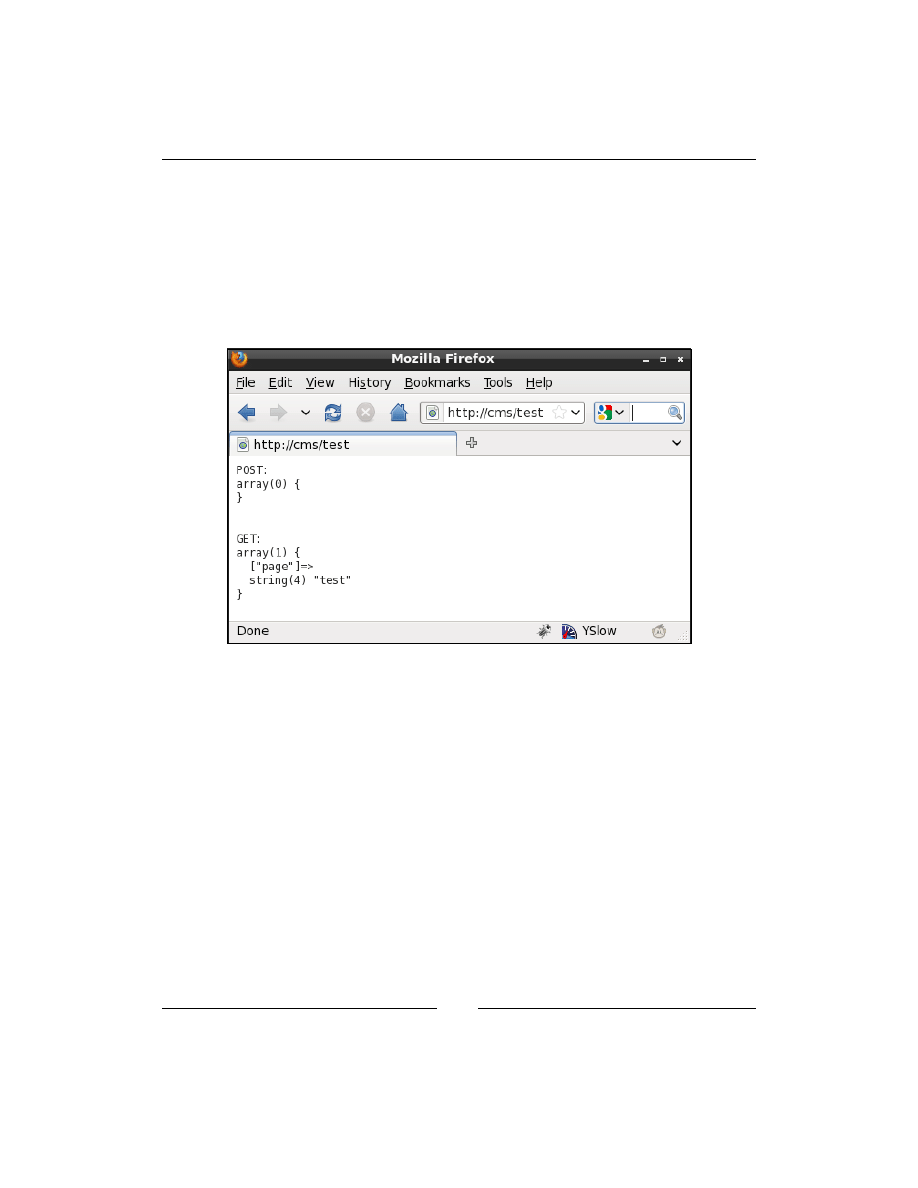
You can test that now.
Open your browser and go to
http://cms/test
, and you should see the
following output:
Notice the
GET
array now has the page name, which we can use in the next section to
retrieve data from the database.
Chapter 1
[
23
]
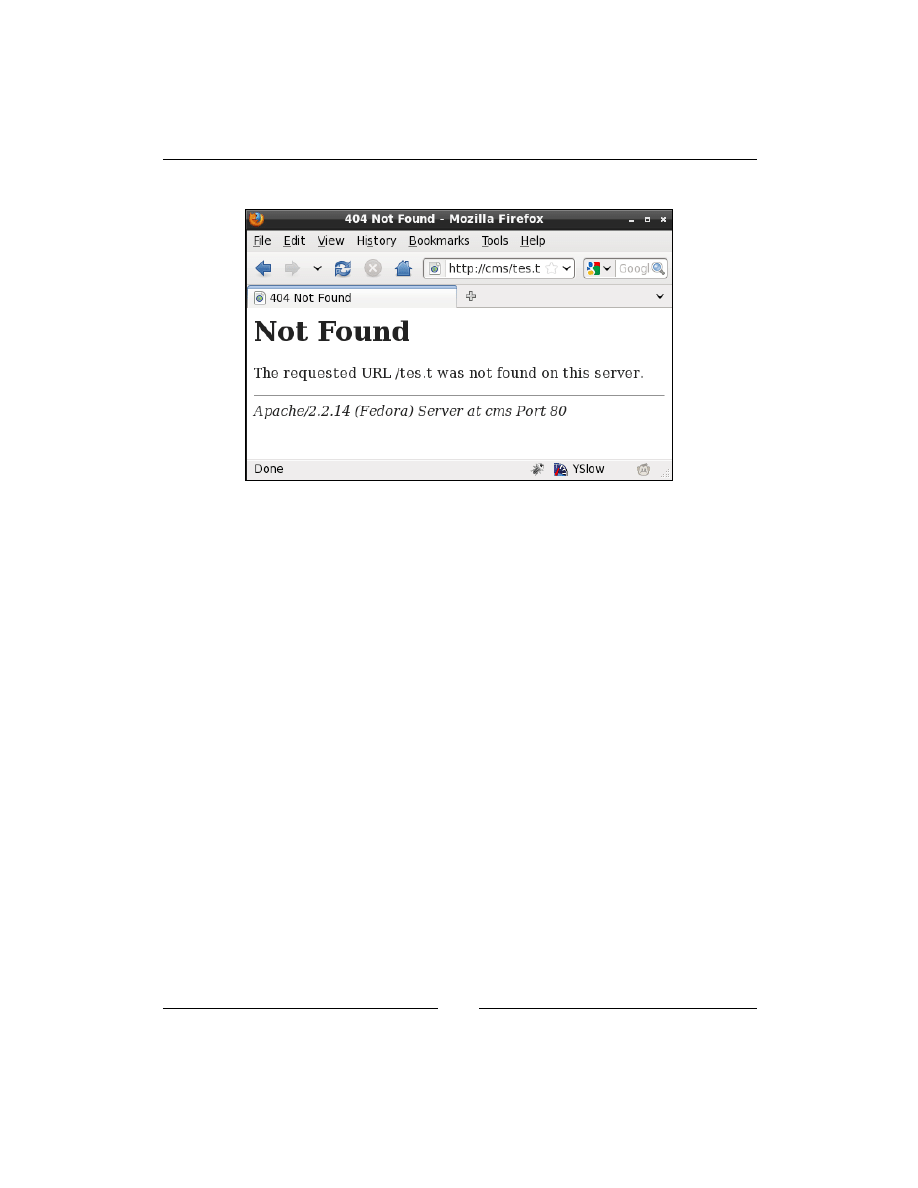
And if you put in a dot, you should get a standard 404 message:
We will discuss proper handling of 404 pages in Chapter 3, Page Management – Part
One.
Reading page data from the database
Okay—now that we can tell the CMS what page we're looking for, we need to write
code that will use that information and retrieve the right data from the database.
First, let's create the "pages" table in the database. Use your MySQL console or
phpMyAdmin to run the following:
CREATE TABLE `pages` (
`id` int(11) NOT NULL auto_increment,
`name` text,
`body` mediumtext,
`parent` int(11) default '0',
`ord` int(11) NOT NULL default '0',
`cdate` datetime default NULL ,
`special` bigint(20) default NULL,
`edate` datetime default NULL,
`title` text,
`template` text,
`type` varchar(64) default NULL,
`keywords` text,
`description` text,
`associated_date` date default NULL,

CMS Core Design
[
24
]
`vars` text,
PRIMARY KEY (`id`)
) DEFAULT CHARSET=utf8;
This is the most important table of the database. The various parts of it are:
Name
Description
id
The ID of the page in the database. Must be unique. This is an
internal reference.
name
When a URL http://cms/page_name is called, 'page_name' is
what's searched for in the database.
body
This is the main HTML of the page.
parent
In a hierarchical site, this references the 'parent' of the page. For
example, in the URL http://cms/deep/page, the 'page' entry's
parent field will be equal to the 'deep' entry's ID.
ord
When pages are listed, in what position of the list will this page
be shown.
cdate
Date that the page was created on.
special
This is used to indicate various 'special' aspects about a
page—such as whether the page is the site's home page, or is a
site map, or is a 404 handler, and so on. These are details that are
important enough that they should be built into the core instead of
as a plugin.
edate
Date that the page was last edited on.
title
This is shown in the browser's window header. When you search
online and find pages titled "Untitled Document", it's because the
author didn't bother changing this.
template
Which template (of the site skin) should this page use. We'll see
how this is used in a later chapter.
type
Type of page is this. For now, we won't use this, but it becomes
important once we start using plugins.
keywords
This is used by search engines.
description
Again, used by search engines.
associated_
date
Pages sometimes need to have a date associated with them. An
example is a news page, where the associated date may not be the
created or last-edited date.
vars
This is a 'miscellaneous' field, where plugins that need to add
values to the page can add them as a JSON object.
We'll discuss these further throughout the book. For now, we are more concerned
with simply installing a single page.
D
o
w
nl
oa
d
fr
om
W
ow
!
eB
oo
k
<
w
w
w
.w
ow
eb
oo
k.
co
m
>

Chapter 1
[
25
]
Insert two rows into the database:
mysql> insert into pages (name,body,special,type)
values('Home','<p>Hello World</p>',1,0);
Query OK, 1 row affected (0.00 sec)
mysql> insert into pages (name,body,special,type)
values('Second Page','<p>A Second Page</p>',0,0);
Query OK, 1 row affected (0.00 sec)
For the purposes of this test, we install two pages. The first one, "Home", has its
special
field set to
1
, which means "this is the home page". This means that if the
website is called without any particular page requested, then this page will be used
(in other words, we want
http://cms/
to equate to
http://cms/Home
).
In both cases, we set the
type
field to
0
, meaning "normal". When we add plugins
later, this field will become important.
There are four files involved in displaying the pages.
•
/index.php
: This is the front-end controller. It receives the request, loads up
any required files, and then displays the result.
•
/ww.incs/common.php
: This is a list of common functions for displaying
pages. For this demo, all it will do is load
basics.php
.
•
/ww.incs/basics.php
: A list of functions common to all CMS actions.
Includes database access and the setting up of basic variables.
•
/ww.php_classes/Page.php
: The
Page
class loads up page data from the
database.
The process flow is as follows:
1.
index.php
is called by the
mod_rewrite
script.
2.
index.php
then loads up
common.php
which also loads
basics.php
.
3.
index.php
initializes the page, causing
Page.php
to be loaded.
4.
index.php
then displays the body of the loaded page.
Create this file as
index.php
in the web root:
<?php
// { common variables and functions
include_once('ww.incs/common.php');
$page=isset($_REQUEST['page'])?$_REQUEST['page']:'';
$id=isset($_REQUEST['id'])?(int)$_REQUEST['id']:0;
// }

CMS Core Design
[
26
]
// { get current page id
if(!$id){
if($page){ // load by name
$r=Page::getInstanceByName($page);
if($r && isset($r->id))$id=$r->id;
unset($r);
}
if(!$id){ // else load by special
$special=1;
if(!$page){
$r=Page::getInstanceBySpecial($special);
if($r && isset($r->id))$id=$r->id;
unset($r);
}
}
}
// }
// { load page data
if($id){
$PAGEDATA=(isset($r) && $r)? $r : Page::getInstance($id);
}
else{
echo '404 thing goes here';
exit;
}
// }
echo $PAGEDATA->body;
This is a simplified version of what we'll have later on. Basically, we check to see
if the page ID is mentioned in the URL. If not, we load up the page using its name
(through the
Page
object) to figure out the ID.
When we have the page data imported into the
$PAGEDATA
variable, we simply
render it to the screen.
The
ww.incs/common.php
file is pretty bare at the moment:
<?php
require dirname(__FILE__).'/basics.php';
That will include common functions to do with page display. For now, all it does is
load up the
ww.incs/basics.php
file:
<?php
session_start();

Chapter 1
[
27
]
function __autoload($name) {
require $name . '.php';
}
function dbInit(){
if(isset($GLOBALS['db']))return $GLOBALS['db'];
global $DBVARS;
$db=new PDO('mysql:host='.$DBVARS['hostname']
.';dbname='.$DBVARS['db_name'],
$DBVARS['username'],
$DBVARS['password']
);
$db->query('SET NAMES utf8');
$db->num_queries=0;
$GLOBALS['db']=$db;
return $db;
}
function dbQuery($query){
$db=dbInit();
$q=$db->query($query);
$db->num_queries++;
return $q;
}
function dbRow($query) {
$q = dbQuery($query);
return $q->fetch(PDO::FETCH_ASSOC);
}
define('SCRIPTBASE', $_SERVER['DOCUMENT_ROOT'] . '/');
require SCRIPTBASE . '.private/config.php';
if(!defined('CONFIG_FILE'))
define('CONFIG_FILE',SCRIPTBASE.'.private/config.php');
set_include_path(SCRIPTBASE.'ww.php_classes'
.PATH_SEPARATOR.get_include_path());
First, we start off a session to record any data which may need to be passed from
page to page.
Next, we set an auto-load function so that we can use objects without explicitly
needing to
require()
their files. You can see that in action in the
index.php
where we used the
Page
object despite it not being explicitly included.
Next, we have three helper functions for databases. Because connecting to a database
takes up precious resources, it is a waste of time to connect to the database upon
every single request to the server. And so we connect only when the first database
request is called, and cache that connection for the rest of the script.

CMS Core Design
[
28
]
Next, we define a few constants:
•
SCRIPTBASE
: This is the directory that the CMS is located in
•
CONFIG_FILE
: This is the location of the configuration file
There will be a few more constants later when we get to themes and uploadable files.
Finally, we have the
ww.php_classes/Page.php
class file:
<?php
class Page{
static $instances = array();
static $instancesByName = array();
static $instancesBySpecial= array();
function __construct($v,$byField=0,$fromRow=0,$pvq=0){
# byField: 0=ID; 1=Name; 3=special
if (!$byField && is_numeric($v)){ // by ID
$r=$fromRow?
$fromRow:
($v?
dbRow("select * from pages where id=$v limit 1"):
array()
);
}
else if ($byField == 1){ // by name
$name=strtolower(str_replace('-','_',$v));
$fname='page_by_name_'.md5($name);
$r=dbRow("select * from pages where name like '"
.addslashes($name)."' limit 1");
}
else if ($byField == 3 && is_numeric($v)){ // by special
$fname='page_by_special_'.$v;
$r=dbRow(
"select * from pages where special&$v limit 1");
}
else return false;
if(!count($r || !is_array($r)))return false;
if(!isset($r['id']))$r['id']=0;
if(!isset($r['type']))$r['type']=0;
if(!isset($r['special']))$r['special']=0;
if(!isset($r['name']))$r['name']='NO NAME SUPPLIED';
foreach ($r as $k=>$v) $this->{$k}=$v;
$this->urlname=$r['name'];
$this->dbVals=$r;
self::$instances[$this->id] =& $this;

Chapter 1
[
29
]
self::$instancesByName[preg_replace(
'/[^a-z0-9]/','-',strtolower($this->urlname)
)] =& $this;
self::$instancesBySpecial[$this->special] =& $this;
if(!$this->vars)$this->vars='{}';
$this->vars=json_decode($this->vars);
}
function getInstance($id=0,$fromRow=false,$pvq=false){
if (!is_numeric($id)) return false;
if (!@array_key_exists($id,self::$instances))
self::$instances[$id]=new Page($id,0,$fromRow,$pvq);
return self::$instances[$id];
}
function getInstanceByName($name=''){
$name=strtolower($name);
$nameIndex=preg_replace('#[^a-z0-9/]#','-',$name);
if(@array_key_exists($nameIndex,self::$instancesByName))
return self::$instancesByName[$nameIndex];
self::$instancesByName[$nameIndex]=new Page($name,1);
return self::$instancesByName[$nameIndex];
}
function getInstanceBySpecial($sp=0){
if (!is_numeric($sp)) return false;
if (!@array_key_exists($sp,$instancesBySpecial))
$instancesBySpecial[$sp]=new Page($sp,3);
return $instancesBySpecial[$sp];
}
}
This may look complex at first glance, but it's not all that bad.
There are three methods,
getInstance
,
getInstanceByName
, and
getInstanceBySpecial
, each of which finds the requested page using its
own method:
•
getInstance
is used if you know the ID of the page.
•
getInstanceByName
is used if you know the name of the page. We'll expand
this later to include hierarchical names such as "
/sub/page/one
".
•
getInstanceBySpecial
is used if there's no particular page requested,
but it's a special case. For example, the front page has the value 1. This is
recorded as a bit mask, so for example, if a page is both the front page and
a sitemap (shown later), then it would be recorded as 3, which is 1 plus 2
(values of Home Page and Sitemap respectively).
CMS Core Design
[
30
]
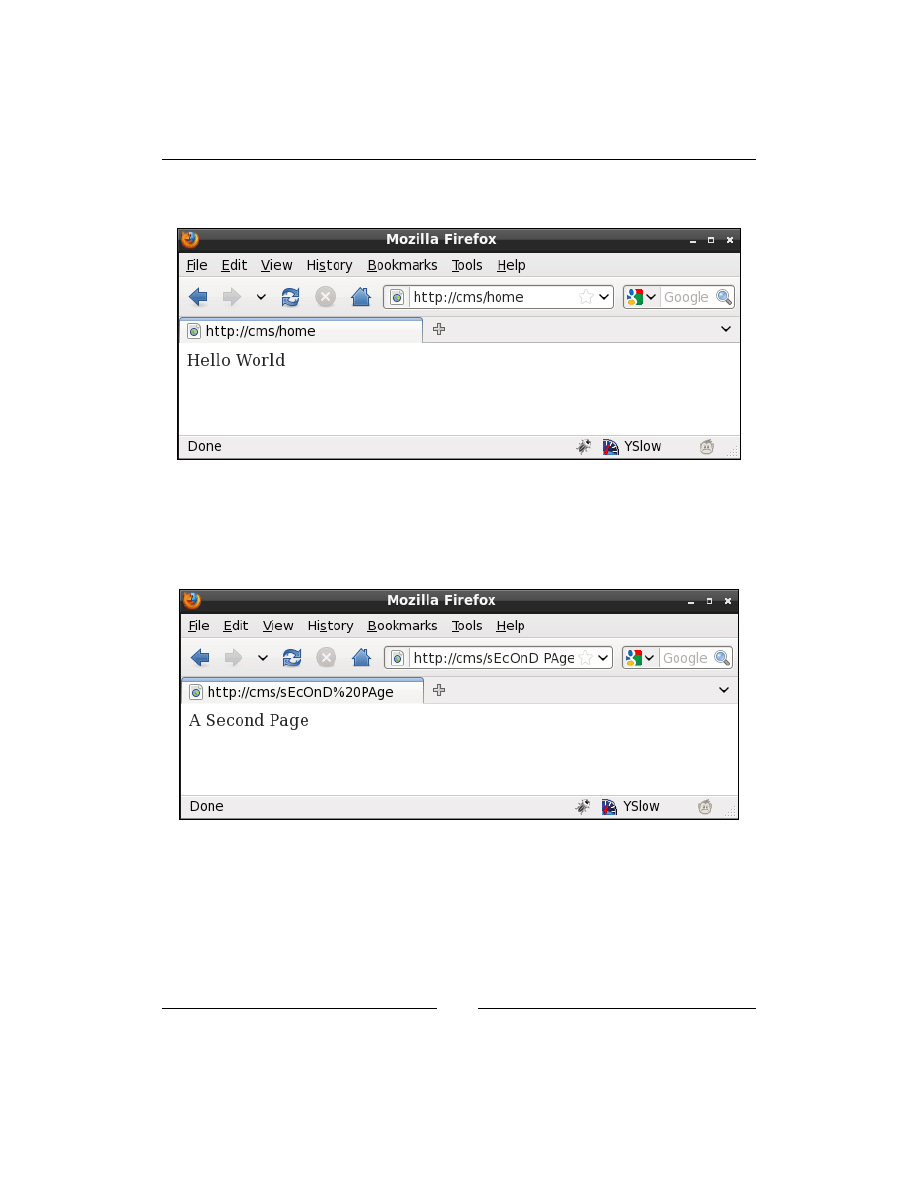
With this code in place, you can now load up pages. Here's an example using the
page name "Home", as seen in the next screenshot:
Notice that the request uses the lower-case home instead of the upper-case "Home".
Because MySQL is case-insensitive by default, and humans tend to not care whether
something is upper-case or lower-case, it makes sense to allow any case to be used at
all in the page name, as seen in the next screenshot:

Chapter 1
[
31
]
And in the case that no page name is given at all, the
index.php
file will load up
using the special "home page" case:
And finally, in the case that a page simply doesn't exist at all, we are able to trap that,
as seen in the next screenshot:
Because we can trap this 404, we can do some interesting things such as show a list of
possible matches that the reader can then choose from. This won't be handled in this
book, but feel free to either redirect to the root or a search page, or any other solution
you want.

CMS Core Design
[
32
]
Summary
In this chapter, we looked at how a CMS works, and built enough of the basics
that we could then view a "Hello World" page, in a few different ways, with
404s trapped as well.
In the next chapter, we will discuss how users and groups work, to allow
granular permissions, and we will build a login script, including forgotten
password functionality and captchas.

User Management
User management is one of the core functions of a CMS—the engine needs to know
who is allowed to edit documents, and needs a way to manage those users.
In this chapter, we will discuss the following points:
•
Overview of user management
•
What "roles" are, and how they work
•
Storage of user data in a database
•
Creation of a login system
•
Using the ReCaptcha tool
•
Forgotten-password management
•
Create a user-management system
We will cover the basics of role-management, but will not go in-depth into it, as none
of the features in the project CMS we are building will require it.
Types of users
As applications evolve from simple scripts to complex systems, developers tend to
add code and ideas as they occur and are needed.
In the beginning, when creating simple CMSs, this means that user access is confined
to administrator logins, as user logins are not usually necessary for simple systems
like news reporting, or image galleries.
So, the developer creates a table of administrators.
Later on, as the system evolves, it becomes necessary to create front-end users, so
that people can log in and contribute comments or content, or purchase items with a
user-based discount.

User Management
[
34
]
Again, because the system is slowly evolving, the developer now adds a table of
front-end users.
But things then get complex—what if we want administrators to correspond with
commenters, or someone who uses the system as a normal user but is also an admin?
One solution to this is to have one table of users, and a flag which states whether the
user is a normal user or an admin.
But then, we have another problem—what if you want some users to be admins, but
you want them to have access only to certain parts of the backend area? For example,
let's say the user is in charge of uploading news stories—that user needs access to the
admin area, but should not have access to, say, the user management areas.
Roles
The solution is not to use flags, but to use "roles" (also called "groups").
A role is a group of permissions which you can assign to a user. I will use the words
"role" and "group" interchangeably in the book—they essentially mean the same
thing when speaking of user rights.
For example, you might have a role such as "page editor", which includes the
following permissions:
•
Can create pages
•
Can delete pages
•
Can edit pages
You might have a user who is allowed to edit pages and also to edit online store
products, in which case you need to either have a single group which covers all those
permissions, or two groups ("page editor" and "online store editor"), and the user is a
member of both.
The latter case, multiple groups, is much easier to manage, and is in fact necessary;
as the number of possible combinations of permissions grows exponentially, more
roles are created.
Another important question is, where do these role names come from? Does an
administrator create them?
It's an interesting question, because the answer is both "yes" and "no".
If in order to create roles, you need to be a member of the "administrator" role, then
who creates the "administrator" role? What if the role is deleted?

Chapter 2
[
35
]
So we have a case where a role should not be created by an administrator.
On the other hand, we might have an online store, and want to assign a 5% discount
to all users who are members of the role "favored customers". Who creates that role?
It makes sense that the administrator should be allowed to create as many custom
roles as is needed. And it is impossible for a sensible application to be created which
predicts all the roles that will be required by a user-defined system.
So, we have a case where a role should be created by an administrator.
In these cases, it is okay if the admin deletes the "favored customers" role, but not if
the "administrator" role is deleted.
How do we get around this?
One solution, which we'll use in this book, is to prefix system-generated role names
with '_', and to disallow administrators from editing or creating role names that use
that scheme.
We will define two starter roles:
•
_administrators
: This role gives a user permission to enter the admin
part of a system
•
_superadministrators
: This role is a special one, which gives a user
total access
We will not build a role management system in this book, because none of the
other chapters will require it. We are discussing it here because it is better to
prepare for a future need than to stumble across the need and have to rewrite
a lot of hardcoded behavior.
D
o
w
nl
oa
d
fr
om
W
ow
!
eB
oo
k
<
w
w
w
.w
ow
eb
oo
k.
co
m
>

User Management
[
36
]
Database tables
To record the users in the database, we need to create the
user_accounts
table,
and the groups table to record the roles (groups).
First, here is the
user_accounts
table. Enter it using phpMyAdmin, or the console:
CREATE TABLE `user_accounts` (
`id` int(11) UNSIGNED NOT NULL AUTO_INCREMENT ,
`email` text,
`password` char(32) DEFAULT NULL,
`active` tinyint DEFAULT '0',
`groups` text,
`activation_key` varchar(32) DEFAULT NULL,
`extras` text,
PRIMARY KEY (`id`)
) DEFAULT CHARSET=utf8;
Name
Description
id
This is the primary key of the table. It's used when a reference to the user
needs to be recorded.
You can never tell how large an e-mail address should be, so this is recorded
as a text field.
password
This will always by 32 characters long, because it is recorded as an MD5
string.
active
This should be a Boolean (true/false), but there is no Boolean field in
MySQL. This field says whether the user is active or disabled. If disabled,
then the user cannot log in.
groups
This is a text field, again, because we cannot tell how long it should be. This
will contain a JSON-encoded list of group names that the user belongs to.
activation_
key
If the user forgets his/her password, or is registering for the first time,
then an activation key will be sent out to the user's e-mail address. This is a
random string which we generate using MD5.
extras
When registering a user, it is frequently desired that a list of extra custom
fields such as name, address, phone number (and so on) also be recorded.
This field will record all of those using JSON. If you prefer, you could call
this "usermeta", and adjust your copy of the code accordingly.
Note the usage of JSON for the groups field (or "column", if you prefer that word).
Deciding whether to fully normalize a database, or whether to combine some values
for the sake of speed, is a decision that often needs to be made.

Chapter 2
[
37
]
In this table, I've decided to combine the groups into one field for the sake of speed,
as the alternative is to use three table (the
user_accounts
table, the
groups
table,
and a linking table), which would be slower than what we have here.
If in the future, it becomes necessary to separate this out into a fully normalized
database, a simple upgrade script can be used to do this.
For now, populate the table with one entry for yourself, so we can test a login.
Remember that the password needs to be MD5-encoded.
Note that MD5, SHA1, and other hashing functions are all vulnerable to collision-
testing. If a hacker was to somehow get a copy of your database, it would be possible
to eventually find working passwords for each MD5 or SHA1 hash. Of course, for
this to happen, the hacker must first break into your database, in which case you
have a bigger problem.
Whether you use SHA1, MD5, bcrypt, scrypt, or any of the other hashing functions
is a compromise between your need for security (bcrypt being more secure), or speed
(MD5 and SHA1 being fast).
Here's an example insert line:
insert into user_accounts
(email,password,active,groups)
values(
'kae@verens.com',
md5('kae@verens.com|my password'),
1,
'["_superadministrators"]'
)
;
Notice that the groups field uses JSON.
If we used a comma-delimited text field, then that would make it impossible to have
a group name with a comma in it. The same is true of other character delimiters.
Also, if we used integer primary key references (to the groups table) then it would
require a table join, which takes time.
By putting the actual name of the group in the field instead of a reference to an
external table row, we are saving time and resources.
The password field is also very important to take note of.
We encrypt the password in the database using MD5. This is so that no one knows
any user's password, even the database administrator.

User Management
[
38
]
However, simply encrypting the password with MD5 is not enough. For example,
the MD5 of the word
password
is
5f4dcc3b5aa765d61d8327deb882cf99
. This may
look secure, but when I run a search for that MD5 string in a search engine, I get
28,300 results!
This is because there are vast databases online with the MD5s of all the
common passwords.
So, we "salt" the MD5 by adding the user's e-mail address to it, which causes
the passwords to be encrypted differently for each user, even if they all use the
same password.
This gets around the problem of users using simple passwords that are easily
cracked by looking up the MD5. It will not stop a determined hacker who is willing
to devote vast resources to the effort, but as I said earlier, if someone has managed to
get at the database in the first place, you probably have bigger problems.
Now, let's put this table to use by creating the login form and the login mechanism.
Admin area login page
In Chapter 1, CMS Core Design, we discussed a number of different systems used by
CMSs to allow administrators to log in. Some have the administrator log in using the
same form as a normal user would log in with, some have totally separate domains
dedicated to administration, and some even have dedicated desktop programs.
We will use a defined directory within the CMS structure,
/ww.admin
. This is
how CMSs such as Joomla! or WordPress manage administration. In Joomla!,
administrators log into
/administrator
, and in WordPress, administrators log
into
/wp-admin
.
How the administration pages will work is that whenever a page is loaded, it checks
first to see if you are logged in as an admin, and if not, you are shown a login page.
So, create the directory
ww.admin
in your web root, and let's create a page called
index.php
in that directory:
<?php
require 'admin_libs.php';
echo 'you are logged in!';

Chapter 2
[
39
]
The file
/ww.admin/admin_libs.php
will be included by every page in the admin
area. Create that now:
<?php
require $_SERVER['DOCUMENT_ROOT'].'/ww.incs/basics.php';
function is_admin(){
if(!isset($_SESSION['userdata']))return false;
return (
isset(
$_SESSION['userdata']['groups']['_administrators']
) ||
isset(
$_SESSION['userdata']['groups']['_superadministrators']
)
);
}
if(!is_admin()){
require SCRIPTBASE.'ww.admin/login/login.php';
exit;
}
So what happens here is that each time the
admin_libs.php
file is loaded, it checks
first that a
userdata
session variable has been created and that it contains either the
group
_administrators
or
_superadministrators
. Remember,
_administrators
have access to the admin area, and
_superadministrators
have total access—there
is not much of a difference in this book's project, but the difference is important
enough that we should "future-proof" the system by using this difference now.
If the function
is_admin()
returns
false
, then the browser is sent a login page,
which we'll create next.
Create a directory
/ww.admin/login
, and create the file
login.php
in it:
<html>
<head>
<title>Login</title>
<link rel="stylesheet" type="text/css"
href="/ww.admin/login/login.css" />
</head>
<body>
<div id="header"></div>
<div class="tabs">,
<ul>
<li><a href="#tab1">Login</a></li>
<li><a href="#tab2">Forgotten Password</a></li>

User Management
[
40
]
</ul>
<div id="tab1">
<form method="post"
action="/ww.incs/login.php?redirect=<?php
echo $_SERVER['PHP_SELF'];
?>">
<table>
<tr><th>email</th><td>
<input id="email" name="email" type="email" />
</td></tr>
<tr><th>password</th><td>
<input type="password" name="password" />
</td></tr>
<tr><th colspan="2" align="right">
<input name="action" type="submit"
value="login" class="login" />
</th></tr>
</table>
</form>
</div>
<div id="tab2">
<form method="post"
action="/ww.incs/forgotten-password.php?redirect=<?php
echo $_SERVER['PHP_SELF'];
?>">
<table>
<tr><th>email</th><td>
<input id="email" type="text" name="email" />
</td></tr>
<tr><th colspan="2" align="right">
<input name="action" type="submit"
value="resend my password" class="login" />
</th></tr>
</table>
</form>
</div>
</div>
</body>
</html>
A
login.css
file is referenced in that source. The contents of it are not important
to what we're doing, so we won't bother repeating it here. The CSS and images
are available to download from Packt's website along with all source code from
this project.
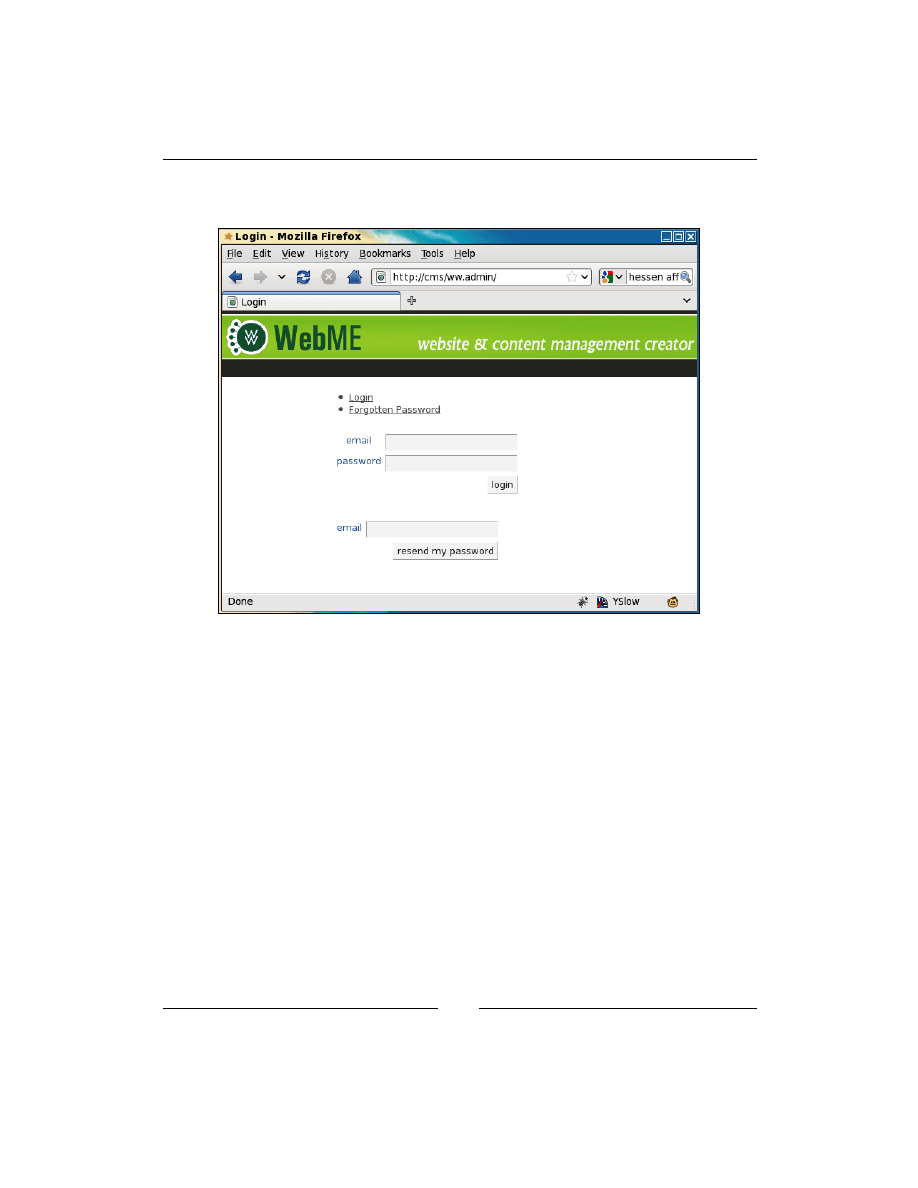
Chapter 2
[
41
]
There are two forms in there; the first is for logging in, and the second is for
reminding the user of the password, if the password has been forgotten.
Notice that we ask for the e-mail address of the user, and not a username.
When people choose usernames, if there are a lot of users in the system, it is likely
that the username that the person wants in the first place is already taken. For
example, I like to log in everywhere as "kae". Unfortunately, in very large systems,
that username can be already taken. This would be a bigger problem for people
named "James" or "John", and so on.
E-mails, though, are unique. You cannot have two people logged in who have the
same e-mail address.
Another reason is that e-mail addresses tend not to be forgotten. People generally
have only one or two e-mail addresses that they use. If it's not one, it's the other.
Yet another reason is that if you have forgotten your password, then a reminder
service can be used to send a "reset" URL to the registrant's e-mail account.
If you go a very long time without forgetting the password, then it is possible that by
the time you need the reminder, you will no longer have access to the e-mail account
you used to create the account–you may have changed company, or some other reason.

User Management
[
42
]
But, if you're using your e-mail address as the account name, and realize you are
about to lose access to it, then the very act of logging in will remind you that you
need to change the user account details before you forget the password.
Another thing to note about the HTML is the target of the forms.
We have a single login point,
/ww.incs/login.php
, which can be used by both
administrators and normal users. The redirect parameter is used to tell the server
where the browser should be sent after the login is done.
We're not quite done yet with that file. The screen is a little bit bland. We can use our
first piece of jQuery to liven it up a bit using tabs.
Change the header by adding these highlighted lines:
<title>Login</title>
<script src="http://ajax.googleapis.com/ajax/libs/jquery/1.4.2/
jquery.min.js"></script>
<script src="http://ajax.googleapis.com/ajax/libs/jqueryui/1.8.0/
jquery-ui.min.js"></script>
<link rel="stylesheet" type="text/css" href="http://ajax.
googleapis.com/ajax/libs/jqueryui/1.8.0/themes/south-street/jquery-ui.
css" />
<script src="/ww.admin/login/login.js"></script>
<link rel="stylesheet" type="text/css"
href="/ww.admin/login/login.css" />
The first three highlighted lines load up jQuery and jQuery UI from Google's
Content Delivery Network (CDN), and load up a jQuery UI stylesheet as well.
Some people don't like to use Google's CDN, so you may want to download the
jQuery and jQuery UI files and link to them on your local server. I've never had a
problem using Google's CDN.
Linking to a CDN has some advantages, such as quicker access in cases where the
browser is far from the site (the CDN copy may be physically closer to the browser,
thus causing less network lag), less bandwidth usage for your own site, and less files
to maintain on your own system.
When building a large application, there's a lot of "widget" functionality (tabs, auto
completes, sliders, drag/drop, and so on) which may be used in various places. The
jQuery UI project provides a lot of these, and is extremely simple to use.
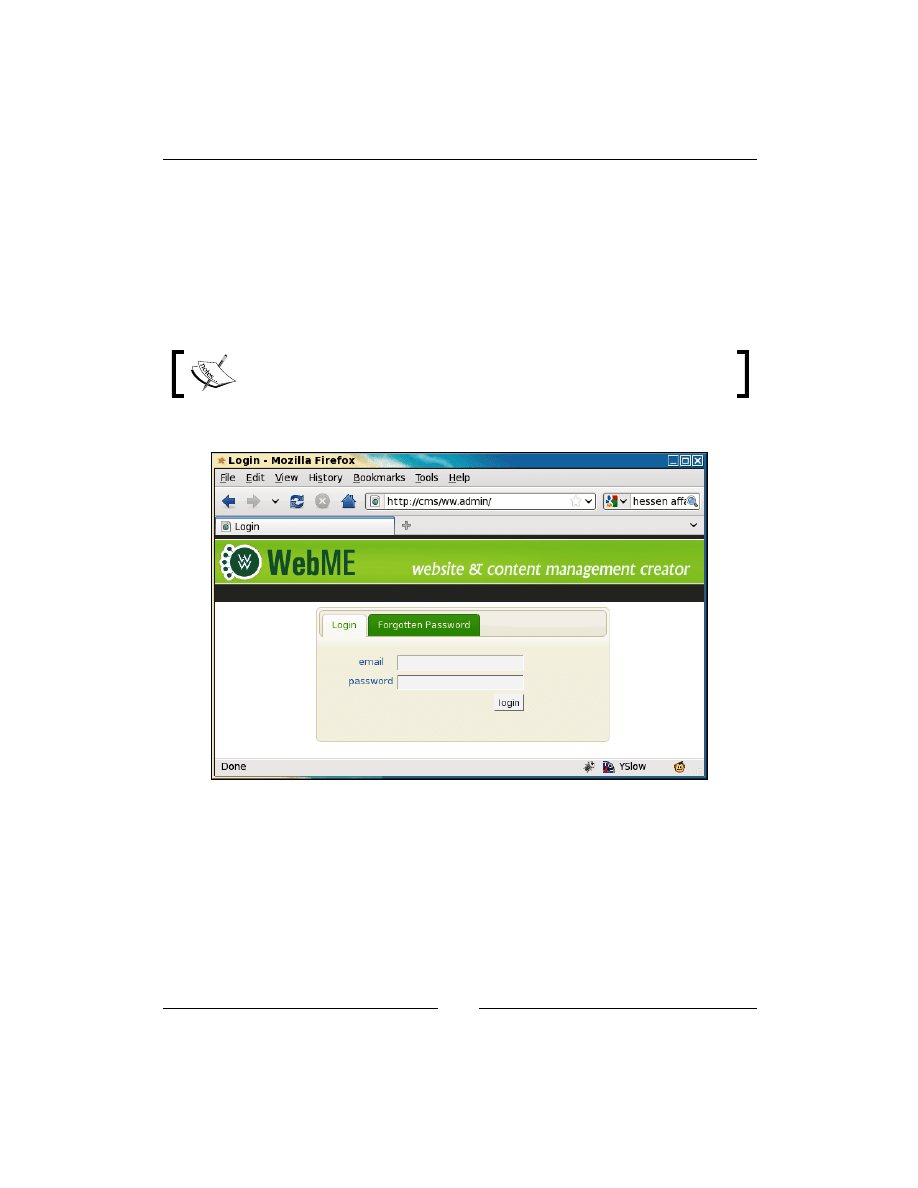
Chapter 2
[
43
]
The last line is a link to a local script, which we'll use to set up the tabs. Create the file
/ww.admin/login/login.js
:
$(function(){
$('.tabs').tabs();
});
This small piece of code tells jQuery: "When the page is finished loading, run the
function
.tabs()
against all elements with the class
tabs
".
Wrapping a function inside $() is equivalent to running $(document).
ready()
with the function as a parameter.
After the browser runs that tiny piece of code, the Login page now looks like this:
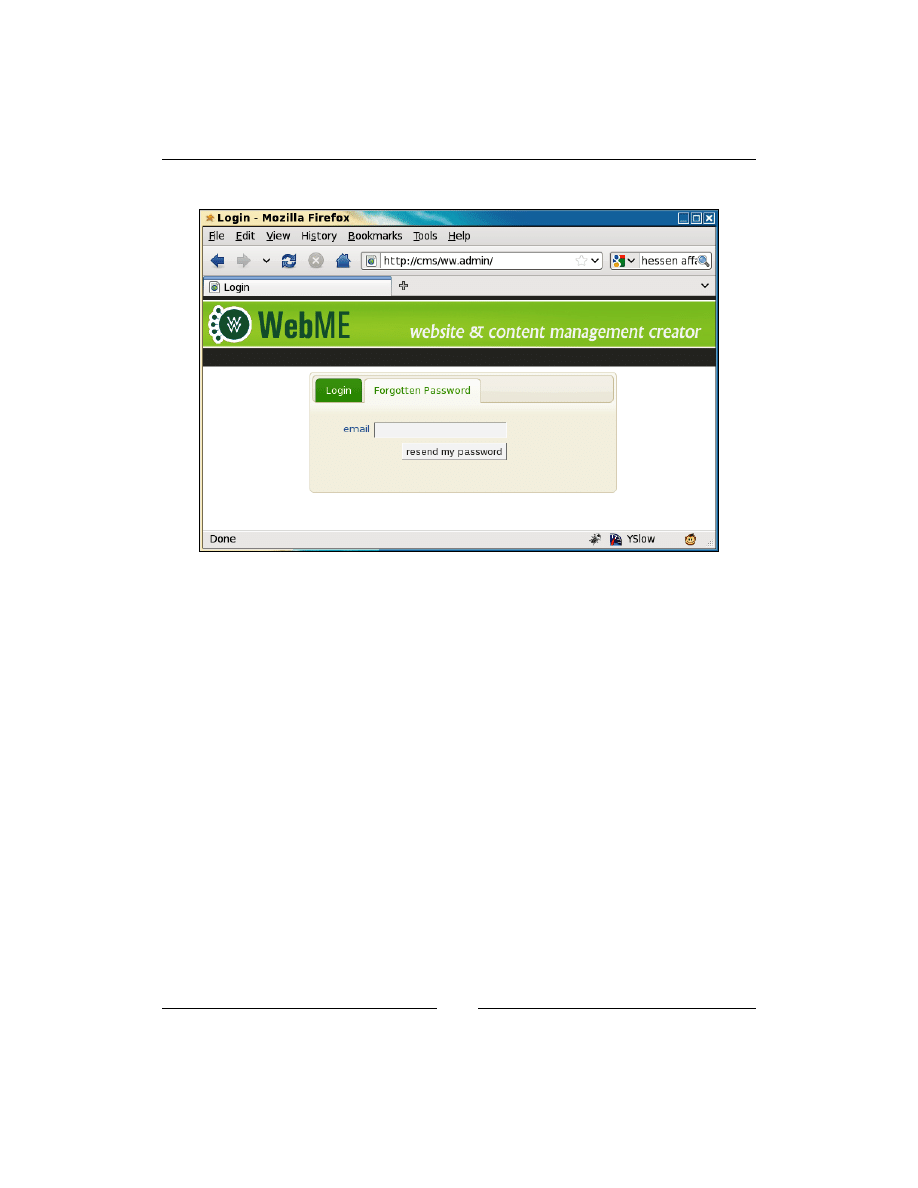
User Management
[
44
]
And if the Forgotten Password tab is clicked, then it appears as follows:
For a full explanation of how tabs work, see the jQuery UI website—
http://
jqueryui.com/demos/tabs/
.
There is one more thing that is needed before the login form is complete.
In order to stop malicious robot programs from trying to log in using brute force
to guess the password, and also to stop similar robots from sending out reminder
e-mails to you and resetting your password, we will use a "captcha" to verify that
whoever is filling in the form is human.
A captcha is a picture of some text. It is obscured slightly by deforming the image
or adding static, and so on, so that it is not easy for a robot to decipher it using an
optical character recognition program.
Generating captchas is not difficult—there are many scripts online that do it for you.
However, if you use a script that you are not constantly tweaking, then it is possible
that someone will eventually find a way to decipher the captcha automatically.
A good solution is to use the reCAPTCHA library (
http://recaptcha.net/
). This
is a well-known captcha program which generates images based on photographs of
old books. It also provides alternative audio from old radio shows in case the user
cannot see clearly.

Chapter 2
[
45
]
Download the latest
recaptcha-php
script from
http://code.google.com/p/
recaptcha/
—at the time of writing, this is
recaptcha-php-1.10.zip
—and unzip it
in
/ww.incs
so you have a directory called
/ww.incs/recaptcha-php-1.10
. If you
found a newer one, replace
-1.10
with whatever is appropriate.
You will also need to get an API key. This is a string of characters which identifies
you to the reCAPTCHA engine when it's used. Do this by creating a user account at
http://recaptcha.net/
. If you plan on using your CMS on more than one domain,
then make sure to tick the Enable this key on all domains check-box while registering.
After registering, you will be given a "public key" and a "private key".
We will record the keys in a file named
/ww.incs/recaptcha.php
:
<?php
require SCRIPTBASE
.'ww.incs/recaptcha-php-1.10/recaptchalib.php';
define('RECAPTCHA_PRIVATE',''); // place private key here
define('RECAPTCHA_PUBLIC',''); // place public key here
Replace the second parameters of these lines with your keys We've placed this file in
the
/ww.incs/
directory so that it can be accessed by any code that needs it, whether
it's in the admin section or the public section. Also, as the file is named
captcha.
php
and doesn't mention the version number of the library, installing a new copy of
the reCAPTCHA library involves simply unzipping it in the
/ww.incs
directory and
changing the given
require
line to match it.
At the top of the
/ww.admin/login/login.php
page, add these highlighted lines:
<?php
require SCRIPTBASE.'ww.incs/recaptcha.php';
$captcha=recaptcha_get_html(RECAPTCHA_PUBLIC);
?>
<html>
<head>
And in the login form's table, add this just before the submit button's row:
<tr id="captcha">
<th>captcha</th>
<td><?php echo $captcha; ?></td>
</tr>
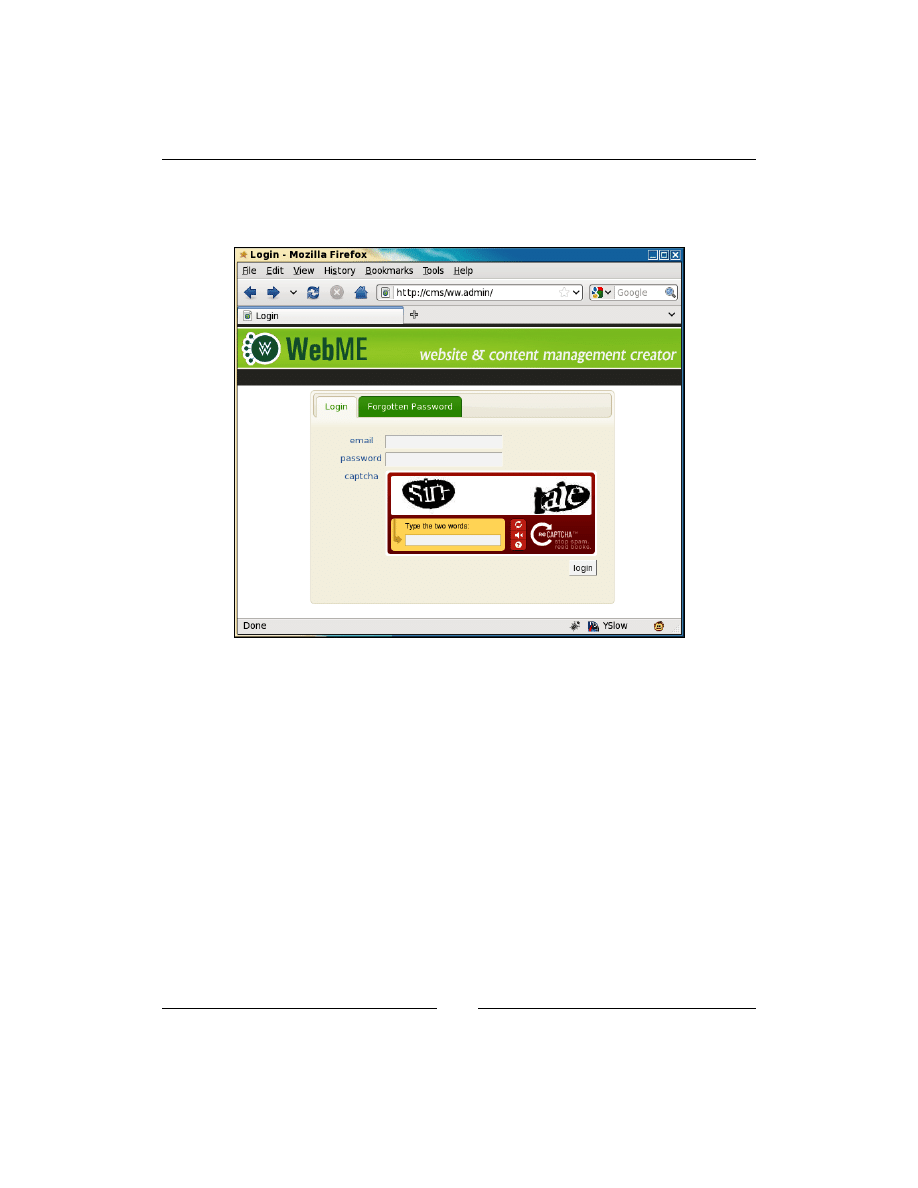
User Management
[
46
]
When the given code is rendered, the captcha writes some HTML which imports an
external JavaScript file, and if no JavaScript is available to the browser, then it also
shows an
iframe
with alternative HTML in it.
Because we have two forms on the page, we should logically want two captchas as
well. Unfortunately, you cannot have two captchas on the same page, as each image
will be different (they're never cached), and each new captcha invalidates the old
one. So, if you had two, only one of them would work.
So, what we will do is add a little bit of jQuery that moves the captcha whenever a
tab is clicked.
To do this, rewrite the
/ww.admin/login/login.js
file completely:
$(function(){
// remove the captcha's script element
$('#captcha script').remove();
// set up tabs
$('.tabs').tabs({
show:function(event,ui){
// if the captcha is already here, return
if($('#captcha',ui.panel).length)return;
// move the captcha into this panel

Chapter 2
[
47
]
$('table tr:last',ui.panel).before($('#captcha'));
}
});
});
When the page is loaded, the given script runs.
First, it removes the captcha's
<script>
element. Otherwise, when it is moved, the
script will run again, breaking the captcha.
Then, we add some code which tells jQuery UI that whenever a tab panel is shown,
we want to check it for the captcha row. If the row doesn't exist, then move it from
where it is, to the present panel.
The highlighted line handles the moving.
Okay! We are finally finished with the login forms. Now, let's handle the actual login.
Logging in
It is tempting to have a separate login script for the admin and normal users, but this
can cause problems in the future if you ever change how logins work.
In the form that we created, we set the action to
/ww.incs/login.php
, with an
added parameter named "redirect".
What's involved with a login is as follows:
•
Verify that the submitted captcha is correct (we don't want robots logging
in!)
•
Verify there is an entry in
user_accounts
where the submitted e-mail
address and password are matched
•
If all is well, set a session variable named
userdata
which holds the user's
information (saves looking it up in the database all the time)
•
Send the browser to wherever the redirect link pointed it, or to the root of the
site if none is provided, or if the provided one is invalid
•
If anything goes wrong, still send the browser on to the redirect page, but
also give an error message as an added parameter

User Management
[
48
]
Some of the code for the login will also be needed for other aspects of logins, such
as logouts and forgotten passwords, so we'll start this by creating
/ww.incs/login-
libs.php
:
<?php
require 'basics.php';
$url='/';
$err=0;
function login_redirect($url,$msg='success'){
if($msg)$url.='?login_msg='.$msg;
header('Location: '.$url);
echo '<a href="'.htmlspecialchars($url).'">redirect</a>';
exit;
}
// set up the redirect
if(isset($_REQUEST['redirect'])){
$url=preg_replace('/[\?\&].*/','',$_REQUEST['redirect']);
if($url=='')$url='/';
}
All of the login functions will require a redirect after the action, so this creates a
function for handling the redirect, and does some simple validation on the requested
redirect_url
, such as removing any query string parameters.
If the parameters were not removed, it is possible an admin on your CMS might be
fooled into going to a link such as
http://cms/ww.admin/?delete-all-pages
,
and after the login, they might be redirected back to that (fake, just an example) URL
which would then proceed and delete all pages.
So, we neutralize this problem by removing anything past a
?
or
&
.
Create a file,
/ww.incs/login.php
, containing the following code:
<?php
require 'login-libs.php';
login_check_is_email_provided();
// check that the password is provided
if(!isset($_REQUEST['password']) || $_REQUEST['password']==''){
login_redirect($url,'nopassword');
}
login_check_is_captcha_provided();
login_check_is_captcha_valid();
D
o
w
nl
oa
d
fr
om
W
ow
!
eB
oo
k
<
w
w
w
.w
ow
eb
oo
k.
co
m
>

Chapter 2
[
49
]
// check that the email/password combination matches a row in the user
table
$password=md5($_REQUEST['email'].'|'.$_REQUEST['password']);
$r=dbRow('select * from user_accounts where
email="'.addslashes($_REQUEST['email']).'" and
password="'.$password.'" and active'
);
if($r==false){
login_redirect($url,'loginfailed');
}
// success! set the session variable, then redirect
$_SESSION['userdata']=$r;
$groups=json_decode($r['groups']);
$_SESSION['userdata']['groups']=array();
foreach($groups as $g)$_SESSION['userdata']['groups'][$g]=true;
if($r['extras']=='')$r['extras']='[]';
$_SESSION['userdata']['extras']=json_decode($r['extras']);
login_redirect($url);
This checks all inputs, sets a session variable if the login is valid, and in all cases
does a redirect to send the browser where it was going. The
$_REQUEST
super-global
variable is generated by merging the
$_POST
and
$_GET
variables.
There are a number of functions referenced in there that are not defined. We define
those in
/ww.incs/login-libs.php
so they can be reused by the other login scripts
(add the functions to the end of the file):
// check that the email address is provided and valid
function login_check_is_email_provided(){
if(
!isset($_REQUEST['email']) || $_REQUEST['email']==''
|| !filter_var($_REQUEST['email'], FILTER_VALIDATE_EMAIL)
){
login_redirect($GLOBALS['url'],'noemail');
}
}
// check that the captcha is provided
function login_check_is_captcha_provided(){
if(
!isset($_REQUEST["recaptcha_challenge_field"]) || $_
REQUEST["recaptcha_challenge_field"]==''
|| !isset($_REQUEST["recaptcha_response_field"]) || $_
REQUEST["recaptcha_response_field"]==''
){

User Management
[
50
]
login_redirect($GLOBALS['url'],'nocaptcha');
}
}
// check that the captcha is valid
function login_check_is_captcha_valid(){
require 'recaptcha.php';
$resp=recaptcha_check_answer(
RECAPTCHA_PRIVATE,
$_SERVER["REMOTE_ADDR"],
$_REQUEST["recaptcha_challenge_field"],
$_REQUEST["recaptcha_response_field"]
);
if(!$resp->is_valid){
login_redirect($GLOBALS['url'],'invalidcaptcha');
}
}
You'll also have noticed that the
login_redirect()
function has two parameters;
the first is the URL to redirect to, and the second is a text code which designates a
message to be shown.
Now let's make use of that message code.
First create a file
/ww.incs/login-codes.php
:
<?php
$login_msg_codes=array(
'success'=>'login successful.',
'noemail'=>'no email address provided, or the email'
.' address was invalid.',
'nopassword'=>'no password provided.',
'nocaptcha'=>'no captcha provided.',
'invalidcaptcha'=>'captcha invalid.',
'loginfailed'=>'login incorrect. if you\'ve forgotten'
.' your password, please use the Forgotten Password form.',
'permissiondenied'=>'your user account does not have'
.' permission for this area.'
);
These correspond to the
$msg
codes in the login script.
I've added two, for those cases where a person has logged in as a normal user but
doesn't have access permission for the admin area (or another area where the user
doesn't have the required role).
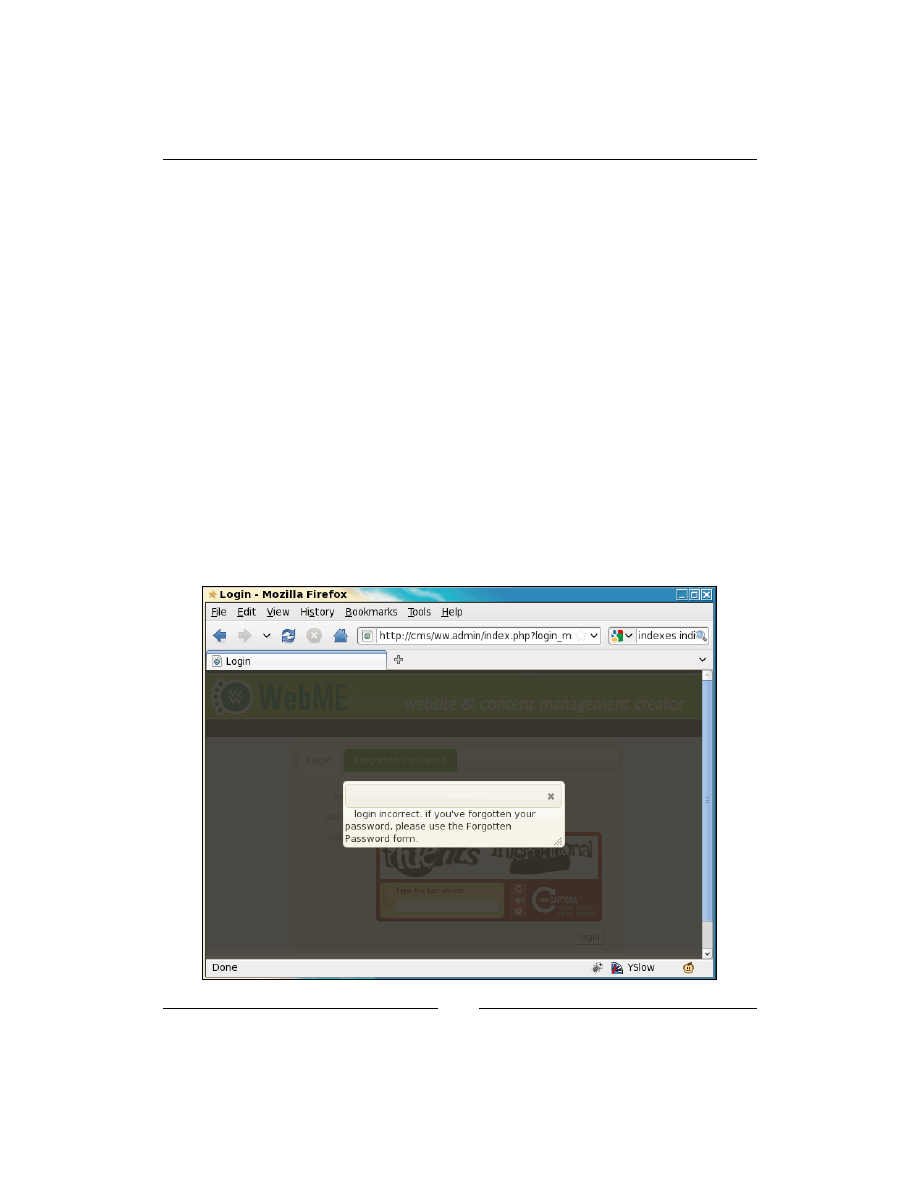
Chapter 2
[
51
]
Let's use the codes. Edit the
/ww.admin/login/login.php
file and add the following
highlighted lines:
<div id="header"></div>
<?php
if(isset($_REQUEST['login_msg'])){
require SCRIPTBASE.'ww.incs/login-codes.php';
$login_msg=(int)$_REQUEST['login_msg'];
if(isset($login_msg_codes[$login_msg])){
echo '<script>$(function(){$("<strong>'
.htmlspecialchars($login_msg_codes[$login_msg])
.'</strong>").dialog({modal:true});});</script>';
}
}
?>
<div class="tabs">
We first check that a valid message code was sent, then display it as a modal dialog
using jQuery UI's
.dialog
plugin.
A visitor could simply change the URL's
login_msg
value to make the various
messages appear, but it would be pointless of them to do that as it would not affect
their user status.

User Management
[
52
]
You can change the dialog content so it has some prettier HTML if you wish.
Now, what if a user is logged in, but doesn't have admin rights?
We'll start testing this one by adding a user to the database with no groups:
mysql> insert into user_accounts
(email,password,active,groups)
values('user@verens.com',
md5('user@verens.com|userpass'),1,'[]');
Query OK, 1 row affected (0.03 sec)
Now, we will change the
/ww.admin/admin_libs.php
file—remember that it has a
function in it called
is_admin()
. Change that function to this:
function is_admin(){
if(!isset($_SESSION['userdata']))return false;
if(
isset($_SESSION['userdata']['groups']['_administrators']) ||
isset(
$_SESSION['userdata']['groups']['_superadministrators'])
)return true;
if(!isset($_REQUEST['login_msg'])) $_REQUEST['login_
msg']='permissiondenied';
return false;
}
So in this case, we know that the user is logged in, and doesn't have admin rights, so
we set the
$_REQUEST['login_msg']
to
'permissiondenied'
if there is not already
another message set.
We avoid overwriting an existing message because that existing message has
priority. For example, a logged-in user trying to log in as an admin user would not
find the "permission denied" message very useful when the actual problem is that
they got the password wrong.
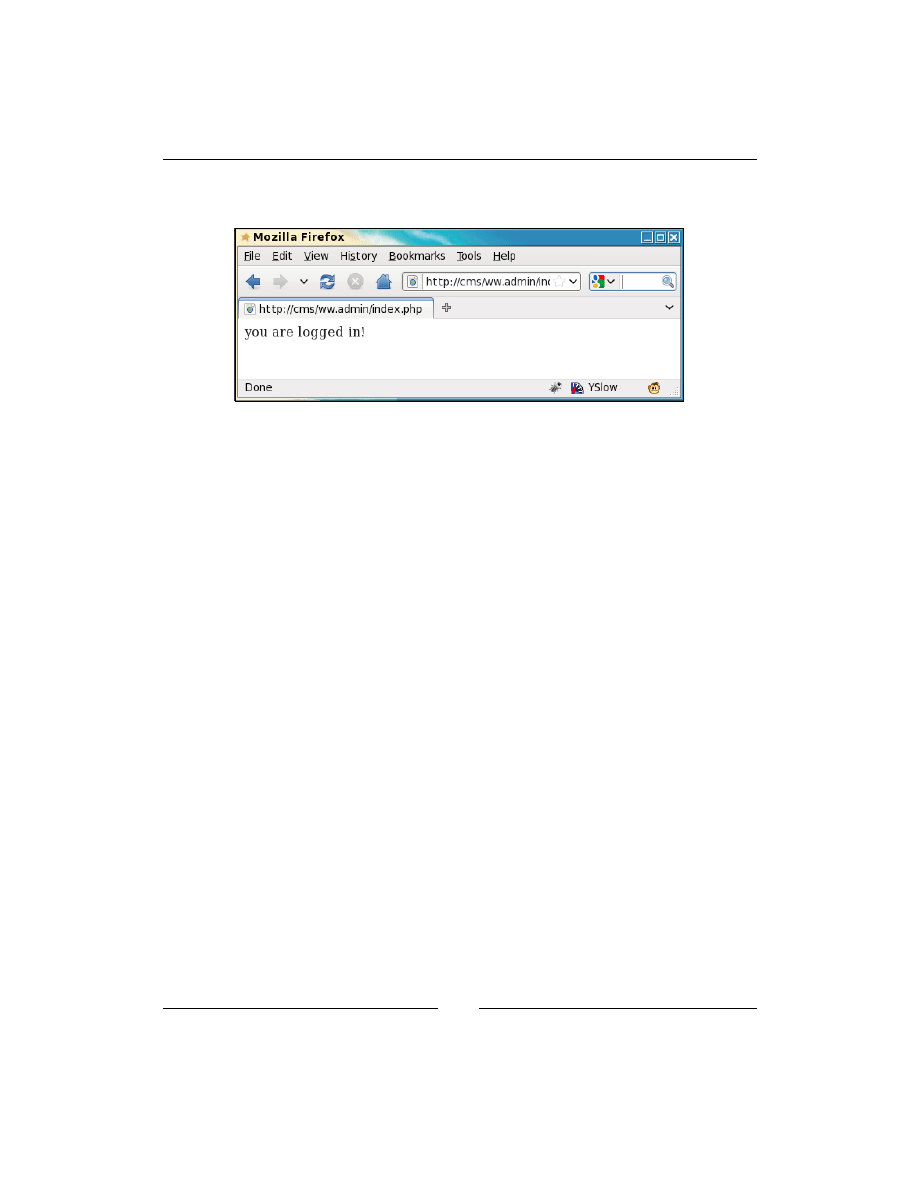
Chapter 2
[
53
]
Okay—so now do the login and use your proper admin details, filling in the captcha
correctly.
As bland as that appears, this little message means you've successfully written a
login script, which verifies your e-mail and password, with a captcha, and verifies
that you are either an administrator or superadministrator.
We are now in the admin area properly!
So, what do we need next? We have not written the forgotten password reminder,
and we also need to provide a method of logging out.
Let's do the logout first.
Logging out
Logging out is much simpler than logging in. All we need to do is to remove the
userdata
session variable that we created when logging in.
First off, let's edit
/ww.admin/index.php
to add in some design, and the start of the
admin menu, including the logout link:
<?php
require 'header.php';
echo 'you are logged in!';
require 'footer.php';
The footer will simply close off the HTML of the design, so here's
/ww.admin/
footer.php
:
</div>
</body>
</html>

User Management
[
54
]
And here's the header—
/ww.admin/header.php
:
<?php
header('Content-type: text/html; Charset=utf-8');
require 'admin_libs.php';
?>
<html>
<head>
<script src="http://ajax.googleapis.com/ajax/
libs/jquery/1.4.2/jquery.min.js"></script>
<script src="http://ajax.googleapis.com/ajax/
libs/jqueryui/1.8.0/jquery-ui.min.js"></script>
<link rel="stylesheet" href="/ww.admin/theme/admin.css"
type="text/css" />
<link rel="stylesheet" href="http://ajax.googleapis.com/
ajax/libs/jqueryui/1.8.0/themes/south-street/
jquery-ui.css" type="text/css" />
</head>
<body>
<div id="header">
<div id="menu-top">
<ul>
<li><a
href="/ww.incs/logout.php?redirect=/ww.admin/">
Log Out</a></li>
</ul>
</div>
</div>
<div id="wrapper">
We will be using jQuery and jQuery UI in all parts of the admin area, so they are
included by default.
Again, I've linked to a CSS file which I won't go through in this book. You can
download it with the rest of the files from Packt.

Chapter 2
[
55
]
Here's the admin index page now with the design and Log Out link included:
Now, let's create
/ww.incs/logout.php
:
<?php
$url='/';
session_start();
// set up the redirect
if(isset($_REQUEST['redirect'])){
$url=preg_replace('/[\?\&].*/','',$_REQUEST['redirect']);
if($url=='')$url='/';
}
unset($_SESSION['userdata']);
header('Location: '.$url);
echo '<a href="'.htmlspecialchars($url).'">redirect</a>';
In this case, it's not necessary to include any libraries (the
/ww.incs/basics.php
file,
for example). All we need to do is unset
$_SESSION['userdata']
and redirect the
browser. And so, we don't need to include
login-libs.php
.
Now, let's work on the forgotten password section.
Forgotten passwords
There are many ways that CMSs handle missing passwords. In some cases, a new
password is sent out through e-mail, in some cases, a security question lets the site
verify that the user is who he or she claims to be, and in some cases, a validation
e-mail is sent to verify the requester is the owner of the e-mail address.

User Management
[
56
]
In this section, I'll mention a few security concerns. I must add that in most cases, it is
very unlikely that they will ever happen. But, as a developer of software, you should
be aware of those things that can go wrong and do your best to make sure they don't
happen in the first place.
If you give the option of resetting the password when a user fills in their e-mail
address in the forgotten password form, there are some problems to beware of:
1. You may have just allowed an anonymous person to invalidate someone's
account just because they knew the e-mail address of the valid user. If this
is done repeatedly, it can really annoy that user, who may have to use a
different password every time they log in.
2. E-mail is insecure. Because it is sent through plain text in most cases (yes,
PGP e-mail is possible, but it is rarely used by normal users), you are sending
passwords that can be potentially read by the e-mail hosters, or anyone that
"taps the line".
If you give the option of changing a password by verifying the identity of the user
using a "security question", there are also some problems. Some sites make the user
pick from a set list of questions, none of which are secure:
1. It is easy to figure out someone's mother's maiden name. There are many
genealogy websites online where that information is readily available.
2. Asking who the user's first teacher was is silly. Personally, I barely remember
who I met two years ago; let alone 30 years ago!
3. Asking the name of the user's pet assumes that there is a pet in the first place,
and that there is only one pet (I have three cats at the moment). Also, all of
your friends probably know that pet's name. My cats are Buffy, Thurston,
and Tweedo.
4. Car's license number. Again, there is an assumption. I don't drive, and have
never owned a car.
Allowing the user to pick a security question is also silly. In most cases, the question
will be obvious. As an example, I was chatting with a friend once about this very
problem, and demonstrated it by opening up his Hotmail account—as his security
question, he'd written something silly like "wibble", and I guessed correctly that if
his security question was as much rubbish as that, then his answer would also be
rubbish. I entered "wibble" again and was in.
There is possibly no real correct solution to the problem of verifying someone's
identity over the Internet, so it's best to choose the "least worst" of the methods.

Chapter 2
[
57
]
I mentioned a third possibility—sending out a validation e-mail. E-mail is a very
personal form of identification. It is rare these days that you will find anyone online
that doesn't have one, and usually, they've had the same e-mail address for years on
end—people get attached to their e-mail addresses. The validation e-mail method
involves some simple steps:
1. In the validation e-mail method, the user has forgotten their password, and
goes to the forgotten password form and enters their e-mail address.
2. An e-mail is sent to the e-mail address with a link embedded in it. This link
has a validation code attached which is recorded in the database.
3. When the user clicks on the link, this verifies the person's identity and logs
the person into the site.
4. The verification code is then removed from the database. This way the login
links only work one single time.
It's not even necessary that the user reset the password as long as they're happy
enough to generate a fresh validation link each time—on some sites I use very
infrequently, I tend to have "moved on" to a new password and keep forgetting the
password I used for those infrequent visits, so for those sites, I'm always using a
validation link to log in!
Anyway—enough musing. Let's create the file
/ww.incs/password-reminder.php
:
<?php
require 'login-libs.php';
login_check_is_email_provided();
login_check_is_captcha_provided();
login_check_is_captcha_valid();
// check that the email matches a row in the user table
$r=dbRow('select email from user_accounts where
email="'.addslashes($_REQUEST['email']).'" and active'
);
if($r==false){
login_redirect($url,'nosuchemail');
}
// success! generate a validation email, then redirect
$validation_code=md5(time().'|'.$r['email']);
$email_domain=preg_replace('/^www\./','',$_SERVER['HTTP_HOST']);
dbQuery('update user_accounts set activation_key="'.$validation_
code.'"
where email="'.addslashes($r['email']).'"');

User Management
[
58
]
$validation_url='http://'.$_SERVER['HTTP_HOST'].'/ww.incs/forgotten-
password-validate.php?verification_code='.$validation_code.'&email='.$
r['email'].'&redirect_url='.$url;
mail(
$r['email'],
"[$email_domain] forgotten password",
"Hello!\n\nThe forgotten password form at http://".$_SERVER['HTTP_
HOST']."/ was submitted. If you did not do this, you can safely
discard this email.\n\nTo log into your account, please use the link
below, and then reset your password.\n\n$validation_url",
"From: no-reply@$email_domain\nReply-to: no-reply@$email_domain"
);
login_redirect($url,'validationsent');
This script is very similar to the login script, but all references to the
password
field
in the database and
$_REQUEST
have been removed, and we add in the validation
link generator.
Notice that we have added two message codes. Amend
/ww.incs/login-codes.php
and add them:
'permissiondenied'=>'your user account does not have'
.' permission for this area.',
'nosuchemail'=>'that email address does not exist in the'
.' user accounts database',
'validationsent'=>'a validation message has been sent to'
.' your email address. please check your email.'
);
The e-mail's content, when it arrives, will look something like this:
Hello!
The forgotten password form at http://cms/ was submitted. If you did
not do this, you can safely discard this email.
To log into your account, please use the link below, and then reset
your password.
http://cms/ww.incs/forgotten-password-verification.php?verification_co
de=97e5daf0d6b96c1945ed450d29c63a42&email=kae@verens.com &redirect_
url=/ww.admin/index.php
You should feel free to amend the validation code generator to write whatever
message you want into it.

Chapter 2
[
59
]
Now, we need to write the validation script,
/ww.incs/forgotten-password-
verification.php
:
<?php
require 'login-libs.php';
login_check_is_email_provided();
// check that a verification code was provided
if( !isset($_REQUEST['verification_code'])
|| $_REQUEST['verification_code']==''
){
login_redirect($url,'novalidation');
}
// check that the email/verification code combination matches a row in
the user table
$password=md5($_REQUEST['email'].'|'.$_REQUEST['password']);
$r=dbRow('select * from user_accounts where
email="'.addslashes($_REQUEST['email']).'" and
verification_code="'.$_REQUEST['verification_code'].'" and active'
);
if($r==false){
login_redirect($url,'validationfailed');
}
// success! set the session variable, clear the code from the
// db, then redirect
dbQuery('update user_accounts set verification_code="" where
email="'.addslashes($_REQUEST['email']).'"');
$_SESSION['userdata']=$r;
$groups=json_decode($r['groups']);
$_SESSION['userdata']['groups']=array();
foreach($groups as $g)$_SESSION['userdata']['groups'][$g]=true;
if($r['extras']=='')$r['extras']='[]';
$_SESSION['userdata']['extras']=json_decode($r['extras']);
login_redirect($url,'verified');
In this one, we verify the e-mail address and validation code, and if they both
are correct, then we do a login, and send a message reminding the user to reset
their password.

User Management
[
60
]
Add these new message codes to
/ww.incs/login-codes.php
:
'validationsent'=>'a validation message has been sent to your email
address. please check your email.',
'novalidation'=>'no validation code provided.',
'validationfailed'=>'that email and validation code combination does
not exist. maybe it has already been used. please use the Forgotten
Password to resend the validation email.',
'verified'=>'you have verified your email address and we have logged
you in. please remember to reset your password.'
);
And that is our login system completed.
In the next section, we will create a user management area in the admin area.
User management
Okay! We now have the admin area login working, so let's build the first admin
page. This will be the user management page, which allows us to create, delete, and
edit users.
So first, we need to edit the
/ww.admin/header.php
to add in a link to the user
management page. In the next chapter, we will rewrite the menu to make it easier to
add items to it. For now, the links will be hardcoded as top-level menu items.
Change the menu list to this:
<ul>
<li><a href="/ww.admin/users.php">Users</a></li>
<li><a href="/ww.incs/logout.php?redirect=/ww.admin/">
Log Out</a></li>
</ul>
Next, we will create
/ww.admin/users.php
:
<?php
require 'header.php';
echo '<h1>User Management</h1>';
echo '<div class="left-menu">';
echo '<a href="/ww.admin/users.php">Users</a>';
echo '</div>';
echo '<div class="has-left-menu">';
echo '<h2>User Management</h2>';
if(isset($_REQUEST['action']))require 'users/actions.php';
if(isset($_REQUEST['id']))require 'users/form.php';

Chapter 2
[
61
]
require 'users/list.php';
echo '</div>';
echo '<script src="/ww.admin/users/users.js"></script>';
require 'footer.php';
Because management involves multiple separate functions—displaying lists of items
and details of specific items, editing items, deleting and creating, if you do all this in
one single file, the file gets huge and unmanageable.
Similarly, if you separate all these functions into separate files and keep all those files
in one directory, it makes it difficult for a developer to find the right file to edit (see
the root directory of a Mantis BT 1.2.0rc2 installation for an example: 219 files!).
To make it easier to figure out what's going on, I like to place grouped files into
their own directories. Hence the login files are in
/ww.admin/login/
, the user
management files are in
/ww.admin/users/
, and we'll see more examples as the
book goes on.
Anyway... when we click on the Users link in the menu, what we want to see is a list
of existing users.
Add this to
/ww.incs/basics.php
to give us a
dbAll()
function:
function dbAll($query,$key='') {
$q = dbQuery($query);
$results=array();
while($r=$q->fetch(PDO::FETCH_ASSOC))$results[]=$r;
if(!$key)return $results;
$arr=array();
foreach($results as $r)$arr[$r[$key]]=$r;
return $arr;
}
What that does is, given an SQL query, it will build an array of results
and return that.
I haven't commented on it yet, but the db* functions we are writing here
use the PDO library to connect to the database.
One reason for using dbAll, dbQuery, and so on, instead of accessing the
database directly through PDO, mysql[i]_connect, or any other method, is
that it's easier to port the engine to another database or database library if
all DB methods are encapsulated in a small number of wrapper functions.
If given a second parameter (for example, 'id'), then the returned array will be
indexed using that parameter's value from each result row.
D
o
w
nl
oa
d
fr
om
W
ow
!
eB
oo
k
<
w
w
w
.w
ow
eb
oo
k.
co
m
>
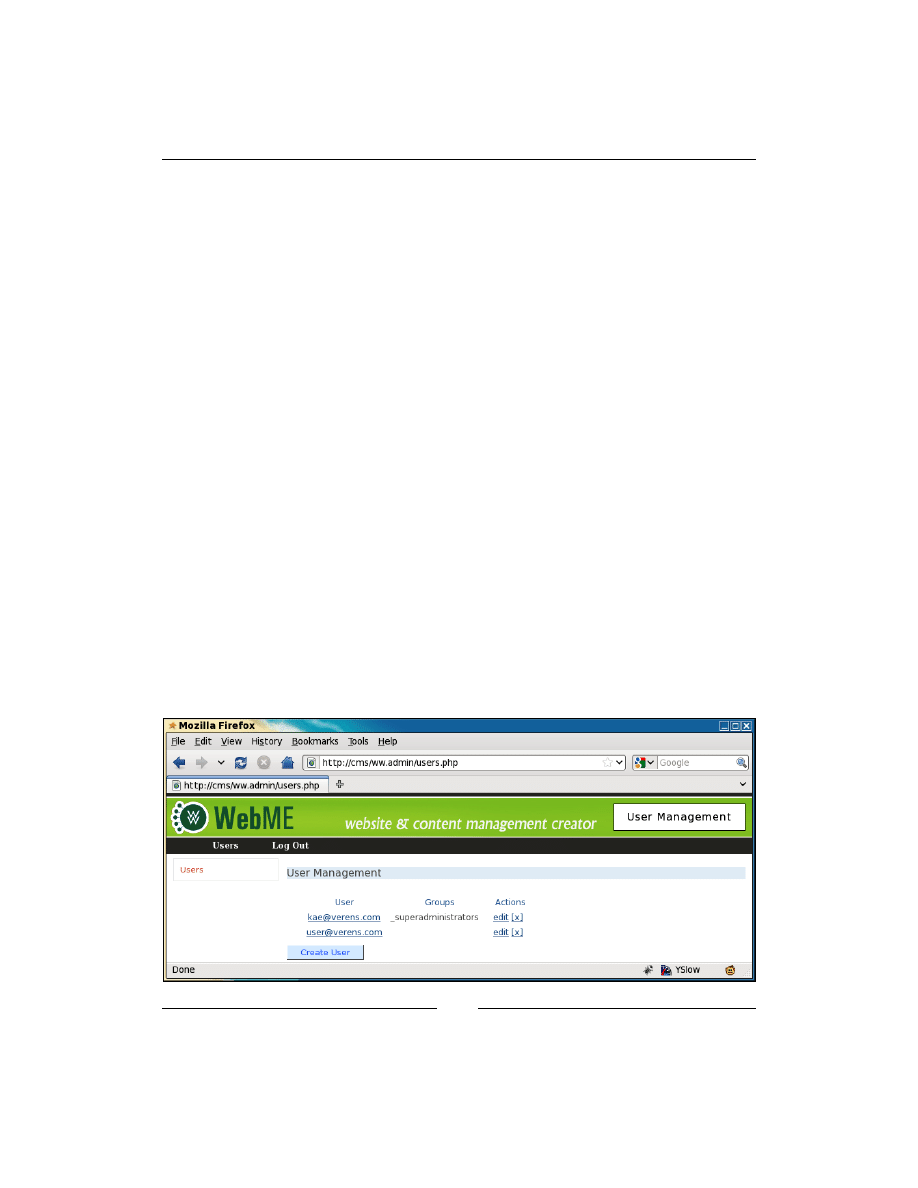
User Management
[
62
]
We'll also need a function for returning a single value. Add this to the same file:
function dbOne($query, $field='') {
$r = dbRow($query);
return $r[$field];
}
function dbLastInsertId() {
return dbOne('select last_insert_id() as id','id');
}
Now that we have that, let's write
/ww.incs/users/list.php
:
<?php
$users=dbAll('select id,email,groups from user_accounts
order by email');
echo '<table style="min-width:50%">
<tr><th>User</th><th>Groups</th><th>Actions</th></tr>';
foreach($users as $user){
echo '<tr><th><a href="users.php?id='.$user['id']
.'">'.htmlspecialchars($user['email']).'</a></th>';
echo '<td>'.join(', ',json_decode($user['groups'])).'</td>';
echo '<td><a href="users.php?id='.$user['id'].'">edit</a>';
echo ' <a href="users.php?id='.$user['id']
.'&action=delete" onclick="return confirm(\'are you
sure you want to delete this user?\')">[x]</a></td></tr>';
}
echo '</table>';
echo '<a class="button" href="users.php?id=-1">
Create User</a>';
That gives me the following result:
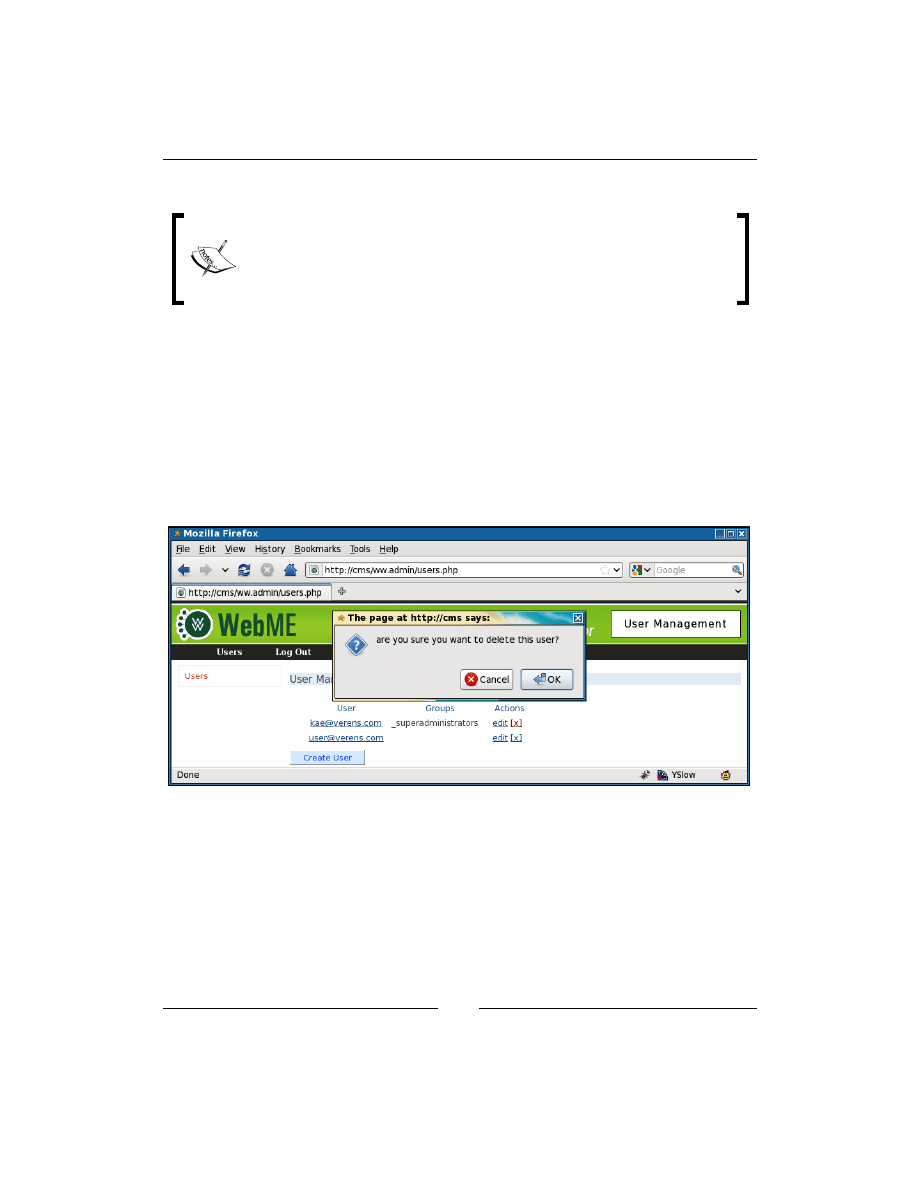
Chapter 2
[
63
]
We can now see the existing users, as well as the groups that they belong to.
The code I wrote here generates and echoes HTML directly to the HTTP
stream. This is a "down and dirty" method of very quickly generating
some code and displaying it. A more appropriate method would be to use
a templating engine such as Smarty. Feel free to enhance the code after
we've looked at Smarty later in the book.
Before talking about editing and creating, we will look at the delete action.
Deleting a user
In the previous screenshot, you can see an [x] beside both users. The link is
intentionally small and obscure, because we really don't want to accidentally delete a
user by clicking the wrong link. So, we make the delete link more difficult to click.
We also add a JavaScript
confirm()
so that if an admin does click it, they are given
the chance to say "No, I did not intend to click this".
Now we can write the code to do the deletion.
Create the file
/ww.admin/users/actions.php
:
<?php
$id=(int)$_REQUEST['id'];
if($_REQUEST['action']=='delete'){
dbQuery("delete from user_accounts where id=$id");
unset($_REQUEST['id']);
}

User Management
[
64
]
What happens with this is that the delete link is clicked, the user is deleted, then the
/ww.admin/users.php
page displays the users list again.
Creating or editing a user
Creating and editing can both be done from the same form.
Basically, what happens is that you select to create or edit a user, which sends the
user's ID to the server.
The server then uses that ID to get the user's data from the database. If the data
doesn't exist, the result will obviously be blank.
The result is then used to fill in the user form.
When submitted, if the user ID is not valid, then the submission is used to create a
new user.
For this form, we will need to create the groups database table, and populate it
with
_administrator
and
_superadministrator
:
CREATE TABLE `groups` (
`id` int(11) NOT NULL AUTO_INCREMENT,
`name` text,
PRIMARY KEY (`id`)
) DEFAULT CHARSET=utf8;
insert into groups values(1,"_superadministrators");
insert into groups values(2,"_administrators");
And now, create
/ww.admin/users/form.php
:
<?php
$id=(int)$_REQUEST['id'];
$groups=array();
$r=dbRow("select * from user_accounts where id=$id");
if(!is_array($r) || !count($r)){
$r=array('id'=>-1,'email'=>'','active'=>0);
}
echo '<form action="users.php?id='.$id.'" method="post">'
.'<input type="hidden" name="id" value="'.$id.'" /><table>'
.'<tr><th>Email</th>
<td><input name="email" value="'.htmlspecialchars($r['ema
il']).'" /></td>
</tr>'
.'<tr><th>Password</th>
<td><input name="password" type="password" /></td>

Chapter 2
[
65
]
</tr>'
.'<tr><th>(repeat)</th>
<td><input name="password2" type="password" /></td>
</tr>'
.'<tr><th>Groups</th><td class="groups">';
$grs=dbAll('select id,name from groups');
$gms=array();
foreach($grs as $g){ $groups[$g['id']]=$g['name'];
}
$grs=json_decode($r['groups']);
foreach($groups as $k=>$g){
echo '<input type="checkbox" name="groups['.$k.']"';
if(in_array($g,$grs))echo ' checked="checked"';
echo ' />',htmlspecialchars($g),'<br />';
}
echo '</td></tr>';
// }
echo '<tr><th>Active</th><td><select name="active">
<option value="0">No</option>
<option value="1"'.($r['active']?'
selected="selected"':'').'>Yes</option></select></td></tr>';
echo '</table>';
echo '<input type="submit" name="action" value="Save" />';
echo '</form>';
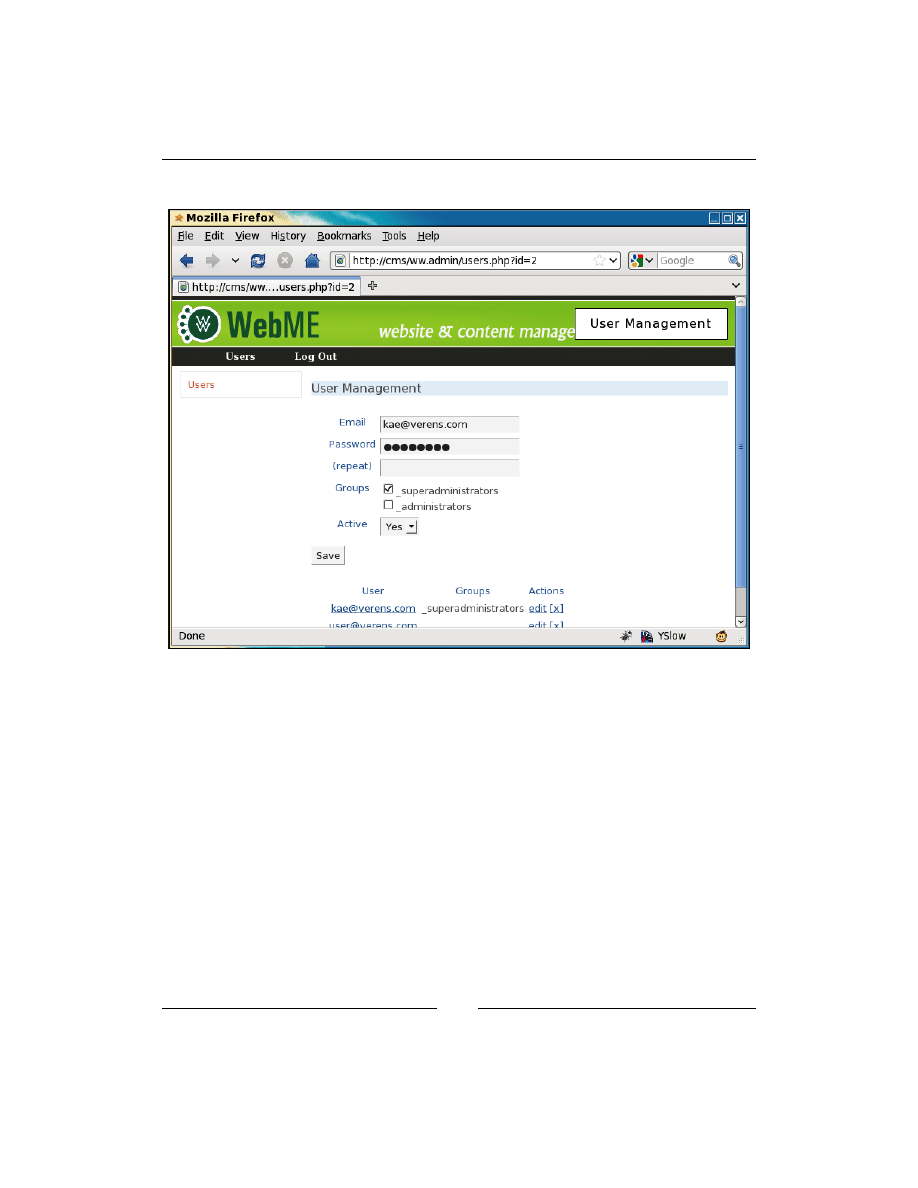
User Management
[
66
]
After clicking on the kae@verens.com link, we get this form:
Next, we just need to save the updated data.
We can do this by adding this code to the end of the
/ww.admin/users/actions.
php
file:
if($_REQUEST['action']=='Save'){
$groups=$_REQUEST['groups'];
if(!count($groups))$groups=array(0);
$grs=dbAll('select name from groups where id in ('
.addslashes(join(',',array_keys($groups)))
.') order by name');
$groups=array();
foreach($grs as $r)$groups[]=$r['name'];
$sql='set email="'.addslashes($_REQUEST['email']).'",
active="'.(int)$_REQUEST['active'].'",
groups="'.addslashes(json_encode($groups)).'"';
if(

Chapter 2
[
67
]
isset($_REQUEST['password']) &&
$_REQUEST['password']!=''
){
if($_REQUEST['password']!==$_REQUEST['password2'])
echo '<em>Password not updated. Must be entered
the same twice.</em>';
else $sql.=',password=md5("'.addslashes(
$_REQUEST['email'].'|'.$_REQUEST['password']
).'")';
}
if($id==-1){
dbQuery('insert into user_accounts '.$sql);
$_REQUEST['id']=dbLastInsertId();
}
else{
dbQuery('update user_accounts '.$sql.' where id='.$id);
}
echo '<em>users updated</em>';
}
That script will handle both the creation and editing of users.
We will discuss the creation and editing of groups later in the book.
Summary
In this chapter, we created the login system, including captcha management
and forgotten password management.
We also created a user management system for creating and editing users.
In the next chapter, we will start building the page management system.


Page Management – Part
One
In this chapter, we will create the forms for page management, and will build a
system for moving the pages around using drag-and-drop.
We will discuss the following topics:
•
How pages are requested and generated
•
Listing the pages in the admin area
•
Administration of pages
Page management will be concluded in the next chapter, where we will discuss
saving the pages, and integrate a rich-text editor and a file manager.
How pages work in a CMS
As we discussed in Chapter 1, CMS Core Design, a "page" is simply the main content
which should be shown when a certain URL is requested.
In a non-CMS website, this is easy to see, as a single URL returns a distinct HTML
file. In a CMS though, the page is generated dynamically, and may include features
such as plugins, different views depending on whether the reader was searching for
something, whether pagination is used, and other little complexities.
In most websites, a page is easily identified as the large content area in the middle
(this is an over-simplification). In others, it's harder to tell, as the onscreen page may
be composed of content snippets from other parts of the site.
We handle these differences by using page "types", each of which can be rendered
differently on the front-end. Examples of types include gallery pages, forms, news
contents, search results, and so on.

Page Management – Part One
[
70
]
In this chapter, we will create the simplest type, which we will call "normal". This
consists of a content-entry textarea in the admin area, and direct output of that
content on the front-end. You could call this "default" if you want, but since a CMS
is not always used by people from a technical background, it makes sense to use a
word that they are more likely to recognize. I have been asked before by clients what
"default" means, but I've never been asked what "normal" means.
If you remember from the first chapter, we discussed what should go in the core, and
what should be a plugin.
At the very least, a CMS needs some way to create the simplest of web pages. This is
why the "normal" type is not a plugin, but is built into the core.
Listing pages in the admin area
To begin, we will add
Pages
to the admin menu. Edit
/ww.admin/header.php
and
add the following highlighted line:
<ul>
<li><a href="/ww.admin/pages.php">Pages</a></li>
<li><a href="/ww.admin/users.php">Users</a></li>
And one more thing—when we log into the administration part of the CMS, it makes
sense to have the "front page" of the admin area be the
Pages
section. After all, most
of the work in a CMS is done in the
Pages
section.
So, we change
/ww.admin/index.php
so it is a synonym for
/ww.admin/pages.php
.
Replace the
/ww.admin/index.php
file with this:
<?php
require 'pages.php';
Next, let's get started on the
Pages
section.
First, we will create
/ww.admin/pages.php
:
<?php
require 'header.php';
echo '<h1>Pages</h1>';
// { load menu
echo '<div class="left-menu">';
require 'pages/menu.php';
echo '</div>';
// }
// { load main page
echo '<div class="has-left-menu">';
require 'pages/forms.php';
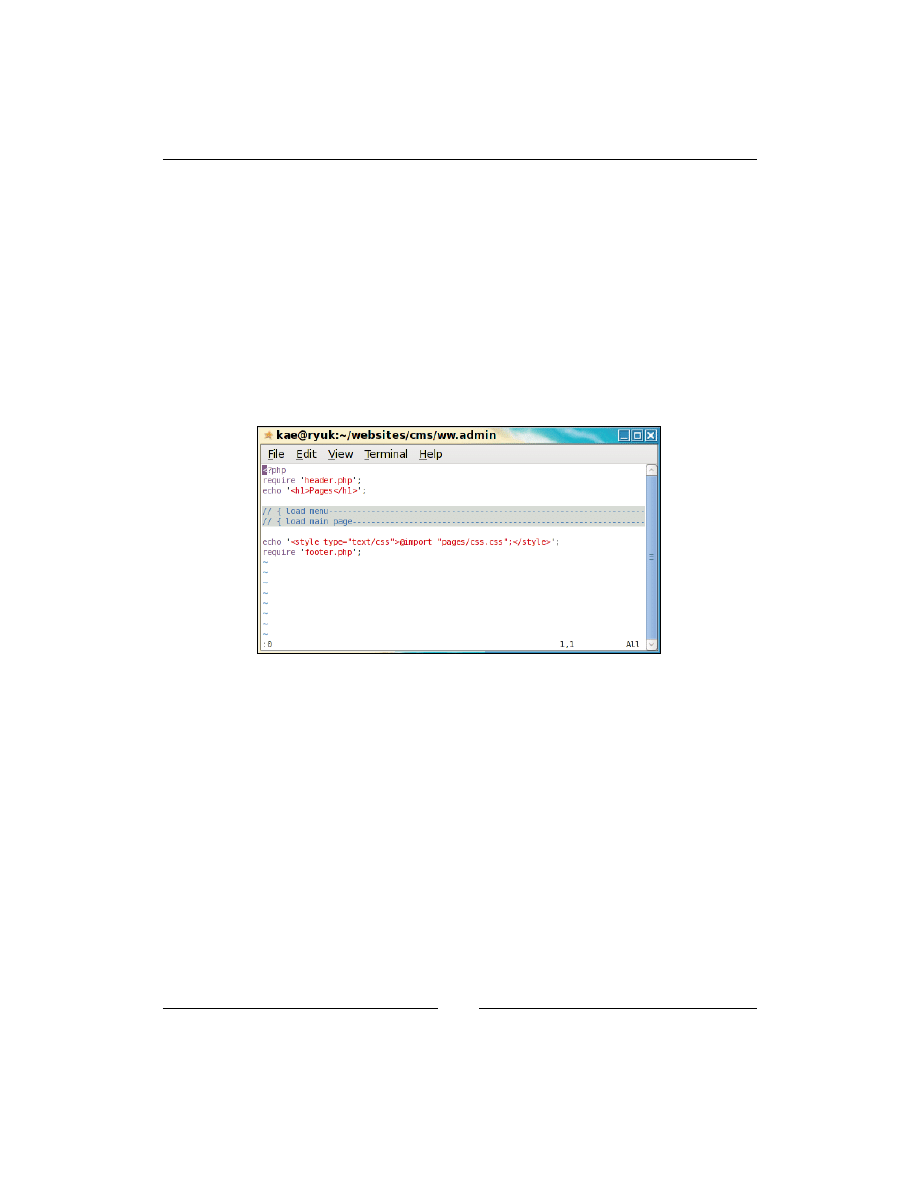
Chapter 3
[
71
]
echo '</div>';
// }
echo '<style type="text/css">
@import "pages/css.css";</style>';
require 'footer.php';
Notice how I've commented blocks of code, using
//
{
to open the comment at the
beginning of the block, and
//
}
at the end of the block.
This is done because a number of text editors have a feature called "folding", which
allows blocks enclosed within delimiters such as
{
and
}
to be hidden from view,
with just the first line showing.
For instance, the previous code example looks like this in my Vim editor:
What the
page.php
does is to load the headers, load the menu and page form, and
then load the footers. There will be more added later in this chapter.
For now, create the directory
/ww.admin/pages
and create a file in it called
/
ww.admin/pages/forms.php
:
<h2>FORM GOES HERE</h2>
And now we can create the page menu. Use the following code to create the file
/
ww.admin/pages/menu.php
:
<?php
echo '<div id="pages-wrapper">';
$rs=dbAll('select id,type,name,parent from pages order by ord,name');
$pages=array();
foreach($rs as $r){
if(!isset($pages[$r['parent']]))$pages[$r['parent']]=array();
$pages[$r['parent']][]=$r;
}

Page Management – Part One
[
72
]
function show_pages($id,$pages){
if(!isset($pages[$id]))return;
echo '<ul>';
foreach($pages[$id] as $page){
echo '<li id="page_'.$page['id'].'">'
.'<a href="pages.php?id='.$page['id'].'"'>'
.'<ins> </ins>'.htmlspecialchars($page['name'])
.'</a>';
show_pages($page['id'],$pages);
echo '</li>';
}
echo '</ul>';
}
show_pages(0,$pages);
echo '</div>';
That will build up a
<ul>
tree of pages.
Note the use of the "parent" field in there. Most websites follow a hierarchical
"parent-child" method of arranging pages, with all pages being a child of either
another page, or the "root" of the site. The parent field is filled with the ID of the page
within which it is situated.
There are two main ways to indicate which page is the "front" page (that is, what
page is shown when someone loads up
http://cms/
with no page name indicated).
1. You can have one single page in the database which has a parent of 0,
meaning that it has no parent—this page is what is looked for when
http://
cms/
is called. In this scheme, pages such as
http://cms/pagename
have
their parent field set to the ID of the one page which has a parent of 0.
2. You can have many pages which have 0 as their parent, and each of these
is said to be a "top-level" page. One page in the database has a flag set in
the
special
field which indicates that this is the front page. In this scheme,
pages named like
http://cms/pagename
all have a parent of 0, and the page
corresponding to
http://cms/
can be located anywhere at all in the database.
Case 1 has a disadvantage, in that if you want to change what page is the front page,
you need to move the current page under another one (or delete it), then move all the
current page's child-pages so they have the new front page's ID as a parent, and this
can get messy if the new front-page already had some sub-pages—especially if there
are any with the same names.
Case 2 is a much better choice because you can change the front page whenever you
want, and it doesn't cause any problems at all.
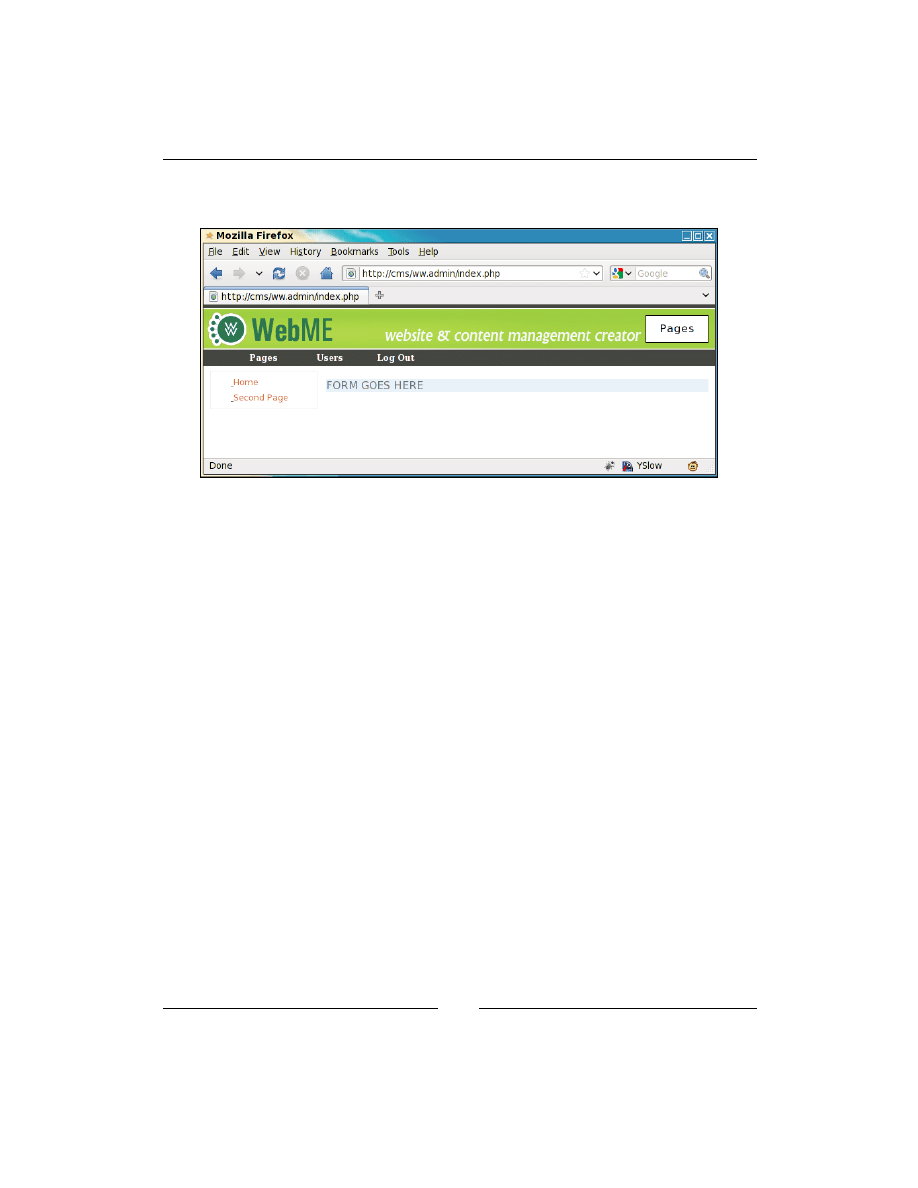
Chapter 3
[
73
]
When you view the site in your browser now, it looks like this (based on the pages
we created manually back in Chapter 1, CMS Core Design):
Hierarchical viewing of pages
Let's update the database slightly so that we can see the hierarchy of the site
pages visually.
Go to your MySQL console, and change the
Second Page
so that its parent field is
the ID of the
Home
page:
mysql> select id,name,parent from pages;
+----+-------------+--------+
| id | name | parent |
+----+-------------+--------+
| 24 | Home | 0 |
| 25 | Second Page | 0 |
+----+-------------+--------+
2 rows in set (0.00 sec)
mysql> update pages set parent=24 where id=25;
Query OK, 1 row affected (0.00 sec)
Rows matched: 1 Changed: 1 Warnings: 0
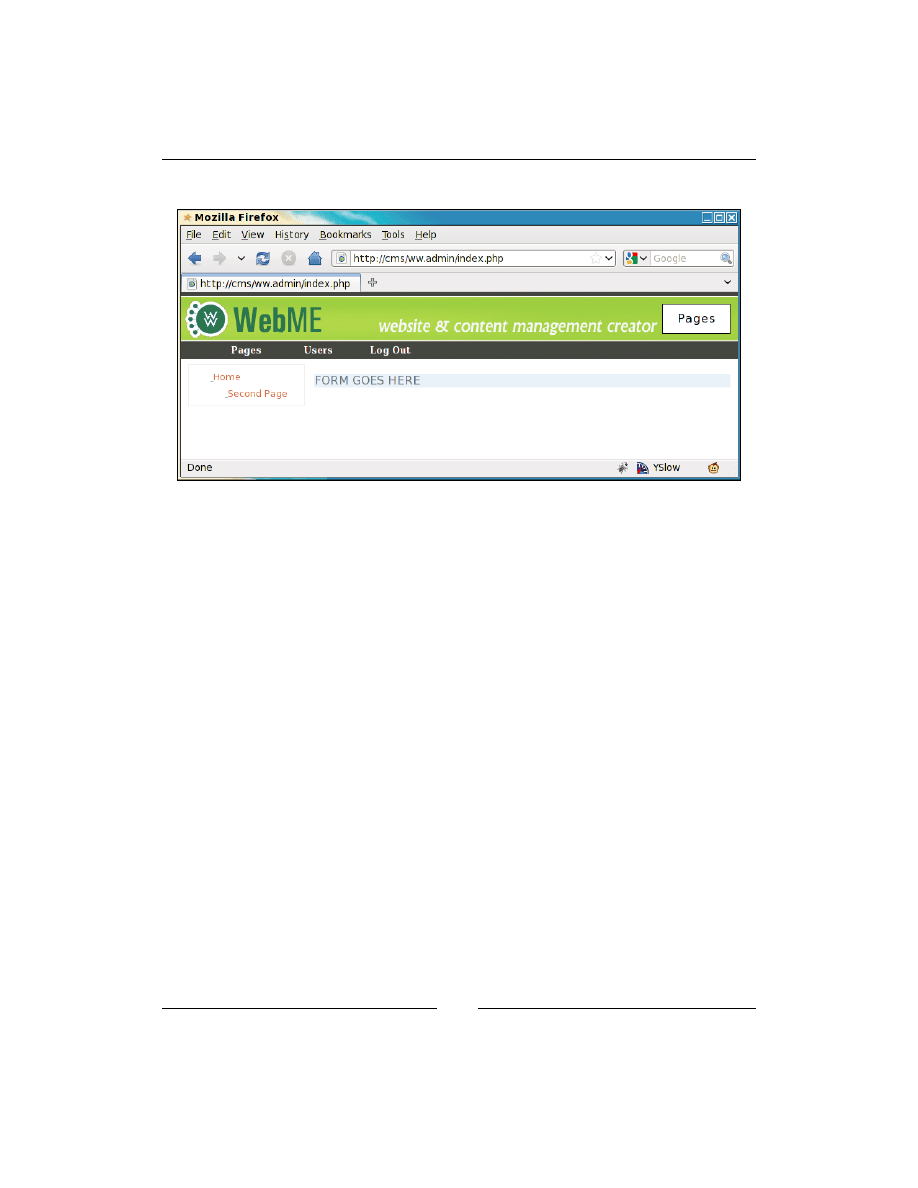
Page Management – Part One
[
74
]
After the update, we refresh the site in the browser:
You can see the Second Page has indented slightly because it is now a child page of
Home, and is contained in a sub-
<ul>
in the HTML.
We can improve on this vastly, though.
There is a jQuery plugin called
jstree
which re-draws
<ul>
trees in a way that is
more familiar to users of visual file managers.
It also has the added features that you can drag the tree nodes around, and attach
events to clicks on the nodes.
We will use these features later in the chapter to allow creation and deletion of pages,
and changing of page parents through drag-and-drop.
Create the directory
/j/
in the root of the website.
Remember that we indicated in the first chapter that the CMS directories would all
include dots in them, unless they were less than three characters long.
One of the reasons we name this directory
/j/
instead of
/ww.javascript/
, is that
it is short, thus saving a few bytes of bandwidth for the end-user, who may be using
something bandwidth-light such as a smartphone.
This may not be a big deal, but if we got into the habit of making small shortcuts
like this whenever possible, then the small shortcuts would eventually add up to a
second or two of extra speed.
Every unnoticeable optimization can help to make a noticeable one when combined
with many more.
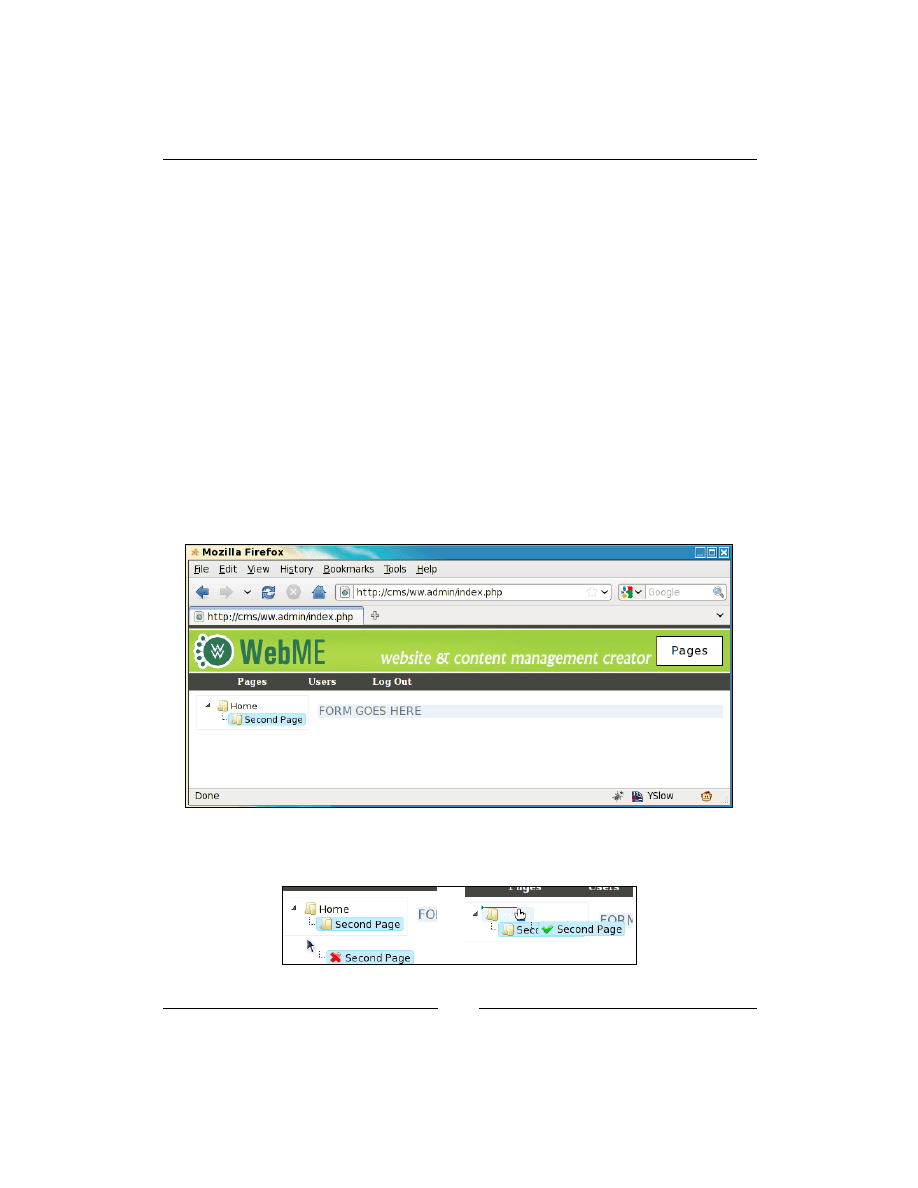
Chapter 3
[
75
]
Anyway—create the
/j/
directory, and download the
jstree
script from
http://
jstree.com/
such that when extracted, the
jquery.tree.js
file is located at
/j/
jquery.jstree/jquery.tree.js
.
I have used version
0.9.9a
in the CMS described in this book.
Now edit
/ww.admin/pages/menu.php
and add the following highlighted lines
before the first line:
<script src="/j/jquery.jstree/jquery.tree.js"></script>
<script src="/ww.admin/pages/menu.js"></script>
<?php
And create the file
/ww.admin/pages/menu.js
:
$(function(){
$('#pages-wrapper').tree();
});
And immediately, we have a beautified hierarchical tree, as seen in the following
screenshot:
If you try, you'll see that you can drag those page names around, with little icons and
signs indicating where a page can be dropped, as shown in the next two screenshots:

Page Management – Part One
[
76
]
Before we get into the actual editing of pages, let's improve on this menu one last time.
We will add a button to indicate we want to create a new top-level page, and we will
also record drag-and-drop events so that they actually do move the pages around.
Change the
/ww.admin/pages/menu.js
file to this:
$(function(){
$('#pages-wrapper').tree({
callback:{
onchange:function(node,tree){
document.location='pages.php?action=edit&id='
+node.id.replace(/.*_/,'');
},
onmove:function(node){
var p=$.tree.focused().parent(node);
var new_order=[],nodes=node.parentNode.childNodes;
for(var i=0;i<nodes.length;++i)
new_order.push(nodes[i].id.replace(/.*_/,''));
$.getJSON('/ww.admin/pages/move_page.php?id='
+node.id.replace(/.*_/,'')+'&parent_id='
+(p==-1?0:p[0].id.replace(/.*_/,''))
+'&order='+new_order);
}
}
});
var div=$(
'<div><i>right-click for options</i><br /><br /></div>');
$('<button>add main page</button>')
.click(pages_add_main_page)
.appendTo(div);
div.appendTo('#pages-wrapper');
});
function pages_add_main_page(){}
We've added a few pieces of functionality to the tree here.
First, we have the
onchange
callback.
When a tree node (a page name) is clicked, the browser is redirected to
pages.
php?edit=
with the page's ID at the end-note that when creating the
<ul>
tree, we
added an ID to every
<li>
, such that a page with the ID 24 would have an
<li>
with
the ID
page_24
.
So, all we need to do when a node (the
<li>
) is clicked, is to remove the
page_
part,
and use that to open up
page.php
for editing that page.
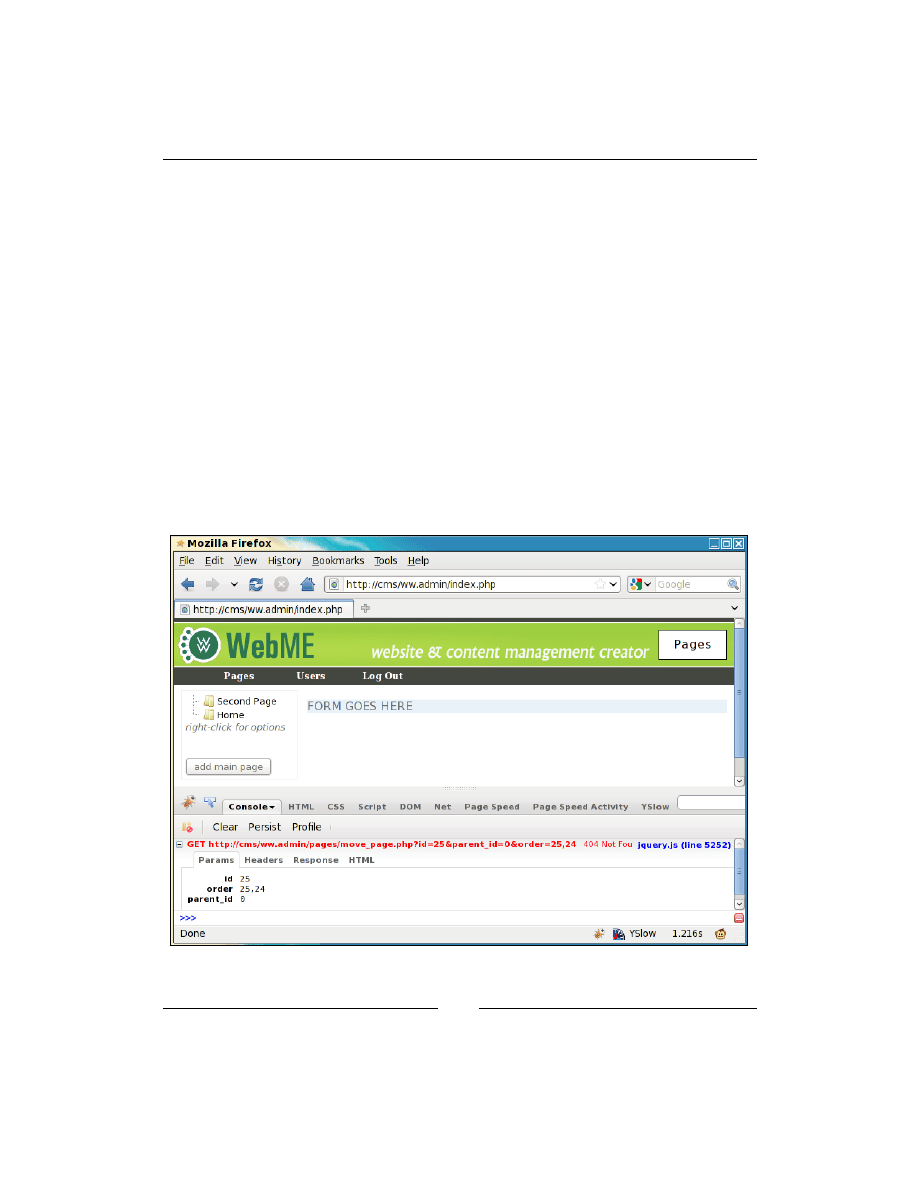
Chapter 3
[
77
]
Second, we added an
onmove
callback. This is called after a drag-and-drop event has
completed.
What we do in this is slightly more complex—we get the new parent's ID, and we
make an array which records the IDs of all its direct descendant child pages. We then
send all that data to
/ww.admin/pages/move_page.php
, which we'll create in just a
moment.
Finally, we've added a message to right-click on the tree for further functionality,
which we'll detail later in the chapter, and a button to create a new top-level page,
which we'll also detail later in the chapter. A dummy function needs to be added so
this code will run without error. We'll replace it with a real one later.
Moving and rearranging pages
Now when you drag a page name to a different place on the tree, an Ajax call is
made to
/ww.admin/pages/move_page.php
, with some details included in the call.
Here's a screenshot showing (using Firebug) what is sent in a sample drag:

Page Management – Part One
[
78
]
We are sending the page ID (
25
), the new parent ID (
0
), and the new page order of
pages which have the parent ID
0
(
25
,
24
).
So, let's create
/ww.admin/pages/move_page.php
:
<?php
require '../admin_libs.php';
$id=(int)$_REQUEST['id'];
$to=(int)$_REQUEST['parent_id'];
$order=explode(',',$_REQUEST['order']);
dbQuery('update pages set parent='.$to.' where id='.$id );
for($i=0;$i<count($order);++$i){
$pid=(int)$order[$i];
dbQuery("update pages set ord=$i where id=$pid");
echo "update pages set ord=$i where id=$pid\n";
}
Simple! It records exactly what it was sent.
Administration of pages
Okay—we now have a list of the existing pages. Let's add some functionality
to edit them.
The form for creating a page is a bit long, so what we'll do is to build it up a bit
at a time, explaining as we go. Replace the file
/ww.admin/pages/forms.php
with the following:
<?php
if(isset($_REQUEST['id']))$id=(int)$_REQUEST['id'];
else $id=0;
if($id){ // check that page id exists
$page=dbRow("SELECT * FROM pages WHERE id=$id");
if($page!==false){
$page_vars=json_decode($page['vars'],true);
$edit=true;
}
}
if(!isset($edit)){
$parent=isset($_REQUEST['parent'])?
(int)$_REQUEST['parent']:0;
$special=0;
if(isset($_REQUEST['hidden']))$special+=2;
$page=array('parent'=>$parent,'type'=>'0','body'=>'',
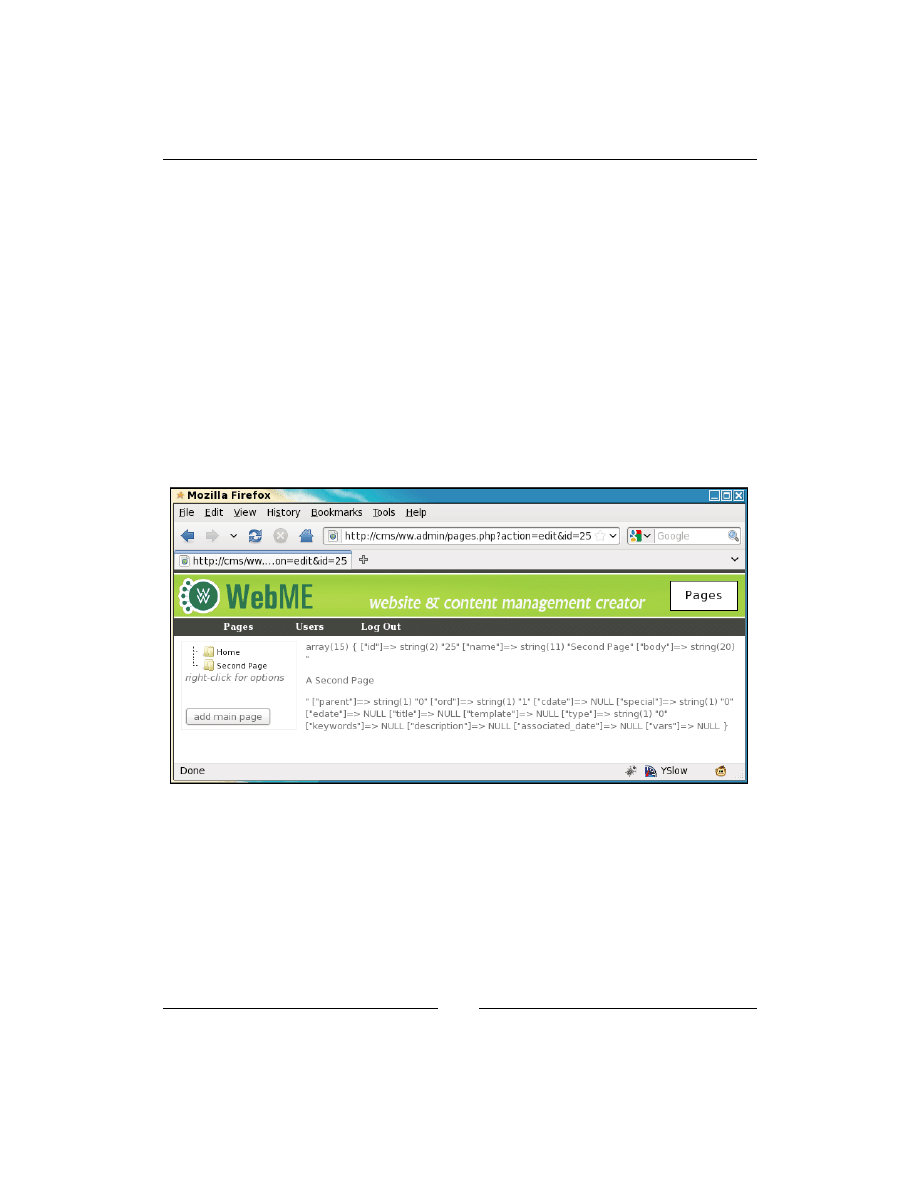
Chapter 3
[
79
]
'name'=>'','title'=>'','ord'=>0,'description'=>'',
'id'=>0,'keywords'=>'','special'=>$special,
'template'=>'');
$page_vars=array();
$id=0;
$edit=false;
}
What the given code does is to initialize an array named
$page
for the main page
details, and another named
page_vars
for any custom details that are not part of the
main page table—for example, data recorded as part of a plugin.
If an ID is passed as part of the URL, then that page's data is loaded.
As an example, if I add the line
var_dump($page);
and then load up
/ww.admin/
pages.php?action=edit&id=25
in my browser (a page which exists in my
database), this is what's shown:
This shows all the data about that page available in the database table.
D
o
w
nl
oa
d
fr
om
W
ow
!
eB
oo
k
<
w
w
w
.w
ow
eb
oo
k.
co
m
>
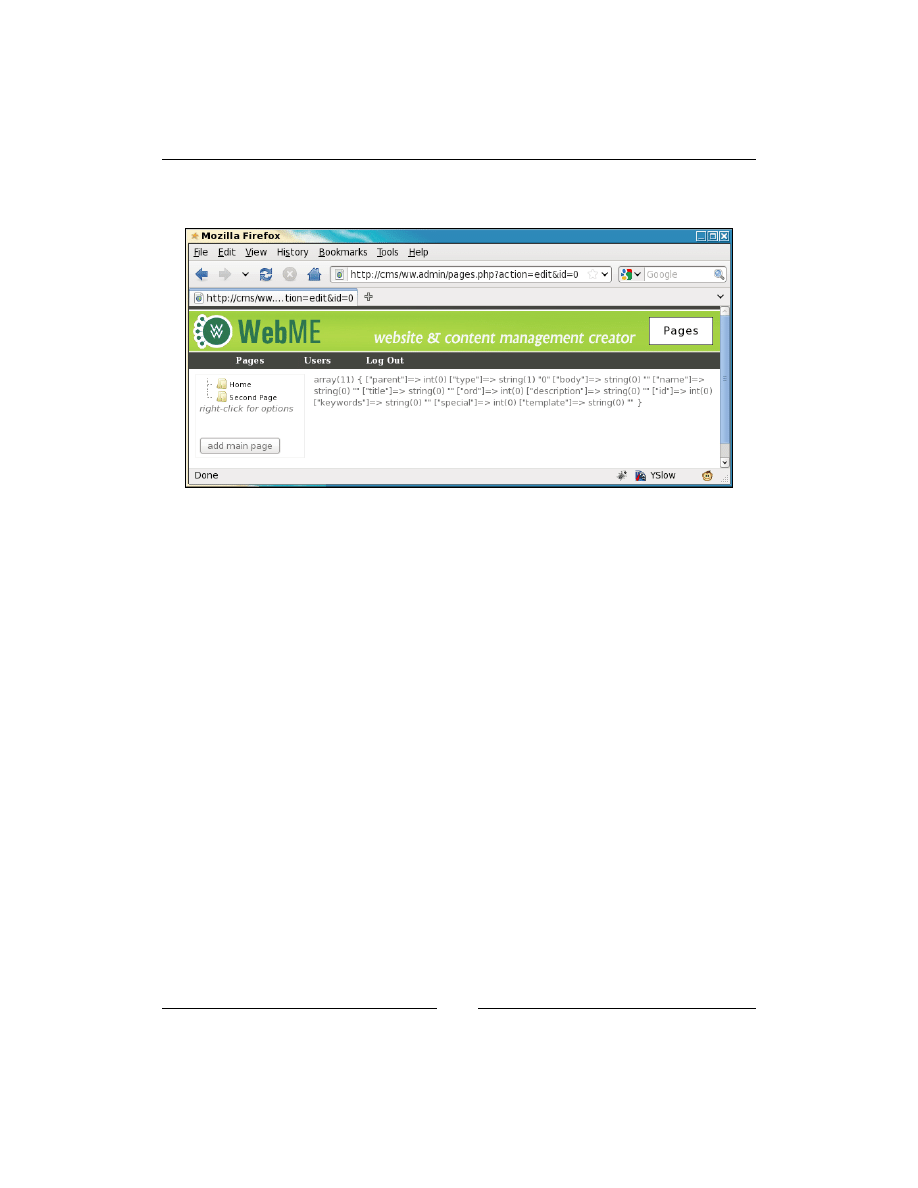
Page Management – Part One
[
80
]
If the ID passed in the URL is 0, or any other ID which does not correspond
to an existing page ID, then we still initialize
$page
but with empty values:
Because pages can get quite complex, especially when we add in different page types
using plugins later in the book, we break the page form into different tabs.
For the "normal" page type, we will have two tabs—common details, and advanced
options.
The common details tab will contain options that are changed very often, such as
page name, page content, and so on.
The advanced options tab will contain more rarely-changed options such as
meta tags, templates, and so on. We call it "advanced", but that's only because
"rarely changed options" doesn't sound as concise, and also because most website
administrators will not know what to do with some of these options.
So, let's add the tab menu to
/ww.admin/pages/forms.php
:
// { if page is hidden from navigation, show a message saying that
if($page['special']&2)
echo '<em>NOTE: this page is currently hidden from the
front-end navigation. Use the "Advanced Options" to
un-hide it.</em>';
// }
echo '<form id="pages_form" method="post">';
echo '<input type="hidden" name="id" value="',$id,'" />'
,'<div class="tabs"><ul>'
,'<li><a href="#tabs-common-details">Common Details</a></li>'
,'<li><a href="#tabs-advanced-options">Advanced Options</a></li>'

Chapter 3
[
81
]
;
// add plugin tabs here
echo '</ul>';
Above the page form, we display a small message if the page we're viewing is
currently not visible in the navigation menu on the front-end of the site—if the
special
field has its 2 bit flagged, then that means that the page is not shown in the
navigation menu.
Bitmasks are useful for when you have "yes/no" values and don't want to take up a
whole database field for each value.
After this, we open the form.
Note that an action parameter is not provided in my code. Although the W3C HTML
4.01 specification says that the action is required, no browsers actually enforce this. If
a browser comes across a form which has no action, then it defaults to the same page.
This is also true of
<style>
, where type defaults to
text/css
, and
<script>
, where
type defaults to
javascript
.
Next we display the tab menu, which is the list of tabs to be shown.
Note the second-last line, which is a comment about plugin tabs. When we get to
plugins in a later chapter, some of them may have enough extra options that they
need a new tab on the page form. We'll handle that when we get to it.
Next, let's add the common details tab to the same file:
// { Common Details
echo '<div id="tabs-common-details"><table
style=“clear:right;width:100%;”><%;”>< tr>‘;
// { name
echo '<th width="5%">name</th><td width="23%">
<input
id="name" name="name"
value="',htmlspecialchars($page['name']),'" /></td>';
// }
// { title
echo '<th width="10%">title</th><td width="23%">
<input
name="title"
value="',htmlspecialchars($page['title']),'" /></td>';
// }
// { url
echo '<th colspan="2">';

Page Management – Part One
[
82
]
if($edit){
$u='/'.str_replace(' ','-',$page['name']);
echo '<a style="font-weight:bold;color:red" href="',$u
,'" target="_blank">VIEW PAGE</a>';
}
else echo ' ';
echo '</th>';
// }
echo '</tr><tr>';
// { type
echo '<th>type</th><td><select name="type"><option
value="0">normal</option>';
// insert plugin page types here
echo '</select></td>';
// }
// { parent
echo '<th>parent</th><td><select name="parent">';
if($page['parent']){
$parent=Page::getInstance($page['parent']);
echo '<option value="',$parent->id,'">'
,htmlspecialchars($parent->name),'</option>';
}
else echo '<option value="0"> -- ','none',' -- </option>';
echo '</select>',"\n\n",'</td>';
// }
if(!isset($page['associated_date']) || !preg_match(
'/^[0-9]{4}-[0-9]{2}-[0-9]{2}$/',$page['associated_date']
) || $page['associated_date']=='0000-00-00'
$page['associated_date']=date('Y-m-d');
echo '<th>Associated Date</th><td><input
name="associated_date" class="date-human" value="',
$page['associated_date'],'" /></td>';
echo '</tr>';
// }
// { page-type-specific data
echo '<tr><th>body</th><td colspan="5">';
echo '<textarea name="body">',
htmlspecialchars($page['body']),'</textarea>';
echo '</td></tr>';
// }
echo '</table></div>';
// }

Chapter 3
[
83
]
The given code shows the commonly changed details of the page database table.
They include:
•
name
•
title
•
type
•
parent
•
associated_date
•
body
We'll enhance a few of those after we've finished the form. For now, a few things
should be noted about the form and its options.
•
URL: When you are editing a page, it's good to view it in another window or
tab. To do this, we provide a link to the front-end page. Clicking on the link
opens a new tab or window.
•
Type: The page type by default is "normal", and in the select-box we built
previously, that is the only option. We will enhance that when we get to
plugins in a later chapter.
•
Parent: This is the page which the currently edited page is contained within.
In the earlier form, we display only the current parent, and don't provide any
other options. There's a reason for that which we'll explain after we finish the
main form HTML.
•
Associated date: There are a number of dates associated with a page. We
record the created and last-edited date internally (useful for plugins or
logging), but sometimes the admin wants to record a date specific to the
page. For example, if the page is part of a news system, we will enhance this
date input box after the form is completed.
•
Body: This is the content which will be shown on the front-end. It's plain
HTML. Of course, writing HTML for content is not a task you should push
on the average administrator, so we will enhance that.
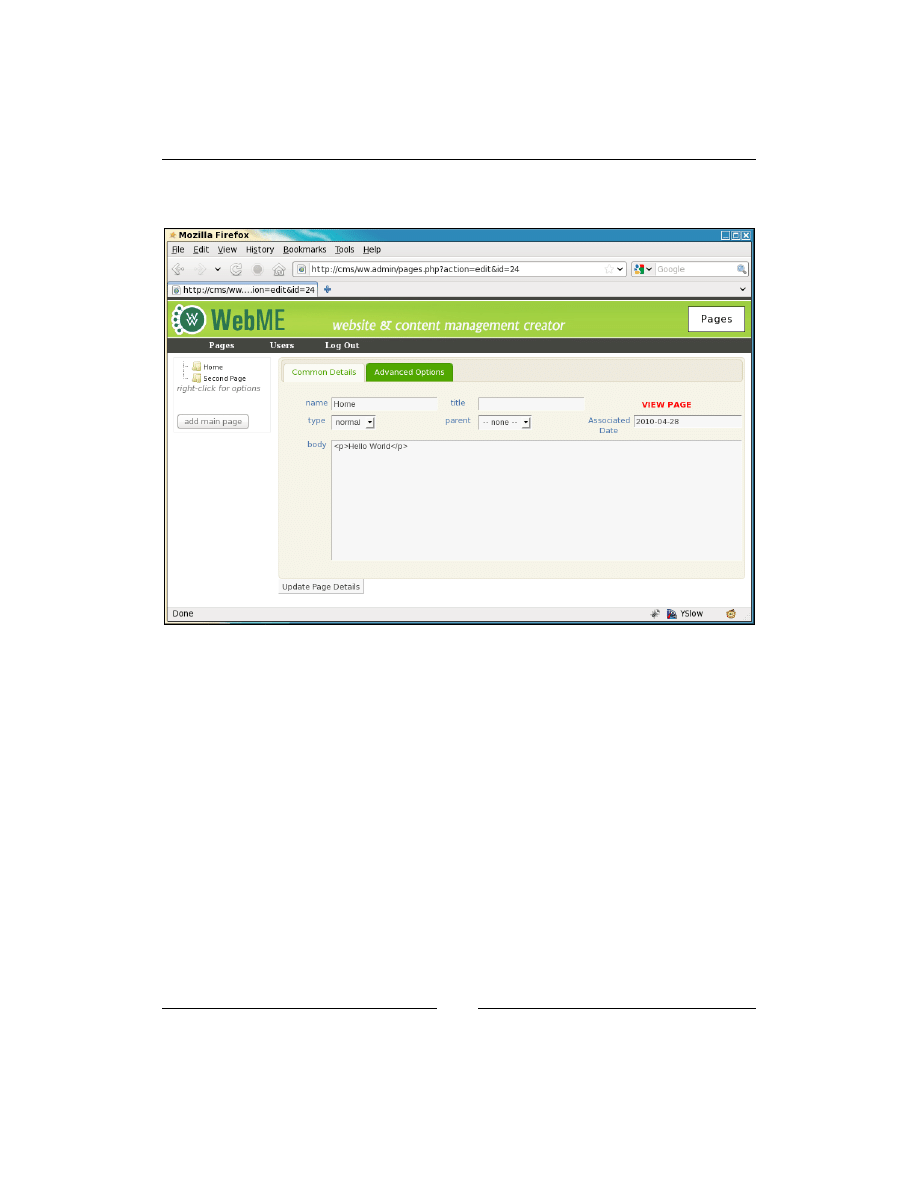
Page Management – Part One
[
84
]
Here's a screenshot of the first tab (I've temporarily completed the jQuery tabs to get
this shot—we'll do it in the chapter later on):
You can see that the date input box is quite large. There's a reason for that, which
we'll see in the next chapter.
The second tab will be a bit shorter. Let's add that now. Add the following code to
the
/ww.admin/pages/forms.php
file:
// { Advanced Options
echo '<div id="tabs-advanced-options">';
echo '<table><tr><td>';
// { metadata
echo '<h4>MetaData</h4><table>';
echo '<tr><th>keywords</th><td>
<input name="keywords"
value="',htmlspecialchars($page['keywords']),'"
/></td></tr>';
echo '<tr><th>description</th><td>
<input name="description"
value="',htmlspecialchars($page['description']),'"
/></td></tr>';

Chapter 3
[
85
]
// { template
// we'll add this in the next chapter
// }
echo '</table>';
// }
echo '</td><td>';
// { special
echo '<h4>Special</h4>';
$specials=array('Is Home Page',
'Does not appear in navigation');
for($i=0;$i<count($specials);++$i){
if($specials[$i]!=''){
echo '<input type="checkbox" name="special[',$i,']"';
if($page['special']&pow(2,$i))echo ' checked="checked"';
echo ' />',$specials[$i],'<br />';
}
}
// }
// { other
echo '<h4>Other</h4>';
echo '<table>';
// { order of sub-pages
echo '<tr><th>Order of sub-pages</th><td><select name="page_
vars[order_of_sub_pages]">';
$arr=array('as shown in admin menu','alphabetically',
'by associated date');
foreach($arr as $k=>$v){
echo '<option value="',$k,'"';
if(isset($page_vars['order_of_sub_pages']) &&
$page_vars['order_of_sub_pages']==$k)
echo ' selected="selected"';
echo '>',$v,'</option>';
}
echo '</select>';
echo '<select name="page_vars[order_of_sub_pages_dir]">
<option value="0">ascending (a-z, 0-9)</option>';
echo '<option value="1"';
if(isset($page_vars['order_of_sub_pages_dir']) &&
$page_vars['order_of_sub_pages_dir']=='1')
echo ' selected="selected"';
echo '>descending (z-a, 9-0)</option></select></td></tr>';
// }
echo '</table>';
// }
echo '</td></tr></table></div>';
// }
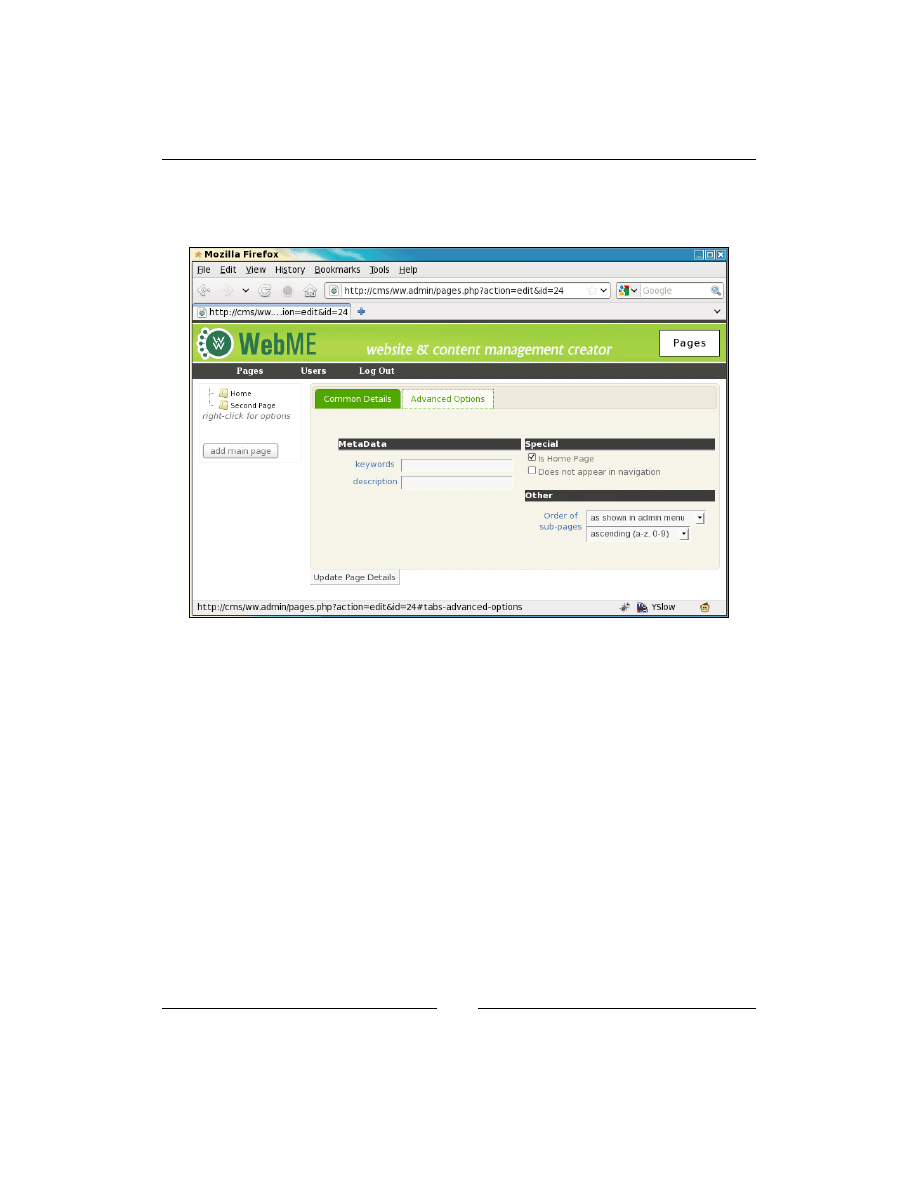
Page Management – Part One
[
86
]
There's not a lot to explain here. There are some extra "advanced" options which
I've not added here, which are useful for the system when it's been more completed
(plugins added, themes or templates completed, and so on).
First, we add inputs for keywords and description meta-data. Most people appear to
leave these alone, which is why it's not on the front tab.
We will add templates and themes in the next chapter. For now, I've added a
commented placeholder.
After this, we show a list of "specials". I've included just two here—a marker to say
whether the current page is the home page, and another marker to indicate that the
page should not appear in front-end navigation.
Finally (for now), we show two drop-down boxes, to let the administrator decide
what order the current page's sub-pages should be shown in the front-end
navigation. For example, you might want a list of authors to be alphabetical or new
items to appear by date descending, but in most cases you will want the pages to
appear in the same order as they appear in the admin area (which you can change by
dragging page names in the navigation menu on the left-hand side).
Okay—now let's complete the form and add in the tabs code.

Chapter 3
[
87
]
There is one more section which we could add—some plugins might want to add
tabs to this form. We'll get to that later in the book.
Add this code to the file
/ww.admin/pages/forms.php
:
echo '</div><input type="submit" name="action" value="',
($edit?'Update Page Details':'Insert Page Details')
,'" /></form>';
echo '<script>window.currentpageid='.$id.';</script>';
echo '<script src="/ww.admin/pages/pages.js"></script>';
And let's create the file
/ww.admin/pages/pages.js
:
$(function(){
$('.tabs').tabs();
});
The
window.currentpageid
variable will be used in the next section.
That completes the basics of the form.
Next, let's look at those inputs we highlighted earlier as needing some enhancements.
Filling the parent selectbox asynchronously
In very large websites, it can sometimes be very slow to load up the
Page
form,
because of the "parents" drop-down. This select-box tells the server what page the
current page is located under.
If you fill that at the time of loading the form, then the size of the downloaded HTML
can be quite large.
A solution for this problem was developed for my previous book (jQuery 1.3 with
PHP), and as part of that book, the solution was packaged into a jQuery plugin
which solves the problem here.
Download the
remoteselectoptions
plugin from
http://plugins.jquery.com/
project/remoteselectoptions
and unzip it in your
/j/
directory.
What this plugin does, is that in the initial load of your page's HTML, you enter
just one option in the select-box, and it will get the rest of the options only when it
becomes necessary (that is, when the select-box is clicked).

Page Management – Part One
[
88
]
To get this to work with the parents select-box, change the
/ww.admin/pages/
pages.js
file to this:
$(function(){
$('.tabs').tabs();
$('#pages_form select[name=parent]').remoteselectoptions({
url:'/ww.admin/pages/get_parents.php',
other_GET_params:currentpageid
});
});
And because this plugin is useful for quite a few places in the admin, let's add it to
/
ww.admin/header.php
(the highlighted line):
<script src="http://ajax.googleapis.com/ajax/libs
/jqueryui/1.8.0/jquery-ui.min.js"></script>
<script src="/j/jquery.remoteselectoptions
/jquery.remoteselectoptions.js"></script>
<link rel="stylesheet" href="http://ajax.googleapis.com/ajax
/libs/jqueryui/1.8.0/themes/south-street/jquery-ui.css"
type="text/css" />
And you can see from the
pages.js
file that another file is required to build up the
actual list of page names. Create this as
/ww.admin/pages/get_parents.php
:
<?php
require '../admin_libs.php';
function page_show_pagenames($i=0,$n=1,$s=0,$id=0){
$q=dbAll('select name,id from pages where parent="'
.$i.'" and id!="'.$id.'" order by ord,name');
if(count($q)<1)return;
foreach($q as $r){
if($r['id']!=''){
echo '<option value="'.$r['id'].'" title="'
.htmlspecialchars($r['name']).'"';
echo($s==$r['id'])?' selected="selected">':'>';
for($j=0;$j<$n;$j++)echo ' ';
$name=$r['name'];
if(strlen($name)>20)$name=substr($name,0,17).'...';
echo htmlspecialchars($name).'</option>';
page_show_pagenames($r['id'],$n+1,$s,$id);
}
}
}
$selected=isset($_REQUEST['selected'])
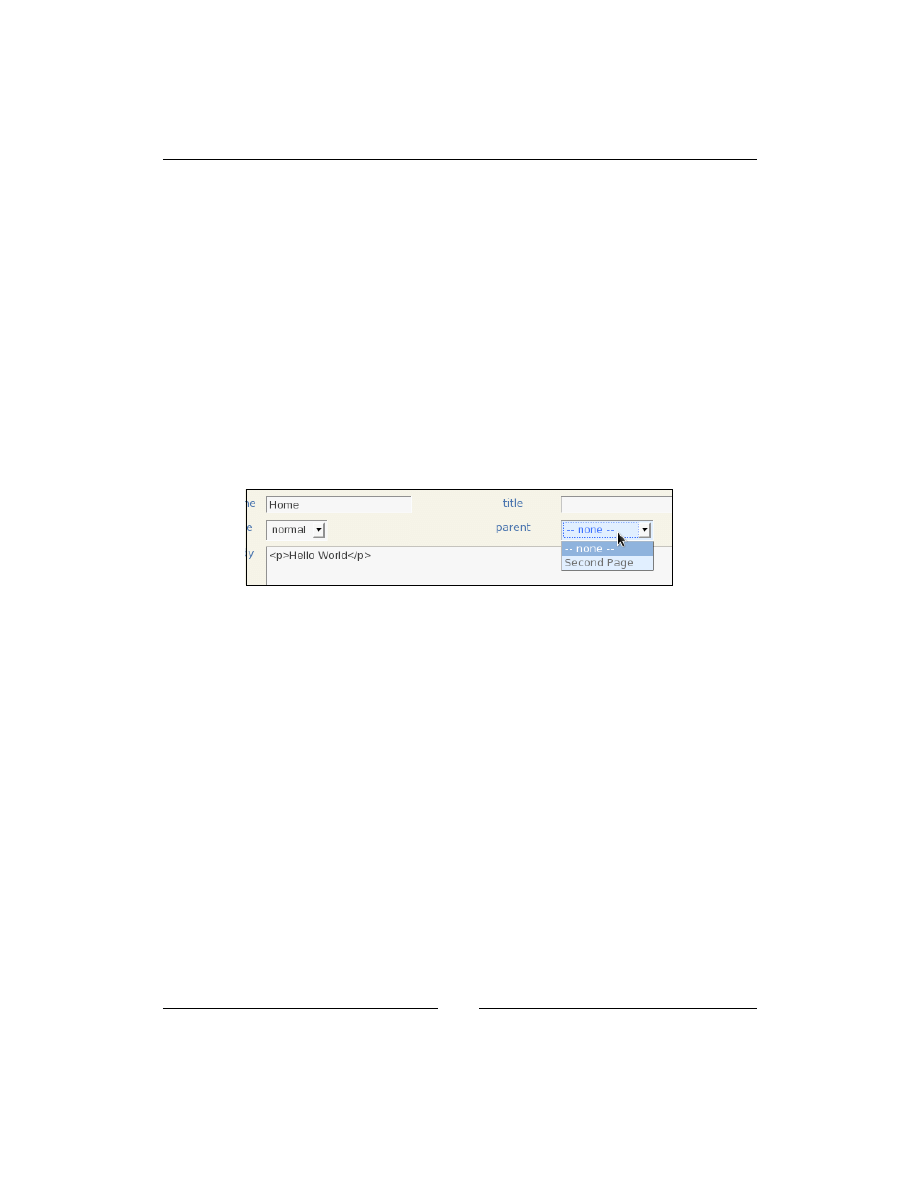
Chapter 3
[
89
]
?$_REQUEST['selected']:0;
$id=isset($_REQUEST['other_GET_params'])
?(int)$_REQUEST['other_GET_params']:-1;
echo '<option value="0"> -- none -- </option>';
page_show_pagenames(0,0,$selected,$id);
The
remoteselectoptions
plugin sends a query to this page, with two
parameters—the currently selected parent's ID, and the current page ID.
The previous code builds up an option list, taking care to not allow the admin
to choose to place a page within itself, or within any page which is contained
hierarchically under itself. That would make the page disappear from all navigation,
including the admin navigation.
For the current example, that means that the only options available are either none
(that is, the page is a top-level one), or Second Page, as in our example, there are
currently only two pages, and obviously you can't place Home under Home.
Okay—we've done enough now that you can take a break before we start on the next
chapter, where we'll finish off page creation.
Summary
In this chapter, we built the basics of page management, including creation of
the form for page management, and a few jQuery tools for making page location
management easy and improving the selection of large select-boxes.
In the next chapter, we will complete the page management section, and build a
simple menu system for the front-end so we can navigate between pages.


Page Management – Part
Two
In this chapter, we will complete the page-management section, and will build a
simple navigation menu for the front-end.
We will discuss the following topics:
•
How to make human-readable dates
•
Rich-text editing
•
File management for images and files
At the end of this chapter, we will have a completed page management system.
Dates
Dates are annoying. The scheme I prefer is to enter dates the same way MySQL
accepts them—
yyyy-mm-dd hh:mm:ss
. From left to right, each subsequent element
is smaller than the previous. It's logical, and can be sorted sensibly using a simple
numeric sorter.
Unfortunately, most people don't read or write dates in that format. They'd prefer
something like
08/07/06
.
Dates in that format do not make sense. Is it the 8th day of the 7th month of 2006, or
the 7th day of the 8th month of 2006, or even the 6th day of the 7th month of 2008?
Date formats are different all around the world.
Therefore, you cannot trust human administrators to enter the dates manually.
A very quick solution is to use the jQuery UI's
datepicker
plugin.
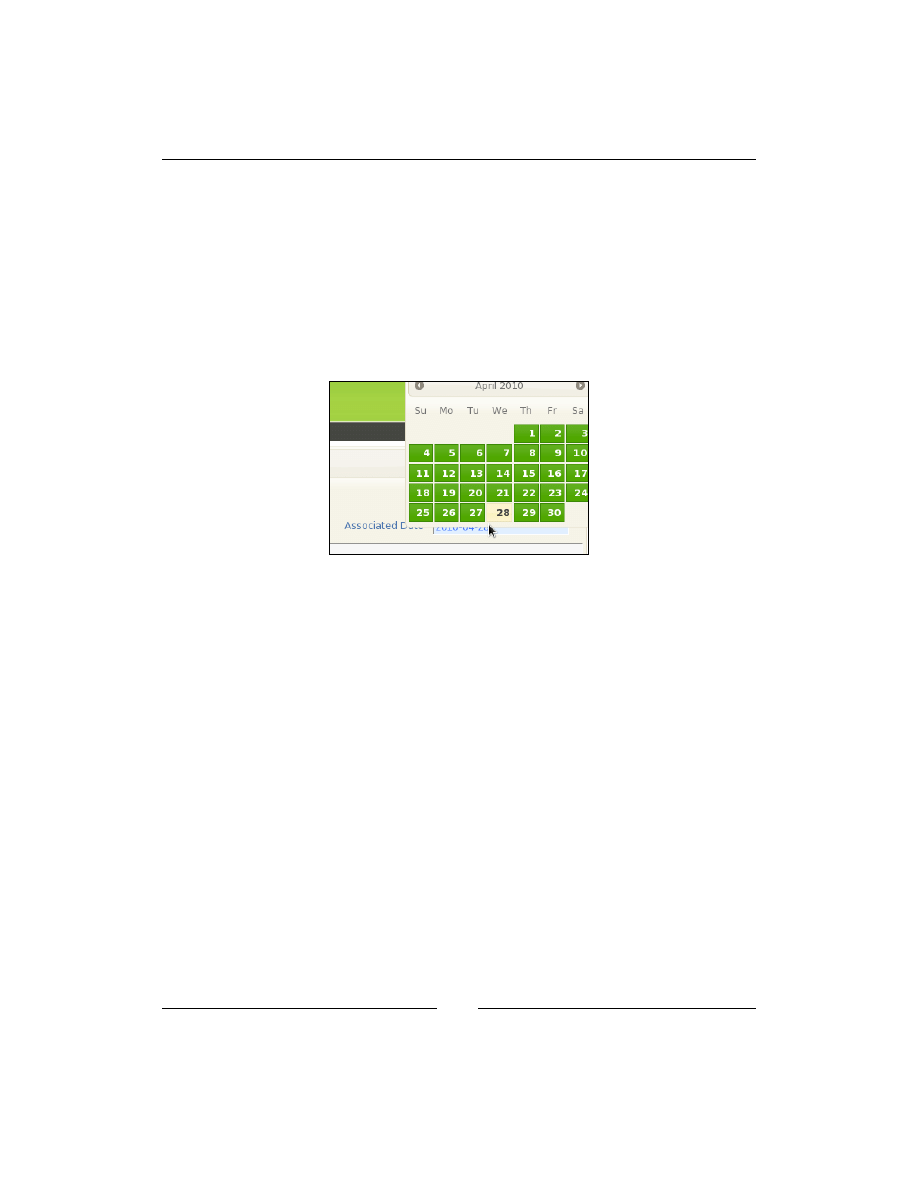
Page Management – Part Two
[
92
]
Temporarily (we'll remove it in a minute) add the highlighted lines to
/ww.admin/
pages/pages.js
:
other_GET_params:currentpageid
});
$('.date-human').datepicker({
'dateFormat':'yy-mm-dd'
});
});
When the date field is clicked, this appears:
It's a great calendar, but there's still a flaw: Before you click on the date field, and
even after you select the date, the field is still in
yyyy-mm-dd
format.
While MySQL will thank you for entering the date in a sane format, you will have
people asking you why the date is not shown in a humanly readable way.
We can't simply change the date format to accept something more reasonable such as
"May 23rd, 2010", because we would then need to ensure that we can understand this
on the server-side, which might take more work than we really want to do.
So we need to do something else.
The
datepicker
plugin has an option which lets you update two fields at the same
time. This is the solution—we will display a dummy field which is humanly readable,
and when that's clicked, the calendar will appear and you will be able to choose a date,
which will then be set in the human-readable field and in the real form field.
Don't forget to remove that temporary code from
/ww.admin/pages/pages.js
.
Because this is a very useful feature, which we will use throughout the admin area
whenever a date is needed, we will add a global JavaScript file which will run on
all pages.

Chapter 4
[
93
]
Edit
/ww.admin/header.php
and add the following highlighted line:
<script src="/j/jquery.remoteselectoptions
/jquery.remoteselectoptions.js"></script>
<script src="/ww.admin/j/admin.js"></script>
<link rel="stylesheet" href="http://ajax.googleapis.com
/ajax/libs/jqueryui/1.8.0/themes/south-street
/jquery-ui.css" type="text/css" />
And then we'll create the
/ww.admin/j/
directory and a file named
/ww.admin/j/
admin.js
:
function convert_date_to_human_readable(){
var $this=$(this);
var id='date-input-'+Math.random().toString()
.replace(/\./,'');
var dparts=$this.val().split(/-/);
$this
.datepicker({
dateFormat:'yy-mm-dd',
modal:true,
altField:'#'+id,
altFormat:'DD, d MM, yy',
onSelect:function(dateText,inst){
this.value=dateText;
}
});
var $wrapper=$this.wrap(
'<div style="position:relative" />');
var $input=$('<input id="'+id+'" class="date-human-readable"
value="'+date_m2h($this.val())+'" />');
$input.insertAfter($this);
$this.css({
'position':'absolute',
'opacity':0
});
$this
.datepicker(
'setDate', new Date(dparts[0],dparts[1]-1,dparts[2])
);
}
$(function(){
$('input.date-human').each(convert_date_to_human_readable);
});
D
o
w
nl
oa
d
fr
om
W
ow
!
eB
oo
k
<
w
w
w
.w
ow
eb
oo
k.
co
m
>

Page Management – Part Two
[
94
]
This takes the computer-readable date input and creates a copy of it, but in a
human-readable format.
The original date input box is then made invisible and laid across the new one. When
it is clicked, the date is updated on both of them, but only the human-readable one
is shown.
Much better. Easy for a human to read, and also usable by the server.
Saving the page
We created the form, and except for making the body textarea more user-friendly, it's
just about finished. Let's do that now.
When you click on the Insert Page Details button (or Update Page Details, if an ID
was provided), the form data is posted to the server.
We need to perform these actions before the page menu is displayed, so it is
up-to-date.
Edit
/ww.admin/pages.php
, and add the following highlighted lines before the
load
menu
section:
echo '<h1>Pages</h1>';
// { perform any actions
if(isset($_REQUEST['action'])){
if($_REQUEST['action']=='Update Page Details'
|| $_REQUEST['action']=='Insert Page Details'){
require 'pages/action.edit.php';
}
else if($_REQUEST['action']=='delete'){
'pages/action.delete.php';
}
}
// }
// { load menu
If an
action
parameter is sent to the server, then the server will use this block to decide
whether you want to edit or delete the page. We'll handle deletes later in the chapter.
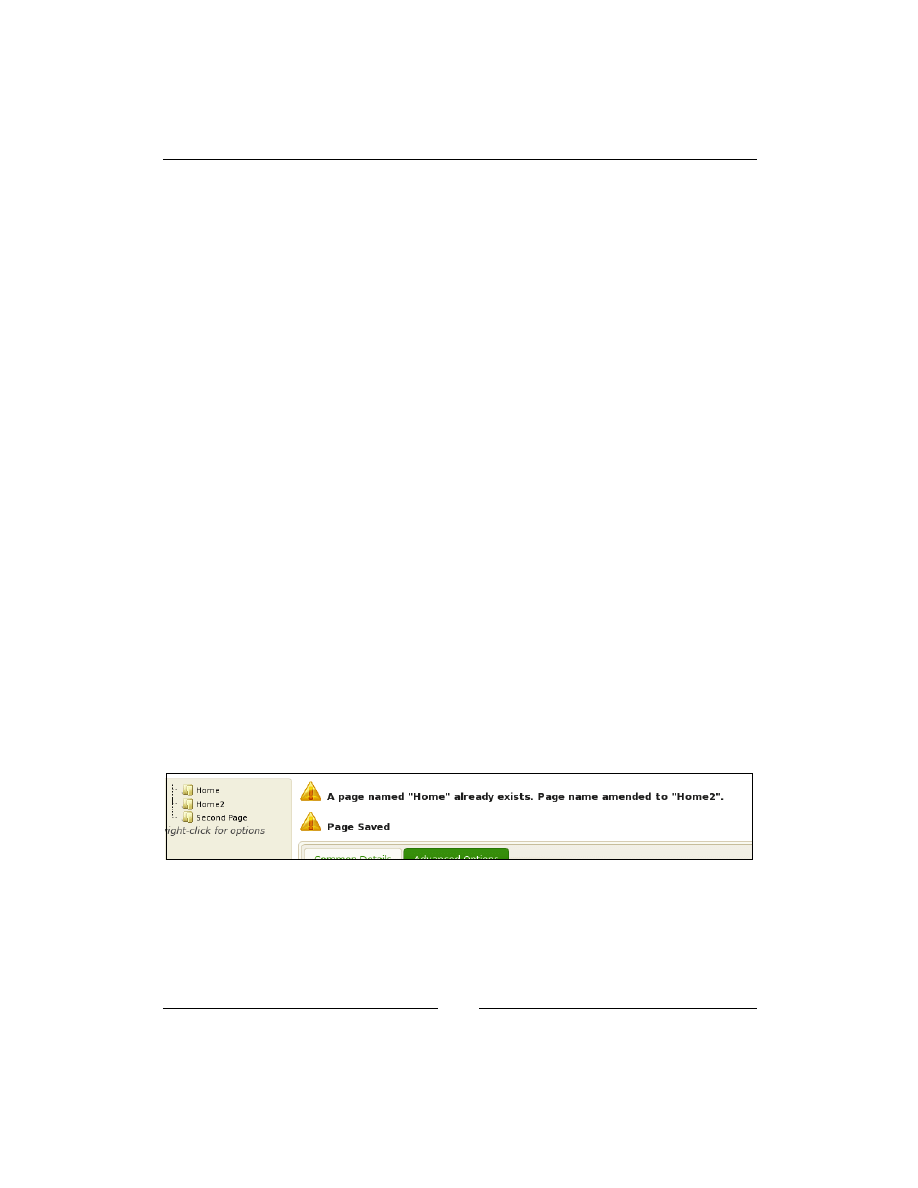
Chapter 4
[
95
]
Notice that we are handling inserts and updates with the same file,
action.edit.
php
—in the database, there is almost no difference between the two when using
MySQL.
So, let's create that file now. We'll do it a bit at a time, like how we did the form, as
it's a bit long.
Create
/ww.admin/pages/action.edit.php
with this code:
<?php
function pages_setup_name($id,$pid){
$name=trim($_REQUEST['name']);
if(dbOne('select id from pages where
name="'.addslashes($name).'" and parent='.$pid.'
and id!='.$id,'id')){
$i=2;
while(dbOne('select id from pages where
name="'.addslashes($name.$i).'" and parent='.$pid.'
and id!='.$id,'id'))$i++;
echo '<em>A page named "'.htmlspecialchars($name).'"
already exists. Page name amended to "'
.htmlspecialchars($name.$i).'".</em>';
$name=$name.$i;
}
return $name;
}
The first piece is a function which tests the submitted page name. If that name is the
same as another page which has the same parent, then a number is added to the end
and a message is shown explaining this.
Here's an example, creating a page named "Home" in the top level (we already have
a page named "Home"):
Page Management – Part Two
[
96
]
Next we'll create a function for testing the inputted
special
variable. Add this to the
same file:
function pages_setup_specials($id=0){
$special=0;
$specials=isset($_REQUEST['special'])
?$_REQUEST['special']:array();
foreach($specials as $a=>$b)
$special+=pow(2,$a);
$homes=dbOne("SELECT COUNT(id) AS ids FROM pages
WHERE (special&1) AND id!=$id",'ids');
if($special&1){ // there can be only one homepage
if($homes!=0){
dbQuery("UPDATE pages SET special=special-1
WHERE special&1");
}
}
else{
if($homes==0){
$special+=1;
echo '<em>This page has been marked as the site\'s
Home Page, because there must always be one.</em>';
}
}
return $special;
}
In this function, we build up the
special
variable, which is a bit field.
A
bit
field is a number which uses binary math to combine a few "yes/
no" answers into one single value. It's good for saving space and fields in
the database.
Each value has a value assigned to it which is a power of two. The
interesting thing to note about powers of two is that in binary, they're
always represented as a 1 with some 0s after it. For example, 1 is
represented as 00000001, 2 is 00000010, 4 is 00000100, and so on.
When you have a bit field such as 00000011 (each number here is a bit), it's
easy to see that this is composed of the values 1 and 2 combined, which
are 2
0
and 2
1
respectively.
The & operator lets us check quickly if a certain bit is turned on (is 1) or
not. For example, 00010011 & 16 is true, and 00010011 & 32 is false,
because the 16 bit is on and the 32 bit is off.

Chapter 4
[
97
]
In the database, we set a bit for the homepage, which we say has a value of 1. In the
previous function, we need to make sure that after inserting or updating a page,
there is always exactly one homepage.
The only other one we've set so far is "does not appear in navigation menu", which
we've given the value 2. If we added a third bitflag ("is a 404 handler", for example),
it would have the value 4, then 8, and so on.
Okay—now we will set up our variables. Add this to the same file:
// { set up common variables
$id =(int)$_REQUEST['id'];
$pid =(int)$_REQUEST['parent'];
$keywords =$_REQUEST['keywords'];
$description =$_REQUEST['description'];
$associated_date =$_REQUEST['associated_date'];
$title =$_REQUEST['title'];
$name =pages_setup_name($id,$pid);
$body =$_REQUEST['body'];
$special =pages_setup_specials($id);
if(isset($_REQUEST['page_vars']))
$vars=json_encode($_REQUEST['page_vars']);
else $vars='[]';
// }
Then we will add the main body of the page update SQL to the same file:
// { create SQL
$q='edate=now(),type="'.addslashes($_REQUEST['type']).'",
associated_date="'.addslashes($associated_date).'",
keywords="'.addslashes($keywords).'",
description="'.addslashes($description).'",
name="'.addslashes($name).'",
title="'.addslashes($title).'",
body="'.addslashes($body).'",parent='.$pid.',
special='.$special.',vars="'.addslashes($vars).'"';
// }
This is SQL which is common to both creating and updating a page.
Finally we run the actual query and perform the action. Add this to the same file:
// { run the query
if($_REQUEST['action']=='Update Page Details'){
$q="update pages set $q where id=$id";
dbQuery($q);
}

Page Management – Part Two
[
98
]
else{
$q="insert into pages set cdate=now(),$q";
dbQuery($q);
$_REQUEST['id']=dbLastInsertId();
}
// }
echo '<em>Page Saved</em>';
In the first case, we simply run an update.
In the second, we run an
insert
, adding the creation date to the query, and then
setting
$_REQUEST['id']
to the ID of the entry that we just created.
Creating new top-level pages
If you've been trying all this, you'll have noticed that you can create a top-level page
simply by clicking on the admin area's Pages link in the top menu, and then you're
shown an empty Insert Page Details form.
It makes sense, though, to also have it available from the pagelist on the left-hand side.
So, let's make that add main page button useful.
If you remember, we created a
pages_add_main_page
function in the
menu.js
file,
just as a placeholder until we got everything else done.
Open up that file now,
/ww.admin/pages/menu.js
, and replace that function with
the following two new functions:
function pages_add_main_page(){
pages_new(0);
}
function pages_new(p){
$('<form id="newpage_dialog" action="/ww.admin/pages.php"
method="post">
<input type="hidden" name="action"
value="Insert Page Details" />
<input type="hidden" name="special[1]"
value="1" />
<input type="hidden" name="parent" value="'+p+'" />
<table>
<tr><th>Name</th><td><input name="name" /></td></tr>
<tr><th>Page Type</th><td><select name="type">
<option value="0">normal</option>
</select></td></tr>

Chapter 4
[
99
]
<tr><th>Associated Date</th><td>
<input name="associated_date" class="date-human"
id="newpage_date" /></td></tr>
</table>
</form>')
.dialog({
modal:true,
buttons:{
'Create Page': function() {
$('#newpage_dialog').submit();
},
'Cancel': function() {
$(this).dialog('destroy');
$(this).remove();
}
}
});
$('#newpage_date').each(convert_date_to_human_readable);
return false;
}
When the add main page button is clicked, a dialog box is created asking some basic
information about the page to create:

Page Management – Part Two
[
100
]
We include a few hidden inputs.
•
action
: To tell the server this is an Insert Page Details action.
•
special
: When Create Page is clicked, the page will be saved in the
database, but we should hide it initially so that front-end readers don't see a
half-finished page. So, the
special[1]
flag is set (2
1
== 2, which is the value
for hiding a page).
•
parent
: Note that this is a variable. We can use the same dialog to create
sub-pages.
When the dialog has been created, the date input box is converted to human-
readable, the same as we did earlier.
Creating new sub-pages
We will add sub-pages by using context menus on the page list. Note that we have
a message saying right-click for options under the list.
First, add this function to the
/ww.admin/pages/menu.js
file:
function pages_add_subpage(node,tree){
var p=node[0].id.replace(/.*_/,'');
pages_new(p);
}
We will now need to activate the context menu. This is done by adding a
contextmenu
plugin to the
jstree
plugin. Luckily, it comes with the download, so
you've already installed it. Add it to the page by editing
/ww.admin/pages/menu.
php
and add this highlighted line:
<script src="/j/jquery.jstree/jquery.tree.js"></script>
<script src=
"/j/jquery.jstree/plugins/jquery.tree.contextmenu.js">
</script>
<script src="/ww.admin/pages/menu.js"></script>
And now, we edit the
.tree()
call in
/ww.admin/menu.js
to tell it what to do:
$('#pages-wrapper').tree({
callback:{
// SKIPPED FOR BREVITY - DO NOT DELETE THESE LINES
},
plugins:{
'contextmenu':{
'items':{

Chapter 4
[
101
]
'create' : {
'label' : "Create Page",
'icon' : "create",
'visible' : function (NODE, TREE_OBJ) {
if(NODE.length != 1) return 0;
return TREE_OBJ.check("creatable", NODE);
},
'action':pages_add_subpage,
'separator_after' : true
},
'rename':false,
'remove':false
}
}
}
});
By default, the contextmenu has three links:
create
,
rename
, and
remove
. You need
to turn off any you're not currently using by setting them to false.
Now if you right-click on any page name in the pagelist, you will have a choice to
create a sub-page under it.
Deleting pages
We will add deletions in the same way, using the context menu.
Edit the same file, and this time in the contextmenu code, replace the
remove: false
line with these:
'remove' : {
'label' : "Delete Page",
'icon' : "remove",
'visible' : function (NODE, TREE_OBJ) {
if(NODE.length != 1) return 0;
return TREE_OBJ.check("deletable", NODE);
},
'action':pages_delete,
'separator_after' : true
}
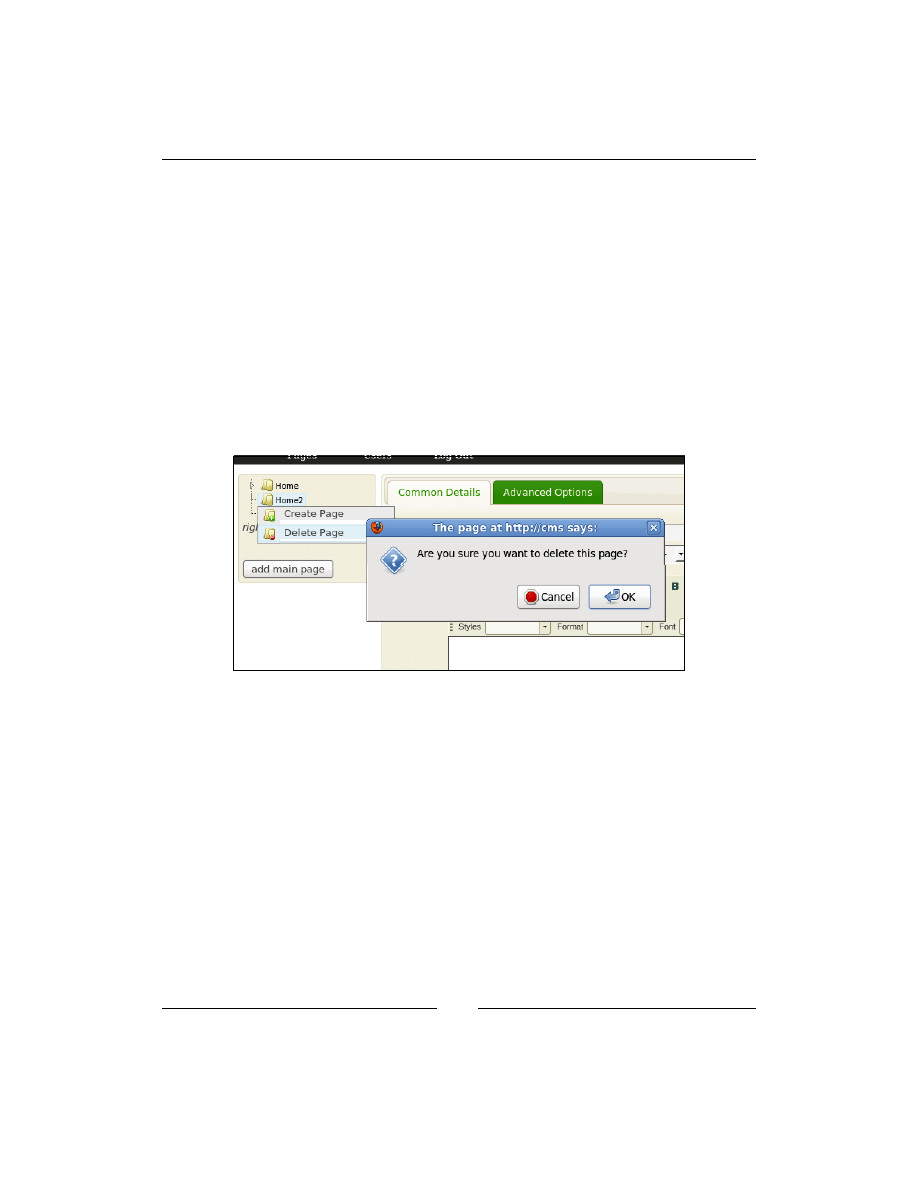
Page Management – Part Two
[
102
]
And add the
pages_delete
function to the same file:
function pages_delete(node,tree){
if(!confirm(
"Are you sure you want to delete this page?"))return;
$.getJSON('/ww.admin/pages/delete.php?id='
+node[0].id.replace(/.*_/,''),function(){
document.location=document.location.toString();
});
}
One thing to always keep in mind is whenever creating any code that deletes
something in your CMS, you must ask the administrator if he/she is sure, just to
make sure it wasn't an accidental click. If the administrator confirms that the click
was intentional, then it's not your fault if something important was deleted.
So, the
pages_delete
function first checks for this, and then calls the server to
remove the file. The page is then refreshed because this may significantly change the
page list tree, as we'll see now.
Create the
/ww.admin/pages/delete.php
file:
<?php
require '../admin_libs.php';
$id=(int)$_REQUEST['id'];
if(!$id)exit;
$r=dbRow("SELECT COUNT(id) AS pagecount FROM pages");
if($r['pagecount']<2){
die('cannot delete - there must always be one page');
}
else{
$pid=dbOne("select parent from pages

Chapter 4
[
103
]
where id=$id",'parent');
dbQuery("delete from pages where id=$id");
dbQuery("update pages set parent=$pid where parent=$id");
}
echo 1;
First, we ensure that there is always at least one page in the database. If deleting this
page would empty the table, then we refuse to do it. There is no need to add an alert
explaining this, as it should be clear to anyone that deleting the last remaining page
in a website leaves the website with no content at all. Simply refusing the deletion
should be enough.
Next, we delete the page.
Finally, any pages which were contained within that page (pages which had this one
as their parent), are moved up in the tree so they are contained in the deleted page's
old parent.
For example, if you had a page,
page1>page2>page3
(where
>
indicates the hierarchy),
and you removed
page2
, then
page3
would then be in the position
page1>page3
.
This can cause a large difference in the treestructure if there were quite a few pages
contained under the deleted one, so the page needs to be refreshed.
Rich-text editing using CKeditor
Anything entered into the body textarea will be displayed directly on the front-end.
We've used a plain textarea for now, but this is not ideal.
It's not a good idea to assume that the administrator knows HTML. Most of them
will not.
For a long time, the only reasonable solution for this was to use a text markup
language such as Textism or BBCode, which allow you to enter text such as
this
_is_ a *word*
, which will be converted to
this <em>is</em> a <strong>word</
strong>
.
While that's a good compromise, in the last few years it has become possible to use
"what you see is what you get"-style editors, where you can type into the textarea
and use buttons or key combinations to style the text and see it right there.
These editors are known as Rich-text Editors (RTEs). When describing them to
clients, though, I find it's easier to describe them as small Word-like editors. In fact,
they're usually designed very similar to the wordprocessor packages that people use
in their normal office work.

Page Management – Part Two
[
104
]
The first one I used was HTMLarea, but that project eventually was discontinued,
and I moved onto FCKeditor. Recently, that project has been rewritten and is now
available as CKeditor from
http://ckeditor.com/
.
While it is interesting to offer a choice of RTE or plaintext editing to the administrator
(WordPress offers the choice, for example), I've never had a client which asked for
plain text. After all, the point of a CMS is to ease the editing of websites and their
pages and content, so why ruin this by then writing HTML instead of using an RTE?
Apart from CKeditor, the only other very popular RTE is TinyMCE. There are many
other editors, but when you read about them, they are usually compared against
CKeditor or TinyMCE.
So, let's start by downloading CKeditor from
http://ckeditor.com/download
—I'm
using version 3.2.1. Download it and extract to
/j/
. It will create a directory called
/j/ckeditor/
.
CKeditor is useful enough that we will use it a lot in the admin area. So, we will add
it as a plugin that's loaded on all pages. Edit
/ww.admin/header.php
and add the
highlighted line:
<script src="/ww.admin/j/admin.js"></script>
<script src="/j/ckeditor/ckeditor.js"></script>
<link rel="stylesheet" href="http://ajax.googleapis.com/
ajax/libs/jqueryui/1.8.0/themes/south-street/
jquery-ui.css" type="text/css" />
To display CKeditor, the method I prefer to use is to create a textarea, and convert it
to an editor afterwards using some JavaScript.
The code to do this is repetitive enough that it makes sense to create a small function
for it. Add this to
/ww.admin/admin_libs.php
:
function ckeditor($name,$value='',$height=250){
return '<textarea style="width:100%;height:'.$height.'px"
name="'.addslashes($name).'">'.htmlspecialchars($value)
.'</textarea><script>$(function(){
CKEDITOR.replace("'.addslashes($name).'",{
});
});</script>';
}
The second parameter for the
CKEDITOR.replace
function call is to supply options
to CKeditor. We'll get to that in a minute.
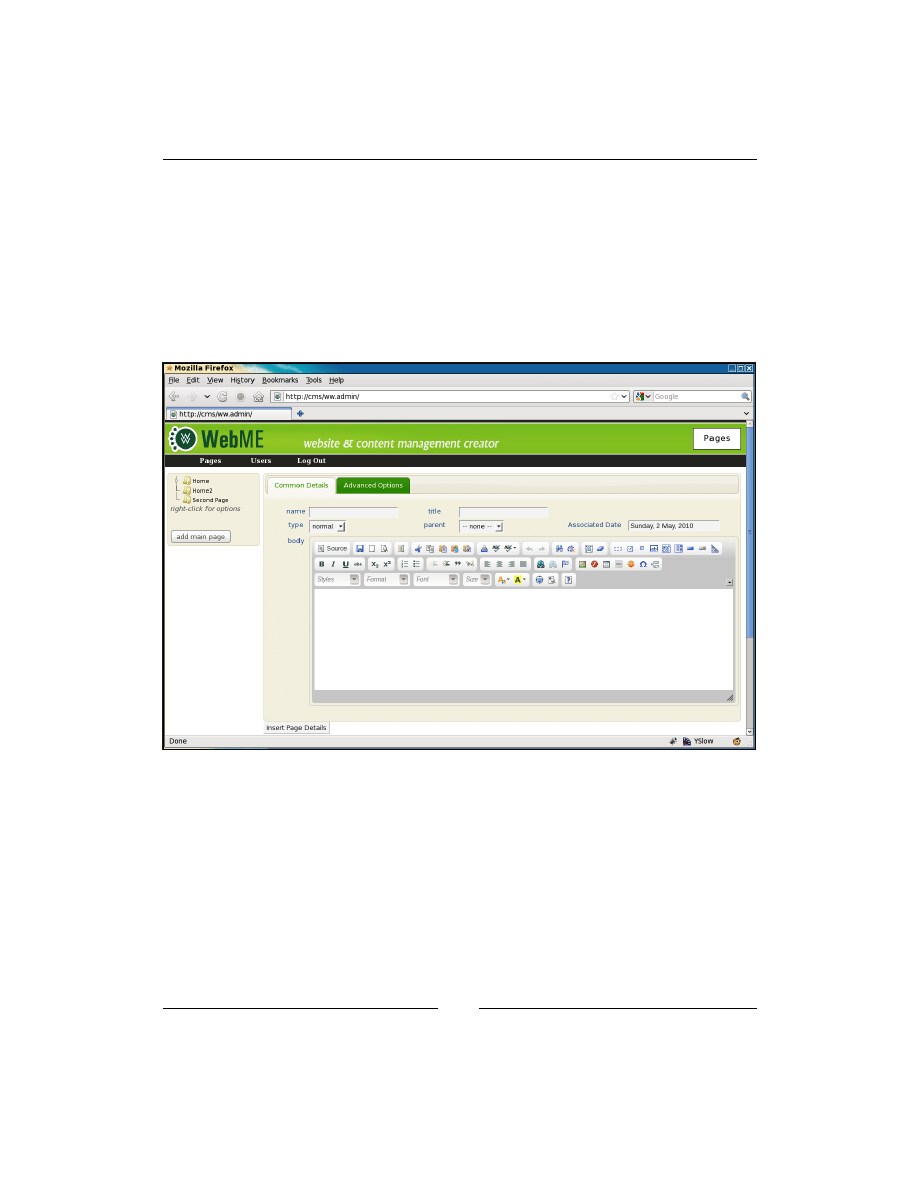
Chapter 4
[
105
]
Now, let's use it. In
/ww.admin/pages/forms.php
, change the
page-type-specific
data
block to the following:
// { page-type-specific data
echo '<tr><th>body</th><td colspan="5">';
echo ckeditor('body',$page['body']);
echo '</td></tr>';
// }
Now when you load up the page admin, you'll see we have the RTE embedded:
That toolbar is much too full though. The first time an administrator sees that, they
would be terrified! Most things an admin will want to do in a web page are really
simple—make something bold, insert an image or table, and so on.
I prefer to give the admin a much smaller toolbar.
You can do this by editing the
/j/ckeditor/config.js
file. Here's what I have:
CKEDITOR.editorConfig = function( config )
{
config.skin="v2";
config.toolbar="WebME";
D
o
w
nl
oa
d
fr
om
W
ow
!
eB
oo
k
<
w
w
w
.w
ow
eb
oo
k.
co
m
>
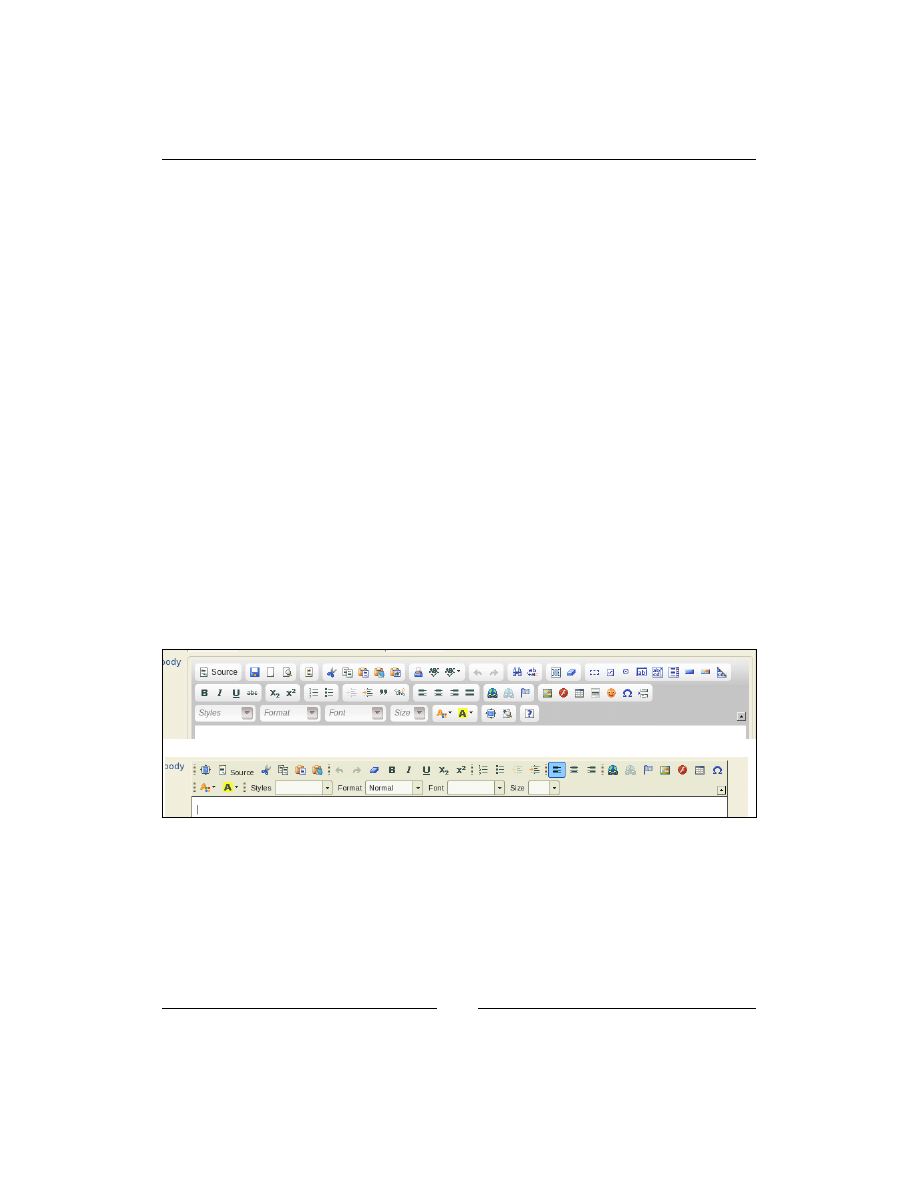
Page Management – Part Two
[
106
]
config.toolbar_WebME=[
['Maximize','Source','Cut','Copy','Paste','PasteText'],
['Undo','Redo','RemoveFormat','Bold','Italic',
'Underline','Subscript','Superscript'],
['NumberedList','BulletedList','Outdent','Indent'],
['JustifyLeft','JustifyCenter','JustifyRight'],
['Link','Unlink','Anchor','Image','Flash','Table',
'SpecialChar'],
['TextColor','BGColor'],
['Styles','Format','Font','FontSize']
];
};
First, I've set the CKeditor skin to
"v2"
, which looks a bit more like what people are
used to (Open Office Writer or MS Word). There are others in
/j/ckeditor/skins/
if you prefer to use a different one.
Next we set the editor to use the
"WebME"
set of buttons, and finally, we define
those buttons.
Each sub-array is a group of buttons which are similar in purpose. If you resize the
editor (notice that the bottom right-hand side of the editor is CMS Design With PHP
and jQuery) then each of those groups of buttons will be kept together.
You can compare the default toolbar and the custom toolbar in the following
screenshot, the new one is at the bottom:
You can see the custom toolbar is more compact, allowing more room in the textarea
to see what is written, and is more like what you would find in the default toolbar of
a word processor.
An administrator can use this editor as easily as they would use any word
processor—you can copy or paste from sources such as websites or word processor
documents and the formats will be mostly retained.

Chapter 4
[
107
]
In fact, you can even copy from websites and any images in the copied text will also
be copied! The
src
parameter of the image will be the original source, so you should
not do this on websites which are not yours. Embedding an image on your site and
yet linking to the original site can be seen as rude (it's called inline linking, but is
also known as leeching and hot-linking) as you are using someone else's bandwidth
to supply the image.
File management using KFM
So, let's say you want to upload your own images or files and link to them through
the RTE?
When FCKeditor was the main RTE on the Internet, it had a file manager built in.
This file manager allowed you to do some very basic things such as create directories
or upload files.
That was about the limit of its capabilities though—if you wanted to rename a file,
move it, delete it, and so on, there was simply no way to do it.
The file manager was limited for a number of reasons.
It was designed to work with several separate server-side languages, such as PHP,
ASP, Java, and Perl, and adding any one feature meant writing the server-side
implementation for it several times over. Concentrating on one single language was
not acceptable to the development team, as they wanted it to appeal to all users of
the RTE.
There is also that the team was developing a commercial file manager add-on for
CKeditor called CKfinder, so enhancing the free file manager was a conflict of interest.
Luckily, the CKeditor plugin system is not hard to work with, so in 2006 I started
building my own file manager specifically for use in a CMS with FCKeditor/
CKeditor, which I called KFM (Kae's File Manager).
I started developing KFM with MooTools, but it soon became obvious that jQuery
was much better for it, so it was converted to use jQuery. Using jQuery meant less
code for me (and my co-developer Benjamin) to write, and also, the more jQuery I
used the less I had to maintain myself, because there is a large community out there
catering to jQuery.
Download a copy of KFM from
http://kfm.verens.com/
. You can use either the
latest stable copy (1.4.5 at the time of writing this book), or the Nightly version,
which is compiled each night from subversions. I will use the Nightly version, which
you can get by clicking on nightly on the front page.

Page Management – Part Two
[
108
]
Extract it in
/j/
. It will create a directory called
trunk
. Rename that to
kfm
.
Now delete the
/j/kfm/admin/
directory. We will handle administration through
the configuration files, and will not allow configuration on-the-fly by administrators.
How KFM works is that you tell it what directory it is to maintain (
/f/
in our case)
and what database to use to manage the files. There are many other configuration
settings, but those are the most important.
For the database, you can use PostGres, MySQL, or SQLite. I prefer to use SQLite,
because it is stored as a single file, which you can actually save within the
/f/
directory itself (KFM creates a hidden directory called
/f/.files
and saves its data
in there).
This makes it easy for you to back up the entire file storage system and move it
to another server if you want, including the database as well. With MySQL or
PostGres, you'd have to export the data to a file, move the files, then import the
data on the far end.
KFM does a lot of image manipulation, in order to provide thumbnails, and so on. To
do this, your PHP server needs to either have GD compiled (this is usually true), or
to have ImageMagick installed.
I prefer to use ImageMagick, because it is quicker than GD, and less resource-hungry.
If you are building your CMS on a Windows server, you may have to use GD.
Configuration is managed by creating a file
/j/kfm/configuration.php
:
<?php
$kfm_userfiles_address=$_SERVER['DOCUMENT_ROOT'].'/f/';
$kfm_userfiles_output='/f/';
$kfm_dont_send_metrics=1;
You can see the full list of configuration settings in
/j/kfm/configuration.dist.
php
. KFM loads the
dist
file first, and then your own file, so you only need to enter
the options that you want to change.
In the previous code snippet, we set
$kfm_userfiles_address
to the full local
address of the website's
/f/
directory (as if you were on the machine from a console
and wanted to navigate to it).
We also set the
$kfm_userfiles_output
setting to
'/f/'
, to tell KFM where in the
website's online-accessible directories the files are kept.

Chapter 4
[
109
]
Finally, we set
$kfm_dont_send_metrics
to
1
. By default, when KFM is loaded
up for the first time every day, it "phones home" to tell the KFM server how many
people are using it, and what version is being used—this is so the developers have a
reasonable idea what versions of KFM they should support and what can be safely
decided to be obsolete. Setting this option to
1
tells KFM not to bother doing this (as
the main developer of KFM, I am usually using the most up-to-date version).
Now, create the directory
/f/
, and make sure it is writable by the web server.
In Linux, you can accomplish this in a number of different ways. The simplest is to
change the permissions on the directory to "0777" (which means read/write/execute
for everyone). This is not advisable on servers where other people may have user
accounts, such as virtual host accounts.
A better method is to use suPHP (
http://www.suphp.org/
), which runs PHP scripts
using your own username instead of the webserver's. This means that you can secure
the files so that they are only accessible or editable by you, and yet the webserver can
still work with them.
Setup of suPHP is outside the scope of this book. Feel free to use whichever you
want.
For the sake of simplicity, I will assume you are on your own server and no other
person has an account on it (this is becoming much more popular lately, thanks to
server virtualization), and so you can use the "0777" method.
You should now have an installed copy of KFM.
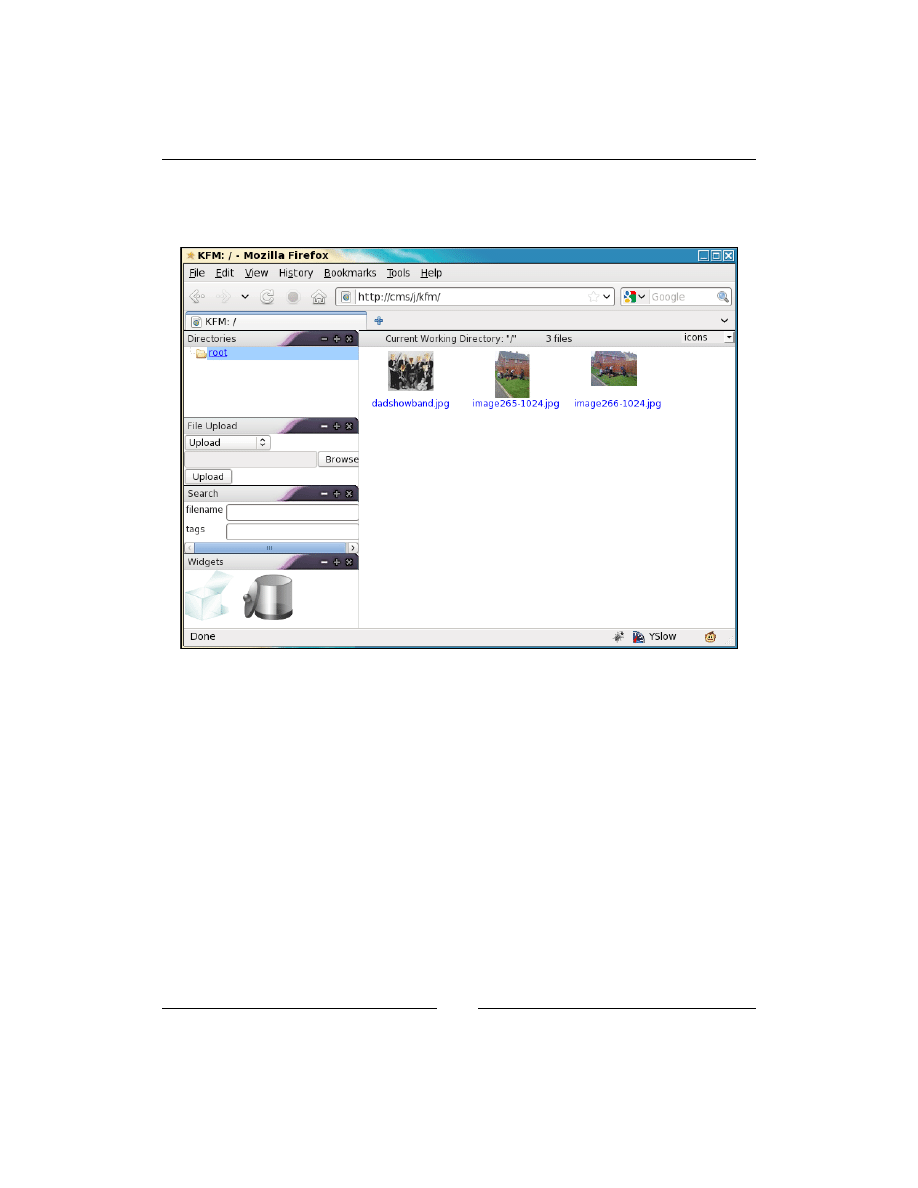
Page Management – Part Two
[
110
]
Test it by going to
/j/kfm/
in your browser. You should see something similar to the
following screenshot (I've uploaded a few images through the File Upload section to
test it):
If your installation fails, ask for help on the
kfm.verens.com
forum.
Okay—you should now have KFM installed. Now, let's connect it to CKeditor.
Hooking the two together is easy—in
/ww.admin/admin_libs.php
, add the
following highlighted line to the
CKEDITOR
function:
CKEDITOR.replace("'.addslashes($name).'",{
filebrowserBrowseUrl:"/j/kfm/"
});
Now when you click on the image icon or link icon in CKeditor, the pop-up window
will have a Browse Server button:-

Chapter 4
[
111
]
Clicking on that will pop up a new window with KFM in it to let you select the file
you want:
We are almost finished.
We now need to make sure that only authorized users can log into KFM.
After KFM has loaded its configuration, it then loads up another file if it exists,
/j/
kfm/api/config.php
, which is there for developers, in case they want to integrate
their CMSes with KFM.

Page Management – Part Two
[
112
]
By default this file does not exist in the usual distribution.
Create it and add this content:
<?php
if($_SERVER['PHP_SELF']=='/j/kfm/get.php' ||
(isset($kfm_api_auth_override) && $kfm_api_auth_override))
$inc='/ww.incs/basics.php';
else $inc='/ww.admin/admin_libs.php';
include_once $_SERVER['DOCUMENT_ROOT'].$inc;
$kfm_userfiles_address=$_SERVER['DOCUMENT_ROOT'].'/f/';
if(!session_id()){
if(isset($_GET['cms_session']))
session_id($_GET['cms_session']);
session_start();
}
if($_SERVER['PHP_SELF']=='/j/kfm/get.php'){
$kfm_do_not_save_session=true;
}
$kfm_api_auth_override=true;
$kfm->defaultSetting('file_handler','return');
$kfm->defaultSetting('file_url','filename');
$kfm->defaultSetting('return_file_id_to_cms',false);
The first few lines are the most important.
When a file is retrieved through KFM, it always comes through
/j/kfm/get.php
.
Within the KFM interface, for example, the thumbnails are retrieved through that
script, and if a file is downloaded, it is downloaded through that script.
So, if that file is loaded in a browser, it needs to be allowed.
Later in the book, we will see plugins which will use KFM's functions to accomplish
some things, such as the gallery plugin. To allow those plugins to use KFM, we need
to set a variable in the plugin to true (
$kfm_api_auth_override
). If KFM loads and
that variable is set, then permission is granted.
Otherwise, the browser must be logged in as an administrator.
The rest of the lines are additional configuration options which are generally done
through the KFM admin area (which we've deleted), and some optimization settings
as well.
One final thing needs to be done.

Chapter 4
[
113
]
KFM uses an
__autoload
function to load its classes. WebME also uses an
__
autoload
function. You can only have one of these.
So, we'll rewrite the
__autoload
function in
/ww.incs/basics.php
to only get set if
no other function of that name exists. Add the following highlighted lines:
if(!function_exists('__autoload')){
function __autoload($name) {
require $name . '.php';
}
}
And that's it! Now if you log out of the admin area, and try go to
/j/kfm/
, you will
see that you are asked to log in again.
Summary
In this chapter, we finished the page management system.
This included the display and management of page data in the admin area,
embedding a rich-text editor, and adding a filemanagement package as well.
In the next chapter, we will look at theme management, and displaying pages and
page navigation menus on the front-end.


Design Templates – Part One
This chapter will demonstrate how the content of the website can be embedded
in a design template.
The design of a site is also known as the "theme" or "skin". I will use these words
interchangeably. They both refer to the same thing.
A theme is composed of one or more page templates. The page template is used to
define a layout of a specific page (for example, a "splash page" vs. a content page),
while the theme says overall what the website looks like—colors, images, and so on.
Designers call this the "look and feel" of the website.
In this chapter, we will discuss:
•
How themes and templates work
•
Smarty templating engine
•
Creation of a theme
•
Front-end navigation
We will continue with these topics into the next chapter, which will improve on the
navigation using jQuery, and then we'll build a theme management system.
How do themes and templates work?
A "theme" is a term which describes the overall look and feel of a website. It
describes what the various elements look like—headers, links, tables, lists, and so
on. It defines the colors that are used, and any common background images such as
gradients or logos. The theme contains one or more templates, and any images or
other resources that will be required by those templates.

Design Templates – Part One
[
116
]
A "template" is basically an HTML snippet which defines the layout of a page—where
on the page the menu is located, are there panels, is there a header and footer. It uses
the theme's design, so that other templates in the same site have a similar feel to them.
In the CMS we are building, a template uses a few codes to define where the various
elements go on a page.
As an example, here is a very simple template, using code designed to work with the
Smarty templating engine:
<!doctype html>
<html>
<head>
{{$METADATA}}
</head>
<body>
{{MENU direction="horizontal"}}
{{$PAGECONTENT}}
</body>
</html>
The three highlighted lines are template codes which show where the CMS should
place various HTML snippets that it generates.
PHP is itself described as a templating engine, as you can mix it in with HTML
simply enough (and in fact, that's how it was originally designed).
You might ask, why bother using an external engine such as Smarty at all when PHP
is one itself?
Here is the above template written as PHP:
<!doctype html>
<html>
<head>
<?php
require 'common.php';
echo $METADATA;
?>
</head>
<body>
<?php
MENU (array('direction'=>'horizontal'));
echo $PAGECONTENT;
?>
</body>
</html>

Chapter 5
[
117
]
The difference here is not huge, but the first example is easier for a non-PHP user (such
as a designer) to use, whereas the second one requires a bit of knowledge of PHP.
Also, notice in the second one, the require line is used to set up the variables
$METADATA
and
$PAGECONTENT
. A non-PHP programmer might be confused if they
forgot to include that and there were empty spaces in the resulting HTML.
Another very important reason is that PHP files tend to be tied to specific URLs, such
as
http://cms/page1.php
. If you have a number of different pages, and the designer
wants to adjust the design, the designer needs to change all of those existing pages.
If the template is kept in an external page and interpreted through an engine, you get
a number of advantages:
•
Designers don't and can't write PHP in the template files. This makes the
engine more robust, allowing the designers to do what they want without
risking breakage.
•
Programmers don't mess with template files. This means that there is no
overlap between what the programmers and designers are doing, making
the end product more stable than if they were constantly tweaking each
others' code.
•
Because the templates are external, you can swap designs by moving the
theme directories around.
I think the most important aspect of this is the separation of concerns. The programmer
(you) handles programming, the designer handles design, and the only time the work
collides is when the design is being interpreted by the templating engine.
Writing your own templating engine is not hard. For a few years, I used my own,
which was based on code similar to the previous examples.
One problem with home-grown templating engines is that they do not always have
the robustness and speed of the more established engines.
Smarty speeds up its parsing by compiling the template into a PHP script, and then
caching that script in a directory set aside for that purpose.
If you use an accelerator such as APC, ionCube, Zend, and so on, then that compiled
script will then be cached in-memory by the accelerator, speeding it up even further.
There are other templating engines out there—Twig, FastTemplate, PHAML, and
others. They all do basically the same thing, so which you use is perhaps a personal
choice. For me, Smarty works and I've no reason to choose another. It's simple to use,
and fast.
D
o
w
nl
oa
d
fr
om
W
ow
!
eB
oo
k
<
w
w
w
.w
ow
eb
oo
k.
co
m
>

Design Templates – Part One
[
118
]
File layout of a theme
We've discussed how a templating engine works. Now let's look at a more concrete
example.
1. Create a directory
/ww.skins
in the CMS webroot.
2. Within that directory, each theme has its own directory. We will create a very
simple theme called "basic".
3. Create a directory
/ww.skins/basic
, and in that, create the following
directories:
/ww.skins/basic/h
This will hold the HTML template files.
/ww.skins/basic/c
This will hold any CSS files.
/ww.skins/basic/i
This will hold images.
Usually, that will be enough for any theme. The only necessary directory there is
/h
.
The others are simply to keep things neat.
If I wanted to add JavaScript specific to that theme, then I would add it to a
/
ww.skins/basic/j
directory. You can see how it all works.
In this basic theme, we will have two templates. One with a menu across the top
(horizontal), and one with a menu on the left-hand side (vertical). We will then
assign these templates to different pages in the admin area.
In the admin area, the templates will be displayed in alphabetical order.
If there is one template that you prefer to be the default one used by new pages, then
the template should be named
_default.html
. After sorting alphabetically, the
underscore causes this file to be top of the list, versus other filenames which begin
with letters.
.html
is used as the extension for the template so that the designer can easily view
the file in a browser to check that it looks okay.
Let's create a default template then, with a menu on the left-hand side. Create this
file as
/ww.skins/basic/h/_default.html
:
<!doctype html>
<html>
<head>
{{$METADATA} }
<link rel="stylesheet"
href="/ww.skins/basic/c/style.css"/>
</head>

Chapter 5
[
119
]
<body>
<div id="menu-wrapper">{{MENU
direction="horizontal"}}</div>
<div id="page-wrapper">{{$PAGECONTENT}}</div>
</body>
</html>
The reason that
{{
is used instead of
{
, is that it if the designer used the brace
character (
{
) for anything in the HTML, or the admin used it in the page content,
then it would very likely cause the templating engine to crash—it would become
confused because it could not tell whether you meant to just display the character,
or use it as part of a code.
By doubling the braces
{{
...
}}
, we reduce the chance of this happening immensely.
Doubled braces very rarely (I've never seen it at all) come up in normal page text.
The reason we use braces at all, and not something more obviously programmatic
such as "
<!--{
...
}-->
", is that it is readable. It is easier to read "insert
{{$pagename}}
here" than to read "insert
<!--{$pagename}-->
here".
I've introduced two variables and a function in the template:
{{$METADATA}}
This variable is an automatically generated string consisting of
<head>
child elements such as <title> and <script> tags
to load jQuery, and so on.
{{$PAGECONTENT}}
This variable is the page body text.
{{MENU}}
This is a function which builds up a menu. It can have a
number of options attached. You've seen "direction" in the
template example code. We'll discuss this later in the chapter.
The template includes a hardcoded reference to the stylesheet.
We could insist that the stylesheet always be named
/ww.skins/themename/c/
styles.css
, and that would allow us to include it automatically in the
{{$METADATA}}
variable, but we can't do this—different templates may need
different styles that cause problems if they are within the one stylesheet.
Another reason is that if the stylesheet is in the template code, then the designer can
work on the design without needing to load it through the CMS.

Design Templates – Part One
[
120
]
Setting up Smarty
Okay—we have a simple template. Let's display it on the front-end.
To do this, we first edit
/ww.incs/basics.php
to have it figure out where the theme
is. Add this code to the end of the file:
// { theme variables
if(isset($DBVARS['theme_dir']))
define('THEME_DIR',$DBVARS['theme_dir']);
else define('THEME_DIR',SCRIPTBASE.'ww.skins');
if(isset($DBVARS['theme']) && $DBVARS['theme'])
define('THEME',$DBVARS['theme']);
else{
$dir=new DirectoryIterator(THEME_DIR);
$DBVARS['theme']='.default';
foreach($dir as $file){
if($file->isDot())continue;
$DBVARS['theme']=$file->getFileName();
break;
}
define('THEME',$DBVARS['theme']);
}
// }
In this, we set two constants:
THEME_DIR
This is the directory which holds the themes repository. Note
that we leave the option open for it to be located somewhere
other than /ww.skins if we want to move it.
THEME
The name of the selected theme. This is the name of the
directory which holds the theme files.
The
$DBVARS
array, from
/.private/config.php
, was originally intended to only
hold information on database access, but as I added to the CMS, I found this was the
simplest place to put information which we need to load in every page of the website.
Instead of creating a second array, for non-database stuff, it made sense to have one
single array of site-wide configuration options. Logically, it should be renamed to
something like
$SITE_OPTIONS
, but it doesn't really matter. I only use it directly in
one or two places. Everywhere else, it's the resulting defined constants that are used.
After setting up
THEME_DIR
, defaulting to
/ww.skins
if we don't explicitly set it to
something else, we then set up
THEME
.

Chapter 5
[
121
]
If no
$DBVARS['theme']
variable has been explicitly set, then
THEME
is set to the
first directory found in
THEME_DIR
. In our example case, that will be the
/ww.skins/
basic
directory.
Now we need to install Smarty.
To do this, go to
http://www.smarty.net/download.php
and download it. I am
using version 2.6.26.
Unzip it in your
/ww.incs
directory, so there is then a
/ww.incs/Smarty-2.6.26
directory.
We do not need to use Smarty absolutely everywhere. For example, we don't use it in
the admin area, as there is no real need to do templating there.
For this reason, we don't put the Smarty setup code in
/ww.incs/basics.php
.
Open up
/ww.incs/common.php
, and add this to the end of it:
require_once SCRIPTBASE
. 'ww.incs/Smarty-2.6.26/libs/Smarty.class.php';
function smarty_setup($cdir){
$smarty = new Smarty;
if(!file_exists(SCRIPTBASE.'ww.cache/'.$cdir)){
if(!mkdir(SCRIPTBASE.'ww.cache/'.$cdir)){
die(SCRIPTBASE.'ww.cache/'.$cdir.' not created.<br />
please make sure that '.USERBASE.'ww.cache is
writable by the web-server');
}
}
$smarty->compile_dir=SCRIPTBASE.'ww.cache/'.$cdir;
$smarty->left_delimiter = '{{';
$smarty->right_delimiter = '}}';
$smarty->register_function('MENU', 'menu_show_fg');
return $smarty;
}
As we'll see shortly, Smarty will not only be used in the theme's templates. It can
be used in other places as well. To reduce repetition, we create a
smarty_setup()
function where common initializations are placed, and common functions are set up.
First, we make sure that the compile directory exists. If not, we create it (or
die()
trying).
We change the delimiters next to
{{
and
}}
.

Design Templates – Part One
[
122
]
Also note the
MENU
function (you'll remember from the template code) is registered
here. If Smarty encounters a
MENU
call in a template, it will call the
menu_show_fg()
function, which we'll define later in this chapter.
We do not define
$METADATA
or
$PAGECONTENT
here because they are explicitly tied
to the page template.
Remove the last line (the
echo
$PAGEDATA->body;
line) from
/index.php
.
We discussed how pages can have different "types". The
$PAGECONTENT
variable may
need to be set up in different ways depending on the type, so we add a switch to the
index.php
to generate it:
// { set up pagecontent
switch($PAGEDATA->type){
case '0': // { normal page
$pagecontent=$PAGEDATA->body;
break;
// }
// other cases will be handled here later
}
// }
That gets the page body and sets
$pagecontent
with it (we'll add it to Smarty shortly).
Next, we need to define the
$METADATA
variable. For that, we'll add the following
code to the same file (
/index.php
):
// { set up metadata
// { page title
$title=($PAGEDATA->title!='')?
$PAGEDATA->title:
str_replace('www.','',$_SERVER['HTTP_HOST']).' > '
.$PAGEDATA->name;
$metadata='<title>'.htmlspecialchars($title).'</title>';
// }
// { show stylesheet and javascript links
$metadata.='<script src="http://ajax.googleapis.com/ajax/
libs/jquery/1.4.2/jquery.min.js"></script>'
.'<script src="http://ajax.googleapis.com/ajax/libs/
jqueryui/1.8.1/jquery-ui.min.js"></script>' ;
// }
// { meta tags
$metadata.='<meta http-equiv="Content-Type"
content="text/html; charset=UTF-8" />';
if($PAGEDATA->keywords)

Chapter 5
[
123
]
$metadata.='<meta http-equiv="keywords" content="'
.htmlspecialchars($PAGEDATA->keywords).'" />';
if($PAGEDATA->description)$metadata.='<meta
http-equiv="description"
content="'.htmlspecialchars($PAGEDATA->description).'"
/>';
// }
// }
If a page title was not provided, then the title is set up as the server's hostname plus
the page name.
We include the jQuery and jQuery-UI libraries on every page.
The
Content-Type
metadata is included because even if we send it as a header,
sometimes someone may save a web page to their hard drive. When a page is loaded
from a hard drive without using a server, there is no
Content-Type
header sent so
the file itself needs to contain the hint.
Finally, we add keywords and descriptions if they are needed.
Note that we added jQuery-UI, but did not choose one of the jQuery-UI themes.
We'll talk about that later in this chapter, when building the page menu.
Next, we need to choose which template to show. Remember that we discussed
how site designs may have multiple templates, and each page needs to select one
or another.
We haven't yet added the admin part for choosing a template, so what we'll do is,
similar to the
THEME
setup, we will simply look in the theme directory and choose
the first template we find (in alphabetical order, so
_default.html
would naturally
be first).
Edit
index.php
and add this code:
// { set up template
if(file_exists(THEME_DIR.'/'.THEME.'/h/'
.$PAGEDATA->template.'.html')){
$template=THEME_DIR.'/'.THEME.'/h/'
.$PAGEDATA->template.'.html';
}
else if(file_exists(THEME_DIR.'/'.THEME.'/h/_default.html')){
$template=THEME_DIR.'/'.THEME.'/h/_default.html';
}
else{
$d=array();

Design Templates – Part One
[
124
]
$dir=new DirectoryIterator(THEME_DIR.'/'.THEME.'/h/');
foreach($dir as $f){
if($f->isDot())continue;
$n=$f->getFilename();
if(preg_match('/^inc\./',$n))continue;
if(preg_match('/\.html$/',$n))
$d[]=preg_replace('/\.html$/','',$n);
}
asort($d);
$template=THEME_DIR.'/'.THEME.'/h/'.$d[0].'.html';
}
if($template=='')die('no template created.
please create a template first');
// }
So, the order here is:
1. Use the database-defined template if it is defined and exists.
2. Use
_default.html
if it exists.
3. Use whatever is alphabetically first in the directory.
4.
die()
!
The reason we check for
_default.html
explicitly is that it saves time. We have
set the convention so when creating a theme the designer should name the default
template
_default.html
, so it is a waste of resources to search and sort when it can
simply be set.
Note that we are ignoring any templates which begin with "
inc.
". Smarty can
include files external to the template, so some people like to save the HTML for
common headers and footers in external files, then include them in the template. If
we simply add another convention that all included files must start with "
inc.
" (for
example,
inc.footer.html
), then using this code, we will only ever select a full
template, and not accidentally use a partial file.
For full instructions on what Smarty can do, you should refer to the online
documentation at
http://www.smarty.net/
.
Finally, we set up Smarty and tell it to render the template.
Add this to the end of the same file:
$smarty=smarty_setup('pages');
$smarty->template_dir=THEME_DIR.'/'.THEME.'/h/';
// { some straight replaces
$smarty->assign('PAGECONTENT',$pagecontent);
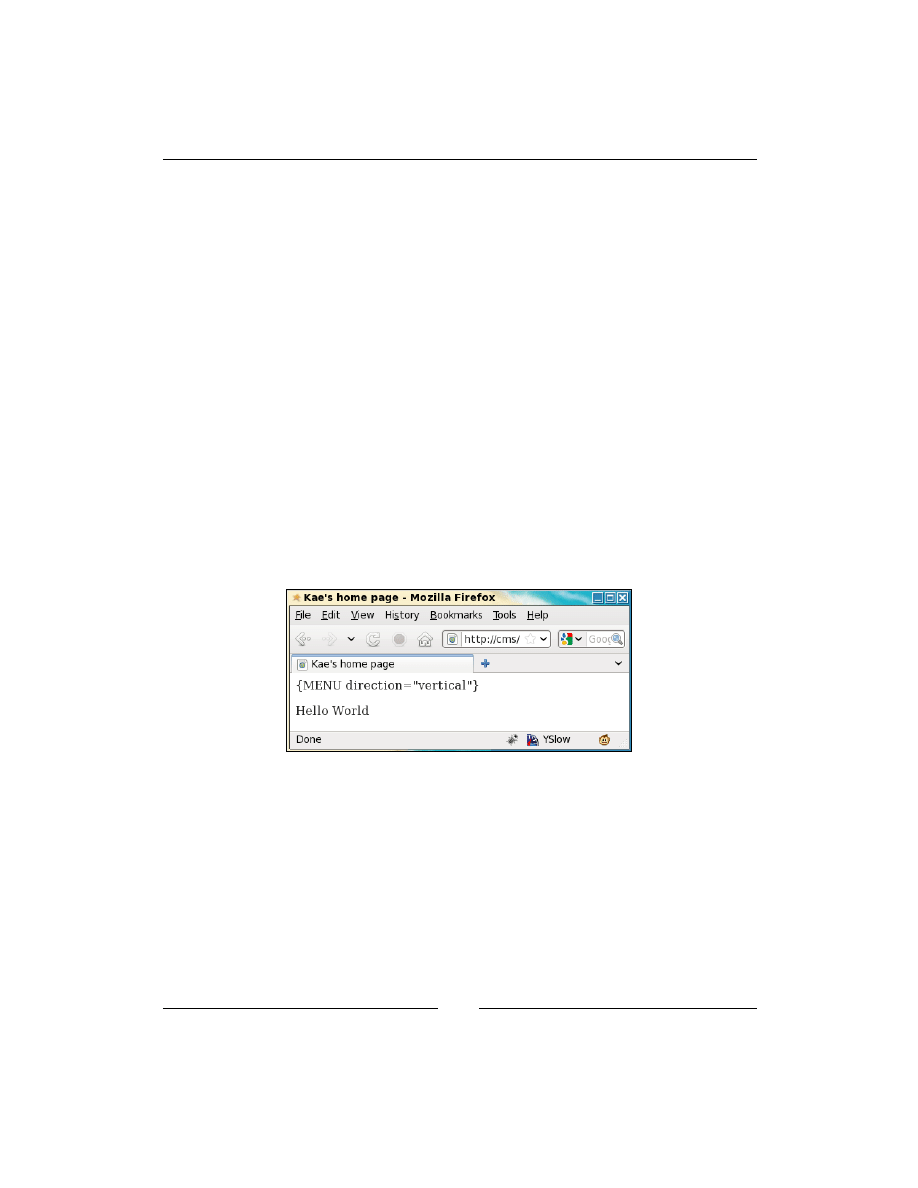
Chapter 5
[
125
]
$smarty->assign('PAGEDATA',$PAGEDATA);
$smarty->assign('METADATA',$metadata);
// }
// { display the document
header('Content-type: text/html; Charset=utf-8');
$smarty->display($template);
// }
This section first sets up Smarty, telling it to use the
/ww.cache/pages
directory for
caching compiled versions of the template.
Then the
$pagecontent
and
$metadata
variables are assigned to it.
We also assign the
$PAGEDATA
object to it, which lets us expose the page object to
Smarty, in case the designer wants to use some aspect of it directly in the design. For
example, the page name can be displayed with
{{$PAGEDATA->name|escape}}
, or
the last edited date can be shown with
{{$PAGEDATA->edate|date_format}}
.
Before viewing this in a browser, edit the
/ww.skins/basics/_default.html
file,
and change the double braces around the
MENU
call to single braces. We haven't yet
defined that function, so we don't want Smarty to fail when it encounters it.
When viewed in a browser, we now have this screenshot:
It is very similar to the one from Chapter 1, CMS Core Design, except that we now
have the page title set correctly.
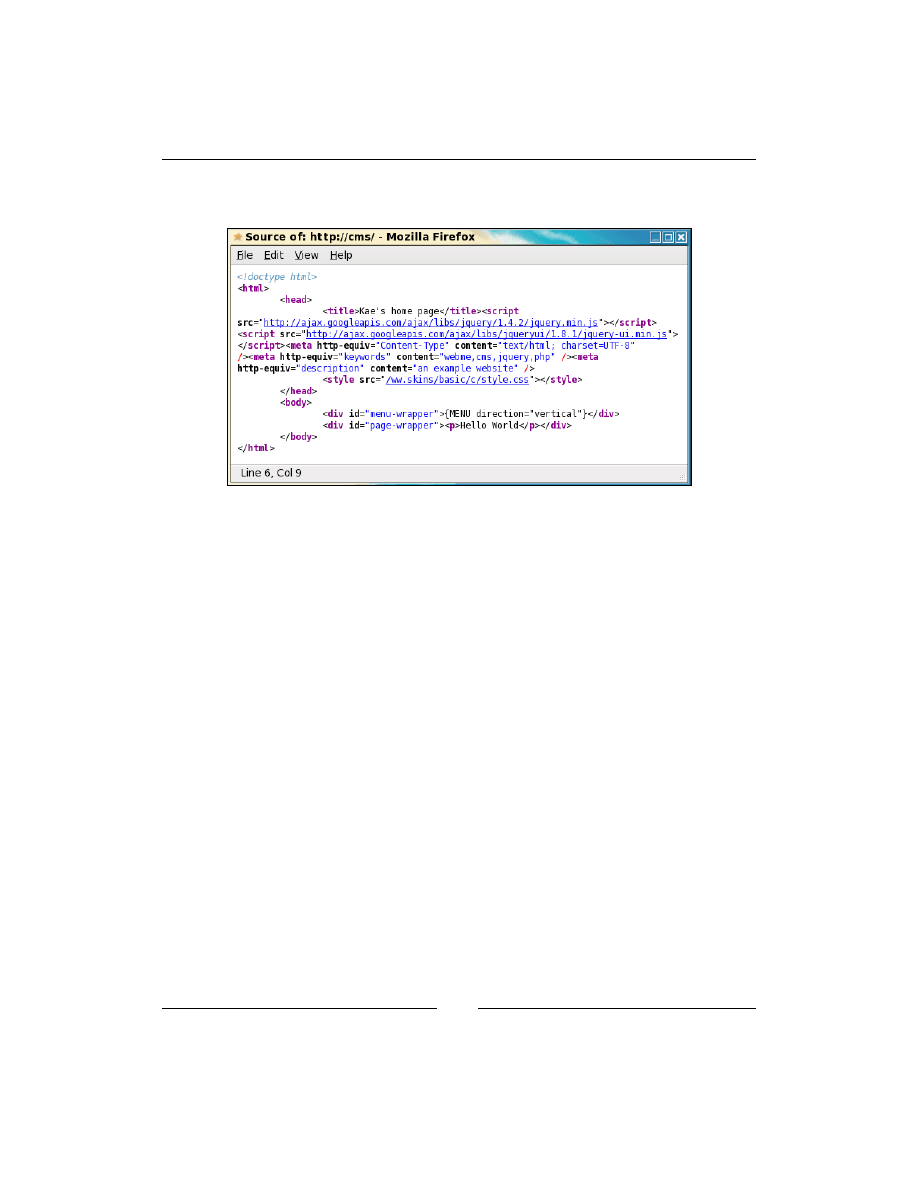
Design Templates – Part One
[
126
]
Viewing the source, we see that the template has correctly been wrapped around
the page content:
Okay—we can now see that the templating engine works for simple variable
substitution. Now let's add in functions, and get the menu working.
Before going onto the next section, edit the template again and fix the braces so
they're double again.
Front-end navigation menu
The easiest way to create a navigation menu is simply to list all the pages on the site.
However, that does not give a contextual feel for where everything is in relation to
everything else.
In the admin area, we created a hierarchical
<ul>
list. This is probably the easiest
menu which gives a good feel. And, using jQuery, we can provide that
<ul>
list in all
cases and transform it to whatever we want.
Let's start by creating the templating engine's
MENU
function with a
<ul>
tree, and
we'll expand on that afterwards.
We've already registered
MENU
to run the function
show_menu_fg()
, so let's create
that function.
We will add it to
/ww.incs/common.php
, where most page-specific functions go:
function menu_show_fg($opts){
$c='';
$options=array(

Chapter 5
[
127
]
'direction' => 0, // 0: horizontal, 1: vertical
'parent' => 0, // top-level
'background'=> '', // sub-menu background colour
'columns' => 1, // for wide drop-down sub-menus
'opacity' => 0 // opacity of the sub-menu
);
foreach($opts as $k=>$v){
if(isset($options[$k]))$options[$k]=$v;
}
if(!is_numeric($options['parent'])){
$r=Page::getInstanceByName($options['parent']);
if($r)$options['parent']=$r->id;
}
if(is_numeric($options['direction'])){
if($options['direction']=='0')
$options['direction']='horizontal';
else $options['direction']='vertical';
}
$menuid=$GLOBALS['fg_menus']++;
$c.='<div class="menu-fg menu-fg-'.$options['direction']
.'" id="menu-fg-'.$menuid.'">'
.menu_build_fg($options['parent'],0,$options)
.'</div>';
return $c;
}
$fg_menus=0;
menu_show_fg()
is called with an array of options as its only parameter. The first
few lines of the function override any default values with values that were specified
in the array (inspired by how jQuery plugins handle options).
Next, we set up some variables, such as getting details about the menu's parent page
if there is one, and convert the direction to use words instead of numbers if a number
was given.
Then, we generate an ID for the menu, to distinguish it from any others that might
be on the page. This is stored in a global variable. In a more structured system, this
might be stored in a static variable in a class (such as how
Page
instances are cached
in the
/ww.php_classes/Page.php
file), but the emphasis here is on speed, and it's
quicker to access a variable directly than to find a class and then read the variable.
Finally, we build a wrapper, fill it with the menu's
<ul>
tree, and return the wrapper.
The
<ul>
tree itself is built using a second function,
menu_build_fg()
, which we'll
add in a moment.

Design Templates – Part One
[
128
]
Before doing that, we need to add a new method to the
Page
object. We will be
showing links to pages, and need to provide a function for creating the right address.
Edit
/ww.php_classes/Page.php
and add these methods to the
Page
class:
function getRelativeURL(){
if(isset($this->relativeURL))return $this->relativeURL;
$this->relativeURL='';
if($this->parent){
$p=Page::getInstance($this->parent);
if($p)$this->relativeURL.=$p->getRelativeURL();
}
$this->relativeURL.='/'.$this->getURLSafeName();
return $this->relativeURL;
}
function getURLSafeName(){
if(isset($this->getURLSafeName))
return $this->getURLSafeName;
$r=$this->urlname;
$r=preg_replace('/[^a-zA-Z0-9,-]/','-',$r);
$this->getURLSafeName=$r;
return $r;
}
The
getRelativeUrl()
method ensures that a page's link includes its parents and so
on. For example, if a page's name is
page2
and it is contained under the parent page
page1
, then the returned string is
/page1/page2
, which can be used in
<a>
elements
in the HTML.
The
getURLSafeName()
ensures that if the admin used any potentially harmful
characters such as
!£$%^&*?
in the page name, then they are converted to
-
in the
page name. When used in a MySQL query, the hyphen character
-
acts as a wildcard.
So for example, if there is a page name "who are tom & jerry?", then the returned
string is
who-are-tom---jerry-
. This method is commonly used in blog software
where its desired that the page name is used in the URL.
Combined, these methods allow the admin to provide "SEO-friendly" page addresses
without needing them to remember what characters are allowed or not. Of course, it
means that there may be clashes if someone creates one page called "test?" and another
called "test!", but those are rare and it is easy for the admin to spot the problem.
Back to the menu—let's add the
menu_build_fg()
function to
/ww.incs/common.
php
. This will be a large function, so I'll explain it a bit at a time:

Chapter 5
[
129
]
function menu_build_fg($parentid,$depth,$options){
$PARENTDATA=Page::getInstance($parentid);
// { menu order
$order='ord,name';
if(isset($PARENTDATA->vars->order_of_sub_pages)){
switch($PARENTDATA->vars->order_of_sub_pages){
case 1: // { alphabetical
$order='name';
if($PARENTDATA->vars->order_of_sub_pages_dir)
$order.=' desc';
break;
// }
case 2: // { associated_date
$order='associated_date';
if($PARENTDATA->vars->order_of_sub_pages_dir)
$order.=' desc';
$order.=',name';
break;
// }
default: // { by admin order
$order='ord';
if($PARENTDATA->vars->order_of_sub_pages_dir)
$order.=' desc';
$order.=',name';
// }
}
}
// }
$rs=dbAll("select id,name,type from pages where parent='"
.$parentid."' and !(special&2) order by $order");
if($rs===false || !count($rs))return '';
This first section gets the list of pages in this level of the menu from the database.
First, we get data about the parent page.
Next we figure out what sorting order the admin wanted that parent page's sub-
pages to be displayed in, and we build up an SQL statement based on that.
Note the
and
!(special&2)
part of the SQL statement. As explained in the previous
chapter, we're using the
special
field as a bitfield. The
&
here is a Boolean
AND
function and returns true if the 2 bit is set (the 2 bit corresponds to "Does not appear
in navigation"). So what this section means is "and not hidden".
If no pages are found, then an empty string is returned.
D
o
w
nl
oa
d
fr
om
W
ow
!
eB
oo
k
<
w
w
w
.w
ow
eb
oo
k.
co
m
>

Design Templates – Part One
[
130
]
Now add this part of the function to the file:
$items=array();
foreach($rs as $r){
$item='<li>';
$page=Page::getInstance($r['id']);
$item.='<a href="'.$page->getRelativeUrl().'">'
.htmlspecialchars($page->name).'</a>';
$item.=menu_build_fg($r['id'],$depth+1,$options);
$item.='</li>';
$items[]=$item;
}
$options['columns']=(int)$options['columns'];
// return top-level menu
if(!$depth)return '<ul>'.join('',$items).'</ul>';
What happens here is that we take the result set we got from the database
in the previous section, and we build a list of links out of them using the
getRelativeURL()
method to generate safe URLs, and then display the admin-
defined name using
htmlspecialchars()
.
Before each
<li>
is closed, we then recursively check
menu_build_fg()
with the
current link as the new parent (the highlighted line). If there are no results, then
the returned string will be blank. Otherwise it will be a sub-
<ul>
which will be
inserted here.
If we are at the top level of the menu, then this generated list is immediately
returned, wrapped in
<ul>...</ul>
tags.
The next section of code is triggered only if the call was to a sub-menu where
$depth
is 1 or more, for example from the call in the highlighted line in the last code section:
$s='';
if($options['background'])$s.='background:'
.$options['background'].';';
if($options['opacity'])$s.='opacity:'
.$options['opacity'].';';
if($s){
$s=' style="'.$s.'"';
}
// return 1-column sub-menu
if($options['columns']<2)return '<ul'.$s.'>'
.join('',$items).'</ul>';
This section checks to see if the
options
array had background or opacity rules for
sub-menus, and applies them.
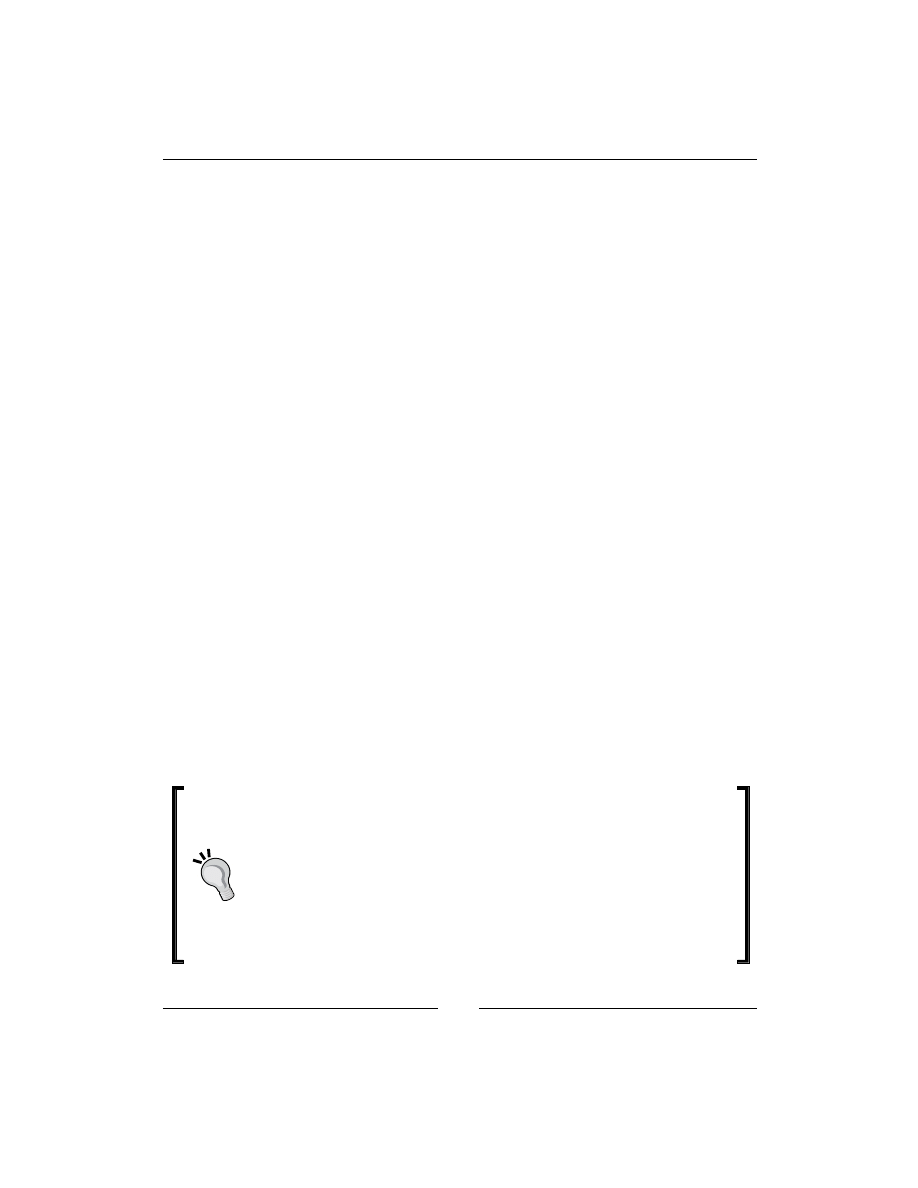
Chapter 5
[
131
]
This is useful in the case that you are switching themes in the admin area, and the
theme you switch to hasn't written CSS rules about sub-menus. It is very hard to
think of every case that can occur, so designers sometimes don't cover all cases. As
an example of this, imagine you have just created a new plugin for the CMS, and it
looks good in a new theme designed specifically for it. The admin however, might
prefer the general look of an older theme and selects it in the admin area (we'll get
to that in this chapter). Unfortunately, that older theme does not have CSS rules to
handle the new code.
In these cases, we need to provide workarounds so the code looks okay no matter
the theme. In a later chapter, we'll look at how the menu options can be adjusted
from the admin area, so that an admin can choose the sub-menu background color
and opacity to fit any design they choose (in case the theme has not covered the case
already).
The final line of the example returns the sub-menu wrapped in a
<ul>
element in
the case that only one column is needed (the most common sub-menu type, and the
default).
Now, let's add some code for multi-column sub-menus:
// return multi-column submenu
$items_count=count($items);
$items_per_column=ceil($items_count/$options['columns']);
$c='<table'.$s.'><tr><td><ul>';
for($i=1;$i<$items_count+1;++$i){
$c.=$items[$i-1];
if($i!=$items_count && !($i%$items_per_column))
$c.='</ul></td><td><ul>';
}
$c.='</ul></td></tr></table>';
return $c;
}
In a number of places throughout the book, I've used HTML tables to
display various layouts. While modern designers prefer to avoid the
use of tables for layout, sometimes it is much easier to use a table for
multi-columned layouts, then to try to find a working cross-browser
CSS alternative. Sometimes the working alternative is too complex to be
maintainable.
Another reason is that if we were to use a CSS alternative, we would be
pushing CMS-specific CSS into the theme, which may conflict with the
theme's own CSS. This should be avoided whenever possible.
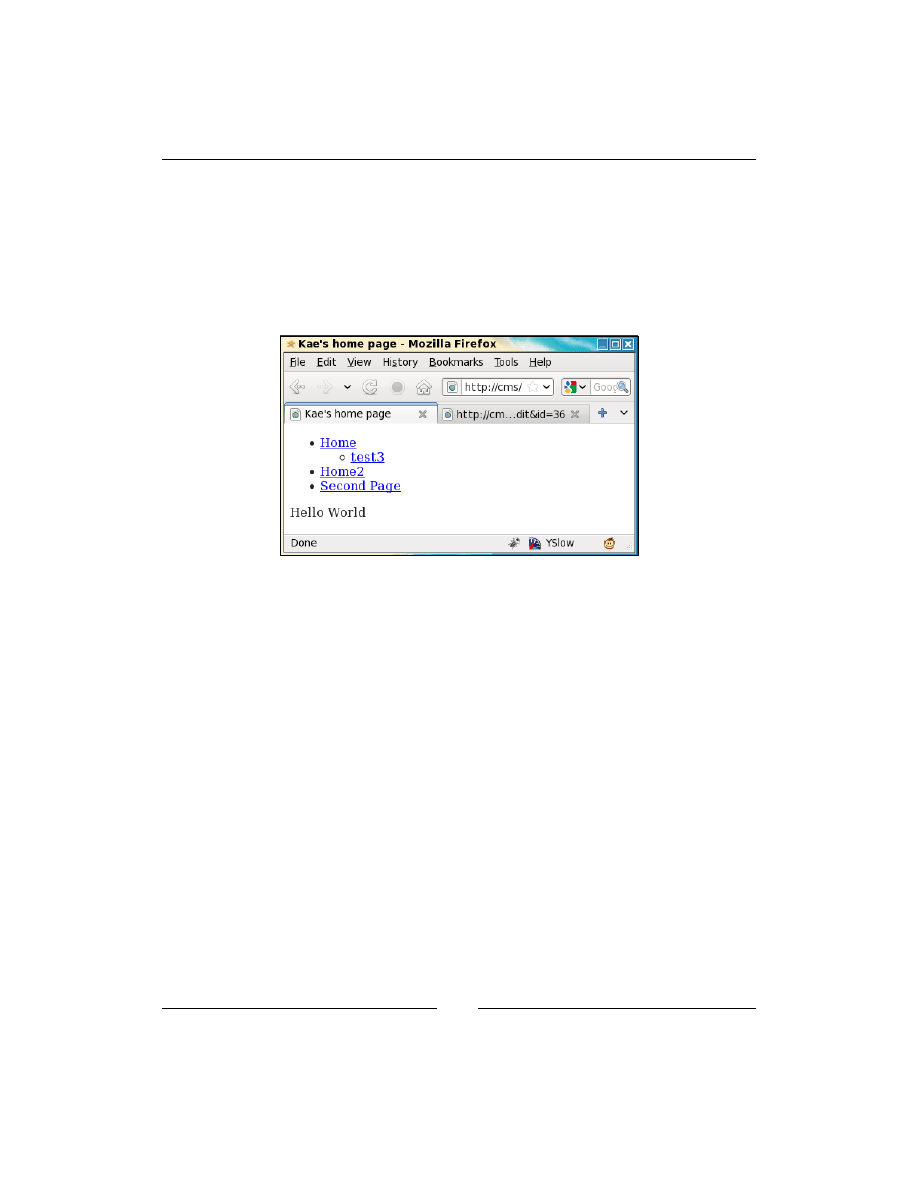
Design Templates – Part One
[
132
]
In this case, we return the sub-menu broken into multiple columns. Most sites will
not need this, but in sites that have a huge number of entries in a sub-menu and the
sub-menu stretches longer than the height of the window, it's sometimes easier to
use multiple columns to fit them all in the window than to get the administrator to
break the sub-menu down into further sub-categories.
We can now see this code in action. Load up your home page in the browser, and it
should look something like the next screenshot:
In my own database, I have two pages under
/Home
, but one of them is marked as
hidden.
So, this shows how to create the navigation tree.
In the next chapter, we will improve on this menu using jQuery, and will then write
a theme management system.
Summary
In this chapter, we advanced the CMS engine to the stage where you can now create
a designed template, including page menus, and embed the page content within that.
In the next chapter, we will improve the menu, write a theme management system,
and add the ability to embed Smarty templating code within page content.

Design Templates – Part Two
In the previous chapter we built the basics of templating, including how to use Smarty,
and how to set up a theme so the CMS can display pages through the templates.
We also built a basic HTML navigation menu.
In this chapter, we will: Finish the templating engine. Improve the navigation menu
using the Filament Group menu.
At the end of this chapter, the CMS will be complete enough to use in simple sites.
Adding jQuery to the menu
For a very long time, I was using a home-grown JavaScript navigational menu.
It was capable of displaying in many different ways—drop downs, slide downs (like
jQuery-UI accordions), fade-ins.
It had built-in collision checks to make sure it was always visible and didn't try to
render past the sides, bottom, or top of a screen.
It was complex, and I would only ever touch it when I was asked to add yet another
feature to it by a client, or when a bug was discovered.
That's never the ideal situation. In an ideal situation, the components you use in your
system are constantly being improved and added to, even when you are not working
on it yourself.
That's where open source comes into its own. I really do love using a piece of
software for a few months, then finding it has been updated by the developers and
now has a load of new features that I wasn't aware that I wanted, but now "need".
In my CMS, I've replaced my home-grown solution with an existing project by the
Filament Group, which can be seen in action here:
http://www.filamentgroup.
com/lab/jquery_ipod_style_and_flyout_menus/
.

Design Templates – Part Two
[
134
]
If you read through that document, you will see that the group is no longer working
on the project, because they've given it to the jQuery-UI team to help create a jQuery-
UI menu plugin.
At the time of writing, the jQuery-UI menu is still in development, and should
be available by version 1.9. It's currently in a very basic state and unusable, but
whenever the jQuery-UI team focuses on anything, the end result is always
comprehensive and amazingly stable.
In the meantime, the existing Filament Group Menu (fg-menu from now on) is
probably the best "general use" menu out there, and I'm certain that when the
jQuery-UI version is released, porting from the fg-menu system to the new plugin
will be easy.
By "general use", I mean that it is not designed specifically to be a drop down or
fly-out menu. It's not designed to look exactly one way, or work exactly one way. It
can work in a few different ways, so the site designers are not constrained too much
by what we developers force on them.
So, let's install it.
Preparing the Filament Group Menu
Download the fg-menu code from the previously mentioned page (search for
Download the script, CSS, and sample HTML on the page) and unzip it in
/j
. A
/j/__MACOSX
directory and a
/j/fg-menu
directory will both be created. Delete the
/j/__MACOSX
directory.
One problem with downloading plugins is that sometimes, the writers will associate
colors and other styles to the elements that you will need to overwrite.
In most cases, I'd advocate adding a CSS sheet which overrides the fg-menu by using
more specific selectors. This has a disadvantage of having the browser download two
sheets when only one is needed.
However, since we know that the current version of the plugin is the last ever until
jQuery-UI 1.9 is released, I feel it is okay to edit the downloaded files themselves.
This includes the JavaScript files. There are a number of things I didn't like about the
fg-menu JavaScript, and the easiest way to address them was by editing the source
itself.
I won't describe the CSS changes here (they're in the downloadable code bundle
available on Packt's website) other than to say it was purely to remove colors.

Chapter 6
[
135
]
The JavaScript gripes are minor as well, but they were enough that I felt the need to
hack the source.
The default code forces the user to click the menu to activate its sub-menus.
This has the disadvantage that if you have say two pages, "Page1" and "Page1>Page2",
where Page2 is a sub-page of Page1, then how do you tell the menu that you want to go
to Page1? Clicking should do it, but instead, it opens the sub-menu!
The solution for this is easy: Just replace the responsible
.click()
events with
.mouseover()
events (lines 26 and 363) in the file
/j/fg-menu/fg.menu.js
.
Another problem has to do with widths and heights. I only noticed this on IE (no
other browser) with jQuery 1.4.
fg-menu has two custom functions,
jQuery.fn.getTotalWidth()
and
jQuery.
fn.getTotalHeight()
(lines 549 to 556), but those are no longer necessary, because
you can use jQuery's
.outerWidth()
and
.outerHeight()
functions.
So, delete the source for those two custom functions, and edit lines 468 and 469 to
refer to
outerWidth()
and
outerHeight()
instead.
I'm walking through the process that I used to fix the code to try to
explain how it was done. If you prefer to skip copying the process
yourself, you can download the finished code as part of this chapter's
downloadable code bundle from the Packt website.
Another thing is the
this.chooseItem()
function. In fg-menu, this is called when
an item is clicked. In our case, we always want this to actually go to the page that's
clicked. So add this line to the beginning of the function (after line 244):
location.href = $(item).attr('href');return;
I've placed both commands on the same line because I want to make as few changes
to the original structure as possible, so that if I ever need to refer to a line number, it's
as close to the original source as possible.
There are some other minor issues, but not important enough to mention here
(they're all fixed in the chapter's code bundle).
The final change I made to the plugin is something that was actually requested of
the Filament Group by an interested user, but they'd passed on responsibility by that
time and it was never answered.
When a menu is opened and you take the mouse off it, it is expected that the menu
will close. This doesn't happen in fg-menu (you need to actually click the document
to close it).

Design Templates – Part Two
[
136
]
To fix this, I added the following jQuery code to the end of the file:
$('.fg-menu,.fg-menu-top-level')
.live('mouseover',function(){
this.mouse_is_over=true;
clearTimeout(window.fgmenu_mouseout_timer);
})
.live('mouseout',function(){
this.mouse_is_over=false;
window.fgmenu_mouseout_timer=setTimeout(function(){
var o=0;
$('.fg-menu,.fg-menu-top-level').each(function(){
if (this.mouse_is_over) o++;
});
if(!o){
$.each(allUIMenus, function(i){
if (allUIMenus[i].menuOpen) {
allUIMenus[i].kill();
};
});
}
},2000);
});
In short, this code tells
fg-menu
to close all menus two seconds after the mouse has
left it.
Let's examine this in more detail.
When you move your mouse between two elements that appear to be right next
to each other, it is possible that the browser will interpret even the slightest gap
(border, margin, and so on) as meaning the mouse is not in either of them.
For this reason, we need to create a "grace" period, which allows the mouse time to
move from one to the other.
How we do that is when the mouse enters a menu item, you set a variable
mouse_
is_over
on it. When the mouse leaves the item, we unset that variable, and start a
countdown to the destruction code.
The countdown (a two second
setTimeout
) gives us enough time to move the mouse
to another item and disable the timer.
If by chance the timer still goes off, for example the menu you left overlaps or
is contained in another menu, and the
mouseenter
event never triggered on the
"container", then the destruction code does a test to see if
mouse_is_over
is set.
If so, it does nothing. If not, then all menu entries are killed.

Chapter 6
[
137
]
Integrating the menu
We've already embedded a
<ul>
tree version of the menu where
{{MENU}}
appears in the template. Enhancing this involves simply applying the fg-menu
plugin to that
<ul>
.
Using the plugin involves adding the source of the plugin as an external JavaScript
reference.
If we simply echo out a
<script>
tag every time we need to reference a file, we may
end up with redundant loads.
For example, let's say you had two menus on the page. It is silly to have to load a
static script twice (once for each menu), so let's create a global array which holds a
list of external scripts and CSS files that need to be loaded, and whenever we want to
output a script, we'll check against it.
Edit
/index.php
and add the following highlighted lines:
// { common variables and functions
include_once('ww.incs/common.php');
$page=isset($_REQUEST['page'])?$_REQUEST['page']:'';
$id=isset($_REQUEST['id'])?(int)$_REQUEST['id']:0;
$external_scripts=array();
$external_css=array();
// }
And we will add these functions to
/ww.incs/common.php
:
function import_script_once($script){
global $external_scripts;
if(isset($external_scripts[$script]))return '';
$external_scripts[$script]=1;
return '<script src="'.htmlspecialchars($script).'">
</script>';
}
function import_css_once($css){
global $external_css;
if(isset($external_css[$css]))return '';
$external_css[$css]=1;
return '<link rel="stylesheet" href="'
.htmlspecialchars($css).'"/ >';
}
It is easier to ensure that
$array[$filename]
is unique (as an array key), than to
ensure that
$filename
is unique in
$array[]
as a value.

Design Templates – Part Two
[
138
]
Now let's add the fg-menu script references. Edit
/ww.incs/common.php
and add
these highlighted lines to the top of the
fg_menu_show()
function:
function menu_show_fg($opts){
$c='';
$c.=import_script_once('/j/fg-menu/fg.menu.js');
$c.=import_css_once('/j/fg-menu/fg.menu.css');
$options=array(
And now we add the code to activate the conversion from
<ul>
tree to
flyOut
menu.
Add this to the end of the same function in the same file. I've highlighted the lines
that the code goes between:
$c.='<div class="menu-fg menu-fg-'.$options['direction']
.'" id="menu-fg-'.$menuid.'">'
.menu_build_fg($options['parent'],0,$options).'</div>';
if($options['direction']=='vertical'){
$posopts="positionOpts: { posX: 'left', posY: 'top',
offsetX: 40, offsetY: 10, directionH: 'right',
directionV: 'down', detectH: true, detectV: true,
linkToFront: false },";
}
else{
$posopts='';
}
$c.="<script>
jQuery.fn.outer = function() {
return $( $('<div></div>').html(this.clone()) ).html();
}
$(function(){
$('#menu-fg-$menuid>ul>li>a').each(function(){
if(!$(this).next().length)return; // empty
$(this).menu({
content:$(this).next().outer(),
choose:function(ev,ui){
document.location=ui.item[0].childNodes(0).href;
},
$posopts
flyOut:true
});
});
$('.menu-fg>ul>li').addClass('fg-menu-top-level');
});
</script>";
return $c;
}
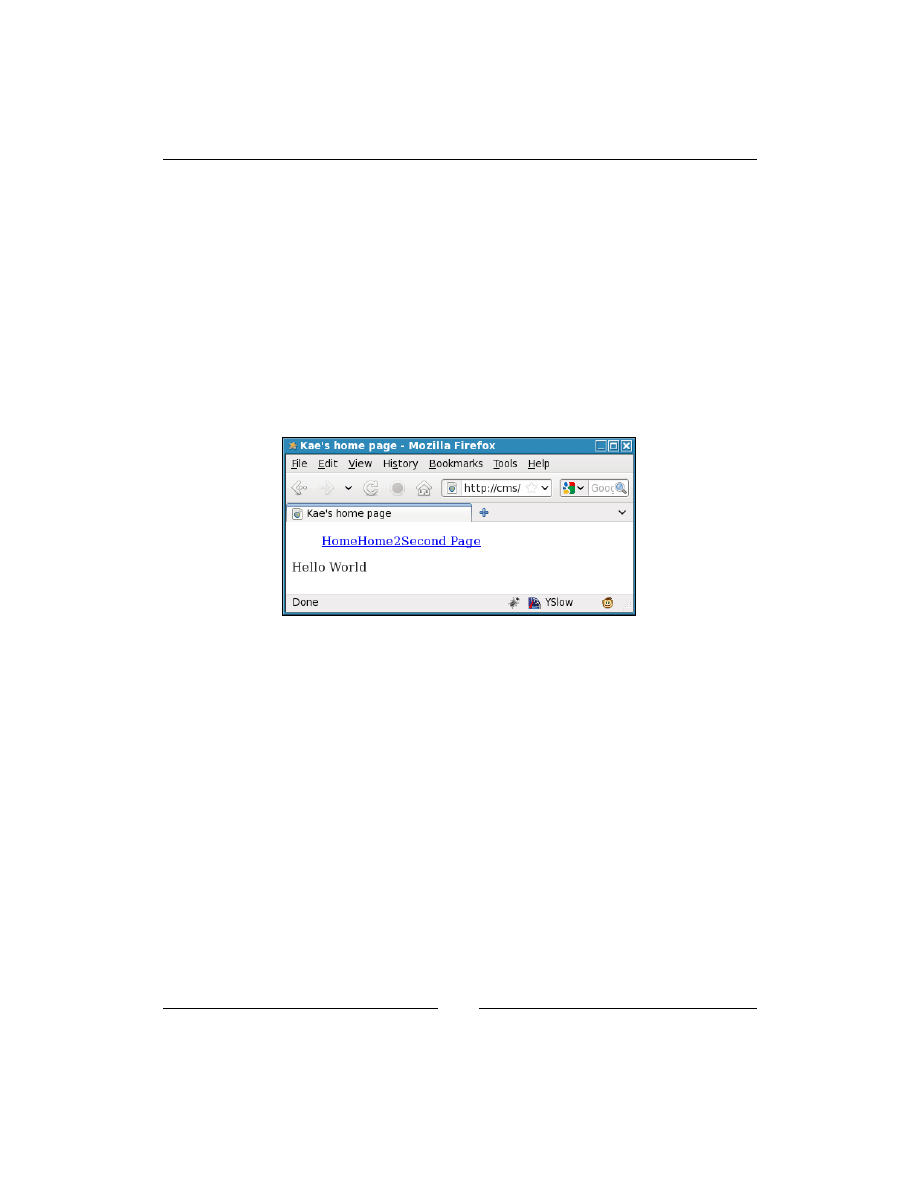
Chapter 6
[
139
]
First off, we set up the
$posopts
variable, which will tell fg-menu where sub-menus
should be positioned relative to their parents. For example, where the top-level menu
is vertical, the sub-menu should be offset to the right-hand side. In horizontal top-
level menus, the sub-menu should appear directly below its parent (the default).
Next, we output the JavaScript which sets up the menu.
Notice that we've added a short jQuery plugin inline—because most browsers don't
provide a method to get the outer HTML of an element, and fg-menu generates its
sub-menus from an HTML string, we need to add this function so we can generate
the HTML from the
<ul>
tree.
Now when you reload the browser, the screen will look like this, with the
sub-menus hidden:
Because we are using an absolutely basic template, there is no margin or padding set
up (in fact, the theme's CSS sheet is still blank at this point of the chapter). Remember
that we set up the template initially to have the menu embedded with its direction
set to "horizontal".
Embedding the
{{MENU}}
template function will automatically set up a basic menu.
You need to then add your own CSS to make it look better. As an example, here is
some simple CSS which I've added to the example template's CSS file,
/ww.skins/
basic/c/style.css
:
.fg-menu-container a{
border:1px solid #000;
text-decoration:none;
font-style:italic;
background:#fff;
}
.menu-fg a{
border:1px solid #000;
padding:5px;
D
o
w
nl
oa
d
fr
om
W
ow
!
eB
oo
k
<
w
w
w
.w
ow
eb
oo
k.
co
m
>
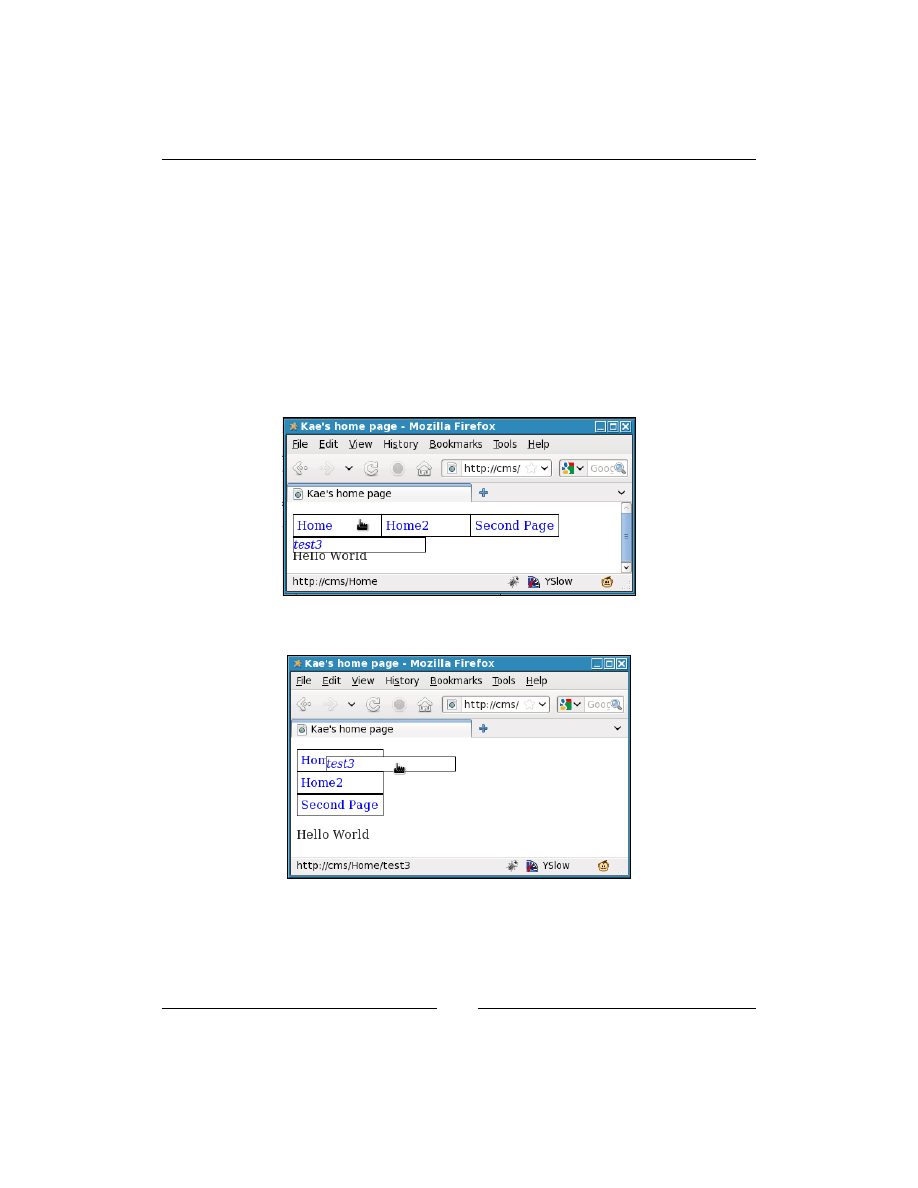
Design Templates – Part Two
[
140
]
text-decoration:none
}
.menu-fg li{
width:120px;
}
.menu-fg ul{
list-style:none;
padding:0;
}
That's enough to make the menu more usable.
Here's a screenshot with the first item opened:
And if we edit the template and replace the "horizontal" with "vertical", we get this:
That's it for now with the menus. We'll come back to them later on when we're
working on a menu plugin (so administrators can add menus to template without
needing to actually edit the template source).

Chapter 6
[
141
]
Until then, if you only plan on having one theme in your CMS, with only one
template, there is enough of the engine built now for you to create simple sites.
However, if you want to provide multiple themes, we will need to build that into the
administration area of the CMS. Let's do that now.
Choosing a theme in the administration area
Okay—let's write the theme switcher.
First, we will add the
Themes
page to the admin menu. The menu is getting a bit full,
but we'll take care of that in the next chapter when we consider plugins.
Edit
/ww.admin/header.php
and add the highlighted line:
<li><a href="/ww.admin/users.php">Users</a></li>
<li><a href="/ww.admin/themes.php">Themes</a></li>
<li>
<a href="/ww.incs/logout.php?redirect=/ww.admin/">
Log Out
</a>
</li>
Eventually, we will want to group the site-management (versus page-management)
functions together, so we will add this to the
Users
admin page menu as well. Edit
/ww.admin/users.php
and add this highlighted line:
echo '<a href="/ww.admin/users.php">Users</a>';
echo '<a href="/ww.admin/themes.php">Themes</a>';
echo '</div>';
Similar to the Users page, we will have a "wrapper" file in
/ww.admin
that loads
up sub-requirements. You can create this file by copying
/ww.admin/users.php
,
making the small changes necessary (highlighted) to make it themes-based, and save
it as
/ww.admin/themes.php
:
<?php
require 'header.php';
echo '<h1>Theme Management</h1>';
echo '<div class="left-menu">';
echo '<a href="/ww.admin/users.php">Users</a>';
echo '<a href="/ww.admin/themes.php">Themes</a>';
echo '</div>';
echo '<div class="has-left-menu">';
echo '<h2>Theme Management</h2>';

Design Templates – Part Two
[
142
]
require 'themes/list.php';
echo '</div>';
echo '<script src="/ww.admin/themes/themes.js"></script>';
require 'footer.php';
Now create the directory
/ww.admin/themes
. We will place the dependent files
in there.
Anything up to twenty or thirty themes can be easily displayed on one page to be
chosen from by the administrator.
If there are more, then a more advanced selection script will need to be created than
the one described in this section.
It is unanticipated, though, that in a single-site CMS, any more than two or three
would be added to the repository at any time—after all, people don't switch their
designs every two weeks!
In a larger system, though, where the CMS may be one of many instances which
are accessing a common repository (in the case of a large hosting company that
offers off-the-shelf websites, for example), there could be hundreds or even
possibly thousands.
So, we've already created one simple theme, called "Basic", which really could not be
any simpler.
However, when offering it up for selection (along with others), the name of the
design is not really enough—it is better to show a screenshot so the admin has a
visual idea of what they are choosing.
In larger systems, you may also have a description, describing the basic colors,
whether the theme has columns, requires certain plugins, and so on. We will not
need these.
So, first, load up your site, and take a screenshot of the design. Save that design as
/ww.skins/basic/screenshot.png.
This is the convention that we will use—inside each theme directory, there will be
a
screenshot.png
, sized
240x172
pixels. If there is no such file, then it will not be
displayed in the admin area. As a side benefit, this will also allow you to "deprecate"
any old designs, by hiding them from the admin, yet still allowing the design to
work if it is already selected.
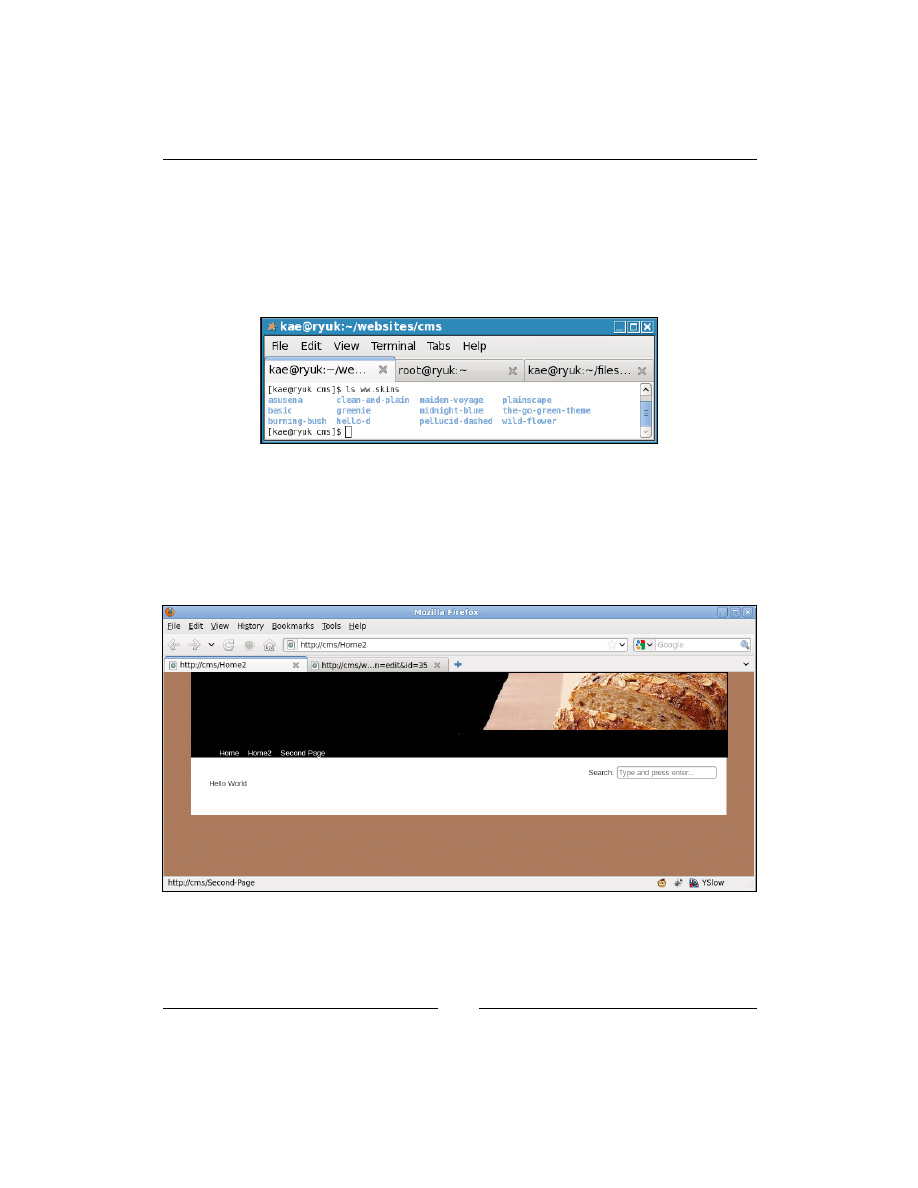
Chapter 6
[
143
]
To demonstrate this sub-project, I've added eleven directories to my
/ww.skins
directory, with screenshots in each taken from freely-available WordPress designs
(available here:
http://wordpress.org/extend/themes/browse/popular/
)—
while WordPress themes will not work directly in the CMS, it is actually very simple
to convert them so they do, either by hand or with a script.
Here is my
/ww.skins
directory:
A shrewd reader will note that at the moment, the CMS does not currently save
which theme it is using, and instead simply chooses the first it finds in that directory.
The order of files in a directory is not necessarily alphabetical.
When I load up my browser and check the front page again, I find it is no longer
using the
Basic
theme, but the one named "Bakery":
So how do we get the CMS to store one theme and not randomly choose others?

Design Templates – Part Two
[
144
]
Earlier in the chapter we wrote some code which checked to see if the theme was
defined in the
/.private/config.php
file's
$DBVARS
array, and if not, then choose
from the
/ww.skins
directory. So we need to be able to change that array on-the-fly
from the admin area.
The way to manage this is to make the file writable by the web server, as described
back in the KFM section of Chapter 3, Page Management – Part One, then add this
function to
/ww.incs/basics.php
:
function config_rewrite(){
global $DBVARS;
$tmparr=$DBVARS;
$tmparr2=array();
foreach($tmparr as $name=>$val)$tmparr2[]=
'\''.addslashes($name).'\'=>\''.addslashes($val).'\'';
$config="<?php\n\$DBVARS=array(\n "
.join(",\n ",$tmparr2)
."\n);";
file_put_contents(CONFIG_FILE,$config);
}
What this does is to take the current global
$DBVARS
array, and re-create it as an
executable PHP string, and write it back into
CONFIG_FILE
(
/.private/config.php
by default).
Now in order to set the theme, all we need to do is to add a
theme
field to the global
$DBVARS
array and then call
config_rewrite()
.
There is one more function needed. Add this to the same file:
function cache_clear($type){
if(!is_dir(SCRIPTBASE.'/ww.cache/'.$type))return;
$d=new DirectoryIterator(SCRIPTBASE.'/ww.cache/'.$type);
foreach($d as $f){
$f=$f->getFilename();
if($f=='.' || $f=='..')continue;
unlink(SCRIPTBASE.'/ww.cache/'.$type.'/'.$f);
}
}
The reason for this is that Smarty caches the templates based on the filename in the
template directory. But, because each template contains the same filenames, Smarty
gets confused and reuses the old cache.
To solve this, we clear the cache whenever a new theme is chosen. We'll talk more
about caches later on in the chapter.

Chapter 6
[
145
]
Now let's create
/ww.admin/themes/list.php
:
<?php
// { handle actions
if(isset($_REQUEST['action']) && $_REQUEST['action']=='set_theme'){
if(is_dir(THEME_DIR.'/'.$_REQUEST['theme'])){
$DBVARS['theme']=$_REQUEST['theme'];
config_rewrite();
cache_clear('pages');
}
}
// }
// { display list of themes
$dir=new DirectoryIterator(THEME_DIR);
$themes_found=0;
foreach($dir as $file){
if($file->isDot())continue;
if(!file_exists(THEME_DIR.'/'.$file.'/screenshot.png'))
continue;
$themes_found++;
echo '<div style="width:250px;text-align:center;
border:1px solid #000;margin:5px;height:250px;
float:left;';
if($file==$DBVARS['theme'])echo 'background:#ff0;';
echo '"><form method="post" action="./themes.php">
<input type="hidden" name="page" value="themes" />
<input type="hidden" name="action"
value="set_theme" />';
echo '<input type="hidden" name="theme"
value="'.htmlspecialchars($file).'" />';
$size=getimagesize(
'../ww.skins/'.$file.'/screenshot.png');
$w=$size[0]; $h=$size[1];
if($w>240){
$w=$w*(240/$w);
$h=$h*(240/$w);
}
if($h>172){
$w=$w*(172/$h);
$h=$h*(172/$h);
}
echo '<img src="/ww.skins/'.htmlspecialchars($file)
.'/screenshot.png" width="'.(floor($w)).'"
height="'.(floor($h)).'" /><br />';

Design Templates – Part Two
[
146
]
echo '<strong>',htmlspecialchars($file),'</strong><br />';
echo '<input type="submit" value="set theme" />
</form></div>';
}
if($themes_found==0){
echo '<em>No themes found. Create a theme and place it
into the /ww.skins/ directory.</em>';
}
// }
At the head of the file, we check to see if any action was requested (to see if a theme
was chosen).
If so, we set that in
$DBVARS
and rewrite the config file, then clear the Smarty cache
so the new template is used instead of the old cached one.
Next, we display a form for each theme in
/ww.skins
that has a
screenshot.png
file in it.
We display the screenshot, making sure to resize it down if it's larger than a certain
size (I chose
240x172
), keeping the aspect ratio so it doesn't look weird.
With all this, you should now be able to click on set theme and have it update the
configuration file. Make sure of this by checking
/.private/config.php
after
clicking, to see if you got the file permissions right.
Here's an example before clicking:
<?php
$DBVARS=array(
'username'=>'cmsuser',
'password'=>'cmspass',
'hostname'=>'localhost',
'db_name'=>'cmsdb'
);
And after clicking, that file is updated to this, with the selected theme highlighted:
<?php
$DBVARS=array(
'username'=>'cmsuser',
'password'=>'cmspass',
'hostname'=>'localhost',
'db_name'=>'cmsdb',
'theme'=>'basic'
);
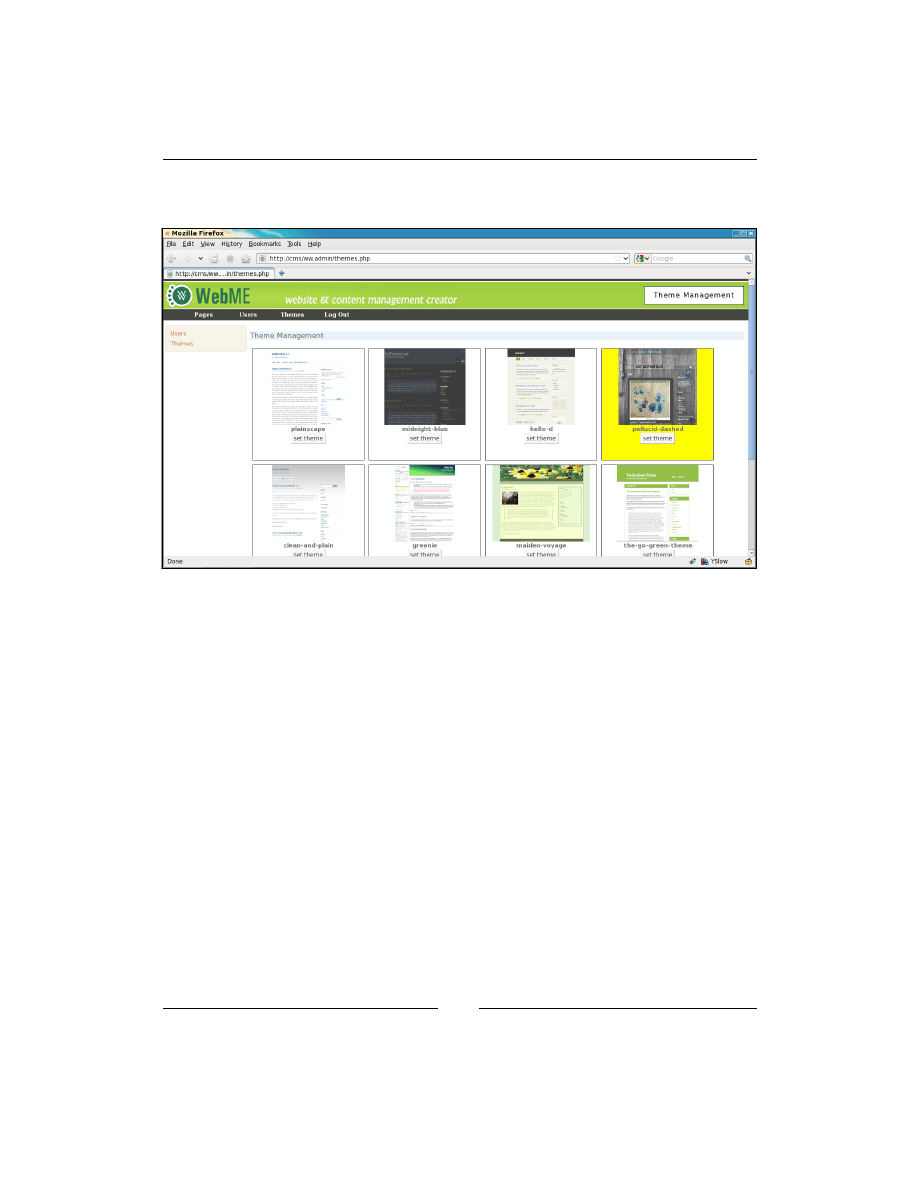
Chapter 6
[
147
]
Oh, and here is what the theme selection page looks like (with the pellucid-dashed
theme selected—upper right-hand side corner):
Next, we will update the Basic theme to have multiple templates, and add the ability
to choose those templates.
Choosing a page template in the
administration area
In the Basic theme, we created just one template, which we named
/ww.skins/
basic/h/_default.html
. Edit that file, and make sure the menu is back to
horizontal
.
Now let's create a second template, called
/ww.skins/basic/h/menu-on-left.html
:
<!doctype html>
<html>
<head>
{{$METADATA}}
<link rel="stylesheet"
href="/ww.skins/basic/c/style.css" />
</head>
<body class="menu-on-left">
<div id="menu-wrapper">{{MENU direction="vertical"}}</div>

Design Templates – Part Two
[
148
]
<div id="page-wrapper">{{$PAGECONTENT}}</div>
</body>
</html>
Notice the class
menu-on-left
. That lets us add the following to the CSS sheet at
/ww.skins/basic/c/style.css
:
.menu-on-left #menu-wrapper{
float:left;
width:130px;
}
.menu-on-left #page-wrapper{
margin-left:140px;
}
This will only affect the menu wrapper and page wrapper in that specific template.
Now open
/ww.admin/pages/forms.php
and where it says
we'll add this in
the next chapter
, replace that block with this:
// { template
echo '<tr><th>template</th><td>';
$d=array();
if(!file_exists(THEME_DIR.'/'.THEME.'/h/')){
echo 'SELECTED THEME DOES NOT EXIST<br />Please
<a href="/ww.admin/siteoptions.php?page=themes">select
a theme</a>';
}
else{
$dir=new DirectoryIterator(THEME_DIR.'/'.THEME.'/h/');
foreach($dir as $f){
if($f->isDot())continue;
$n=$f->getFilename();
if(preg_match('/\.html$/',$n))
$d[]=preg_replace('/\.html$/','',$n);
}
asort($d);
if(count($d)>1){
echo '<select name="template">';
foreach($d as $name){
echo '<option ';
if($name==$page['template'])echo ' selected="selected"';
echo '>',$name,'</option>';
}
echo '</select>';
}
else echo 'no options available';
}
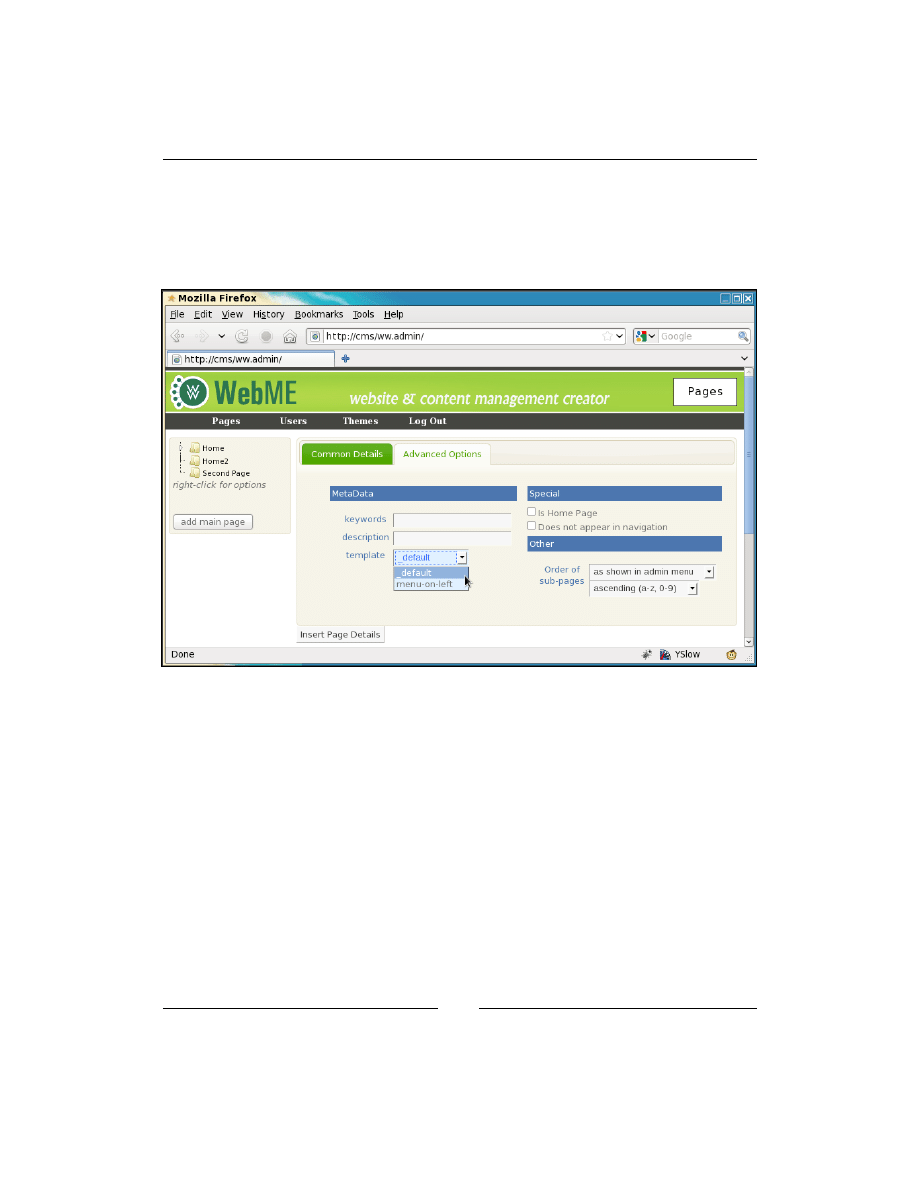
Chapter 6
[
149
]
echo '</td></tr>';
// }
Straightforward enough—this block first checks that the selected theme actually
exists, and then displays template options if there are any, with the already-selected
one selected (or the first on the list if none are already selected).
In the screenshot, you can see the list of templates.
_defaul
t is at the top alphabetically.
Now, you need to edit
/ww.admin/pages/action.edit.php
, and change the
create
SQL
block to this:
// { create SQL
$q='template="'.addslashes($_REQUEST['template']).'",
edate=now(),type="'.addslashes($_REQUEST['type']).'",
associated_date="'.addslashes($associated_date).'",
keywords="'.addslashes($keywords).'",
description="'.addslashes($description).'",
name="'.addslashes($name).'",
title="'.addslashes($title).'",
body="'.addslashes($body).'",parent='.$pid.',
special='.$special.',vars="'.addslashes($vars).'"';
// }
And with that done, you can now switch templates for each page on the front-end.

Design Templates – Part Two
[
150
]
Running Smarty on page content
Let's say you want to embed some templated stuff into the actual content of the page.
For example, let's say that we've already done the next few chapters and have build
the "image transitions" plugin. You want to have a load of images fading into each
other in the page you are writing.
To do that, you would either have to write the source code of the transition
effect into the page itself, or embed just the code for it.
{{IMAGE_TRANSITION
directory="img"}}
is much easier to write than a whole code block, so it makes
sense to use Smarty to handle not just the wrapping template, but also the page
content itself.
To do that, you need to have the page content saved in a file, as Smarty works on
actual files, and not on database stuff.
Edit
/ww.php_classes/Page.php
and add this method to the
Page
class:
function render(){
$smarty=smarty_setup('pages');
$smarty->compile_dir=SCRIPTBASE . '/ww.cache/pages';
if(!file_exists(SCRIPTBASE.'/ww.cache/pages/template_'
.$this->id)){
file_put_contents(SCRIPTBASE.'/ww.cache/pages/template_'
.$this->id,$this->body);
}
return $smarty->fetch(SCRIPTBASE
.'/ww.cache/pages/template_'.$this->id);
}
When called, this method first sets up Smarty, as we saw earlier in the chapter.
Then it checks to see if a copy of the page body exists as a file in
SCRIPTBASE
.'/
ww.cache/pages/'
. If not, then the file is created.
Then, Smarty is run against that file and the result is returned.
Now we need to make sure it is used. Edit
/index.php
, and in the
set
up
pagecontent
section, change the first case to this:
case '0': // { normal page
$pagecontent=$PAGEDATA->render();
break;
// }
D
o
w
nl
oa
d
fr
om
W
ow
!
eB
oo
k
<
w
w
w
.w
ow
eb
oo
k.
co
m
>
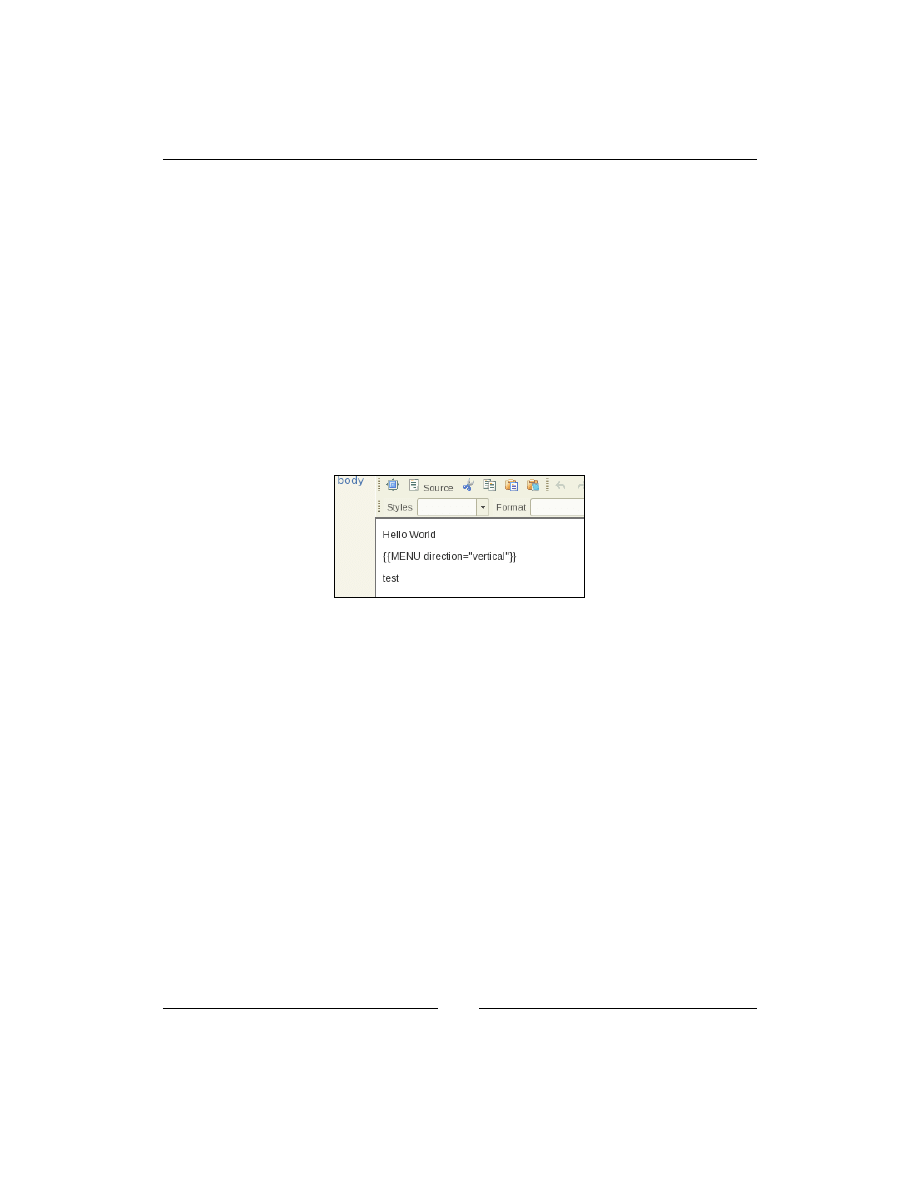
Chapter 6
[
151
]
And finally, to make sure that the Smarty cache is cleared every time a page is
changed, we add this (highlighted line) to the end of
/ww.admin/pages/action.
edit.php
:
echo '<em>Page Saved</em>';
cache_clear('pages');
And also to the end of
/ww.admin/pages/delete.php
:
}
echo 1;
cache_clear('pages');
That will do it!
Now, as a test, change your home page to use the
_default
template (the one with
the horizontal menu), and then edit the page body to this:
Before you save, there's something important to fix first. The CKeditor RTE (Rich-
text Editor) converts the double-quote character
"
to the HTML entity code
"
in the background. This can cause problems, so we will edit
/ww.admin/pages/
action.edit.php
, and where the
$body
variable is initialised, convert that line to
this highlighted one:
$name =pages_setup_name($id,$pid);
$body =str_replace('"','"',$_REQUEST['body']);
$special =pages_setup_specials($id);
Then click on Update to save the page.
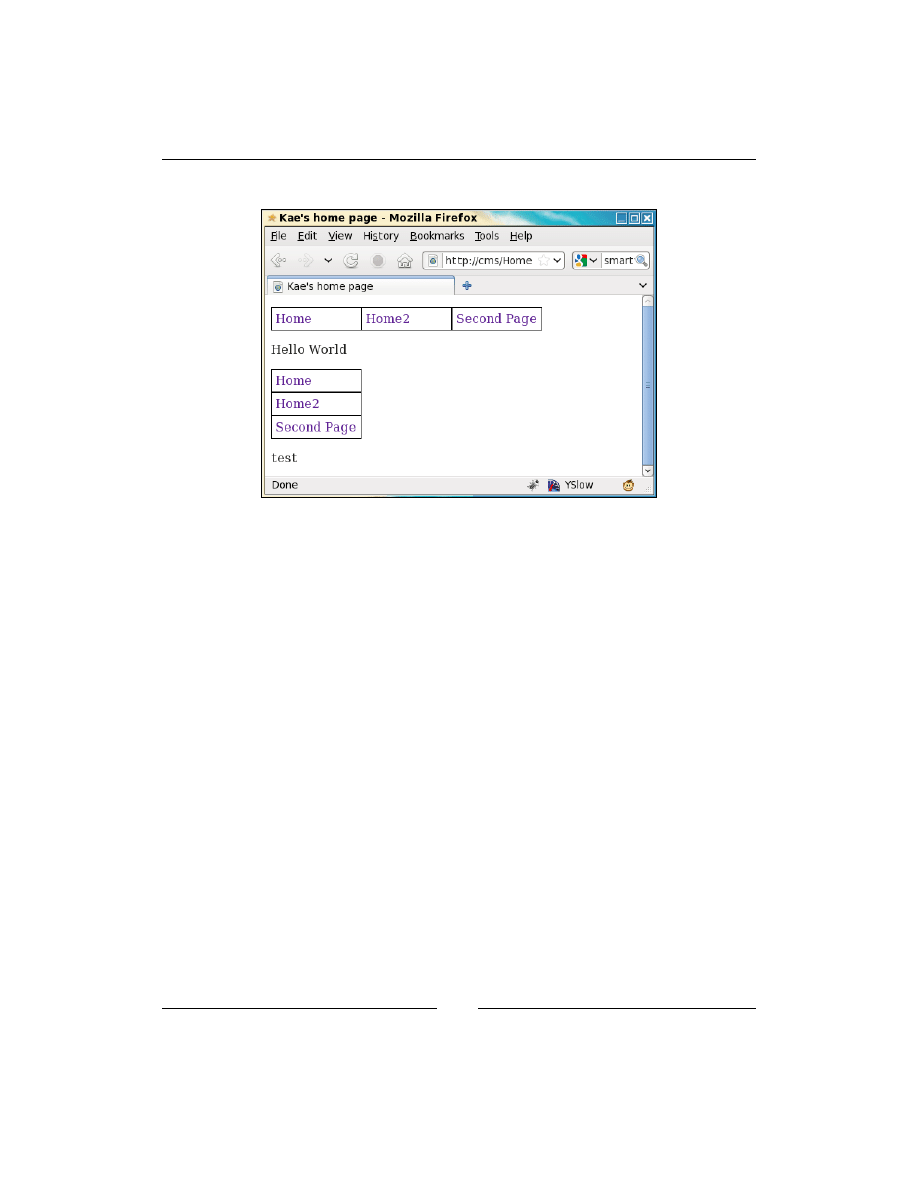
Design Templates – Part Two
[
152
]
Now when you view the front-end, you should see this:
And that demonstrates that you can now call Smarty functions from within the page
body itself!
Summary
In this chapter, we advanced the CMS engine to the stage that you can now create a
designed template, including page menus, and embed the page content within that.
Not only that, but you can also now use Smarty functions within the page body as
well, meaning that when we create plugins, we can use some of them "inline" in the
page body.
In the next chapter, we will start on the plugin framework, allowing us to add or
remove modules of code without affecting the core code at all.

Plugins
In this chapter, we will enhance the CMS engine so it can use plugins or external
code modules, which can be "plugged" into the engine to add new abilities to it.
This chapter will include the following topics:
•
What are plugins and triggers and why must a CMS handle them
•
The creation of the plugin architecture
•
Enabling plugins
•
Handling of plugin database tables and upgrades
•
Creating an example plugin, Page Comments
After completing this chapter, the CMS could be considered "complete", in that
almost every other requested feature can be supplied by writing a plugin for it.
However, it should be noted that a CMS never is actually complete, because each
new website may bring a new request that is not yet catered for.
Having said that, using plugins lets you at least complete a "core" engine and
concentrate on providing hooks that allow further development to be done, outside
that core.
What are plugins?
A plugin is a module of code that can be dropped into a directory and enabled, to
give a CMS extra capabilities.
Plugins need to be able to change the output and do other tasks, so it is necessary to
add various "hooks" throughout the code where the plugins can apply their code.

Plugins
[
154
]
A very important reason for adding a plugin architecture to a CMS is that it lets you
stabilize the core code. The core is basically the code that will be available in every
instance of the CMS, as opposed to plugin code, which may or may not be present in
any particular instance of the CMS.
With a core piece of code that is deemed "complete", it becomes easier to manage
bugs. Because you are not always adding to the core code, you are not actively
adding to the potential number of bugs.
In a CMS which does not have a stable core, any change to the central code can affect
just about anything else.
You really need to get your CMS to a stage where you are no longer developing
the central engine. Instead, you are working mostly on external plugins and maybe
occasional bug fixes to the core, as they are found.
In my case, for example, I worked for years on building up a CMS before getting
around to building in plugins. Every change that was requested was built into the
core code. Usually, only the fully-tested code at that time would be the new code,
so very often we would miss a problem that the new code would have caused
somewhere else in the CMS. Often, this problem would not show up for weeks, so it
would not be obvious what the problem was related to!
When all the development of a CMS is shifted to plugins, it becomes less likely that
the core is at fault when a problem occurs. Because plugins, by their nature, tend to
be isolated pieces of code, if a bug does appear, it is very likely the bug is within the
plugin's code and not anywhere else.
Also, because plugins allow a person to develop without touching the core engine, it is
possible for the external teams or individuals to create their own plugins that they can
use with the engine, without needing to understand all the parts of the core engine.
One more advantage is that if the plugin architecture is solid, it is possible for
development to continue on the core completely separately from the plugins,
knowing that plugins from one version of the CMS will most likely work with a core
from another version.
Events in the CMS
One example of a hook is event triggers.
In JavaScript (and therefore jQuery), there is the concept of events, where you can set
a block of code to run when a certain trigger happens.

Chapter 7
[
155
]
For example, when you move your mouse over an element, there are a number of
potential trigger points—
onmouseover
,
onmouseenter
,
onmousemove
(and possibly
others, depending on the context).
Obviously, PHP does not have those events, as it's a server-side language. But it is
possible to conceive of triggers for your CMS that you could potentially hook onto.
For example, let's say you've just finished figuring out the page content. At this
point, you may want to trigger a
page-content-created
event. This could (and
will, in this chapter) be used by a Page Comments plugin to tack on the comments
thread, and any required forms, to the end of that page content.
Another example: Let's say you want to create a custom log for your own purposes.
You would then be interested in a start trigger that can be used to initialize certain
values, such as a timer. After the output has been sent, a finish trigger that can be
used to tally up a number of figures (compilation time, memory used, size of rendered
output, and so on) and record them in a file or database before the script finishes.
Page types
In some cases, you will want the page content to be totally converted. Instead of
showing a page body as normal, you may want to show an image gallery or a store
checkout.
In this case, you would need to create a "page type" block of code, which the front-
end will use instead of the usual page data
render()
call.
In the admin area, this might also require using a customized form instead of the
usual rich text editor.
Admin sections
The admin area may need to have new sections added by a plugin. In the Events
section, we described a logging plugin. A perfect complement to that is a graphing
log viewer, which would be shown as a completely new admin section and have its
own entry in the admin menu.
Page admin form additions
You may also want to add extra forms to all the Page forms in the admin, regardless
of what page type it is. For example, if you create a security plugin and want to
protect various pages depending on who is viewing it, you will need to be able to
choose which users or groups have access and what to display if the current user
does not have full access. This requires an additional form in the Page admin.

Plugins
[
156
]
It is very difficult to describe all the possible plugin uses, and the number of triggers
that may be required.
The easiest way to proceed is to just adjust the engine as required. If it turns out you
forgot to add an event trigger at some point, it should be a small matter to just add it
in at that point without affecting the core code beyond that addition.
Example plugin configuration
Create a directory called
/ww.plugins
.
Each plugin you create will be placed in a directory—one directory per plugin.
For our first example, we're going to build a Page Comments plugin, which will
allow visitors to your site to leave comments on your pages.
On the admin side, we will need to provide methods to maintain the submitted
comments per page and for the whole site.
Anyway, create a directory to hold the plugin called
/ww.plugins/page-comments
.
The CMS will expect the plugin configuration for each plugin to be in a file named
plugin.php
. So the configuration for the Page Comments plugin
/ww.plugins/
page-comments/plugin.php
is as follows:
<?php
$plugin=array(
'name' => 'Page Comments',
'description' => 'Allow your visitors to comment on pages.',
'version' => '0',
'admin' => array(
'menu' => array(
'Communication>Page Comments' => 'comments'
) ,
'page_tab' => array(
'name' => 'Comments',
'function' => 'page_comments_admin_page_tab'
)
),
'triggers' => array(
'page-content-created' => 'page_comments_show'
)
);
The
plugin.php
files at least contain an array named
$plugin
, which describes the
plugin.

Chapter 7
[
157
]
We will expand on the possible configurations of this array throughout the book. For
now, let's look at what the current example says. All of these options, except the first
two, are optional.
First, we define a name, "Page Comments". This is only ever used in the admin area,
when you are choosing your plugins. The same is true of the description field.
The version field is used by the CMS to tell whether a plugin is up-to-date or if some
automatic maintenance is needed. This will be explained in more detail later in this
chapter.
Next, we have the admin array, which holds details of the admin-only functions.
The menu array is used to edit the admin menu, in case you need to add an admin
section for the plugin. In this case, we will add an admin section for Page Comments,
which will let you set site-wide settings and view comments site-wide.
If a new tab is to be added to the page admin section, this tab is described in the
page_tab
array.
name
is what appears in the tab header, and
function
is the name of
a PHP function that will be called to generate the tab content.
Finally, the triggers array holds details of the various triggers that the plugin should
react to. Each trigger calls a function.
Obviously, this is not a complete list, and it is not possible to ever have a complete
list, as each new circumstance you are requested to write for may bring up a need for
a trigger or plugin config setting that you had not thought of.
You will see as we go through the book that we add on new settings as we go.
However, you should also note that as we get closer to the end of the book, there are
less and less additions, as the plugin architecture becomes more complete.
From the plugin configuration, you can see that there are some functions named,
which we have not defined.
You should define those functions in the same file:
function page_comments_admin_page_tab($PAGEDATA){
require_once SCRIPTBASE.'ww.plugins/page-comments/'
.'admin/page-tab.php';
return $html;
}
function page_comments_show($PAGEDATA){
if(isset($PARENTDATA->vars->comments_disabled) &&
$PARENTDATA->vars->comments_disabled=='yes')
return;
require_once SCRIPTBASE.'ww.plugins/page-comments/'
.'frontend/show.php';
}

Plugins
[
158
]
The functions are prefixed with an identifier to make sure that they don't clash with
the functions from other plugins. In this case, because the plugin is named Page
Comments, the prefix is
page_comments_
.
The functions here are essentially stubs. Plugins will be loaded every time any
request is made to the server. Because of this, and the obvious fact that not all the
functions would be needed in every request, it makes sense to keep as little code in it
as possible in the
plugin.php
files.
In most cases, triggers will be called with just the
$PAGEDATA
object as a parameter.
Obviously, in cases in the admin area where you're not editing any particular page
this would not make sense, but for most plugins, to keep the function calls consistent,
the only parameter is
$PAGEDATA
.
Enabling plugins
We have defined a plugin. We could make it such that when you place a plugin in
the
/ww.plugins
directory, it is automatically enabled. However, if you are creating
a CMS that you intend to reuse for a lot of other clients, it is a lot easier to simply
copy the entire CMS source and reconfigure, than to copy the CMS source and then
clear out the existing plugins and repopulate carefully with new ones that you would
download from a repository that you keep somewhere else.
So, what we do is we give the admin a maintenance page where they choose the
plugins they want to load. The CMS then only loads those and does not even look at
the other directories.
Edit the
/ww.admin/header.php
file and add a new link (highlighted) to the plugin
admin section:
<li><a href="/ww.admin/themes.php">Themes</a></li>
<li><a href="/ww.admin/plugins.php">Plugins</a></li>
<li><a href="/ww.incs/logout.php?redirect=/ww.admin/"
>Log Out</a></li>
We will be changing the admin menu later in this chapter to make it customizable
more easily, but for now, add in that link manually.
Now create the
/ww.admin/plugins.php
file:
<?php
require 'header.php';
echo '<h1>Plugin Management</h1>';
echo '<div class="left-menu">';
echo '<a href="/ww.admin/users.php">Users</a>';

Chapter 7
[
159
]
echo '<a href="/ww.admin/themes.php">Themes</a>';
echo '<a href="/ww.admin/plugins.php">Plugins</a>';
echo '</div>';
echo '<div class="has-left-menu">';
echo '<h2>Plugin Management</h2>';
require 'plugins/list.php';
echo '</div>';
require 'footer.php';
You'll have noticed that this is similar to the
/ww.admin/themes.php
and
/
ww.admin/users.php
files. They're all related to site-wide settings, so I've placed
links to them all in the left-menu. Edit those files and add in the new Plugins link to
their menus.
Before we create the page for listing the enabled plugins, we must first set up the array
of enabled plugins in
/ww.incs/basics.php
, by adding this to the end of the file:
// { plugins
$PLUGINS=array();
if (isset($DBVARS['plugins'])&&$DBVARS['plugins']) {
$DBVARS['plugins']=explode(',',$DBVARS['plugins']);
foreach($DBVARS['plugins'] as $pname){
if (strpos('/',$pname)!==false) continue;
require SCRIPTBASE . 'ww.plugins/'.$pname.'/plugin.php';
$PLUGINS[$pname]=$plugin;
}
}
else $DBVARS['plugins']=array();
// }
As you can see, we are again referencing the
$DBVARS
array in the
/.private/
config.php
.
Because we already have a function for editing that (
config_rewrite()
, created
in the previous chapter), all we need to do to change the list of enabled or disabled
plugins, and create and maintain the
$DBVARS['plugins']
array, making sure to
resave the config file after each change.
What the code block does is that it reads in the
plugin.php
file for each enabled
plugin, and saves the
$plugin
array from each file into a global
$PLUGINS
array.

Plugins
[
160
]
The
$DBVARS['plugins']
variable is an array, but we'll store it as a comma-delimited
string in the config file. Edit
config_rewrite()
in the same file and add this
highlighted line:
$tmparr=$DBVARS;
$tmparr['plugins']=join(',',$DBVARS['plugins']);
$tmparr2=array();
We'll enhance the plugin loader in a short while. In the meantime, let's finish the
admin plugin maintenance page.
Create the directory
/ww.admin/plugins
, and in it, add
/ww.admin/plugins/list.
php
:
<?php
echo '<table id="plugins-table">';
echo '<thead><tr><th>Plugin Name</th><th>Description</th>
<th> </th></tr></thead><tbody>';
// { list enabled plugins first
foreach($PLUGINS as $name=>$plugin){
echo '<tr><th>',htmlspecialchars(@$plugin['name']),'</th>',
'<td>',htmlspecialchars(@$plugin['description']),'</td>',
'<td><a href="/ww.admin/plugins/disable.php?n=',
htmlspecialchars($name),'">disable</a></td>',
'</tr>';
}
// }
// { then list disabled plugins
$dir=new DirectoryIterator(SCRIPTBASE . 'ww.plugins');
foreach($dir as $plugin){
if($plugin->isDot())continue;
$name=$plugin->getFilename();
if(isset($PLUGINS[$name]))continue;
require_once(SCRIPTBASE.'ww.plugins/'.$name.'/plugin.php');
echo '<tr id="ww-plugin-',htmlspecialchars($name),
'" class="disabled">',
'<th>',htmlspecialchars($plugin['name']),'</th>',
'<td>',htmlspecialchars($plugin['description']),'</td>',
'<td><a href="/ww.admin/plugins/enable.php?n=',
htmlspecialchars($name),'">enable</a></td>',
'</tr>';
}
// }
echo '</tbody></table>';
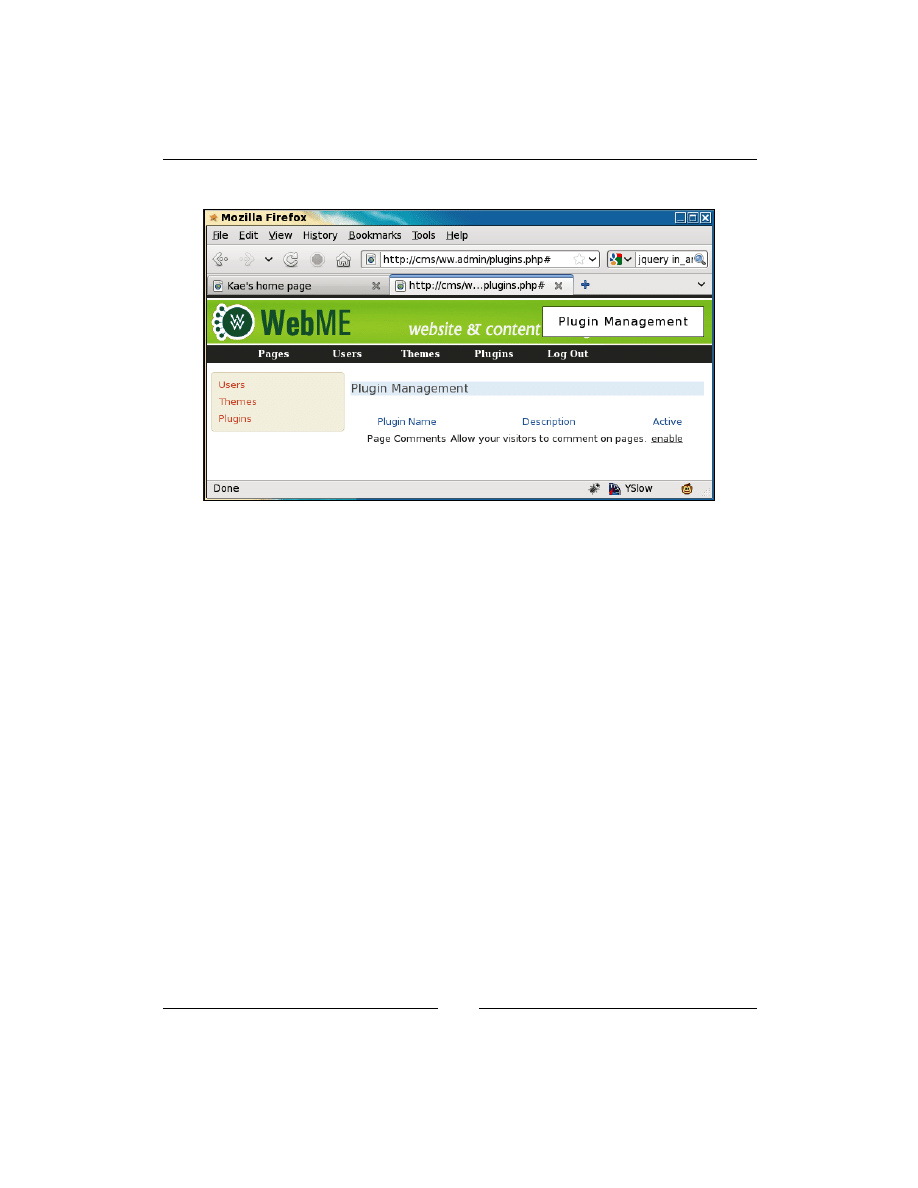
Chapter 7
[
161
]
When viewed in a browser, it displays like this:
The script displays a list of already-enabled plugins (we have none so far), and then
reads the
/ww.plugins
directory for any other plugins and adds them along with an
"enable" link.
Now we need to write some code to do the actual selection/enabling of the plugins.
While it would be great to write some jQuery to do it in an Ajaxy way (so you click
on the enable link and the plugin is enabled in the background, without reloading
the page), there are too many things that might cause problems. For instance, if the
plugin caused new items to appear in the menu, we'd have to handle that. If the
plugin changed the theme, or did anything else that caused a layout change, we'd
have to handle that as well.
So instead, we'll do it the old-fashioned PHP way—you click on enable or disable,
which does the job on the server, and then reloads the plugin page so you can see
the change.
Create the
/ww.admin/plugins/enable.php
file:
<?php
require '../admin_libs.php';
if(!in_array($_REQUEST['n'],$DBVARS['plugins'])){
$DBVARS['plugins'][]=$_REQUEST['n'];
config_rewrite();
}
header('Location: /ww.admin/plugins.php');
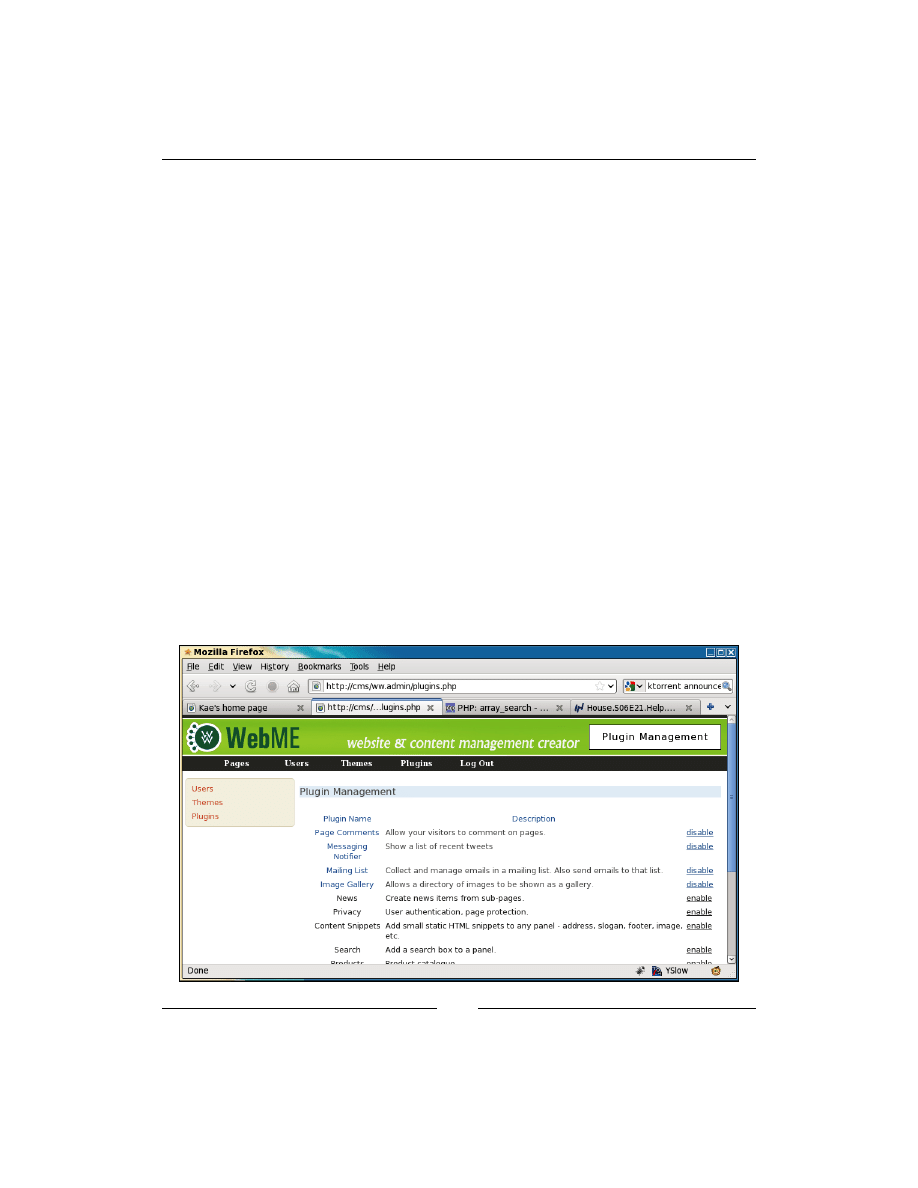
Plugins
[
162
]
It simply adds the requested plugin to the
$DBVARS['plugins']
array, then rewrites
the config and redirects the browser back to the plugins page.
When clicked, the page apparently just reloads, and the plugin's link changes to
disable.
The opposite script is just as simple. Write this code block in the file
/ww.admin/
plugins/disable.php
:
<?php
require '../admin_libs.php';
if(in_array($_REQUEST['n'],$DBVARS['plugins'])){
unset($DBVARS['plugins'][
array_search($_REQUEST['n'],$DBVARS['plugins'])
]);
config_rewrite();
}
header('Location: /ww.admin/plugins.php');
In this case, all we needed to do was to remove the plugin name from
$DBVARS['plugins']
by unsetting its position in the array.
Plugins are now very simply set up. Here's a screenshot of that page with a number
of plugins enabled and disabled. I copied some plugins from a more mature copy of
the CMS that I have. We won't cover all of them in this book, but will be looking at a
few of them, and building one or two others:

Chapter 7
[
163
]
The enabled plugins are moved to the top of the list to make them more visible and
the rest are shown below them.
Handling upgrades and database tables
Plugins frequently require database tables to be created or amended.
Because we are not doing a traditional installation when we install a plugin and
simply clicking on enable, the CMS needs to know if anything needs to be done to
the database (or other things, as we'll see).
For this, the CMS needs to keep a record of what version of the plugin is installed.
The way I handle upgrades in the CMS is that there are two copies of the plugin
version numbers. One is kept in the
$DBVARS
array and another is kept hardcoded in
the plugin's
$plugin
array.
If there is a discrepancy between the two, for example, if you've simply never used
the plugin before or if you downloaded a later version of the plugin that has a
different version number, you know an upgrade needs to be done.
I'll explain as we create the upgrade architecture. First, edit
/ww.incs/basics.php
and add the following highlighted lines to the plugins section:
require SCRIPTBASE . 'ww.plugins/'.$pname.'/plugin.php';
if(isset($plugin['version']) && $plugin['version'] && (
!isset($DBVARS[$pname.'|version'])
|| $DBVARS[$pname.'|version']!=$plugin['version']
)){
$version=isset($DBVARS[$pname.'|version'])
?(int)$DBVARS[$pname.'|version']
:0;
require SCRIPTBASE.'ww.plugins/'.$pname.'/upgrade.php';
$DBVARS[$pname.'|version']=$version;
config_rewrite();
header('Location: '.$_SERVER['REQUEST_URI']);
exit;
}
$PLUGINS[$pname]=$plugin;
How it works is that if the
$plugin
version is greater than 0 and either the
$DBVARS
-
recorded version doesn't exist or is not equal to the
$plugin
version, we run an
upgrade.php
script in the plugin's directory and then reload the page.

Plugins
[
164
]
Note the
$DBVARS[$pname.'|version']
variable name. In the Page Content
plugin's case, that will be
$DBVARS['page-content|version']
.
Even if a plugin is eventually disabled, we don't clear that value. Because the
upgrade may have made database changes, there's no point removing the value and
potentially ruining the database, if you eventually re-enable the plugin.
Let's create the Page Comments
upgrade.php
,
/ww.plugins/page-comments/
upgrade.php
:
<?php
if($version==0){ // create tables
dbQuery('create table `page_comments_comment` (
`id` int(11) NOT NULL auto_increment,
`comment` text,
`author_name` text,
`author_email` text,
`author_website` text,
`page_id` int,
`status` int,
`cdate` datetime,
PRIMARY KEY (`id`)
) ENGINE=MyISAM DEFAULT CHARSET=utf8');
$version++;
}
And add a version number to the end of the array in
/ww.incs/page-comments/
plugin.php
:
) ,
'version' => 1
);
Now, let's say you've just enabled the Page Comments plugin. What will happen is:
•
'page-comments' is added to
$DBVARS
and the plugins admin page is
reloaded.
•
As part of the reload, the
/ww.incs/basics.php
plugins section
notices that the plugin has a version number, but the
$DBVARS['page-
content|version']
value does not exist.
$version
is set to 0, and the
plugin's
upgrade.php
script is run.
•
The upgrade script creates the
page_comments_comment
table and
increments
$version
to 1.
•
The new
$version
is then recorded in
$DBVARS['page-content|version']
and the page is reloaded (again).
D
o
w
nl
oa
d
fr
om
W
ow
!
eB
oo
k
<
w
w
w
.w
ow
eb
oo
k.
co
m
>

Chapter 7
[
165
]
So in this case, clicking on enable triggered two reloads, one of which also ran an
upgrade script.
Now, let's say that you later decided that you needed to also record a moderation
e-mail address and whether or not moderation was turned on.
It doesn't make sense to create a whole new database table just to record single values.
Luckily, we already have some code in place that can record single values efficiently.
Edit the
upgrade.php
script again and add the following code at the end:
if($version==1){ // add moderation details
$DBVARS[$pname.'|moderation_email']='';
$DBVARS[$pname.'|moderation_enabled']='no';
$version++;
}
Change the version number in the
plugin.php
file to 2.
Remember that the first run of the script set
$DBVARS['page-content|version']
equal to 1. In this case, when a page is loaded, the upgrade script will skip the first
if
statement and will run the second.
If the plugin was being enabled for the first time, both
if
statements would be run.
The script we just wrote adds the moderation values directly to the
/.private/
config.php
file. Notice that we prefixed the values with
page-comments|
so that
they would not clash with other plugins.
In my case, that means
/.private/config.php
now looks like this:
<?php
$DBVARS=array(
'username'=>'cmsuser',
'password'=>'cmspass',
'hostname'=>'localhost',
'db_name'=>'cmsdb',
'theme'=>'basic',
'plugins'=>'page-comments',
'page-comments|moderation_email'=>'',
'page-comments|moderation_enabled'=>'no',
'page-comments|version'=>'2'
);
Also, notice that the second change was not a database one. You can do file updates,
send a notification ping to a remote server, send an e-mail, or anything else you
want, in those updates.

Plugins
[
166
]
Custom admin area menu
If you remember, we had the following code lines in
plugin.php
:
'menu' => array(
'Communication>Page Comments' => 'comments'
),
Those indicate that we want to add a Page Comments link under a Communication
top-level menu. When clicked, it should load up an admin maintenance script kept in
/ww.plugins/page-comments/admin/comments.php
.
To make this work, we will need to rewrite the admin menu.
Luckily, we've already installed the Filament Group menu, so we can use that. All
we need to do is build a customized
<ul>
menu in the admin header instead of the
hardcoded one we already have.
In
/ww.admin/header.php
, remove the entire
#menu-top
element and its contents.
We will replace that code with the custom form. Here is the start of it:
<?php
$menus=array(
'Pages'=>array(
'_link'=>'/ww.admin/pages.php'
),
'Site Options'=>array(
'Users' => array('_link'=>'/ww.admin/users.php'),
'Themes' => array('_link'=>'/ww.admin/themes.php'),
'Plugins'=> array('_link'=>'/ww.admin/plugins.php')
)
);
// }
First, we create the basic menu array. Any of the plugins that have menu items will
add theirs to this.
// { add custom items (from plugins)
foreach($PLUGINS as $pname=>$p){
if(!isset($p['admin'])
|| !isset($p['admin']['menu']))continue;
foreach($p['admin']['menu'] as $name=>$page){
if(preg_match('/[^a-zA-Z0-9 >]/',$name))continue;
$json='{"'.str_replace('>','":{"',$name)
.'":{"_link":"plugin.php?_plugin='
.$pname.'&_page='.$page.'"}}'

Chapter 7
[
167
]
.str_repeat('}',substr_count($name,'>'));
$menus=array_merge_recursive($menus,
json_decode($json,true));
}
}
// }
Our Page Comments plugin has a menu address Communication > Page
Comments. This code block takes that string and creates a recursive JSON object
from it (Page Comments contained in Communication), which it then converts to a
PHP array, and merges it with
$menus
.
I know it looks difficult to understand—it was a pain to write it as well! I couldn't
think of a simpler way to do it which was as concise. If you do, please e-mail me. I
prefer my code to be readable by other people.
$menus['Log Out']=array('_link'=>
'/ww.incs/logout.php?redirect=/ww.admin/');
Finally, we add the Log Out button at the end of the
$menus
array.
And now, let's output the data in a nested
<ul>
list.
// { display menu as UL list
function admin_menu_show($items,$name=false,
$prefix,$depth=0){
if(isset($items['_link']))
echo '<a href="'.$items['_link'].'">'.$name.'</a>';
else if($name!='top')
echo '<a href="#'.$prefix.'-'.$name.'">'.$name.'</a>';
if(count($items)==1 && isset($items['_link']))return;
if($depth<2)echo '<div id="'.$prefix.'-'.$name.'">';
echo '<ul>';
foreach($items as $iname=>$subitems){
if($iname=='_link')continue;
echo '<li>';
admin_menu_show($subitems,$iname,
$prefix.'-'.$name,$depth+1);
echo '</li>';
}
echo '</ul>';
if($depth<2)echo '</div>';
}
admin_menu_show($menus,'top','menu');
// }
?>
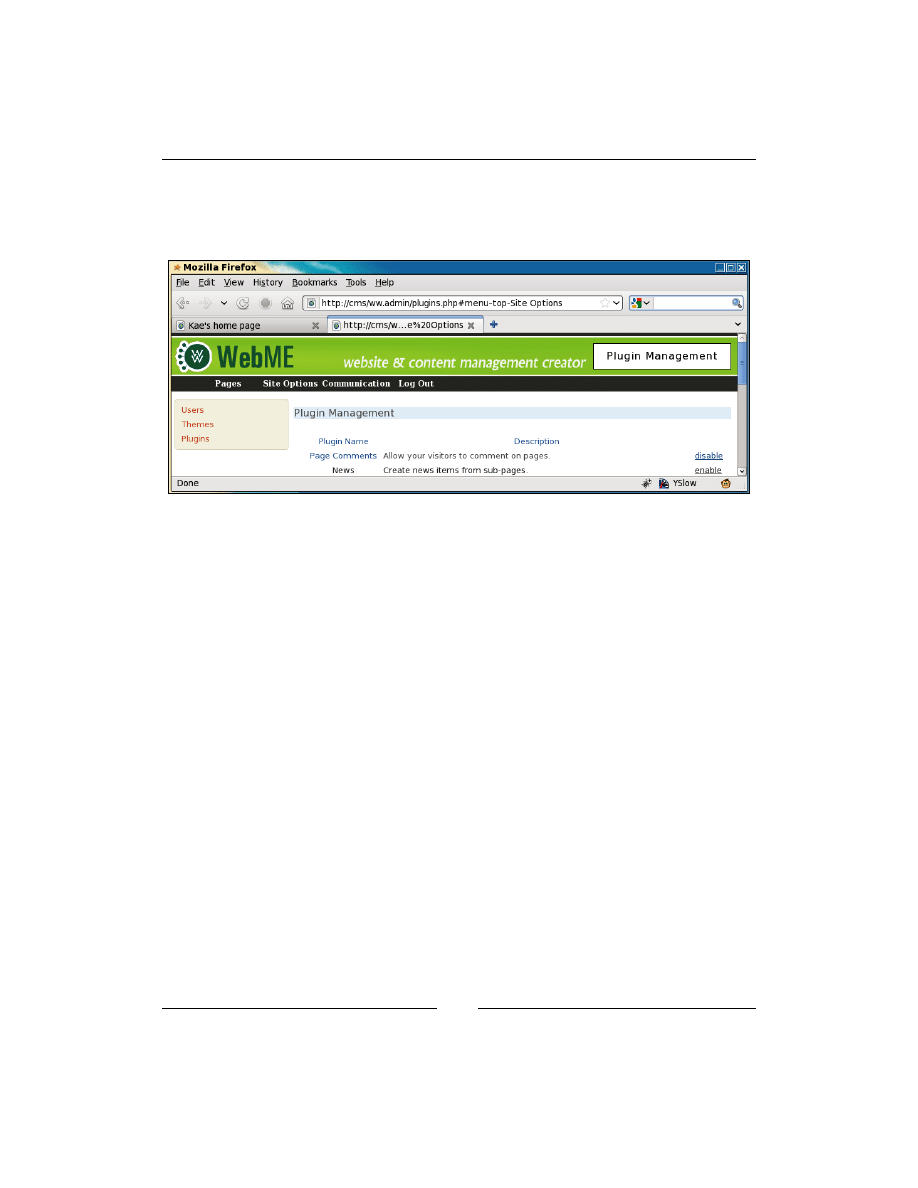
Plugins
[
168
]
If an item does not explicitly have a
_link
associated with it, the name is shown and
it is not clickable (or at least doesn't do anything when clicked).
With that in place, we have the following menu:
The sub-menus do not yet appear because we haven't enabled the fg-menu.
Edit
/ww.admin/j/admin.js
and add the following highlighted lines to the final
section:
$('input.date-human').each(convert_date_to_human_readable);
$('#menu-top>ul>li>a').each(function(){
if(!(/#/.test(this.href.toString())))return;
$(this).menu({
content: $(this).next().html(),
flyOut:true,
showSpeed: 400,
callerOnState: '',
loadingState: '',
linkHover: '',
linkHoverSecondary: '',
flyOutOnState: ''
});
});
});
That piece of code runs fg-menu on all the items in the menu that do not link to
#
.
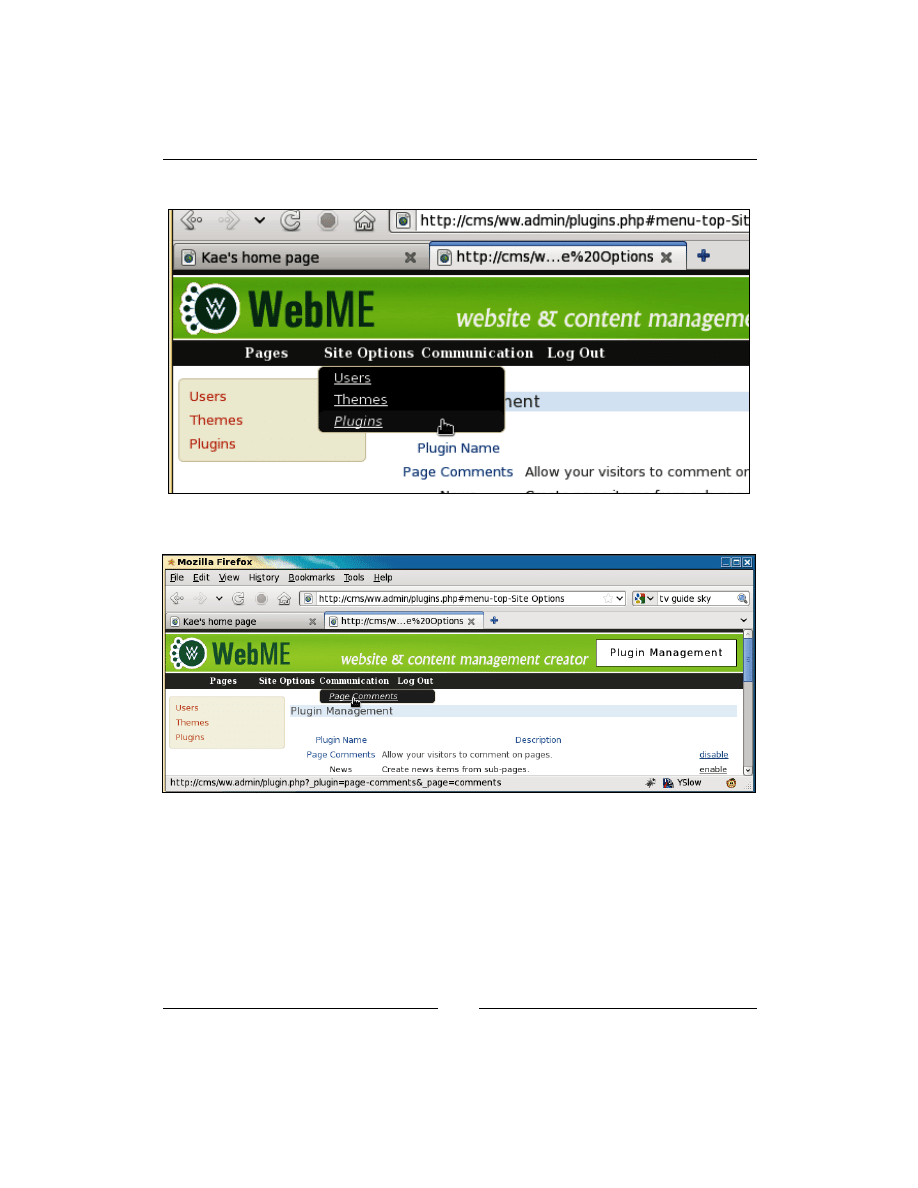
Chapter 7
[
169
]
After this, we can see that the Site Options menu now makes sense:
And we have our Page Comments menu item:
Notice the URL in the status bar.
http://cms/ww.admin/plugin.php
?_plugin=page-comments&_page=comments
All the menu items created from plugins are directed to
/ww.admin/plugin.php
(not
/ww.admin/plugins.php
; that has a different purpose), telling the script what
plugin is being used (
page-comments
) and what admin form (
comments
) should be
used from the plugin's
/admin
directory.

Plugins
[
170
]
Create the file
/ww.admin/plugin.php
:
<?php
require 'header.php';
$pname=$_REQUEST['_plugin'];
$pagename=$_REQUEST['_page'];
if(preg_match('/[^\-a-zA-Z0-9]/',$pagename) || $pagename=='')
die('illegal character in page name');
if(!isset($PLUGINS[$pname]))die('no plugin of that name ('
.htmlspecialchars($pname).') exists');
$plugin=$PLUGINS[$pname];
$_url='/ww.admin/plugin.php?_plugin='.urlencode($pname)
.'&_page='.$pagename;
echo '<h1>'.htmlspecialchars($pname).'</h1>';
if(!file_exists(SCRIPTBASE.'/ww.plugins/'.$pname.'/admin/'
.$pagename.'.php')){
echo '<em>The <strong>'.htmlspecialchars($pname).'</strong>
plugin does not have an admin page named <strong>'
.$pagename.'</strong>.</em>';
}
else{
if(file_exists(SCRIPTBASE.'/ww.plugins/'.$pname
.'/admin/menu.php')){
include SCRIPTBASE.'/ww.plugins/'
.$pname.'/admin/menu.php';
echo '<div class="has-left-menu">';
include SCRIPTBASE.'/ww.plugins/'.$pname.'/admin/'
.$pagename.'.php';
echo '</div>';
}
else include SCRIPTBASE.'/ww.plugins/'.$pname.'/admin/'
.$pagename.'.php';
}
require 'footer.php';
When called, this displays the standard admin area header, including the menu, and
then checks the requested plugin data.
If the plugin doesn't exist, the requested page doesn't exist in the plugin's
/admin
directory, or if the other tests fail, an explanation is shown to the admin and the
script is exited.
If all is well, we display the plugin's admin page.
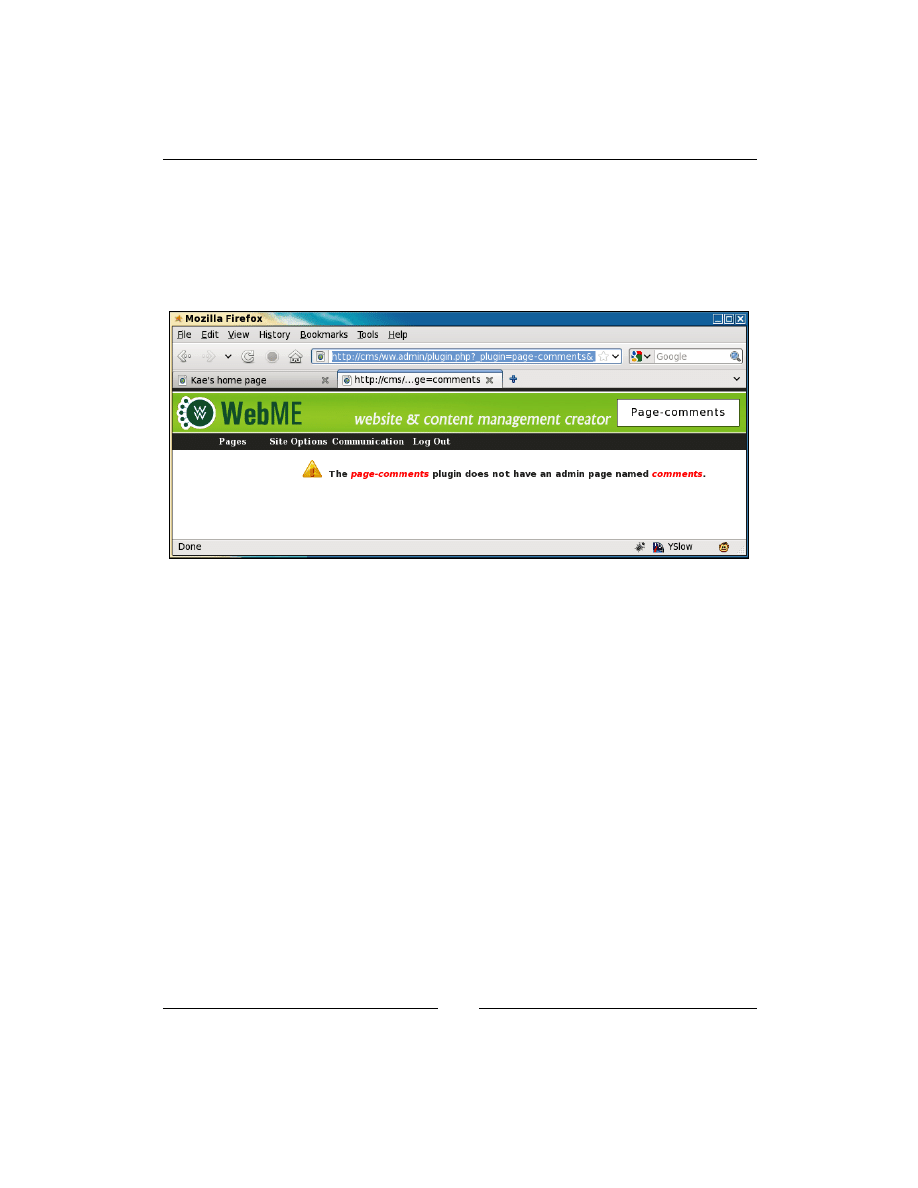
Chapter 7
[
171
]
If a
menu.php
file exists in the plugin's
/admin
directory, the menu is shown in a
column on the left-hand side and the rest of the page is on the right-hand side.
Otherwise, the page takes over the entire space available.
We haven't created the admin page for comments yet, so here's what the error
message looks like:
Ideally, the admin should never see that page at all, but if they go playing around
with the contents of the URL bar, we need to take care of any eventualities.
Now, we'll write a simple script for that. Create the
/ww.plugins/page-comments/
admin/
directory, and create a file in it called
comments.php
, with the following code:
<?php
$htmlurl=htmlspecialchars('/ww.admin/plugin.php?_plugin='
.'page-comments&_page=comments');
// { moderation settings
echo '<form action="',$htmlurl,'" method="post">'
,'<h2>Moderation</h2><table><tr><th>Enabled</th>'
,'<th>Moderator\'s email</th></tr>';
// { moderation enabled
echo '<tr><td><select name="moderation_enabled">'
,'<option value="no">No</option><option value="yes"';
if($DBVARS['page-comments|moderation_enabled']=='yes')
echo ' selected="selected"';
echo '>yes</option></select></td>';
// }
// { moderation email
echo '<td><input name="moderation_email" value="'
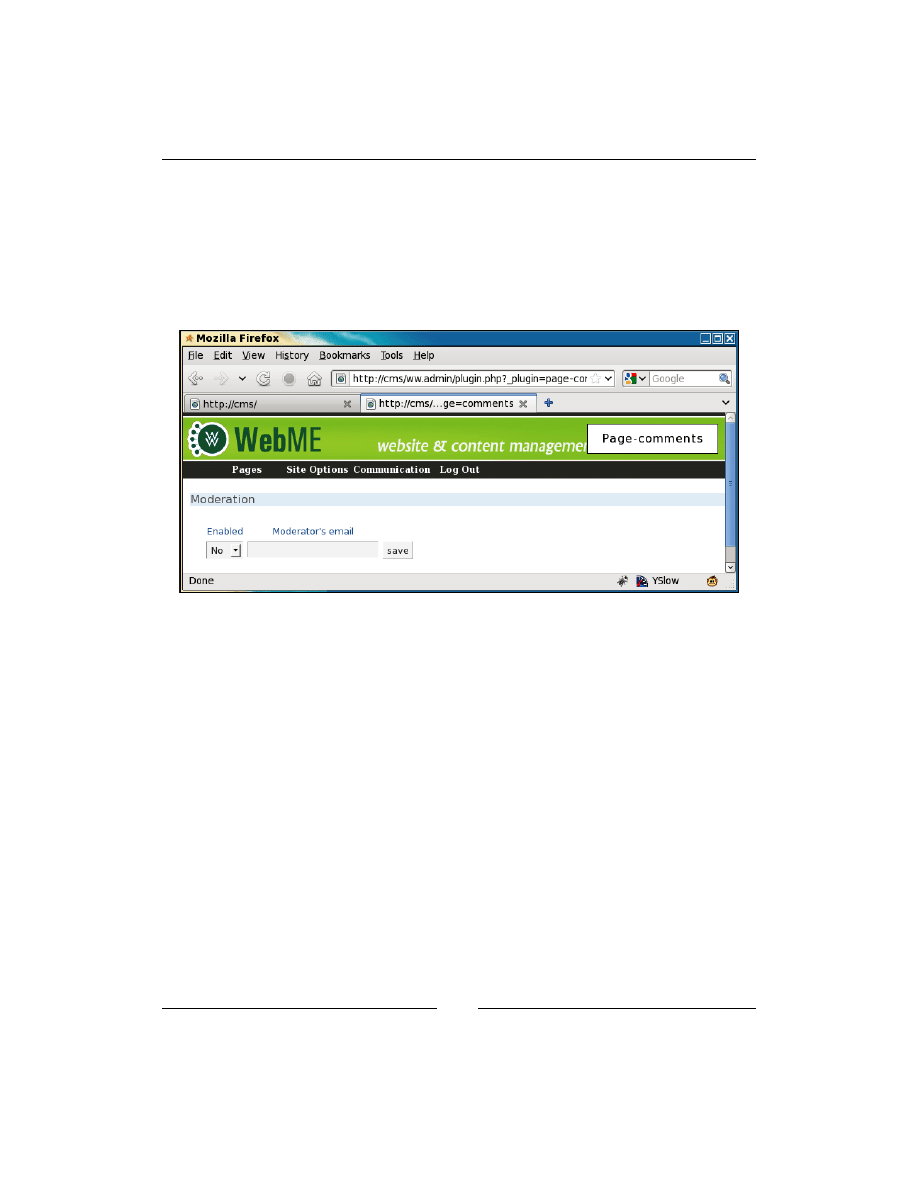
Plugins
[
172
]
,htmlspecialchars(
$DBVARS['page-comments|moderation_email'])
,'" /></td>';
// }
echo '<td><input type="submit" name="action" value="save" '
,'/></td></tr></table></form>';
This code, when viewed in the browser, shows the following:
The first thing we do is to set
$htmlurl
. This is the HTML-encoded URL of the
current plugin admin page. You will need to use this in all the actions so that the
CMS knows what plugin you're working with.
We use it, for example, in the
<form>
that we set to use the POST method (otherwise,
when the form is submitted, it may override the
?_plugin=page-comments&_
page=comments
part of the URL).
Let's add the code for saving that now. Add it after the opening the
<?php
line in
the file.
if(isset($_REQUEST['action']) && $_REQUEST['action']=='save'){
$mod=($_REQUEST['moderation_enabled']=='yes')?'yes':'no';
$email=$_REQUEST['moderation_email'];
if(($mod=='yes' && $email=='') ||
($mod=='yes' && !
filter_var($email,FILTER_VALIDATE_EMAIL))){
echo '<em>error: email is not valid. please retry</em>';
}
else{
$DBVARS['page-comments|moderation_email']=$email;
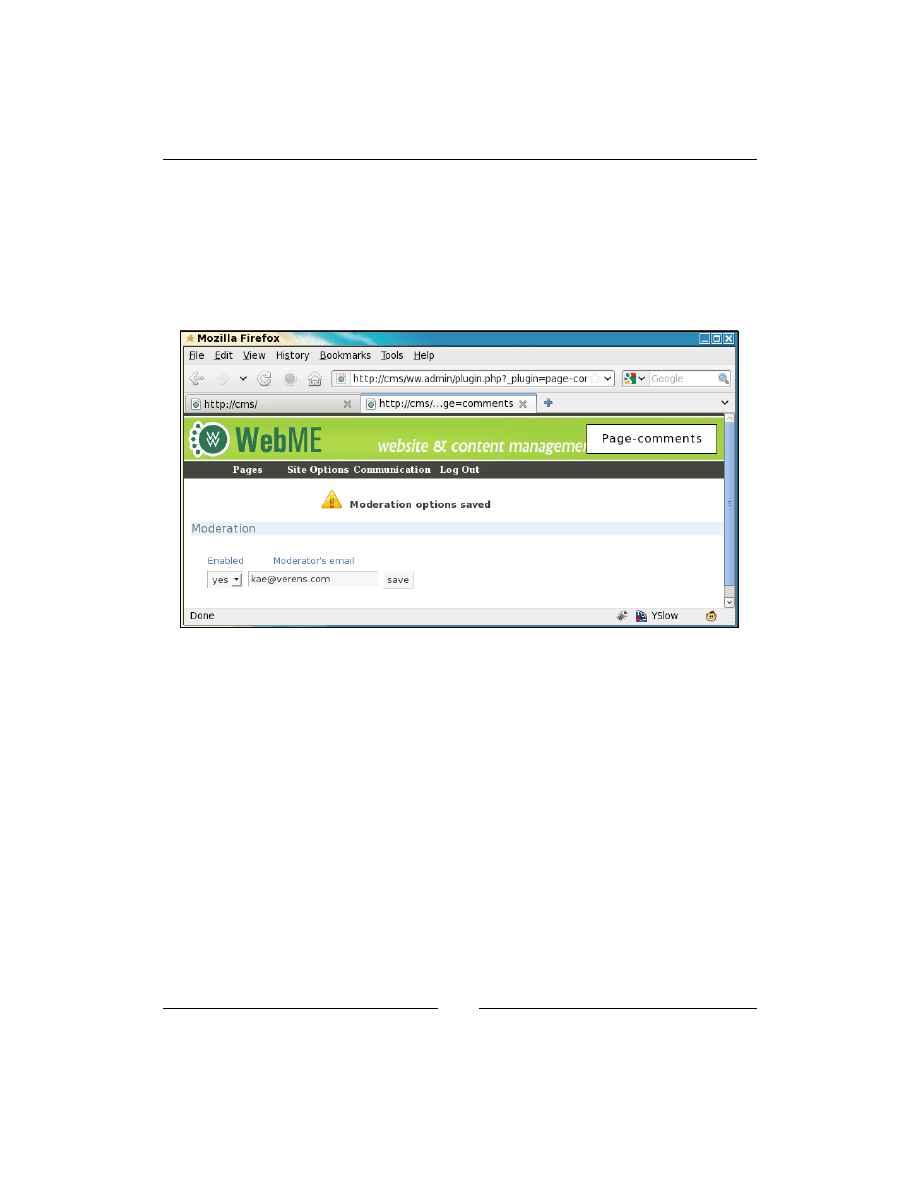
Chapter 7
[
173
]
$DBVARS['page-comments|moderation_enabled']=$mod;
config_rewrite();
echo '<em>Moderation options saved</em>';
}
}
This just does a bit of validation on the submitted form, then saves it using the
config_rewrite()
function to write it directly to the config file.
Okay, that's enough from the admin area for now. Let's work on the front-end.
Adding an event to the CMS
We want it so that after the content of a page is figured out, we can trigger a plugin
to run some code on it. The obvious place for this trigger to run is immediately at the
end of the "set up pagecontent" block in
/ww.index.php
(highlighted):
// other cases will be handled here later
}
plugin_trigger('page-content-created',$PAGEDATA);
// }
// { set up metadata
We will create that function in
/ww.incs/basics.php
:
function plugin_trigger($trigger_name){
global $PLUGIN_TRIGGERS,$PAGEDATA;

Plugins
[
174
]
if(!isset($PLUGIN_TRIGGERS[$trigger_name]))return;
foreach($PLUGIN_TRIGGERS[$trigger_name] as $fn)
$fn($PAGEDATA);
}
This checks to see if a plugin trigger of that name (
page-content-created
) exists
in the global
$PLUGIN_TRIGGERS
array, which we'll create in a moment, and if so, it
runs all functions associated with the name, sending
$PAGEDATA
as a parameter.
In the same file as we are creating the
$PLUGINS
array, we should also be creating the
$PLUGINS_TRIGGERS
array.
Change the start of the plugins block to this:
// { plugins
$PLUGINS=array();
$PLUGINS_TRIGGERS=array();
if(isset($DBVARS['plugins'])&&$DBVARS['plugins']){
And near the end of the block:
$PLUGINS[$pname]=$plugin;
if(isset($plugin['triggers'])){
foreach($plugin['triggers'] as $name=>$fn){
if(!isset($PLUGIN_TRIGGERS[$name]))
$PLUGIN_TRIGGERS[$name]=array();
$PLUGIN_TRIGGERS[$name][]=$fn;
}
}
}
}
else $DBVARS['plugins']=array();
And it's as simple as that. We can now create triggers anywhere in the CMS core, and
they will execute any that are in the plugins.
If you remember, the Page Comments plugin triggers the function
page_comments_
show()
when
page-content-created
is triggered.
We've already written a stub function for this, which then loads up the file
/
ww.plugins/page-comments/frontend/show.php
.

Chapter 7
[
175
]
Create that file now (create the directory
ww.plugins/page-comments/frontend
first):
<?php
global $pagecontent,$DBVARS;
$c='';
$message='';
// { add submitted comments to database
// }
// { show existing comments
// }
// { show comment entry form
$c.='<a name="page-comments-submit"></a>'
.'<h3>Add a comment</h3>';
if($message)$c.=$message;
$c.='<form action="'.$PAGEDATA->getRelativeURL()
.'#page-comments-submit" method="post"><table>';
$c.='<tr><th>Name</th><td><input name="page-comments-name" />'
.'</td></tr>';
$c.='<tr><th>Email</th><td><input type="email" '
.'name="page-comments-email" /></td></tr>';
$c.='<tr><th>Website</th><td><input '
.'name="page-comments-website" /></td></tr>';
$c.='<tr><th>Your Comment</th><td><textarea '
.'name="page-comments-comment"></textarea></td></tr>';
$c.='<tr><th colspan="2"><input name="action" '
.'value="Submit Comment" /></th></tr>';
$c.='</table></form>';
// }
$pagecontent.='<div id="page-comments-wrapper">'.$
c.'</div>';
Simple enough; this adds a comment box onto the global
$pagecontent
variable.
Note that the
#page-comments-submit
anchor appended to the page URL. If
someone submits a comment, they will be brought back to the comment form.
I've adjusted the basic theme we've been using, to make it a little neater and added
some Lorem Ipsum text to the body of the home page, so we can see what it looks
like with some text in it.
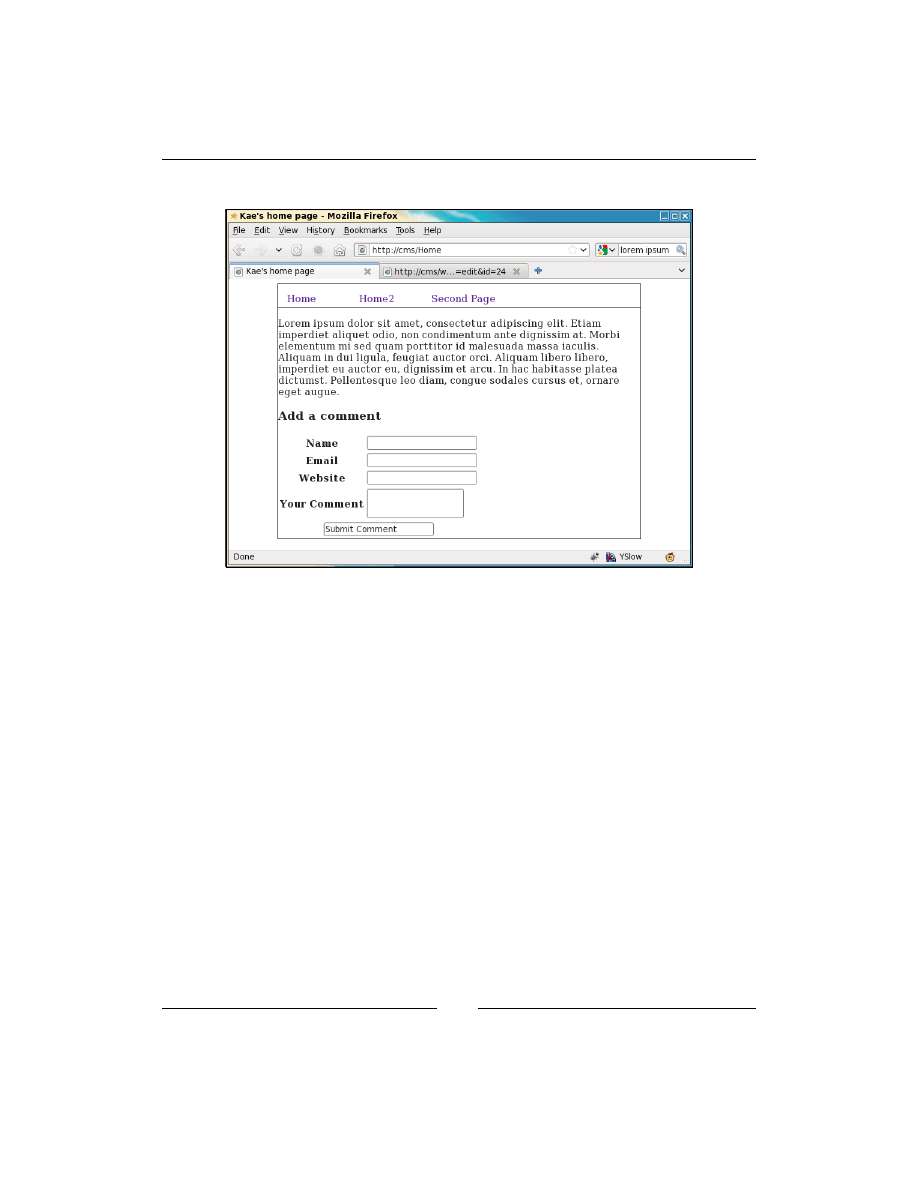
Plugins
[
176
]
Here's what the home page looks like with the Page Comments plugin enabled:
Now we need to take care of what happens when the comment is submitted.
Edit the
/ww.plugins/page-comments/frontend/show.php
file, changing the "add
submitted comments to database" section to this:
// { add submitted comments to database
if(isset($_REQUEST['action']) &&
$_REQUEST['action']=='Submit Comment'){
if(!isset($_REQUEST['page-comments-name']) ||
$_REQUEST['page-comments-name']=='')
$message.='<li>Please enter your name.</li>';
if(!isset($_REQUEST['page-comments-email']) ||
!filter_var($_REQUEST['page-comments-email'],
FILTER_VALIDATE_EMAIL))
$message.='<li>Please enter your email address.</li>';
if(!isset($_REQUEST['page-comments-comment']) ||
!$_REQUEST['page-comments-comment'])
$message.='<li>Please enter a comment.</li>';
if($message)$message='<ul
class="error page-comments-error">'.$message.'</ul>';
else{
$website=isset($_REQUEST['page-comments-website'])
D
o
w
nl
oa
d
fr
om
W
ow
!
eB
oo
k
<
w
w
w
.w
ow
eb
oo
k.
co
m
>

Chapter 7
[
177
]
?$_REQUEST['page-comments-website']:'';
if($DBVARS['page-comments|moderation_enabled']=='yes'){
$status=0;
mail($DBVARS['page-comments|moderation_email'],
'['.$_SERVER['HTTP_HOST'].'] comment submitted',
'A new comment has been submitted to the page "'
.$PAGEDATA->getRelativeUrl().'". Please log into '
'the admin area of the site and moderate it using '
'that page\'s admin.',
'From: noreply@'.$_SERVER['HTTP_HOST']
."\nReply-to: noreply@".$_SERVER['HTTP_HOST']);
$message='<p>Comments are moderated. It may be a '
.'few minutes before your comment appears.</p>';
}
else $status=1;
dbQuery('insert into page_comments_comment set comment="'
.addslashes($_REQUEST['page-comments-comment'])
.'",author_name="'
.addslashes($_REQUEST['page-comments-name'])
.'",author_email="'
.$_REQUEST['page-comments-email']
.'",author_website="'.addslashes($website)
.'",cdate=now(),page_id='.$PAGEDATA->id.',status='
.$status);
}
}
// }
This will record the comment in the database. Notice the
status
field. This says
whether a comment is visible or not.
This can be enhanced in many ways. You can change the e-mail that's sent to the
moderator to add links back to the right places, you can add an
is_spam
field to the
database and check the comment using the Akisment service (
http://akismet.
com/
), or you can have client-side jQuery form validation.
I haven't added these, as I am currently simply explaining how plugins work.
Finally in this section, we need to display any comments that have been successfully
entered and moderated. To simulate this, I temporarily turned off moderation in my
own copy before doing the following (so comments go through with status set to 1).

Plugins
[
178
]
Before we write the code for showing comments, we will add a new function to
/
ww.incs/basics.php
:
function date_m2h($d, $type = 'date') {
$date = preg_replace('/[- :]/', ' ', $d);
$date = explode(' ', $date);
if ($type == 'date') {
return date('l jS F, Y', mktime(0, 0, 0,
$date[1], $date[2], $date[0]));
}
return date(DATE_RFC822, mktime($date[5],
$date[4], $date[3], $date[1], $date[2], $date[0]));
}
This function
m2h
(stands for "mysql to human") takes a MySQL date and converts it
to a format that can be read by humans.
It's easy to write two or three lines and get the same result (or one complex line), but
why bother, when it just takes a single function call?
Now, edit
/ww.plugins/page-comments/frontend/show.php
again and this time
change the "show existing comments" section to this:
// { show existing comments
$c.='<h3>Comments</h3>';
$comments=dbAll('select * from page_comments_comment where
status=1 and page_id='.$PAGEDATA->id.' order by cdate');
if(!count($comments)){
$c.='<p>No comments yet.</p>';
}
else foreach($comments as $comment){
$c.=htmlspecialchars($comment['author_name']);
if($comment['author_website'])$c.=' (<a href="'
.htmlspecialchars($comment['author_website']).'">'
.htmlspecialchars($comment['author_website']).'</a>)';
$c.=' said, at '.date_m2h($comment['cdate'])
.':<br /><blockquote>'
.nl2br(htmlspecialchars($comment['comment']))
.'</blockquote>';
}
// }
This code takes comments from the
page_comments_comment
table and shows them
in the page, as long as they have already been accepted/moderated (their status is 1),
and they belong to that page.
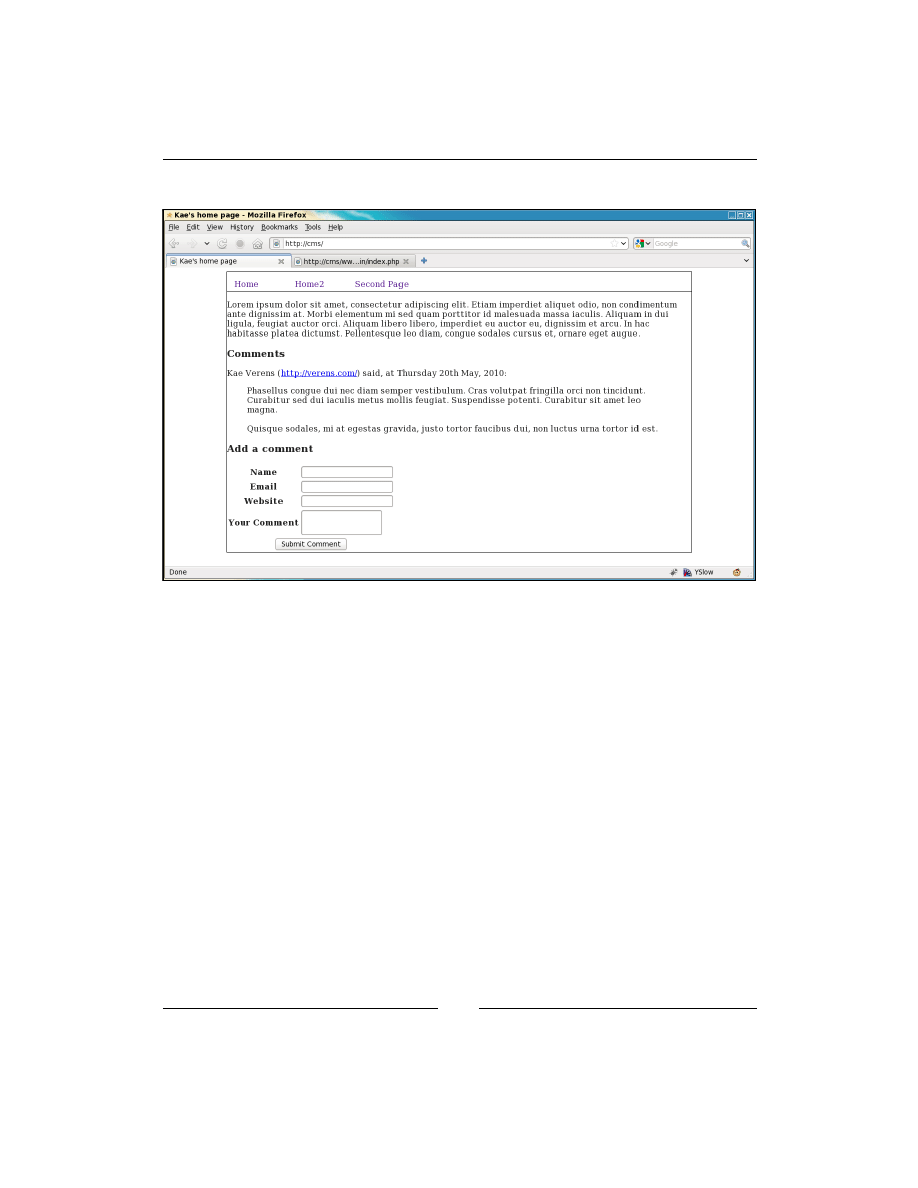
Chapter 7
[
179
]
Here's a screenshot of our home page now, with a submitted comment:
And now we get to the final major plugin method for the CMS in this chapter (there
is still more to come): adding a tab to the page admin.
Adding tabs to the page admin
When a comment is submitted (by the way, turn moderation back on), an e-mail is
sent to the moderator, who is asked to log into the admin area to check messages that
may have been sent.
We had this in the
plugin.php
file:
'page_tab' => array(
'name' => 'Comments',
'function' => 'page_comments_admin_page_tab'
)
We will use this information to add a new tab to the page admin named Comments,
which will be populated by calling a function
page_comments_admin_page_tab()
,
which we've already built as a stub. It loads and runs the file
/ww.plugins/page-
comments/admin/page-tab.php
, which generates a string named
$html
(it contains
HTML) and returns that to the page admin to be displayed.

Plugins
[
180
]
Note that it is also very useful to have a central area where comments
from all pages can be moderated. This chapter does not discuss that,
but if you wish to see how that would be implemented, please see the
comments plugin here: http://code.google.com/p/webworks-
webme/source/browse/#svn/ww.plugins/comments
.
So first, let's adapt the page admin so it will run the plugin's function. Edit
/
ww.admin/pages/forms.php
and before the line which opens the
<form>
, add the
highlighted code given as follows:
// }
// { generate list of custom tabs
$custom_tabs=array();
foreach($PLUGINS as $n=>$p){
if(isset($p['admin']['page_panel'])){
$custom_tabs[$p['admin']['page_panel']['name']]
=$p['admin']['page_panel']['function'];
}
}
// }
echo '<form id="pages_form" method="post">';
This code builds up a
$custom_tabs
array from the global
$PLUGINS
array.
Next, we display the tab names . Replace the "// add plugin tabs here" line with this
highlighted line:
,'<li><a href="#tabs-advanced-options">Advanced
Options</a></li>';
foreach($custom_tabs as $name=>$function)echo '<li><a
href="#tabs-custom-'
,preg_replace('/[^a-z0-9A-Z]/','',$name)
,'">',htmlspecialchars($name),'</a></li>';
echo '</ul>';
Finally, we add in the actual tab content (highlighted code) after the "Advanced
Options" section:
// }
// { tabs added by plugins
foreach($custom_tabs as $n=>$p){
echo '<div id="tabs-custom-'
,preg_replace('/[^a-z0-9A-Z]/','',$n),'">'
,$p($page,$page_vars),'</div>';
}

Chapter 7
[
181
]
// }
echo '</div><input type="submit" name="action" value="',
($edit?'Update Page Details':'Insert Page Details')
,'" /></form>';
This creates the tab bodies by calling the plugin functions with two parameters; the
main
$page
table data, and the custom variables of the page,
$page_vars
.
The result is then echoed to the screen.
So, let's create the
/ww.plugins/page-comments/admin/page-tab.php
file:
<?php
$html='';
$comments=dbAll('select * from page_comments_comment where
page_id='.$PAGEDATA['id'].' order by cdate desc');
if(!count($comments)){
$html='<em>No comments yet.</em>';
return;
}
$html.='<table id="page-comments-table"><tr><th>Name</th>'
,'<th>Date</th><th>Contact</th>'
,'<th>Comment</th><th> </th></tr>';
foreach($comments as $comment){
$html.='<tr class="';
if($comment['status'])$html.='active';
else $html.='inactive';
$html.='" id="page-comments-tr-'.$comment['id'].'">';
$html.='<th>'.htmlspecialchars($comment['author_name'])
.'</th>';
$html.='<td>'.date_m2h($comment['cdate'],'datetime')
.'</td>';
$html.='<td>';
$html.='<a href="mailto:'
.htmlspecialchars($comment['author_email']).'">'
.htmlspecialchars($comment['author_email']).'</a><br />';
if($comment['author_website'])$html.='<a href="'
.htmlspecialchars($comment['author_website']).'">'
.htmlspecialchars($comment['author_website']).'</a>';
$html.='</td>';
$html.='<td>'.htmlspecialchars($comment['comment']).'</td>';
$html.='<td></td></tr>';
}
$html.='</table><script src="/ww.plugins/page-comments'
.'/admin/page-tab.js"></script>';
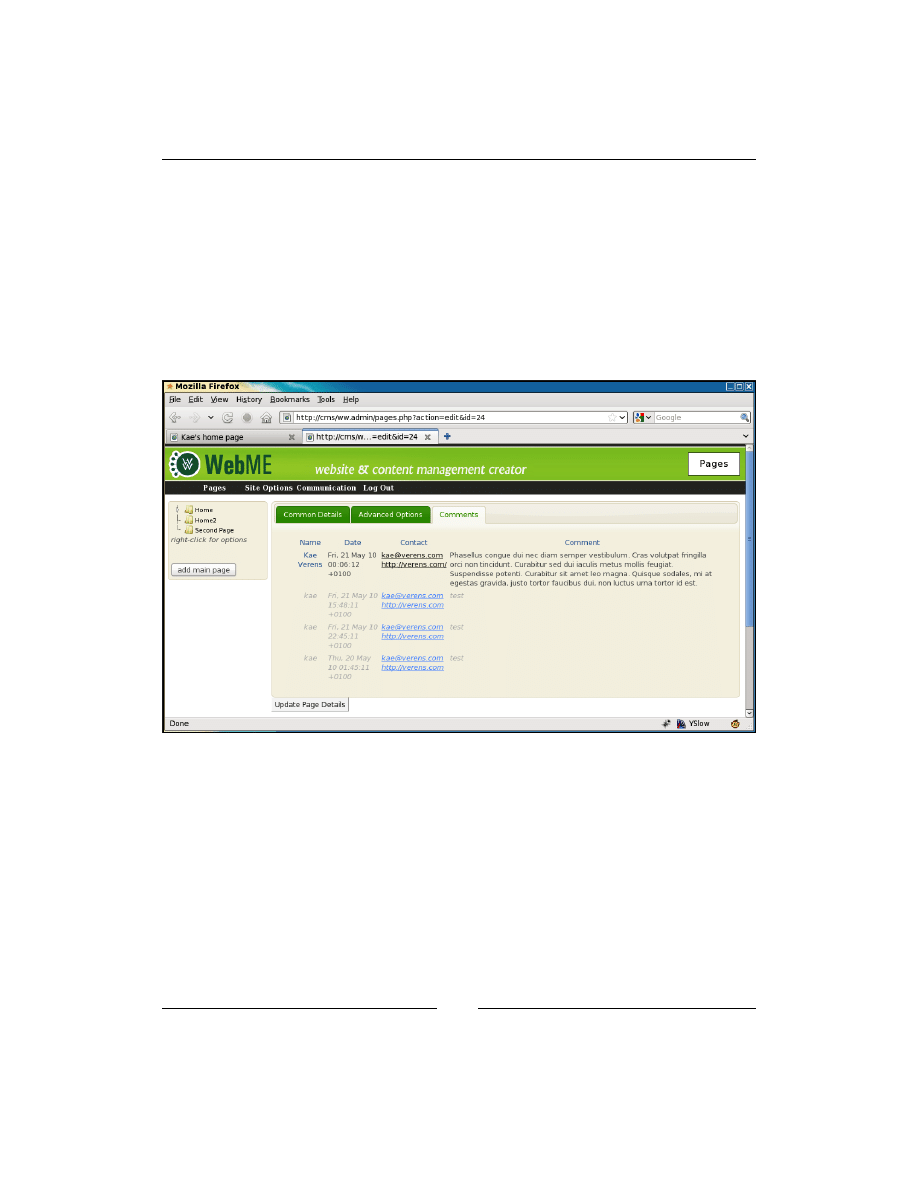
Plugins
[
182
]
In this code block, we build up a string variable named
$html
that holds details on
all the comments for a specified page.
We've left a blank
<td>
at the end of each row, which will be filled by jQuery with
some actionable links.
Enhancements that you could build in here might be to limit the number of
characters available in each table cell or also to add pagination for pages with vast
numbers of comments.
We can already see that the tab is working:
Now we need to add in the actions.
Create the file
/ww.plugins/page-comments/admin/page-tab.js
:
function page_comments_build_links(){
var stat=this.className;
if(!stat)return;
var id=this.id.replace('page-comments-tr-','');
var html='<a href="javascript:page_comments_'+(
(stat=='active')
?'deactivate('+id+');">deactivate'
:'activate('+id+');">activate'
)+'</a> | <a href="javascript:'
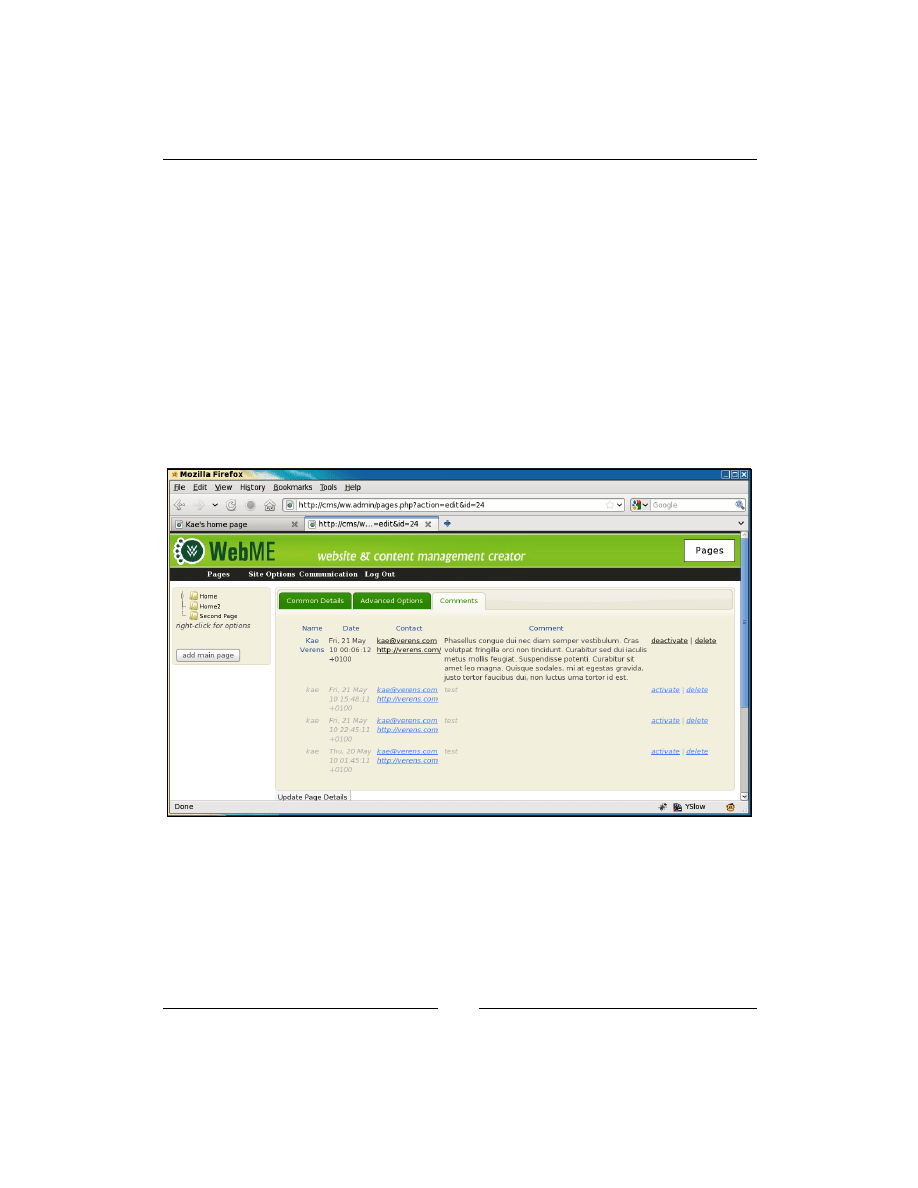
Chapter 7
[
183
]
+'page_comments_delete('+id+');">delete</a>';
$(this).find('td:last-child').html(html);
}
$(function(){
$('#page-comments-table tr')
.each(page_comments_build_links);
});
This script takes all the
<tr>
rows in the table, checks their classes, and builds up
links based on whether the link is currently active or inactive.
The reason we do this through JavaScript and not straight in the PHP is that we're
going to moderate the links through AJAX, so it would be a waste of resources to do
it in both PHP and jQuery.
The page now looks like this:
Okay, now we just need to make those links work. Add these functions to the
same file:
function page_comments_activate(id){
$.get('/ww.plugins/page-comments/admin/activate.php'
+'?id='+id,function(){
var el=document.getElementById('page-comments-tr-'+id);
el.className='active';

Plugins
[
184
]
$(el).each(page_comments_build_links);
});
}
function page_comments_deactivate(id){
$.get('/ww.plugins/page-comments/admin/deactivate.php'
+'?id='+id,function(){
var el=document.getElementById('page-comments-tr-'+id);
el.className='inactive';
$(el).each(page_comments_build_links);
});
}
function page_comments_delete(id){
$.get('/ww.plugins/page-comments/admin/delete.php'
+'?id='+id,function(){
$('#page-comments-tr-'+id).fadeOut(500,function(){
$(this).remove();
});
});
}
These handle the deletion, activation, and deactivation of comments from the client-
side. I haven't included tests to see if they were successful (this is a demo).
The deletion event is handled by fading out the table row and then removing it. The
others simply change classes on the row and links in the right cell.
First, let's build the activation PHP script
/ww.plugins/page-comments/admin/
activate.php
:
<?php
require $_SERVER['DOCUMENT_ROOT'].'/ww.admin/admin_libs.php';
$id=(int)$_REQUEST['id'];
dbQuery('update page_comments_comment set status=1
where id='.$id);
echo '1';
The next one is to deactivate the comment,
/ww.plugins/page-comments/admin/
deactivate.php
:
<?php
require $_SERVER['DOCUMENT_ROOT'].'/ww.admin/admin_libs.php';
$id=(int)$_REQUEST['id'];
dbQuery('update page_comments_comment set status=0
where id='.$id);
echo '0';

Chapter 7
[
185
]
Yes, they're the same except for two numbers. I have them as two files because it
might be interesting in the future to add in separate actions that happen after one
or the other, such as sending an e-mail when a comment is activated and other such
actions.
The final script is the deletion one,
/ww.plugins/page-comments/admin/delete.
php
:
<?php
require $_SERVER['DOCUMENT_ROOT'].'/ww.admin/admin_libs.php';
$id=(int)$_REQUEST['id'];
dbQuery('delete from page_comments_comment where id='.$id);
echo '1';
Very simple and it completes our Page Comments example!
As pointed out, there are a load of ways in which this could be improved. For
example, we didn't take into account people that are already logged in (they
shouldn't have to fill in their details and should be recorded in the database), there
is no spam control, we did not use client-side validation, you could add "gravatar"
images for submitters, and so on.
All of these things can be added on at any point. We're onto the next plugin now!
Summary
In this chapter, we built the framework for enabling plugins and looked at a number
of ways that the plugin can integrate with the CMS.
We also changed the admin menu so it could incorporate custom items from the
plugins.
We built an example plugin, Page Comments, which used a few different plugin
hook types, page admin tabs, a standalone admin page, and a
page-content-
created
trigger.
In the next chapter, we will create a plugin that allows the admin to create a form
page for submission as an e-mail or for saving in the database.


Forms Plugin
In this chapter, we will create a plugin for providing a form generator which can be
used for sending the submitted data as an e-mail, or saving in the database.
By building this plugin, we will extend the core engine so that it can display custom
content forms in the page admin and custom page types. We will also adjust the
output on the front-end so it can display from the plugin instead of straight from the
page's body field.
How it will work
There are a number of ways to create a form. Probably the simplest way is to allow
the administrator to "draw" the form using a rich text editor, and treat the submitted
$_POST
values as being correct.
There are a number of reasons why POST should be used for forms instead of GET:
A form may contain file-upload inputs, requiring multi-part encoded POST data.
A form may contain textareas, which could have arbitrarily long tracts of text pasted
in them (GET has a rather short limit on the number of characters allowed).
When a form is submitted through POST, and the user reloads the page, the browser
pops up a warning asking if the user is sure that he/she wants to post the form data
again. This is better than accidentally sending forms over and over again.
This method has the disadvantage that the server doesn't know what type of data
was supposed to be inputted, so it can't validate it.
A more robust method is to define each field that will be in the form, then create a
template which will be shown to the user.

Forms Plugin
[
188
]
This allows us to autogenerate server-side and client-side validation. For example, if
the input is to be an e-mail address, then we can ensure that only e-mails are entered
into it. Similar tests can be done for numbers, select-box values, and so on.
We could make this comprehensive and cover all forms of validation. In this chapter,
though, we will build a simple forms plugin that will cover most cases that you will
meet when creating websites.
We will also need to define what is to be done with the form after it's
submitted—e-mail it or store in a database.
Because we're providing a method of saving to database, we will also need a way
of exporting the saved values so they can be read in an office application. CSV is
probably the simplest format to use, so we'll write a CSV exporter.
And finally, because we don't want robots submitting rubbish to your form or trying
to misuse it, we will have the option of using a captcha.
The plugin config
Plugins are usually started by creating the definition file. So, create the directory
/
ww.plugins/forms
and add this file to it:
<?php
$plugin=array(
'name' => 'Form',
'admin' => array(
'page_type' => array(
'form' => 'form_admin_page_form'
)
),
'description' =>
'Generate forms for sending as email or saving in the database',
'frontend' => array(
'page_type' => array(
'form' => 'form_frontend'
)
),
'version' => 3
);
function form_admin_page_form($page,$page_vars){
$id=$page['id'];
$c='';
require dirname(__FILE__).'/admin/form.php';

Chapter 8
[
189
]
return $c;
}
function form_frontend($PAGEDATA){
require dirname(__FILE__).'/frontend/show.php';
return $PAGEDATA->render().form_controller($PAGEDATA);
}
In the
admin
section of the
$plugin
array, we have a new value,
page_type
. We
are going to handle forms as if they were full pages. For example, you may have a
contact page where the page is predominantly taken over by the form itself.
The
page_type
value tells the server what function to call in order to generate
custom forms for the page admin.
It's an array, in case one plugin handles a number of different page types.
Because we've provided an admin-end
page_type
, it also makes sense to provide the
front-end equivalent, so we also add a
page_type
to the
frontend
array.
I've set the version to
3
here, because while developing it, I made three adjustments
to the database.
Here's the
upgrade.php
file, which should go in the same directory:
<?php
if($version==0){ // forms_fields
dbQuery('CREATE TABLE IF NOT EXISTS `forms_fields` (
`id` int(11) NOT NULL auto_increment,
`name` text,
`type` text,
`isrequired` smallint(6) default 0,
`formsId` int(11) default NULL,
`extra` text,
PRIMARY KEY (`id`)
) ENGINE=MyISAM DEFAULT CHARSET=utf8');
$version=1;
}
if($version==1){ // forms_saved
dbQuery('CREATE TABLE IF NOT EXISTS `forms_saved` (
`forms_id` int(11) default 0,
`date_created` datetime default NULL,
`id` int(11) NOT NULL auto_increment,
PRIMARY KEY (`id`)
) ENGINE=MyISAM DEFAULT CHARSET=utf8');
$version=2;
}
D
o
w
nl
oa
d
fr
om
W
ow
!
eB
oo
k
<
w
w
w
.w
ow
eb
oo
k.
co
m
>
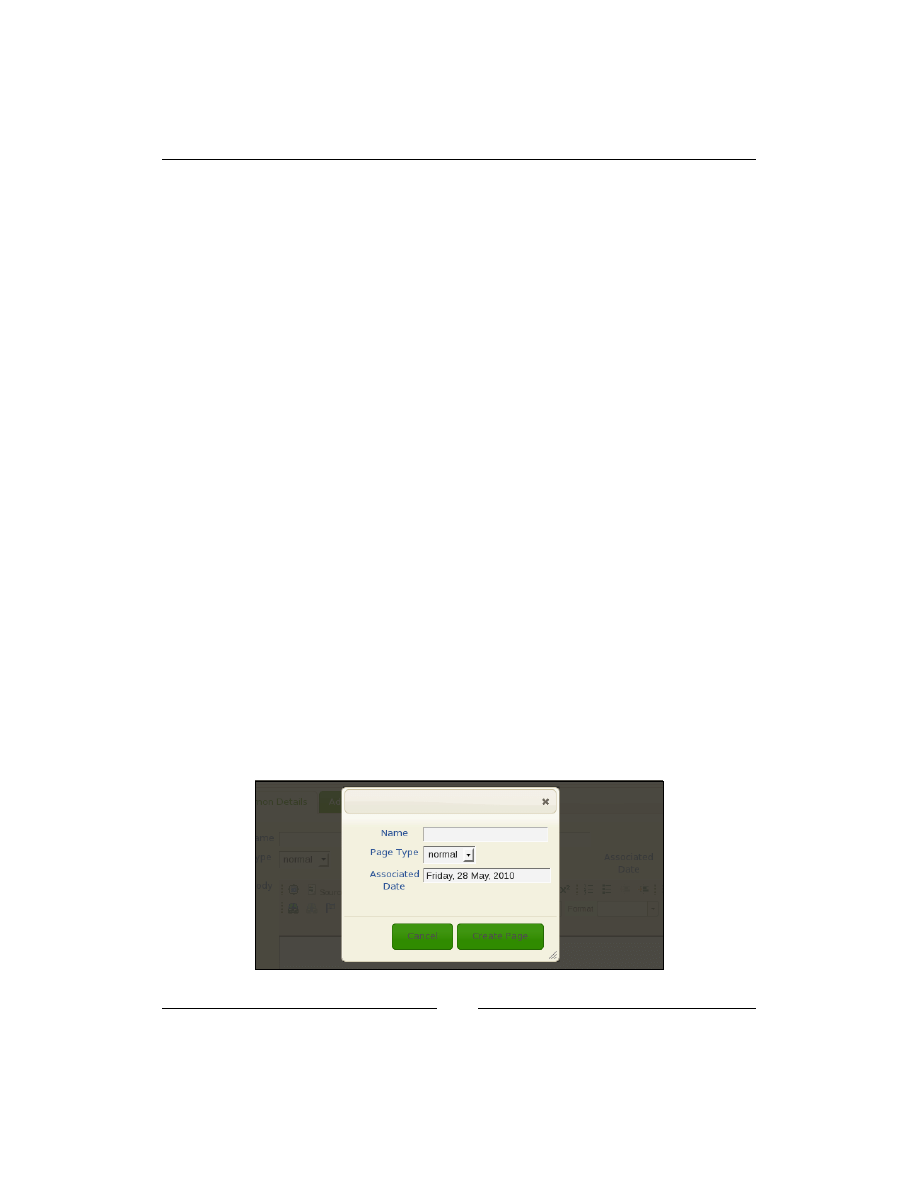
Forms Plugin
[
190
]
if($version==2){ // forms_saved_values
dbQuery('CREATE TABLE IF NOT EXISTS `forms_saved_values` (
`forms_saved_id` int(11) default 0,
`name` text,
`value` text,
`id` int(11) NOT NULL auto_increment,
PRIMARY KEY (`id`)
) ENGINE=MyISAM DEFAULT CHARSET=utf8');
$version=3;
}
When the plugin is enabled (enable it in the plugins section of the admin area), that
script will be run, and the tables added to the database.
•
The
forms_fields
table holds information about the fields that will be
shown in the form.
•
The
formsId
value links to the page ID, and the extra value is used to hold
values in cases where the input type needs extra data—such as select-boxes,
where you need to tell the form what the select-box options are.
•
The
forms_saved
table holds data on forms that have been saved in the
database, including the date and time that the form was saved.
•
The
forms_saved_values
holds the saved data and is related via
forms_
saved_id
to the
forms_saved
table.
Okay—we have the config and the database tables installed. Now let's get down to
the administration.
Page types in the admin
When you click on add main page in the page admin section, the pop up appears as
seen here:

Chapter 8
[
191
]
The Page Type in the form only holds one value at the moment, normal. We need to
change this so that it can add types created by plugins.
We first assume that most pages will be "normal", so we can leave that as the single
value in the select-box; we then use the
RemoteSelectOptions
plugin described
earlier in the book to add any others if the select-box is used.
Edit
/ww.admin/pages/menu.js
and add the following highlighted line to the
pages_new()
function:
$('#newpage_date').each(convert_date_to_human_readable);
$('#newpage_dialog select[name=type]')
.remoteselectoptions({
url:'/ww.admin/pages/get_types.php'
});
return false;
And here's the
/ww.admin/pages/get_types.php
file:
<?php
require '../admin_libs.php';
echo '<option value="0">normal</option>';
foreach($PLUGINS as $n=>$plugin){
if(!isset($plugin['admin']['page_type']))continue;
foreach($plugin['admin']['page_type'] as $n=>$p){
echo '<option value="'.htmlspecialchars($n).'">'
.htmlspecialchars($n).'</option>';
}
}
All it does is to echo out the
normal
type as an option, then goes through all installed
plugins and displays their
page_type
values as well.
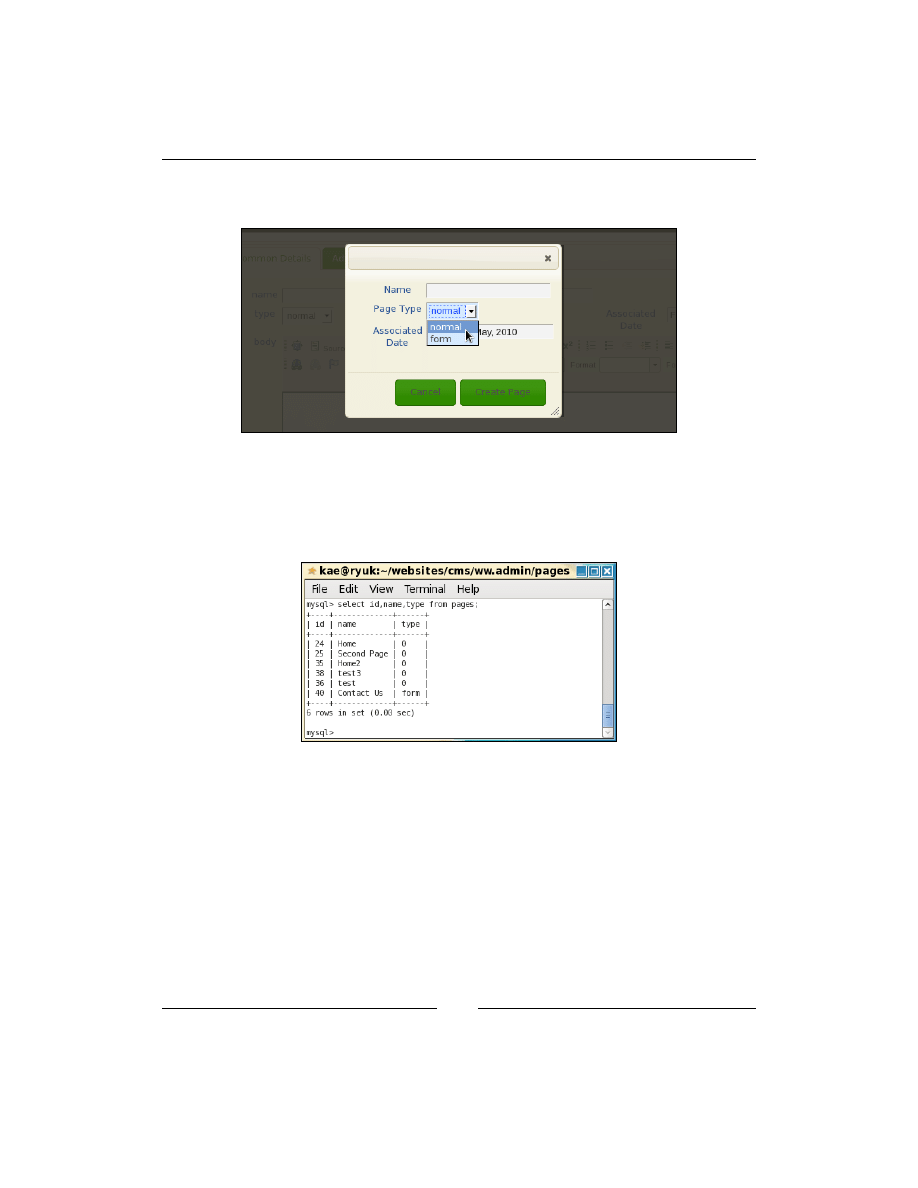
Forms Plugin
[
192
]
The add main page pop up now has the new
form
page type added, as seen in the
next screenshot:
When you submit this form, a new page is created. The new page's form says its type
is
normal
, but that's because we haven't added the code yet to the main form.
You can see that it's been done correctly by checking the database, as seen in the next
screenshot:
We add the page types to the main page form in the same way as we did with the
add main page form.
Edit the
/ww.admin/pages/pages.js
file and add these highlighted lines to the
$(function…)
section:
other_GET_params:currentpageid
});
$('#pages_form select[name=type]').remoteselectoptions({
url:'/ww.admin/pages/get_types.php'
});
});
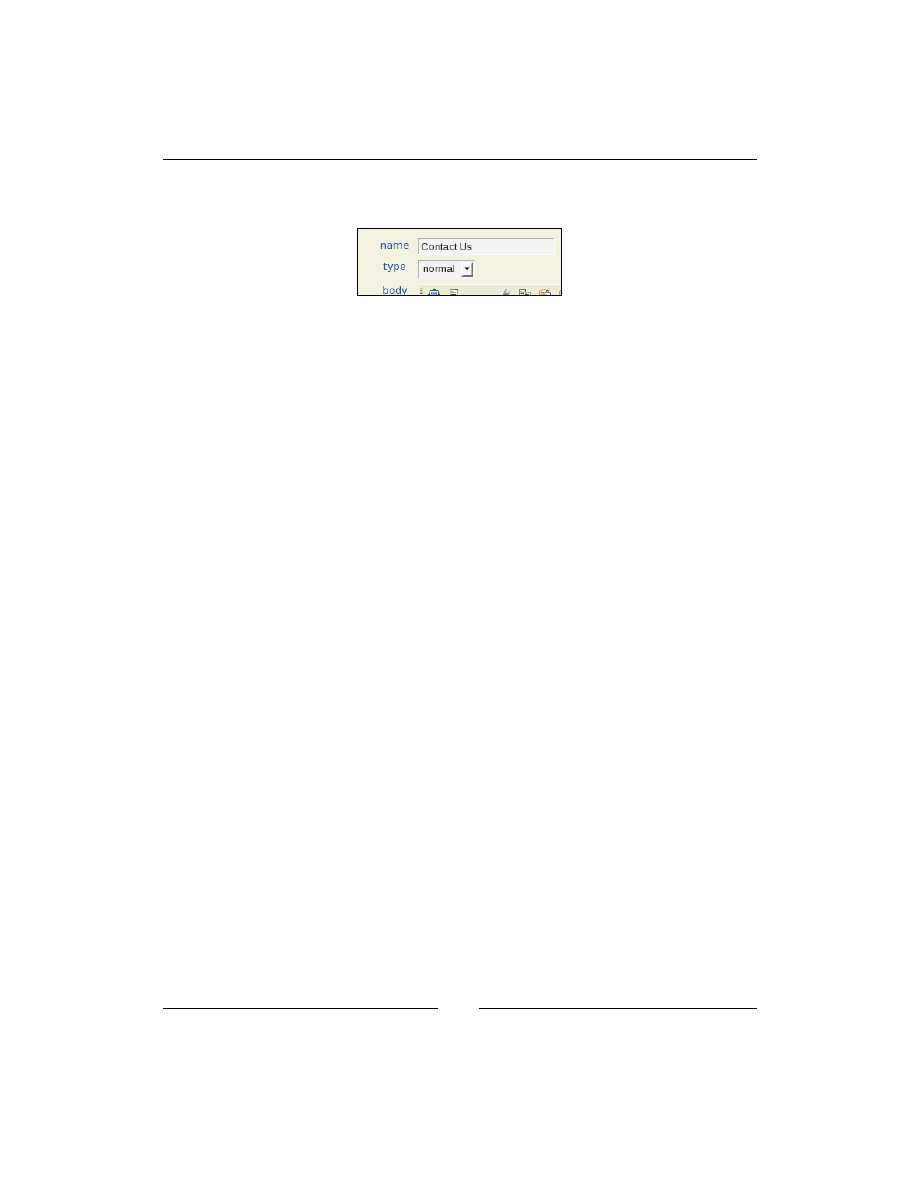
Chapter 8
[
193
]
This does exactly the same as the previous one. However, on doing it you'll see that
the page form still says
normal
:
The reason for this is that the HTML of the page is generated without knowing about
the other page types. We need to add code to the form itself.
Because the name of the type is stored in the page table (except if it's
normal
, in
which case it's stored as
0
), all we need to do is to output that name on its own.
Edit
/ww.admin/pages/forms.php
, in the Common Details section, change the
type
section to this:
// { type
echo '<th>type</th><td><select name="type"><option';
if(!$page['type'])echo ' value='0'>normal';
else echo '>'.htmlspecialchars($page['type']);
echo '</option></select></td>';
// }
Now, let's get back to the plugin and adding its admin forms to the page.
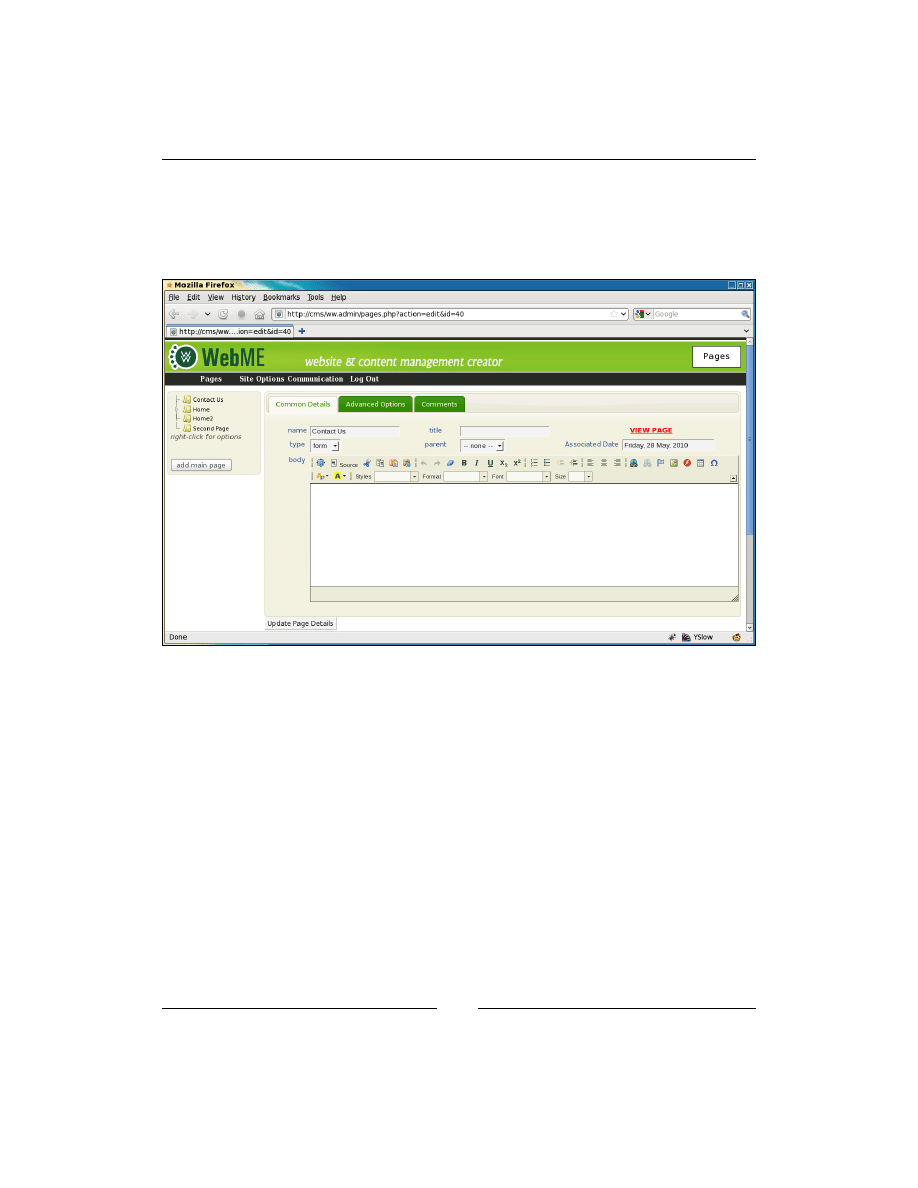
Forms Plugin
[
194
]
Adding custom content forms to the
page admin
The page admin form appears as seen in the next screenshot:
We saw in the previous chapter how to add another tab along the top.
When creating the custom form for the plugin, we could use the same method and
add another tab.
However, it makes more sense to convert the body section so that it can be tabbed.
In the end, it all gets added to the database in the same way, but visually, tabs along
the top of the page appear to be "meta" data (data about the page), whereas tabs in
the body section appear to be "content" data.
The difference is subtle, but in my experience, admins tend to find it easier to use
forms that are arranged in this way.
So, we will add the forms to the body section.
Open
/ww.admin/pages/forms.php
again, and change the
generate
list
of
custom
tabs
section to this (changed lines are highlighted):

Chapter 8
[
195
]
// { gather plugin data
$custom_tabs=array();
$custom_type_func='';
foreach($PLUGINS as $n=>$p){
if(isset($p['admin']['page_tab'])){
$custom_tabs[$p['admin']['page_tab']['name']]
=$p['admin']['page_tab']['function'];
}
if(isset($p['admin']['page_type'])){
foreach($p['admin']['page_type'] as $n=>$f){
if($n==$page['type'])$custom_type_func=$f;
}
}
}
// }
We rename it to
gather
plugin
data
because it's no longer specifically about tabs.
This loops through all installed plugins, getting any tabs that are defined, and setting
$custom_type_func
to the plugin's
page_type
function if it exists.
And later in the same file, change the
page-type-specific
data
section to this:
// { page-type-specific data
if($custom_type_func && function_exists($custom_type_func)){
echo '<tr><td colspan="6">'
.$custom_type_func($page,$page_vars).'</td></tr>';
}
else{
echo '<tr><th>body</th><td colspan="5">';
echo ckeditor('body',$page['body']);
echo '</td></tr>';
}
// }
This outputs the result of the
page_type
function if it was set and the function exists.
The function requires a file that we haven't yet created, so loading the admin page
will display only half the form before crashing.
Create the directory
/ww.plugins/forms/admin
and create the file
form.php
in it:
<?php
$c.='<div class="tabs">';
// { table of contents
$c.='<ul><li><a href="#forms-header">Header</a></li>'

Forms Plugin
[
196
]
.'<li><a href="#forms-main-details">Main Details</a></li>'
.'<li><a href="#forms-fields">Fields</a></li>'
.'<li><a href="#forms-success-message">Success Message</a></li>'
.'<li><a href="#forms-template">Template</a></li></ul>';
// }
// { header
$c.='<div id="forms-header"><p>Text to be shown
above the form</p>';
$c.=ckeditor('body',$page['body']);
$c.='</div>';
// }
// { main details
// }
// { fields
// }
// { success message
// }
// { template
// }
$c.='</div>';
I've left the
main
details
,
fields
(and other) sections empty on purpose. We'll fill
them in a moment.
This code creates a tab structure. You can see the table of contents matches the
commented sections.
Creating a "skeleton" of a config form can be useful because it lets you view your
progress in the browser, and you can leave reminders to yourself in the form of
commented sections that have not yet been filled in.
Doing this also helps you to develop the habit of commenting your code, so that
others can understand what is happening at various points of the file.
The previous code snippet can now be viewed in the browser, and renders as seen in
the following screenshot:
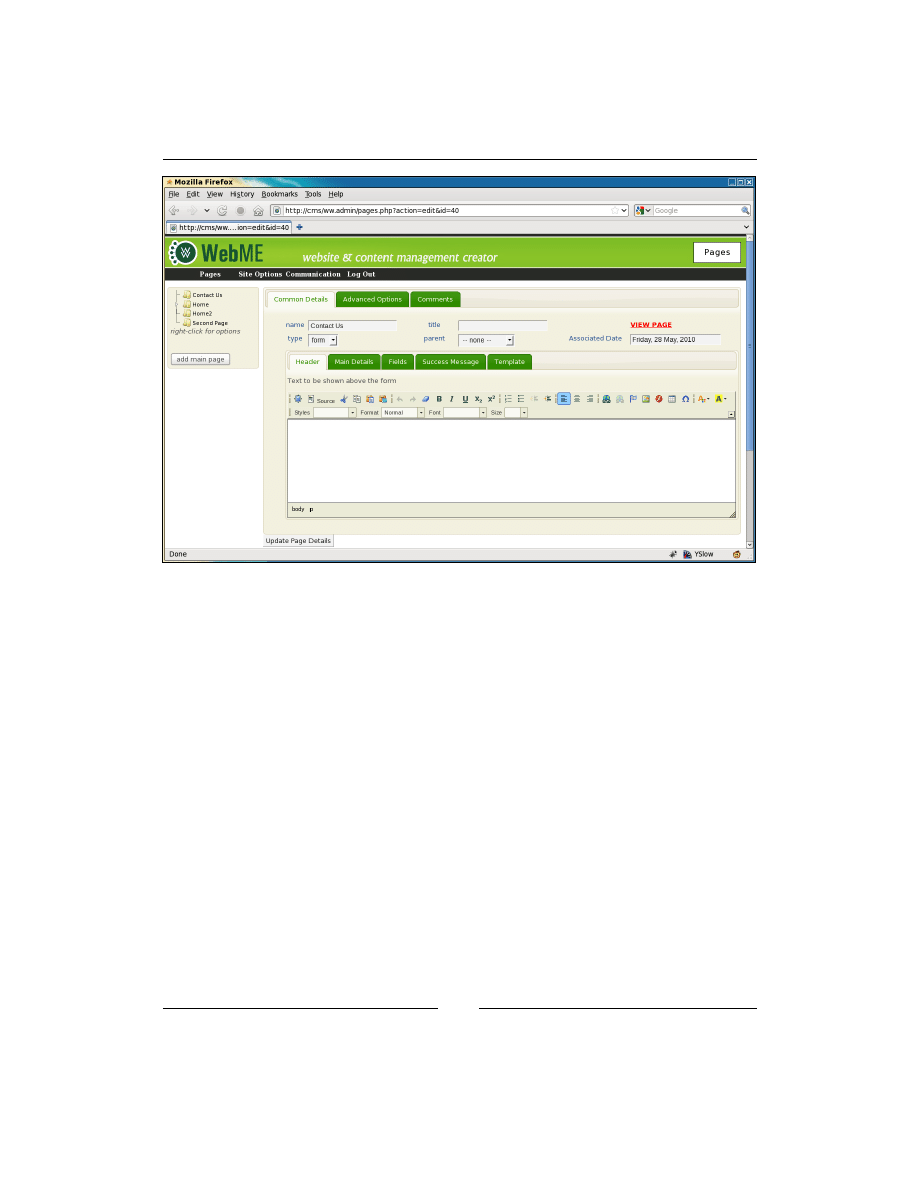
Chapter 8
[
197
]
So we have two rows of tabs. You can now see what I meant—the bottom collection
of tabs is obviously about the page content, while the others are more about the
page itself.
Before we work on the
fields
tab, let's do the other three.
First, replace the
template
section with this:
// { template
$c.= '<div id="forms-template">';
$c.= '<p>Leave blank to have an auto-generated
template displayed.</p>';
$c.= ckeditor('page_vars[forms_template]',
$page_vars['forms_template']);
$c.= '</div>';
// }
The template defines how you want the form to appear on the front-end. We start
off with the assumption that the admin does not know (or want to know) how to fill
this in, so we leave a message saying that if the template is left blank, it will be auto-
generated on the front-end.

Forms Plugin
[
198
]
When we get to displaying the form on the front-end, we'll discuss this one more.
Notice that we use
page_vars[forms_template]
as the name for the template's
input box. With this, we will not need to write server-side code to save the data, as it
will be handled by the page admin's own saving mechanism.
Next, replace the
success
message
section with this:
// { success message
$c.= '<div id="forms-success-message">';
$c.= '<p>What should be displayed on-screen after the
message is sent.</p>';
if(!$page_vars['forms_successmsg'])
$page_vars['forms_successmsg']=
'<h2>Thank You</h2>
<p>We will be in contact as soon as we can.</p>';
$c.= ckeditor('page_vars[forms_successmsg]',
$page_vars['forms_successmsg']);
$c.= '</div>';
// }
This defines the message which is shown to the form submitter after they've submitted
the form. We initialize this with a simple non-specific message (We will be in contact
as soon as we can), as we cannot be certain what the form will be used for.
The final straightforward tab is the
main
details
section. Replace it with the
following code. It may be a little long, but it's just a few fields. A screenshot after the
code will explain what it does:
// { main details
$c.= '<div id="forms-main-details"><table>';
// { send as email
if(!isset($page_vars['forms_send_as_email']))
$page_vars['forms_send_as_email']=1;
$c.= '<tr><th>Send as Email</th><td><select
name="page_vars[forms_send_as_email]"><option
value="1">Yes</option><option value="0"';
if(!$page_vars['forms_send_as_email'])
$c.=' selected="selected"';
$c.= '>No</option></select></td>';
// }
// { recipient
if(!isset($page_vars['forms_recipient']))
$page_vars['forms_recipient']=
$_SESSION['userdata']['email'];

Chapter 8
[
199
]
$c.= '<th>Recipient</th><td><input
name="page_vars[forms_recipient]"
value="'.htmlspecialchars($page_vars['forms_recipient'])
.'" /></td></tr>';
// }
// { captcha required
if(!isset($page_vars['forms_captcha_required']))
$page_vars['forms_captcha_required']=1;
$c.= '<tr><th>Captcha Required</th><td><select
name="page_vars[forms_captcha_required]"><option
value="1">Yes</option><option value="0"';
if(!$page_vars['forms_captcha_required'])
$c.=' selected="selected"';
$c.='>No</option></select></td>';
// }
// { reply-to
if(!isset($page_vars['forms_replyto'])
|| !$page_vars['forms_replyto'])
$page_vars['forms_replyto']='FIELD{email}';
$c.= '<th>Reply-To</th><td><input
name="page_vars[forms_replyto]"
value="'.htmlspecialchars($page_vars['forms_replyto']).'"
/></td></tr>';
// }
// { record in database
if(!isset($page_vars['forms_record_in_db']))
$page_vars['forms_record_in_db']=0;
$c.= '<tr><th>Record In DB</th><td><select
name="page_vars[forms_record_in_db]"><option
value="0">No</option><option value="1"';
if($page_vars['forms_record_in_db'])
$c.=' selected="selected"';
$c.='>Yes</option></select></td>';
// }
// { export
if($id){
$c.= '<th>Export<br /><i style="font-size:small">(requires
Record In DB)</i></th><td>from: <input id="export_from"
class="date" value="'
.date('Y-m-d',mktime(0,0,0,date("m")-1,date("d"),
date("Y")))
.'" />. <a href="javascript:form_export('.$id
.')">export</a></td></tr>';
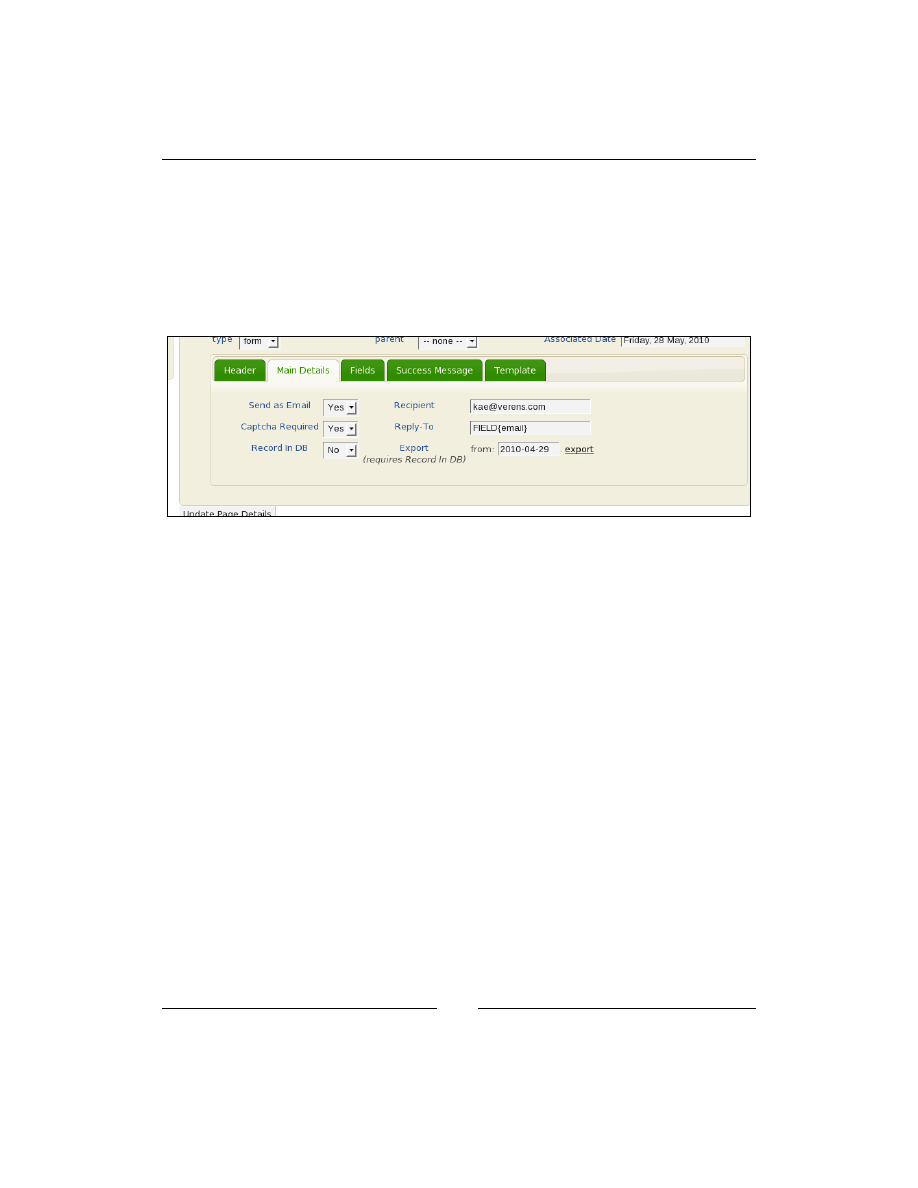
Forms Plugin
[
200
]
}
else{ $c.='<td colspan="2"> </td></tr>';
}
// }
$c.= '</table></div>';
// }
This code builds up the Main Details tab, which looks like this in the browser:
The Send as Email and Captcha Required are defaulted to Yes, while the Record in
DB is defaulted to No.
Recipient is the person that the form is e-mailed to, which is set initially to the e-mail
address of the administrator that created the form.
If the form is e-mailed to the recipient, and the recipient replies to the e-mail, then
we need to know who we're replying to. We default this to
FIELD{email}
, which is
a code indicating that the reply-to should be equal to whatever was filled in in the
form in its
field (assuming it has one). We'll talk more on this later on. You
could just as well enter an actual e-mail address such as
no-reply@no-such.domain
.
The Export field lets you export saved form details to a CSV file. We'll work on this
later in the chapter as well.
For now, let's define the form fields.
Defining the form fields
Before we look at the code, we should define what it is that we are trying to achieve
with the
fields
tab.
We want to be able to define each field that will be entered in the form by the user.

Chapter 8
[
201
]
While some validation will be available, we should always be aware that the forms
plugin will be used by an administrator who may be daunted by complex controls,
so we will try to keep the user interface as simple as possible.
Validation will be kept to a minimum of whether the field must be entered in the
form, and whether the entered value matches the field type. For example, if the field
is defined as an e-mail, then the entered value must be an e-mail address. If the field
is a select-box, then the entered value must match one of the entries we've defined as
belonging to that select-box, and so on.
We will not use complex validation, such as if one entry is entered, then another
must not. That kind of validation is rarely required by a simple website, and it would
make the user interface much more cluttered and difficult to use.
Now, the
fields
tab is made of two parts—first, any fields that are already
associated with the form will be printed out by the PHP, and we will then add some
JavaScript to allow more fields to be added "on-the-fly".
Here is the PHP of it (replace the
fields
section in the file with this):
// { fields
$c.= '<div id="forms-fields">';
$c.= '<table id="formfieldsTable" width="100%"><tr><th
width="30%">Name</th><th width="30%">Type</th><th
width="10%">Required</th><th id="extrasColumn"><a
href="javascript:formfieldsAddRow()">add
field</a></th></tr></table><ul id="form_fields"
style="list-style:none">';
$q2=dbAll('select * from forms_fields where formsId="'.$id.'"
order by id');
$i=0;
$arr=array('input box','email','textarea','date',
'checkbox','selectbox','hidden');
foreach($q2 as $r2){
$c.= '<li><table width="100%"><tr>';
// { name
$c.='<td width="30%"><input name="formfieldElementsName['
.$i.']" value="'.htmlspecialchars($r2['name']).'" />'
.'</td>';
// }
// { type
$c.='<td width="30%"><select name="formfieldElementsType['
.$i.']">';
foreach($arr as $v){

Forms Plugin
[
202
]
$c.='<option value="'.$v.'"';
if($v==$r2['type'])$c.=' selected="selected"';
$c.='>'.$v.'</option>';
}
$c.='</select></td>';
// }
// { is required
$c.='<td><input type="checkbox"
name="formfieldElementsIsRequired['.($i).']"';
if($r2['isrequired'])$c.=' checked="checked"';
$c.=' /></td>';
// }
// { extras
$c.='<td>';
switch($r2['type']){
case 'selectbox':case 'hidden':{
$c.='<textarea class="small"
name="formfieldElementsExtra['.($i++)
.']">'.htmlspecialchars($r2['extra']).'</textarea>';
break;
}
default:{
$c.='<input type="hidden"
name="formfieldElementsExtra['.($i++).']"
value="'.htmlspecialchars($r2['extra']).'" />';
}
}
$c.= '</td>';
// }
$c.='</tr></table></li>';
}
$c.= '</ul></div>';
// }
If you've read through that, you'll see that it simply outputs a number of rows of
field data. We'll have a look at a screenshot shortly. First, let's add the JavaScript.
At the end of the file, add these lines:
$c.='<script>var formfieldElements='.$i.';</script>';
$c.='<script src="/ww.plugins/forms/admin/forms.js">
</script>';
The variable
$i
here was set in the previous code-block, and represents the number
of field rows that are already printed on the screen.

Chapter 8
[
203
]
Now create the file
/ww.plugins/forms/admin/forms.js
:
window.form_input_types=['input box','email','textarea',
'date','checkbox','selectbox','hidden'];
function formfieldsAddRow(){
formfieldElements++;
$('<li><table width="100%"><tr><td width="30%"><input '
+'name="formfieldElementsName['+formfieldElements+']" '
+'/></td><td width="30%"><select class="form-type" name="'
+'formfieldElementsType['+formfieldElements+']"><option>'
+form_input_types.join('</option><option>')
+'</option></select></td><td width="10%"><input '
+'type="checkbox" name="'
+'formfieldElementsIsRequired['+formfieldElements+']" '
+'/></td><td><textarea name="'
+'formfieldElementsExtra['+formfieldElements+']" '
+'style="display:none" class="small"></textarea></td>'
+'</tr></table></li>'
).appendTo($('#form_fields'));
$('#form_fields').sortable();
$('#form_fields input,#form_fields select,#form_fields
textarea').bind('click.sortable mousedown.sortable',
function(ev){
ev.target.focus();
});
}
$('select.form-type').live('change',function(){
var val=$(this).val();
var display=(val=='selectbox' || val=='hidden')
?'inline':'none';
$(this).closest('tr').find('textarea')
.css('display',display);
});
if(!formfieldElements)var formfieldElements=0;
$(function(){
formfieldsAddRow();
});
First, we define the list of available field types.
The
formfieldsAddRow()
function adds a new field row to the
fields
tab. The row
is a simple line of HTML, replicating what we did in the PHP earlier.
Notice that we add a hidden textarea. This is to hold data on select-box values or
hidden values if we choose to set the field type to either of those.
D
o
w
nl
oa
d
fr
om
W
ow
!
eB
oo
k
<
w
w
w
.w
ow
eb
oo
k.
co
m
>
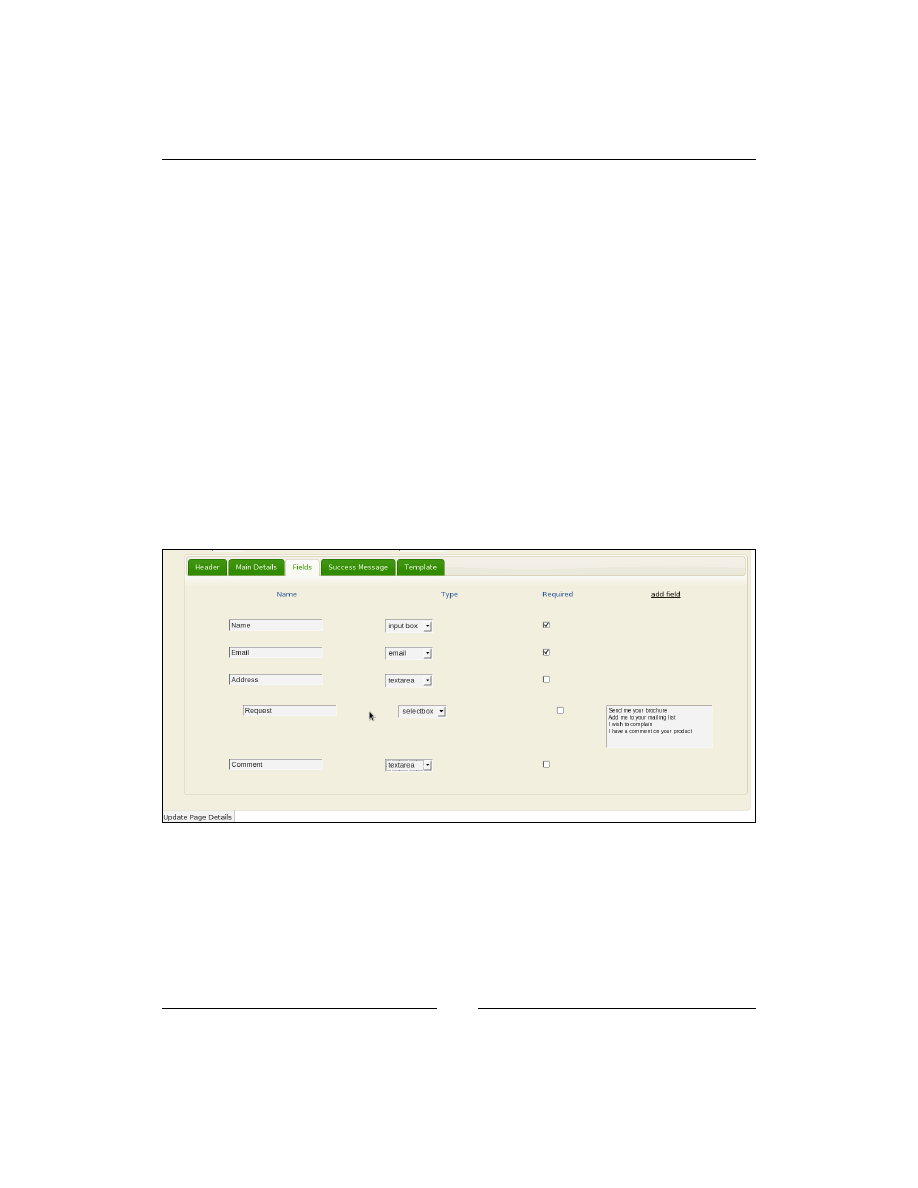
Forms Plugin
[
204
]
Next, we make the rows sortable using the jQuery UI's
.sortable()
plugin. This is
so that the admin can reorder the field values if they want to.
Note that the
.sortable()
plugin makes it tricky to click on the input, select, and
textarea boxes in the field row, as it hijacks the click and mousedown events, so the
next line overrides the
.sortable()
event grab if you click on one of those elements.
If you want to sort the rows, you should drag from a point outside those elements.
Next, we add a
live
event, which says that whenever a select-box with the class
form-type
is changed, we should change the visibility of the
extras
textarea in that
row based on what you changed it to.
And finally, we initialize everything by calling
formfieldsAddRow()
so that the
form has at least one row in it.
Note that we could have replaced the last three lines with this:
$( formfieldsAddRow);
However, when we get around to exporting saved data, we will want to add some
more to the initialization routine, so we do it the long way.
In the screenshot, you can see the result of all this. I took this snapshot as I was
dragging the Request field above the Comment one. Notice that the Request field
has its extras textarea visible and filled in, one option per line.
Next we need to save the inputs.
Edit the file
/ww.plugins/forms/plugin.php
, and change the function
form_
admin_page_form()
to the following (changes are highlighted):

Chapter 8
[
205
]
function form_admin_page_form($page,$page_vars){
$id=$page['id'];
$c='';
if(isset($_REQUEST['action'])
&& $_REQUEST['action']=='Update Page Details')
require dirname(__FILE__).'/admin/save.php';
require dirname(__FILE__).'/admin/form.php';
return $c;
}
And then all that's required is to do the actual save. Create the file
/ww.plugins/
forms/admin/save.php
:
<?php
dbQuery('delete from forms_fields where formsId="'.$id.'"');
if(isset($_POST['formfieldElementsName'])
&&is_array($_POST['formfieldElementsName'])){
foreach($_POST['formfieldElementsName'] as $key=>$name){
$name=addslashes(trim($name));
if($name!=''){
$type=addslashes($_POST['formfieldElementsType'][$key]);
$isrequired=
(isset($_POST['formfieldElementsIsRequired'][$key]))
?1:0;
$extra=
addslashes($_POST['formfieldElementsExtra'][$key]);
$query='insert into forms_fields set name="'.$name.'"
,type="'.$type.'", isrequired="'.$isrequired.'"
,formsId="'.$id.'",extra="'.$extra.'"';
dbQuery($query);
}
}
}
First, the old existing fields are deleted if they exist, and then a fresh set are added to
the database.
This happens each time you edit the form, because updating existing entries is much
more complex than simply starting from scratch each time. This is especially true if
you are moving them around, adding new ones, and so on.
Note that we check to see if the field's name was entered. If not, that row is not
added to the database. So, to delete a field in your form, simply delete the name and
update the page.
Now, let's show the form on the front-end.

Forms Plugin
[
206
]
Showing the form on the front-end
Showing the form is a matter of taking the information from the database and
rendering it in the page HTML.
First, we need to tell the controller (
/index.php
) how to handle pages which are of a
type other than
normal
.
Edit the
/index.php
file, and in the
switch
in
set
up
pagecontent
, replace the
other
cases
will
be
handled
here
later
line with the following default case:
default: // { plugins
$not_found=true;
foreach($PLUGINS as $p){
if(isset($p['frontend']['page_type'][$PAGEDATA->type])){
$pagecontent=$p['frontend']['page_type']
[$PAGEDATA->type]($PAGEDATA);
$not_found=false;
}
}
if($not_found)$pagecontent='<em>No plugin found to handle
page type <strong>'.htmlspecialchars($PAGEDATA->type)
.'</strong>. Is the plugin installed and
enabled?</em>';
// }
If the page type is not
normal
(type
0
in the switch that we've edited), then we check
to see if it's a plugin.
This code runs through the array of plugins that are loaded, and checks to see if any
of them have a
frontend
page_type
that matches the current page. If so, then the
associated function is run, with the
$PAGEDATA
object as a parameter.
We've already created the function as part of the
plugin.php
file. Now let's work on
rendering the form.
Create the file
/ww.plugins/forms/frontend/show.php
(create the directory first):
<?php
require_once SCRIPTBASE.'ww.incs/recaptcha.php';
function form_controller($page){
$fields=dbAll('select * from forms_fields where
formsId="'.$page->id.'" order by id');
if(isset($_POST['_form_action']))
return form_submit($page,$fields);
return form_display($page,$fields);
}

Chapter 8
[
207
]
The first thing we do is to load up the field data from the database, as this is used
when submitting and when rendering.
When the page is first loaded, there is no
_form_action
value in the
$_POST
array,
so the function
form_display()
is then run and returned.
Add that function to the file now:
function form_display($page,$fields){
if(isset($page->vars->forms_template)){
$template=$page->vars->forms_template;
if($template==' ')$template=false;
}
else $template=false;
if(!$template)
$template=form_template_generate($page,$fields);
return form_template_render($template,$fields);
}
We first check the form's template to see that it is created and is not blank.
Next, if the template was blank, we build one using the field data as a guide.
And finally, we render the template and return it to the page controller.
Okay—the first thing we're missing is the
form_template_generate()
function.
Add that to the file as follows:
function form_template_generate($page,$fields){
$t='<table>';
foreach($fields as $f){
if($f['type']=='hidden')continue;
$name=preg_replace('/[^a-zA-Z0-9_]/','',$f['name']);
$t.='<tr><th>'.htmlspecialchars($f['name'])
.'</th><td>{{$'.$name.'}}</td></tr>';
}
if($page->vars->forms_captcha_required){
$t.='<tr><td> </td><td>{{CAPTCHA}}</td></tr>';
}
return $t.'</table>';
}
Simple enough—we iterate through each row, and generate some Smarty-like code.
Here's an example output of the function (formatted for easier reading):
<table class="forms-table">
<tr><th>Name</th><td>{{$Name}}</td></tr>

Forms Plugin
[
208
]
<tr><th>Email</th><td>{{$Email}}</td></tr>
<tr><th>Address</th><td>{{$Address}}</td></tr>
<tr><th>Request</th><td>{{$Request}}</td></tr>
<tr><th>Comment</th><td>{{$Comment}}</td></tr>
<tr><td> </td><td>{{CAPTCHA}}</td></tr>
</table>
We're not going to actually use Smarty on this one, as it would be too much—we just
want to do a little bit of code replacement, so adding the full power of Smarty would
be a waste of resources.
We use the Smarty-like code so that the admin doesn't have to remember different
types of code. We could have also used BBCode, or simply placed
%
on either end of
the field names, and so on.
Note that we don't output a line for hidden fields. Those fields are only ever seen by
the administrator when the form is submitted.
Finally, we get to the rendering.
This function is kind of long, so we'll do it in bits.
function form_template_render($template,$fields){
if(strpos($template,'{{CAPTCHA}}')!==false){
$template=str_replace('{{CAPTCHA}}',
recaptcha_get_html(RECAPTCHA_PUBLIC),$template);
}
foreach($fields as $f){
$name=preg_replace('/[^a-zA-Z0-9_]/','',$f['name']);
if($f['isrequired'])$class=' required';
else $class='';
if(isset($_POST[$name])){
$val=$_POST[$name];
}
else $val='';
We first initialize the function and render the captcha if it's turned on. We're using
the same captcha code that we used for the admin authentication.
Next, we start looping through each field value.
If the form has already been submitted, and we're showing it again, then we set
$val
to the value that was submitted. This is so we can show it in the form again.
Next, we figure out what should go into the template for the field:

Chapter 8
[
209
]
switch($f['type']){
case 'checkbox': // {
$d='<input type="checkbox" id="forms-plugin-'.$name
.'" name="'.$name.'"';
if($val)$d.=' checked="'.$_REQUEST[$name].'"';
$d.=' class="'.$class.'" />';
break;
// }
case 'date': // {
if(!$val)$val=date('Y-m-d');
$d='<input id="forms-plugin-'.$name.'" name="'.$name
.'" value="'.htmlspecialchars($val).'" class="date'
.$class.'" />';
break;
// }
case 'email': // {
$d='<input type="email" id="forms-plugin-'.$name.'"
name="'.$name.'" value="'.htmlspecialchars($val).'"
class="email'.$class.'" />';
break;
// }
case 'selectbox': // {
$d='<select id="forms-plugin-'.$name.'" name="'.$name
.'" class="'.$class.'">';
$arr=explode("\n",htmlspecialchars($f['extra']));
foreach($arr as $li){
if($li=='')continue;
$li=trim($li);
if($val==$li)$d.='<option selected="selected">'.$li
.'</option>';
else $d.='<option>'.$li.'</option>';
}
$d.='</select>';
break;
// }
case 'textarea': // {
$d='<textarea id="forms-plugin-'.$name.'" name="'
.$name.'" class="'.$class.'">'
.htmlspecialchars($val).'</textarea>';
break;
// }
default: // {
$d='<input id="forms-plugin-'.$name.'" name="'.$name
.'" value="'.htmlspecialchars($val).'" class="text'
.$class.'" />';
// }
}

Forms Plugin
[
210
]
This switch block checks what type of field it is, and generates an appropriate HTML
string to represent it.
Note that we've added classes to the inputs. These classes can be used for client-side
validation, or for CSS.
Finally:
$template=str_replace('{{$'.$name.'}}',$d,$template);
}
return '<form method="post" id="forms-plugin">'.$template
.'<input type="submit" name="_form_action"
value="submit" /></form>
<script src="/ww.plugins/forms/frontend/forms.js">
</script>';
}
We replace the Smarty-like code with the HTML string for each field, and finally
return the generated form with the
submit
button attached.
We also load up a JavaScript file, to handle validation on the client-side. We'll get to
that shortly.
Having finished all of this, here's a screenshot of an example filled-in form:

Chapter 8
[
211
]
The form can be easily marked up in CSS to make it look better. But we're not here to
talk style—let's get on with the submission of the form.
Handling the submission of the form
When submit is clicked, the form data is sent to the same page (we didn't put an
action
parameter in the
<form>
element, so it goes back to the same page by default).
The submit button itself has the name
_form_action
which, when the form
controller is loaded, triggers
form_submit()
to be called.
Add that function to the same file:
function form_submit($page,$fields){
$errors=form_validate($page,$fields);
if(count($errors)){
return '<ul id="forms-plugin-errors"><li>'
.join('</li><li>',$errors)
.'</ul>'
.form_display($page,$fields);
}
if($page->vars->forms_send_as_email)
form_send_as_email($page,$fields);
if($page->vars->forms_record_in_db)
form_record_in_db($page,$fields);
return $page->vars->forms_successmsg;
}
The first thing we do is validate any submitted values.
Always write your validation for the server-side first.
If you do your validation on the client-side first, then you may forget
to do it on the server-side. You'd also have to disable your client-side
validation in order to test the server-side work.
After validation, we send the form off in an e-mail and save the form in the database
if that's how it was set up in the admin area.
Finally, we return the success message to the page controller.
There are three functions to add.

Forms Plugin
[
212
]
The first is the validation function:
function form_validate($page,$fields){
$errors=array();
if($page->vars->forms_captcha_required){
$resp=recaptcha_check_answer(
RECAPTCHA_PRIVATE,
$_SERVER["REMOTE_ADDR"],
$_POST["recaptcha_challenge_field"],
$_POST["recaptcha_response_field"]
);
if(!$resp->is_valid)$errors[]='Please fill in
the captcha.';
}
foreach($fields as $f){
$name=preg_replace('/[^a-zA-Z0-9_]/','',$f['name']);
if(isset($_POST[$name])){
$val=$_POST[$name];
}
else $val='';
if($f['isrequired'] && !$val){
$errors[]='The "'.htmlspecialchars($f['name']).'" field
is required.';
continue;
}
if(!$val)continue;
switch($f['type']){
case 'date': // {
if(preg_replace('/[0-9]{4}-[0-9]{2}-[0-9]{2}/','',
$val)=='')continue;
$errors[]='"'.htmlspecialchars($f['name']).'" must be
in yyyy-mm-dd format.';
break;
// }
case 'email': // {
if(filter_var($val,FILTER_VALIDATE_EMAIL))continue;
$errors[]='"'.htmlspecialchars($f['name']).'" must be
an email address.';
break;
// }
case 'selectbox': // {
$arr=explode("\n",htmlspecialchars($f['extra']));
$found=0;
foreach($arr as $li){
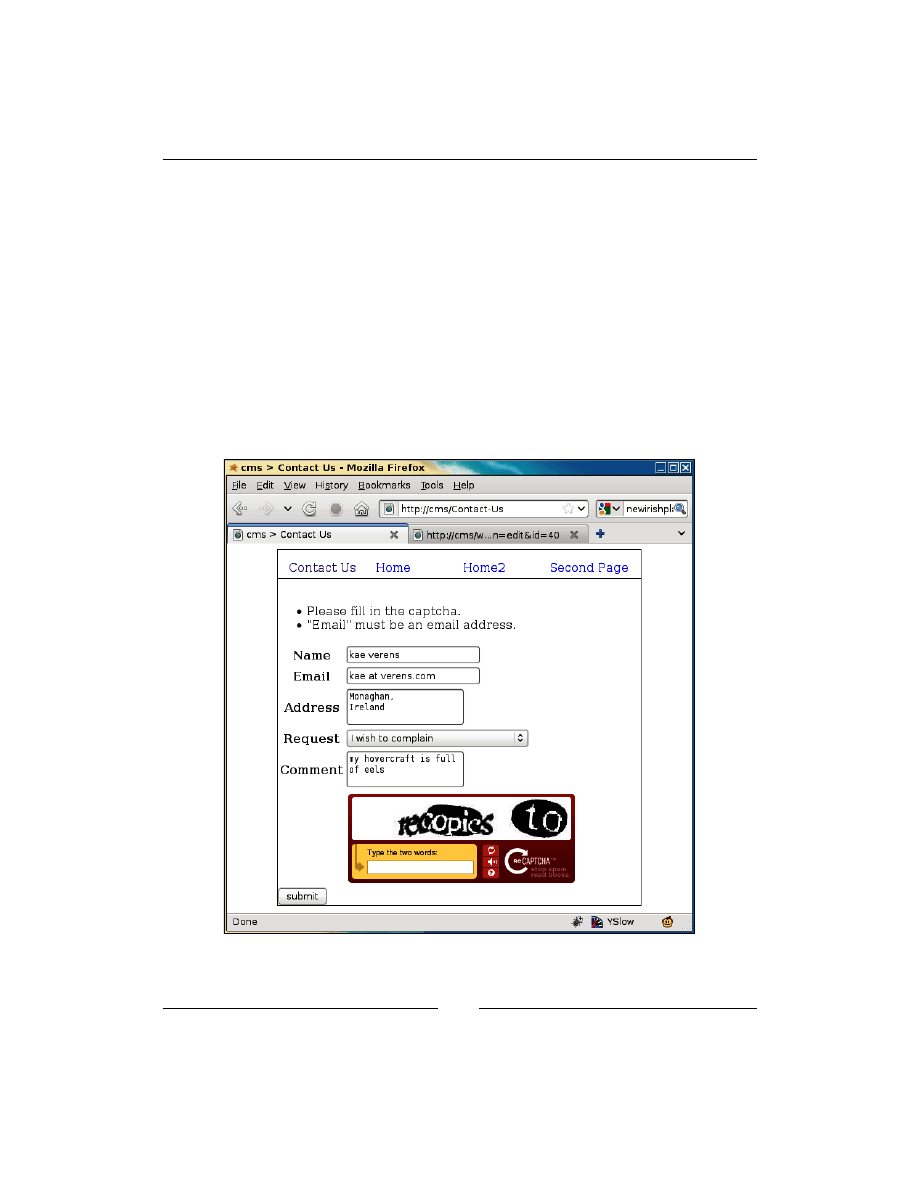
Chapter 8
[
213
]
if($li=='')continue;
if($val==trim($li))$found=1;
}
if($found)continue;
$errors[]='You must choose one of the options in
"'.htmlspecialchars($f['name']).'".';
break;
// }
}
}
return $errors;
}
If you create dummy functions for
form_send_as_email()
then you can test the
given code, and its output should appear as seen in the next screenshot:
Okay, so validation works.

Forms Plugin
[
214
]
Sending by e-mail
Next, we will add the e-mail sender function.
The e-mail that we create does not need to be fancy—we're submitting a simple list
of questions and responses, and it's not to a client, so it doesn't need a template to be
created.
With that in mind, it's reasonable to create the following simple function:
function form_send_as_email($page,$fields){
$m="--------------------------------\n";
foreach($fields as $f){
$name=preg_replace('/[^a-zA-Z0-9_]/','',$f['name']);
if(!isset($_POST[$name]))continue;
$m.=$f['name']."\n\n";
$m.=$_POST[$name];
$m.="--------------------------------\n";
}
$from=preg_replace('/^FIELD{|}$/','',
$page->vars->forms_replyto);
$to=preg_replace('/^FIELD{|}$/','',
$page->vars->forms_recipient);
if($page->vars->forms_replyto!=$from)
$from=$_POST[preg_replace('/[^a-zA-Z0-9_]/','',$from)];
if($page->vars->forms_recipient!=$to)
$to=$_POST[preg_replace('/[^a-zA-Z0-9_]/','',$to)];
mail($to,'['.$_SERVER['HTTP_HOST'].'] '
.addslashes($page->name),$m,
"From: $from\nReply-to: $from");
}
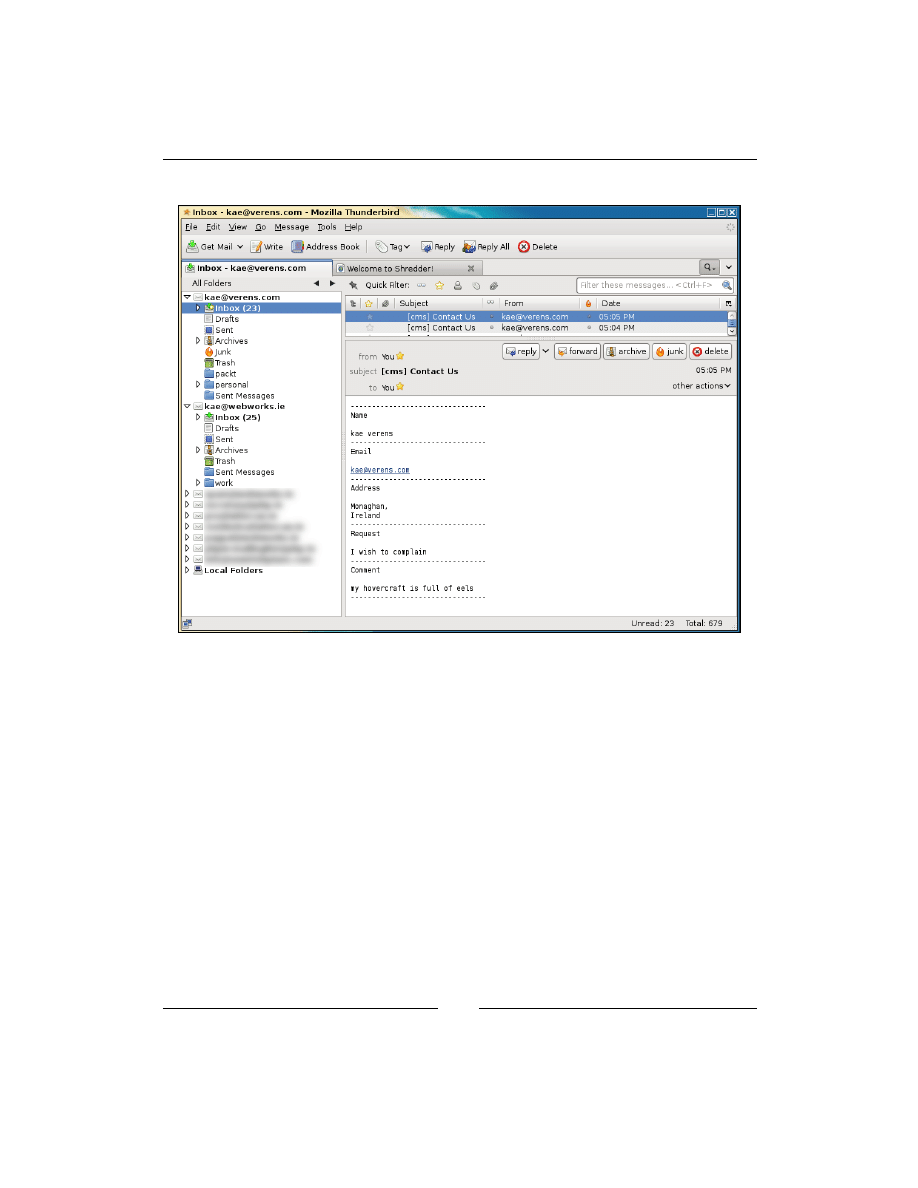
Chapter 8
[
215
]
With this in place, the system will send the form contents as an e-mail:
Perfectly readable and simple.
Saving in the database
Next, we tackle saving the form into the database:
function form_record_in_db($page,$fields){
$formId=$page->id;
dbQuery("insert into forms_saved (forms_id,date_created)
values($formId,now())");
$id=dbOne('select last_insert_id() as id','id');
foreach($fields as $r){
$name=preg_replace('/[^a-zA-Z0-9_]/','',$r['name']);
if(isset($_POST[$name]))$val=addslashes($_POST[$name]);
else $val='';
$key=addslashes($r['name']);
dbQuery("insert into forms_saved_values (forms_saved_
id,name,value) values($id,'$key','$val')");
}
}
D
o
w
nl
oa
d
fr
om
W
ow
!
eB
oo
k
<
w
w
w
.w
ow
eb
oo
k.
co
m
>

Forms Plugin
[
216
]
This records the values of the form in the database:
mysql> select * from forms_saved;
+----------+---------------------+----+
| forms_id | date_created | id |
+----------+---------------------+----+
| 40 | 2010-06-01 05:58:16 | 1 |
+----------+---------------------+----+
1 row in set (0.00 sec)
mysql> select * from forms_saved_values \G
*************************** 1. row ***************************
forms_saved_id: 1
name: Name
value: Kae Verens
id: 6
*************************** 2. row ***************************
forms_saved_id: 1
name: Email
value: kae@verens.com
id: 7
*************************** 3. row ***************************
forms_saved_id: 1
name: Address
value: Monaghan,
Ireland
id: 8
*************************** 4. row ***************************
forms_saved_id: 1
name: Request
value: I wish to complain
id: 9
*************************** 5. row ***************************
forms_saved_id: 1
name: Comment
value: my hovercraft is full of eels
id: 10
5 rows in set (0.00 sec)
We cannot expect the admin to use the MySQL, so we need to write the export
function now.
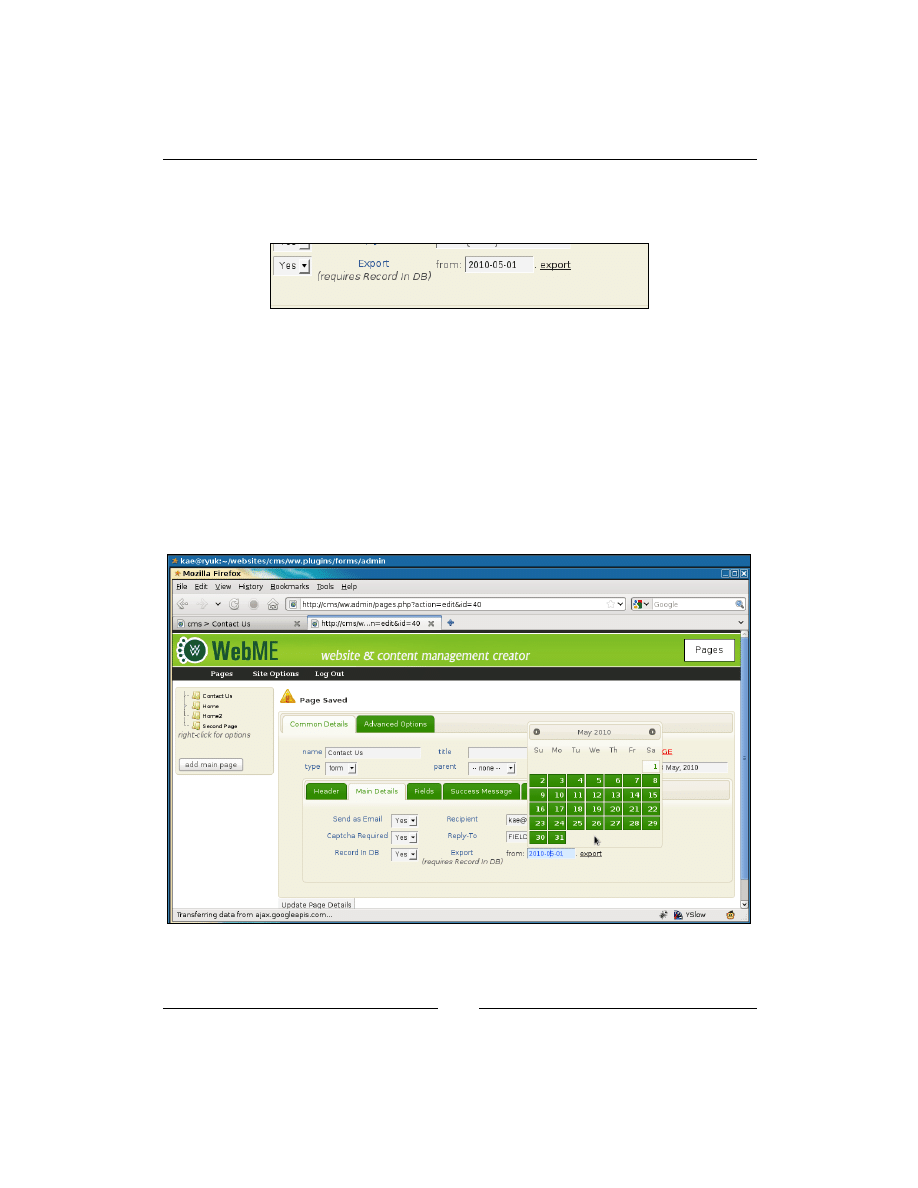
Chapter 8
[
217
]
Exporting saved data
Back in the admin area, we had the following part of the Forms config:
First, let's make that date area more interesting.
Edit the file
/ww.plugins/forms/admin/forms.js
and add the following
highlighted line to the
$(function)
part:
$(function(){
formfieldsAddRow();
$('#export_from').datepicker({dateFormat:'yy-m-d'});
});
This simple line then adds calendar functionality to that input, as seen in the
next screenshot:
When the input is clicked, the calendar pops up, so the admin doesn't have to write
the date and get the format right.

Forms Plugin
[
218
]
Now let's add the function for handling the export (to that same file):
function form_export(id){
if(!id)return alert('cannot export from an empty
form database');
if(!(+$('select[name="page_vars\\[forms_record_in_db\\]"]')
.val()))
return alert('this form doesn\'t record to database');
var d=$('#export_from').val();
document.location='/ww.plugins/forms/admin/export.php?date='
+d+'&id='+id;
}
This function checks first to see if the form is marked to save in the database. If so, then
it does a redirect to
/ww.plugins/forms/admin/export.php
. Create that file now:
<?php
require $_SERVER['DOCUMENT_ROOT'].'/ww.admin/admin_libs.php';
if(isset($_REQUEST['id']))$id=(int)$_REQUEST['id'];
else exit;
if(!$id)exit;
$date=$_REQUEST['date'];
if(!preg_match('/^20[0-9][0-9]-[0-9][0-9]-[0-9][0-9]$/',
$date))die('invalid date format');
header('Content-type: application/octet-stream');
header('Content-Disposition: attachment; filename="form'
.$id.'-export.csv"');
// { ids
$ids=array();
$rs=dbAll("select id,date_created from forms_saved where
forms_id=$id and date_created>'$date'");
foreach($rs as $r){
$ids[$r['id']]=$r['date_created'];
}
// }
// { columns
$cols=array();
$rs=dbAll('select name from forms_fields where formsId="'
.$id.'" order by id');
foreach($rs as $r){
$cols[]=$r['name'];
}
// }
// { do the export
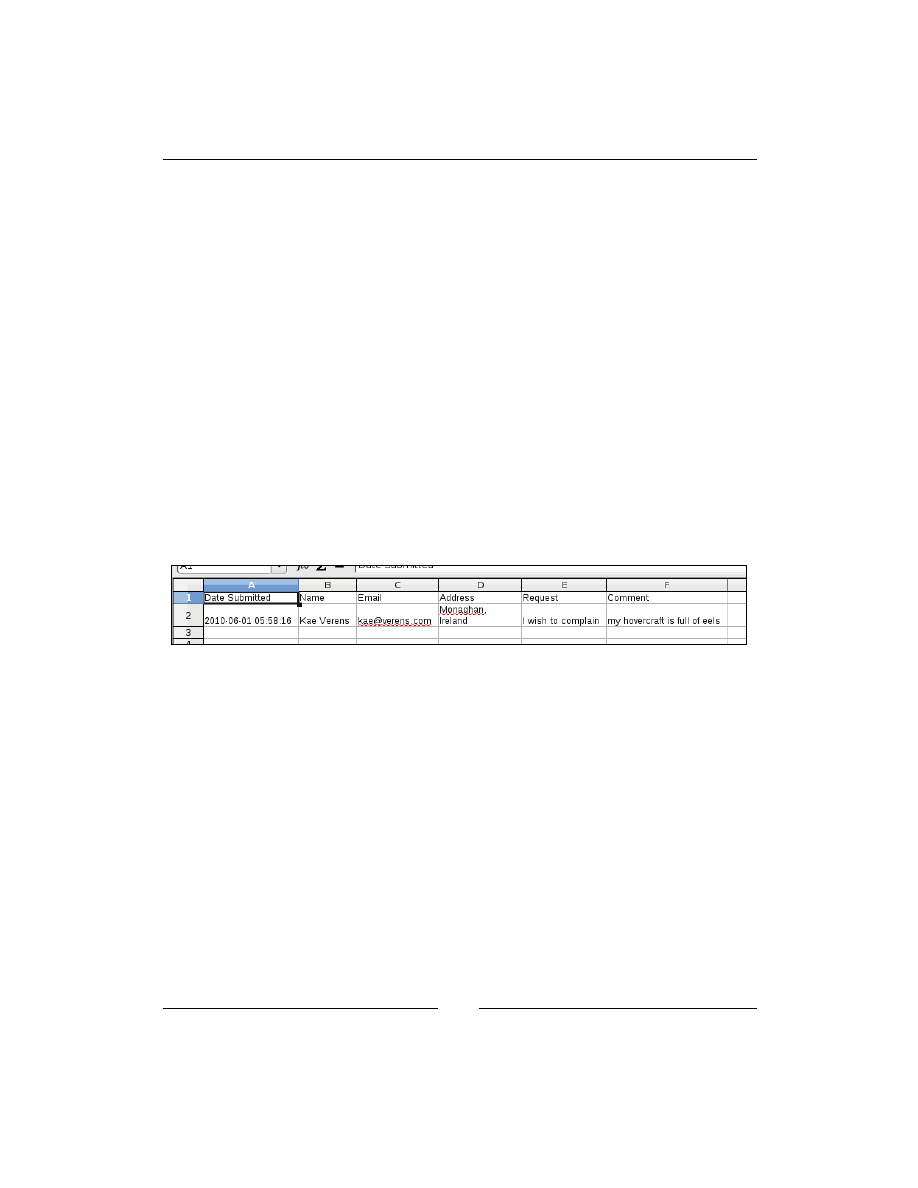
Chapter 8
[
219
]
echo '"Date Submitted","';
echo join('","',$cols).'"'."\n";
foreach($ids as $id=>$date){
echo '"'.$date.'",';
for($i=0;$i<count($cols);++$i){
$r=dbRow('select value from forms_saved_values where
forms_saved_id='.$id.' and name="'.addslashes($cols[$i])
.'"');
echo '"'.str_replace('\\"','""',addslashes($r['value']))
.'"';
if($i<count($cols)-1)echo ',';
else echo "\n";
}
}
// }
This exports the data as a CSV file.
Because the
Content-type
is
application/octet-stream
and browsers would
not normally know how to handle that, the file is forced to download, instead of
displaying in the browser. You can then open that exported file up in a spreadsheet:
With the export finished, we've completed a functional forms plugin.
Summary
In this chapter, we added the ability for a plugin to create a full page type, instead of
just a trigger.
We also added content tabs to the page admin.
With the Forms plugin created, the admin can now create contact pages,
questionnaires, and other types of page that request data in the form of user input.
In the next chapter, we will create an Image Gallery plugin.


Image Gallery Plugin
When the time comes to display images in a website, whether it is a family album, a
portfolio, or a series of product shots, there are a few ways to do this:
•
You can insert each image manually using a rich-text editor to build up a
large table
•
You can select the images one-by-one from a list of images that exists on your
server
•
You can upload your images into a directory and have them automatically
converted into a gallery
Option one can be done by using the rich-text editor—CKeditor, which we've
already integrated into pages—but it's horribly tedious work building a gallery that
way.
Option two would take some work to achieve, as we would need to create a list of
all the images first and then create a method to select the images, store them in a
database, and then, finally, create the gallery. Even then, selecting images one-by-one
is probably more work than an admin should need to do.
Option three is perfect—the admin simply uploads images into a folder and a gallery
is automatically created. It's even easier than that, as we will see, because we don't
even need the admin to realize a directory is in use.
In this chapter, we will create an Image Gallery plugin, allowing an admin to upload
a lot of images and have them automatically converted to either a slide-show gallery
or a tabular gallery (we'll offer the choice).
We will not need to extend the plugin architecture any further for this one, so there
will be minimal core engine editing.

Image Gallery Plugin
[
222
]
Plugin configuration
Create the directory
/ww.plugins/image-gallery
, and in it, create the
plugin.php
file:
<?php
$kfm_do_not_save_session=true;
require_once SCRIPTBASE.'j/kfm/api/api.php';
require_once SCRIPTBASE.'j/kfm/initialise.php';
$plugin=array(
'name' => 'Image Gallery',
'page_type' => array(
'image-gallery' => 'image_gallery_admin_page_form'
)
),
'description' => 'Allows a directory of images to be
shown as a gallery.',
'frontend' => array(
'page_type' => array(
'image-gallery' => 'image_gallery_frontend'
)
)
);
function image_gallery_admin_page_form($page,$vars){
require dirname(__FILE__).'/admin/index.php';
return $c;
}
function image_gallery_frontend($PAGEDATA){
require dirname(__FILE__).'/frontend/show.php';
return image_gallery_show($PAGEDATA);
}
Earlier in the book, we introduced KFM, which is an online file manager. Instead
of writing a whole new file management system every time we need to manage
uploads or other file stuff, it makes sense to use what we already have.
The first three lines of the
plugin.php
load up KFM in a way that can be used by the
server without needing to have a pop-up window for the client.
The first line tells KFM not to bother recording or checking its database for session
data. This vastly speeds up interaction with it. As we are not interested in reusing the
session, it is fine to ignore it.

Chapter 9
[
223
]
The second loads up some useful functions that are not used within KFM, but
would be useful for external systems. For example, we will use the
kfm_api_
getDirectoryId()
function, which translates a human-readable directory (such as
images/page-2
) to an internal KFM ID.
We then initialize KFM, loading the various classes and building up its base
information.
The rest of the
plugin.php
is standard fare by now—we create a page type, "Image
Gallery", and its associated helper functions.
Now, log in to your admin area and enable the plugin, then go to the Pages section.
Page Admin tabs
As we did with the Forms plugin, let's create a skeleton tabs list first before we fill
them in.
Create the directory
/ww.plugins/image-gallery/admin
and add the file
index.
php
to it:
<?php
$c='<div class="tabs">';
// { table of contents
$c.='<ul><li><a href="#image-gallery-images">Images</a></li>'
.'<li><a href="#image-gallery-header">Header</a></li>'
.'<li><a href="#image-gallery-settings">Settings</a></li></ul>';
// }
// { images
$c.='<div id="image-gallery-images">';
$c.='</div>';
// }
// { header
$c.='<div id="image-gallery-header">';
$c.=ckeditor('body',$page['body']);
$c.='</div>';
// }
// { settings
$c.='<div id="image-gallery-settings">';
$c.='</div>';
// }
$c.='</div>';
$c.='<link rel="stylesheet"
href="/ww.plugins/image-gallery/admin/admin.css" />';
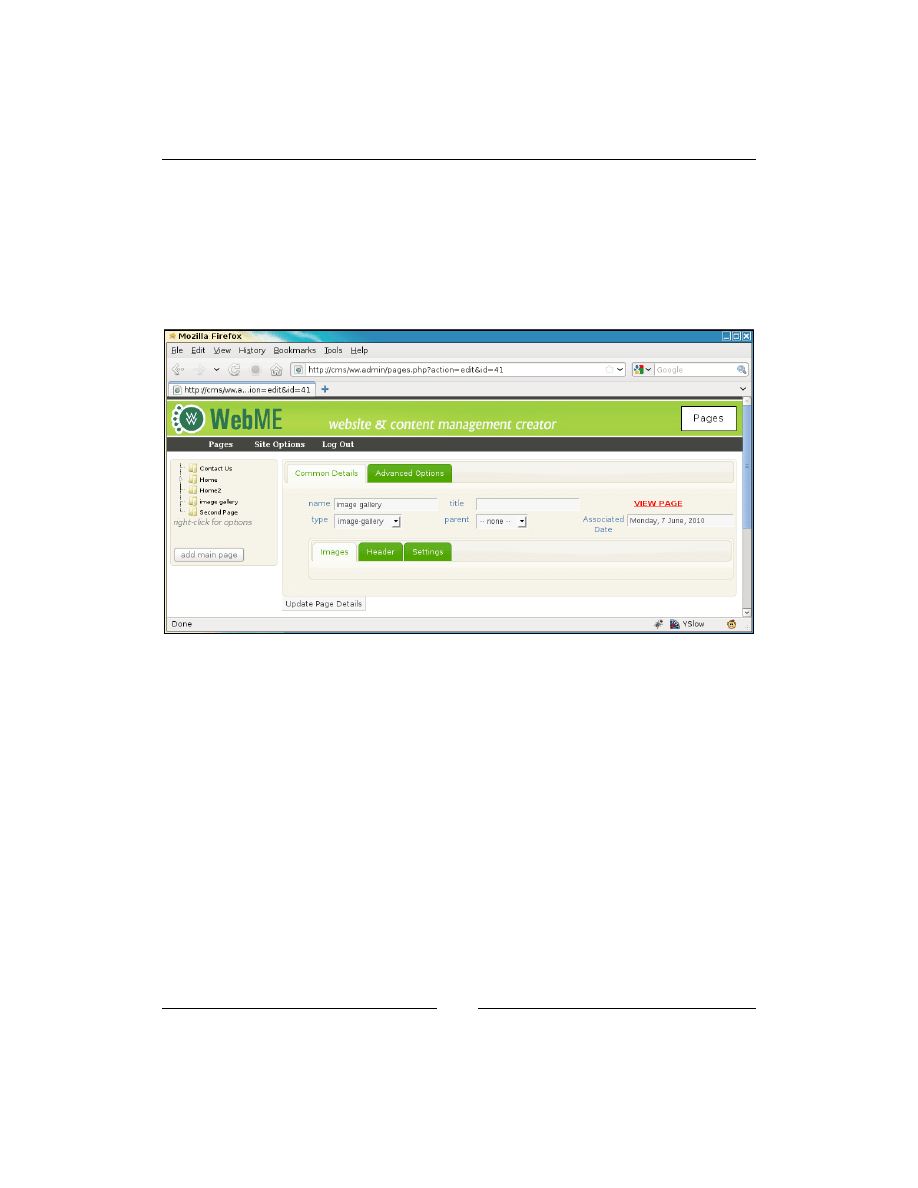
Image Gallery Plugin
[
224
]
As before, the only tab that we've fully completed is the Header one, which is simply
a CKeditor object. This tab will appear in just about every page admin, so it makes
sense to simply copy or paste it each time.
The other two tabs will be fleshed out shortly, and I won't explain the
admin.css
file
(it's just style—download it from Packt's archived files for this chapter).
When viewed, this looks totally bare:
Notice that in the Forms plugin, we placed the Header tab first. In this one, it is the
second tab.
The reason for this is that once a form is created, it is unlikely to be changed much, so
if an admin is going to that page it is probably to adjust the header text, so we make
that immediately available.
In an image gallery, however, the most likely reason an admin visits the page is to
upload new images or delete old ones, so we make that one the first tab.
Initial settings
Before we get to work on the upload tab, we need to add some settings so the gallery
knows how to behave.
Edit the
index.php
file again and add the following code after the opening
<?php
;
the existing lines (beginning and end) have been highlighted:

Chapter 9
[
225
]
<?php
// { initialise variables
$gvars=array(
'image_gallery_directory' =>'',
'image_gallery_x' =>3,
'image_gallery_y' =>2,
'image_gallery_autostart' =>0,
'image_gallery_slidedelay' =>5000,
'image_gallery_thumbsize' =>150,
'image_gallery_captionlength'=>100,
'image_gallery_type' =>'ad-gallery'
);
foreach($gvars as $n=>$v)if(isset($vars[$n]))$gvars[$n]=$vars[$n];
// }
$c='<div class="tabs">';
This reads the page variables and if any of the
$gvars
variables are not defined, the
page variable of that name is created and set to the defaults set here.
Default
Function
image_gallery_directory
The directory that contains the images.
image_gallery_x
If the gallery type is a tabular one, then x is the
width in cells of that table.
image_gallery_y
This is the height in rows of the images table.
image_gallery_autostart
If the gallery type is a slide-show, then this
indicates where it should start sliding when the
page loads.
image_gallery_slidedelay
How many milliseconds between each page slide.
image_gallery_thumbsize
This is the size of the image thumbnails.
image_gallery_captionlength
How many characters to show of the image's
caption before cutting it off.
image_gallery_type
What type of gallery to use.
As we can save these variables directly into the page variables object, we don't need
to provide an external database table for them or even to save them into the site's
$DBVARS
array (that should really only be used for data that is site-wide and not
page-specific).

Image Gallery Plugin
[
226
]
Uploading the Images
As we discussed earlier, the easiest way to manage images is to have them all
uploaded to a single directory.
It is not necessary for the admin to know what directory that is. Whenever I do
anything that involves uploading user-sourced files, it is always into the KFM-
controlled files area, so that the files can be manipulated in more than one way.
We will upload the files into a directory
/f/image-gallery/page-
n, where the 'n' is
a number corresponding to the page ID.
Let's build the Images tab. The code is medium long, so I'll describe it in a few
blocks. In total, it should replace the current images comment block in the source:
// { images
$c.='<div id="image-gallery-images">';
if(!$gvars['image_gallery_directory'] || !is_dir(
SCRIPTBASE.'f/'.$gvars['image_gallery_directory'])){
mkdir(SCRIPTBASE.'f/image-galleries');
$gvars['image_gallery_directory']=
'/image-galleries/page-'.$page['id'];
mkdir(SCRIPTBASE.'f/'.$gvars['image_gallery_directory']);
}
Here's how it goes:
The first thing that we do is check if the
image_gallery_directory
option is set and
whether the directory actually exists.
If not, the option is set to
/image-galleries/page-
plus the page ID and this
directory is then created.
$dir_id=kfm_api_getDirectoryId(preg_replace('/^\//','',
$gvars['image_gallery_directory']));
$images=kfm_loadFiles($dir_id);
$images=$images['files'];
$n=count($images);
Next, we get the internal KFM ID of that directory (the ID is created if it doesn't
already exist), and then load up all files in that directory.
$n
is set to the number of files found.
$c.='<iframe src="/ww.plugins/image-gallery/admin/'
.'uploader.php?image_gallery_directory='
.urlencode($gvars['image_gallery_directory'])
.'" style="width:400px;height:50px;'

Chapter 9
[
227
]
.'border:0;overflow:hidden"></iframe>'
.'<script>window.kfm={alert:function(){}};'
.'window.kfm_vars={};function x_kfm_loadFiles(){}'
.'function kfm_dir_openNode(){'
.'document.location=document.location;}</script>';
Because all the tabs are contained in the page form, we can't have a sub-form to
handle image uploads. So, we create an
<iframe>
to handle the upload.
This
<iframe>
will submit its files to KFM's
upload.php
file, which will handle their
upload.
Upon a successful upload, KFM calls two functions,
x_kfm_loadFiles()
and
kfm_
dir_openNode()
. We create dummy versions of these so there are no errors, and use
the
kfm_dir_openNode()
call to reload the page to show the new images.
We'll create the
<iframe>
's file after we finish this tab.
if($n){
$c.='<div id="image-gallery-wrapper">';
for($i=0;$i<$n;$i++){
$c.='<div><img src="/kfmget/'.$images[$i]['id']
.',width=64,height=64" title="'
.str_replace('\\\\n','<br />',$images[$i]['caption'])
.'" /><br /><input type="checkbox" id="image-gallery-'
.'dchk-'.$images[$i]['id'].'" /><a href="javascript:;"'
.' id="image-gallery-dbtn-'.$images[$i]['id']
.'">delete</a></div>';
}
$c.='</div>';
}
If images were found in the directory, then we display the images, shrunk down to a
maximum width of 64x64. The
/kfmget/...
bit will be explained shortly.
After the image is displayed, we add a check-box and delete link to delete the image.
We'll add behaviors to those shortly.
else{
$c.='<em>no images yet. please upload some.</em>';
}
$c.='</div>';
// }
Finally, we handle the case where there are no images, by simply asking for them to
be uploaded.
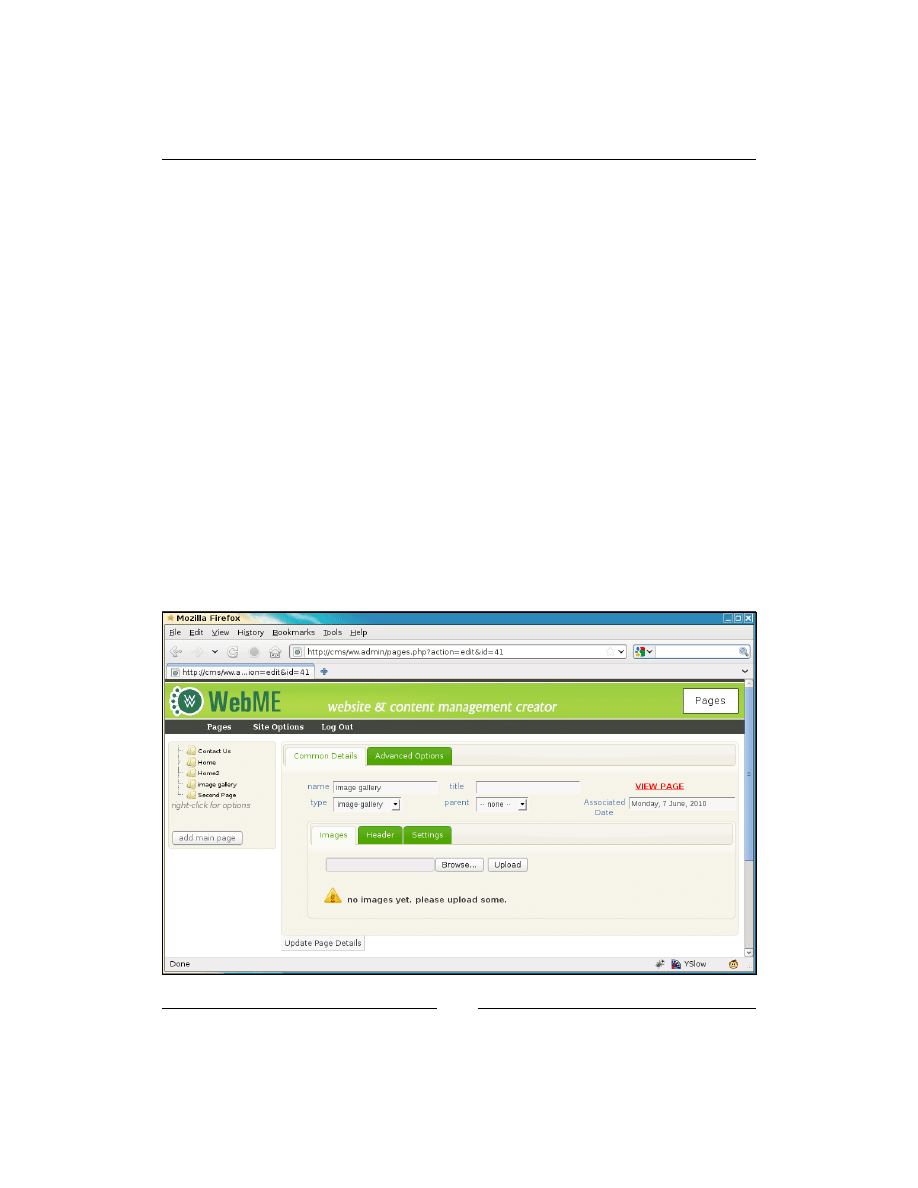
Image Gallery Plugin
[
228
]
Handling the uploads
In the same directory,
/ww.plugins/image-gallery/admin
, create the file
uploader.php
:
<?php
$dir=$_REQUEST['image_gallery_directory'];
echo '<form action="/j/kfm/upload.php" method="POST"
enctype="multipart/form-data">
<input type="file" name="kfm_file[]" multiple="multiple" />
<input type="hidden" name="MAX_FILE_SIZE" value="9999999999"
/>
<input type="hidden" name="directory_name"
value="'.htmlspecialchars($dir).'" />
<input type="submit" name="upload" value="Upload" />
</form>';
This is a very simple upload form.
Note the use of
multiple="multiple"
in the file input box. Modern browsers will
allow you to upload multiple files, while older browsers will still work, but one
image at a time.
With that in place, we can now view the tab:
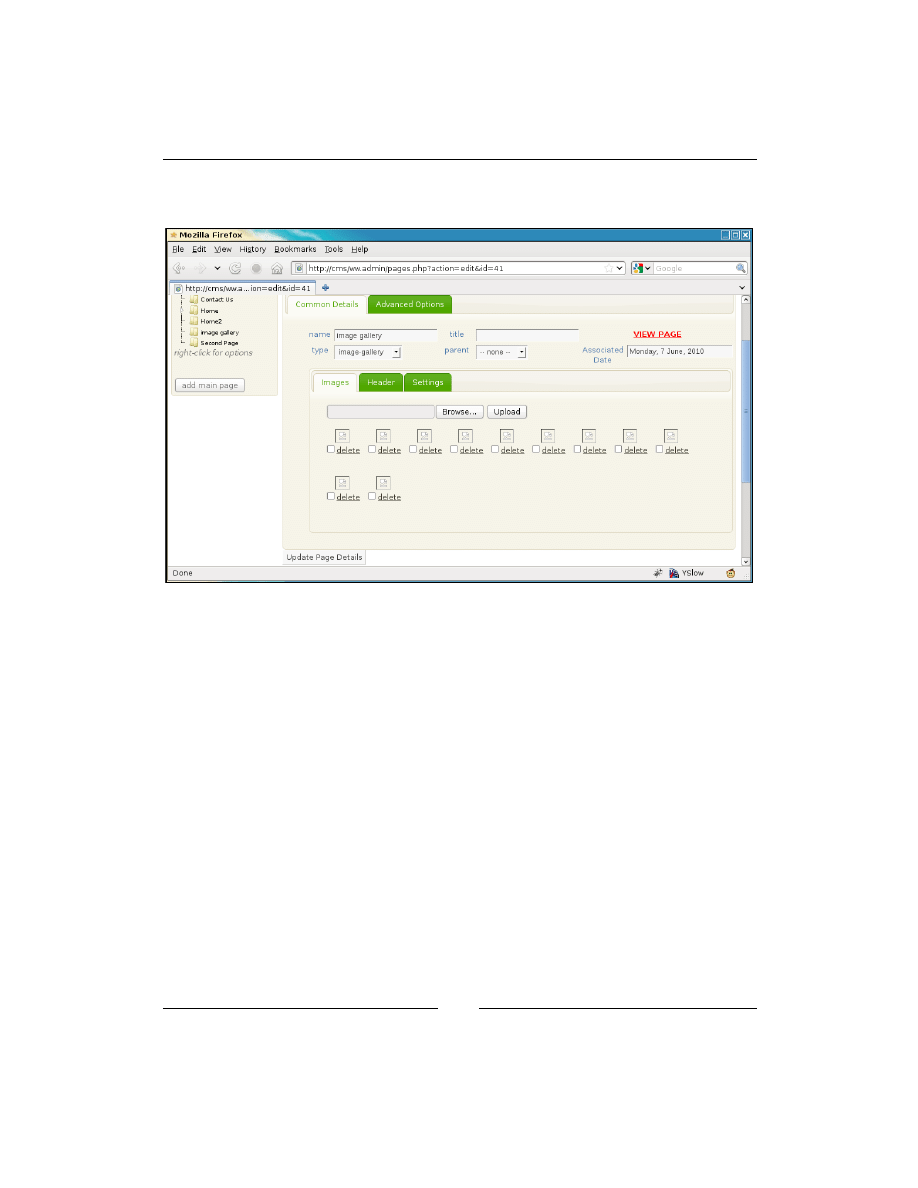
Chapter 9
[
229
]
Uploading images will work, as you can verify by looking in your
/f/image-
galleries/page-
n directory, but will appear broken:
The reason for this is that the images are displayed using a
mod_rewrite
URL that
we have not yet defined.
Adding a kfmget mod_rewrite rule
Here is what we provided in the source (for example):
<img src="/kfmget/13,width=64,height=64" ... />
The long version of this is:
/j/kfm/get.php?id=13,width=64,height=64
KFM understands that you want the file with ID
13
to be displayed and its size is
constrained to 64x64.
Edit
/.htaccess
and add the following highlighted line:
RewriteEngine on
RewriteRule ^kfmget/(.*)$ /j/kfm/get.php?id=$1 [L]
RewriteRule ^([^./]{3}[^.]*)$ /index.php?page=$1 [QSA,L]
D
o
w
nl
oa
d
fr
om
W
ow
!
eB
oo
k
<
w
w
w
.w
ow
eb
oo
k.
co
m
>
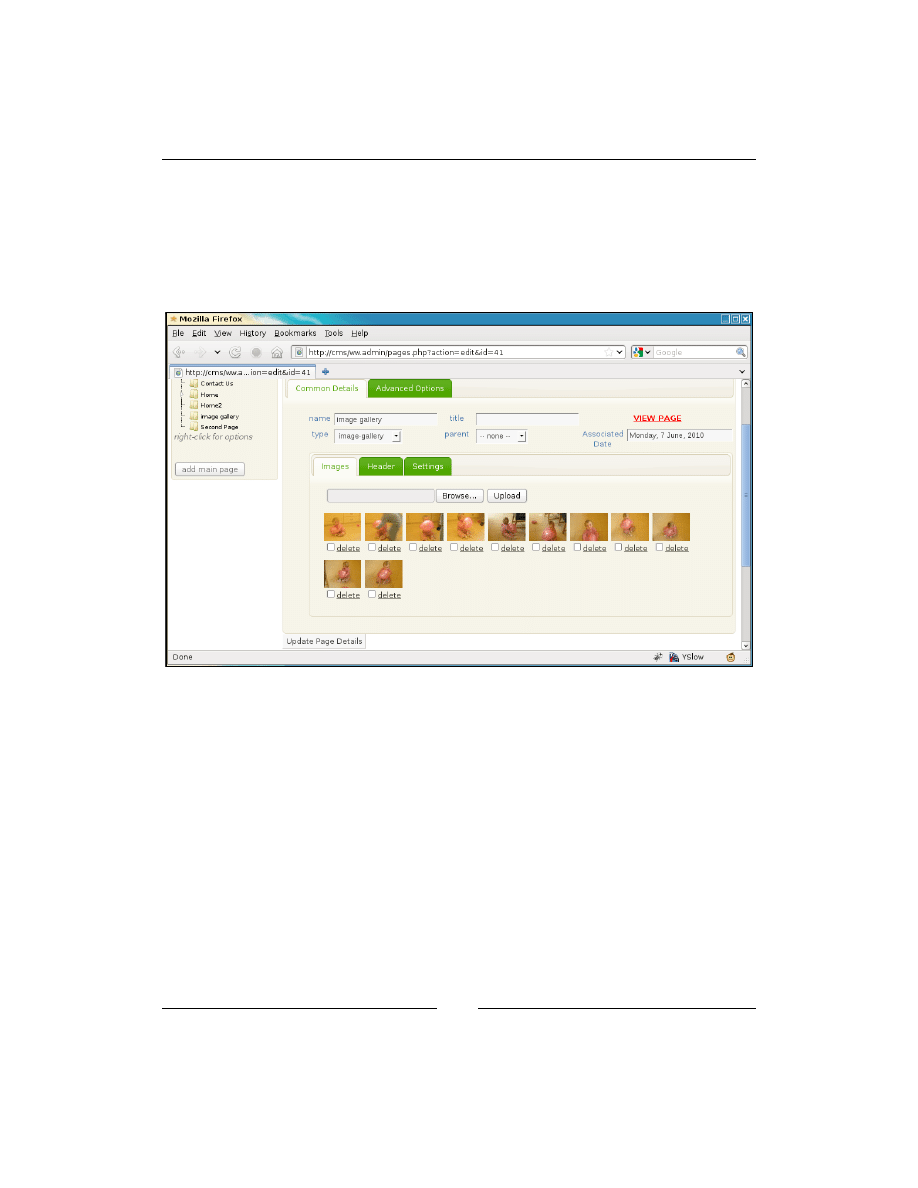
Image Gallery Plugin
[
230
]
We place the rule before the main page rule because that one matches everything
and
mod_rewrite
would not get to the
kfmget
rule.
The reason we use the shortcut in the first place is that by eliminating the
?
symbol,
we allow the file to be cached. If you work a lot with images, it can be a drain on
your network (and your wits) to constantly reload images that you were only
viewing a moment ago.
Much better.
Now, let's work on the delete links.
Deleting images
In the previous screenshot, you saw that each image had a check-box and link. The
check-box must be ticked before the delete link is clicked to verify that the admin
meant to delete the image.
Add the following highlighted line to the end of the
index.php
file:
$c.='</div>';
$c.='<link rel="stylesheet"
href="/ww.plugins/image-gallery/admin/admin.css" />';
$c.='<script
src="/ww.plugins/image-gallery/admin/js.js"></script>';

Chapter 9
[
231
]
Then create the
/ww.plugins/image-gallery/admin/js.js
file:
$('#image-gallery-wrapper a').bind('click',function(){
var $this=$(this);
var id=$this[0].id.replace('image-gallery-dbtn-','');
if(!$('#image-gallery-dchk-'+id+':checked').length){
alert('you must tick the box before deleting');
return;
}
$.get('/j/kfm/rpc.php?action=delete_file&id='
+id,function(ret){
$this.closest('div').remove();
});
});
First, we bind the click event to each of the delete links.
When clicked, we verify that the check-box was checked or return an alert explaining
that it needs to be checked.
Finally, we call KFM through an RPC (Remote Procedure Call) to delete the file.
The RPC file is not yet a part of the official KFM distribution but was always on the
plans for version 2, so here's the first implementation of
/j/kfm/rpc.php
:
<?php
require 'initialise.php';
switch($_REQUEST['action']){
case 'delete_file': // {
$id=(int)$_REQUEST['id'];
$file=kfmFile::getInstance($id);
if($file){
$file->delete();
echo 'ok';
exit;
}
else die('file does not exist');
// }
}
Over time, that file will grow to include all sorts of RPC commands.
With this in place, we have completed the Images tab.
Before we get to the Settings tab, we will create the front-end part of the plugin.
Upload some images so we've something to look at and then let's get to work.

Image Gallery Plugin
[
232
]
Front-end gallery display
There are many ways to show lists of images on the front-end.
If you look in the "Media" section of
http://plugins.jquery.com/
, you will find
many galleries and other ways of representing multiple images.
When given the choice, most people in my experience want a gallery where a list of
thumbnails is shown and clicking or hovering on one of them shows a larger version
of the image.
The plugin we will use here is ad-gallery (
http://coffeescripter.com/code/
ad-gallery/
) but we are writing the CMS plugin such that we can easily switch to
another jQuery plugin by changing the "type" select-box in the admin area.
Create the directory
/ww.plugins/image-gallery/j/ad-gallery
(create the
j
first,
obviously) and then download the JS and CSS files (in the Downloads section of
http://coffeescripter.com/code/ad-gallery/
) to there.
Create the
/ww.plugins/image-gallery/frontend
directory, and in there, create
the file
show.php
:
<?php
function image_gallery_show($PAGEDATA){
$gvars=$PAGEDATA->vars;
// {
global $plugins_to_load;
$c=$PAGEDATA->render();
$start=isset($_REQUEST['start'])?(int)$_REQUEST['start']:0;
if(!$start)$start=0;
$vars=array(
'image_gallery_directory' =>'',
'image_gallery_x' =>3,
'image_gallery_y' =>2,
'image_gallery_autostart' =>0,
'image_gallery_slidedelay' =>5000,
'image_gallery_thumbsize' =>150,
'image_gallery_captionlength'=>100,
'image_gallery_type' =>'ad-gallery'
);
foreach($gvars as $n=>$v)
if($gvars->$n!='')$vars[$n]=$gvars->$n;
$imagesPerPage=
$vars['image_gallery_x']*$vars['image_gallery_y'];
if($vars['image_gallery_directory']=='')
$vars['image_gallery_directory']

Chapter 9
[
233
]
='/image-galleries/page-'.$PAGEDATA->id;
// }
$dir_id=kfm_api_getDirectoryId(preg_replace('/^\//','',
$vars['image_gallery_directory']));
$images=kfm_loadFiles($dir_id);
$images=$images['files'];
$n=count($images);
if($n){
switch($vars['image_gallery_type']){
case 'ad-gallery':
require dirname(__FILE__).'/gallery-type-ad.php';
break;
default:
return $c.'<em>unknown gallery type "'
.htmlspecialchars($vars['image_gallery_type'])
.'"</em>';
}
return $c;
}else{
return $c.'<em>gallery "'.$vars['image_gallery_directory']
.'" not found.</em>';
}
}
This script acts as a controller for the gallery, making sure default variables are set
before including the requested gallery type's script.
Notice the
switch
statement. If you want to add more jQuery gallery plugins, you
can add them here.
Let's create the file
/ww.plugins/image-gallery/frontend/gallery-type-ad.
php
. We'll build it up a bit at a time:
<?php
$c.='<style type="text/css">img.ad-loader{
width:16px !important;height:16px !important;}</style>
<div style="visibility:hidden" class="ad-gallery">
<div class="ad-image-wrapper"> </div>
<div class="ad-controls"> </div>
<div class="ad-nav"> <div class="ad-thumbs">
<ul class="ad-thumb-list">';
for($i=0;$i<$n;$i++){
$c.='<li> <a href="/kfmget/'.$images[$i]['id'].'">
<img src="/kfmget/'.$images[$i]['id'].',width='
.$vars['image_gallery_thumbsize'].',height='

Image Gallery Plugin
[
234
]
.$vars['image_gallery_thumbsize'].'" title="'
.str_replace('\\\\n','<br />',$images[$i]['caption'])
.'"> </a> </li>';
}
$c.='</ul> </div> </div> </div>';
First, we display the list of thumbnails, similar to how it was done in the admin area.
The styles and element structure are the
ad-gallery
plugin.
$c.='<script src="/ww.plugins/image-gallery/j/ad-gallery/'
.'jquery.ad-gallery.js"></script>'
.'<style type="text/css">@import "/ww.plugins/image-'
.'gallery/j/ad-gallery/jquery.ad-gallery.css";'
.'.ad-gallery .ad-image-wrapper{ height: 400px;}'
.'</style>';
Next, we import the
ad-gallery
plugin and its CSS file.
$c.='<script>
$(function(){
$(".ad-gallery").adGallery({
animate_first_image:true,
callbacks:{
"init":function(){
$("div.ad-gallery").css("visibility","visible");
}
},
loader_image:"/i/throbber.gif",
slideshow:{';
$slideshowvars=array();
if($vars['image_gallery_autostart']){
$slideshowvars[]='enable:true';
$slideshowvars[]='autostart:true';
}
$sp=(int)$vars['image_gallery_slidedelay'];
if($sp)$slideshowvars[]='speed:'.$sp;
$c.=join(',',$slideshowvars);
$c.='}
});
});</script>';
Finally, we build up the start-up function that will be called when the page loads.
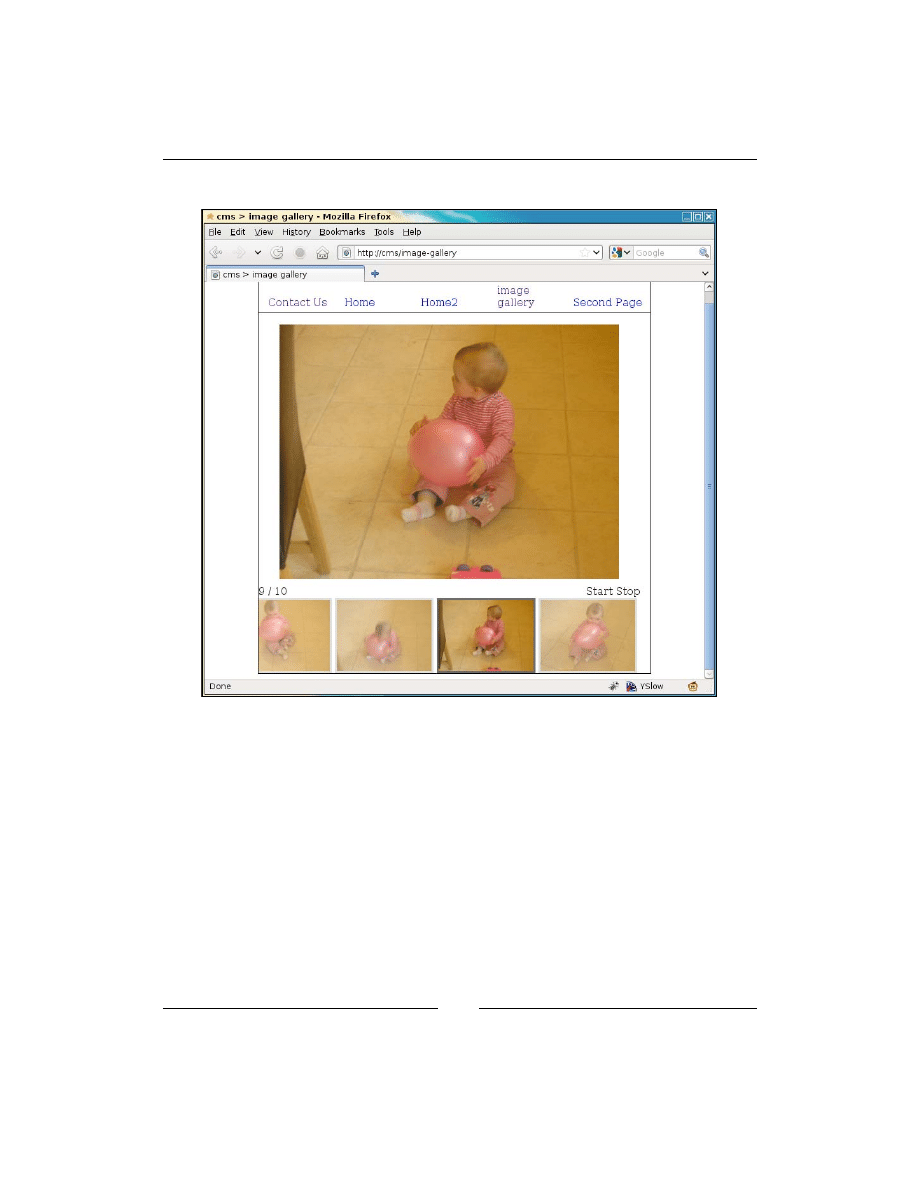
Chapter 9
[
235
]
And you can then view the page in your browser:
This gallery should cover the most basic needs, but if you wanted to use a different
gallery type, it should be simple enough to add it to this.
We'll demonstrate this by building up a simple gallery in a grid fashion.
Settings tab
First, we need to write the Settings tab code so we can configure it. Edit the file
/
ww.plugins/image-gallery/admin/index.php
and let's replace the
settings
comment block, starting with this:
// { settings
$c.='<div id="image-gallery-settings">';
$c.='<table><tr><th>Image Directory</th><td><select '

Image Gallery Plugin
[
236
]
.'id="image_gallery_directory" '
.'name="page_vars[image_gallery_directory]">'
.'<option value="/">/</option>';
foreach(image_gallery_get_subdirs(SCRIPTBASE.'f','') as $d){
$c.='<option value="'.htmlspecialchars($d).'"';
if($d==$gvars['image_gallery_directory'])
$c.=' selected="selected"';
$c.='>'.htmlspecialchars($d).'</option>';
}
$c.='</select></td>';
$c.='<td colspan="2"><a style="background:#ff0;'
.'font-weight:bold;color:red;display:block;'
.'text-align:center;" '
.'href="#page_vars[image_gallery_directory]" '
.'onclick="javascript:window.open(\'/j/kfm/?startup_folder='
.'\'+$(\'#image_gallery_directory\').attr(\'value\')'
.',\'kfm\',\'modal,width=800,height=600\');">Manage '
.'Images</a></td></tr>';
This first section allows finer control over where the files are uploaded to.
After that, follow the next steps:
First, we create a select-box containing all the directories in the user uploads section
(
/f
), using the
image_gallery_get_subdirs()
, which we'll define in a moment.
Next, we add a link that lets you open KFM straight to that directory, so you can edit
the images with more control than what was in the first tab.
// { columns
$c.='<tr><th>Columns</th><td><input '
.'name="page_vars[image_gallery_x]" value="'
.(int)$gvars['image_gallery_x'].'" /></td>';
// }
// { gallery type
$c.='<th>Gallery Type</th><td><select '
.'name="page_vars[image_gallery_type]">';
$types=array('ad-gallery','simple gallery');
foreach($types as $t){
$c.='<option value="'.$t.'"';
if(isset($gvars['image_gallery_type']) &&
$gvars['image_gallery_type']==$t)
$c.=' selected="selected"';
$c.='>'.$t.'</option>';
}

Chapter 9
[
237
]
$c.='</select></td></tr>';
// }
Next, we add an input box for columns (in case the type you choose is a grid-style
gallery) and a drop-down select-box to choose the gallery type.
In the
$types
array, you name the types just as the
switch
in
show.php
on the front-
end expects to find them. I've named our new one "simple gallery".
// { rows
$c.='<tr><th>Rows</th><td><input '
.'name="page_vars[image_gallery_y]" value="'
.(int)$gvars['image_gallery_y'].'" /></td>';
// }
// { autostart the slideshow
$c.='<th>Autostart slide-show</th><td><select '
.'name="page_vars[image_gallery_autostart]"><option '
.'value="0">No</option><option value="1"';
if($gvars['image_gallery_autostart'])
$c.=' selected="selected"';
$c.='>Yes</option></select></td></tr>';
// }
Next, we add an input for the rows for grid-style galleries, followed by a select-box
to choose whether slide-shows should be auto-started or not.
// { caption length
$cl=(int)@$gvars['image_gallery_captionlength'];
$cl=$cl?$cl:100;
$c.='<tr><th>Caption Length</th><td><input '
.'name="page_vars[image_gallery_captionlength]" value="'
.$cl.'" /></td>';
// }
// { slide delay
$sd=(int)@$gvars['image_gallery_slidedelay'];
$c.='<th>Slide Delay</th><td><input name="'
.'page_vars[image_gallery_slidedelay]" class="small" '
.'value="'.$sd.'" />ms</td></tr>';
// }

Image Gallery Plugin
[
238
]
Next, we ask for the caption length. We set its default to 100 and if we are using a
slide-show, we ask for the slide-show delay (default value is set to 5000 ms).
You can set an image's caption by either editing its embedded data before uploading
it, or by using KFM to edit the caption after it's uploaded (right-click on the image |
edit | change caption).
// { thumb size
$ts=(int)@$gvars['image_gallery_thumbsize'];
$ts=$ts?$ts:150;
$c.='<tr><th>Thumb Size</th><td><input name="'
.'page_vars[image_gallery_thumbsize]" value="'.$ts
.'" /></td></tr>';
// }
$c.='</table>';
$c.='</div>';
// }
Finally, we ask for the thumb-size, and then close up the tab.
Okay, before we can view the tab, we need to create that missing function. Add this
at the top of the file (after the
<?php
):
function image_gallery_get_subdirs($base,$dir){
$arr=array();
$D=new DirectoryIterator($base.$dir);
$ds=array();
foreach($D as $dname){
$d=$dname.'';
if($d{0}=='.')continue;
if(!is_dir($base.$dir.'/'.$d))continue;
$ds[]=$d;
}
asort($ds);
foreach($ds as $d){
$arr[]=$dir.'/'.$d;
$arr=array_merge($arr,image_gallery_get_subdirs(
$base,$dir.'/'.$d));
}
return $arr;
}
This function recursively builds up a list of the directories contained in the user
uploads section and returns it.
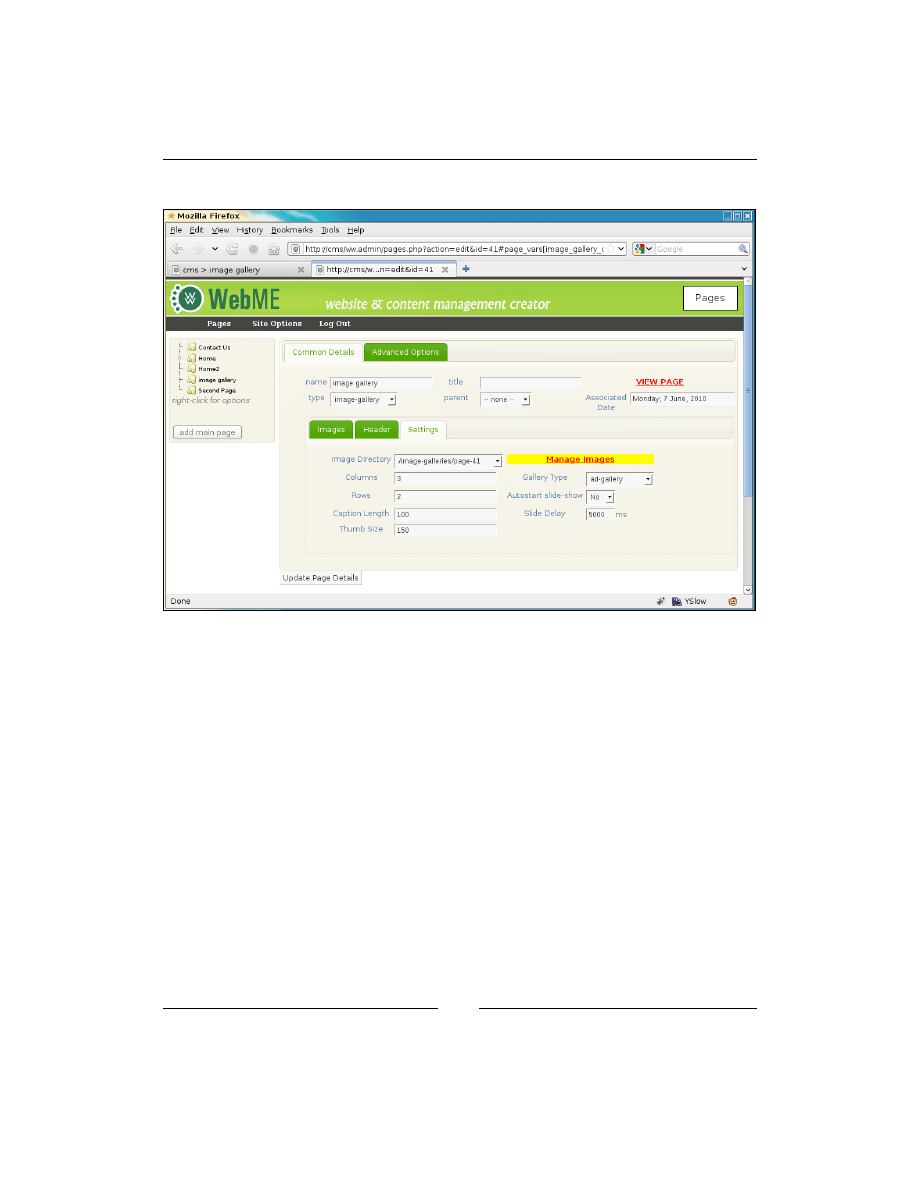
Chapter 9
[
239
]
Finally, we can view the tab:
That's the admin area completed.
Now, we can get back to the front and finish our grid-based gallery.
Grid-based gallery
We've already added the ad-gallery. Now let's create our grid-based gallery that will
be called
simple gallery
.
Edit
/ww.plugins/image-gallery/frontend/show.php
and add the following
highlighted lines to the switch:
break;
case 'simple gallery':
require dirname(__FILE__).'/gallery-type-simple.php';
break;
default:

Image Gallery Plugin
[
240
]
After that, create
/ww.plugins/image-gallery/frontend/gallery-type-simple.
php
, again explained in parts, as follows:
<?php
$c.='<table id="image_gallery" class="image_gallery">';
if($n>$imagesPerPage){
$prespage=$PAGEDATA->getRelativeURL();
// { prev
$c.='<th class="prev" style="text-align:left" '
.'id="image_gallery_prev_wrapper">';
if($start>0){
$l=$start-$imagesPerPage;
if($l<0)$l=0;
$c.='<a href="'.$prespage.'?start='.$l.'"><-- '
.'prev</a>';
}
$c.='</th>';
// }
for($l=1;$l<$vars['image_gallery_x']-1;++$l)$c.='<th></th>';
// { next
$c.='<th class="next" style="text-align:right" '
.'id="image_gallery_next_wrapper">';
if($start+$imagesPerPage<$n){
$l=$start+$imagesPerPage;
$c.='<a href="'.$prespage.'?start='.$l.'">next '
.'--></a>';
}
$c.='</th>';
// }
}
This first section sets up pagination. If we have columns and rows set to 3 and 2, then
there are six images per page.
If there are more than six images in the set, we need to provide navigation to those
images.
This block figures out what page we're on and whether there is more to come.
$all=array();
$s=$start+$vars['image_gallery_x']*$vars['image_gallery_y'];
if($s>$n)$s=$n;
for($i=$start;$i<$s;++$i){
$cap=$images[$i]['caption'];
if(strlen($cap)>$vars['image_gallery_captionlength'])

Chapter 9
[
241
]
$cap=substr($cap,0,$vars['image_gallery_captionlength']-3)
.'...';
$all[]=array(
'url'=>'/kfmget/'.$images[$i]['id'],
'thumb'=>'/kfmget/'.$images[$i]['id'].',width='
.$vars['image_gallery_thumbsize'].',height='
.$vars['image_gallery_thumbsize'],
'title'=>$images[$i]['caption'],
'caption'=>str_replace('\\\\n',"<br />",
htmlspecialchars($cap))
);
}
Next, we build up an array of the visible images, including details such as caption,
link to original image, address of thumbnail, and so on.
for($row=0;$row<$vars['image_gallery_y'];++$row){
$c.='<tr>';
for($col=0;$col<$vars['image_gallery_x'];++$col){
$i=$row*$vars['image_gallery_x']+$col;
$c.='<td id="igCell_'.$row.'_'.$col.'">';
if(isset($all[$i]))$c.='<div style="text-align:center" '
.'class="gallery_image"><a href="'.$all[$i]['url']
.'"><img src="'.$all[$i]['thumb'].'" />'
.'<br style="clear:both" /><span class="caption">'
.$all[$i]['caption'].'</span></a></div>';
$c.='</td>';
}
$c.='</tr>';
}
$c.='</table>';
Finally, we generate the table of images.
This can be enhanced by generating jQuery to manage the pagination but as this is
just a demonstration of having two gallery methods for the one CMS plugin, it's not
necessary to go through that trouble.
In the admin area, go to the Settings tab and change the gallery type to simple
gallery and click Update to save it.
D
o
w
nl
oa
d
fr
om
W
ow
!
eB
oo
k
<
w
w
w
.w
ow
eb
oo
k.
co
m
>
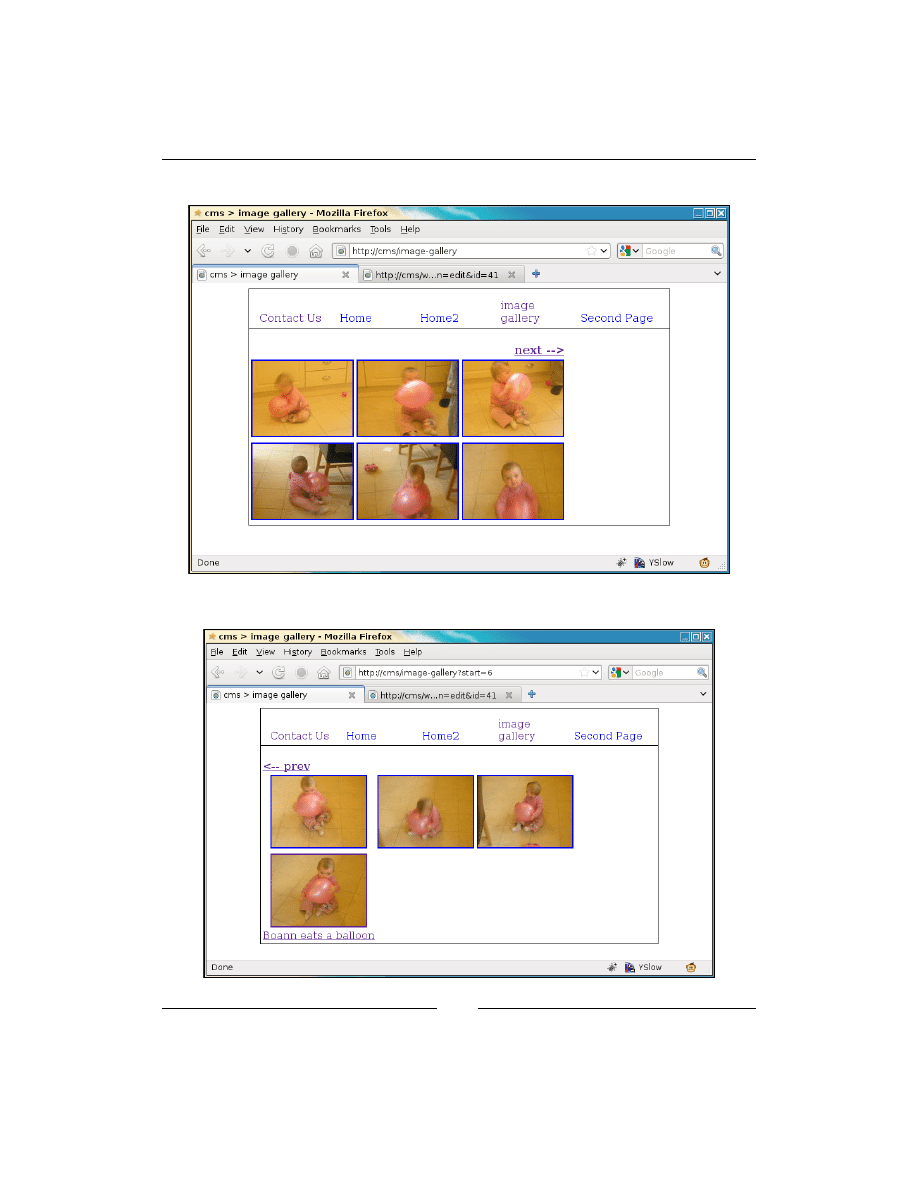
Image Gallery Plugin
[
242
]
Now, when viewed in a browser, the page looks like this:
And when the next --> link is clicked, it changes to this:

Chapter 9
[
243
]
Notice that the URL has been changed to add a
start
parameter and the pagination
has changed. There is no next --> and a <-- prev link is added.
Also, the bottom photo on the left-hand side has a caption on it.
That's it—a completed Image Gallery plugin.
Summary
In this chapter, we created an Image Gallery plugin for the CMS, which lets you
upload multiple images to a directory and choose from a list of gallery types how
you want to show the images on the front-end.
In the next chapter, we will build the basics of the Panels plugin. A Panel is basically
a "wrapper", within which widgets can be placed by the admin. It greatly extends the
customizability of a site design.


Panels and Widgets – Part
One
A panel is an area in your design which can contain a number of widgets. These
widgets can be installed by simply "dropping" them into place using the admin area.
A widget is a small visual object such as a poll, login box, search box, news scroller,
and so on, which you may want to place on your site.
Items placed in a panel can be seen on every page of the site.
In this chapter, we will learn how to:
•
Create the panel plugin
•
Create the content snippet widget
•
Add widgets to panels
•
Display panels and widgets on the front-end
This is another two-part chapter.
This first chapter will develop panels and widgets enough that they can be created
and seen on the front-end.
The next chapter will enhance this foundation and let you customize the widgets,
and choose which pages the panels and widgets should be visible on.
Creating the panel plugin
Usually when creating a website, a header, footer, and sidebar will be written into
the theme which are specific to the company the website is for.

Panels and Widgets – Part One
[
246
]
The header would include the company name, logo, and maybe a collage of pertinent
images.
The footer would include the company name, trademarks, maybe a contact number.
The sidebar would include contact details of the company.
If you replace those three areas with panels (named "header", "footer", "sidebar"),
each of which can contain a widget which provides the required HTML for the
company-specific details, then this allows you to create a generic web design which
can be customized for a specific company, and yet be reused by another customer if
you wish.
The Content Snippet widget is just that—it's a snippet of HTML content which you
want to have shared among all your pages.
Create the directory
/ww.plugins/panels
and add this
plugin.php
to it:
<?php
$plugin=array(
'name'=>'Panels',
'description'=>
'Allows content sections to be displayed throughout the site.',
'admin'=>array(
'menu'=>array(
'Misc>Panels'=>'index'
)
),
'frontend'=>array(
'template_functions'=>array(
'PANEL'=>array(
'function' => 'panels_show'
)
)
),
'version'=>4
);
function panels_show($vars){
}
We'll leave the front-end function blank for now.
Notice that we've added a template function to the configuration array. Because we
are talking about adding panels to specific parts of the site design, we need to add
code to the theme's template files to say where the panels go. We do this by adding
the
PANEL
function to Smarty, which will call
panels_show()
when it is used in the
design. The
template_functions
array will be explained later.

Chapter 10
[
247
]
An example of its use:
<html>
<body>
{{$PANEL name="header"}}
<p>page content goes here</p>
{{$PANEL name="footer"}}
</body>
</html>
At the moment, our CMS doesn't actually add that function to Smarty, but we'll get
to that.
Notice as well that the configuration set the version number to
4
. This is because
there were four database table revisions I made while developing the plugin.
I've combined all four into one step here. Add the
/ww.plugins/panels/upgrade.
php
file:
<?php
if($version<4){ // panels table
dbQuery('CREATE TABLE IF NOT EXISTS `panels` (
`id` int(11) NOT NULL auto_increment,
`name` text,
`body` text,
`visibility` text,
`disabled` smallint default 0,
PRIMARY KEY (`id`)
) ENGINE=MyISAM DEFAULT CHARSET=utf8');
$version=4;
}
The panels table includes these fields:
id
Internal ID of the panel.
name
The name of the panel. This is used in the design template.
For example: {{PANEL name="footer"}}
body
A JSON array containing details of any contained widgets.
visibility
A list of pages which this panel is visible on. If left blank, it's visible
on all of them.
disabled
This allows you to "turn off" a panel so it's not visible at all on the
front-end, yet keeps its settings.

Panels and Widgets – Part One
[
248
]
The reason we detail the contained widgets in a JSON array instead of a related
database table is that database access is usually slower than simply reading a text
file, especially if there are quite a few records.
In any one panel, there would usually be only two or three widgets. Running a
database search for that number of items is silly when you can include their details in
the container panel's result instead.
Registering a panel
A panel is tied explicitly to a name, which is referred to in a template. When you
create the template, you write into it where you want the panel to appear by using
that name.
There are two ways to know the names of the panels that are contained in any
template:
1. Decide beforehand what names are allowed.
2. Parse the templates to extract the names.
The first option is simply unreasonable. If we do decide on a certain list of allowed
names, we may end up with a list of ten or more panel names, where any design may
pick and choose from the list. However, we then still have the problem of showing
only the active panel names to the administrator.
It is more reasonable to not restrict the list of names, but instead extract the names
that the designer chose from the template itself.
The extraction itself also poses a problem. Do we parse the actual template file itself?
If so, we would be writing the equivalent of a Smarty compiler.
Why not let Smarty do the work itself? The solution I've come to use is that the panel
names in any template are figured out by viewing the template in the front-end and
using Smarty to then register any unknown panels in a database table.
This means that by viewing the front-end of the site before you go to the
administration page, we populate the table of panels with a list of actual panels that
are in use by the site.
While this is not ideal, in actual usage, it's sufficient. Most website designs involve
creating the pages before worrying about panels. This means that the list of panels is
complete before the administrator goes to populate them.
So, first we need to edit the template and add in the panel. Open up the
/ww.skins/
basic/h/_default.html
file and add in the following highlighted lines:

Chapter 10
[
249
]
<div id="wrapper">
<div id="menu-wrapper">{{MENU
direction="horizontal"}}</div>
{{PANEL name="right"}}
<div id="page-wrapper">{{$PAGECONTENT}}</div>
{{PANEL name="footer"}}
</div>
I've also edited the CSS file so the right panel, when generated, will be floated to the
right-hand side and the
#page-wrapper
element leaves enough margin space for it.
It's not essential for me to print that here.
Note that in the
plugin.php
file, we had this section:
'frontend'=>array(
'template_functions'=>array(
'PANEL'=>array(
'function' => 'panels_show'
)
)
),
We will use the
template_functions
array to add custom functions to Smarty,
which will be executed at the appropriate place in the template.
Edit
/ww.incs/common.php
, and add the highlighted code to the
smarty_setup
function:
$smarty->register_function('MENU', 'menu_show_fg');
foreach($GLOBALS['PLUGINS'] as $pname=>$plugin){
if(isset($plugin['frontend']['template_functions'])){
foreach($plugin['frontend']['template_functions']
as $fname=>$vals){
$smarty->register_function($fname,$vals['function']);
}
}
}
return $smarty;
}
Now any
template_functions
array items will be added to Smarty and can be
called from the template itself.

Panels and Widgets – Part One
[
250
]
Edit the
/ww.plugins/panels/plugin.php
file, and replace the
panels_show()
function:
function panels_show($vars){
$name=isset($vars['name'])?$vars['name']:'';
// { load panel data
$p=dbRow('select visibility,disabled,body from panels where
name="'.addslashes($name).'" limit 1');
if(!$p){
dbQuery("insert into panels (name,body)
values('".addslashes($name)."','{\"widgets\":[]}')");
return '';
}
// }
// { is the panel visible?
// }
// { get the panel content
$widgets=json_decode($p['body']);
if(!count($widgets->widgets))return '';
// }
}
This is a skeleton function. A lot of it has been left out. At the moment, all that it
does is to verify that the panel is in the database and if not, the panel is added to the
database.
When you view the page in the browser, there is no visible difference. The HTML
source has not been changed. It's as if the
{{PANEL}}
lines weren't in the template at all.
This is because if a panel is empty, it is pointless having an empty space in the page.
It is possible to have CSS change the layout of the page depending on whether the
panel exists or not. That is outside the scope of the book, but if you need to know
how to do it, read the following article which I wrote a few months ago:
http://blog.webworks.ie/2010/04/27/creating-optional-columns-in-
website-layouts/
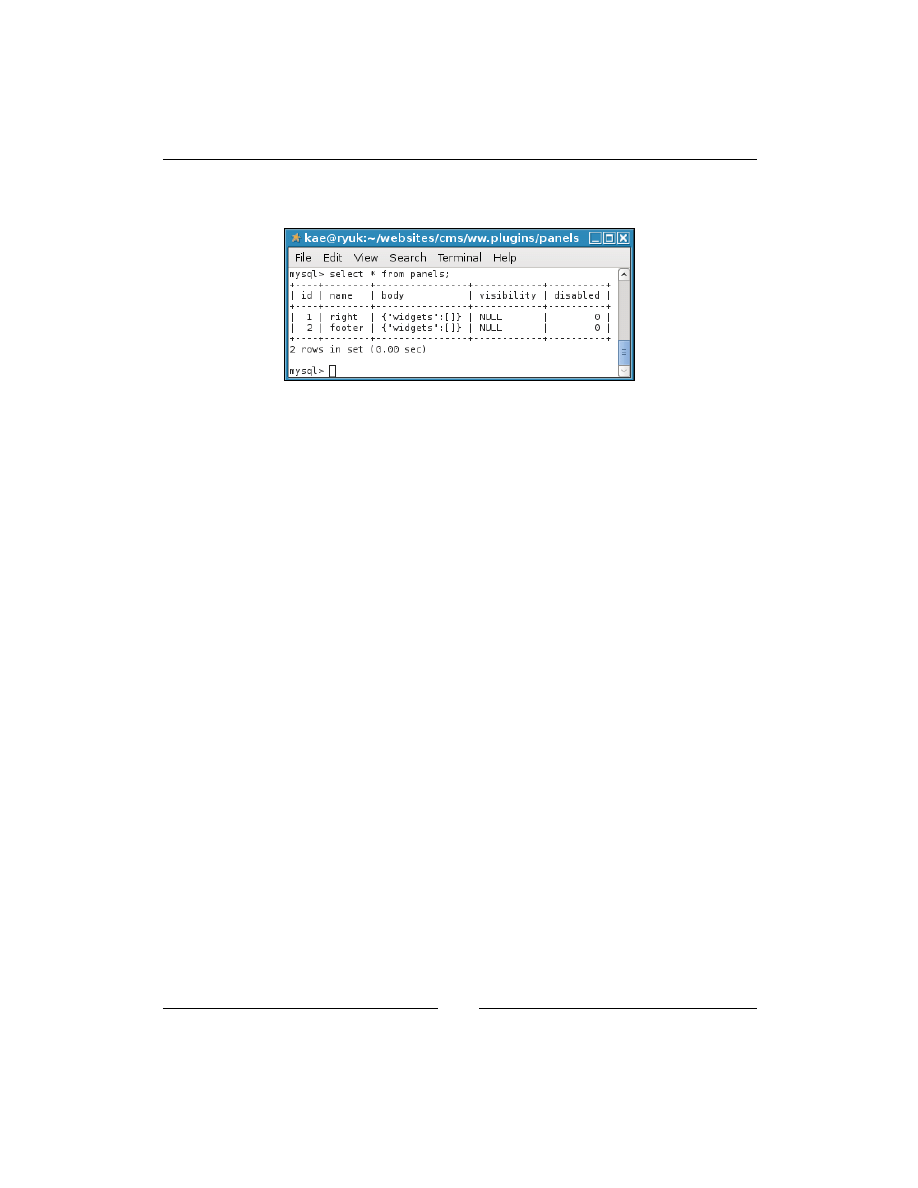
Chapter 10
[
251
]
Even though there is no visible difference in the HTML, the database table has been
populated:
By decoding the JSON in the body field, the function knew there were no contained
widgets and returned an empty string.
The panel admin area
Now we need to populate the panels.
The panel admin section will be easy to explain the look of, but is kind of complex
underneath it.
The page will be a two-column layout, with a wide column on the left-hand side
holding a list of all available widgets, and a narrow column on the right-hand side
listing the available panels.
We will start by building that visual.
Create the
/ww.plugins/panels/admin
directory, and in there, place an
index.php
file:
<?php
echo '<table style="width:95%"><tr>';
echo '<td><h3>Widgets</h3><p>Drag a widget into a panel on '
.'the right.</p><div id="widgets"></div>'
.'<br style="clear:both" /></td>';
echo '<td style="width:220px"><h3>Panels</h3><p>Click a '
.'header to open it.</p><div id="panels"></div>'
.'<br style="clear:both" /></td></tr>';
echo '</table>';
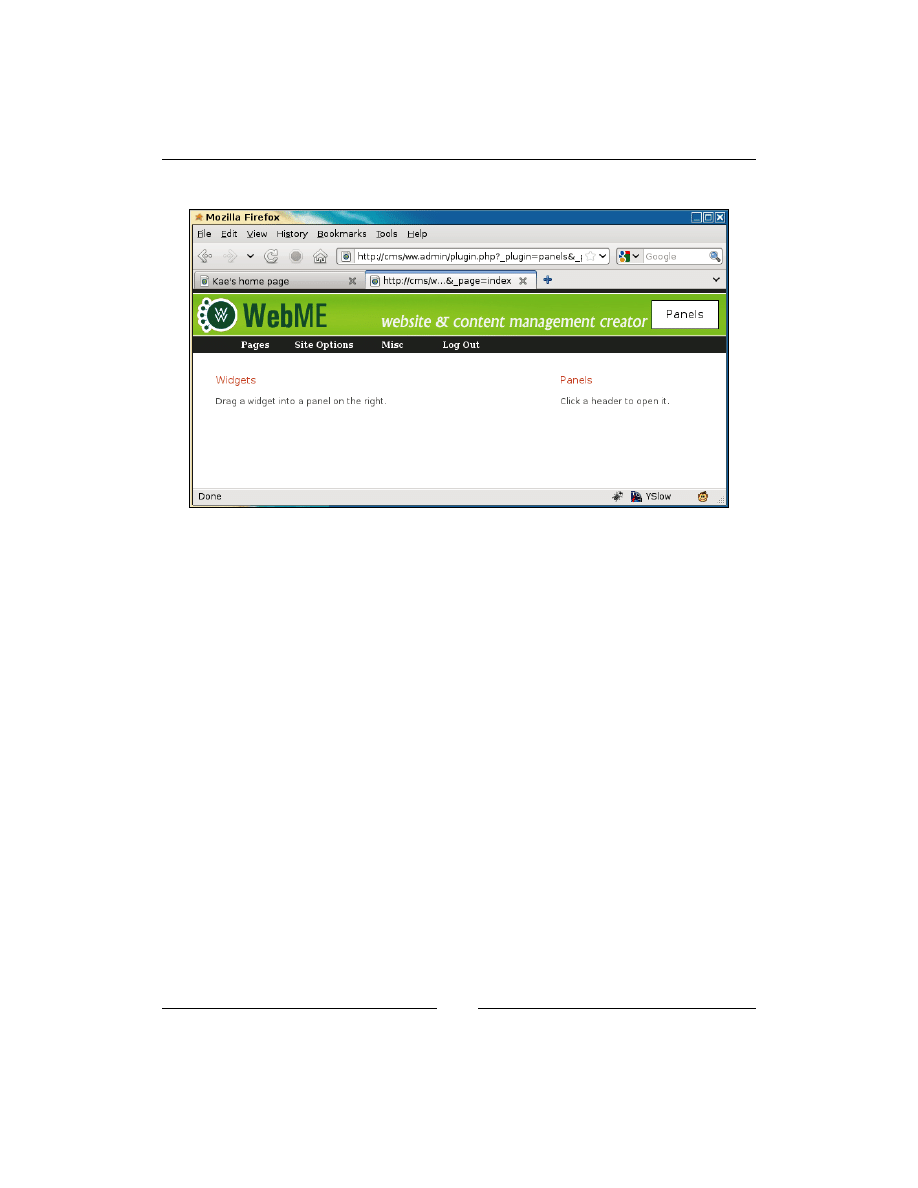
Panels and Widgets – Part One
[
252
]
When viewed, we get a general idea of how this will work.
Next, we will show the panels that we inserted into the database in the previous
section of the chapter.
Showing panels
Add the following code to the
admin/index.php
file that we just edited:
echo '<link rel="stylesheet" type="text/css"
href="/ww.plugins/panels/admin/css.css" />';
// { panel and widget data
echo '<script>';
// { panels
echo 'ww.panels=[';
$ps=array();
$rs=dbAll('select * from panels order by name');
foreach($rs as $r)$ps[]='{id:'.$r['id'].',disabled:'
.$r['disabled'].',name:"'.$r['name'].'",widgets:'
.$r['body'].'}';
echo join(',',$ps);
echo '];';
// }
// { widgets
echo 'ww.widgets=[];';
// }

Chapter 10
[
253
]
// { widget forms
echo 'ww.widgetForms={};';
// }
// }
?>
</script>
<script src="/ww.plugins/panels/admin/js.js"></script>
When viewed in a browser, the plugin now generates the following HTML:
<h1>panels</h1>
<table style="width:95%">
<tr>
<td><h3>Widgets</h3><p>Drag a widget into a panel on the
right.</p><div id="widgets"></div>
<br style="clear:both" /></td>
<td style="width:220px"><h3>Panels</h3><p>Click a header
to open it.</p><div id="panels"></div>
<br style="clear:both" /></td>
</tr>
</table>
<link rel="stylesheet" type="text/css"
href="/ww.plugins/panels/admin/css.css" />
<script>
ww.panels=[
{id:2,disabled:0,name:"footer",widgets:{"widgets":[]}},
{id:1,disabled:0,name:"right",widgets:{"widgets":[]}}
];
ww.widgets=[];
ww.widgetForms={};
</script>
<script src="/ww.plugins/panels/admin/js.js"></script>
And now we can add some JavaScript to generate the panel wrappers. Create the file
/ww.plugins/panels/admin/js.js
:
function panels_init(panel_column){
for(var i=0;i<ww_panels.length;++i){
var p=ww_panels[i];
$('<div class="panel-wrapper '
+(p.disabled?'disabled':'enabled')+'" id="panel'
+p.id+'">'
+'<h4><span class="name">'+p.name+'</span></h4>'
+'<span class="controls" style="display:none">'
+'<a title="remove panel" href="'

Panels and Widgets – Part One
[
254
]
+'javascript:panel_remove('
+i+');" class="remove">remove</a>, '
+'<a href="javascript:panel_visibility('
+p.id+');" class="visibility">visibility</a>, '
+'<a href="javascript:panel_toggle_disabled('
+i+');" class="disabled">'
+(p.disabled?'disabled':'enabled')+'</a>'
+'</span></div>'
)
.data('widgets',p.widgets.widgets)
.appendTo(panel_column);
}
}
$(function(){
var panel_column=$('#panels');
panels_init(panel_column);
$('<span class="panel-opener">↓</span>')
.appendTo('.panel-wrapper h4')
.click(function(){
var $this=$(this);
var panel=$this.closest('div');
if($('.panel-body',panel).length){
$('.controls',panel).css('display','none');
return $('.panel-body',panel).remove();
}
$('.controls',panel).css('display','block');
});
});
So first, we get the
#panels
wrapper and run
panels_init
on it. This function
builds up a simple element with a few links inside it:
remove
This link is for deleting the panel if your template doesn't use it or you just
want to empty it quickly.
visibility
This will be used to decide what pages the panel is visible on. If you want
this panel to only show on the front page, for example, you would use this.
enabled
This link lets you turn off the whole panel and its contained widgets so you
can work on it in the admin area but it's not visible in the front-end.
Notice the usage of
.data('widgets',p.widgets.widgets)
—this saves the
contained widget data to the panel element itself. We'll make use of that soon.
The panels start with their bodies hidden and only their names visible (in
<h4>
elements).
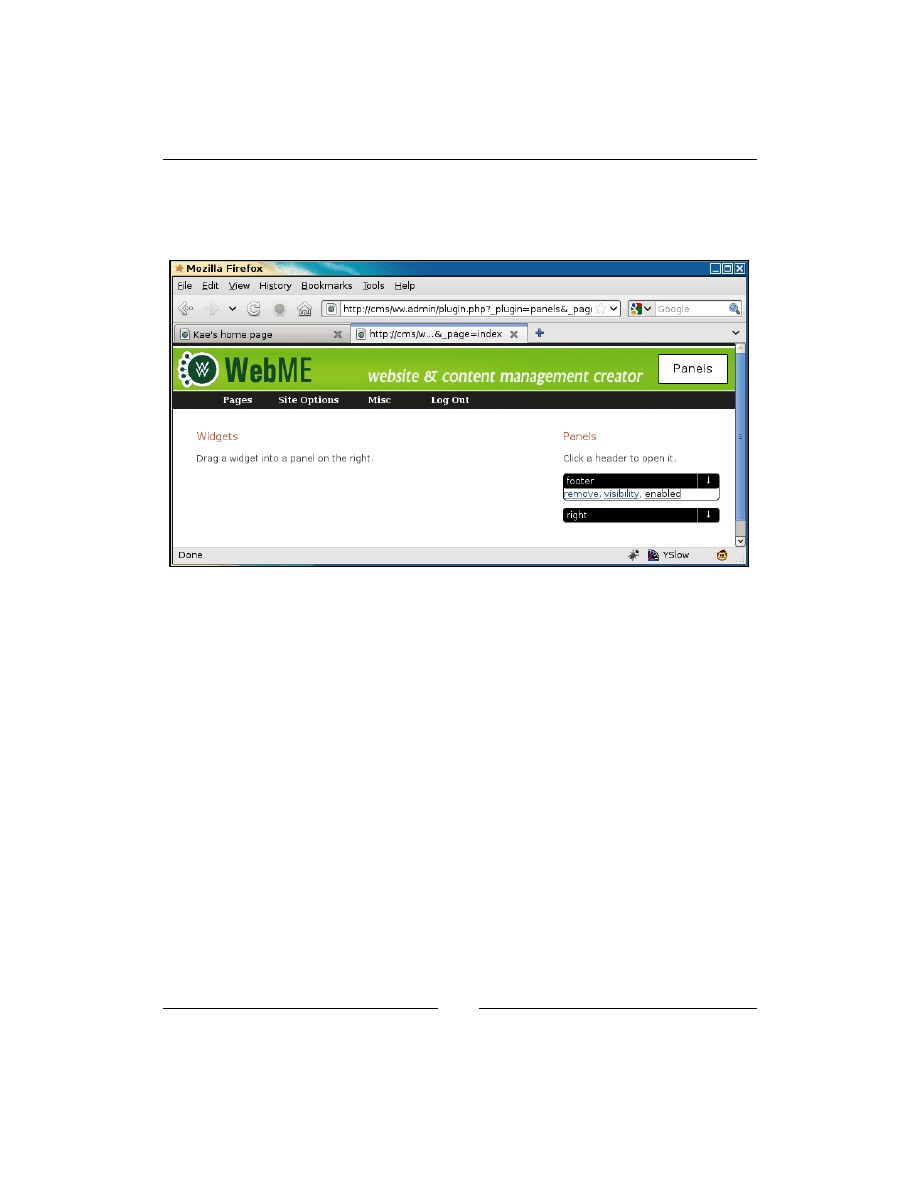
Chapter 10
[
255
]
After
panels_init()
is finished, we then add a down-arrow link to each of those
<h4>
elements, which when clicked will toggle the panel body's visibility.
Here's what the page looks like now, with one of the panels opened up:
Before we write the code for those links, we will start building the widget code—
otherwise, there'd be no visible proof that the links are working.
Creating the content snippet plugin
In order to demonstrate widgets, we will build a simple plugin called content
snippet. This plugin will manage small snippets of code which can be displayed
anywhere that a panel is.
In my own work, I use content snippets to add editable footers, headers, and side
panel content sections (for addresses, contact details, and so on) to design templates.
This allows the customer to update details without needing access to the template
files themselves.
Create the directory
/ww.plugins/content-snippet
, and add the following
plugin.php
file in it:
<?php
$plugin=array(
'name' => 'Content Snippets',
'admin' => array(
D
o
w
nl
oa
d
fr
om
W
ow
!
eB
oo
k
<
w
w
w
.w
ow
eb
oo
k.
co
m
>

Panels and Widgets – Part One
[
256
]
'widget' => array(
'form_url' => '/ww.plugins/content-snippet/admin/'
.'widget-form.php'
)
),
'description' => 'Add small static HTML snippets to any '
.'panel - address, slogan, footer, image, etc.',
'frontend' => array(
'widget' => 'contentsnippet_show'
),
'version' => '1'
);
function contentsnippet_show($vars=null){
require_once SCRIPTBASE.'ww.plugins/content-snippet/'
.'frontend/index.php';
return content_snippet_show($vars);
}
Inside the admin array, we have a widget section. The
form_url
parameter points to
the address of a PHP script which will be used to configure the panel.
And inside the front-end array, we have a corresponding widget section which
points at a function which will display the widget.
We will need a database table for this plugin, so create the
upgrade.php
file:
<?php
if($version=='0'){ // add table
dbQuery('create table if not exists content_snippets( id'
.' int auto_increment not null primary key, html text)'
.'default charset=utf8;');
$version=1;
}
All we need for this panel is to record some HTML, which is then displayed as-is on
the front-end.
After you finish writing the files, go to the Plugins area of the CMS and enable this
new plugin, then go back to the Panels area.
Adding widgets to panels
We now have a very simple plugin skeleton ready to go. All we need to do is add
it to a panel, configure it (by adding HTML), and then show it on the front-end.

Chapter 10
[
257
]
Showing widgets
First, we need to show the list of available widgets.
Edit the file
/ww.plugins/panels/admin/index.php
and change the widgets
section to this:
// { widgets
echo 'ww_widgets=[';
$ws=array();
foreach($PLUGINS as $n=>$p){
if(isset($p['frontend']['widget']))$ws[]='{type:"'.$n
.'",description:"'.addslashes($p['description']).'"}';
}
echo join(',',$ws);
echo '];';
// }
That will output the following to our browser:
ww_widgets=[{type:"content-snippet",description:"Add small static HTML
snippets to any panel - address, slogan, footer, image, etc."}];
Now we edit the
admin/js.js
file to show these widgets in the left-hand side column.
This will involve a few small changes, so we'll step through them one at a time.
First, add the highlighted lines to the
$(function){
section:
panels_init(panel_column);
var widget_column=$('#widgets');
ww_widgetsByName={};
widgets_init(widget_column);
$('<span class="panel-opener">↓</span>')
Then add the
widgets_init()
function:
function widgets_init(widget_column){
for(var i=0;i<ww_widgets.length;++i){
var p=ww_widgets[i];
$('<div class="widget-wrapper"><h4>'+p.type
+'</h4><p>'+p.description+'</p></div>')
.appendTo(widget_column)
.data('widget',p);
ww_widgetsByName[p.type]=p;
}
}
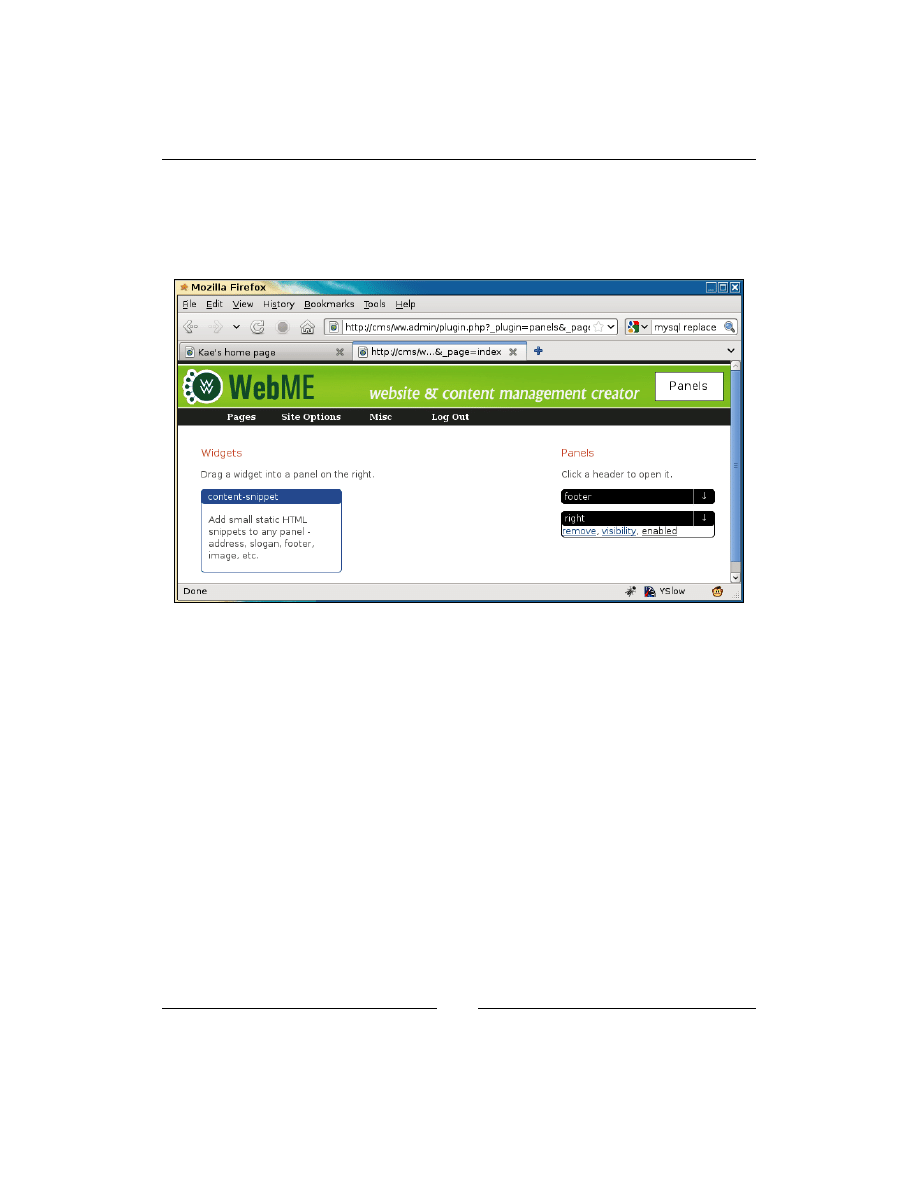
Panels and Widgets – Part One
[
258
]
This takes the global
ww_widgets
array and builds little box elements out of the data,
attaching the widget data to the boxes, and then adding the boxes to the left column
of the main table.
The page looks much better now, as you can see in the next screenshot:
The next step is to take widgets from the left-hand side of the page and associate
them with panels on the right-hand side of the page.
Dragging widgets into panels
Drag-and-drop is handled by using jQuery UI's Sortable plugin, which allows you to
drag items from one list (the widgets list on the left-hand side) and drop into another
list (the list of contained widgets in each panel on the right).
Edit the
$(function()){
section of
js.js
again and add these highlighted lines:
$('.controls',panel).css('display','block');
var widgets_container=$('<div class="panel-body">'
+'</div>');
widgets_container.appendTo(panel);
$('<br style="clear:both" />')
.appendTo(panel);
$('.panel-body').sortable({
});
});
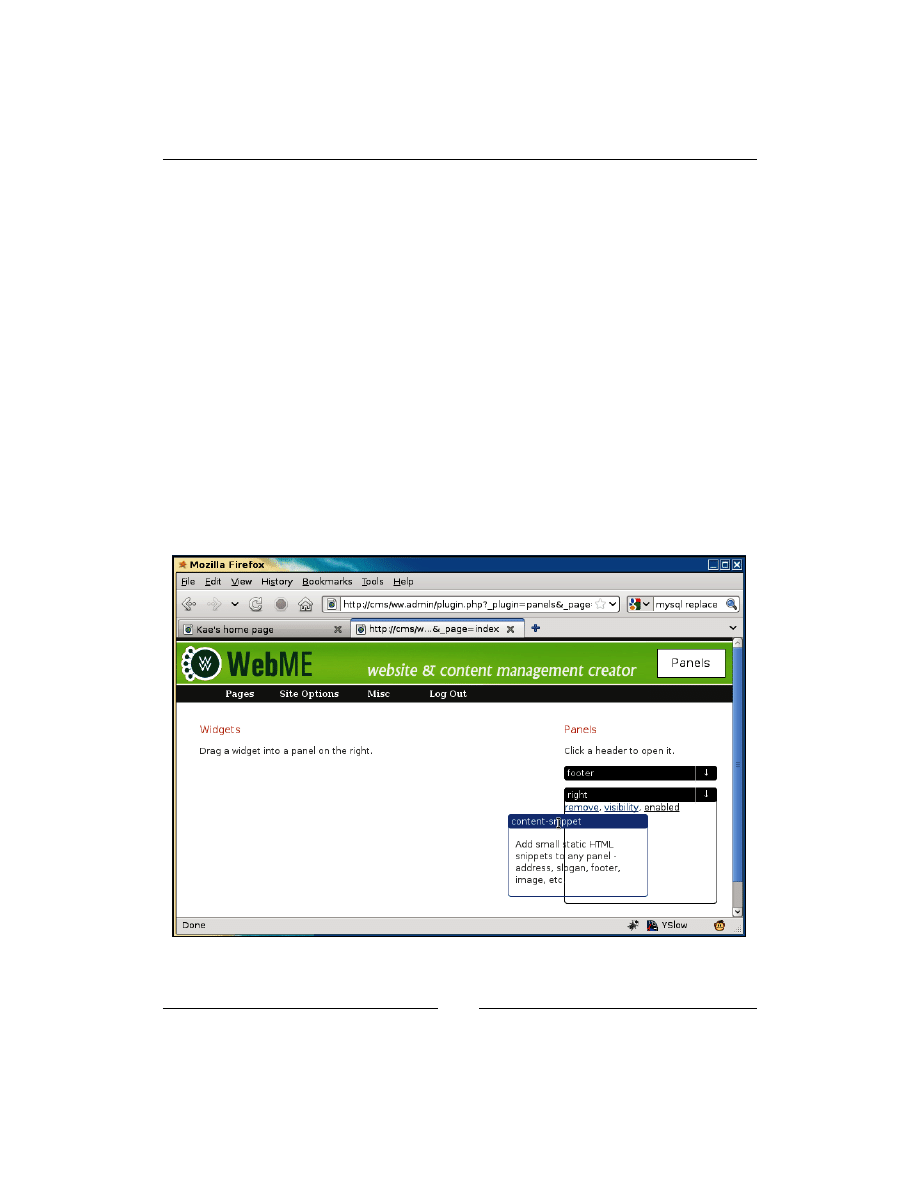
Chapter 10
[
259
]
$('#widgets').sortable({
'connectWith':'.panel-body',
'stop':function(ev,ui){
var item=ui.item;
var panel=item.closest('.panel-wrapper');
if(!panel.length)return $(this).sortable('cancel');
}
})
$('<br style="clear:both" />').appendTo(widget_column);
});
First we add a
panel-body
element to the right-hand side panels, which will hold
the widgets.
Next, we make the contents of the right-hand side
pane-body
elements
sortable
, so
we can link to them with the left-hand side column widgets.
Finally, we make the left-hand side column
sortable
, linking to the
panel-body
elements on the right-hand side.
With this done, we can now drag widgets into the panels:

Panels and Widgets – Part One
[
260
]
Unfortunately, this is not very useful, as the widget has been removed from the
left-hand side column, and therefore can't be reused. For example, if you wanted
to use a content snippet in each panel, you can't do that now.
So, what we need to do is "clone" the dragged item (or at least its data properties)
and place the clone in the panel, then cancel the drag so the original dragged widget
goes back to the right panel.
Edit the same file again, and add these highlighted lines:
'stop':function(ev,ui){
var item=ui.item;
var panel=item.closest('.panel-wrapper');
if(!panel.length)return $(this).sortable('cancel');
var p=ww_widgetsByName[$('h4',ui.item).text()];
var clone=buildRightWidget({'type':p.type});
panel.find('.panel-body').append(clone);
$(this).sortable('cancel');
}
The above code calls a function
buildRightWidget()
with the widget name (the
name of the plugin used to create the widget), and the resulting element is added to
the panel instead of the actual dragged widget.
The dragged widget is then returned to its original place (by cancelling the sortable's
drag) where it can be used again.
Here's the function
buildRightWidget()
, to be added to the file:
function buildRightWidget(p){
var widget=$('<div class="widget-wrapper '
+(p.disabled?'disabled':'enabled')+'"></div>')
.data('widget',p);
var h4=$('<h4></h4>')
.appendTo(widget);
var name=p.name||p.type;
$('<input type="checkbox" class="widget_header_visibility"'
+' title="tick this to show the widget title on the'
+' front-end" />')
.click(widget_header_visibility)
.appendTo(h4);
$('<span class="name">'+name+'</span>')
.click(widget_rename)
.appendTo(h4);
$('<span class="panel-opener">↓</span>')
.appendTo(h4)
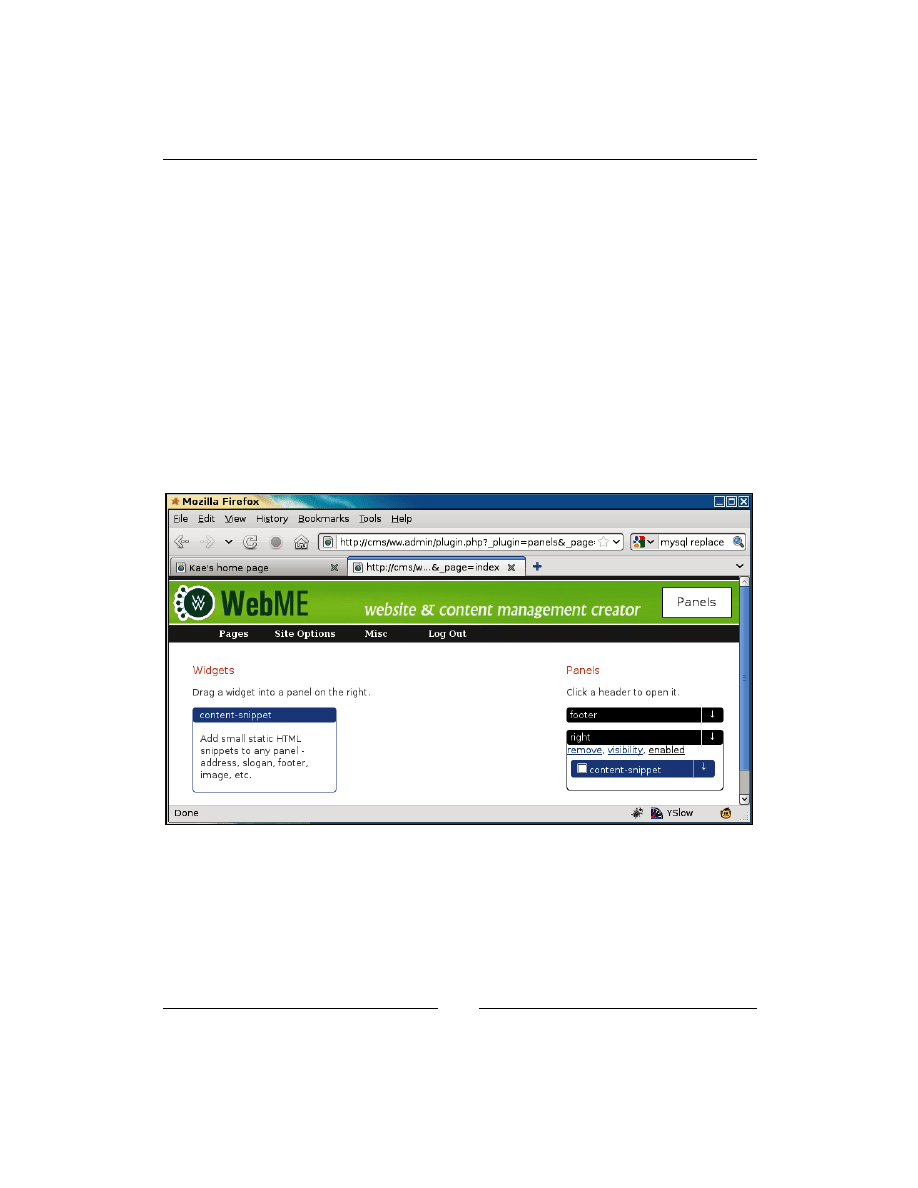
Chapter 10
[
261
]
.click(showWidgetForm);
return widget;
}
This code creates another wrapper similar to the panels wrappers, with the title of
the widget visible.
There are a number of functions called with callbacks, for doing things such as
renaming the widget, showing the widget name in the front-end, or showing the
widget form.
We'll get to those. In the meantime, add some "stub" functions as placeholders:
function showWidgetForm(){}
function widget_header_visibility(){}
function widget_rename(){}
Now, after dragging, we have a visual similar to the following screenshot:
We'll do one more thing in the admin area, then we can show the widget in the
front-end.
Saving panel contents
Whenever a new widget is added to a panel, we need to rebuild the panel's body
JSON string (in the panels table in the database) and save it to the server.

Panels and Widgets – Part One
[
262
]
Edit the
js.js
file again, and add the following highlighted lines:
widgets_container.appendTo(panel);
$('<br style="clear:both" />').appendTo(panel);
$('.panel-body').sortable({
'stop':function(){
updateWidgets($(this).closest('.panel-wrapper'));
}
});
});
This code runs
updateWidgets()
whenever a widget in the right panel is moved
around (rearranged, for instance).
Add the following highlighted code as well:
var clone=buildRightWidget({'type':p.type});
panel.find('.panel-body').append(clone);
$(this).sortable('cancel');
updateWidgets(panel);
}
})
This adds a behavior such that when the widget is dropped into a panel body,
the function
updateWidgets()
is run.
Here is the
updateWidgets()
function:
function updateWidgets(panel){
var id=panel[0].id.replace(/panel/,'');
var w_els=$('.widget-wrapper',panel);
var widgets=[];
for(var i=0;i<w_els.length;++i){
widgets.push($(w_els[i]).data('widget'));
}
panel.data('widgets',widgets);
var json=json_encode({'widgets':widgets});
$.post('/ww.plugins/panels/admin/save.php',{
'id':id,
'data':json
});
}
This function takes a panel as its parameter. It then searches the panel for any
contained widgets, adds all of their contained "widget" data to its own "widgets"
array, and sends that to the server to be saved.

Chapter 10
[
263
]
There is no built-in JSON encoder in jQuery, so you'll need to add one.
Edit
/ww.admin/j/admin.js
and add this:
function typeOf(value) {
// from http://javascript.crockford.com/remedial.html
var s = typeof value;
if (s === 'object') {
if (value) {
if (value instanceof Array) {
s = 'array';
}
} else {
s = 'null';
}
}
return s;
}
function json_encode(obj){
switch(typeOf(obj)){
case 'string':
return '"'+obj.replace(/(["\\])/g,'\\$1')+'"';
case 'array':
return '['+obj.map(json_encode).join(',')+']';
case 'object':
var string=[];
for(var property in obj)string.push(
json_encode(property)+':'
+json_encode(obj[property]));
return '{'+string.join(',')+'}';
case 'number':
if(isFinite(obj))break;
case false:
return 'null';
}
return String(obj);
}
The first function,
typeOf()
, is there because JavaScript's built-in
typeof
keyword
doesn't differentiate between objects and arrays, and those are very different in JSON!
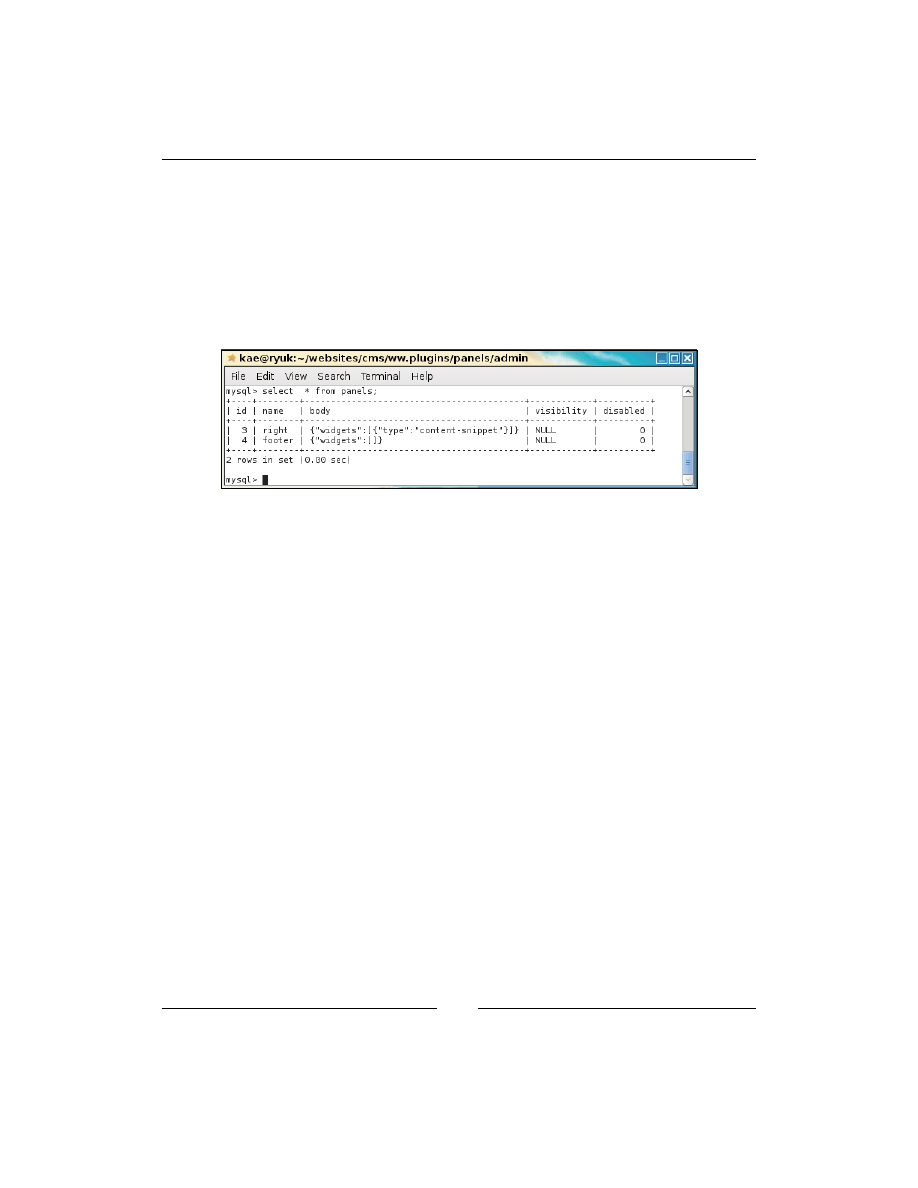
Panels and Widgets – Part One
[
264
]
Here is the server-side file that saves it—
/ww.plugins/panels/admin/save.php
.
<?php
require $_SERVER['DOCUMENT_ROOT'].'/ww.admin/admin_libs.php';
$id=(int)$_REQUEST['id'];
$widgets=addslashes($_REQUEST['data']);
dbQuery("update panels set body='$widgets' where id=$id");
Now after dragging a content snippet widget into a panel, here is the database table:
We can now record what widgets are in what panels.
While interesting details of the widgets, such as customizing widget contents, are
yet to be recorded, this is enough to display some stubs on the front-end, which
we'll do next.
Showing panels on the front-end
We have the panel widgets in the database now, so let's write some code to extract
and render them.
Edit
/ww.plugins/panels/plugin.php
and add the following highlighted code to
the end of the
panels_show()
function:
// { show the panel content
$h='';
global $PLUGINS;
foreach($widgets->widgets as $widget){
if(isset($PLUGINS[$widget->type])){
if(
isset($PLUGINS[$widget->type]['frontend']['widget'])
){
$h.=$PLUGINS[$widget->type]['frontend']['widget']
($widget);
}
else $h.='<em>plugin "'

Chapter 10
[
265
]
.htmlspecialchars($widget->type)
.'" does not have a widget interface.</em>';
}
else $h.='<em>missing plugin "'
.htmlspecialchars($widget->type)
.'".</em>';
}
// }
$name=preg_replace('/[^a-z0-9\-]/','-',$name);
return '<div class="panel panel-'.$name.'">'.$h.'</div>';
// }
}
The highlighted line does the trick. In the
plugin.php
for the content snippet
plugin, we had this section:
'frontend' => array(
'widget' => 'contentsnippet_show'
),
What the highlighted line does is to call the function
contentsnippet_show()
with
a parameter
$widget
which is set to the contents of the panel's
$widgets
array at
that point.
So, anything that's saved in the admin area for that widget is passed to the function
on the front-end as an array. We'll see more on this later.
The function
contentsnippet_show()
loads up
frontend/index.php
and then
returns the result of a call to its contained
content_snippet_show()
.
The functions have similar names—the only difference being the '_'. The one without
the '_' is a stub, in case the other is not actually required. There is no point loading up
a lot of code if only a little of it is actually used.
Create the directory
/ww.plugins/content-snippet/frontend
, and add the file
index.php
to it:
<?php
function content_snippet_show($vars){
if(is_object($vars) && isset($vars->id) && $vars->id){
$html=dbOne('select html from content_snippets
where id='.$vars->id,'html');
if($html)return $html;
}
return '<p>this Content Snippet is not yet defined.</p>';
}
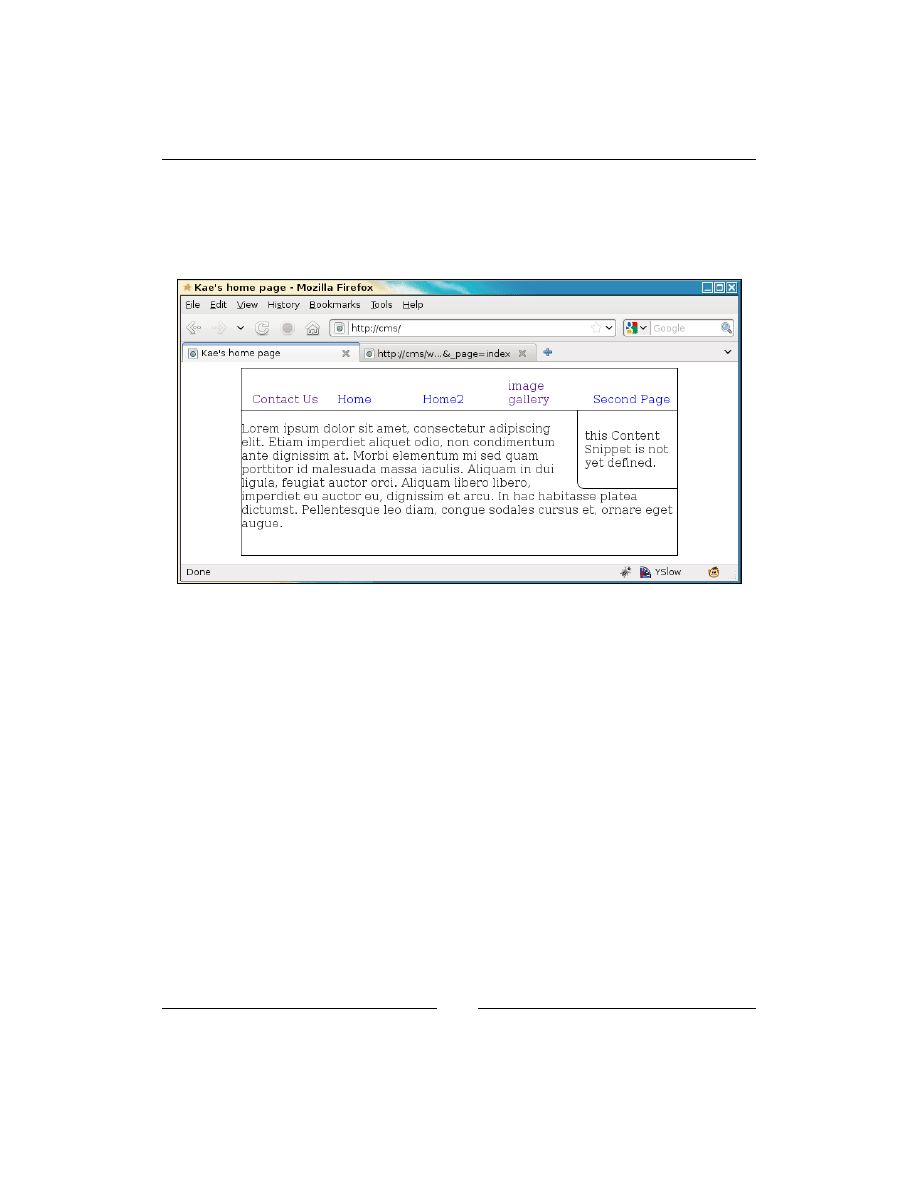
Panels and Widgets – Part One
[
266
]
You can see that the function expects the parameter
$vars
to be an object with a
variable
$id
in it.
We have not set that variable yet, which would correspond to a table entry in the
database, so the alternative failure string is returned instead.
If you remember, we added two panels to the template—a right panel, visible in this
screenshot, and a footer panel. The footer panel is not visible, because we haven't
added anything to it yet.
Summary
In this chapter, we built the basics of a panels and widgets system.
Widgets are a way to add huge flexibility to any web design that has panels built
into it.
In the next chapter, we will finish the system, letting the admin customize the
widgets, and choose what pages the widgets and panels are visible on.

Panels and Widgets – Part
Two
In the previous chapter, we built the basics of the panels and widgets system. You
can now create panels, can drag widgets into them, and can see the results on the
front-end of the site.
In this chapter, we will enhance the system letting you customize the widgets and
letting you choose what pages the panels and widgets are visible on.
Widget forms
In the last chapter, we had widgets showing on the front-end, but with a default This
Content Snippet is not yet defined message.
In order to change the message to something more useful, we will need to do more
work in the admin area.
Firstly, when you reload the Panels area of the admin, you'll see that our right panel
widget appears to have vanished. We've recorded it in the database, but have not set
the page to show it on loading.
Edit
/ww.plugins/panels/admin/js.js
and where the
.panel-opener
is added to
the
h4
of
.panel-wrapper
, add these highlighted lines:
widgets_container.appendTo(panel);
var widgets=panel.data('widgets');
for(var i=0;i<widgets.length;++i){
var p=widgets[i];
var w=buildRightWidget(p);
w.appendTo(widgets_container);
if(p.header_visibility)

Panels and Widgets – Part Two
[
268
]
$('input.widget_header_visibility',w)[0]
.checked=true;
}
$('<br style="clear:both" />').appendTo(panel);
When we created the panels in the JavaScript, we set the wrapper's
data('widgets')
with data from the database. This code takes that data and adds
the widgets on-the-fly, when the panel is opened.
Because each widget is different, we need to provide a way to load up external
configuration forms.
To do this, replace the
showWidgetForm()
stub function with this:
function showWidgetForm(w){
if(!w.length)w=$(this).closest('.widget-wrapper');
var f=$('form',w);
if(f.length){
f.remove();
return;
}
var form=$('<form></form>').appendTo(w);
var p=w.data('widget');
if(ww_widgetForms[p.type]){
$('<button style="float:right">Save</button>')
.click(function(){
w.find('input,select').each(function(i,el){
p[el.name]=$(el).val();
});
w.data('widget',p);
updateWidgets(form.closest('.panel-wrapper'));
return false;
})
.appendTo(form);
var fholder=$('<div style="clear:both;border-bottom:1px solid
#416BA7">loading...</div>').prependTo(form);
p.panel=$('h4>span.name',form.closest('.panel-wrapper')).eq(0).
text();
fholder.load(ww_widgetForms[p.type],p);
}
else $('<p>automatically configured</p>').appendTo(form);
$('<a href="javascript:;" title="remove widget">remove</a>')
.click(function(){
if(!confirm('Are you sure you want to remove this widget from
this panel?'))return;

Chapter 11
[
269
]
var panel=w.closest('.panel-wrapper');
w.remove();
updateWidgets(panel);
})
.appendTo(form);
$('<span>, </span>').appendTo(form);
$('<a href="javascript:;">visibility</a>')
.click(widget_visibility)
.appendTo(form);
$('<span>, </span>').appendTo(form);
$('<a class="disabled" href="javascript:;">'+(p.disabled?'disabled':
'enabled')+'</a>')
.click(widget_toggle_disabled)
.appendTo(form);
}
function widget_toggle_disabled(){}
function widget_visibility(){}
The first few lines toggle the form closed, if it's already closed.
Then, if a form is provided (we'll get to this in a moment), it is added to a form
element, along with a Save button. The external form is embedded in the element
using jQuery's
.load()
function, which also runs any scripts in the external form.
If no form is provided, a message is shown saying that the widget is automatically
configured.
Then, a number of links are added to let you remove, disable, or set the pages that
the widget is active on.
The only link that works at the moment is the remove link, which simply deletes the
widget element, and then updates the panel.
The other links are served by stub functions. We will finish them all before the end of
the chapter!
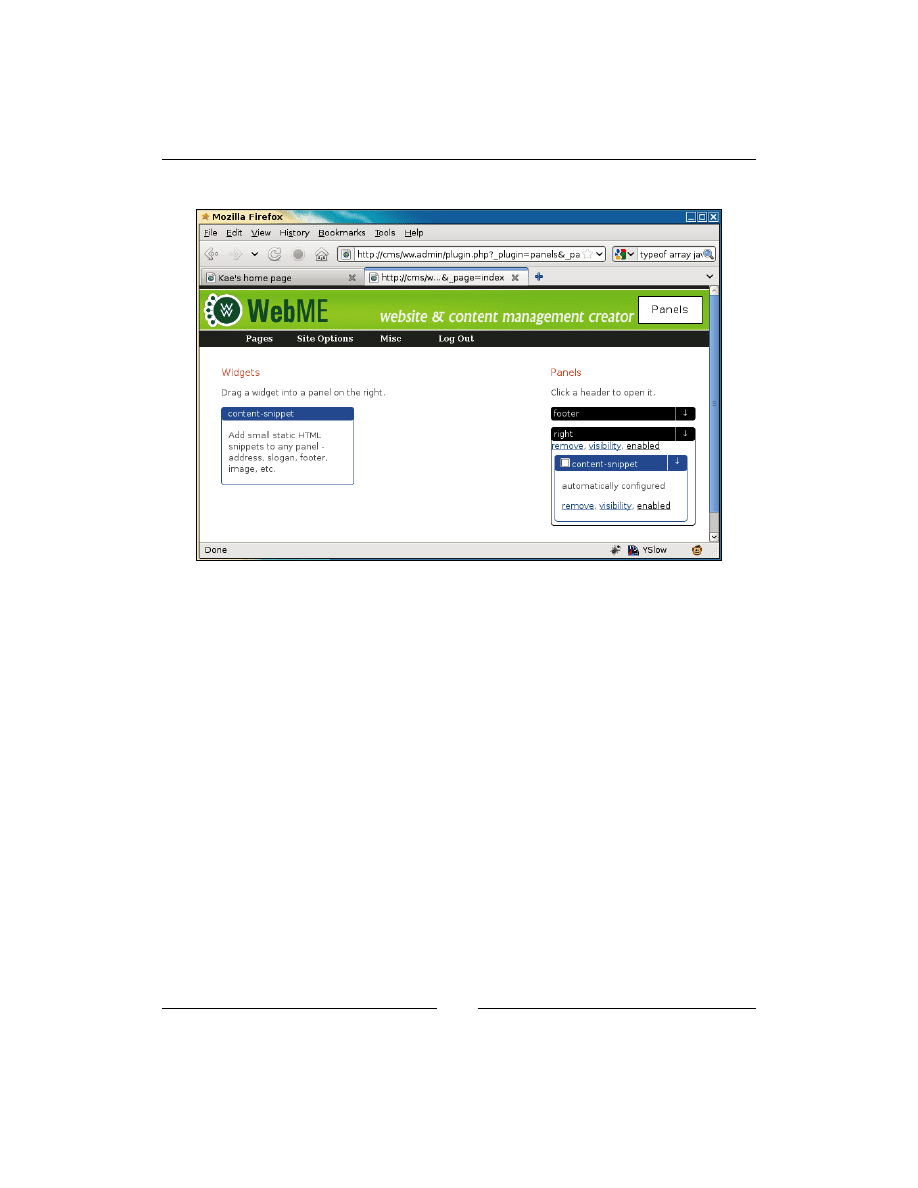
Panels and Widgets – Part Two
[
270
]
Here's a screenshot showing the widget as it appears now:
When we were initially creating
/ww.plugins/panels/admin/index.php
, we
added a simple "widget forms" comment block. Now, replace that with this:
// { widget forms
echo 'ww.widgetForms={';
$ws=array();
foreach($PLUGINS as $n=>$p){
if(isset($p['admin']['widget'])
&& isset($p['admin']['widget']['form_url']))
$ws[]='"'.$n.'":"'
.addslashes($p['admin']['widget']['form_url']).'"';
}
echo join(',',$ws);
echo '};';
// }
This builds up a list of panel forms and echoes them to the browser's HTML:
ww_widgets=[{type:"content-snippet",description:"Add small static HTML
snippets to any panel - address, slogan, footer, image, etc."}];
ww_widgetForms={"content-snippet":"/ww.plugins/content-snippet/admin/
widget-form.php"};
</script>

Chapter 11
[
271
]
So let's create the form. Make the
/ww.plugins/content-snippet/admin
directory
and add a
widget-form.php
file to it:
<?php
require $_SERVER['DOCUMENT_ROOT'].'/ww.admin/admin_libs.php';
// { return content from table if requested
if(isset($_REQUEST['get_content_snippet'])){
require '../frontend/index.php';
$o=new stdClass();
$o->id=(int)$_REQUEST['get_content_snippet'];
$ret=array('content'=>content_snippet_show($o));
echo json_encode($ret);
exit;
}
// }
// { set ID and show link in admin area
if(isset($_REQUEST['id']))$id=(int)$_REQUEST['id'];
else $id=0;
echo '<a href="javascript:content_snippet_edit('.$id.');"
id="content_snippet_editlink_'.$id.'"
class="content_snippet_editlink">view or edit snippet</a>';
// }
?>
This is not the end of the file—we've only just started. It's a large snippet, so I'll
explain just this bit first.
First, we check that the user is an admin and load up the admin libraries, in case
they're needed.
Then, we check to see if the browser has asked for the content of the snippet. There'll
be more on that in a bit when we talk about the JavaScript part of the file.
Next, we make sure that an ID has been provided or else set it to 0.
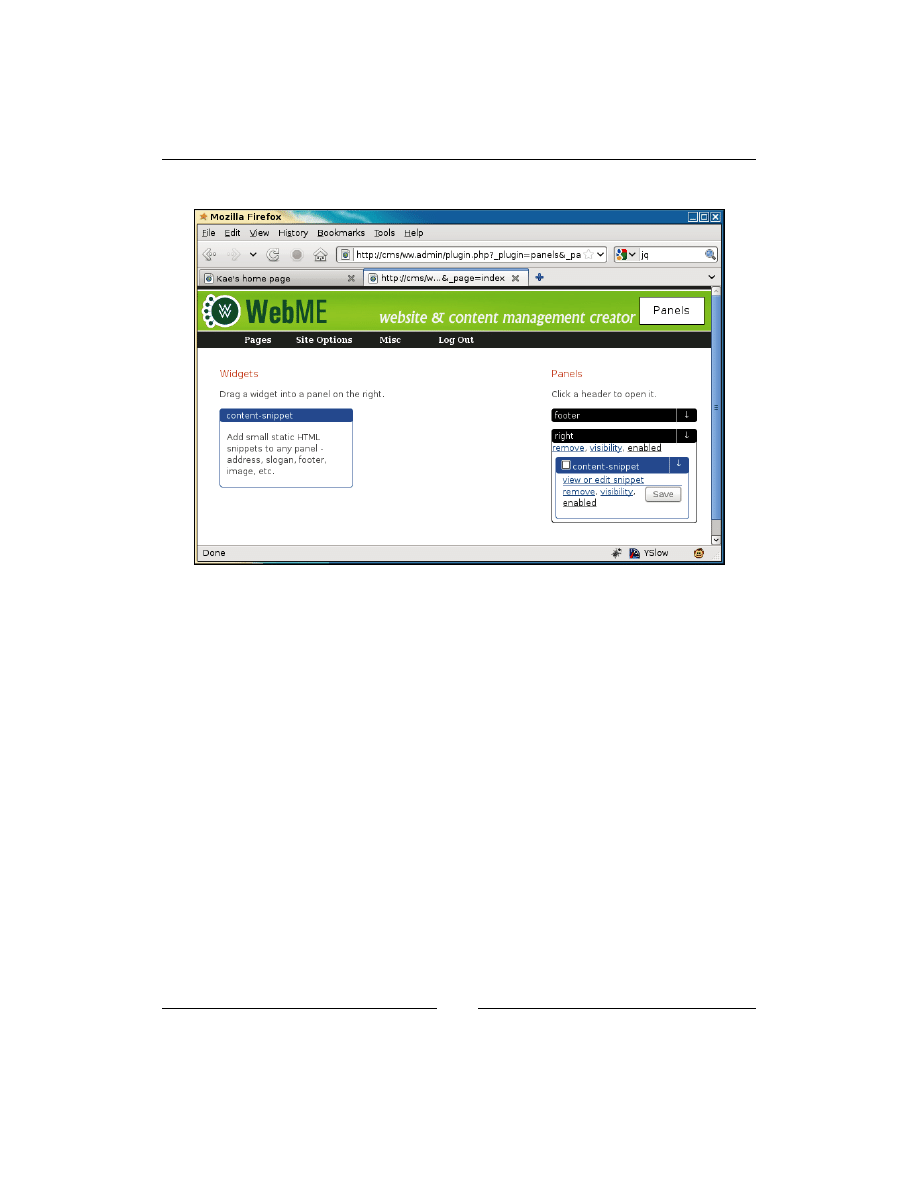
Panels and Widgets – Part Two
[
272
]
Finally, we output a link for the browser to show to the user.
So next, we need to define what happens when the view or edit snippet link is clicked.
Add the following code to the same file:
<script>
if(!window.ww_content_snippet)window.ww_content_snippet={
editor_instances:0
};
function content_snippet_edit(id){
var el=document.getElementById('content_snippet_editlink_'
+id);
ww_content_snippet.editor_instances++;
var rtenum=ww_content_snippet.editor_instances;
var d=$('<div><textarea style="width:600px;height:300px;" '
+'id="content_snippet_html'+rtenum+'" '
+'name="content_snippet_html'+rtenum+'"></textarea>'
+'</div>');
$.getJSON(
'/ww.plugins/content-snippet/admin/widget-form.php',
{'get_content_snippet':id},
function(res){
d.dialog({
D
o
w
nl
oa
d
fr
om
W
ow
!
eB
oo
k
<
w
w
w
.w
ow
eb
oo
k.
co
m
>

Chapter 11
[
273
]
minWidth:630,
minHeight:400,
height:400,
width:630,
modal:true,
beforeclose:function(){
if(!ww_content_snippet.rte)return;
ww_content_snippet.rte.destroy();
ww_content_snippet.rte=null;
},
buttons:{
'Save':function(){
// leave empty for now
},
'Close':function(){
d.remove();
}
}
});
ww_content_snippet.rte=CKEDITOR.replace(
'content_snippet_html'+rtenum,
{filebrowserBrowseUrl:"/j/kfm/",menu:"WebME"}
);
ww_content_snippet.rte.setData(res.content);
});
}
</script>
What this does is create a dialog, add an instance of the CKeditor rich text editor to
it, and then request the snippet content from the server (see the previous PHP section
for that).
Note the steps we've taken with CKeditor. At the time of writing, CKeditor 3 is still
not complete—the documentation on the main website, for example, has hardly
anything in the JavaScript section.
Destroying an instance of CKeditor dynamically is still not absolutely safe, so what we
do is that when a dialog is closed, we do what we can using the
.destroy()
method
provided by CKeditor. To be extra sure, we don't reuse a destroyed instance, but we
always initiate a new one (see the use of
editor_instances
in the code).
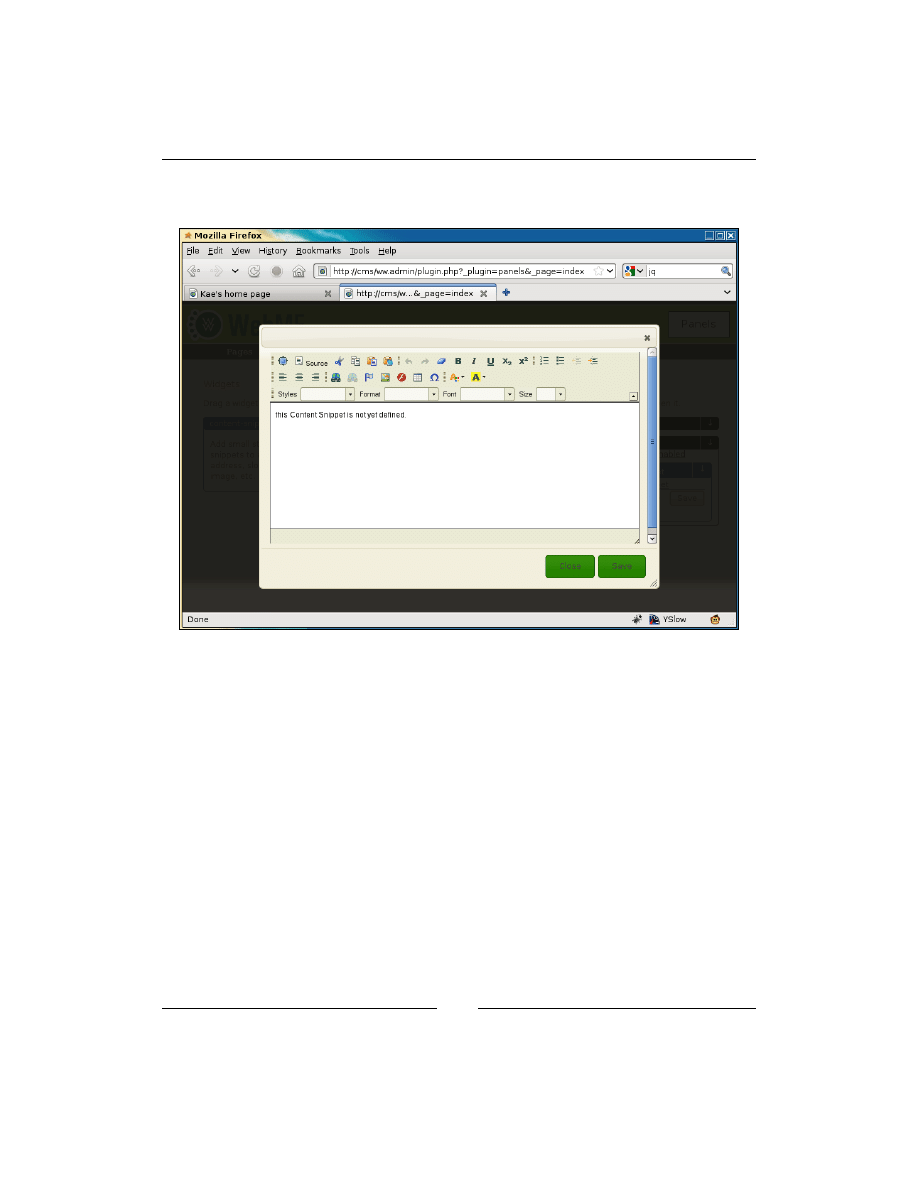
Panels and Widgets – Part Two
[
274
]
The previous block of code will render this to the screen when the view or edit
snippet link is clicked:
You can now insert any HTML you want into that.
Saving the snippet content
The code I've shown doesn't include the Save function. Let's add that now.
Edit the JavaScript part of the file, and replace the line
// leave empty for now
with this:
var html=ww_content_snippet.rte.getData();
$.post('/ww.plugins/content-snippet/admin/'
+'widget-form.php',
{'id':id,'action':'save','html':html},
function(ret){
if(ret.id!=ret.was_id){
el.id='content_snippet_editlink_'+ret.id;
el.href='javascript:content_snippet_edit('
+ret.id+')';

Chapter 11
[
275
]
}
id=ret.id;
var w=$(el).closest('.widget-wrapper');
var wd=w.data('widget');
wd.id=id;
w.data('widget',wd);
updateWidgets(w.closest('.panel-wrapper'));
d.remove();
},
'json'
);
The Save functionality sends the RTE contents to the server.
On the server, we will save it to the database. If an ID was provided, it will be an
update; otherwise, it will be an insert.
In either case, data including the ID is then returned to the client. If the database
entry was an insert, the widget is updated with the new ID.
The panel is then saved to the server in case any of its data (for instance, the widget
data in the case where an ID was created) was changed.
In the PHP section, add this to the top of the file, below the require line:
// { save data to the database if requested
if(isset($_REQUEST['action']) && $_REQUEST['action']=='save'){
$id=(int)$_REQUEST['id'];
$id_was=$id;
$html=addslashes($_REQUEST['html']);
$sql="content_snippets set html='$html'";
if($id){
$sql="update $sql where id=$id";
dbQuery($sql);
}
else{
$sql="insert into $sql";
dbQuery($sql);
$id=dbOne('select last_insert_id() as id','id');
}
$ret=array('id'=>$id,'id_was'=>$id_was);
echo json_encode($ret);
exit;
}
// }
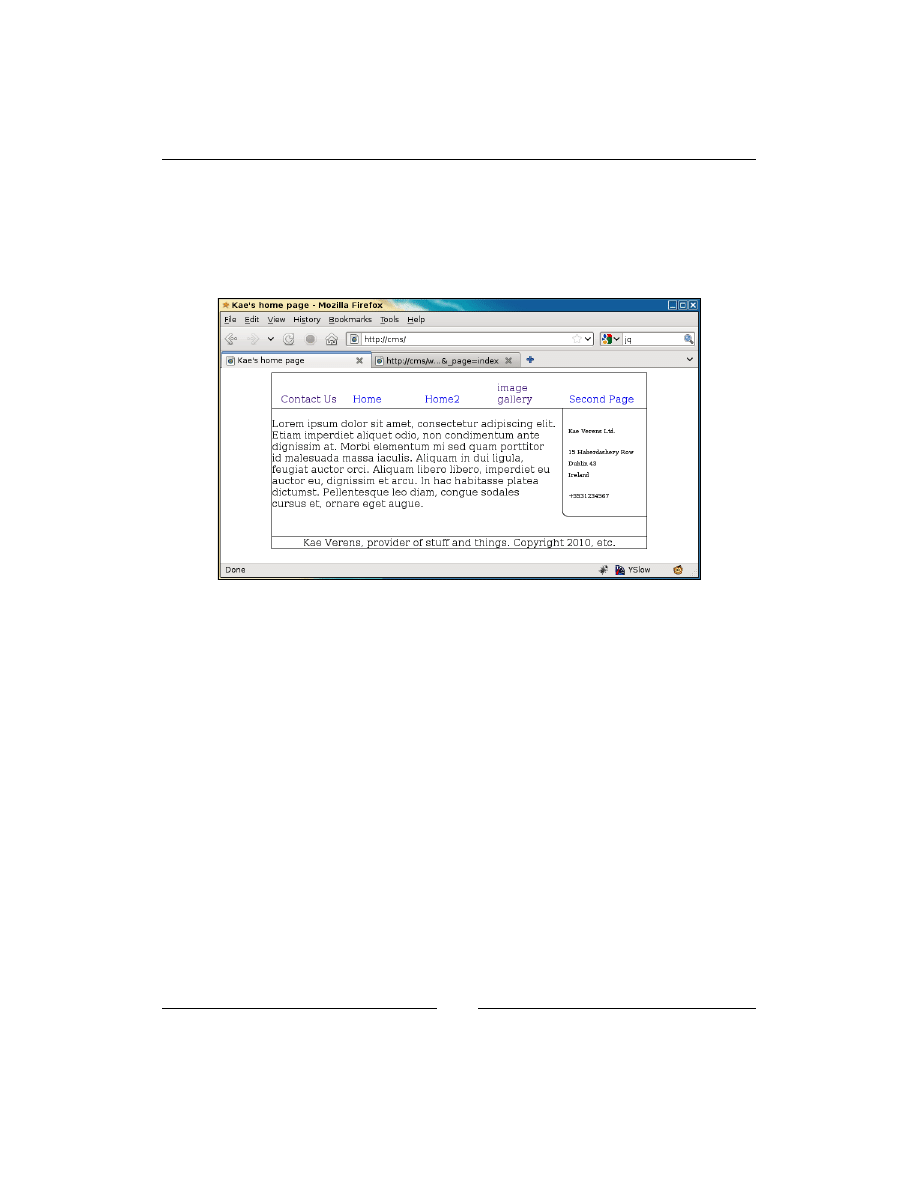
Panels and Widgets – Part Two
[
276
]
This simply saves the offered data into the database and returns the original ID as
submitted, along with the new one, in case an insert was made and the client-side
code needs to update itself.
With this code in place, you can now edit your content snippets, as can be seen in the
following screenshot:
You can see that I've used the panel on the right-hand side to add an address and the
bottom panel to add some standard footer-type stuff.
You can add as many widgets to a panel as you want.
We are now finished with the Content Snippet plugin.
Renaming widgets
In a busy website, it is a nuisance if you have a load of widgets in panels and are
not sure which one you're looking for. For example, if one of the Content Snippet
widgets is an address, it is better that it says address in the panel, than content
snippet.
We've already added the code that calls the function
widget_rename()
, when the
widget header is clicked.
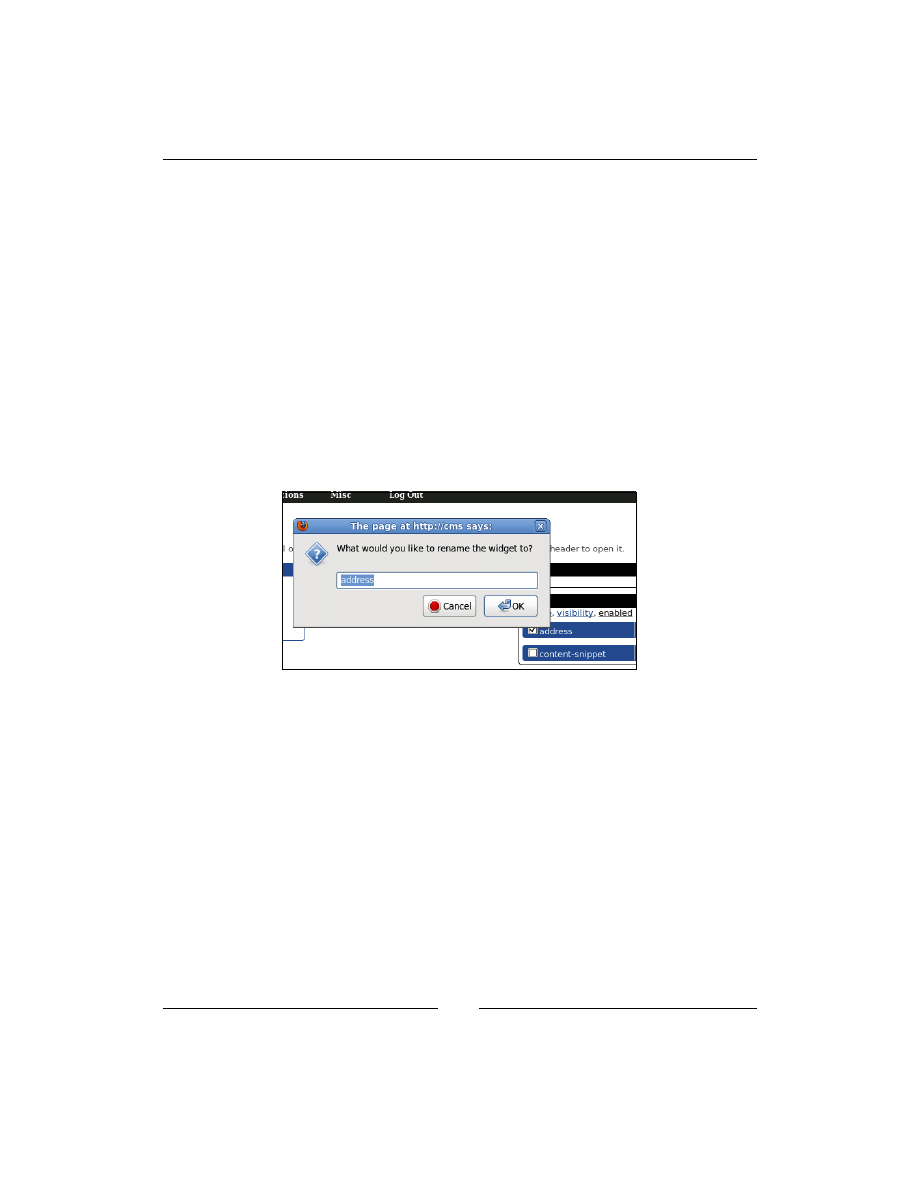
Chapter 11
[
277
]
Replace the stub
widget_rename()
function in
/ww.plugins/panels/admin/js.js
with this:
function widget_rename(ev){
var h4=$(ev.target);
var p=h4.closest('.widget-wrapper').data('widget');
var newName=prompt('What would you like to rename the '
+'widget to?',p.name||p.type);
if(!newName)return;
p.name=newName;
h4.closest('.widget-wrapper').data('widget',p);
updateWidgets($(h4).closest('.panel-wrapper'));
h4.text(newName);
}
Very simply put, this sets
p
to the current widget data, asks for a new name for the
widget, sets
p.name
equal to that new name, and then saves the widget data again.
In small sites where there're only a few widgets in use, this may seem like overkill,
but in more complex sites, this is necessary.
Widget header visibility
On the front-end, you might want to have Address written above the address section
of the panel on the right.
For Content Snippets, this is simple, as you just need to add it to the HTML that
you're already building.
But, if you're using a different widget, then there may not be an editable section of
HTML. For example, in an RSS reader widget, which simply displays a list of items
from an RSS stream, it would be overkill to add an editor for user-controlled HTML.

Panels and Widgets – Part Two
[
278
]
So, for these cases, we provide a check-box in the widget's header which lets you tell
the server to add a
<h4>
element before the widget is rendered.
Add this code to the
js.js
file, replacing the
widget_header_visibility()
stub function:
function widget_header_visibility(ev){
var el=ev.target,vis=[];
var w=$(el).closest('.widget-wrapper');
var p=w.data('widget');
p.header_visibility=el.checked;
w.data('widget',p);
updateWidgets(w.closest('.panel-wrapper'));
}
Similar to the widget renaming section, this simply edits the widget data, saves it,
and updates the visuals.
For the front-end, edit
/ww.plugins/panels/plugin.php
and add the following
highlighted line:
foreach($widgets->widgets as $widget){
if(isset($widget->header_visibility)
&& $widget->header_visibility)
$h.='<h4 class="panel-widget-header '
.preg_replace('/[^a-z0-9A-Z\-]/','',$widget->name)
.'">'.htmlspecialchars($widget->name).'</h4>';
if(isset($PLUGINS[$widget->type])){
if(isset($PLUGINS[$widget->type]['frontend']['widget'])){
This will add a
<h4>
before any widgets you select:
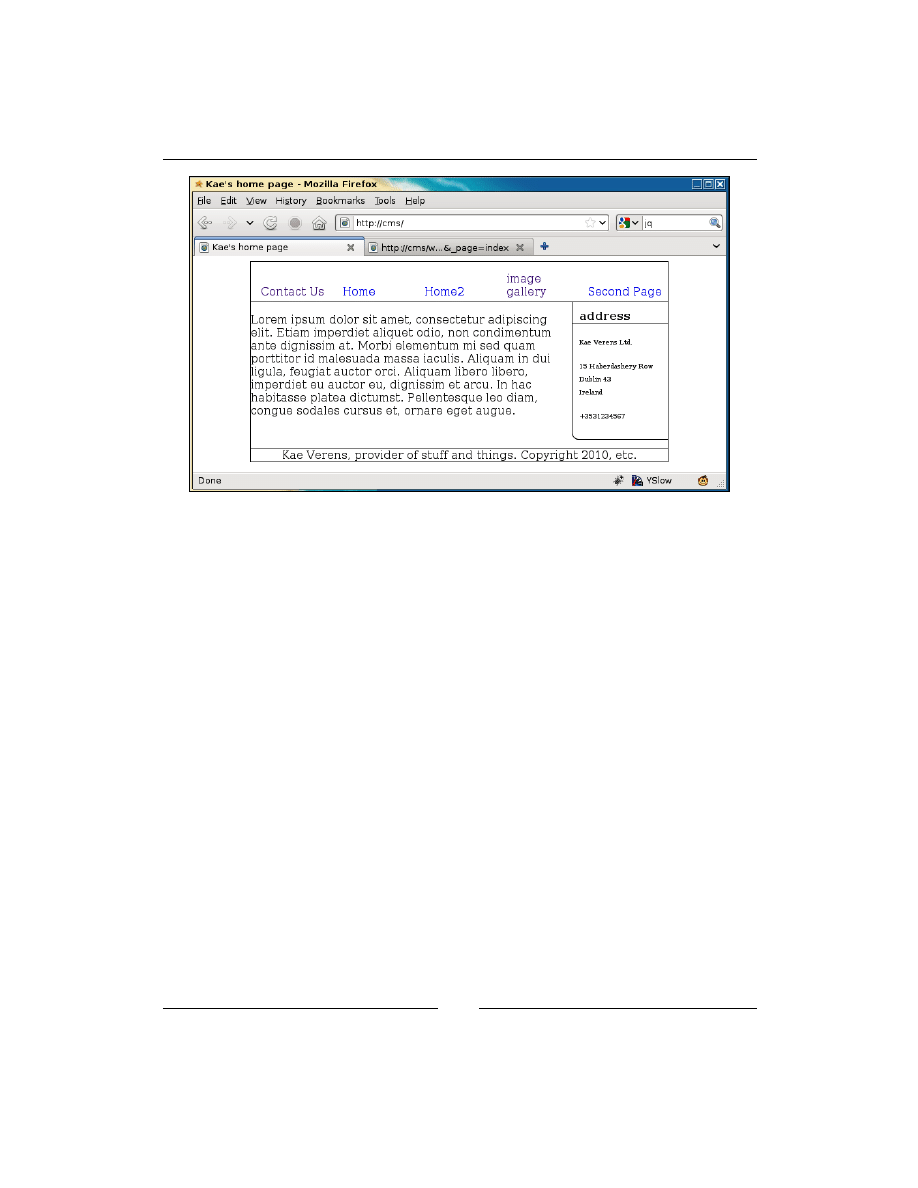
Chapter 11
[
279
]
Notice the address header. Also, notice that I've not added a header to the footer panel.
Disabling widgets
If you have a number of different widgets that you use for different occasions, it is
useful to disable those that you are not currently using, so they don't appear in the
front-end and yet are available to re-enable at any point.
An example of this might be a menu for a restaurant, where the "soup of the day"
revolves based on the day. If there are seven different soups, it's a simple matter to
disable the six that you are not displaying, and each day, enable the next and disable
the previous.
As you can imagine, the admin side code of this is easy, based on the most recent
examples. Edit the
admin/js.js
file and replace the
widget_toggle_disabled()
stub function with this:
function widget_toggle_disabled(ev){
var el=ev.target,vis=[];
var w=$(el).closest('.widget-wrapper');
var p=w.data('widget');
p.disabled=p.disabled?0:1;
w.removeClass().addClass('widget-wrapper '
+(p.disabled?'disabled':'enabled'));
$('.disabled',w).text(p.disabled?'disabled':'enabled');
w.data('widget',p);
updateWidgets(w.closest('.panel-wrapper'));
}
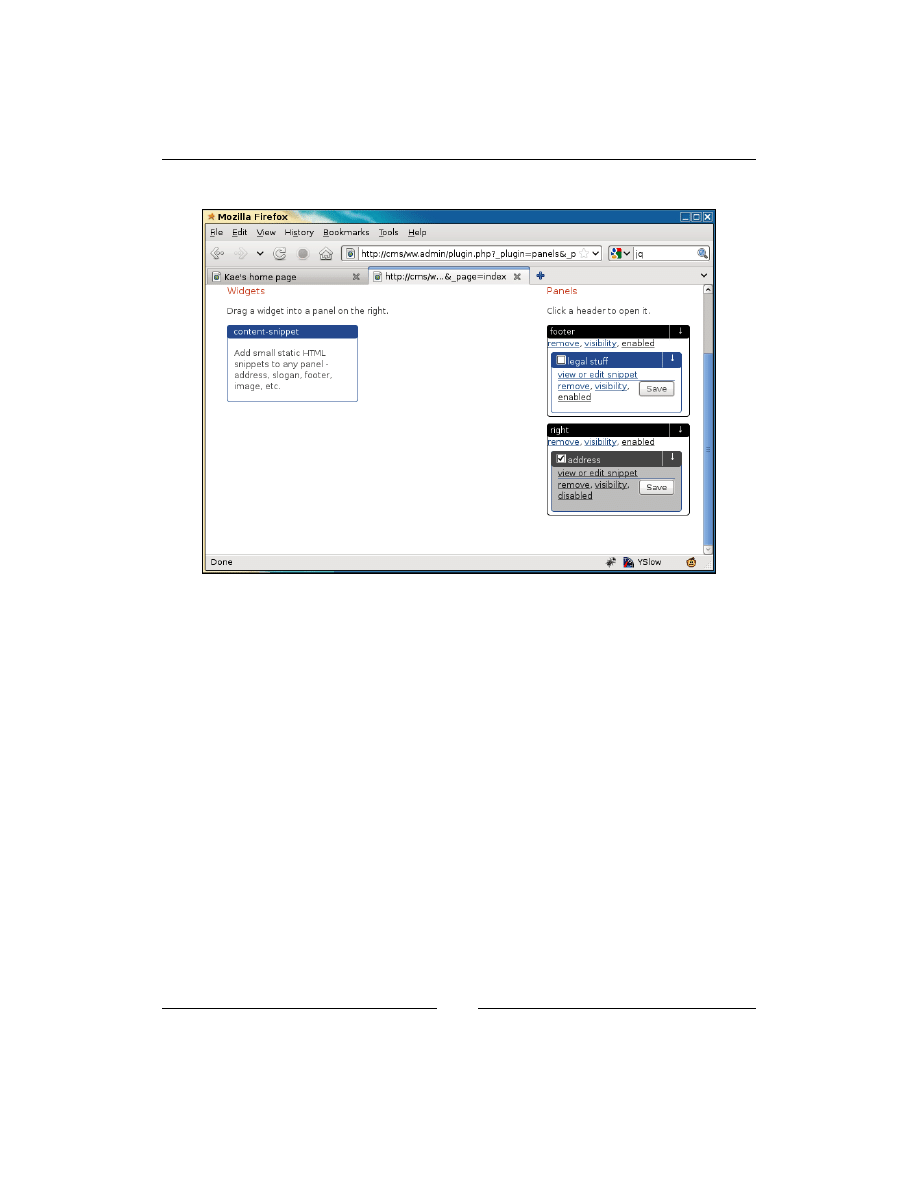
Panels and Widgets – Part Two
[
280
]
In the admin area, after disabling a panel, here's how it looks:
And on the front-end, we simply return a blank string if the panel is disabled.
To do this, edit the
plugin.php
and add the highlighted line:
foreach($widgets->widgets as $widget){
if(isset($widget->disabled) && $widget->disabled)continue;
if(isset($widget->header_visibility)
&& $widget->header_visibility)
$h.='<h4 class="panel-widget-header '
.preg_replace('/[^a-z0-9A-Z\-]/','',$widget->name)
.'">'.htmlspecialchars($widget->name).'</h4>';
If the widget is disabled, you simply ignore that widget and carry onto the next
iteration of the loop.
Disabling a panel
Panels are not recorded the same way as widgets, so there's slightly more work
needed.
The JavaScript is basically the same. We already have the links for remove, visibility,
and enable/disable in there, so it's just a matter of adding the functions they call.
D
o
w
nl
oa
d
fr
om
W
ow
!
eB
oo
k
<
w
w
w
.w
ow
eb
oo
k.
co
m
>

Chapter 11
[
281
]
Add this function to
/ww.plugins/panels/admin/js.js
:
function panel_toggle_disabled(i){
var p=ww_panels[i];
p.disabled=p.disabled?0:1;
var panel=$('#panel'+p.id);
panel
.removeClass()
.addClass('panel-wrapper '
+(p.disabled?'disabled':'enabled'));
$('.controls .disabled',panel)
.text(p.disabled?'disabled':'enabled');
ww_panels[i]=p;
$.get('/ww.plugins/panels/admin/save-disabled.php?id='
+p.id+'&disabled='+p.disabled);
}
This function switches classes and the visible text in the panel to toggle its mode
between enabled and disabled, then calls a server-side file to save the state.
Create the file
/ww.plugins/panels/admin/save-disabled.php
to handle the
saving:
<?php
require $_SERVER['DOCUMENT_ROOT'].'/ww.admin/admin_libs.php';
if(isset($_REQUEST['id']) && isset($_REQUEST['disabled'])){
$id=(int)$_REQUEST['id'];
$disabled=(int)$_REQUEST['disabled'];
dbQuery("update panels set disabled='$disabled' where id=$id");
}
echo 'done';
After the enabled link is clicked (below the panel name), the entire panel is then
disabled and is not visible from the front-end.
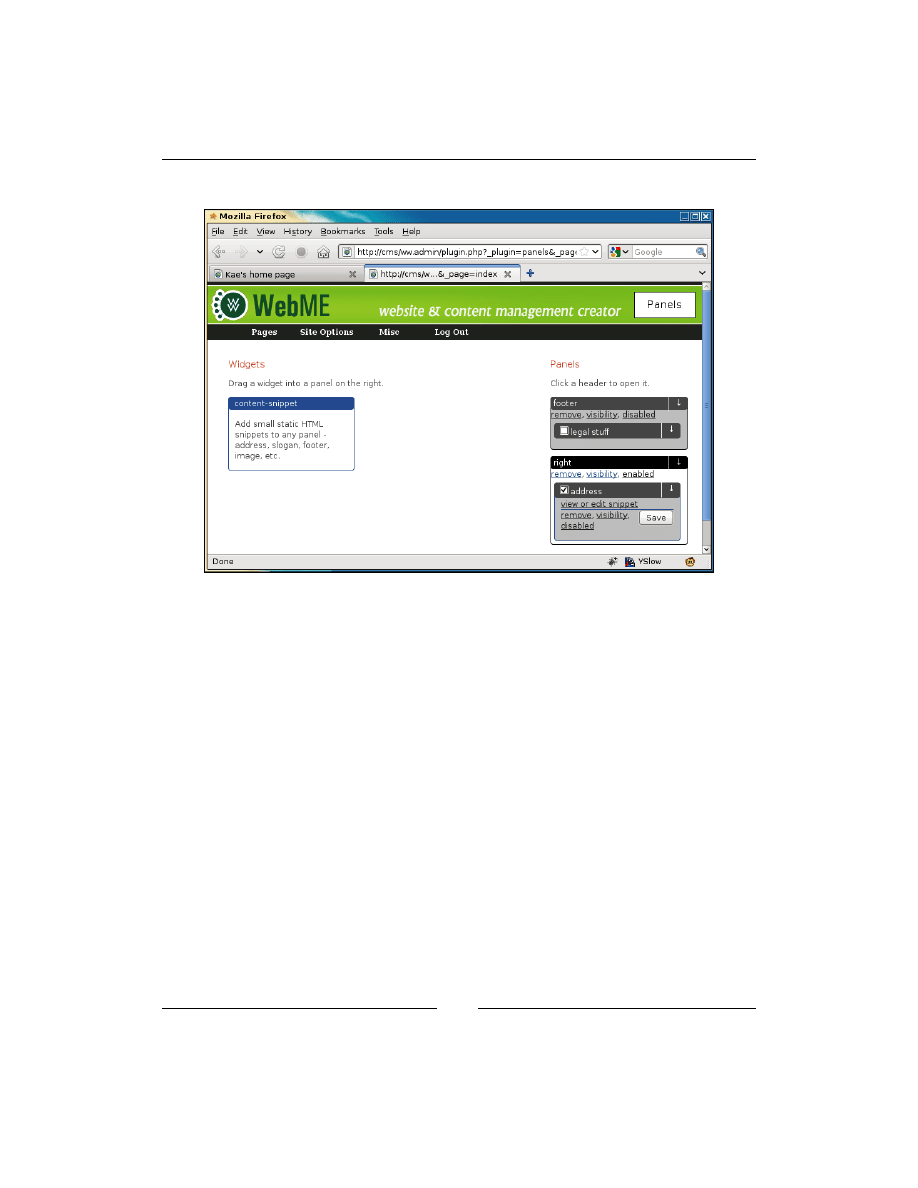
Panels and Widgets – Part Two
[
282
]
In the admin area, this is indicated by graying out the entire panel:
Because the widget statuses are not changed, re-enabling the panel by clicking on
disabled will bring the panel back to the exact status it had before. For example.,
if half the widgets contained in it were disabled, then the exact same widgets are
disabled and the rest are enabled.
Deleting a panel
Panels are tied in with templates. The panels that appear in the admin area depend
on what is visible in the front-end.
Let's say that you were using one theme which had a footer panel and a right panel.
And then, you switch to a new theme which has a header, left panel, and footer.
Loading a page in the front-end will register the new header and left panels, but will
not remove the obsolete right panel.
Panels don't automatically delete when you switch themes. Because we have not tied
a Smarty parser into the panels system, the CMS does not automatically know if a
panel is no longer needed because it is not in the new skin.

Chapter 11
[
283
]
Add the following function to
admin/js.js
:
function panel_remove(i){
var p=ww_panels[i];
var id=p.id;
if(!confirm('Deleting this panel '
+'will remove the configurations of its contained '
+'widgets. Are you /sure/ you want to remove this? Note '
+'that your panel will be recreated (without its '
+'widgets) if the site theme has it defined.'))return;
$.get('/ww.plugins/panels/admin/remove-panel.php?id='+id,
function(){
$('#panel'+id).remove();
});
}
In this function, we first get the panel ID.
Next, we verify that the admin means to delete the panel—once it is deleted, the
widget data will also be deleted, so it's important that the admin realizes this.
Finally, we send to the server to do the deletion, and remove the panel element from
the page.
Here is the server-side file,
/ww.plugins/panels/admin/remove-panel.php
:
<?php
require $_SERVER['DOCUMENT_ROOT'].'/ww.admin/admin_libs.php';
if(isset($_REQUEST['id'])){
$id=(int)$_REQUEST['id'];
dbQuery("delete from panels where id=$id");
}
echo 'ok';
Again, a very simple file.
We first check that the requester is an admin, then remove the table row that
corresponds to the panel ID.
Panel page visibility—admin area code
Sometimes, you will want a panel to appear on only a few pages.
For example, you may have a vertical side panel that you want to appear on all
pages, except for one or two pages which need a lot of space, so you want to hide the
panel on those pages.

Panels and Widgets – Part Two
[
284
]
Instead of creating different templates for these pages, you could simply hide
the panels.
To do this, we first need to select what pages the panel is visible on.
Add the following function to
admin/js.js
:
function panel_visibility(id){
$.get('/ww.plugins/panels/admin/get-visibility.php',
{'id':id},function(options){
var d=$('<form><p>This panel will be visible in <select '
+'name="panel_visibility_pages[]" multiple="multiple">'
+options+'</select>. If you want it to be visible in '
+'all pages, please choose <b>none</b> to indicate '
+'that no filtering should take place.</p></form>');
d.dialog({
width:300,
height:400,
close:function(){
$('#panel_visibility_pages').remove();
d.remove();
},
buttons:{
'Save':function(){
var arr=[];
$('input[name="panel_visibility_pages[]"]:checked')
.each(function(){
arr.push(this.value);
});
$.get('/ww.plugins/panels/admin/save-visibility'
+'.php?id='+id+'&pages='+arr);
d.dialog('close');
},
'Close':function(){
d.dialog('close');
}
}
});
});
}
This function is quite large compared to the previous functions, but it is also more
complex.
In this case, we first retrieve the list of pages already selected from the server and
then show this to the admin.

Chapter 11
[
285
]
The admin selects which pages the panel should be visible on. Click on Save.
This then gets the page IDs of the selected options and saves this to the server.
There are two server-side files to create. First, the file to retrieve the list of pages is
/
ww.plugins/panels/admin/get-visibility.php
:
<?php
require $_SERVER['DOCUMENT_ROOT'].'/ww.admin/admin_libs.php';
function panel_selectkiddies($i=0,$n=1,$s=array(),$id=0,$prefix=''){
$q=dbAll('select name,id from pages where parent="'.$i
.'" and id!="'.$id.'" order by ord,name');
if(count($q)<1)return;
$html='';
foreach($q as $r){
if($r['id']!=''){
$html.='<option value="'.$r['id'].'" title="'
.htmlspecialchars($r['name']).'"';
$html.=(in_array($r['id'],$s))
?' selected="selected">':'>';
$name=strtolower(str_replace(' ','-',$r['name']));
$html.= htmlspecialchars($prefix.$name).'</option>';
$html.=panel_selectkiddies($r['id'],$n+1,$s,$id,
$name.'/');
}
}
return $html;
}
$s=array();
if(isset($_REQUEST['id'])){
$id=(int)$_REQUEST['id'];
$r=dbRow("select visibility from panels where id=$id");
if(is_array($r) && count($r)){
if($r['visibility'])$s=json_decode($r['visibility']);
}
}
if(isset($_REQUEST['visibility']) && $_REQUEST['visibility']){
$s=explode(',',$_REQUEST['visibility']);
}
echo panel_selectkiddies(0,1,$s,0);
First, we make sure (as always) that the request came from an admin.
Next, we define the
panel_selectkiddies()
function that builds up an option list
composed of pages in an hierarchical tree fashion.
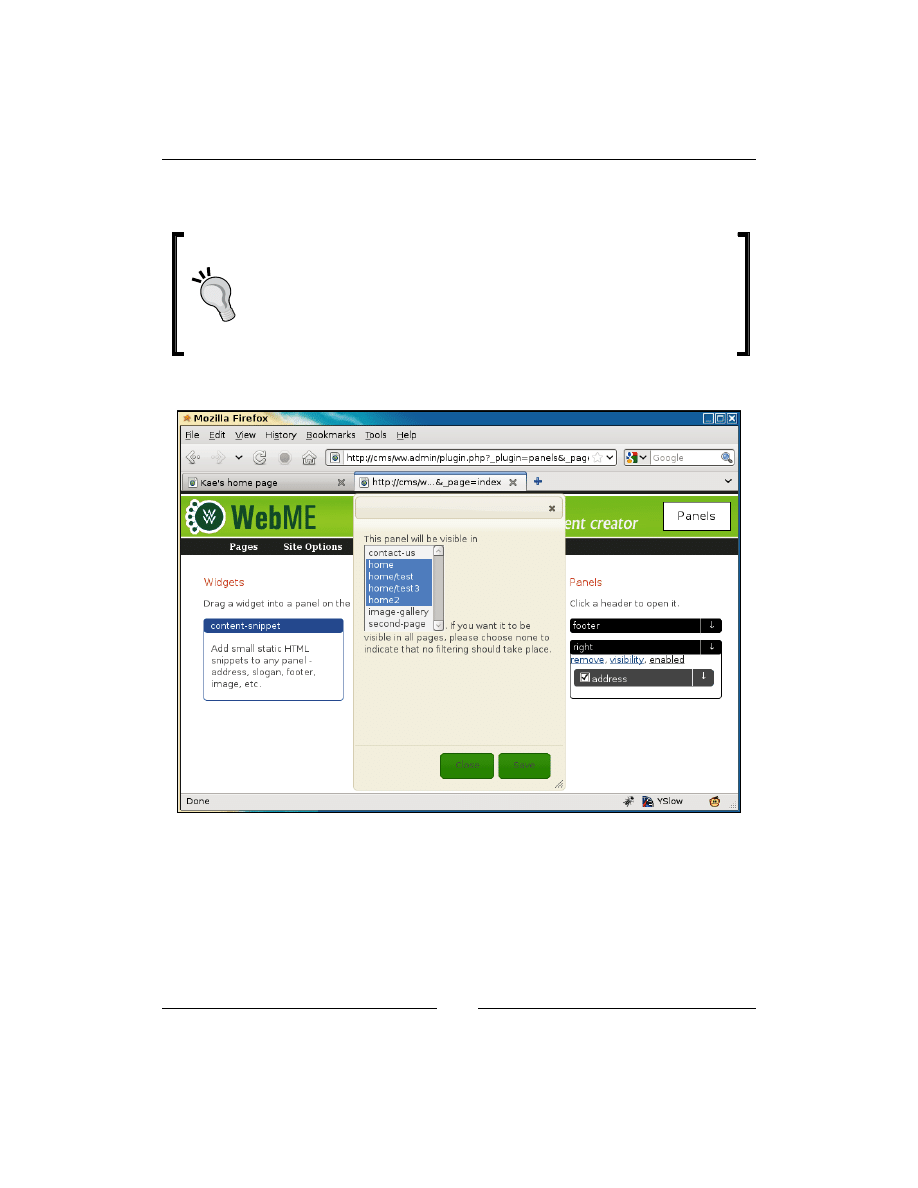
Panels and Widgets – Part Two
[
286
]
Finally, we retrieve the list of pages that are already selected and display the options
using that list, to mark some as selected.
This could easily be added as a function of the core engine.
The main reason it is not currently in the core engine is that we have one
single use case for it and the core functions should really be functions that
are used multiple times.
If you find yourself rewriting functionality that exists in other plugins,
then that functionality should be re-factored and added to the core.
When we click visibility under the panel, this is what we get:
Not very user-friendly, is it?
We can improve this by using the jQuery inlinemultiselect plugin, available from
here:
http://code.google.com/p/inlinemultiselect/
.
The inlinemultiselect plugin, by Peter Edwards, is an enhancement of some work I
did a few years beforehand to make multi-select elements easier to use.

Chapter 11
[
287
]
The version of the file that I'm using is a slight enhancement of the version on the
Google repository. I've submitted my changes back and am waiting for the changes
to be added to the repository.
In the meantime, you can get my version from Packt, by downloading the code for
this chapter.
I place the file as
/ww.plugin/panels/admin/jquery.inlinemultiselect.js
and
then edit the file
/ww.plugin/panels/admin/index.php
to link it in (highlighted
lines):
?>
</script>
<script src="/ww.plugins/panels/admin/js.js"></script>
<script src="/ww.plugins/panels/admin/
jquery.inlinemultiselect.js"></script>
And now, we can amend the
admin/js.js
file to use it. Add these highlighted lines
to the end of the
$.get()
section in
panel_visibility()
:
});
$('select').inlinemultiselect({
'separator':', ',
'endSeparator':' and '
});
});
}

Panels and Widgets – Part Two
[
288
]
And now, the page selection is much more friendly:
You can see what's happened. When the dialog opens, the list of selected pages is
shown inline in the text (you can see the words home and home/test are bold. When
[Change...] is clicked, a pop up appears with the list of pages shown in a check-box
version of a multi-select).
Behind the scenes, the original clumsy multi-select box has been removed and
converted to this nice check-box version.
When submitted, the check-boxes act exactly the same as the multi-select box, so the
server can't tell the difference.
Now, write the save file,
/ww.plugins/panels/admin/save-visibility.php
:
<?php
require $_SERVER['DOCUMENT_ROOT'].'/ww.admin/admin_libs.php';
if(isset($_REQUEST['id']) && isset($_REQUEST['pages'])){
$id=(int)$_REQUEST['id'];
$json='['.addslashes($_REQUEST['pages']).']';
dbQuery("update panels set visibility='$json'
where id=$id");
}

Chapter 11
[
289
]
Again, the server-side code is very simple.
We check that the submitter is an admin, then record what was submitted directly
into the panels table.
Panel page visibility—front-end code
The front-end code is very simple.
Edit the
/ww.plugins/panels/plugin.php
file and replace the "
is the panel
visible?
" comment block with this code:
// { is the panel visible?
if($p['disabled'])return '';
if($p['visibility'] && $p['visibility']!='[]'){
$visibility=json_decode($p['visibility']);
if(!in_array($GLOBALS['PAGEDATA']->id,$visibility))
return '';
}
// }
The visibility field in the table is an array of page IDs. If there are any IDs in the array
and the ID of the current page is not one of them, then the panel is returned blank.
Widget page visibility
The final piece of the Panels plugin is how to manage widget visibility.
Similar to panels, widgets are not always necessary on every page.
For example, you may have a widget which displays the contents of an online store
basket. This widget should not be shown on a page where the online store's checkout
shows the same list.
Or maybe you have some widgets that you want to only appear on very specific pages,
such as showing an RSS feed from the local cinema on a page which reviews a film.
The script works the same way as the panel visibility code.
Open
/ww.plugins/panels/admin/js.js
and replace the
widget_visibility()
function stub with this:
function widget_visibility(ev){
var el=ev.target,vis=[];
var w=$(el).closest('.widget-wrapper');
var wd=w.data('widget');

Panels and Widgets – Part Two
[
290
]
if(wd.visibility)vis=wd.visibility;
$.get('/ww.plugins/panels/admin/get-visibility.php?'
+'visibility='+vis,function(options){
var d=$('<form><p>This panel will be visible in <select '
+'name="panel_visibility_pages[]" multiple="multiple">'
+options+'</select>. If you want it to be visible in '
+'all pages, please choose <b>none</b> to indicate '
+'that no filtering should take place.</p></form>');
d.dialog({
width:300,
height:400,
close:function(){
$('#panel_visibility_pages').remove();
d.remove();
},
buttons:{
'Save':function(){
var arr=[];
$('input[name="panel_visibility_pages[]"]:checked')
.each(function(){
arr.push(this.value);
});
wd.visibility=arr;
w.data('widget',wd);
updateWidgets(w.closest('.panel-wrapper'));
d.dialog('close');
},
'Close':function(){
d.dialog('close');
}
}
});
$('select').inlinemultiselect({
'separator':', ',
'endSeparator':' and '
});
});
}
You can see that this is very similar to the panel visibility code. The main difference
is that the panel code calls the server directly in order to save the page IDs, while this
code records the page IDs in the widget data contained in the panel and then calls
updateWidgets()
to record it.

Chapter 11
[
291
]
On the front-end, the code is just as simple as the panel code. Add the highlighted
lines to
/ww.plugins/panels/plugin.php
:
if(isset($widget->disabled) && $widget->disabled)continue;
if(isset($widget->visibility)
&& count($widget->visibility)){
if(!in_array($GLOBALS['PAGEDATA']->id,
$widget->visibility))continue;
}
if(isset($widget->header_visibility)
&& $widget->header_visibility)
$h.='<h4 class="panel-widget-header '
.preg_replace('/[^a-z0-9A-Z\-]/','',$widget->name)
.'">'.htmlspecialchars($widget->name).'</h4>';
It's the same idea as with panels—we check to see if a list of page IDs is recorded.
If there is and the current page is not in the list, then we don't go any further in the
loop with this widget.
Summary
In this chapter, we enhanced and completed the panels and widgets system such
that you could disable them, choose which pages they were visible on, and
customize the widgets.
In the final chapter, we will build an installer for the CMS.

D
o
w
nl
oa
d
fr
om
W
ow
!
eB
oo
k
<
w
w
w
.w
ow
eb
oo
k.
co
m
>

Building an Installer
Throughout the book, we have built up a CMS. This CMS works on your machine.
The next step is to make sure that it works on other machines as well.
This chapter will cover topics such as:
•
Creating a virtual machine using VirtualBox
•
Creating the installer application
•
Checking for missing features on the server
At the end of this chapter, you will be able to package and release your CMS for
others to use, whether in-house or the general public.
This chapter shows how to detect various settings on the host machine. It is not a
100% complete installer, but it details how the tests can be done. As an example, I
have not added a test to see that MySQL has been installed. You can add your own
detection script for that.
Although it is possible to create and test the installer on your own machine, it's not
ideal—you've already had the CMS installed and running, which means that your
web server is already set up and compatible with the CMS's needs.
Ideally, you should create and test the installer on a machine which has not been
carefully adjusted to match those needs. This way you can alert the eventual admin
who installs the program of any missing requirements.
Because it is unrealistic to have a separate computer for testing each possible web
server configuration, it is best to test using virtual machines.

Building an Installer
[
294
]
Installing a virtual machine
A Virtual Machine (VM) is an emulation of an entire computer, which runs in a
"host" machine, whether it is your laptop, a desktop, or even your company server.
There are many different VM engines out there. Examples include VMWare, QEMU,
VirtualBox, Virtuozzo, Xen—and the list goes on.
In this chapter, we will use VirtualBox, because it's free, and it works on the four
most popular server operating systems: Linux, Windows, Solaris, and OS X.
Installing VirtualBox
You can download a VirtualBox binary for your operating system from this place:
http://www.virtualbox.org/wiki/Downloads
.
I will describe installation using Fedora (a Linux brand). If you are not using this
brand or operating system, use the online material to properly install your program.
First, create a Yum repository configuration file. Yum is a downloader which
automatically installs programs and their dependencies.
Create the file
/etc/yum.repos.d/virtualbox.repo
(from the root of your
machine):
[virtualbox]
name=Fedora $releasever - $basearch - VirtualBox
baseurl=http://download.virtualbox.org/virtualbox/rpm/fedora/\
$releasever/$basearch
enabled=1
gpgcheck=1
gpgkey=http://download.virtualbox.org/virtualbox/debian/\
sun_vbox.asc
Next, install the program with this command:
[root@ryuk ~]# yum install VirtualBox
Note that if you are using a bleeding edge distribution, you may need to change
$releasever
to an older version number of Fedora. At the time of writing, the
current release of Fedora is 13, and Sun (the makers of VirtualBox) has not updated
their servers to include this, so I needed to change
$releasever
to
12
to get the
installation to work:
baseurl=http://download.virtualbox.org/virtualbox/rpm/fedora/\
12/$basearch

Chapter 12
[
295
]
After installation, you may need to configure a kernel module to allow VirtualBox to
run at a reasonable speed. Enter the following command:
[root@ryuk ~]# /etc/init.d/vboxdrv setup
This may require further dependencies, but any error message that shows up will tell
you what those dependencies are.
After these steps, you will have a fully installed VirtualBox application. You can now
start installing a guest operating system.
Installing the virtual machine
The operating system (OS) which runs inside the VM is called a guest. The main
operating system of the machine is called the host.
Installing a guest OS is straightforward. It's almost the same as doing it on the real
machine itself.
First, download an ISO image of the operating system you want to install. ISO is
an archive format which is used to store DVDs and CDs as single files. When you
download any OS from an online repository, it's usually in ISO format.
If you don't have fast bandwidth, you can also get installation DVDs from Linux
magazines.
The choice of operating system is up to you, but you should keep the following
in mind:
1. Don't choose an operating system that you are certain will never need to
be supported. With my own CMS, I never expect it to be run on Windows.
It may be run on any variety of Linux, though. And so, I won't try to run it
on Windows but would choose a variant of Linux (including Unix variants
such as perhaps OS X or Solaris, but with no great effort to make it work for
those).
2. Don't choose a totally up-to-date operating system—the installer should
work on older systems as well—such as systems that have older PHP
installations, or missing Pear dependencies, or older versions of console
applications such as ImageMagick.
3. Try to choose operating systems that are popular. Debian, CentOS, Fedora
and, Ubuntu, are all very popular Linux variants for hosting. Don't focus
all your energy on a variant that you are not likely to come across in
professional life.
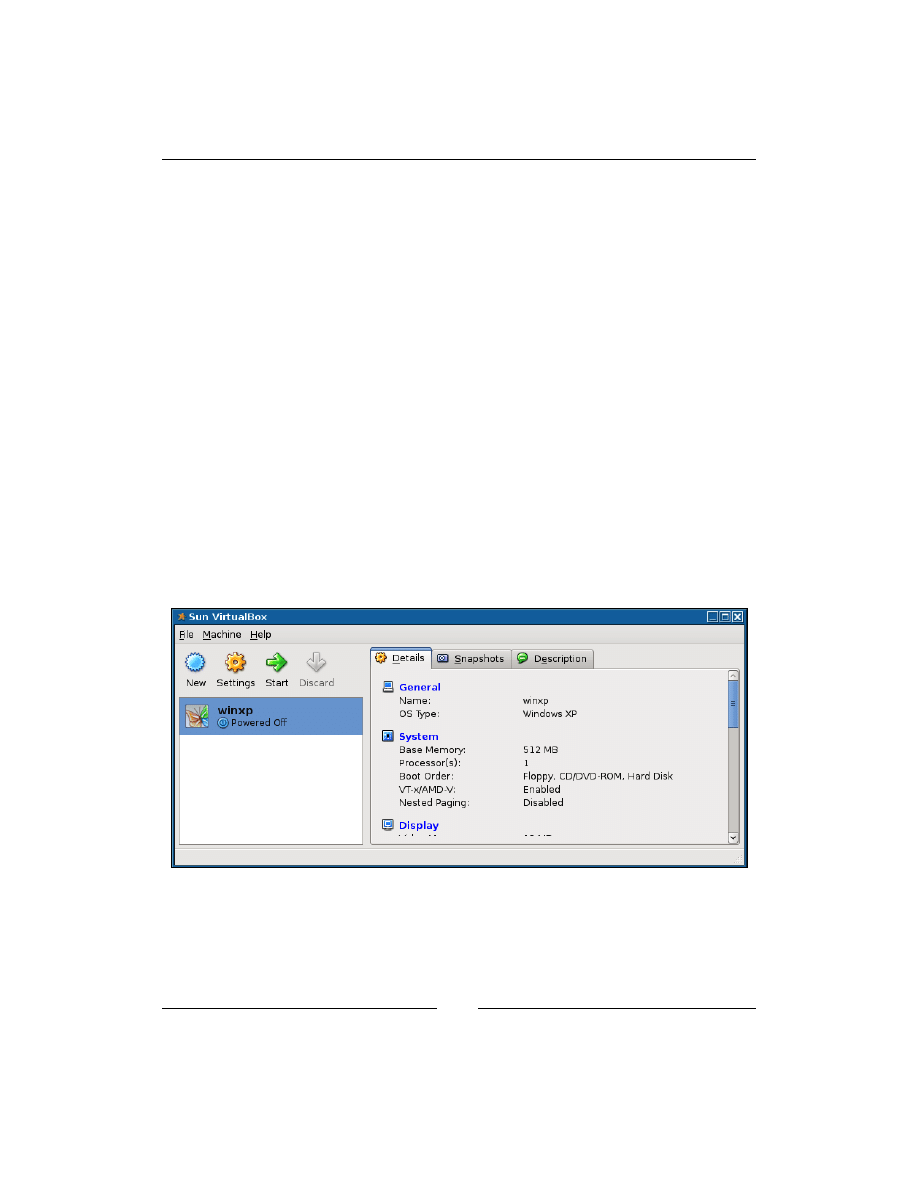
Building an Installer
[
296
]
CentOS 5.2 fits the bill almost perfectly—it's a well-known variant of RedHat
Enterprise Linux, is free to download, and has a very conservative upgrade history.
While Ubuntu and Fedora push the limits of what can be done with Linux, CentOS
is about stability.
You could also use Debian for exactly the same reason. I'm more comfortable
with CentOS.
Go to
http://mirror.centos.org/centos/5/isos/
and download the appropriate
ISO for your machine.
The files online at the time of writing are actually for Centos 5.5, but I have a copy of
5.2 here from a previous installation I did, and the process is identical in both cases
(5.5 is more stable than 5.2, but apart from that, there are not many visible changes).
The file I have is called
CentOS-5.2-i386-bin-DVD.iso
, and the 5.5 equivalent is
CentOS-5.5-i386-bin-DVD.iso
.
Note that this is for installation on your own machine for testing purposes. If
you were to use a production server, you should naturally use the latest version
available, 5.5.
Okay—start up the program. In my machine, it's under Applications | System
Tools | Sun VirtualBox:
You can see from the screenshot that I already had one virtual machine installed
from earlier testing. This also illustrates that virtual machines can be used to install
totally different guest operating systems than the host. The screenshot shows an
installation of Windows XP which is inside a Fedora Linux host.
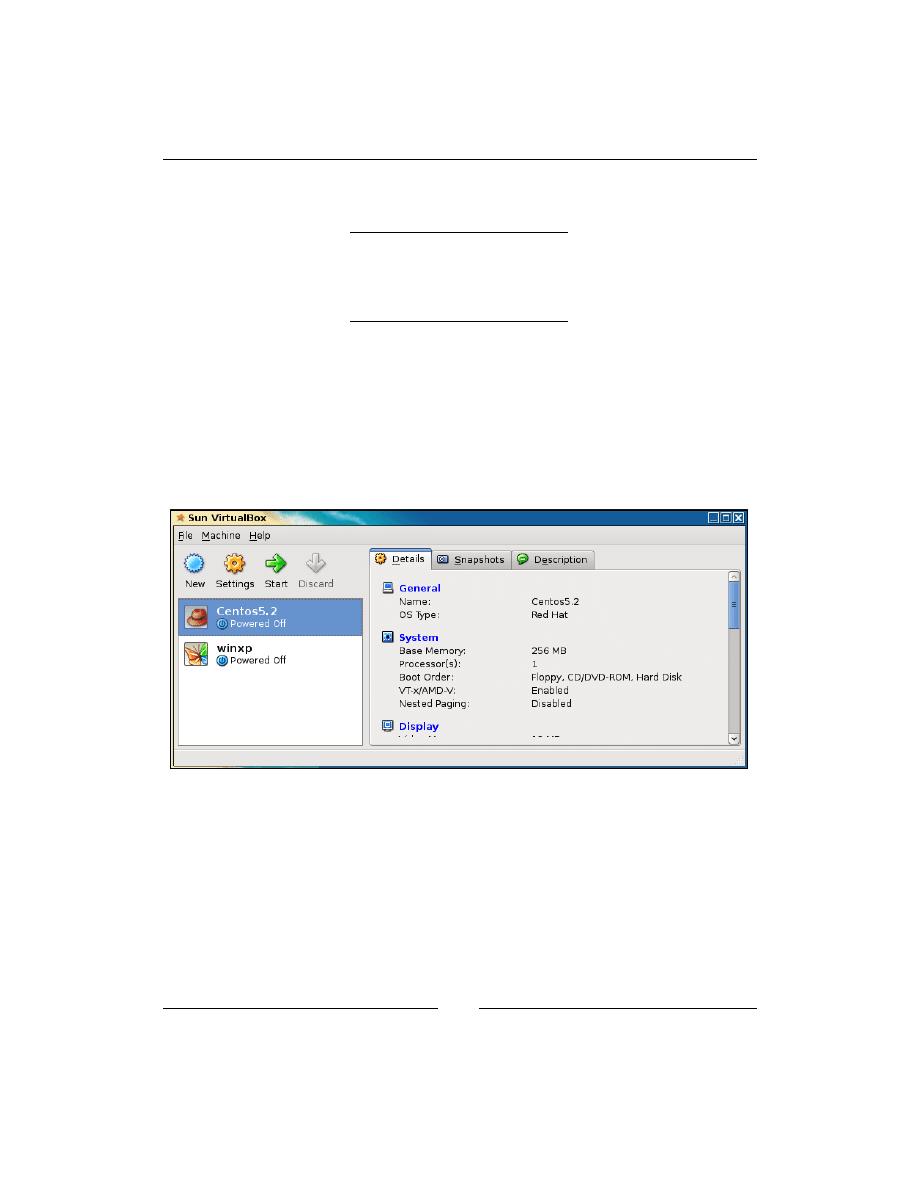
Chapter 12
[
297
]
Click on New, and follow the setup wizard. Here are some suggested answers to the
questions:
Name
Centos5.2
Operating System
Linux
Version
RedHat
Base Memory
256 MB
Boot Hard Disk should be checked, as well as Create new Hard Disk. Click on Next
until the next question appears.
Dynamically expanding storage lets the fake hard disk of the VM expand if it's near
full, so tick that.
Accept the defaults for the rest of the wizard.
On completion, the screen should now appear similar to the next screenshot:
Now, make sure that Centos5.2 is selected, then click on Settings.
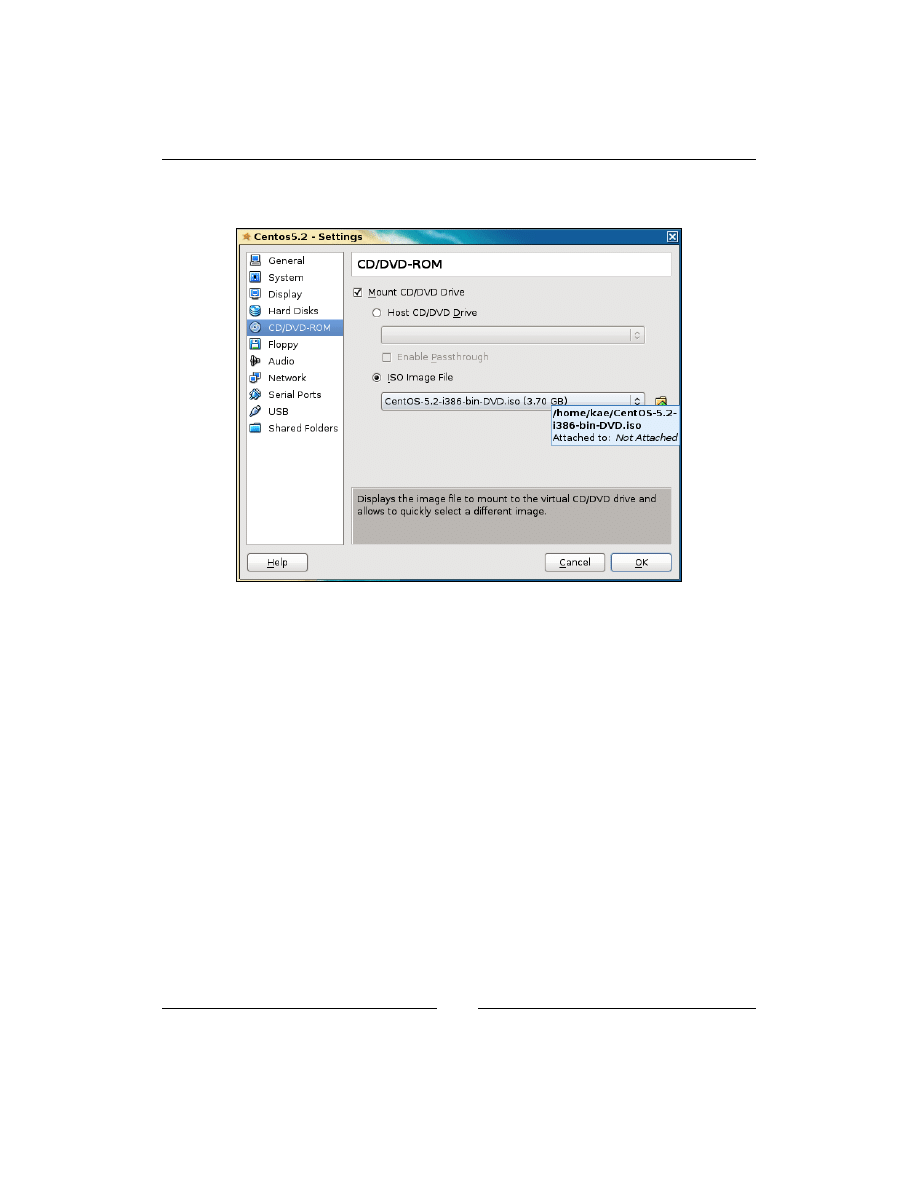
Building an Installer
[
298
]
Click on CD/DVD-ROM, tick Mount CD/DVD Drive, tick the ISO Image file box,
and select the ISO file that you downloaded, as seen in the next screenshot:
Then click on OK.
Now click on Start.
The Centos5.2 machine will boot up, acting like the ISO file you selected was a disk
sitting in the virtual machine's DVD drive.
After a few moments, the installation will begin. Follow the wizard and install your
guest operating system.
In most cases, the default selected option is the correct one, so if you're not sure
about something, just click on OK—it's only a virtual image anyway, so if something
goes wrong, you can always reinstall it.
When the wizard asks you which packages to install, accept the pre-selected
packages and click on Next—we want a default installation which is not tailored to
work with the CMS.
When the wizard is completed, the installation will take place. This can take
anywhere from a few minutes up to half an hour or so:
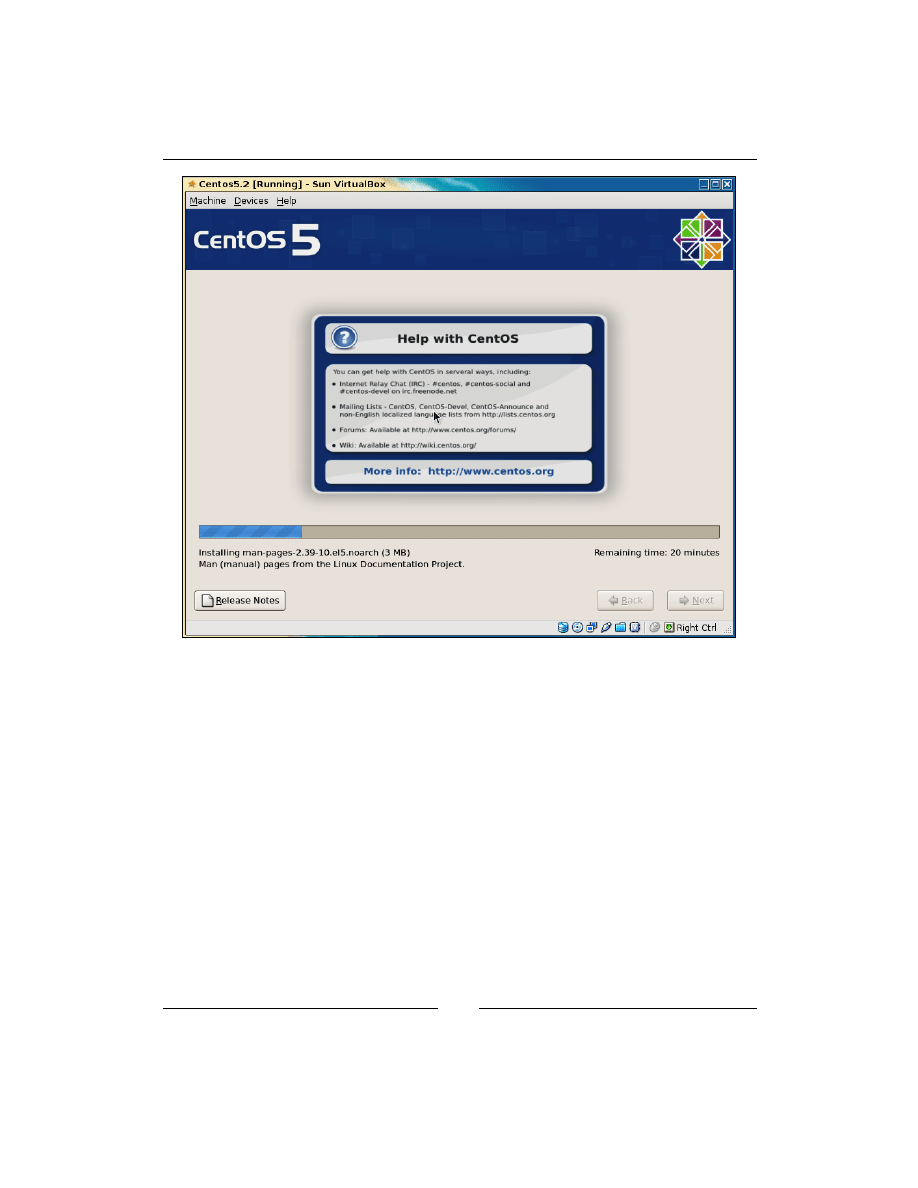
Chapter 12
[
299
]
Notice the Right Ctrl message in the bottom-right-hand side of the screen—when
you click into the VM's window, your mouse and keyboard are trapped by the VM.
To escape from it, so you can select other applications on the host, and use the Right
Ctrl button on your keyboard to release the trap.
Another useful key combination is Right Ctrl + F, which will show the window in full
screen, as if you had booted the laptop or desktop from the guest OS instead of your
main OS.
When the installation is complete, click on the Reboot button in the guest screen. The
virtual machine will reboot.
You will be asked a number of config questions—user setup and so on. Accept the
defaults where possible. Create a user account when asked.
Okay—all done!

Building an Installer
[
300
]
One final thing before we get to the CMS installation: When you log in, the machine
will check for upgrades. Don't bother upgrading. Remember that we want the installer
to work on older machines as well, and upgrading will therefore be pointless.
Installing the CMS in the VM
Now, log in to the guest OS. Open a console (Applications | Accessories |
Terminal),
su
to
root
(use
su - root
, so we have access to
root
's environment
variables) and install the absolute minimum you would expect to find on a hosting
platform—web server, MySQL database, and PHP:
[root@localhost: ~]# yum install httpd php-mysql php mysql\
mysql-server
Note that the PHP version installed with the default CentOS installation will be
out-of-date. In the case of 5.2, the version installed is 5.1.6. This is not recent enough
for our CMS to run (it's missing
json_encode()
, for example), but is a good test for
the installer.
When that's done, we can install the CMS code.
By default, an installation of Apache in CentOS (and most other Linux variants) will
have its default webroot set to
/var/www/html
, so copy your CMS to that location
using FTP, or HTTP, and so on.
Oh—before we go any further, open up the VirtualBox application again,
go into settings for the CentOS 5.2 machine, and uncheck the box next to
Mount CD/DVD Drive.
Otherwise, your VM may try to reinstall itself next time you turn it on.
Transferring the file from your laptop or desktop to the virtual machine can be done
in many different ways, including setting up an FTP server on the guest or host or
creating a shared directory where files are visible in both systems.
Personally, I chose to zip up the latest copy of the CMS, upload it to a file server I
control, and download it through HTTP on the virtual machine. As a PHP developer,
you no doubt also have a file server or web server somewhere where you can
temporarily place a file while transferring it. This is probably the easiest way to
transfer files without any prior preparation.
After unzipping, move all of the contents of your zipped file to
/var/www/html
, such
that in that directory, you have the following files:
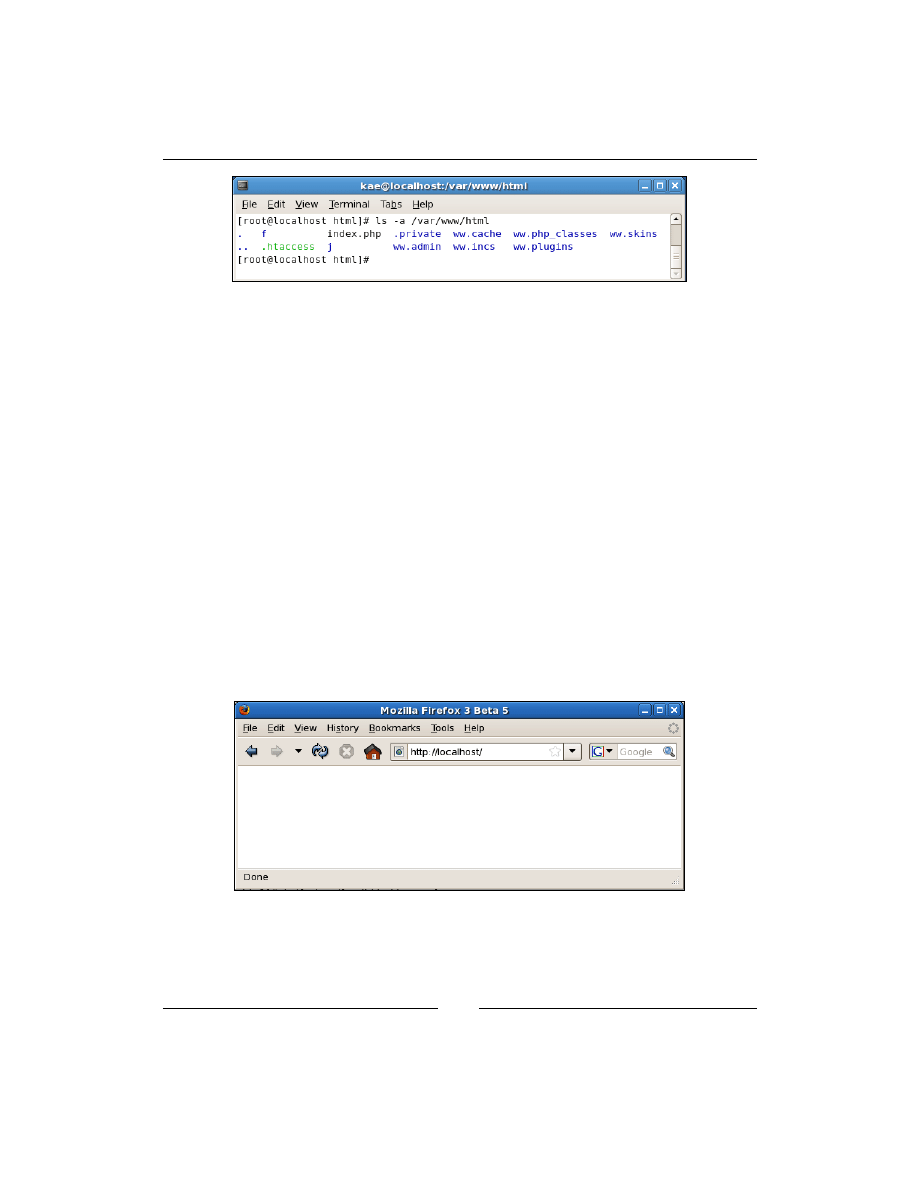
Chapter 12
[
301
]
Note that this is from directly zipping up a working copy of the CMS.
Delete the
.private
,
f
, and
ww.cache
directories—they are specific to an installed
copy of the CMS, and should not be there before the installer places them there:
[root@localhost html]# cd /var/www/html && rm -rf .private \
f ww.cache
Your files are in place. Now we need to start up the web server and database server:
[root@localhost html]# /etc/init.d/httpd start && \
/etc/init.d/mysqld start
And finally, let's make sure those two load up automatically the next time the virtual
machine is turned on:
[root@localhost html]# chkconfig --add httpd && \
chkconfig --add mysqld
Now that your files are in place and the web server is running, you can load up a
browser (Applications | Internet | Firefox Web Browser), and point it at
localhost
:
The screen is blank because the server expects the
.private
directory to be there,
and crashes because it's not found.
This is the point at which we can begin writing the installer.
D
o
w
nl
oa
d
fr
om
W
ow
!
eB
oo
k
<
w
w
w
.w
ow
eb
oo
k.
co
m
>

Building an Installer
[
302
]
Firstly though, make sure that your normal user account can edit the web files—you
should not stay logged in as
root
while working:
[root@localhost html]# chown kae.kae /var/www/html -Rf
Change
kae
in the the command to whatever your user account is.
Creating the installer application
You can either edit the files within the VM, or edit them on the host machine and
upload them to the VM after each change.
Personally, I prefer to edit things in-place, so all work in the rest of the chapter will
happen within the virtual machine itself.
If you are comfortable with Vim (the console-based editor), then you're ready to go.
If not, then either install an editor you are comfortable with, or use gedit
(Applications | Accessories | Text Editor), which is installed by default in most
Linux systems.
Core system changes
The first thing we need to do is to intercept the failed loading of
/.private/config.
php
, and redirect the browser to the installer.
Create the directory
/ww.installer
within
/var/www/html
(all directory references
will be relative to
/var/www/html
in the rest of the chapter), and edit
/ww.incs/
basics.php
:. Add the following highlighted new lines around the existing un-
highlighted line:
if(file_exists(SCRIPTBASE . '.private/config.php')){
require SCRIPTBASE . '.private/config.php';
}
else{
header('Location: /ww.installer');
exit;
}
This checks to see if the
.private/config.php
file exists, and if not, it is assumed
that this is a fresh system, so the server redirects the browser into the
/ww.installer
directory.
And that's all we need to do to the core scripts. Now we can concentrate solely on the
/ww.installer
directory.

Chapter 12
[
303
]
The installer
We need to first decide exactly what the job of the installer is.
In most systems, an installer handles three things:
1. Checking the environment to see if it is suitable for the application.
2. Choosing and entering starter configuration options.
3. Installation of the database.
Based on this, we can extend the installation process to this:
1. Check the environment, including:
°
PHP version. We need the
json_encode()
and
json_decode()
functions, so the version needs to be at least 5.2.
°
SQLite support, for KFM.
°
Writable
/f
,
/ww.cache
, and
/.private
directories.
2. Ask for any admin-entered configuration options needed for the system,
including:
°
MySQL database access codes.
°
Details for the first administrator's user account.
3. Install the database, then save the configuration file to
/.private/config.php
.
You can see that the
config.php
file is created absolutely last. It is also obvious
that if a
config.php
file already exists, then the installer has already been run, and
should not be run again.
Therefore, the first thing we need to do is to create the
/ww.installer/index.php
file and tell it to exit if the installer has already been run:
<?php
if(file_exists('../.private/config.php'))exit;
?>
<html>
<head>
<script src="http://ajax.googleapis.com/ajax/libs/
jquery/1.4.2/jquery.min.js"></script>
<script src="http://ajax.googleapis.com/ajax/libs/
jqueryui/1.8.0/jquery-ui.min.js"></script>
<script src="/ww.installer/js.js"></script>
<link rel="stylesheet" href="/ww.installer/css.css"

Building an Installer
[
304
]
type="text/css" />
</head>
<body>
<div id="header"></div>
<div id="content">please wait...</div>
</body>
</html>
We will handle the configuration through jQuery.
Checking for missing features
First, we need to check for missing features. To do this, we will first show the list of
required features, then use jQuery to ask the server about each of those features one
at a time.
The reason we use jQuery here is purely visual—it looks better to have things appear
to be checked and then removed from the screen, than to just have a PHP-generated
page list the problems.
If all of those feature requirements are resolved, we automatically go forward to the
next step, configuration. Installation on the ideal server will not display the first step
at all, as there will be nothing to resolve.
Create the file
/ww.installer/js.js
:
function step1(){
var tests=[
['php-version','PHP version 5.2 or higher'],
['sqlite','PDO SQLite version 3+'],
['f','Write permissions for user-files directory'],
['ww-cache','Write permissions for cache directory'],
['private','Write permissions for config directory']
]
var html='';
for(var i=0;i<tests.length;++i){
html+='<div id="'+tests[i][0]+'" class="checking">'
+'Checking: '+tests[i][1]
+'</div>';
}
$('#content').html(html);
$('.checking').each(function(){
$.post('/ww.installer/check-'+this.id+'.php',
step1_verify,'json');
});
Chapter 12
[
305
]
}
function step1_verify(res){
}
$(step1);
The last line is what starts everything off—when the page has loaded enough for
JavaScript to safely run, the function
step1()
is called.
This function then draws out a list of points to the screen, as seen in the following
screenshot:
After drawing the points to the screen, a separate HTTP request is called depending
on the check.
For example, for the first item, where the array is
['php-version','PHP version
5.2 or higher']
, the file
/ww.installer/check-php-version.php
is called on
the server.
The result is then passed to the stub function
step1_verify()
.
Let's write the first of the checking files,
/ww.installer/check-php-version.php
:
<?php
if(file_exists('../.private/config.php'))exit;
$vs=explode('.',phpversion());
if($vs[0]>5
|| ($vs[0]==5 && $vs[1]>=2)){

Building an Installer
[
306
]
echo '{"status":1,"test":"php-version"}';
exit;
}
echo '{"status":0,"error":"'
.'The PHP version must be at least 5.2. '
.'It is currently '.phpversion().'",'
.'"test":"php-version"}';
First, we check that the
config.php
file does not exist—we do not want people
snooping on the capabilities of the server, so these checks should only be available
while you're installing.
Next, we check that the version number is greater than 5.2. The version string
returned by
phpversion()
is of the form "x.y.z", so the string needs to be separated
into distinct numbers before it can be compared.
If the version number is higher, then a JSON object is returned containing a status
variable which is true. Basically, it returns a "this is OK" message.
Otherwise, we return an error message.
Now, on the client-side, we want error messages to be highlighted to point out to
the admin that something needs to be done. Edit
js.js
and replace the stub
step1_
verify()
function with this:
function step1_verify(res){
if(res.status==1){
$('#'+res.test).slideUp(function(){
$('#'+res.test).remove();
});
return;
}
$('#'+res.test)
.addClass('error')
.append('<p>'+res.error+'</p>');
}
This simple function first sees if the check was successful, in which case the
displayed text for the check is removed in a sliding motion.
Otherwise, the element is highlighted as being in error. We add the class
"error"
to the displayed
<div>
and add some text explaining what went wrong. The
explanation is sent by the server, allowing it to be tailored specifically to that server if
you want.
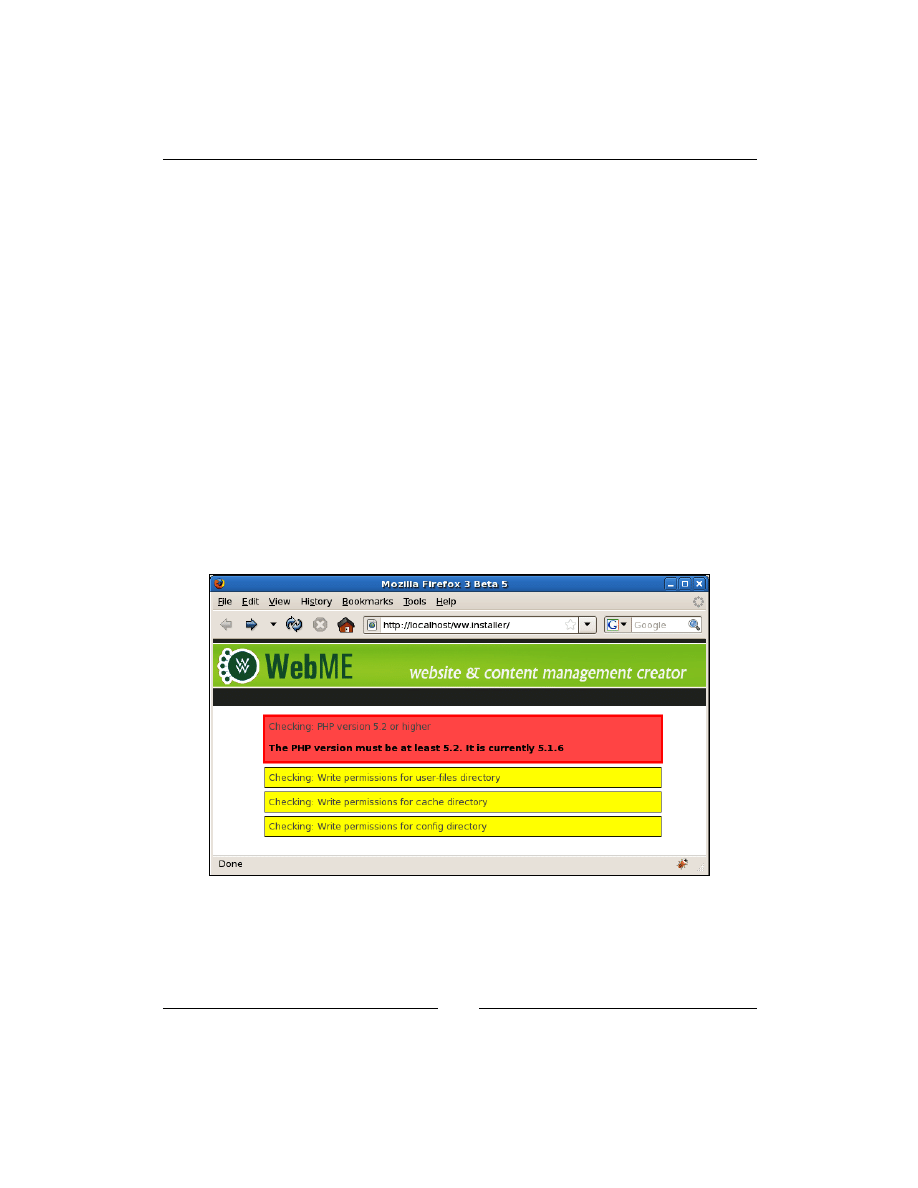
Chapter 12
[
307
]
The other tests are similarly done.
Here is the SQLite one,
check-sqlite.php
:
<?php
if(file_exists('../.private/config.php'))exit;
if(extension_loaded('pdo_sqlite')){
echo '{"status":1,"test":"sqlite"}';
exit;
}
echo '{"status":0,"error":"'
.'You must have the PDO SQLite library installed. '
.'"test":"sqlite"}';
The same process is followed. First, verify that the script is allowed to be run,
then check to see if the requested feature can be verified, and finally, give an error
message if it fails.
The default CentOS 5.2 installation we've installed does have SQLite installed as a
PDO library, but doesn't have the required PHP version, as we can see here:
In this image, you can see that the PHP version has returned an error message with a
clear description of the problem, and the SQLite test succeeded, so has been removed
from the screen.

Building an Installer
[
308
]
There are three remaining tests. They are all basically the same. Here's the first,
/
ww.installer/check-f.php
:
<?php
if(file_exists('../.private/config.php'))exit;
$dname='f';
@mkdir('../'.$dname);
@file_put_contents('../'.$dname.'/test-permissions','test');
if(file_exists('../'.$dname.'/test-permissions')){
echo '{"status":1,"test":"f"}';
unlink('../'.$dname.'/test-permissions');
exit;
}
$dir=preg_replace('/ww.installer$/',$dname,dirname(__FILE__));
if(!is_dir($dir))$error=$dir.' does not exist. '
.'Please create it.';
else $error=$dir.' is not writable by the web server.';
echo '{"status":0,'
.'"error":"'.$error.'",'
.'"test":"f"}';
The other two are basically the same, but for
ww.cache
and
.private
respectively.
Simply copy the above file to
check-ww-cache.php
and
check-private.php
, then
replace the
$dname
value in both with
ww.cache
and
.private
respectively, and then
change the returned
test
variable in the JSON to
ww-cache
and
private
respectively.
The next step is for you to resolve the pointed out problems for yourself.
In my case, that's done by upgrading the PHP version, then creating the user
directories and making them writable by the server.
When the page is then reloaded, you end up with a blank content area.
We need to add a piece of code to watch for this and then move to
step 2
.
So, add this to the bottom of the
step1()
function (highlighted line):
});
setTimeout(step1_finished,500);
}
And then we need to add the
step1_finished()
function:
function step1_finished(){
if($('.checking').length){

Chapter 12
[
309
]
setTimeout(step1_finished,500);
}
else step2();
}
function step2(){
}
This function loops every half-second until the checkpoints are gone. This should
only loop once on any reasonable server and connection, but with slow bandwidth
or a slow server, it will take a few seconds, and you'll see the valid points gradually
vanish as they're checked and verified.
Adding the configuration details
Step two is to ask for information such as database and user details.
So, first, let's display the form. Replace the
step2()
stub function with this:
function step2(){
$('#content').html('<table>'
+'<tr><th id="db" colspan="2">Database name</th></tr>'
+'<tr><th>Name</th><td><input id="dbname" /></td>'
+'</tr>'
+'<tr><th>Host</th><td>'
+'<input id="dbhost" value="localhost" /></td></tr>'
+'<tr><th>User</th><td><input id="dbuser" /></td></tr>'
+'<tr><th>Password</th><td><input id="dbpass" /></td>'
+'</tr>'
+'<tr><th id="ad" colspan="2">Administrator</th></tr>'
+'<tr><th>Email address</th><td><input id="admin" /></td>'
+'</tr>'
+'<tr><th>Password</th><td><input id="adpass" /></td>'
+'</tr>'
+'<tr><th>(and again)</th><td><input id="adpass2" /></td>'
+'</tr>'
+'</table><div class="error" id="errors"></div>');
$('#content input').change(step2_verify);
}
function step2_verify(){
}
This will display a form with the most commonly needed configuration items. It can
be expanded at a later date if you want it to include rarely changed things such as
the database port and so on.
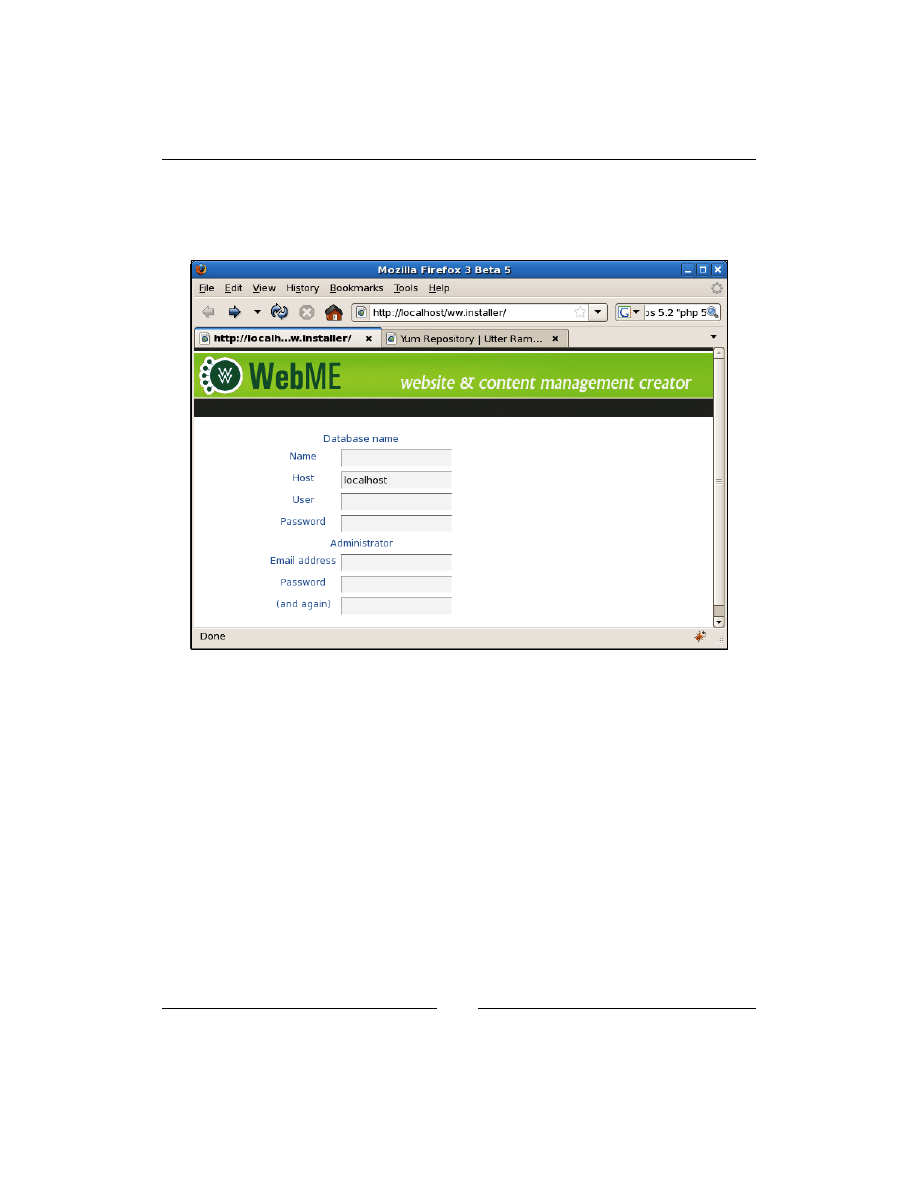
Building an Installer
[
310
]
We print out the form to the page, and set a watch on the inputs such that any
change to them will cause
step2_verify()
to call.
The form looks like this:
Now let's replace the
step2_verify()
stub form:
function step2_verify(){
var opts={
dbname:$('#dbname').val(),
dbhost:$('#dbhost').val(),
dbuser:$('#dbuser').val(),
dbpass:$('#dbpass').val(),
admin:$('#admin').val(),
adpass:$('#adpass').val(),
adpass2:$('#adpass2').val(),
}
$.post('/ww.installer/check-config.php',
opts,step2_verify2,'json');
}
function step2_verify2(res){
}

Chapter 12
[
311
]
This function just grabs all the input values and sends them to the server to be
verified, which then returns its result to the
step2_verify2()
stub function.
Let's start with the verification file. Create
/ww.installer/check-config.php
:
<?php
if(file_exists('../.private/config.php'))exit;
$errors=array();
$dbname=@$_REQUEST['dbname'];
$dbhost=@$_REQUEST['dbhost'];
$dbuser=@$_REQUEST['dbuser'];
$dbpass=@$_REQUEST['dbpass'];
$admin=@$_REQUEST['admin'];
$adpass=@$_REQUEST['adpass'];
$adpass2=@$_REQUEST['adpass2'];
if($dbname=='' || $dbhost=='' || $dbuser==''){
$errors[]='db requires name, hostname and username';
}
else{
$db=mysql_connect($dbhost,$dbuser,$dbpass);
if(!$db)$errors[]='db: could not connect - incorrect '
.'details';
else if(!mysql_select_db($dbname,$db)){
$errors[]='db: could not select database "'
.addslashes($dbname).'"';
}
}
if(!filter_var($admin,FILTER_VALIDATE_EMAIL)){
$errors[]='admin account must be an email address';
}
if(!$adpass && !$adpass2)$errors[]='admin password must not '
.'be empty';
else if($adpass!=$adpass2)$errors[]='admin passwords must '
.'both be equal';
echo json_encode($errors);
This checks the various submitted values, and builds up an array of error strings.
The error strings are then returned.
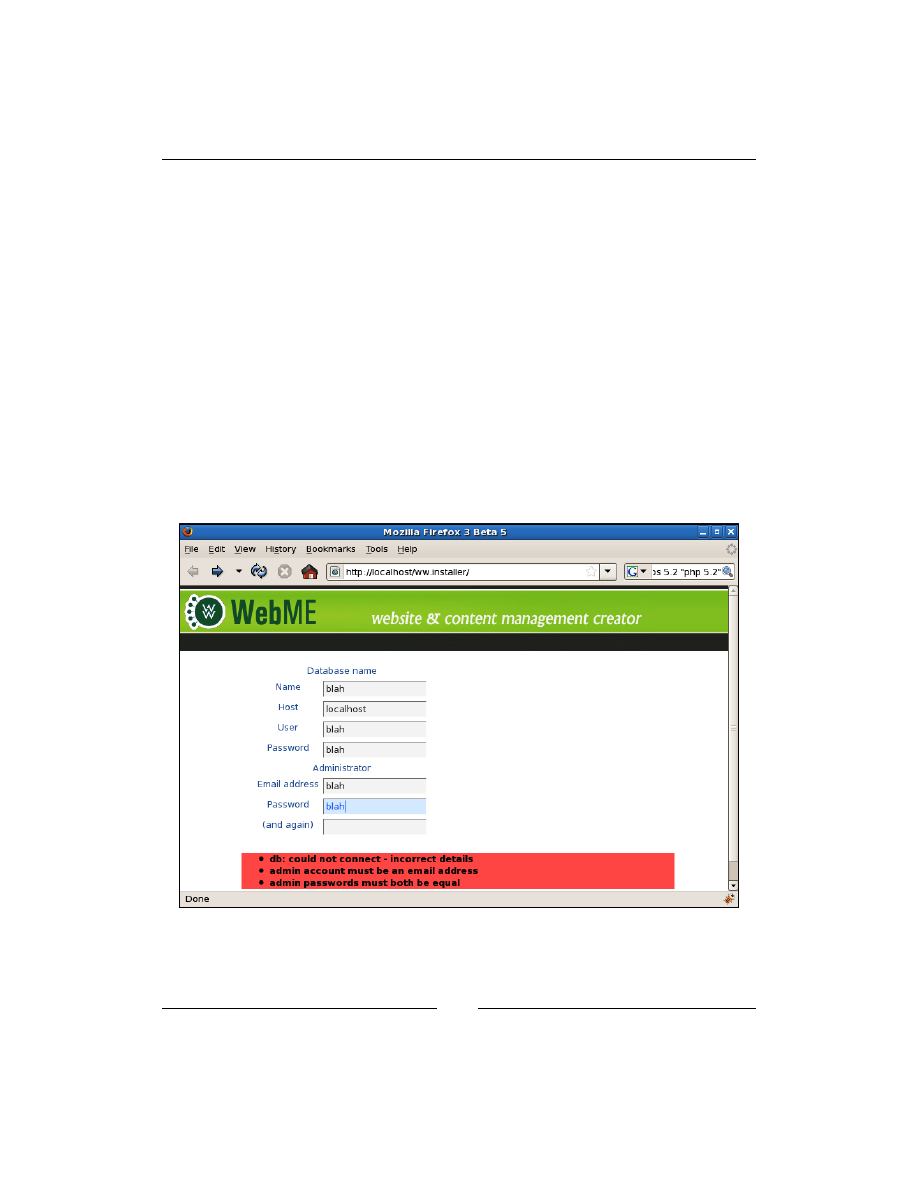
Building an Installer
[
312
]
On the client-side, we then need to display the errors on the screen so the admin
knows what to correct. Edit the
js.js
file again and replace the
step2_verify2()
stub function with this:
function step2_verify2(res){
if(!res.length)return step3();
var html='<ul>';
for(var i=0;i<res.length;++i){
html+='<li>'+res[i]+'</li>';
}
html+='</ul>';
$('#errors').html(html);
}
function step3(){
}
So, if there are no errors returned, then
step3()
is called.
Otherwise, the errors are displayed in a
<ul>
list:
So what do we do when the values are finally correct?
D
o
w
nl
oa
d
fr
om
W
ow
!
eB
oo
k
<
w
w
w
.w
ow
eb
oo
k.
co
m
>

Chapter 12
[
313
]
We need to save the values to file, and then display a message explaining that
we're done.
On the server-side, we know exactly when
step3
will be called, because that's where
we're doing the checking, so all we need to do is to do the
step3
process (saving the
values to the config file) if we find nothing wrong with the submitted values.
To do that, place the following code before the final line of
check-config.php
(highlighted):
if(!count($errors)){
mysql_query('create table user_accounts(id int
auto_increment not null primary key, email text,
password char(32), active smallint default 0, groups
text, activation_key char(32), extras text)default
charset=utf8');
mysql_query('insert into user_accounts values(1,"'
.addslashes($admin).'", "'.md5($adpass).'",
1, \'["_superadministrators"]\',"","")');
mysql_query('create table groups(id int auto_increment not
null primary key,name text)default charset=utf8');
mysql_query('insert into groups values
(1,"_superadministrators"),(2,"_administrators")');
mysql_query('create table pages(id int auto_increment not
null primary key,name text, body text, parent int, ord
int, cdate datetime, special int, edate datetime, title
text, template text, type varchar(64), keywords text,
description text, associated_date date, vars text)
default charset=utf8');
$config='<?php $DBVARS=array('
.'"username"=>"'.addslashes($dbuser).'",'
.'"password"=>"'.addslashes($dbpass).'",'
.'"hostname"=>"'.addslashes($dbhost).'",'
.'"db_name"=>"'.addslashes($dbname).'");';
file_put_contents('../.private/config.php',$config);
}
echo json_encode($errors);
Because there are no errors, we know the configuration is complete and ready for
installation, so we carry on with the installation, installing the core database tables
and then recording the values to the config file
/.private/config.php
.
Finally, the result is returned to the client-side.
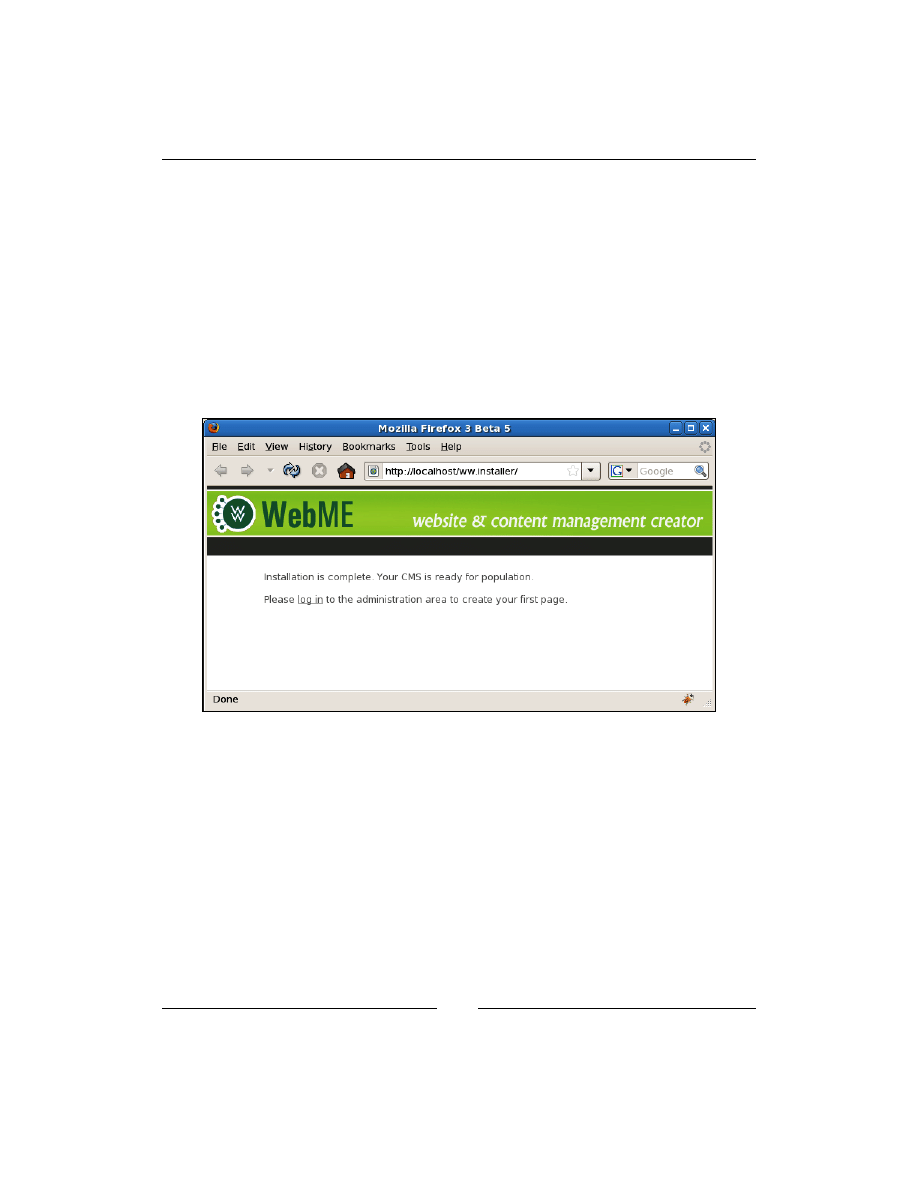
Building an Installer
[
314
]
On the client-side, the result contains no errors, so we display a simple message
saying it's all done. Replace the
step3()
stub function with this:
function step3(){
$('#content').html(
'<p>Installation is complete. Your CMS is ready for '
+'population.</p>'
+'<p>Please <a href="/ww.admin/">log in</a> to the '
+'administration area to create your first page.</p>'
);
}
And with that in place, the CMS is installed:
Note that this does not mean the installer is absolutely finished.
Other problems may arise later, due to unforeseen incompatibilities between the
system and the CMS, which allowed the installation to complete, but don't allow
some unspecified function to work.
When these things happen, all you can do is to find out what the problem is—maybe
you are missing a certain PHP extension or Pear library—add a test for that problem
to the installer, and re-run the installation to make sure that fixes it.
But, for the most part, this is it.

Chapter 12
[
315
]
Summary
In this chapter, we completed the CMS by adding an installer.
You now have a completed CMS, including administration area, plugins, and all the
extensibility that you could possibly need.
From this point forward, doing anything you want with the CMS is up to you—add
new plugins to give new features, or redesign the administration area to suit your
own company. You are free to do as you wish with it.
Have fun!


Index
Symbols
__autoload function
{{MENU}} template function 139
#page-comments-submit anchor 175
A
admin area, CMS 10
admin area login page
forgotten password section 55-60
administration area
B
buildRightWidget() function 260
C
CentOS 5.2
CKeditor
CMS

[
318
]
missing features, checking 304-308
CMS core 7
CMS events 154, 155
CMS files 12
config_rewrite() function 159, 173
configuration details
configuration file
Content Delivery Network (CDN) 42
content snippet plugin
contentsnippet_show() function 265
custom content forms
adding, to page admin form 194-200
D
database structure, CMS 14
datepicker plugin 92
dates
DBVARS['plugins'] variable 160
design templates 115
directory structure, CMS 12, 13
E
event
F
FCKeditor
filament group menu (fg-menu)
file management
form
displaying, on front-end 206-211
form fields
formfieldsAddRow() function 203, 204
Forms plugin
form submission
form_template_generate() function 207
front-end, CMS
front-end gallery
front-end navigation menu
G

[
319
]
grid-based gallery
guest 295
H
Hello World example
page data, reading from database 23-31
host 295
I
Image Gallery plugin
front-end gallery display 232-235
images
kfmget mod_rewrite rule, adding 229, 230
image uploads
initial settings, Image Gallery plugin 224
installer application
J
jQuery
K
KFM
kfm_dir_openNode() function 227
kfmget mod_rewrite rule
L
M
menu
filament group menu (fg-menu), preparing
missing features, CMS
O
P
page admin
page admin form additions 155, 156
page admin, Forms plugin
custom content forms, adding 194-200
page admin section, Forms plugin 190-193
page admin tabs, Image Gallery plugin
page_comments_comment table 178
page content

[
320
]
page-content-created event 155
page management system
file management, KFM used 107-112
rich-text editing, CKeditor used 103, 104
pages
parent select-box, filling 87, 89
page template
selecting, in administration area 147, 149
page variable, Image Gallery plugin
panel
panel plugin
panels
displaying, on front-end 264-266
panels_show() function 246, 250, 264
panels table, fields
plugin config, Forms plugin 188-190
plugin.php file, Image Gallery plugin
plugins
custom admin area menu 166-172
Q
R
reCAPTCHA library
recaptcha-php script
RemoteSelectOptions plugin 191
rich-text editing
S
saved data, Forms plugin

[
321
]
settings tab code, Image Gallery plugin
showWidgetForm() stub function 268
Smarty
running, on page content 150-152
smarty_setup() function 121, 249
Smarty templating engine
step2_verify2() stub function 311
T
tabs
template
templating engines
theme
selecting, in administration area 141-147
this.chooseItem() function 135
top-level pages
trigger
U
updateWidgets() function 262, 290
user_accounts table
user management
V
VirtualBox
Virtual Machine (VM)
VM engines
D
o
w
nl
oa
d
fr
om
W
ow
!
eB
oo
k
<
w
w
w
.w
ow
eb
oo
k.
co
m
>

[
322
]
W
WebME (Website Management Engine) 7
widget forms
panel page visibility, admin area
panel page visibility, front-end code 289
snippet content, saving 274-276
widget page visibility 289-291
widget header visibility() function 277, 279
widgets
panel contents, saving 261-264
widget_toggle_disabled() function 279
widget_visibility() function 289
X

Thank you for buying
CMS Design Using PHP and jQuery
About Packt Publishing
Packt, pronounced 'packed', published its first book "Mastering phpMyAdmin for Effective
MySQL Management" in April 2004 and subsequently continued to specialize in publishing
highly focused books on specific technologies and solutions.
Our books and publications share the experiences of your fellow IT professionals in adapting
and customizing today's systems, applications, and frameworks. Our solution based books
give you the knowledge and power to customize the software and technologies you're using
to get the job done. Packt books are more specific and less general than the IT books you have
seen in the past. Our unique business model allows us to bring you more focused information,
giving you more of what you need to know, and less of what you don't.
Packt is a modern, yet unique publishing company, which focuses on producing quality,
cutting-edge books for communities of developers, administrators, and newbies alike. For
more information, please visit our website:
www.packtpub.com
.
About Packt Open Source
In 2010, Packt launched two new brands, Packt Open Source and Packt Enterprise, in order to
continue its focus on specialization. This book is part of the Packt Open Source brand, home
to books published on software built around Open Source licences, and offering information
to anybody from advanced developers to budding web designers. The Open Source brand
also runs Packt's Open Source Royalty Scheme, by which Packt gives a royalty to each Open
Source project about whose software a book is sold.
Writing for Packt
We welcome all inquiries from people who are interested in authoring. Book proposals
should be sent to author@packtpub.com. If your book idea is still at an early stage and you
would like to discuss it first before writing a formal book proposal, contact us; one of our
commissioning editors will get in touch with you.
We're not just looking for published authors; if you have strong technical skills but no writing
experience, our experienced editors can help you develop a writing career, or simply get some
additional reward for your expertise.
jQuery 1.3 with PHP
ISBN: 978-1-847196-98-9 Paperback: 248 pages
Enhance your PHP applications by increasing their
responsiveness through jQuery and its plugins.
1. Combine client-side jQuery with your server-
side PHP to make your applications more
efficient and exciting for the client
2. Learn about some of the most popular jQuery
plugins and methods
3. Create powerful and responsive user interfaces
for your PHP applications
PHP 5 CMS Framework
Development - 2nd Edition
ISBN: 978-1-849511-34-6 Paperback: 416 pages
This book takes you through the creation of a
working architecture for a PHP 5-based framework
for web applications, stepping you through the
design and major implementation issues, right
through to explanations of working code examples
1. Learn about the design choices involved in
the creation of advanced web oriented PHP
systems
2. Build an infrastructure for web applications
that provides high functionality while avoiding
pre-empting styling choices
Please check
www.PacktPub.com for information on our titles
jQuery 1.4 Reference Guide
ISBN: 978-1-849510-04-2 Paperback: 336 pages
A comprehensive exploration of the popular
JavaScript library
1. Quickly look up features of the jQuery library
2. Step through each function, method, and
selector expression in the jQuery library with
an easy-to-follow approach
3. Understand the anatomy of a jQuery script
4. Write your own plug-ins using jQuery's
powerful plug-in architecture
jQuery UI 1.7: The User Interface
Library for jQuery
ISBN: 978-1-847199-72-0 Paperback: 392 pages
Build highly interactive web applications with ready-
to-use widgets from the jQuery User Interface library
1. Organize your interfaces with reusable widgets:
accordions, date pickers, dialogs, sliders, tabs,
and more
2. Enhance the interactivity of your pages by
making elements drag-and-droppable, sortable,
selectable, and resizable
3. Packed with examples and clear explanations
of how to easily design elegant and powerful
front-end interfaces for your web applications
Please check
www.PacktPub.com for information on our titles
Document Outline
- Cover
- Copyright
- Credits
- About the Author
- Acknowledgement
- About the Reviewers
- Table of Contents
- Preface
- Chapter 1: CMS Core Design
- Chapter 2: User Management
- Chapter 3: Page Management —Part One
- Chapter 4: Page Management— Part Two
- Chapter 5: Design Templates —Part One
- Chapter 6: Design Templates —Part Two
- Chapter 7: Plugins
- Chapter 8: Forms Plugin
- Chapter 9: Image Gallery Plugin
- Chapter 10: Panels and Widgets — Part One
- Chapter 11: Panels and Widgets —Part Two
- Chapter 12: Building an Installer
- Index
Wyszukiwarka
Podobne podstrony:
CMS Design Using PHP and jQuery
Building A Database Driven Website Using PHP And Mysql 2000 Yank
Yank Kevin Building a Database Driven Web Site Using PHP and MySQL
IBM Using Ajax with PHP and Sajax (2005)
informatyka projektowanie systemow cms przy uzyciu php i jquery kae verens ebook
jQuery, PHP, and Forms
Kluwer Digital Computer Arithmetic Datapath Design Using Verilog HDL
81 Group tactics using sweepers and screen player using zon
9 Finite Element Method using ProENGINEER and ANSYS
Control Systems Simulation using Matlab and Simulink
Design Guide 02 Design of Steel and Composite Beams with Web Openings
Next Gen VoIP Services and Applications Using SIP and Java
Penguin Readers Teacher's Guide to using Film and TV
80 Group Tactics 2v2 ( 2) using sweepers and screen player
83 Group tactics using sweeper and screen players in zones
#0434 – Using Coupons and Rebates
Variable Speed Control Of Wind Turbines Using Nonlinear And Adaptive Algorithms
więcej podobnych podstron