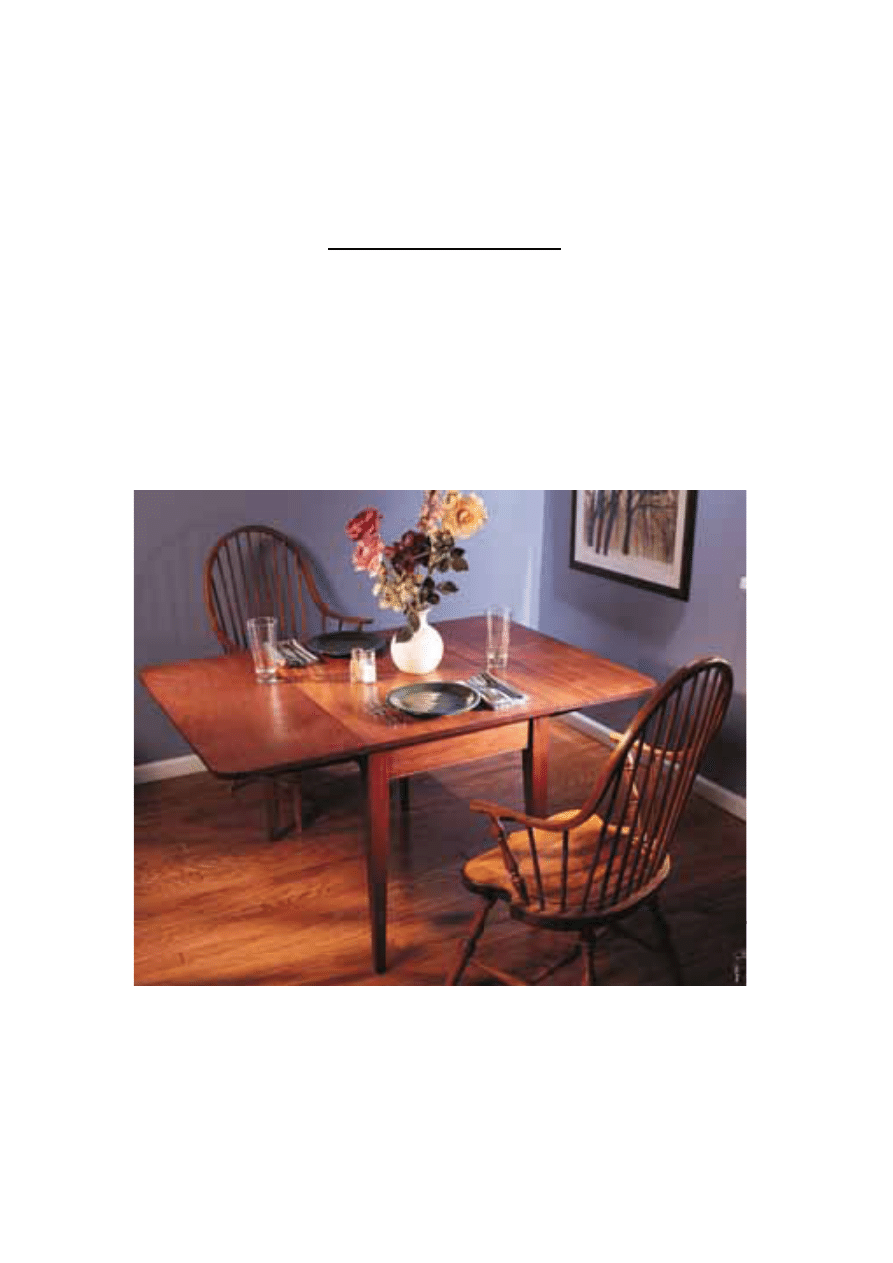
DROP-LEAF TABLE
Roseand Copyright ©2004
Start with the Basics
After cutting all your rough stock to length, surface your wood down to ¾" thick
(except for the legs). The original 19th-century table’s top was only one board.
You can still find mahogany in these widths, but I couldn’t. To obtain the
appropriate width, I had to glue up two boards for both the leaves and the
tabletop. I used three biscuits at each joint to keep the boards aligned during
glue-up. Also, if you can’t get 2¼"-thick stock for the legs, ask for turning blanks
at the lumber store instead; you might just get lucky.
Mortises, Tenons and Tapers
The first step is to make mortise-and-tenon joints where the aprons join the legs.
I made the tenons using a dado stack on the table saw. Cut the shoulders as
shown in the photo on the next page. Make the tenons 3/8" thick, 1" long and
3¼" wide. After cutting your tenons, cut a groove in the aprons for the tabletop
Roseand Copyright ©2004
fasteners, which will attach the top to the table’s base. Make this slot by cutting
a kerf in the aprons that’s 7/16" down from the top edge. For a nice detail, I
routed a bead on the bottom edge of the aprons.
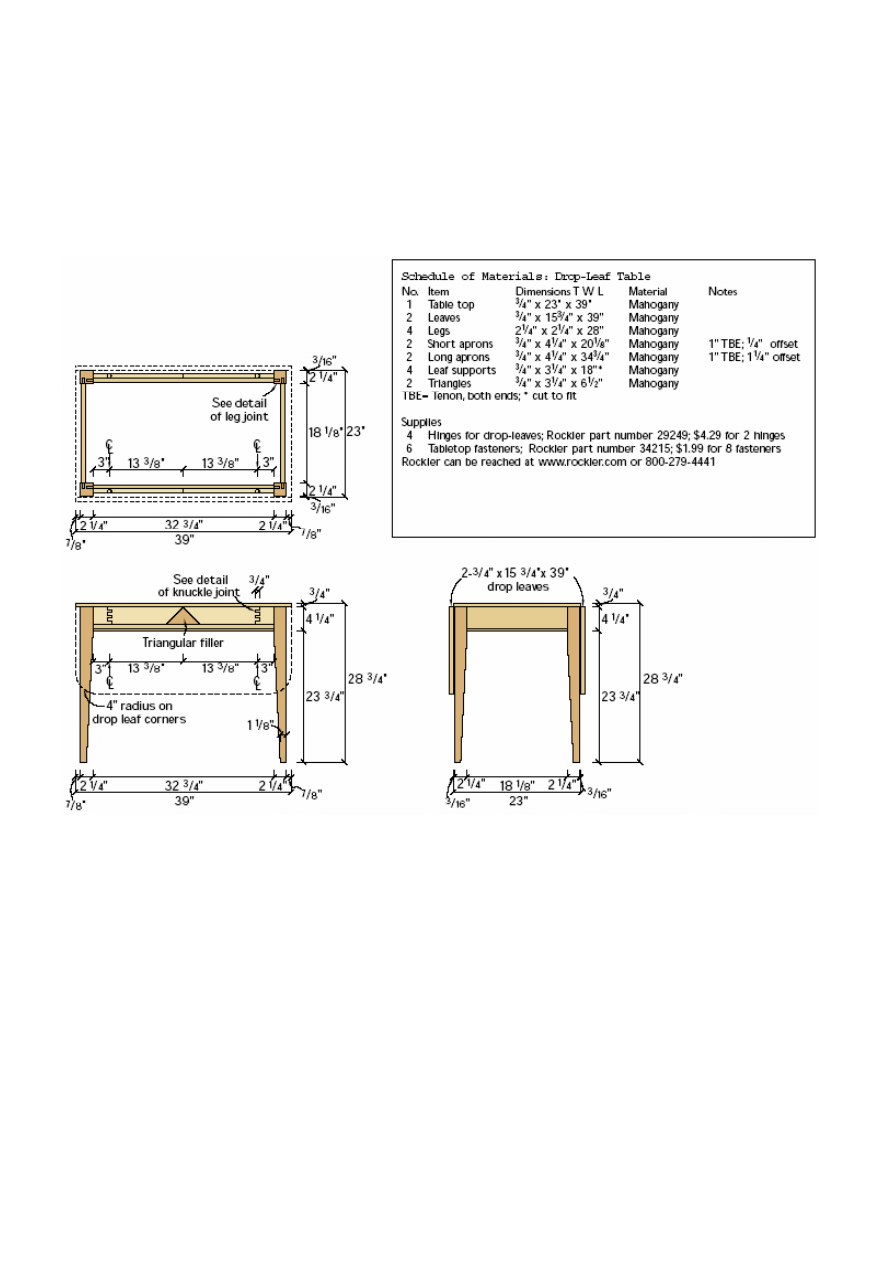
The mortises on all the legs are made 1-7/16" from the inside for the short
aprons and 7/16" from the inside for the long aprons as shown in the diagram
below. Cut your mortises on the legs; I used a mortiser, but you can use a chisel
or Forstner bit.
The original table had turned legs, but in order to simplify things, I tapered the
legs. Tapering jigs for the table saw can be tricky, so I used a band saw to cut
the tapers about 1/16" shy of my line and then cleaned up the cut on the jointer.
The taper should start 1" below where the aprons end and result in a leg that
tapers to one-half the original thickness. Remember: taper only the sides that
have mortises.
Install the Hinges
After tapering, sand the legs and aprons. Start with 100-grit sandpaper, move up
to 150-grit, then finish with 220-grit. Next, glue up the legs and aprons and
clamp. After gluing up the base, turn your attention to the top.
Install the hinges that connect the tabletop to the leaves. Use two on each side,
and place them 7¼" inches from the end to allow room for the leaf supports. Lay
out the location of the hinges by first placing a 1/16" spacer (I used pieces of
plastic laminate) between the leaf and tabletop. Clamp the pieces together, put
the hinges down and trace them with a pencil. Use a router with a straight bit to
hog out most of the area. Then use a chisel to define the corners. Install the
hinges and make sure they work properly.
A 4" radius on the outside corners of the leaves on the original table was a nice
touch. In order to recreate this, I traced the curve from the original and made a
template using a piece of plywood. Cut the shape to size on a band saw and
then use the template with a router and straight bit to finish the radius.
Make the Leaf Supports
To keep the leaves upright, assemble two supports for each side. These are
basically two pieces of wood finger-jointed together to form a “knuckle” joint
hinge. The ½" knuckle joints are made on a table saw using a finger-jointing jig.
Round the edges of the “fingers” with a rasp or sandpaper so the joint pivots.
Then drill a ¼" hole through the fingers and tap a ¼" dowel in place. Instant
wooden hinges. One note: you’ll have to cut a notch in the two supports so
they’ll clear the hinge barrels on the top. Mark the location of the notch when
you dry-assemble the table. The angle cuts on the supports form a triangular
hole against the apron. Cut a triangular piece of mahogany to fill this space,
being careful not to let the filler rub against the supports. For simplicity, you may
use brass hinges instead of knuckle joints.
Sanding and Finishing
Remove the hinges from the tabletop and sand the table. Because the top will
be the most visible surface, I chose to go up to 220 grit. The bottom requires
only 150 grit. In order to simplify finishing, I waited to attach the supports until
after finishing. This requires masking off the area where the support will be
glued. For the finish, I applied a dark mahogany stain made by United Gilsonite
Laboratories (P.O. Box 70, Scranton, Penn. 18501; 800-272-3235;
www.ugl.com). The color is called “118 Dark Mahogany,” order number 11811,
LR1294. Both the phone number and the website can refer you to a retailer in
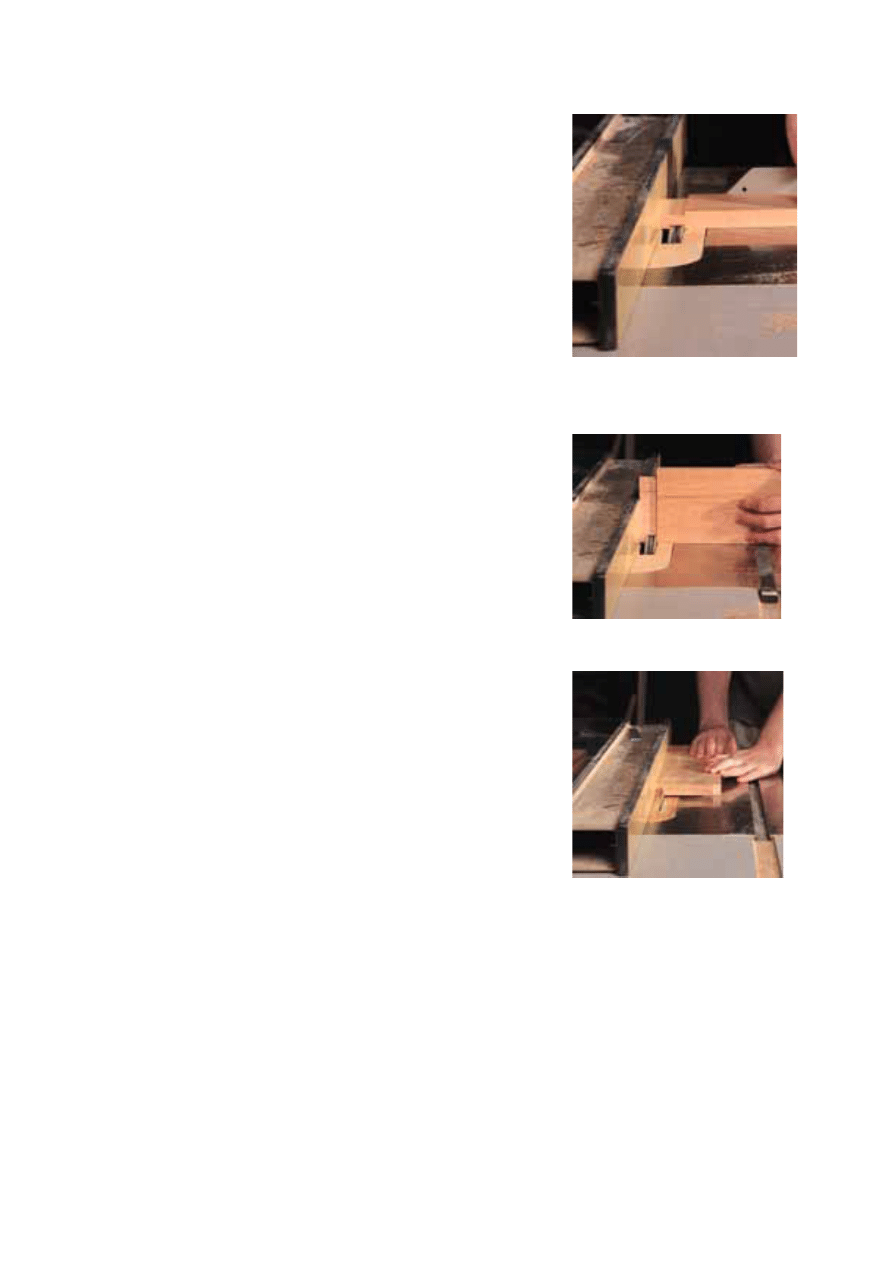
To cut the tenons, use a dado stack on the table
saw. Reduce the tenon in thickness by 3/16" on
each side.
Cut ½" shoulders on each side of the aprons.
You will need to fasten the tabletop using
tabletop fasteners, which requires making a kerf
in the aprons. I made this kerf on the table saw
7/16" from the edge and ¼" deep.
Roseand Copyright ©2004
your area. After letting the stain cure, I applied four coats of clear lacquer.
Final Construction Details
After the lacquer has dried, attach the supports and the triangle with glue and
nails through the inside of the aprons. Place the top on the base and make sure
the supports keep the leaves level. Now attach the top. Because of the
expansion and contraction of wood, you will need to attach the aprons to the
tabletop using tabletop fasteners. These fasteners are available from Rockler
and are listed in the Schedule of Materials. The tabletop fasteners are installed
by simply screwing the fasteners into place. Because the wood will move more
in width than in length over time, be sure to leave more space on the long apron
sides for the fasteners.
Overall, I was extremely pleased with the results of my project. I think my great-
great-grandfather would be proud to know that I’ve continued the family
tradition.
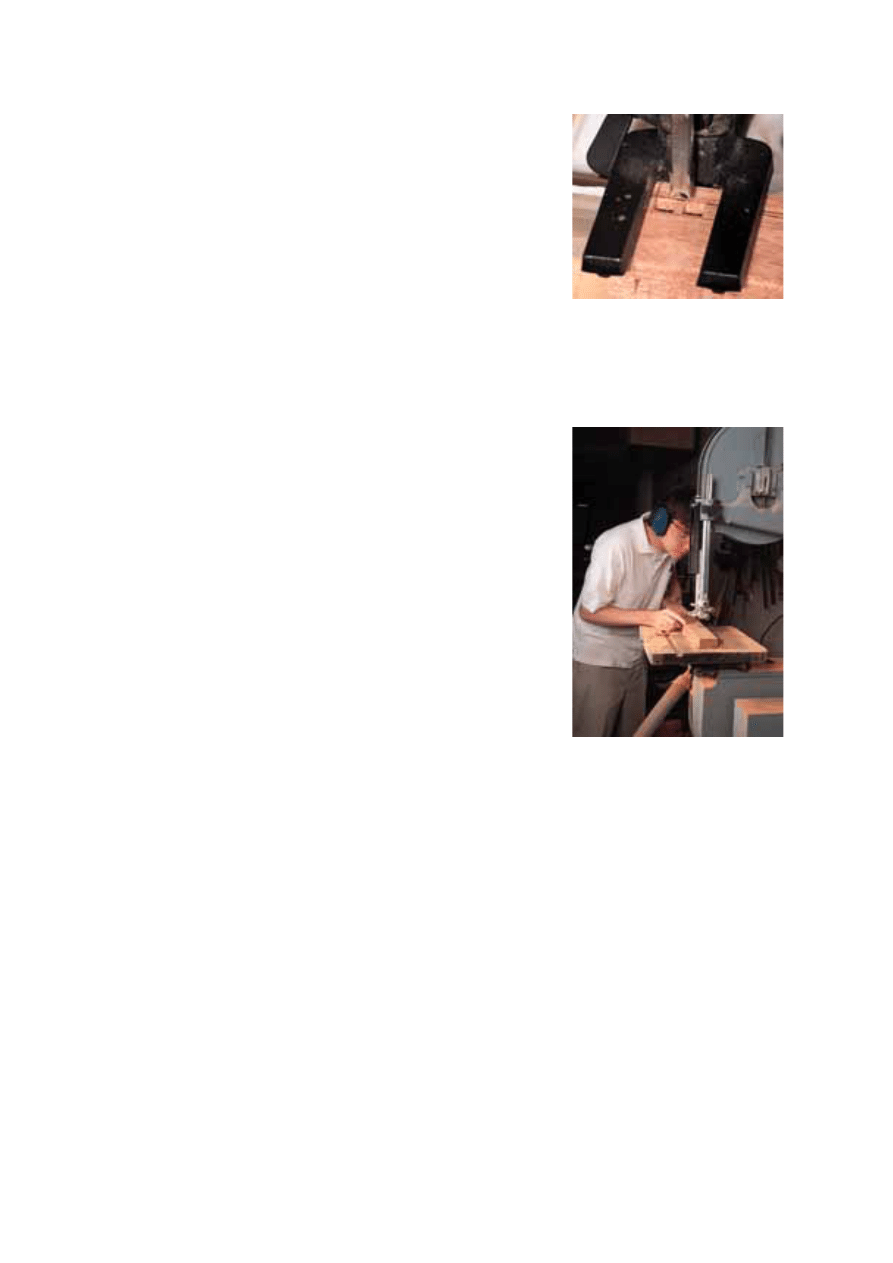
I made the mortises using a mortiser. In order to
form the holes more safely, you should think of
the path of least resistance. Instead of just going
in a straight line from left to right or right to left,
make two holes with a slight gap between. Then
clear out the gap. If you simply work in a straight
line, the mortiser’s chisel could bend or break.
I tapered the legs on a band saw, then ran the
legs over the jointer in order to make them
smooth.
Roseand Copyright ©2004
Wyszukiwarka
Podobne podstrony:
Drop Leaf Table
Drop leaf table
Shaker Single Drop leaf Table
Table Leaf Table
Drop Table
oak dining table
Assessment of cytotoxicity exerted by leaf extracts
Coffee Table 1
table style2, ♥Dokumenty
table cellspacin5, ❀KODY RAMEK I INNE, Ramki
table border (2)
Foresight Resolution Table
Leaf and Apple Calendar Numbers
Chess Table
więcej podobnych podstron