BMW 525iT (E34)
Rear Strut (Shock) Replacement
Note: This should be about a one hour job. But it’s not, because you have to disassemble most of the interior
south of the rear seats to do it. If you know exactly what you’re doing, expect 2-3 hours. Any references to right
or left sides of the vehicle are relative to the driver’s seating position.
Warning:
Replacing strut cartridges properly, and safely, requires use of a spring compressor. The same tool
works for both front and rear struts and only costs ~$30. If you do not have the correct tool for this procedure, do
not attempt it.
ACCESSING THE UPPER STRUT MOUNTS
Remove the following items:
•
rear floor panel over the spare tire area
•
the tray to the right of the spare tire well
•
spare tire cover panel
•
the hatch for the window washer reservoir
•
rear floor panel over the jack storage area
•
the comparable hatch on the driver’s side
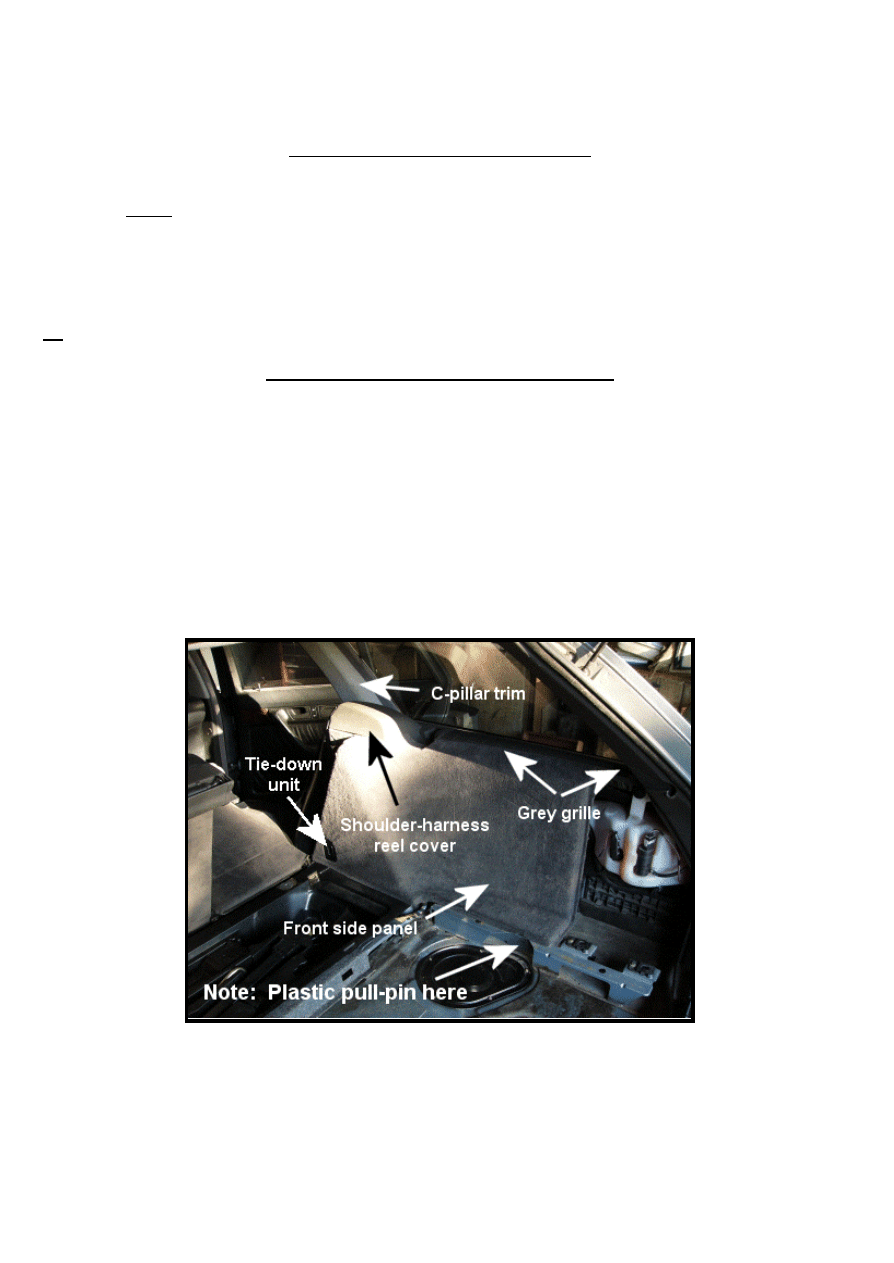
Doing the right-hand side first, you need to remove the items shown in the following photo.
These instructions were developed from performing this work on a 1995 model 525iT; the steps on the
following page will guide you in the process:
To remove the Front side panel:
•
Begin at the right of the Front side panel and remove a 6mm hex bolt that fastens both it and the Grey
grille to the body.
•
Next remove the Plastic pull-pin shown at the bottom of the panel.
•
Remove a Phillips screw just to the rear of the Shoulder- harness reel cover.
•
Finally, there are two T-25 Torx screws behind a plastic cover inside the Tie-down unit. The small
(nearly invisible) cover will pop out by prying it loose using a small screwdriver in a slot found inside.
•
Now rotate the Front side panel out, and downwards, from the bottom and remove it.
To remove the C-pillar trim and Grey gri lle:
•
Pull the edge-guard strip straight off the rear door opening to expose the edge of the C-pillar trim.
•
Pull the rear seat shoulder cushion slightly forward, it’s held by a blade-type clip near the top.
•
Pull the C -pillar trim piece outward and downward from the bottom and set it aside.
•
Remove the other 6mm hex bolt holding the Grey grille in place.
To remove the Shoulder-harness reel cover:
•
Remove the Phillips screw for the cover that was hidden by the C-pillar trim.
•
Lift the reel cover upwards and set it aside.
Congratulations! You can now just lift the rubber boot from the top of the strut tower, which will expose the
three nuts that hold the strut assembly in place. Simply remove the rubber dust cap on the strut, along with these
nuts and store them in a safe place. BMW, of course, recommends that you replace the nuts with new ones.
REMOVING THE STRUT ASSEMBLY
•
Make certain the car cannot move, jack the car up, place it safely on jack-stands while leaving the rear
suspension unsupported and remove the rear tires.
•
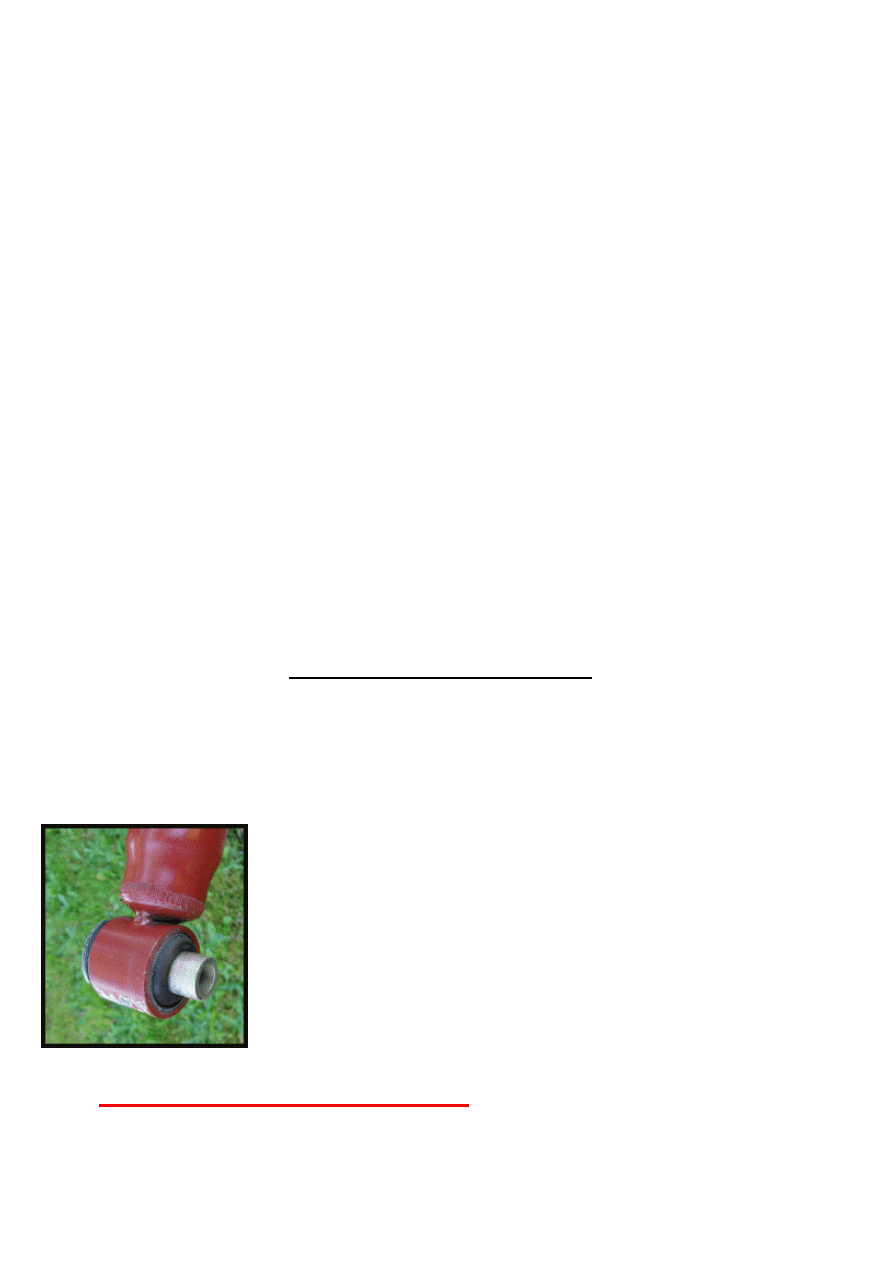
Using a 22mm socket, unfasten, and remove, the lower attachment bolt. The strut assembly should
remain in place because of a sleeve (part of the strut assembly) that fits into a hole in the rear suspension
[see photo below].
My strut just popped loose with a gentle tap from a rubber hammer, but I
have read that removing the strut may be difficult because the sleeve can get stuck
in the hole because of corrosion. You’re on your own if you run into problems in
this area.
Note:
The strut is still partially loaded by the coil spring
. I wouldn’t call it death dealing because you can
install the unit by hand, but injury might occur if you are not careful when it comes loose. If you’re tackling this
job, then you have the responsibility to use good judgment, common sense and work safely, .
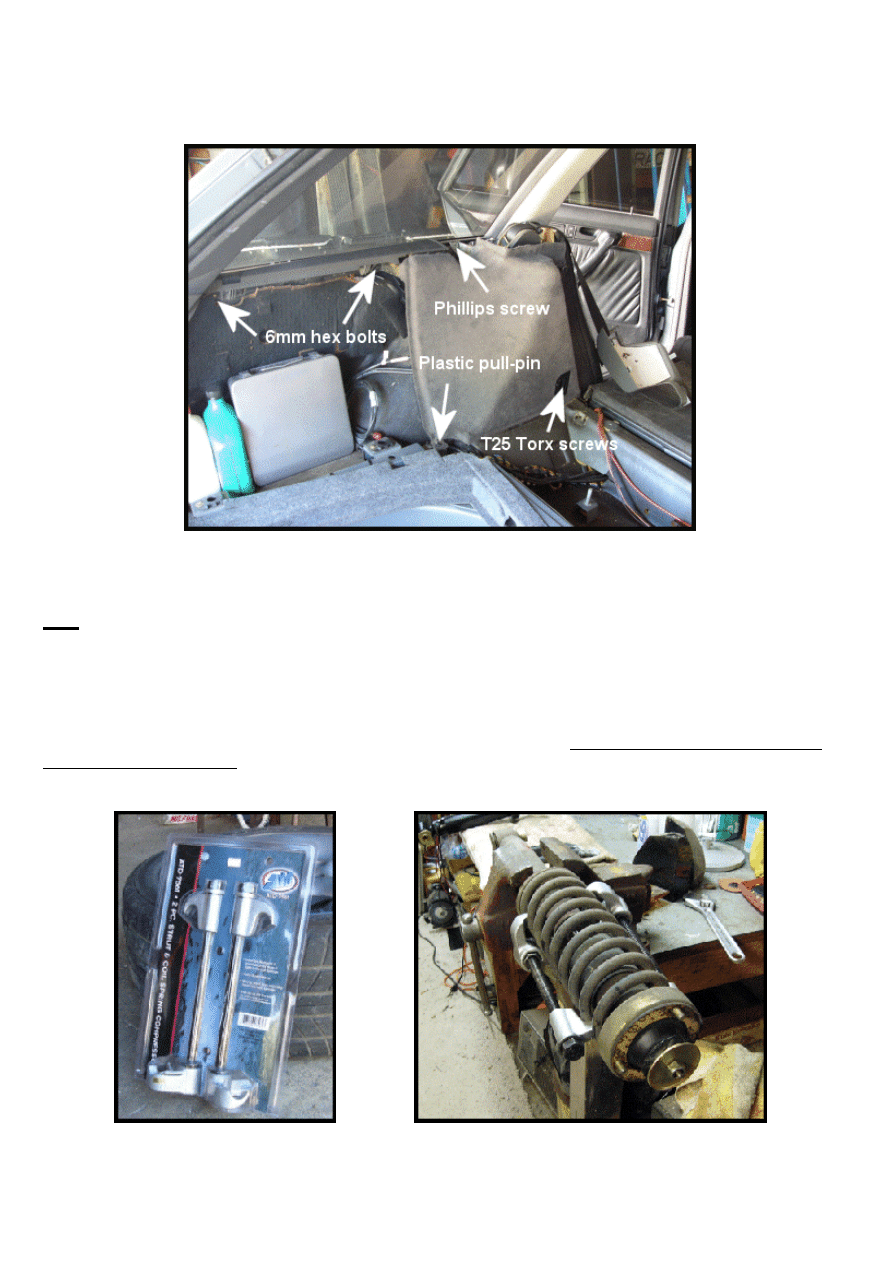
Doing the left-hand side is similar to the right-hand side. The following photo shows the minor difference.
Simply repeat the steps shown for the right-hand side, bearing in mind that right is now left, and
you should have both strut assemblies out and ready for replacement of the cartridges.
Note: The picture above is slightly ahead of the discussion because I actually did the left side first. I made the
mistake of not removing the C-pillar trim and just yarfed on the shoulder-harness cover not realizing that it was
still retained by a Phillips-head screw through a tab behind the C-pillar trim. The good part is that the cover has a
small lip that the C-pillar trim fits into and it still retained its stock appearance.
The next photos show the spring compressor I used. It only cost $30 at my local auto parts store, came
with complete instructions, and it also worked perfectly on the front struts. It’s both safer and easier than trying
to do the job the wrong way.

INSTALLING THE NEW STRUT ASSEMBLIES
The major difference between installation and the removal process is that you first guide the three upper
strut mounting bolts through the holes in the chassis and get the nuts started on the threads. I managed to do this
by myself, but it is a tad easier if you have a friend to help.
Once the upper end has been located, you can align the sleeve on the lower end with hole in the rear
suspension by rotating that end of the strut by using a screwdriver inside of it as a lever. Application of an anti-
seize compound to the outside of the sleeve prior to install should eliminate future problems with corrosion.
Now just apply moderate upward pressure on the end of the strut while guiding the sleeve into the hole in
the rear suspension. Once that is in place, simply reinstall the bolt and tighten all bolts and nuts securely.
And, finally, now you get to experience the sheer joy of reinstalling all that lovely interior that you
removed simply to undo six nuts. If BMW had just made the shoulder-harness cover a slightly different shape
that extended to the surface where the latch pin for the back seats is, and changed a couple of fastener locations,
this would’ve been a much easier job. But, then again, we all know about BMW flat rates and hourly rates. This
way you not only get to save money but get some exercise as well.
Toss on the tires, pull the jack stands, drop the jack and your road rocket will sit properly, no t to mention
handle better than it did before you started this nightmare exercise.
Wyszukiwarka
Podobne podstrony:
ARTICLE SUSPENSION STRUT REAR DISASSEMBLE REASSEMBLE
ARTICLE SUSPENSION STRUT REAR REPLACE INSTALL
BMW E38 schematic Left rear lumbar circuit
BMW 750iL 1995
bmw service training funkfernbedienung e36 1995 172
BMW E38 schematic Right rear lumbar
BMW E38 schematic Rear window defogger
BMW E38 schematic Rear seat heater
Lęk i samoocena na podstawie Kościelak R Integracja społeczna umysłowo UG, Gdańsk 1995 ppt
1995 (11)
39 SC DS300 R BMW 5 A 00 XX
Bmw 01 94 Business Mid Radio Owners Manual
ARTICLE SUSPENSION STRUT FRONT REPLACE INSTALL
Mathematics HL P1 May 1995
02 1995 1
000006516 1995
PONTIAC SUNFIRE 1995 2004
więcej podobnych podstron