2001 thru 2003 E39 Headlight Adjusters
Replacement DIY
Problem: 01+ headlight (made by Hella) adjusters become brittle and break, resulting
in the headlights aiming down. Pre 01, you could replace the adjusters for around $20
from your local BMW dealer. 2001 – 2003 headlights were changed and are “sealed”
with no replacement parts available. Your only option was a complete new assembly
from BMW or go aftermarket. Costs were in the $1000+ range. Through forums
searches I found replacement parts at
www.odometergears.com
for $85/side.
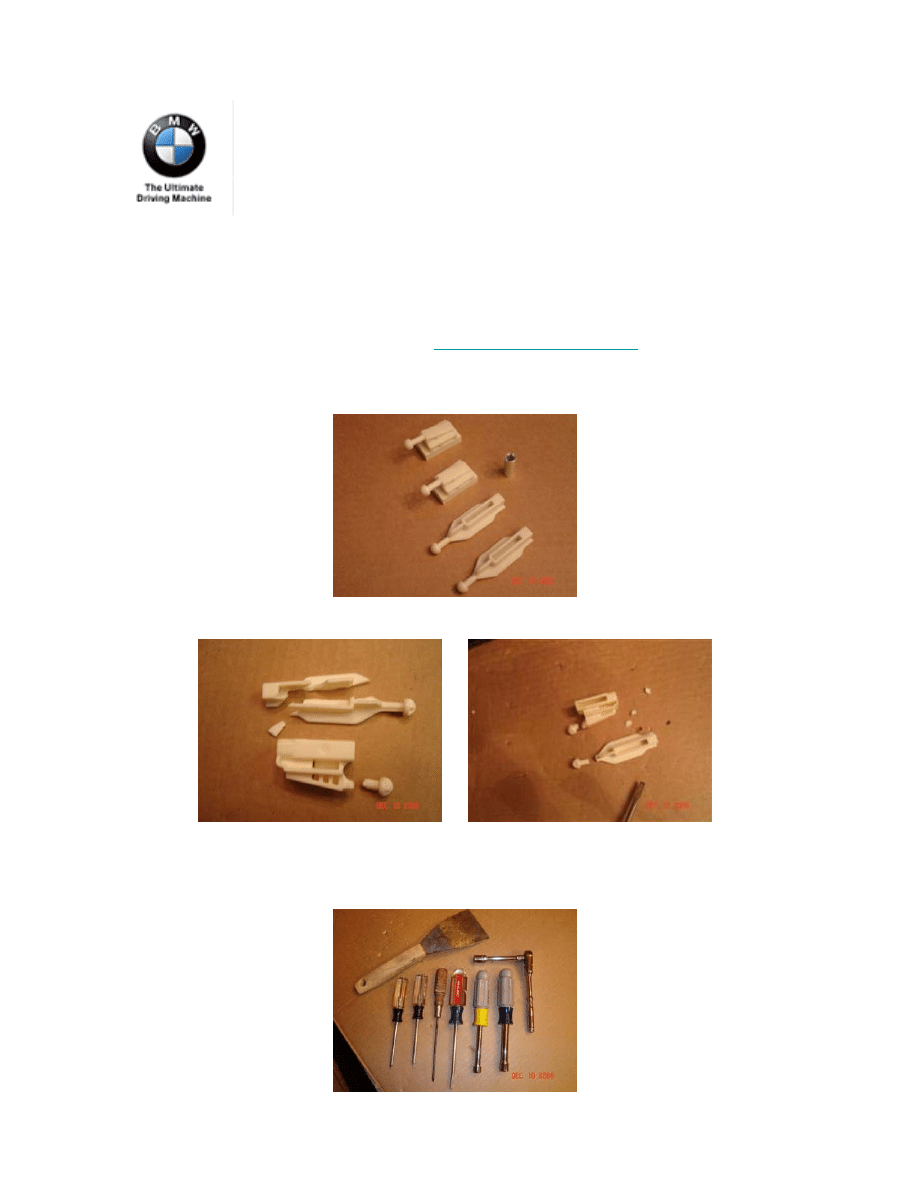
This is what your adjusters should look like when they are new.
This is what they look like when broken.
Tools you will need.
8mm nut driver, 10mm nut driver, thin blade screwdriver, T10 torx, T20 torx,
something with a wide blade, oven, hairdryer or heat gun.
NOTE: Th
e
follo
w
ing inform
ation i
s
to be u
s
e
d
at
y
our o
w
n
ri
s
k
,
and
shoul
d only
s
e
rv
e
a
s
a p
ro
c
edu
ral r
e
fer
e
n
c
e
.
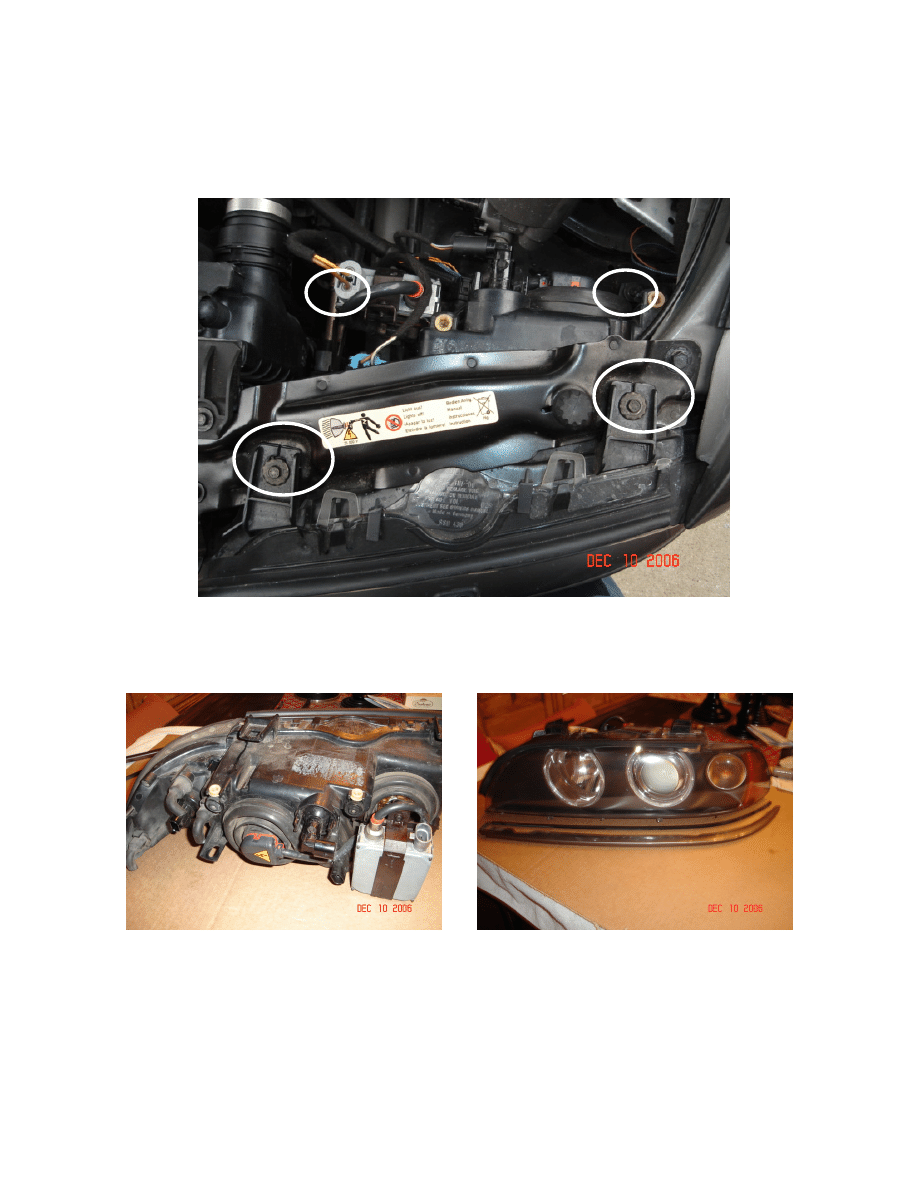
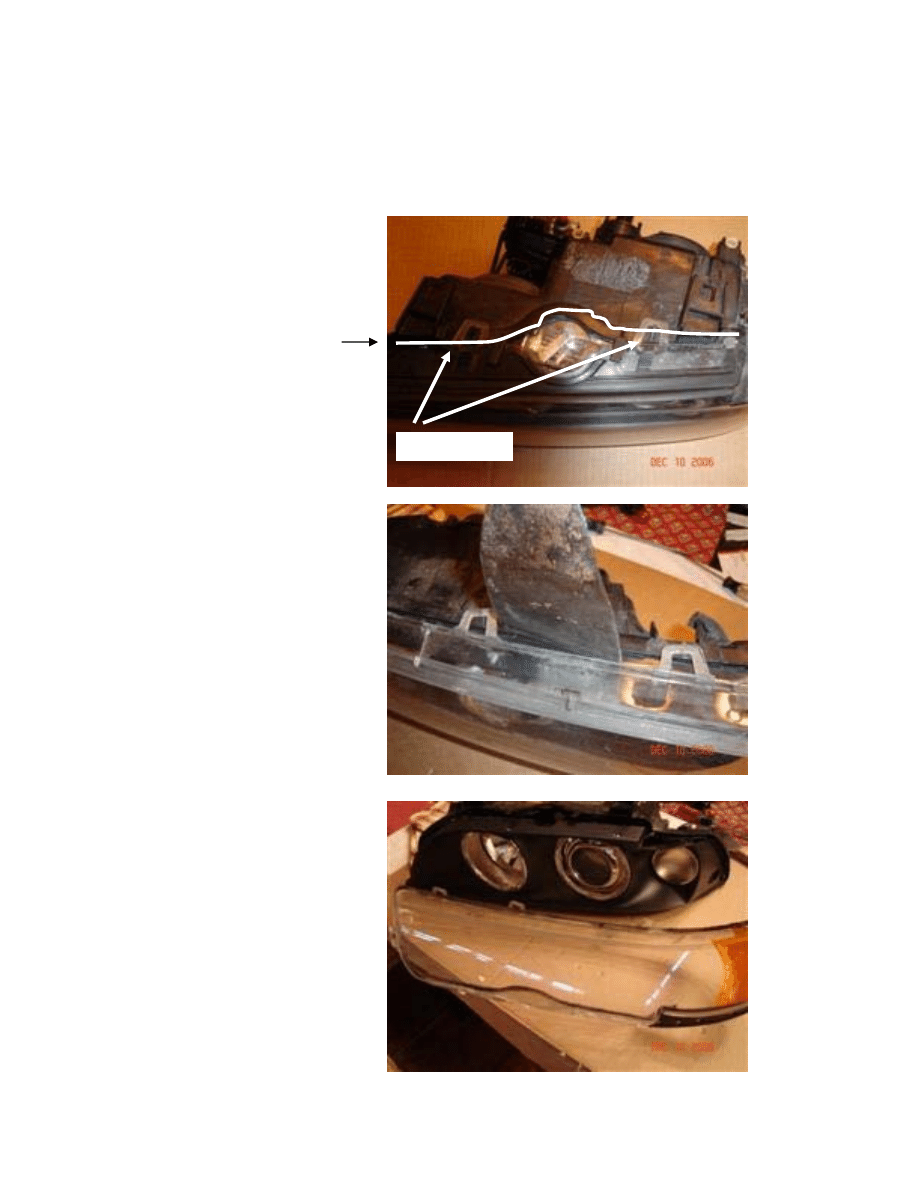
Remove the headlights from the car. There are (4) 8mm screws. Disconnect
all electrical plugs. Pull headlight out the front of car.
Complete headlight assembly.
back
front
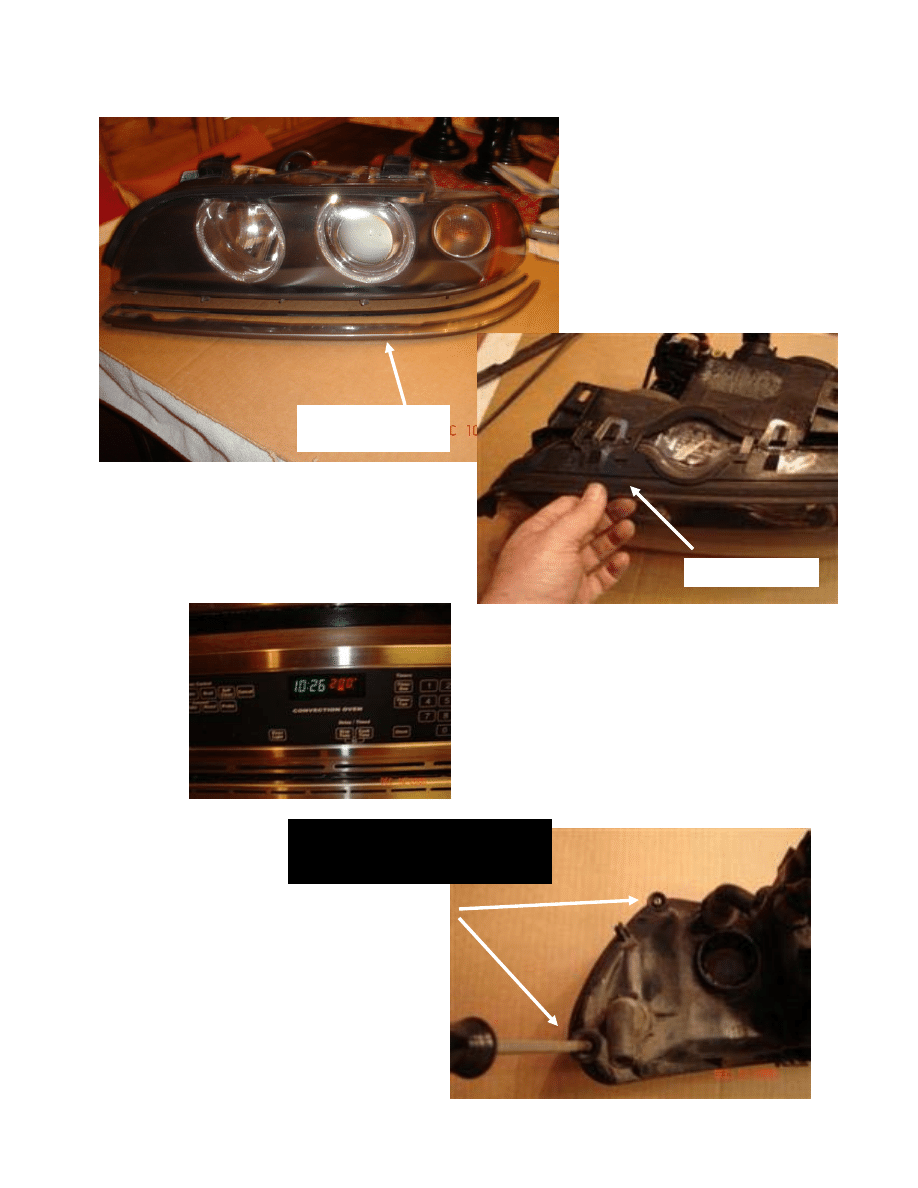
Heat the oven to 200
o
F.
That’s right, I said heat up
the oven ! or find a good
hairdryer or heat gun.
Leave the oven on, you will
need to use it again during
reassembly.
Remove beauty trim and rubber piece.
Beauty trim w/
rubber trim
Rubber piece
Remove the 2 screws on the
backside of the lens where the
amber turn signal is located.
Now its time to loosen the
“glue” that holds the front
lens cover to the body, Place
in the oven for 5 minutes @
200
0
F.
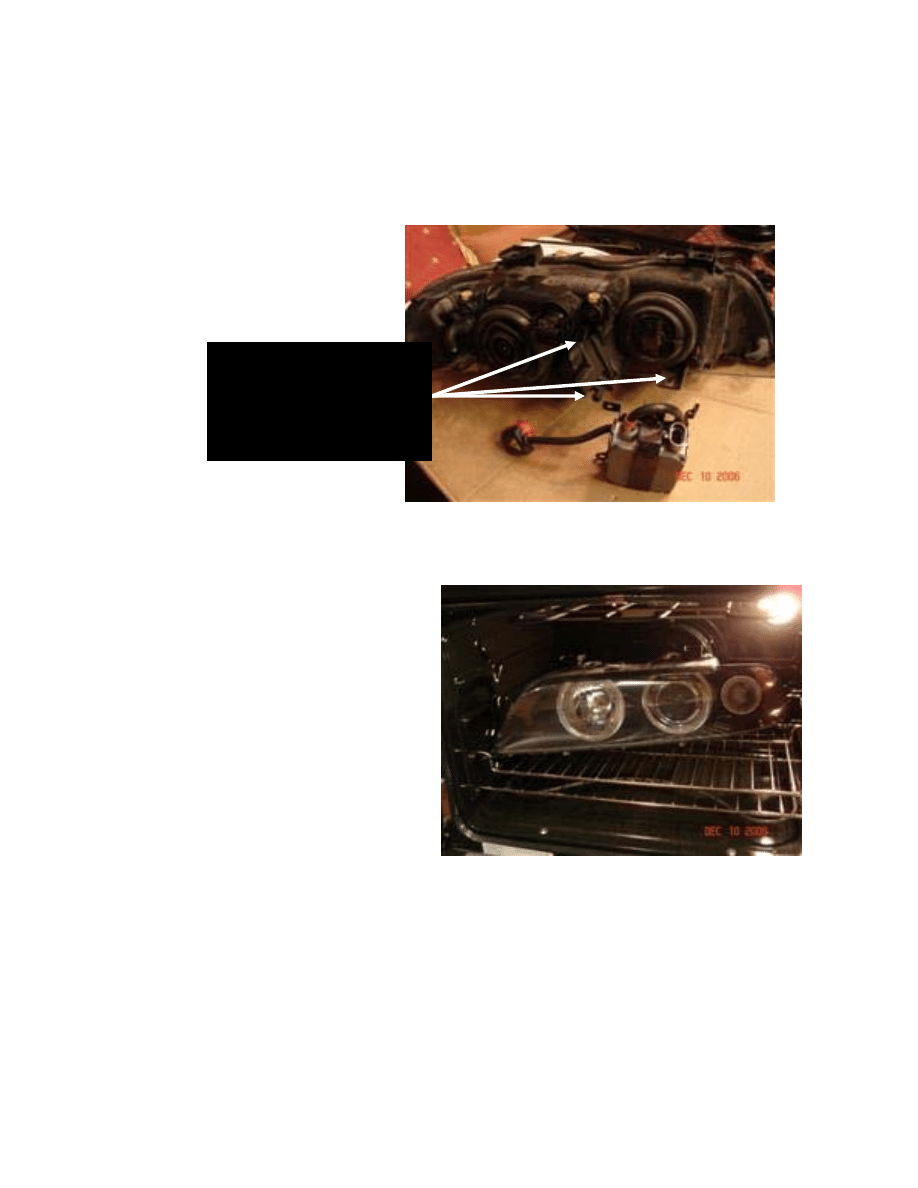
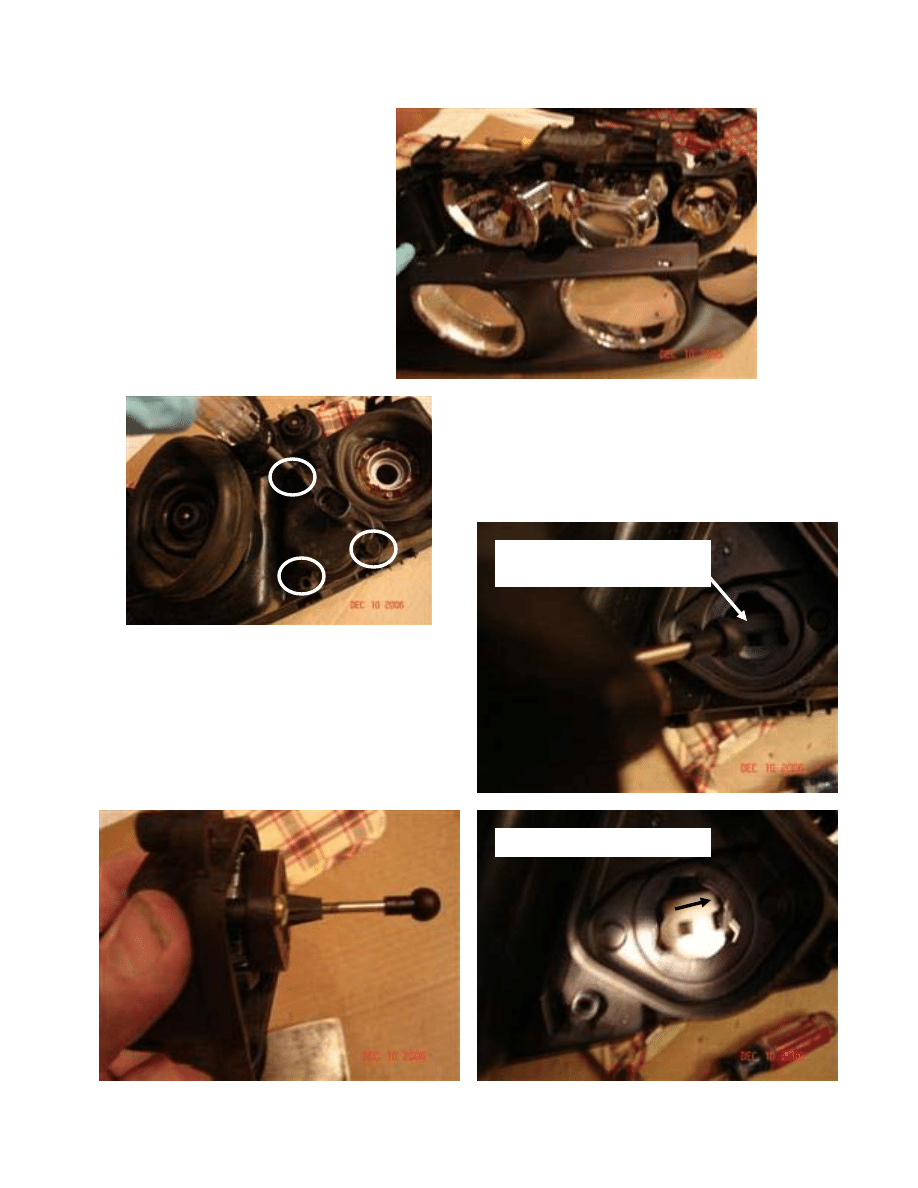
Remove the ballast.
Held on by (3) 8mm
screws. Also remove the
halogen bulb and amber
turn signal bulb.
Start at one end with a screwdriver or flat blade and separate the clear
front cover from the main body. You will need to lift the clear tabs over
their holding post as you go. You will see the “black” goop start to give
up its hold. Take your time and go a little at a time. Work your way around
the entire lens.
Separate front
clear lens from
body
I used a wide flat
blade to wedge
between lens
and body
Here is what you
are after !!! Now
we are inside
and can get to
the adjusters
Clear tabs
Remove the black
bezel that contains the
AE rings. This is also
held on by the black
goop. If the goop is
not pliable enough,
put the lens back in
the oven for a few
minutes to soften.
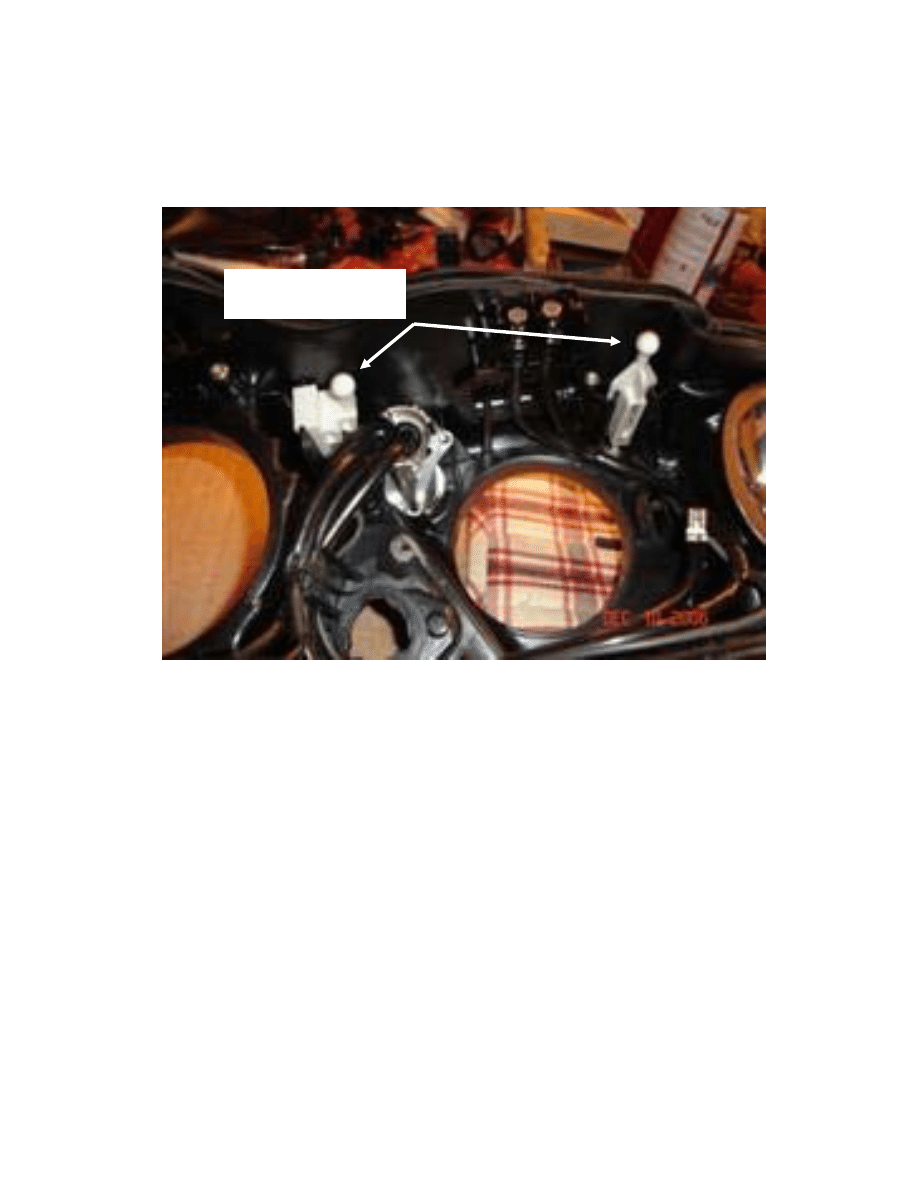
Remove the 3 screws holding the Height
adjuster motor. At the end of the shaft is a
ball that slides into a track on the back of the
inner headlight assembly.
DO NOT PULL
THIS STRAIGHT OUT.
You need to push in
and slide the ball to the right to remove. You
are essentially working blind. It took me an
hour to figure this move out!
Here is the track the ball
slides into from the side
Slide ball out to the right.
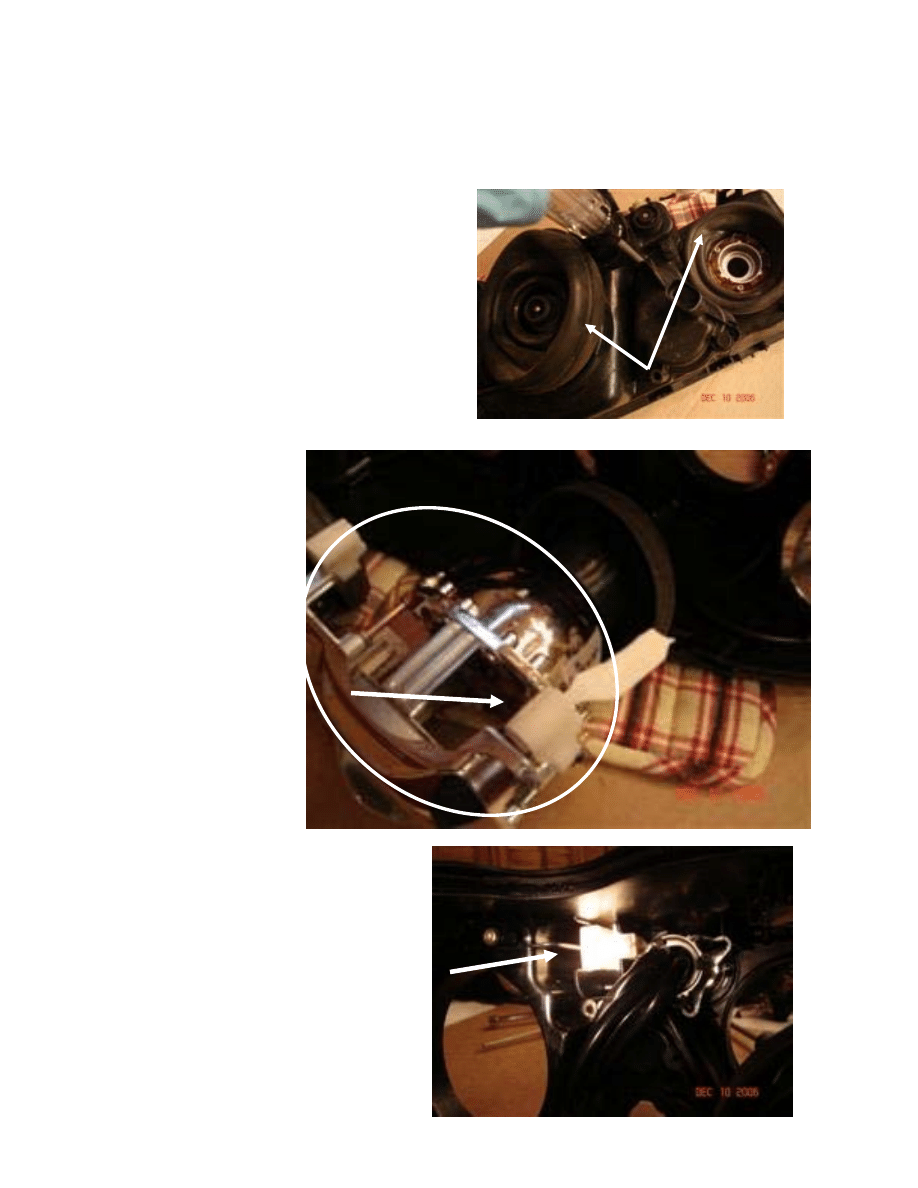
Next you need to remove the rubber
boots from the back of the lights
chassis (low and high beams). You
should be able to pull the bulb
assembly out through the front. The
boots will stay attached to the bulb
assembly and be pulled through to
the front.
Broken piece on chassis. Use the
adjuster on the back side to turn the
screw to release what left of the
original piece.
Here is what
we are after.
THE BULB
ASSEMBLY IS
OUT !!!!
Ball socket on bulb
assembly. You will
need to get the
broken “ball” out
from this piece. I
removed the socket
from the bulb then
inserted a small flat
blade screwdriver
to depress the tab
and push the ball
out from the from
side.
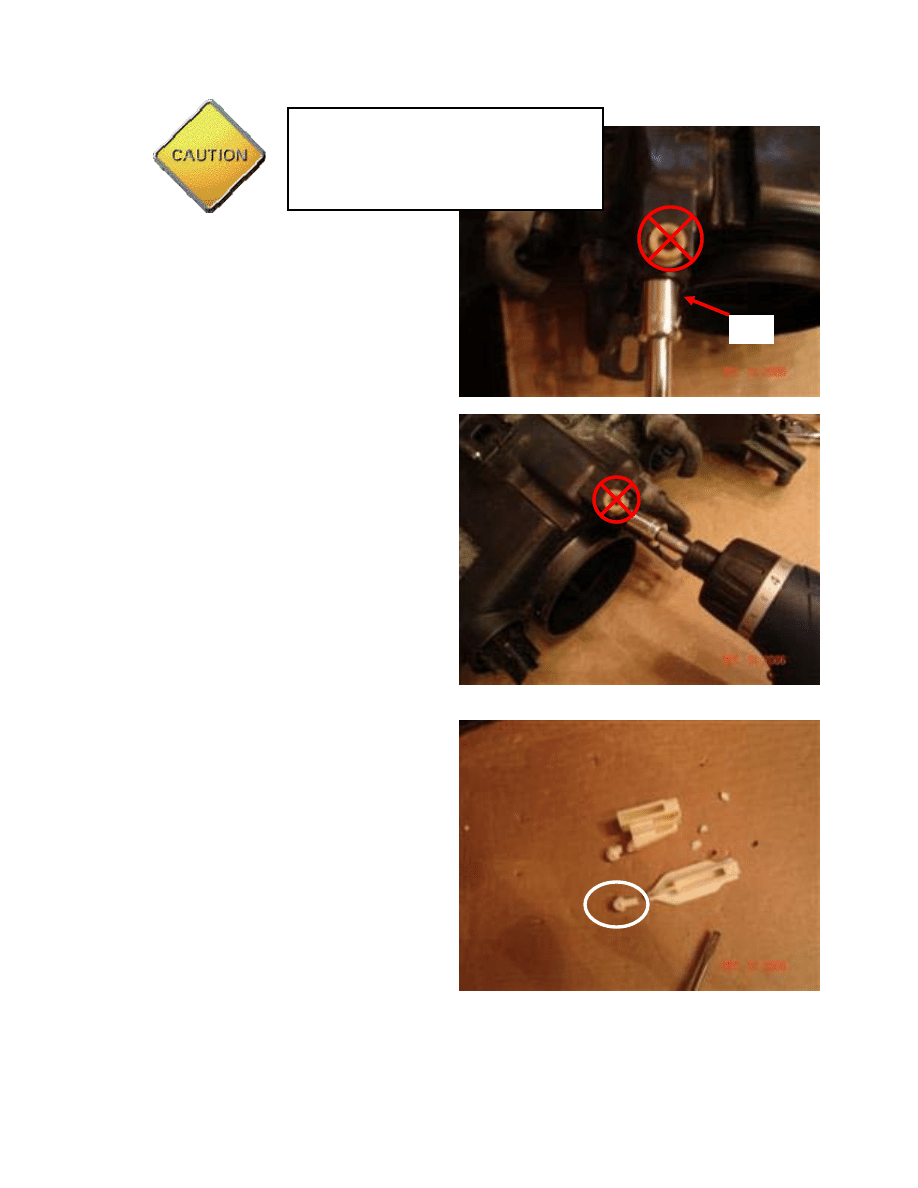
I used a 10mm nut driver to turn
the headlight adjustment screw to
remove the broken pieces that
were still attached. The new
pieces are of excellent quality and
look as though they should last a
long time. I did notice that they
are very tight and when using the
white adjusting knob, it started to
skip teeth due to the toque
required to thread the new pieces
on the existing screw. I suggest
you use the 10mm nut on the
back to run the new piece on and
off a few times to “loosen” the
torque requirements as you cut
the new threads. I added a little
lithium grease to the new pieces
to help cut the new threads as I
ran them up and down. On the
second light, I saved a lot of time
by attaching the 10mm nut to a
drill to speed things up.
The new pieces are very tight and need
to be run in and out a few times using
the 10mm nut on the back instead of the
adjuster screw on top to avoid breaking
any teeth.
OK
Look for any broken “balls” that
remain in the holders on the
headlight. I used a thin blade
screw driver to hold the tab down
and pushed the “ball” out from
the backside.
Pop the light assembly into the new pieces and reverse the disassembly
order. Use the oven to heat up the lens and body to “glue” the two pieces
together. Go out and enjoy your new headlights.
New pieces installed
in headlight chassis.
The first light took about 1.5 hours, the second about 30 minutes.
Good luck and repair at your own risk …………………
Wyszukiwarka
Podobne podstrony:
naprawa lamp Avensis
Naprawa LCM w e39
Materiał genetyczny, mutacje, systemy naprawy DNA, test Amesa
prawo upadłościowe i naprawcze
bmw E38 E39 rozladowany akumulator halas z komory silnika
EGZAMIN Naprawiony
14 04 Remonty przeglady i naprawy maszynid 15614
Naprawimy misia, Scenariusze zajęć
Naprawa elektroniki w aucie, Diagnostyka dokumety
Ch w2 13.10 (Naprawiony), Studia (Geologia,GZMIW UAM), I rok, Chemia
Politechnika Śląska sprawko moje (Naprawiony)
Ustawa z dnia( lutego 03 r Prawo upadłościowe i naprawcze
Algorytm obliczeń (Naprawiony)
3 Systemy naprawcze w DNA
Atmega fusebit doctor (HVPP+HVSP) – napraw fusebity
cw 6 1 (Naprawiony)
Elektrotechnika zadanie z omomierzem (Naprawiony)
więcej podobnych podstron