_MaskDoc 4/11/98 15:44 Page 1

2
King’s Quest I :
Quest For The Crown (1984)
Originally commisioned by IBM as a
showpiece for their ill-fated IBM PCjr, Roberta
Williams’ King’s Quest would only become an
industry bestseller the following year when it
was released for the IBM PC and new Tandy
1000 computers. Being the first game to fully
support the newly introduced EGA color card,
King’s Quest clearly demonstrated the superior
16-color capabilities of the then $400 optional
video card. The player directs game action by
way of text-based commands (example:
“OPEN DOOR”) and use of the keyboard
arrow keys to control the hero’s onscreen
movements.
This original King’s Quest game was released
later in an updated version as King’s Quest 1:
Quest for the Crown. The new version (a
contemporary of King’s Quest IV), allowed the
use of icons rather than a text parser interface,
and had updated graphics and sound to keep
up with the games of that time.
Synopsis:
The King of Daventry is nearing the end of his
life. Tragically, he has no heir to carry on the
royal line, and he worries that his kingdom will
be left without a leader. Daventry is already a
shadow of its former glory, as the three
treasures of the realm have been lost to the
ages. And so the king summons his bravest
knight, Sir Graham, and sets him on this quest
— return all three of the lost treasures, and the
throne will be his. Not an easy task, but the
recovery of the Mirror, the Chest of Gold, and
the Shield will take Sir Graham through
mythical perils and magical dangers, and forge
a new kingdom from the ruins of the old!
_MaskDoc 4/11/98 15:44 Page 2

3
King’s Quest II :
Romancing The Throne (1985)
This sequel to the original King’s Quest
provided not just a second look at the life of
King (formerly Sir) Graham of Daventry, it also
began a tradition of using King’s Quest as a
training ground for future designers. Future
Space Quest series designers Scott Murphy
and Mark Crowe joined the development team,
making this game an even bigger hit than the
original.
Synopsis:
Sir Graham is now King Graham, inheritor of
the Daventry throne. But he is a king without a
queen, and his subjects fear the heirless fate
which befell his predecessor. Until the day
when Graham beholds a dreadful sight in the
magic Mirror — a beautiful woman held captive
in a secret tower! Smitten, the king vows to
release her. His search for three magical keys
will lead him to an enchanted land on the other
side of the world. To claim his future bride,
Graham must explore underground caverns,
eerie towers, and ocean wonderlands; ride
flying carpets; and meet and mingle with
legendary characters like King Neptune and
Count Dracula!
King’s Quest III :
To Heir Is Human (1986)
The release of this product in 1986 was quickly
met with loud protests from gamers claiming
that this King’s Quest wasn’t really a King’s
quest at all. Because it focused on a young
slave named Gwydion and his attempts to
escape his evil master, players didn’t grasp the
connection between Gwydion and King
Graham of Daventry until they finished the
game some months later. (This was before
_MaskDoc 4/11/98 15:44 Page 3

4
Sierra began offering hint books or a hint line.)
It was here that a programmer named Al
Lowe, the future designer of the
Leisure Suit
Larry series, learned the internals of adventure
game programming. An exciting feature of
King’s Quest III was “automagic mapping”.
This feature was widely promoted on King’s
Quest III’s introduction... however, it was not
included in future King’s Quest games, since
players’ feedback indicated that it reduced the
challenge. This mapping feature was later built
into Roberta Williams’ Mixed-Up Mother
Goose adventure game for children, where it
was better appreciated.
Synopsis:
Step into the tattered shoes of Gwydion, a
young slave whose existance has been spent
serving the powerful and evil wizard
Manannan. But now your usefulness to him is
ending, and a landmark birthday approaches
— you are certain that Manannan will choose
to end your miserable life that day. With
nothing left to lose, you must finally dare to
learn the wizard’s magic spells, explore the
world outside the tower you’ve called home,
and finally challenge the wizard himself to save
your own skin, and discover the awesome
secret of your own past!
King’s Quest IV :
The Perils of Rosella (1988)
This innovative epic invited players to step not
into the boots of the now familiar adventure
hero King Graham, but instead into the soft
slippers of his young daughter Rosella - a bold
step for 1988, when the audience for
computer games was almost exclusively male.
Designer Roberta Williams’ move to attract
more female players to adventure gaming was
_MaskDoc 4/11/98 15:44 Page 4

5
a success, and King’s Quest IV went on to be
one of the most successful games of the year.
From a technical standpoint, King’s Quest IV
also scored big as the first commercial
entertainment product to support optional
music cards. Hollywood composer William
Goldstein (Fame) provided the stereo
soundtrack, adding new dimensions and
motion to the presentation. King’s Quest IV
was the first 3-D Animated Adventure to use
Sierra’s improved graphics system, and
allowed the player to use a mouse to move
their character around the landscape.
Synopsis:
King Graham is hanging up his adventurer’s
cap for good! With his beautiful queen at his
side and his kingdom momentarily at peace,
he prepares to pass that symbol of his
questing youth to one of his two children. But
before he can speak, he collapses, struck
down by a fell magical disease! Now his fate
lies in the hands of his daughter Rosella, who
must journey to a faraway land on a frantic
search for the one item that can save your
father from certain death. But when Good and
Evil vye for the throne of Faerie, you can bet
that no task is as simple as it seems. Soon,
the ailing Faerie Queen has Rosella on a quest
of her own, to stop an evil sorceress from
taking over. Only by saving the Faeries can
Rosella save her father — but who’s going to
save Rosella from ogres, witches, and ghosts?
King’s Quest V :
Absence Makes the
Heart Go Yonder (1990)
A computer game on a CD? Unheard of! No
game since the original King’s Quest had the
impact of King’s Quest V, which redefined
_MaskDoc 4/11/98 15:44 Page 5

6
adventure gaming in game play, design and
overall presentation. It was Sierra’s first million-
dollar-plus development effort. Designer
Roberta Williams assembled an unequaled
team of animators, artists, musicians, and
programmers to make the project a reality. A
new interface was designed to appeal to a
larger audience, and extra efforts were taken
to make the game an attractive entertainment
venture for every member of the family. No
more typing ‘open the door’ — now the player
could simply use their mouse to click a ‘hand’
cursor on the door.
Sales of King’s Quest V during its first year
shattered all known records for computer
games. Led by Emmy award-winning producer
Bill Davis, King’s Quest V made the leap in
graphics resolution to full 256-color VGA.
Animations and backgrounds advanced from
“computer art” to true handpainted, life-like
scenes inhabitied by life-like and fluid-animated
characters. Over fifty voice actors lent their
talents to the effort, making King’s Quest V the
most elaborate and cinematic game to date.
Synopsis:
A year has passed since Princess Rosella’s
journey to Tamir, and King Graham’s health has
been fully restored. The Royal Family of
Daventry is whole once more, and all is well
with the Kingdom. But unbeknownst to
Graham, his beloved family will soon be in
grave danger! Somewhere far away, a powerful
presence watches the castle of Daventry with
evil intent. Mordack, a wizard even more
powerful than the late Manannan, has
concocted a dreadful plan: to capture the
castle of Daventry, and the Royal Family within.
He waits for the right moment to strike - when
_MaskDoc 4/11/98 15:44 Page 6

7
King Graham will be helpless to stop him. On
that fateful day, King Graham will return home
to find that his castle and his family have
disappeared. Graham must don his
adventurer’s cap once again and find Mordack
before harm can come to Rosella, Alexander,
and Valanice. With Cedric the owl, his
relucatant guide, Graham journeys through
forests, across deserts, over mountains and
oceans in search of the evil wizard who holds
the Royal Family and the castle in his grasp.
King’s Quest VI :
Heir Today, Gone Tomorrow (1992)
From the opening sequence of the game, there
could be no doubt that if King’s Quest V
redefined what computer gaming actually was,
King’s Quest VI provided the quality standard
for the next generation. The state-of-the-art
“floating camera” sequence that opened the
game, featuring young Prince Alexander as he
sets out to find his “girl in the tower,” gave
computer gamers the world over a real view of
what the new age of multimedia computers
could bring to classic storytelling. The
character graphics were based on motion-
captures of real actors, giving the game an
unprecedented ‘feel’ of reality.
The King’s Quest VI love song “Girl In the
Tower,” a soulful duet featuring the voices of
Bob Bergthold and Debbie Seibert, rivaled the
best motion picture anthems of the year.
Continuing in a long tradition, Jane Jensen,
who would go on to design the industry
bestselling Gabriel Knight”!: Sins of the
Fathers, assisted Roberta Williams in game
design of this epic.
_MaskDoc 4/11/98 15:44 Page 7

8
Synopsis:
Prince Alexander sits in the throne room of
Daventry, longing for the beautiful Cassima.
Suddenly, just as it had done a score of years
ago for his father, the magic Mirror sprang to
life to show him an image of his beloved. But
one look at her distraught face made it clear
that something terrible had happened to her!
Immediately, Alexander sets off by ship for her
home — the Kingdom of the Green Isles.
Rather unfortunately for Alexander, the Green
Isles are surrounded by rocks and reefs, and
he is shipwrecked. Washed up on the shore
with little more than his signet ring and a single
coin, he must unravel the twisted schemes of
an evil vizier, restore the kingdom to its rightful
rulers, and win back Cassima’s heart... before
she is married to someone else!
King’s Quest VII:
The Princeless Bride (1994)
King’s Quest VII featured an innovative chapter-
based design, an intelligent bookmarking
system for saving games, and an easy point-
and-click interface, making the game more
intuitive for the novice gamer, while still being
challenging for those who had enjoyed the
series for the past 10 years. This was the first
King’s Quest game which could not be
released on diskette, as the number of disks
which would be required to hold the files would
never fit in a game box, or even multiple game
boxes! The graphics were breathtaking in
scope, created by a team of animators who
drew individual images, cel-style, and then
digitally added color and sequenced the
images to produce motion. The resulting
animation not only set new standards for game
_MaskDoc 4/11/98 15:44 Page 8

9
graphics, but also rivaled or surpassed the
animation available on TV or film.
Synopsis:
Rosella of Daventry is reaching marriagable
age, and her mother Valanice hopes to find a
suitable match for her daughter. Unfortunately
Rosella has no interest, either in the men her
mother has chosen, or in marriage itself! As the
two of them walk in the woods, discussing this
very subject, Rosella sees a small dragon-
sprite leap from a pond, leaving behind it an
image of a fantastic castle floating in the
clouds. Intrigued, and feeling mischevious,
Rosella dives into the pond and disappears.
Valanice leaps in after her, and the two find
themselves drawn into a vortex of magical
energy, and seperated.
Now each woman must pursue her own quest
— Rosella to save the Volcanix Underground
from the evil witch Malicia, and Valanice to find
her daughter. Before they can be reunited,
each must cross the land of Eldritch, face the
dangers of Ooga Booga, delve into the world
of spirits and legends, and finally confront
Malicia in the heart of an active volcano!
_MaskDoc 4/11/98 15:44 Page 9
10
History of the King’s Quest Series ........................2
Installation ..........................................................12
Main Menu ..........................................................12
New ....................................................................12
Load ..................................................................12
Save....................................................................12
Options ..............................................................12
Replay Intro ........................................................12
Quit ....................................................................12
Back to Game ....................................................12
Options Menu ....................................................12
Graphics Mode ..................................................13
Performance Issues ............................................14
Games Controls ..................................................15
The Interface ......................................................15
Controlling Connor ..............................................15
Controlling the Camera ......................................16
First-Person/Third-person ..................................16
The Cursors ........................................................17
Conversations ....................................................18
Pushing ..............................................................19
Jumping ..............................................................19
The Rope and Hook............................................20
Rocks ................................................................20
Hand Weapons ..................................................21
Ranged Weapons ..............................................22
Armor..................................................................23
The Magic Map and Teleporting ..........................23
Gold ....................................................................24
_MaskDoc 4/11/98 15:44 Page 10
11
Inventory Items....................................................25
Health and Magic Items ......................................25
The Mask ............................................................26
Health and Experience Meters ............................27
The Lands ..........................................................28
The Kingdom of Daventry....................................28
The Dimension of Death......................................28
The Swamp ........................................................29
The Underground Realm of the Gnomes ............29
The Barren Region ..............................................29
The Frozen Reaches ..........................................29
The Realm of the Sun ........................................29
The Monsters ......................................................30
Hints ..................................................................37
Credits ................................................................38
Team Mask ........................................................38
Additional Credits ................................................38
Cast ....................................................................39
Customer Services ..............................................40
Limited warranty..................................................41
_MaskDoc 4/11/98 15:44 Page 11

12
Installation
Start Windows 95/98.
Insert the King’s Quest: Mask of Eternity disk into your
CD-ROM drive. If you have disabled AutoPlay, click on
the start button, select [Run].
Type “D:\SETUP” and press [ENTER].
(If your CD-ROM is not named “D:,” substitute its letter
instead.)
Main Menu
New
Click on this or press [ENTER] with the “Mask” icon next
to it to start a new game.
Load
Click on this or press [ENTER] with the “Mask” icon next
to it to go to the load game screen. Once there, you can
load a previously saved game.
Save
Click on this or press [ENTER] with the “Mask” icon next
to it to go to the save game screen. Once there, you will
be able to save your current game and/or multiple games.
Options
Click on this or press [ENTER] with the “Mask” icon next
to it to go to the options screen. Once there, you will be
able to set many of the game settings.
Replay Intro
Click on this or press [ENTER] with the “Mask” icon next
to it to watch the opening movie. Once the movie starts,
you can exit it by clicking or pressing [ESC].
Quit
Click on this or press [ENTER] with the “Mask” icon next
to it to quit the game.
Back to Game
Click on this or press [ENTER] with the “Mask” icon next
to it to return to a currently running game.
Options Menu
Here you can select a number of different game options.
When you first install the game, the install will attempt to
set all the options specifically for your machine based on
your hardware. Here’s what can be adjusted:
Graphics: This will take you to a new screen where you
can adjust your graphic options.
_MaskDoc 4/11/98 15:44 Page 12

13
Graphics Mode
The three graphic modes available are Direct Draw, Direct
3D, and 3DFX. If you have a 3DFX card, Direct 3D will be
grayed out as you’ll want to run in 3DFX mode. If you don’t
have a 3D hardware accelerator then both 3DFX and Direct
3D will be grayed out.
(Note: Some 3D cards don’t support the full set of 3D
features required for King’s Quest: Mask of Eternity For
more information about this, check the readme file.)
Resolution: 640 x 480 is available in all modes. 800 x 600
is available ONLY to Direct 3D and 3DFX and then ONLY if
your card has at least 4 megs of available texture ram.
Dynamic Lighting: On/Off. This feature is suggested only
for Pentium II/266 or faster. This makes many of the lights
in the world dynamic, effecting the objects near them.
Connor Shadows: On/Off. Available in all modes, this
casts a shadow from Connor.
Monster Shadows: On/Off. This feature is ONLY
available if you are running in Direct 3D or 3DFX mode. Like
Connor’s shadow, this will cast a shadow from all monsters.
Character Shadows: On/Off. Available in all modes, this
casts a shadow from all characters.
Object Shadows: On/Off. This feature is ONLY available if
you are running in Direct 3D or 3DFX mode. Like Connor’s
shadow, this will cast a shadow from many of the objects in
the world.
Brightness: Allows you to set how bright the game looks
on screen. If this option is grayed out, then your card does
not support this kind of gamma control.
Keyboard: This will take you to a new screen that will allow
you to remap a number of the game key controls.
Sound Volume: Individually for music, sound effects, and
speech.
Subtitles: On/Off. Take a guess . . .
_MaskDoc 4/11/98 15:44 Page 13
14
Help Getting Started: On/Off. This will turn on or off the
“help” dialogs that pop up throughout playing Daventry (the
first land). These are very useful if this is your first time
playing the game.
Performance Issues:
King’s Quest: Mask of Eternity has been designed with
lots of options you can turn on or off. When the game is
installed, we try to look at your machine and set up what
we think will be the best configuration balanced between
look and performance. If you feel the game is running
slow, try turning off some or all of the options. The cost
to performance in order of options is: Dynamic Lights,
Object Shadows, Monster Shadows, Character Shadows,
and, lastly, Connor Shadow. (For more information check
the readme file.)
_MaskDoc 4/11/98 15:44 Page 14
15
Games Controls
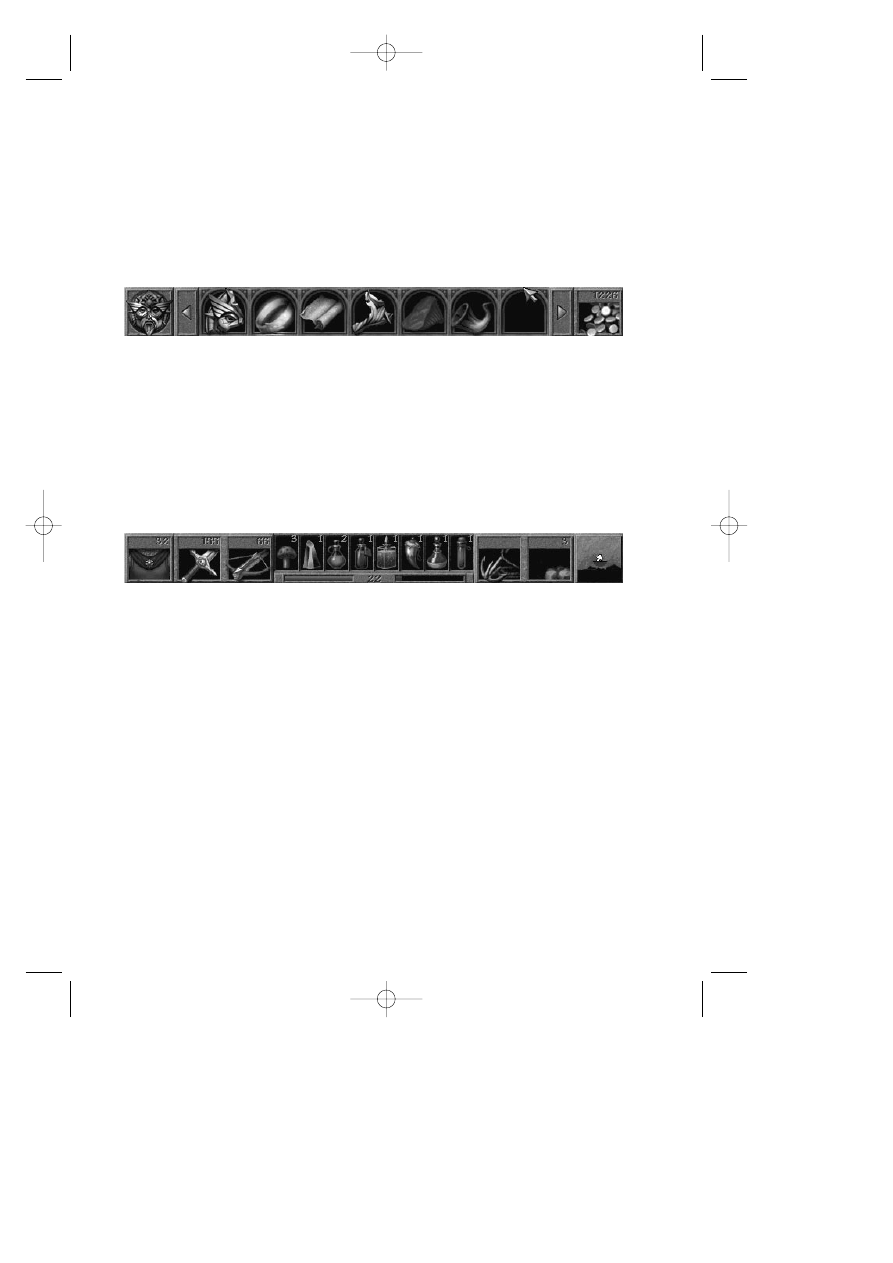
The Interface
There are two main pieces of the onscreen
interface, the top and bottom bars. The details
of both of these bars will be covered in their own
sections. All references to keys in this manual
assume you have not remapped them.
To get to the top bar, simply move the play cursor
to the top of the screen; the top bar will
automatically slide down. Moving the play cursor
off of this bar will cause it slide back up and out of
the way. (Note that the attack cursors do not
activate this bar.) Features of this top bar from left
to right include: the Mask icon to go to the options
screen, your inventory items, and gold currency.
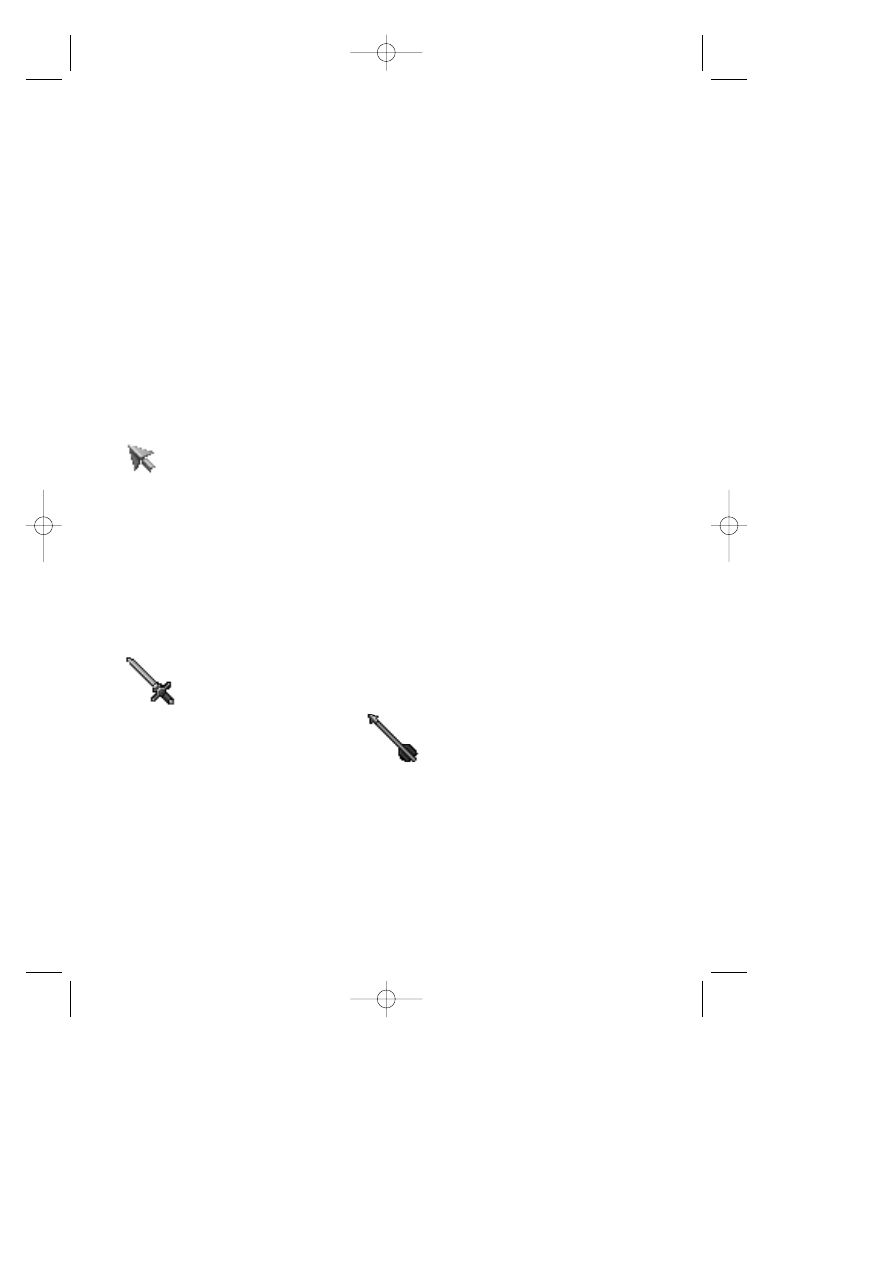
The bottom bar can be put away or opened up
by pressing the [SPACE BAR]. If this is closed
and you are in combat, the health and
experience meter will pop up by itself until
combat is complete. Features of this bottom bar
from left to right include: armor class and stat,
hand weapon and stat, ranged weapon and stat,
the health and experience meters, four health
and four magic items, the rope and hook, supply
of rocks, and the magic map.
Controlling Connor
Connor has two modes of moving: run or walk.
Use the [END] key to toggle between running
and walking. Use the four arrow keys to move
Connor around. While you are moving around
the world, Connor will react to things he runs
_MaskDoc 4/11/98 15:44 Page 15

16
into, as well as the slope of the ground. If
Connor runs straight into an object he will stop.
If he hits something at an angle, he will glance
off of it and keep moving in the same general
direction.
Controlling the Camera
In third-person the camera will automatically
follow Connor around. It will attempt to keep
Connor in the middle of the screen. At anytime
you can take control of the camera. To do this,
right-click and hold, and then move the mouse.
Moving forward or backward with the mouse will
zoom the camera in or out. Moving the mouse
right or left will swing the camera around Connor.
Continuing to hold the right mouse button down
while Connor moves will maintain the camera in
the same relative position and allow you to track
Connor from a constant angle and distance.
The [Page Up] and [Page Down] keys are used
to tilt the camera view up or down. If you have
tilted the camera, it will automatically reset itself
as soon as Connor moves.
The [Shift] key can be used to temporarily
modify camera movement. Pressing [Shift] while
right-clicking and moving forward or backward
with the mouse will tilt the camera up or down
as opposed to zooming in or out.
[F11] toggles the behavior of the third-person
camera. Move the camera to the distance you
want it to stay from Connor and then press [F11].
The camera will now always keep that same
distance from Connor. The default behavior for
the right-click camera movement is now
changed. Right-click and move the mouse
forward or backward; the camera will now tilt up
or down. [Shift] right-click now zooms.
First-person/Third-person
At anytime you can change between playing in
first-person and third-person mode. [F2] toggles
between the two modes. While the game is
_MaskDoc 4/11/98 15:44 Page 16
17
best played in third-person, you can play all of it
in first-person. However, we recommend you
play it in third-person and use the first-person
mode for special cases where you might want to
look at something close up. If you are playing in
first-person, any hands-off scenes will jump you
into third-person so you can see the interaction.
Switching to first-person is disabled in hands-off
scenes.
The Cursors
There are four main game cursors: 1) The play
cursor (a gold arrow); 2) The hand weapon
cursor (a sword); 3) The ranged weapon cursor
(a bow arrow); and 4) the wait cursor (the
spinning Mask).
The play cursor looks like a golden arrow
pointer. With this cursor you can click on
items to select them, get information about them,
and/or start conversations with other characters.
Actions for the play cursor includes: DO, TALK,
and TAKE, but is never ATTACK. To temporarily
change to the play cursor without having to put
away a weapon, press [CTRL]. This is a
momentary switch to get the play cursor.
Releasing the [CTRL] key will change the cursor
back to the prior attack cursor.
There are many different weapons
Connor can find while exploring.
Regardless of the weapon Connor
may currently have, the hand
weapon cursor always looks like a
sword, and the ranged weapon cursor
always looks like an arrow from a bow. These
are the attack cursors. With these two cursors
you shoot or swing at the object or character
you click on. These can also be used to start
conversations. The difference between the
attack cursors and the play cursor is that the
default action for the attack cursors is attack
unless it is clicked on a character with whom
you can talk. It is never DO or TAKE. If you
_MaskDoc 4/11/98 15:44 Page 17
18
want to look at something or pick up an item,
you need to click it with the play cursor.
The wait cursor looks like a rotating
image of the Mask, and gets moved
to the right-ower corner of the game
screen. When the cursor is in this
mode, it means you are in a hands-off
sequence. During these times you cannot
move Connor, and monsters can’t attack. Just
watch and enjoy the scene!
Conversations
Throughout the game Connor will meet helpful
characters and interact with them. When you
click on one of these characters, Connor will
begin a conversation. During a conversation,
as long as it’s not a hands-off
scene, you remain in complete
control of the camera and Connor.
If you don’t move the camera,
the program will automatically
make camera cuts to better
tell the story. If you move the
camera at any time, all future
camera cuts for that
conversation will be terminated.
If you walk Connor away during a
conversation, the conversation will
end. If you return from one of
these interrupted conversations,
the character will pick up where he
or she left off.
Listen carefully to conversations. Characters
give important clues to puzzles. Sometimes it
takes several clicks to get to the end of a
conversation. Just because the character has
stopped talking doesn’t mean that they have
nothing else to say. Clicking on a character
after exhausting the talk string will result in the
playing of a summation. You will never miss an
important message!
_MaskDoc 4/11/98 15:44 Page 18
19
Pushing
Connor can push and move many objects in
this game. To get Connor to push something,
stand him next to it. From a stopped position,
move him forward, if it’s something
he can push, he’ll automatically go
into push mode and start pushing.
As long as you keep moving him
forward he’ll continue to push. If he
stops pushing and you’re still trying
to move forward, then the object he
is pushing has run into something
that is preventing it from moving further
forward.
Pushing cannot be initiated when Connor’s
hands are full. In other words, you can’t have a
weapon out while pushing. If you want to push
something, you will have to put away your
weapon first.
Jumping
Connor has three different kinds of
jumps: 1) The standing or walking jump;
2) the running jump; 3) the back flip. The
standing jump moves Connor forward about
six feet and he clears a height of about four
feet. His running jump moves him forward
about thirty feet and he clears a height of about
six feet. The back flip moves him backward
about eight feet and he clears a height of
about six feet.
To do a standing or walking jump, simply
press [INSERT]. You can press this either
while standing or while walking forward. To
do a running jump, you must be in run mode.
While running forward press [INSERT] and
Connor will do a running jump. To do a back
flip you can be in either run or walk mode, it
doesn’t matter. Simply walk Connor
backwards by pressing the back arrow. While
walking backwards, press [INSERT] and
Connor will do a back flip.
_MaskDoc 4/11/98 15:44 Page 19
You will find a number of places where you will want
to use these jumps to get over obstacles, jump up
on something, or cross areas of trouble. Remember
that each jump clears a defined distance. Also, take
gravity into consideration. Jumping from a high spot
to a low spot will increase the length of the
jump, whereas jumping from a low spot to a
high spot will shorten the distance. Be careful
jumping from high places. If Connor falls more than
15 feet, he will die.
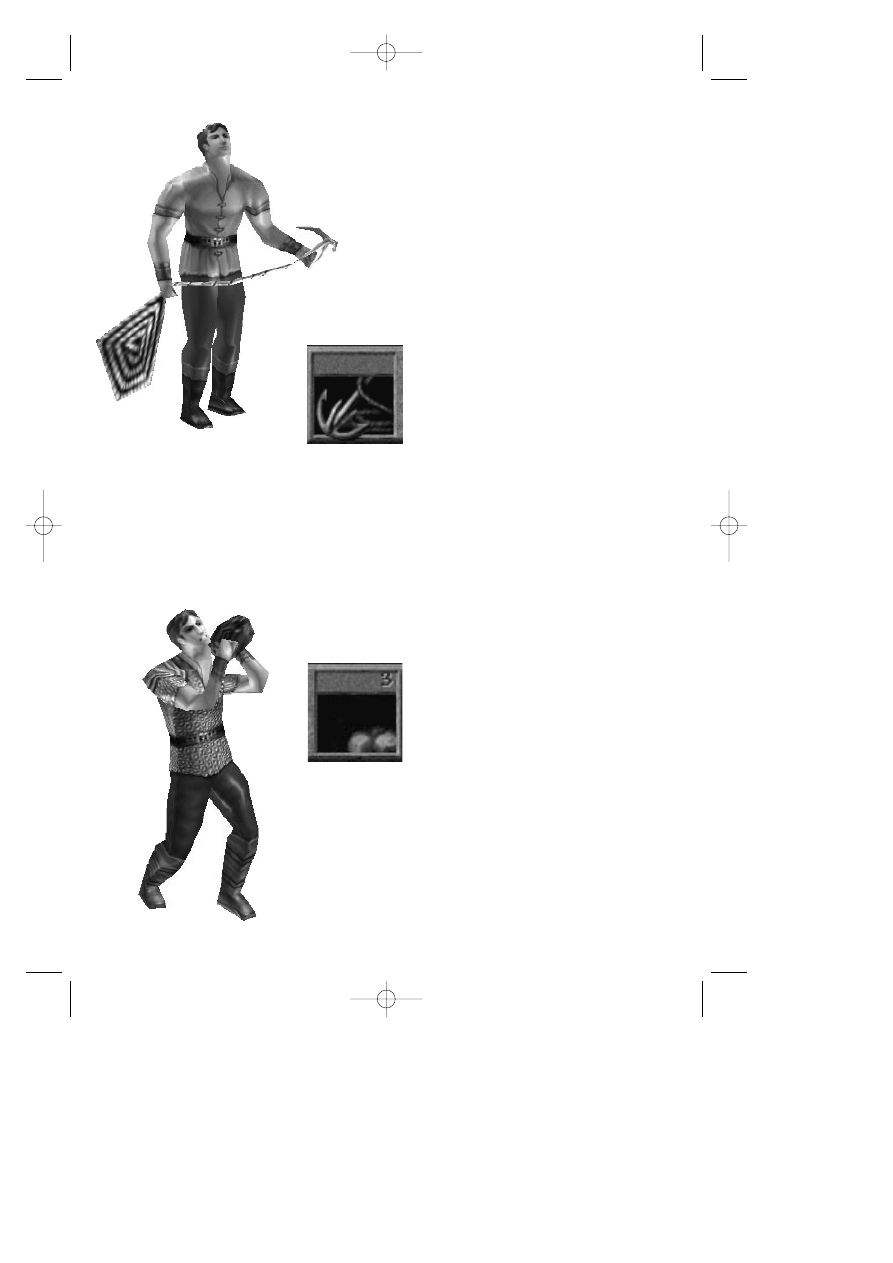
The Rope and Hook
During the course of game play you’ll
find a rope and hook. The rope and
hook can be used to climb up and
down things. Places where you can
use the rope and hook are identified
by a rope and hook/arrow icon at the
bottom right of the game screen. When you see this it
means you can climb something nearby. To use the
rope and hook, click on its icon on the lower bar. The
cursor will change to the rope and hook. Now click
on the object (cliff, wall, building, etc.) you want to
climb. Connor will throw the rope and automatically
get into “climb” position. Use the arrow keys to make
him climb up and down the rope. To get him off the
rope move him past the end of the rope and he will
automatically get off and put the rope away.
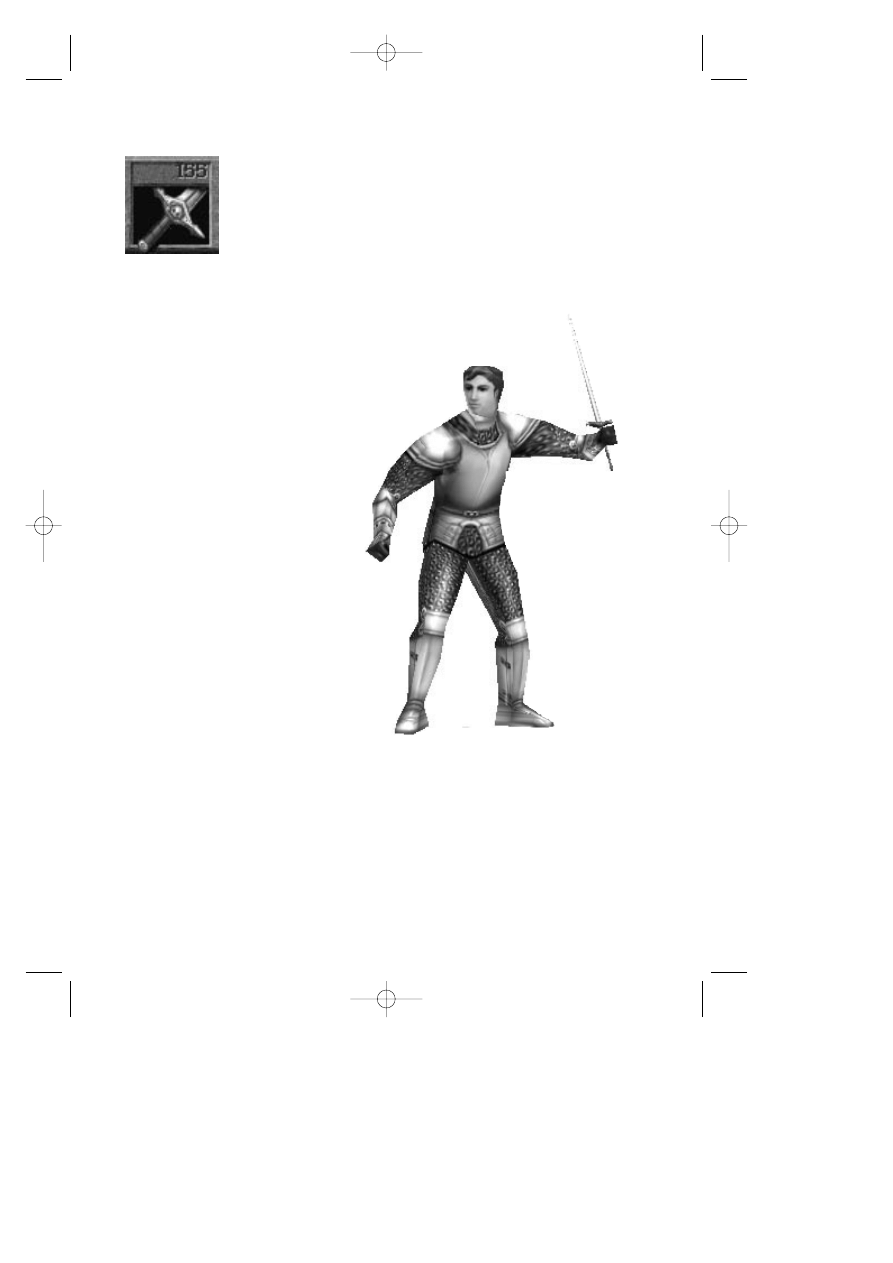
Rocks
Connor will be able to find small
boulders in various places. These will
be useful for solving certain puzzles.
In a number of places throughout the
game Connor will discover pressure
plates which depress when stepped
upon. Rocks can be used to weight down these
plates. To use one, click on the rocks on the interface.
The cursor then becomes a rock. Now click the
cursor where you’d like Connor to throw it. Connor
can only throw rocks a fairly short distance. If you’ve
clicked beyond his range, he’ll throw it as far as he
can in the direction you’ve clicked.
20
_MaskDoc 4/11/98 15:44 Page 20
21
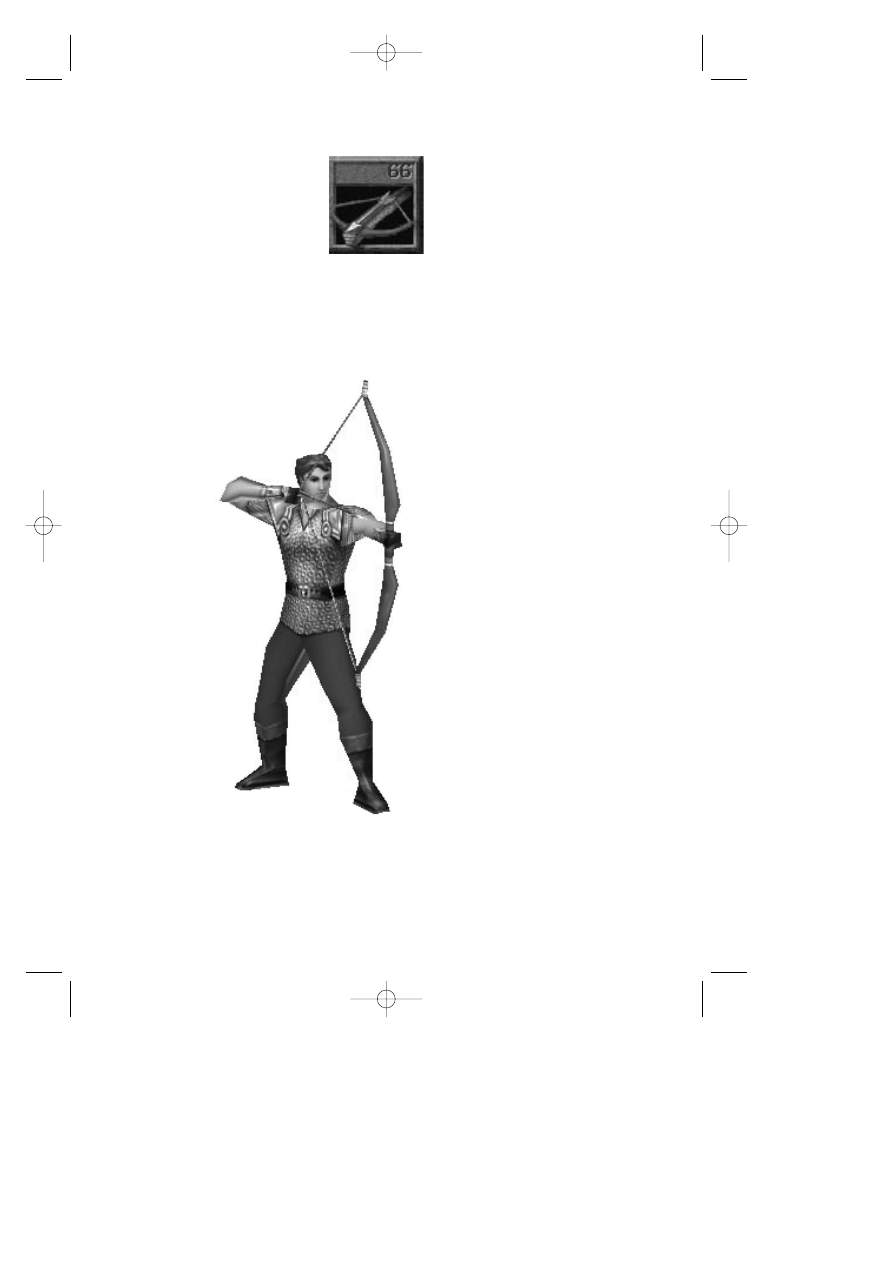
Hand Weapons
During the course of game play
Connor will find a number of
different hand weapons. Click on
the weapon to pick it up. If you
already had a hand weapon, it will
automatically swap with this one.
Connor can only carry one hand weapon at a time.
When you pick up a new hand weapon, watch the
stats for hand weapons to determine which one you
want to keep. Keep the one that displays the
highest number.
To use a hand weapon, click on the hand weapon
icon on the interface. Once the hand weapon is
out and Connor is ready, the cursor will look like a
sword. Each left-click will now make Connor
swing in the direction you’ve clicked. If
you click behind him, he will
automatically turn around and swing.
For hand weapons, Connor will need
to be close enough to an object to
hit it. Connor will always swing, but
if he’s not close enough, as in the
real world, he’ll just hit dead air. Pressing
[DEL] switches between weapons.
With hand weapons you can choose two
kinds of attacks: the standard attack or
the “big” swing. The standard attack is
done with a simple left-click. This is the
quickest kind of attack, but does not
deliver the biggest blow. To do the “big”
swing, hold down [SHIFT] while left-
clicking. Connor will take the “big” swing
and deliver between .75 to 5 times the possible
damage. Be careful in using this. While Connor
usually delivers greater damage, it also takes him
longer to make this kind of swing. Upon fighting
one opponent this might prove effective. However,
if battling a group, a quicker attack might prove
more effective.
_MaskDoc 4/11/98 15:45 Page 21
22
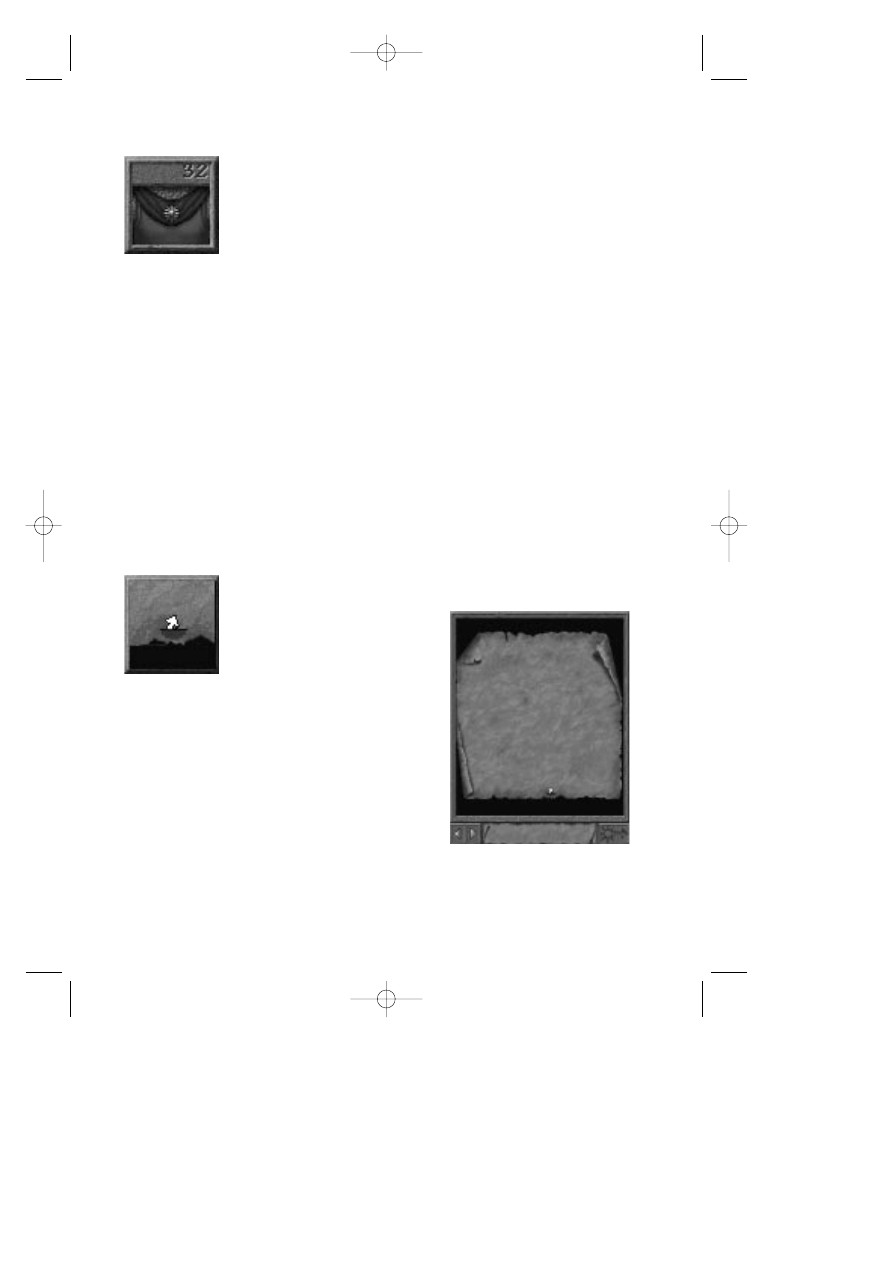
Ranged Weapons
During the course of game play,
Connor will find a number of
different ranged weapons. Click
on the weapon to pick it up. If
you already had a ranged
weapon it will automatically
swap with this one. Connor can only carry one
ranged weapon at a time. When you pick up a
ranged weapon, watch the stats for ranged
weapons to determine which one you want to
keep. You will want to keep the one that
displays the highest number.
To use a ranged weapon, click on the
ranged weapon on the interface or
press [DEL]. This will make Connor
draw his ranged weapon. Once the
weapon is out and Connor is ready,
the cursor will look like an arrow
from a bow. Each left-click will now
make Connor shoot in the direction
you’ve clicked. If you click behind
him, he will automatically turn around
and shoot. Ranged weapons can
shoot in any direction at anytime.
You don’t have to click on an object
to shoot. This is important to
remember as often in combat monsters
might be moving around. Be careful to
lead moving monsters with your shot.
Clicking on a moving monster will cause
Connor to shoot where the monster is,
and by the time the arrow gets there the
creature may no longer be there.
Note about weapons: In a couple of
places, Connor will pick up a new
weapon and in the course of so doing will lose
his old weapon. Don’t worry about this, it is part
of the design, and in these cases the new
weapon will ALWAYS be better or be exactly
what you need.
_MaskDoc 4/11/98 15:45 Page 22
23
Armor
During the course of game play,
Connor will find various kinds of
armor (gloves, boots,
breastplates, etc.). Click on the
object to pick it up. If you don’t
have that piece of armor, Connor
will simply put it on and you’ll see his armor stat
increase. If he already has that piece of armor,
then just like the weapons, you’ll see it swap (for
example: swap a leather breastplate for a bronze
breastplate). When you obtain a new piece of
armor, watch the armor stat to determine which
one you want to keep. Keep the one that
displays the highest number. Some armor
comes as a complete suit. If you are wearing a
suit of armor and click on a single piece like
gloves, Connor will remove the full suit to put on
the single item. In almost all cases you’ll want to
keep a full suit over swapping for a single item.
Just be careful and make sure you keep what
gives you the highest armor stat.
The Magic Map and Teleporting
During the course of game play
you will find a magic map. The
magic map can be opened and
closed by clicking on the map
icon on the interface or pressing
[TAB]. The magic map will track
everywhere Connor goes. The forward and
backward arrows under the map allow you to
page through the maps of the various displayed
worlds. At the bottom center of each map is the
name of the current world.
Located at the bottom right of the map is a
teleport button. Each world has one
teleportation location except the Realm of the
Sun, the final world. Once you find these you
can then teleport between teleportation
locations. This button will be grayed out until it’s
possible to teleport.
_MaskDoc 4/11/98 15:45 Page 23
24
To teleport, open the map. Make sure Connor is
standing on the teleporter in the current world.
Now page to another map where you have
ALREADY discovered the teleportation location.
The button will now be active. Click on the
teleport button. Connor will disappear, and the
world displayed on the map will be loaded. Once
it’s loaded you will see Connor appear on the
teleportation location in the new land.
The map is very interactive. As you change
things in the world, the map will often reflect
these changes. Opening a locked door may
reveal the door open on the map where before it
was closed. Pay special attention to potential
changes on the map as Connor does actions to
trigger these changes. Note that changes could
occur elsewhere in his current world besides
where he is standing.
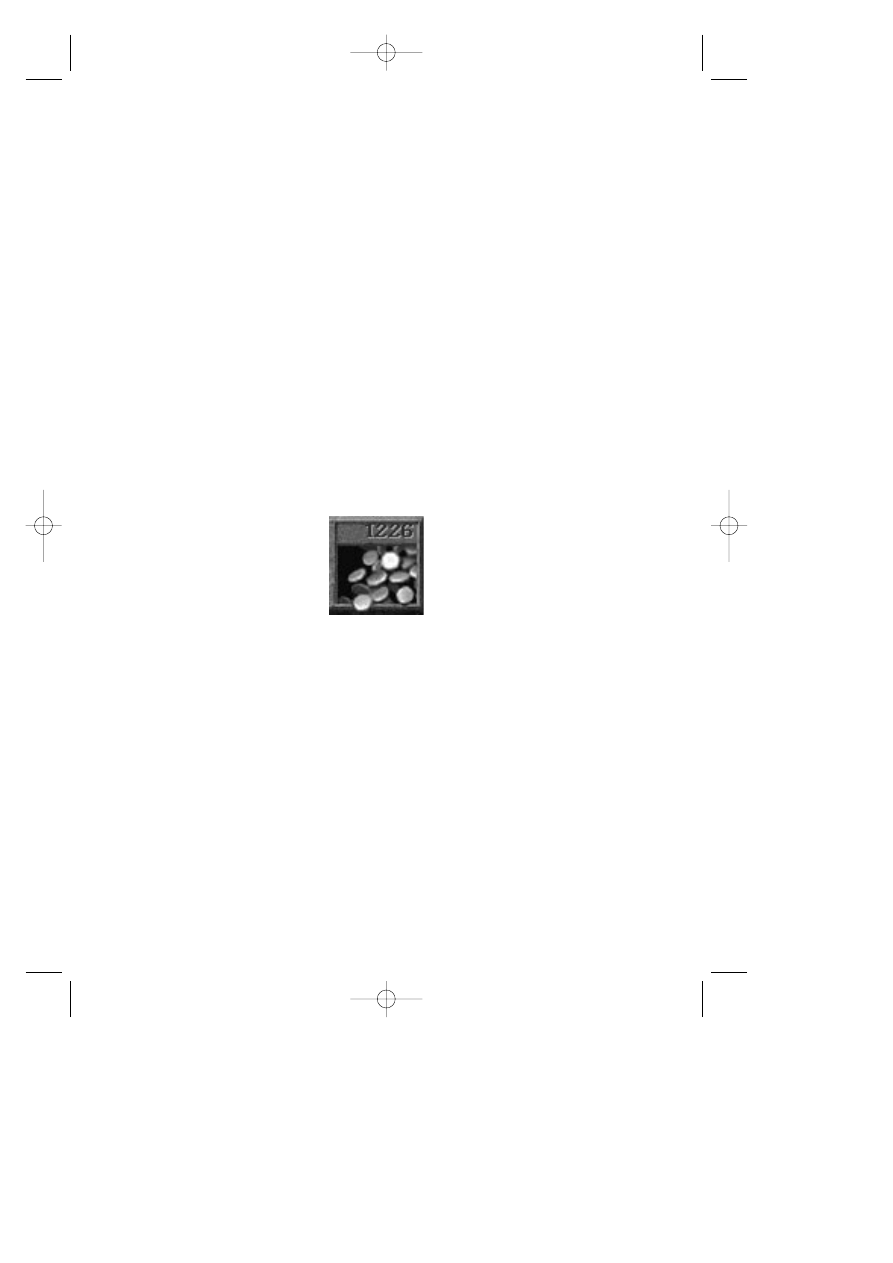
Gold
As Connor travels he will find
gold hidden in places, and will
find that some monsters will
drop gold when they die. Make
sure you take any gold you find.
There are several places
throughout the game where you’ll be able to buy
items and information. To use the gold, click on
the gold icon on the interface. The cursor turns
into gold coins. Now click where you want to
use it. If you have enough gold in your inventory,
your gold will automatically be reduced by the
proper amount and the exchange will be made.
_MaskDoc 4/11/98 15:45 Page 24
25
Inventory Items
On the top interface is a section containing seven
boxes used for storing inventory items. If you
have more than seven inventory items you can use
the arrow buttons at either end of the inventory to
scroll. To use an inventory item, simply left-click
on it. The cursor changes to the item. Now left-
click where you want to use it. If it can be used
there, something will happen. To get information
about an inventory item, right-click on it. Connor
will give you a spoken description of its attributes.
Health and Magic Items
In the middle of the bottom interface is a section
containing eight small boxes. This is where health
and magic potions are stored. The four boxes on
the left are for the four types of health items
Connor can find (sorted by strength from left to
right; least powerful to most powerful). The four
boxes on the right are for the four kinds of magic
potions Connor can find. When Connor uses a
magic potion an icon will appear at the bottom-
right corner of the screen. The icon is a timer.
You’ll notice it seems to empty out, as does liquid
from a bottle. As soon as it completely empties,
the potion’s effect will wear off.
The four magic potions sorted in order from left to
right include:
Potion of Shield: While under this spell Connor’s
protection stat increases to 50% or by 50%,
whichever is greater.
_MaskDoc 4/11/98 15:45 Page 25
26
Potion of Strength: This potion increases
Connor’s hand weapon stat to 150% of its
current value. For example: If Connor’s hand
weapon stat is 100 and this potion gets used,
it will increase to 150 for the duration of the
timer.
Potion of Reveal: While under the influence of
this potion, Connor cannot be fooled by
magic or invisibility. Things that are invisible
will become visible, and things that are
illusionary will be revealed.
Potion of Invisibility: Using this potion turns
Connor invisible to many of the evil minions,
and some of the lesser forms of life. Be
warned that this potion does not work
against some of the greater creatures that
have been sent forth, nor does it work against any
of the other more advanced forms of life or
characters.
To the left are the four timer icons that
appear when each of the four magic potions
are used. When the inside drains out, the
magic effect wears off.
All of these eight items, both health and magic,
can be accessed via Hotkeys. While you can
simply left-click on these to use them, you can
also use them by pressing their associated
“Hotkey,” the number keys 1 through 8. The eight
items line up left to right with the number keys 1
through 8. This allows you to access them
quickly during combat.
The Mask
The Mask icon serves two
purposes. Each time Connor
finds a Mask piece, you’ll see it
appear here as well as in
inventory. This will give you an
easy visualization of how many
pieces you have found. This is what the game is
all about: As Connor will find out soon enough, his
_MaskDoc 4/11/98 15:45 Page 26

27
quest is to find all of the pieces of the broken
Mask of Eternity and return them to their rightful
place.
If you right-click on the Mask, Connor will tell you
how many pieces he has found. A left-click
takes you to the Main Menu where you can
make all types of game adjustments including
starting a new game, save, load, adjust game
options, replay the introduction, and quit.
Health and Experience Meters
At the bottom center of the interface are two little
meters, one red and one green. The red meter
shows the state of Connor’s health. Don’t let this
one drop to empty or Connor will die and you’ll
have to load a saved game.
The green meter shows Connor’s progress via
experience points. As Connor explores the world
he gains experience. Experience can be gained by
winning in combat, solving a puzzle, gaining new
knowledge, and by meeting and talking to
characters. When the experience meter reaches
the top it gets reset; your combat stats increase
and your health increases and gets reset to 100%.
In other words, the higher Connor’s level, the
stronger he is. (Note: Keep in mind Connor’s
health gets reset to 100% on level jumps. Don’t
waste health items!)
Each time you gain a level the experience points
required to get to the next level is doubled until
you reach level 15. Once Connor reaches level
15 the amount of experience points needed to
gain a level gets fixed for the rest of the game.
Each level is worth 10 points of health. For
example: if Connor is a level 5, with a full health
meter he has 50 points of health which allows
him to take 50 points of damage before dying. If
he’s a level 22, a full health meter represents 220
points.
_MaskDoc 4/11/98 15:45 Page 27
28
The Lands
The Kingdom of Daventry
Connor lives in an area just outside Daventry. The
community is made up mostly of farmers. A grinding
mill in the center of the community is for the
processing of grain. Connor lives here where it’s less
populated and nearer trade with hunters, as he is a
tanner.
The Dimension of Death
The Dimension of Death is not physically connected
to either Daventry or the Swamp, although there are
magical portals whichcan be found in each for the
purposes of travel. These portals have been silent
and unseen for centuries, and are but legend in
Daventry. Only recently have they opened--as if in
preface to the cataclysm.
The Dimension of Death is the holding place of souls
awaiting judgment. Here Lord Azriel rules with the aid
of his skeleton guards.
_MaskDoc 4/11/98 15:45 Page 28

29
The Swamp
The Swamp is an area not far from Daventry. With all
the road and exits from Connor’s village blocked off,
Connor must find his way here through the Dimension
of Death. With the cataclysm came poisonous pools
of water, swamp slime, and other dangerous creatures.
The Underground Realm
of the Gnomes
The Realm of the Gnomes is north of the swamp and
lies in tunnels under the mountains. The gnomes,
mostly miners and traders, have now been sealed in
their underground world. While traveling through this
realm Connor will encounter several gnomes working
on reestablishing an exit topside. It is said that
millennia ago there was a large civilization that lived in
the underground world, but no one has ever found
proof of this.
The Barren Region
The Barren Region lies above the Gnome world on a
plateau at the base of an ancient volcano. A hot and
dry place with rivers of lava, the Barren Region is no
place for Man. It is populated by friendly weirdling
traders and metal-working hill people who have now
come upon hard times as a result of the cataclysm.
Years ago there was regular trade with the people
from the Ice World who live at the top of the volcano.
The Frozen Reaches
The Frozen Reaches lies at the top of the volcano. In
the center of the cone is a lake of icy water. This land
is inhabited by Snow Nymphs (a female race), Gryphs
(an avian race), and ice orcs (a terrible race). Being
one of the highest known locations in the world, it has
become known as the place where the earth meets
the sun.
The Realm of the Sun
This is the celestial world where the Temple of the
Mask of Eternity resides. There is no physical
connection between here and any of the other lands.
This realm is Connor’s final destination--where he will
meet his ultimate destiny.
_MaskDoc 4/11/98 15:45 Page 29
30
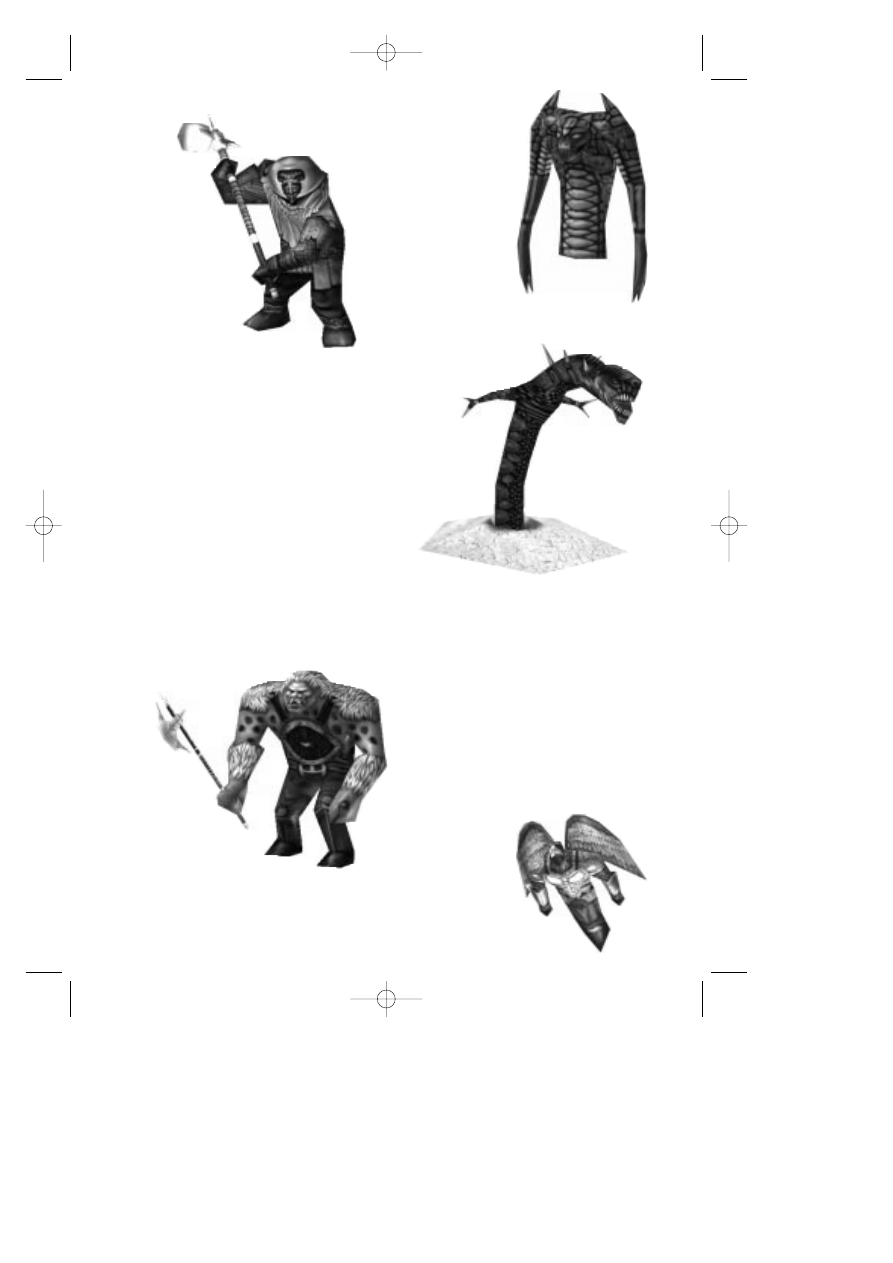
The Monsters
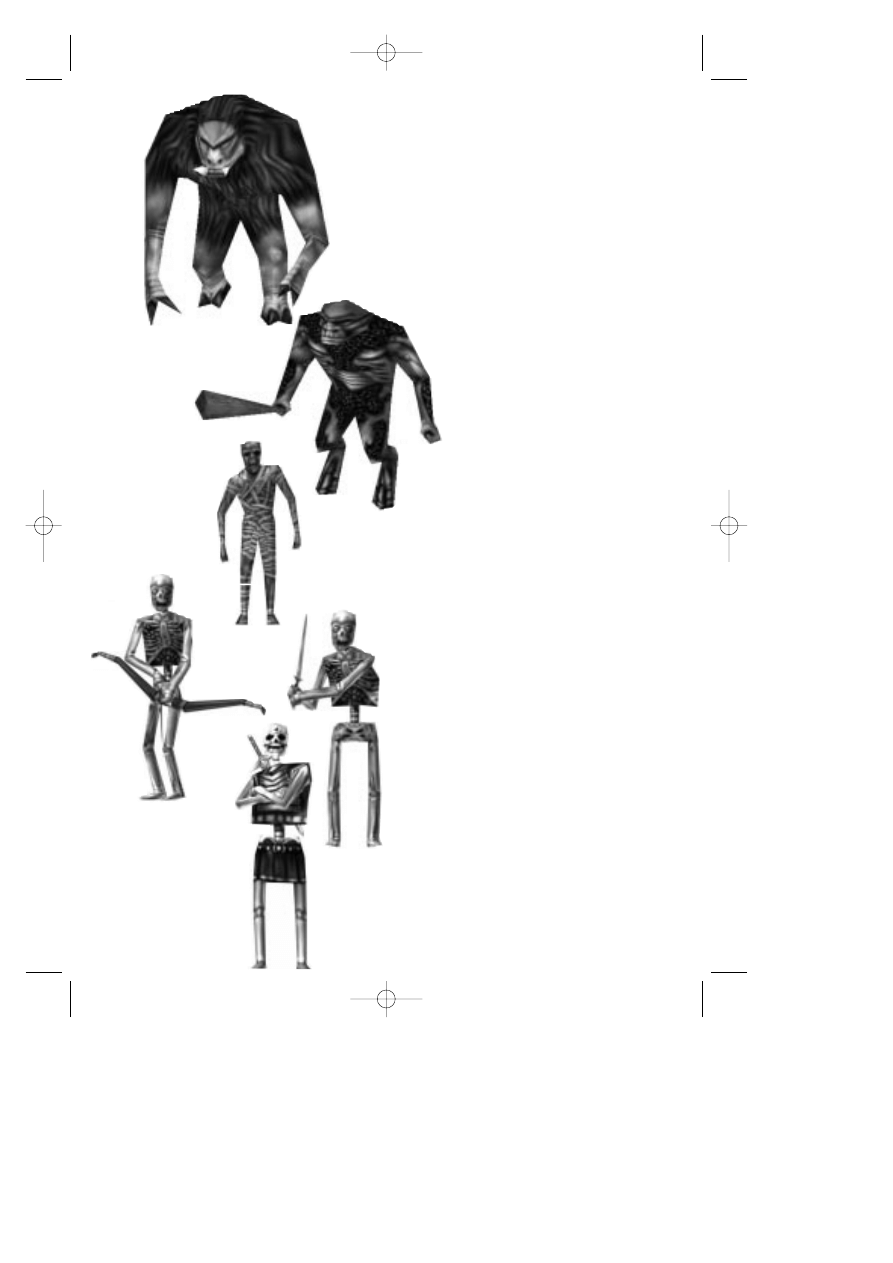
Goblin
The goblin is a creature found mainly in
Daventry. They are typically dumb, slow, and
weak. They present themselves as nice targets
for the early adventurer.
Spriggan
The spriggan is found in several lands.
While they are rather dumb, they
can be fast and powerful. Be
careful when you see one of
these, as they often run in
packs.
Zombie
The zombie is a creature that is
found in many lands. They dig up
out of the ground when they sense
your presence, often popping up
behind you. While these are dumb and very
slow-moving creatures, they often pack a
powerful punch. Some of them seem able to
take a lot of punishment before finally ripping
apart.
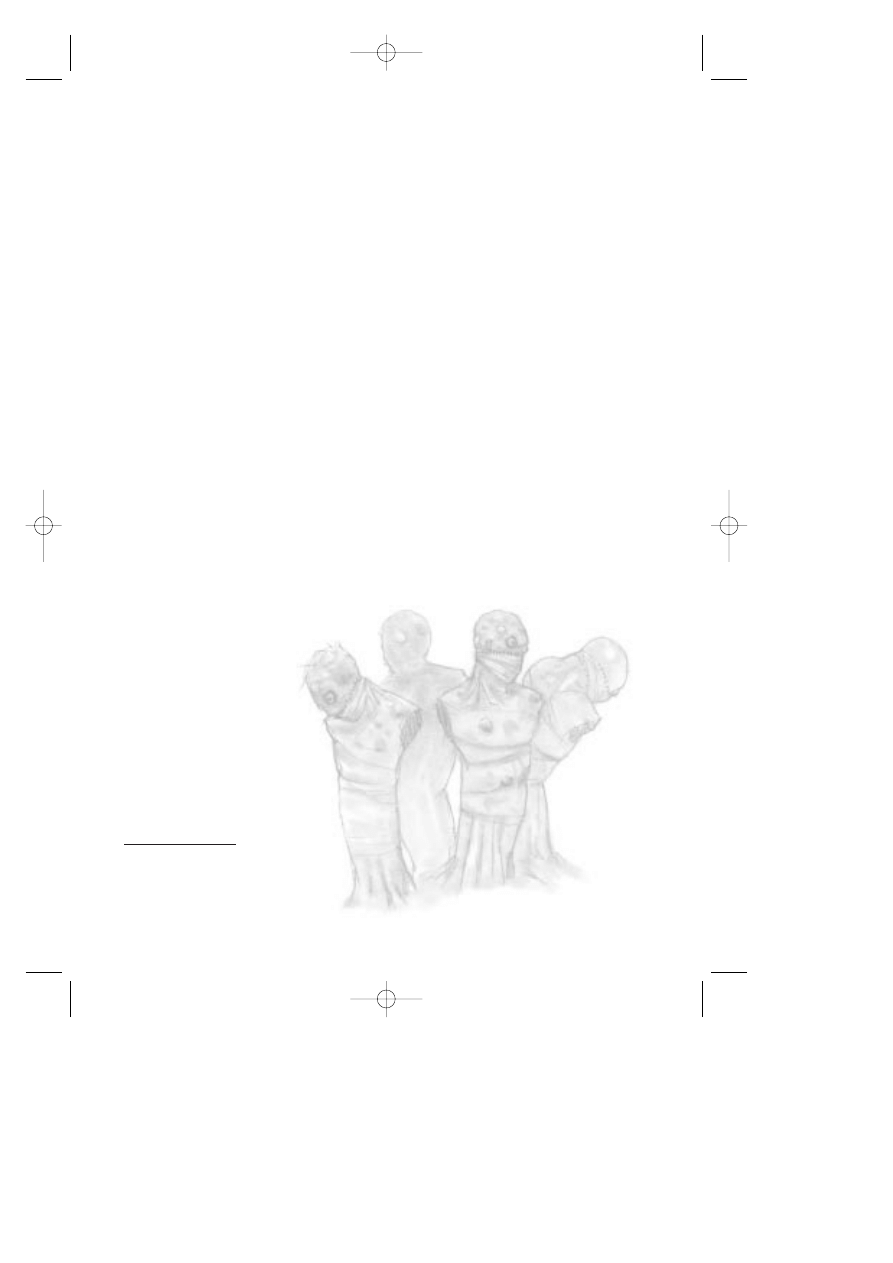
Skeleton
The skeletons are the guards of the
Dimension of Death. They’re smart,
fast, and often run in groups. Groups
are often made up of archers and
swordsmen, making a challenge for
even the most experienced adventurer.
Commander Skeleton
These guys are big and bad. When you
see one of these guys, you’re in for a
battle. Their heavy armor gives them
good protection and their massive size and
heavy sword deliver a crushing blow. Be
prepared to use your health items quickly. A
potion of shield is not a bad idea either!
_MaskDoc 4/11/98 15:45 Page 30
31
Weeper
The weeper is a strange and unusual creature.
It is the soul of the yet-to-be-judged. Now
that chaos has been released in the
Dimension of Death, those waiting to
be judged have become mindless
wanderers looking for the energy of life. If
Connor nears one, it will begin to feed on his
own life force.
Wandering Spirit
These spirits can be found only in the
Dimension of Death. They wander the
passages and corridors. Since they
have no essence, no physical attack
effects them. Be careful to stay out of
their way. While they are not interested in
Connor, if they happen to come into
contact, their mere aura is harmful to
Connor.
Scavenger Slime
The slime is a creature
that can be found only
in the swamp. It spits
a poisonous glob of sludge.
Be careful with these guys,
as they are fast and skittish. While
the slime is not a hearty creature,
they are relentless in their attack,
constantly hitting and running.
Carnivorous Plant
The carnivorous plant is indigenous only
to the swamp. They can hide
under the water and pop up
with a powerful bite.
Fortunately, these plants are
just that, plants. They are rooted where they are,
and can’t move. Ranged weapons prove
ineffectual against them, as they seem to quickly
duck under the water.
_MaskDoc 4/11/98 15:45 Page 31
32
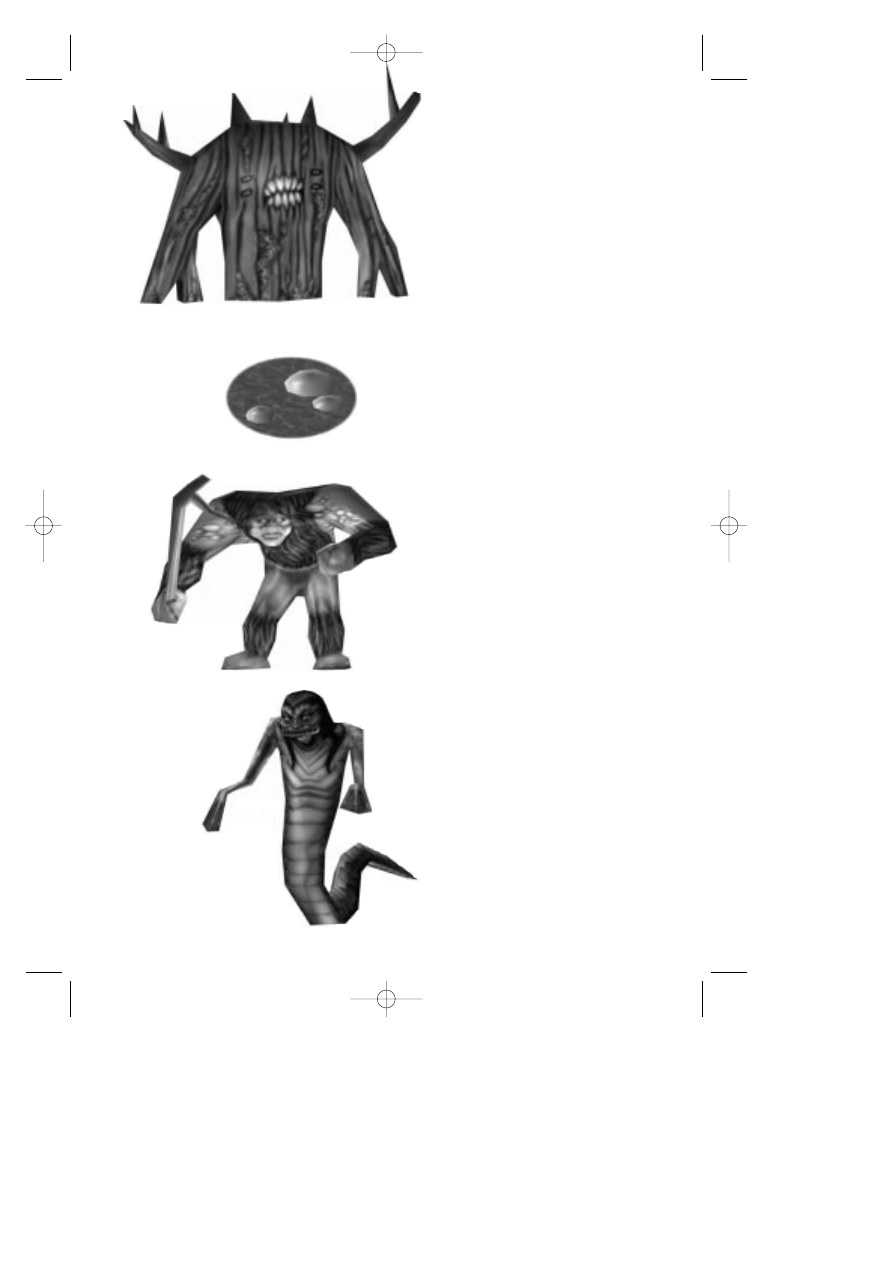
Mandragor Tree
The mandragor tree is a most powerful
opponent. Its strong roots block
Connor’s path to the heart of the beast.
While chopping away at a root may
open a path for attack, the creature
can spawn a new root quickly. Take
advantage when a root dies to
move in and attack at the trunk.
Ranged weapons are completely
useless against these creatures.
Bubble monster
It is unknown exactly what these creatures
are. They live under the water in the swamp
and seem to be some kind of tentacled
creature. They strike with little warning, often
dragging their victim under the murky waters.
Watch and listen carefully for bubbles.
Swamp Fiend
The swamp fiend appears to be
genetically related to the spriggan.
They are fairly slow and dumb creatures, but
pack a terrible blow with their clubs of wood.
Watch out for these guys, as they often run
in packs.
Swamp Witch
The swamp witch is a unique creature of
the swamp. While she’s slow-moving,
she’s very hearty and can throw a
powerful fireball. Be prepared for heavy
battle and using lots of healing potions!
_MaskDoc 4/11/98 15:45 Page 32
33
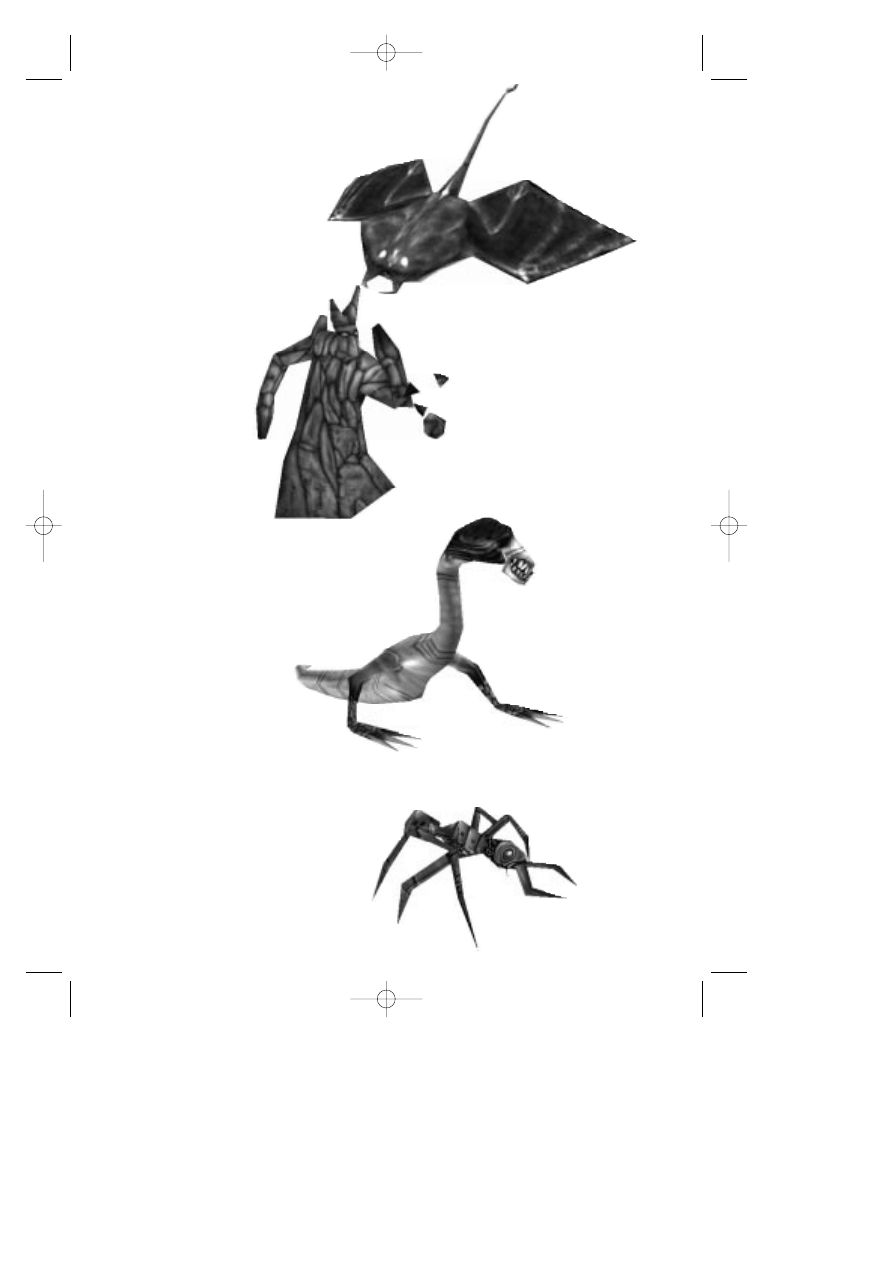
Bat Manta
The bat manta is a creature of the
Gnome Realm. Dropping down
from the ceiling, they fly toward
Connor shooting a lethal
electrical charge from their tails.
While affected by any weapon, in
the close quarters of the
underground a strong hand
weapon proves most
effective.
Rock Demon
The rock demon is
a creature made
completely of
stone. Popping up
out of the ground,
they’ll throw small
boulders at Connor.
Since they’re made of
stone, a ranged
weapon does little damage.
Dragon Wyrm
This dragon is a unique creature found in the
Gnome Underground. Its thick hide is
impervious to ranged weapons. Be
ready for a battle when
confronting this huge
beast in hand to hand
combat.
Fire Ants
The fire ant is a creature found in the Barren
Region. While it’s not a strong opponent,
neither is it out to get Connor. If you leave
them alone, they usually leave you alone--
just don’t get too close. Be careful!--if
you combat one of these they usually
call their friends. You can quickly get
knee-deep in ants!
_MaskDoc 4/11/98 15:45 Page 33
34
Pyro Demon
The pyro demon is a
creature that lives in the
burning lava. If you get
too close to the lava,
they will pop up and
defend their home
tossing globs of searing
hot lava at Connor.
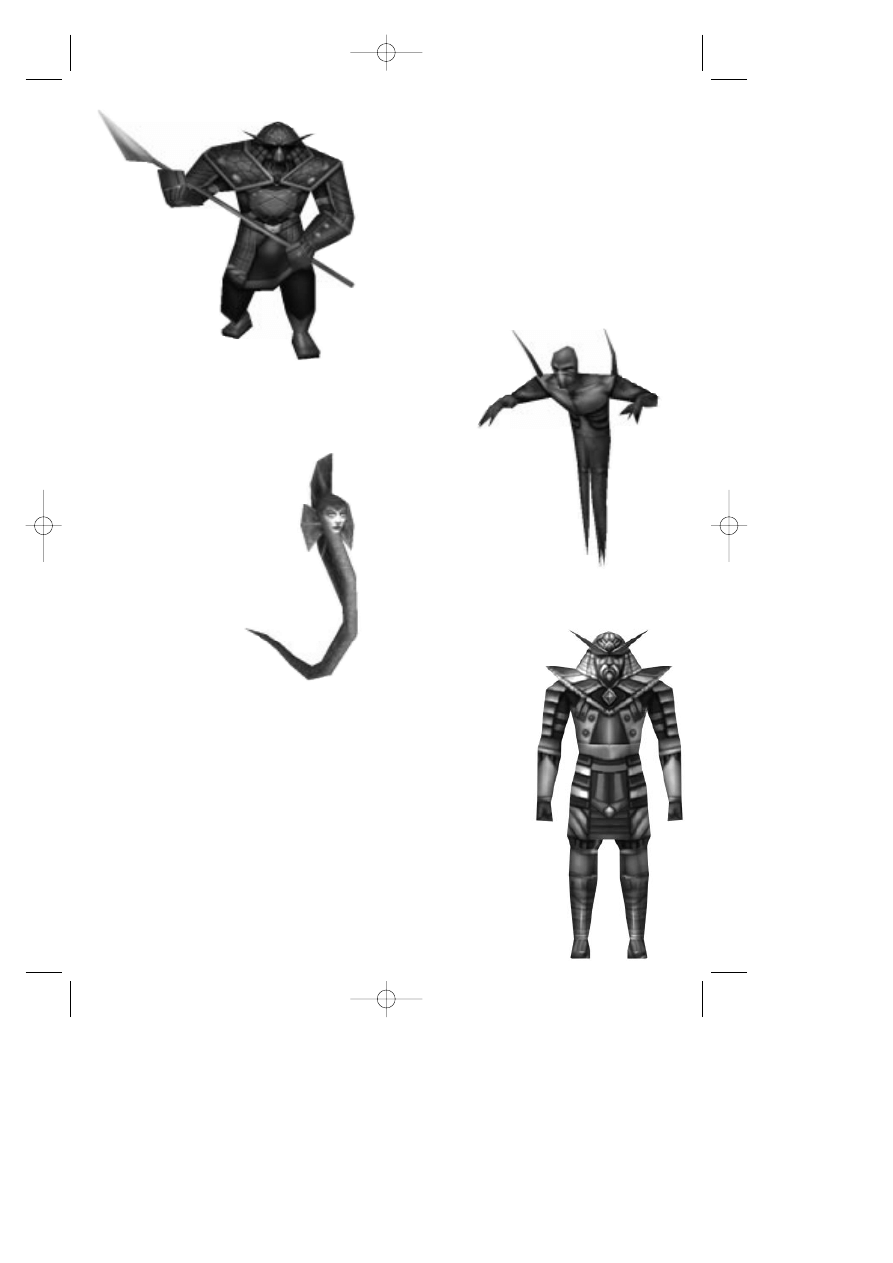
Fire Dwarf
The fire dwarves are a
mean and cruel people. Their
short stout bodies can
swing a heavy
and powerful
hammer, while others of
them carry a flaming
firebow. They are
usually well-armored,
and can
withstand a
heavy
attack.
Basilisk
This behemoth showed up in the Barrens
shortly after the cataclysm. In addition to its
size and powerful jaws, its eyes can fire a
deadly bolt of energy. Many have tried to
confront this beast, but none have
survived.
Ice Orc
The ice orc is the slow and dumb foot
soldier of the Warlord in the Frozen
Reaches. In spite of that, they are well
equipped with sharp
battle axes and ice
crossbows. If you can
outthink these guys, it
always proves better than a
frontal assault.
_MaskDoc 4/11/98 15:45 Page 34
35
Gryphs
The gryphs are winged creatures of the
Frozen Reaches. They’re smart, fast, and
well-equipped. It’s best to just avoid
these guys if you can.
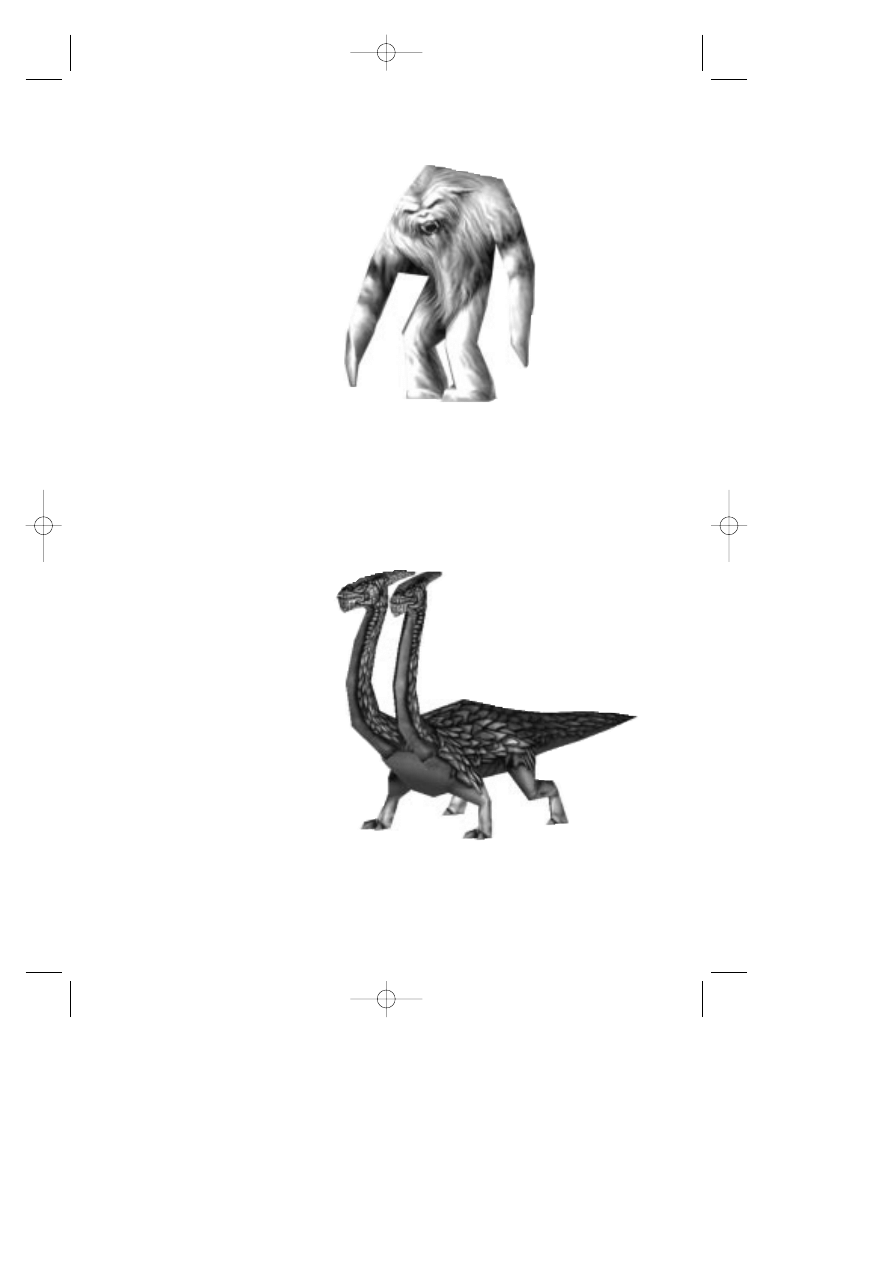
Frost Demon
The frost demon is a large and
shaggy beast of the ice world.
They are slow-moving and rather
dumb. However, don’t under-
estimate them. They are very
strong and often run in packs.
Snow Mane
The snow mane is a unique creature in the ice
world. It is swift of foot, and packs a
tremendous bite. It is not known what this
creature looks like as it’s invisible. It’s also
unknown what kind of magic empowers this
beast.
Two-Headed Dragon
The two-headed dragon guards
a passageway in the Frozen
Reaches. It is said there is a way
to defeat this magnificent
creature, but so far none have
found the secret. It is rumored
that the dragon guards a
gateway to a fantastic land.
_MaskDoc 4/11/98 15:45 Page 35
36
Henchman
The henchman is the foot soldier and minion
of Lucreto. Created from the now-evil fluids
that run through the Temple of the Sun,
Lucreto has sent these beings forth in
search of the lost fragments of the Mask of
Eternity. These guys are strong and well-
armored. When you see one, defend
yourself. They’ll try to kill Connor and take
the Mask pieces back to Lucreto, their master.
Shadow Demon
The shadow demon is
found only in the Temple
of the Sun. Sensing
Connor’s presence,
they appear from out
of walls and floors. Watch out for
these guys as they often appear in
groups.
Water Snake
The water snake is a creature
found only in the lower levels of
the Temple of the Sun. Their powerful
whip-like tongue can pack a striking punch.
Lucreto
He’s the reason for all this
trouble! You’ll have to face
him at the end of the game.
Since Lucreto was an Archon
of the Temple before he
became evil, he’s not good at
combat. However, he does
hold a good grasp of the
powers of magic. Be
prepared with plenty of health
items when facing him, and
keep in mind that he can’t be
killed by normal means. You’ll
have to find a way to deal with
him other than standard combat!
_MaskDoc 4/11/98 15:45 Page 36
37
Hints
Each of the seven realms’ puzzles are mostly
self-contained within their respective lands. In
other words, if you’re stuck in a land, you should
probably look for your answers IN that land.
There will never be a puzzle that keeps you from
progressing to the next land where the answer is
not in the land you are currently in. However,
that doesn’t mean that some puzzles won’t span
lands, just that there will never be a puzzle to get
out of a land that is not wholly contained within
that land.
Exceptions to hint #1: Yes, there are a few
exceptions to the above rule. It’s possible to
leave a land that has a piece of the Mask without
aquiring it. If you do this, you’ll have to go back
at some point. There are also several side
quests that you can choose to do if you like.
Some of these may require going back to a
previous land if you’ve missed an item.
Not sure what to do or where to go? Take a
look at your magic map. If there’s any place that
is not yet uncovered, go there. Exploration is a
big part of this game.
Still lost? Try talking to some of the characters
AGAIN. They often have very helpful hints.
STILL STUCK? OK, keep in mind that any thing
you click on that has a message is probably
something important. There aren’t messages for
every cup and plate in the world, only things that
pertain to the game and story.
READY TO GIVE UP? Alright, try going to
HYPERLINK http://www.sierra.com
www.sierra.com and find the King’s Quest:
Mask of Eternity message board. Here you
will find a place to post questions, talk to other
players, and share hints.
_MaskDoc 4/11/98 15:45 Page 37
38
Credits
Team Mask
Designer/Writer
Roberta Williams
Producer/Director/Co-Designer
Mark Seibert
Art Director
Jason Piel
Animation Director
Jason Zayas
Programmers
Adam Szofran
Alan Clark
David Wenger
Jeff Orkin
Jeff Pobst
Jim Edwards
John McKinnie
Scott Bodenbender
3D Artists
Barry Sundt
Bob Munsil
William Todd Bryan
Animators
Ethan Walker
John Piel
Marc Vulcano
Ray Bornstein
Quality Assurance Lead
Jennifer Keenan
Sound FX & Additional Music
Ben Houge
Additional help from:
Al Eufrasio
John Shroades
Layne Gifford
Mark Martino
Mikhail Agadzhanov
Rob Kenny
Steve Conrad
William O’Brien
Additional Credits
Voice Director
Roberta Williams
Mark Seibert
Voice Casting
Roberta Williams
Mark Seibert
Voice Auditions
VoiceCaster
Burbank, CA
Voice Recording
Hollywood Recording Services
Voice Recording Engineer
Mark Howlett
DREAMS Software Specialist
Ben Houge
Original Music Composed &
Performed By
Kevin Manthei
Ben Houge
Mark Seibert
Opening, Closing and
Flight to Temple Movies
Digital Post Graphics
Seattle, WA
_MaskDoc 4/11/98 15:45 Page 38

39
Packaging
Dan Amdur
Jim Veevert
Documentation
Mark Seibert
Cheryl Sweeney
Roberta Williams
Quality Assurance Manager:
Gary Stevens
Assistant Manager: Ken Eaton
Lead: Bernadette Pryor
Engineer: Erinn Hamilton
PC Technician: Pat Callahan
Compatibility: Byron Hummel
Analysts: Ishmael Burns, Julie
Bazuzi, Marc Nagel, Kate Powell,
Noel Prude
Beta Testers
Kate Ashley, Chris Canavan, Alan
Chan, Lars Christen, Robert
Glover, Mark Goodman, Chris
Kateff, Geoff Keighley, Noah
Koontz, Linda Lindley, Wes Litt,
Tom Marley, Sherry Marshall,
Steve Martin, Jeff Miller, Michael
O’Brien, Michael Piontek, Della
Rodgers, Mike Shavelson,
Charles Solen, Corey Vanderlaan,
Robin Ward, Stuart Young
Special Thanks To
Mark Hood, Scott Lynch, Jim
Murphy, Zippy the Incredibly
Inflatable Spitting Wonder Llama,
The World Famous Talking Bear,
--and all the moms, dads,
husbands, wives, girlfriends, boy
friends, & significant others
without whom this game would
have been completed months
earlier.
Cast
Ben Houge
Ferryman, Skeletons
Bill Farmer
Weirdling tradesman, King Gryph
Daran Norris
King Graham, Weapon Seller Gnome, Ice Lord
Jan Rabson
Crystal Mystic, Henchman
Jennifer Darling
Swamp Wisp, Lady of the Lake, Unicorn/Ugly beast
Jim Ward
Unseen Voice, Armor Seller Gnome, Hillman
Kevin Richardson
Prophet Tree, Lord Azriel, Lucreto
Kirsten Seibert
Gwennie
Mary Kay Bergman Swamp Witch, Apothecary Gnome
Neil Ross
Spirit Knight, Archon, Wizard
Nick Jameson
Daventry Official, Sage Gnome
Philece Sampler
Swamp Wisp, Queen Freesa
Richard Horvitz
Swamp Wisp, Ice Orc Foot Soldier, Skeleton
Scott Bullock
Connor, King Mudge
Tasia Valenza
Sylph, Sarah
_MaskDoc 4/11/98 15:45 Page 39

2:
A, B, C
Before you call our technical support lines, please check that you have read the Readme file
included on the game disk #1. You may well find a very quick answer to the problem that you
are facing as these files contain answers to most common problems. If the answer is not here,
make sure you have precise details of any error message that you receive, and details
regarding the specifications of your computer before you call us, as this will help us in giving
you a faster and more efficient service.
If you would prefer to write to us, please send your mail to the following address:
HAVAS INTERACTIVE UK Ltd.
Customer Services / Mail Order / Tech Support Department
2 Beacontree Plaza
Gillette Way
Reading • Berkshire
RG2 0BS
United Kingdom
3:
D, E, F
4:
G, H, I
5:
J, K, L
6:
M, N, O
7:
P, R, S
8:
T, U, V
9:
W, X, Y
0:
Q, Z
CUSTOMER SERVICES
Technical Support Tel: (0118) 920 9111
Fax: (0118) 987 5603
Lines open 24 hrs, 365 days a year, using our automated technical support attendant.
This system includes answers to all commonly posed questions and problems with our new and
major titles. It is set up in a friendly and easy to use menu system that you navigate through
using a touch tone telephone. If the answer to your question is not in our automated system,
then you will be transferred to a technician between the hours of 9am and 5.30pm
Monday to Friday.
Here are some key-presses that will allow you to navigate through our automated attendant.
Note that these are the standard letter assignments that are given to UK telephones so if your
phone has letters on the keypad, please use them instead:
Sierra UK Web site
http://www.sierra-online.co.uk
UK Website includes technical support, mail order, chat rooms, product information, game
demos and much, much more.
Hintline (UK callers only)
(0891) 660 660
24 hrs. Automated service requires a touch tone phone. Calls cost 50p/min. at all times.
Max call length 7.5 minutes. Max call charge at £3.75 at all times.
manuel A5 uk 9/04/99 11:50 Page 1

WARRANTY
Each company of the HAVAS INTERACTIVE group is named “HAVAS INTERACTIVE” in the paragraphs below:
Havas Interactive warrants for a period of ninety (90) days from the date of purchase that the software title contained in this package shall be
free from defects in material and workmanship. In the event that this software titles proves defective during that time period, Havas
Interactive will provide the customer with a functionally equivalent disk upon receipt by Havas Interactive of proof of purchase and the defecti-
ve product.
REPAIR, REPLACEMENT, OR REFUND AS PROVIDED IN THIS WARRANTY IS THE EXCLUSIVE REMEDY OF THE CONSUMER. CUC SHALL NOT BE
LIABLE FOR ANY INCIDENTAL OR CONSEQUENTIAL DAMAGES FOR BREACH OF ANY EXPRESS OR IMPLIED WARRANTY. EXCEPT TO THE EXTENT
PROHIBITED BY APPLICABLE LAW, ANY IMPLIED WARRANTY OF MERCHANTABILITY OR FITNESS FOR A PARTICULAR PURPOSE ON THIS PRODUCT
IS LIMITED IN DURATION TO THE DURATION OF THIS WARRANTY.
Some countries do not allow the exclusion or limitation of incidental or consequential damages, or allow limitations on how long an implied
warranty lasts, so above limitations or exclusion may not apply to you.
COPYRIGHT NOTICE
The software title and the manual are copyrighted. All rights reserved. They may not, in whole or part, be copied, photocopied, reproduced,
translated, or reduced to any electronic medium or machine-readable form without prior consent, in wirting, from Havas Interactive. The user
of this product shall be entitled to use the product for his or her own use, any commercial use being excluded, but shall not be entitled to sell
or transfer the reproductions of the software or manual to other parties in any way, nor to rent or lease the product to others without written
permission of Havas Interactive.
[You are entitled to use this software title on a single computer in a single location and on only one terminal at any given time. Any further use
is prohibited.]
manuel A5 uk 9/04/99 11:50 Page 2
Wyszukiwarka
Podobne podstrony:
Fred Saberhagen The Mask of the Sun
Eric Brown The Kings of Eternity
King Crimson The Court Of The Crimson King
James Horner The Mask Of Zorro I Want To Spend My Lifetime Loving You
Pillars of Eternity The White March Part II poradnik do gry
Isaac Asimov The End Of Eternity
Stephen King In a Half World of Terror
The Mask of Demeter Donald A Wollheim
Saberhagen, Fred The Mask of the Sun
Sir William Stephen Richard King Hall The Diary of a U boat Commander (2006)
Pillars of Eternity poradnik do gry
King s Quest II
Pelaam Mask of the Shaman [DHP MM]
King s Quest VII
Asimov, Isaac The End of Eternity(1)
Caris Roane 2 5 Brink of Eternity (Guardians of Ascension = Dawn of Ascension 1)
Mask of Autumn
Asimov, Isaac The End of Eternity
więcej podobnych podstron