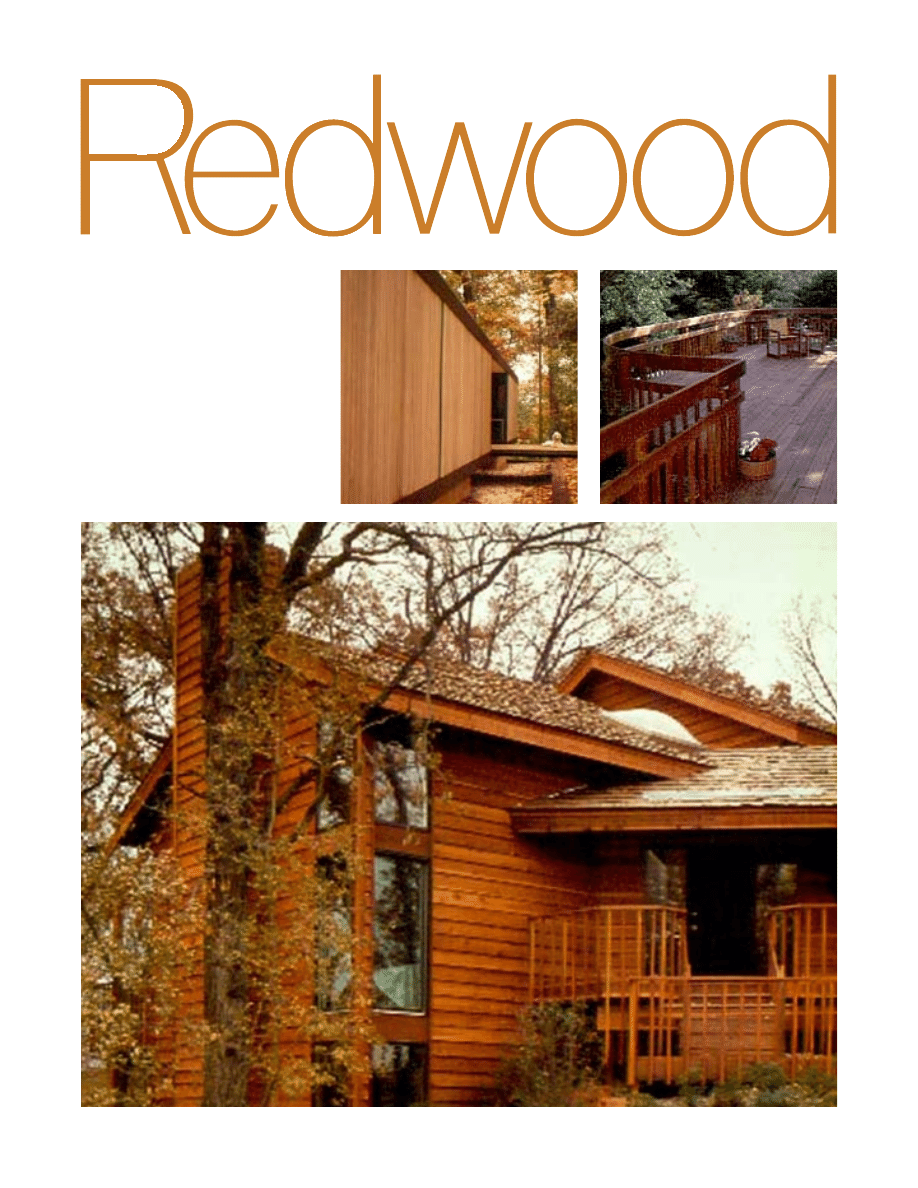
Exterior Finishes
California redwood is one of nature’s
most maintenance-free building
materials. It has a natural resistance to
decay and insects. Redwood’s natural
stability means it shrinks, warps, and
splits less than most other woods. In
addition, no other wood takes and holds
finishes better than redwood.
General Finishing Tips
■
Apply finishes on windless days. Tem-
perature should be between 50 and 70
degrees Fahrenheit.
■
Surfaces should be clean and dry
■
New structures built with unseasoned
wood should air-dry one month before
finishing.
■
Back-priming is recommended for all
exterior finishes, particularly paints.
■
Don’t use wire brushes or steel wool as
metal particles may become embedded
in the wood and can cause stains. Use
stiff bristle brushes.
■
Use finishes recommended for wood
exteriors.
■
Follow manufacturer’s directions and
read warnings on toxicity
■
Don’t mix incompatible materials. Finish
failures may result from mixing incom-
patible products or applying them over
one another.
■
Moisture is the most common cause
of finish failures, so use proper vapor
barriers, air vents and flashing in new
construction.
■
Saw-textured redwood holds stains,
water repellents and bleaches up to
twice as long as smooth-surfaced wood.
■
Redwood grade marked Certified Kiln
Dried will provide the best finish retention
available.
■
To avoid nail stains, use stainless steel,
aluminum or top quality hot-dipped
galvanized nails.
■
Periodic rinsing with a garden hose will
remove dirt and grime from siding.
Stubborn build-up can be removed by
scrubbing with a bristle brush with a
solution of warm water and a mild
detergent. Rinse afterward.
■
Splash lines can be minimized by an
occasional hosing of the unaffected
area, which will even the appearance
of the wood.
Exterior Finishes Not Recommended
■
Varnishes and polyurethanes crack and
pool when used for exteriors. They are
difficult and expensive to apply and
deteriorate quickly Removal is expen-
sive and difficult.
■
Pure oil-treatments such as boiled
linseed oil, are not recommended on
exterior redwood as they tend to promote
mildew growth. Quality oil-based finishes,
including those based upon linseed oil,
contain mildewcides, and are appropriate
for use on exterior redwood.
■
“Shake and shingle” type paints do not
last well on redwood lumber siding.
Clear Water Repellents
with Mildewcide
Clear finishes that modify weath-
ering characteristics and let
color and grain show through.
Bleaching or
Weathering Stains
Low maintenance, natural
appearance with a gray-
toned finish.
Semitransparent Stains
Penetrating finishes available
in a variety of semitransparent
colors including several
redwood hues. Oil-based
stains are recommended.
Solid Body Stains
Film forming finishes avail-
able in a wide variety of
opaque colors. Oil-based
stains are recommended.
Paints
Durable, attractive finishes for
traditional exteriors. Quality
paints are generally worth the
extra cost.
Exterior Finishes
Natural Appearance Finishes
Description
Pigmented Stains
Paints

Uses
Effect
Application
Maintenance
Certified Kiln Dried or air sea-
soned siding, fascia, trim,
decks, fences, garden struc-
tures, commercial and industrial
buildings. Finishes containing
toxic mildewcides are not rec-
ommended for seating, tables
or interiors.
Certified Kiln Dried or air sea-
soned siding, fascia trim,
decks, fences, garden struc-
tures, commercial and industrial
buildings. Finishes containing
toxic mildewcides are not rec-
ommended for seating, tables,
or interiors.
Certified Kiln Dried or air
seasoned siding, fascia, trim,
decks, fences, garden
structures and furniture,
commercial and industrial
buildings. Most semitransparent
stains contain mildewcides.
Certified Kiln Dried or air sea-
soned siding, fascia, trim,
decks, fences, garden struc-
tures and furniture, commercial
and industrial buildings.
Certified Kiln Dried siding,
fascia, trim, some garden struc-
tures and furniture, commercial
and industrial buildings. Not
recommended for decks and
walking or seating surfaces.
Note: For air-seasoned or
unseasoned siding use a
stainblocking latex primer
formulated for redwood.
Minimize weather and mildew
attack. Stabilize redwood’s
color at buckskin tan. Helps
eliminate redwood’s natural
darkening period. Areas ex-
posed to direct sun and rain
may eventually bleach to gray.
Provide for low maintenance
and give redwood a uniformly
gray or naturally weathered
look.
Provide color in a finish that lets
wood breathe naturally Semi-
transparent stains let the grain
show through but present a uni-
form single color. The amount of
pigment contained in stains will
vary according to brand.
Provide color in a finish that
lets wood breathe naturally.
Opaque stains will obscure the
grain but highlight the texture
and have an appearance more
like paint.
Provide attractive colorful
finishes which obscure grain
and texture of the wood.
Apply with brush or roller. Lap
marks and brushstrokes will not
show through. Two coats rec-
ommended for new wood. For
best results, coat sawn ends,
backs and edges before nailing
in place. Read Labels: Mildew-
cides may be toxic.
Apply with brush or roller. Lap
marks and brushstrokes may
show through as many include
gray pigment. Use one or two
coats according to manufac-
turer’s directions. Bleaching
is aided by sunlight and
moisture, so it may speed
the process to periodically
dampen surfaces with a fine
spray from a garden hose.
Apply with brush for best re-
suIts, next best is a roller. Avoid
drips and lap marks. Two coats
usually required for new wood—
follow manufacturer’s directions.
For best results use a brush.
The next best applicator is a
roller. Avoid drips and lap
marks. Two coats usually re-
quired for new wood—follow
manufacturer’s directions.
Apply with brush for best
results, roller is next best appli-
cator. One prime coat and two
top coats are recommended
for new wood. Back-priming
is highly recommended. Use
oil- or alkyd based stain-
blocking primer. Acrylic latex
top coat is recommended.
Reapplication is required after
old finish has lost its effective-
ness. In humid or harsher
climates, reapplication may be
required every 12 –18 months.
Before applying, wood may
be restored to its natural color
as described on back page.
Bleaching oils and stains
provide nearly maintenance-
free performance. Reapply
finish only if wood begins to
darken or bleaching is uneven.
One refinish coat should be
enough.
Refinishing may be necessary
every 3–5 years. Color in pig-
mented stains may wear away
gradually after weathering.
Light brushing with a bristle
brush will help remove old finish
in some spots. One refinish
coat is usually enough.
Refinishing may be necessary
every 3–5 years. Color in pig-
mented stains may wear away
gradually after weathering.
Light brushing with a bristle
brush will help remove old finish
in some spots. One refinish
coat is usually enough.
Refinishing may be necessary
every 7 to 10 years. Paint films
that are too thick tend to pool
and crack. Sand or scrub with
stiff bristle brush. Paint and
varnish removers may also be
used. If sanding, countersink
galvanized nail heads to
protect their coating.

California
Redwood
Association
2 /01
405 Enfrente Drive, Suite 200
Novato, California 94949
Telephone 415-382-0662
Fax 415-382-8531
Toll Free 888 Cal-Redwood
www.calredwood.org
Redwood—our renewable resource
Finish Restoration
Dirt and Dust may build up to the point
that a mere rinsing with water from a
hose will not remove them. A mild deter-
gent and warm water will generally re-
move stubborn dirt and grime.
Mildew appears as dark spots or gray,
fan shaped spots on the wood surface.
Severely infested areas may appear uni-
formly gray or black. To remove a mild
case of mildew, scrub with a mild
cleanser or detergent. Next rinse with a
household bleach to kill surviving spores.
Lastly rinse with water. When applying a
new finish, be sure it contains a mildew-
cide. Note: Household bleach should
never be mixed with detergent containing
ammonia. Fumes can be fatal.
For severe mildew infestations, scrub
with a stiff bristle brush using a solution of
one cup of trisodium phosphate, one cup
of liquid household bleach and one gal-
lon of warm water. Rinse thoroughly. If
necessary, follow with an application of
4 ounces of oxalic acid crystals dis-
solved in one gallon of warm water in a
non-metallic container. Apply evenly with
a soft brush. When wood dries, rinse with
water. Caution: Oxalic acid is poisonous,
but not dangerous if precautions are
taken. Wear rubber gloves. Avoid contact
with skin or eye.
Nail Stains are an unsightly problem that
can be avoided by using stainless steel,
aluminum or top quality, hot-dipped gal-
vanized nails. The cleaning method de-
scribed above for removing heavy mildew
stains is suggested for nail stains. To help
prevent recurrence, countersink the nails
and swab the holes with a water repel-
lent. When dry, fill the nail holes with a
non-oily wood filler for natural finishes,
or putty if the wood is to be painted.
Paint Peeling, blistering and flaking
occurs when moisture under a non-
breathing film finish destroys the film’s
adhesion to the wood. A properly
installed vapor barrier is the recom-
mended way to control this problem.
Vapor barriers should be on the warm
side of the wall. Problems also may be
caused by faulty surface preparation, or
the use of incompatible materials.
Restoring Redwood’s Color
Discoloration of paints and finishes may
occur when extractives are dissolved in
water and leach from the wood. This
discoloration can also result from
moisture migrating to the surface of
unseasoned lumber. To remove extrac-
tive stains and to restore the new
appearance to weathered wood, follow
these steps. Scrub wood with a bristle
brush and a solution of one cup tri-
sodium phosphate (TSP) and one cup of
household bleach to a gallon of water.
Then apply a solution of 4 ounces oxalic
acid crystals dissolved in one gallon of
warm water. When wood dries, rinse
thoroughly with water.
Removing Finishes
When a finish has deteriorated to the
point of cracking and peeling or some
other finish ailment, it may be desirable
to remove it before refinishing.
Sanding effectively removes pigmented
stain finishes. Galvanized nail heads
should be set below the surface before
sanding to protect the coating and
prevent nail stains.
Water blasting is an effective way of
removing old finish and grime and
preparing for a new finish. A fine, high-
powered spray effectively removes loose
materials without damaging the wood.
The use of a paint and varnish remover
is another way to remove a finish.
Several kinds are available. Before
using, test the preparation on a piece of
new, clean redwood to make sure it will
not discolor the wood—particularly if a
natural finish is to be used. Film-forming
finishes can be removed with a paint
and varnish remover. Heat is another
method of paint removal.
Wyszukiwarka
Podobne podstrony:
(Ebooks) Diy Woodwork How To Door, Making A Solid Wood Door
(Ebooks) Diy Woodwork How To About Router Bits
(Ebooks) Diy Woodwork How To Understand Your Water System
DIY Guide How to research companies
(EBooks) DIY Woodwork Plans 10 Workbench Accessories
(Ebooks) Diy Woodwork Woodworking Basics Router Bit Storage
(Ebooks) DIY Woodwork Plans Drill Press Table
(Ebooks) Diy Woodwork Plans Kitchen Cabinets
(Ebooks) Diy Woodwork Plans Shed 24 Utility Shed
(Ebooks) Diy Woodwork Plans Longer Plank Top Workbench
(Ebooks) Diy Woodwork Hole Saw Sander
(Ebooks) Diy Woodwork Plans Shed 10 x10 Gambrel Roof With Loft Plans
(Ebooks) Diy Woodwork Plans Timber Garden Shed Part Ii
(Ebooks) Diy Woodwork Plans Bending Wood
Diy How To Paint Woodwork
eBook DIY Woodworking Plans Guide To Wood Finishing
How To Create Adobe PDF eBooks
więcej podobnych podstron