1
Thanks for purchasing the Totally Rad Action Mix! We hope they will help you get better
results in your post-production, and in less time than you’re currently putting in. We’ve
put a ton of time and effort into making the best, most flexible set of actions we can, and
we want to make sure you get the most out of your purchase. This is a little mini
instruction manual, which should help you install and use the actions. If you have any
questions, this is a good place to start.

2
Installing the Actions
Installing a set of Photoshop actions is quick and easy.
1.
Unzip the .zip file you downloaded containing the
actions. Place the files in an easy to remember
location. (if you’re reading this file, chances are,
you’ve already done this!)
2.
Click on the little right arrow button on the ACTIONS
palette.
3.
From the drop-down menu, select LOAD ACTIONS.
4.
Select the action set you wish to install, and select LOAD.
A little note about our actions – the Totally Rad Action Mix is actually 4 sets of actions, so you’ll
need to repeat the above steps for all four sets.
Using the Actions
Photoshop actions are designed to be simple and easy to use.
Click on the action you want to run in the actions palette, and
press the PLAY ACTION button at the bottom of the actions
palette. (If you’re in button mode, you will simply need to
click the button which corresponds to the action you would
like to run.)
Many of the actions in the Totally Rad Action Mix require some input from you in the form of
painting in a layer mask. If you’re familiar with layer masks, great! If not, try our crash-course
in layer masks below…
Using Layer Masks
Layer masks are one of the most powerful tools available in
Photoshop. They allow you to specify exactly what parts of a
photo you want to change with a particular layer or group of
layers. If a layer has a layer mask, it will have two thumbnail
images in the layers palette. The one on the right is the layer
mask. If you click on the layer mask to select it, you can alter
the layer mask just like a normal image. In fact, a layer mask
is basically just a grayscale image that’s used to determine the
strength of how the layer applies.
So how does a layer mask work? It’s very simple. Where a
layer mask is light, the layer it’s attached to will show
through. Where the layer mask is dark, the layer it’s attached to WON’T show through.
3
Try this – bring up any random photo in Photoshop, then create a new threshold adjustment
layer (you create adjustment layers by clicking on the half black / half white circle at the bottom
of the layers palette). Accept the default value of 128. You now have an adjustment layer with
an all-white mask, indicating that it will apply everywhere in the photo. Because of this, the
whole photo has been rendered in a harsh black and white.
Now, select your brush tool (just push the “B” key if you’re lazy like me). Make your brush size
nice and big. Set your foreground color to black, and click on the layer mask for the layer
you’ve just created. Start painting anywhere in the photo. Notice how the original photo
begins to show through where you’ve just painted? Now look at the layer mask… notice how
the thumbnail is black in the areas you’ve just painted? What you just did is darken the layer
mask where you painted, telling Photoshop to lessen the effect of the layer in those areas. If
you were to change your foreground color to white and paint over the photo again, the effect of
the adjustment layer would show through again. Once you are comfortable with layer masks,
you will be able to gain a lot more control over the different effects possible in Photoshop.
Layer masks are an important concept for many of the Totally Rad Actions. It will give you a
great deal more control over certain actions, and some (like Pro Retouch) REQUIRE you to use
the layer mask to specify where you want the action to apply.
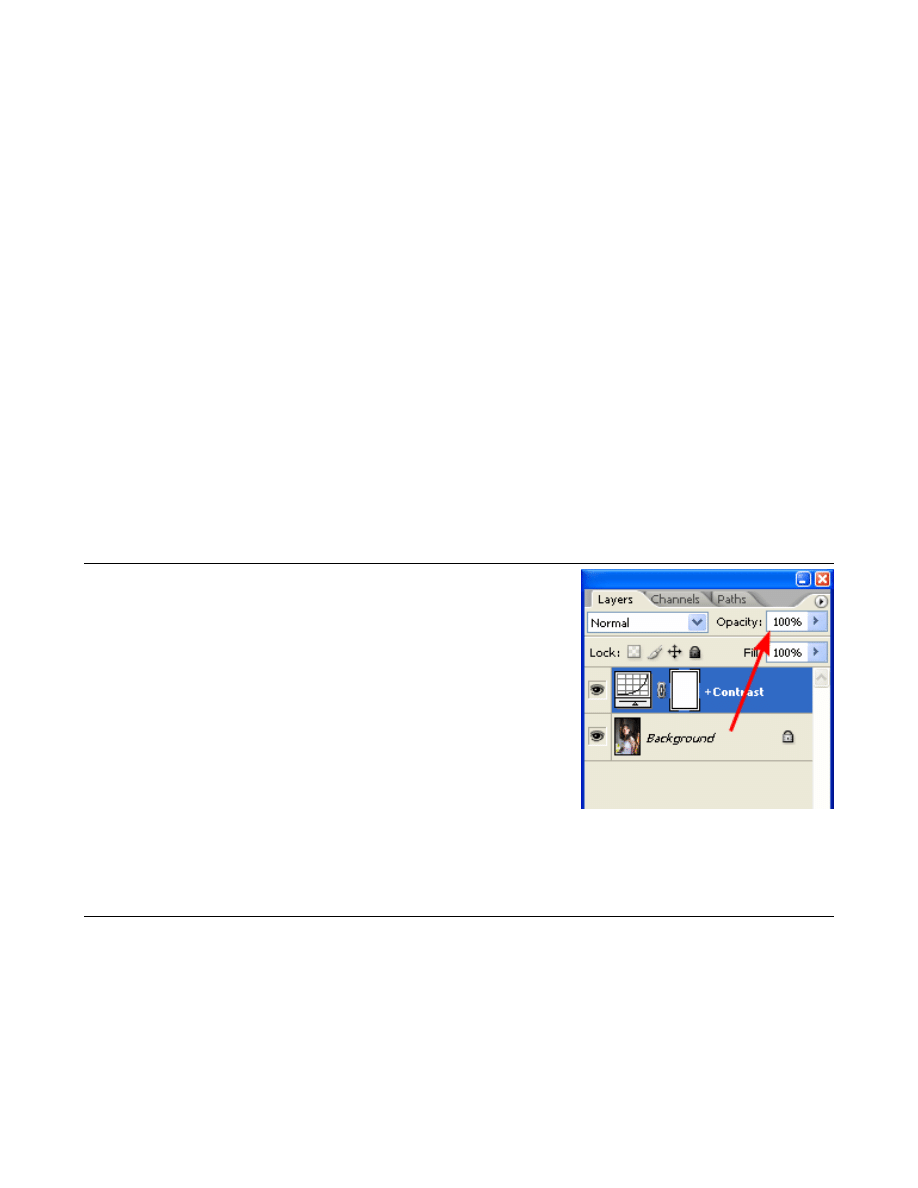
Using Opacity to Control Action Effects
Another easy and powerful tool for tweaking the effects of the
Totally Rad Actions is the LAYER OPACITY SLIDER. By
default, the Totally Rad Actions will create a new layer or
layer group at 100% opacity. If the effect is too strong for
your taste, you can select the new layer and lower its opacity
to lessen the effect of the action.
Don’t forget to try this on actions that create a black and
white result… Old Skool can look really neat at medium
opacities! There are tons of different combinations of effects
you can create by running multiple actions at reduced
opacities.
Layer Order
One other important concept is the order of layers in the “layer stack.” When determining
what the final image will look like, Photoshop works from the bottom up. Generally, you will
want to make sure that the topmost layer is selected before running an action. If you just ran an
action that either didn’t produce the desired result, or had no effect whatsoever, it might be
because there are other layers above it in the layer stack that are messing with it.
The most important thing, generally, is to make sure that any “toning” actions are placed at the
very top.

4
If you have a fairly advanced understanding of how the layer stack works, you can exercise
some subtle control over the final result by altering the order of the layers.
One Last General Note
Almost all of the Totally Rad Actions will result in the creation of a new layer or group of layers.
Some of them require no further input from you, but many of them need a little more work.
Specifically, some of the most useful actions in the set will produce no effect at all until you
paint into a layer mask. If the new layer that’s been created has a black layer mask attached to
it, you’ll need to paint some white into it with the brush tool to indicate where you want the
action to apply.
Caffeine Jolt
These actions are meant to create dramatic effects in color images. Can totally change the
mood of a photo. They also work pretty well over B&W images, too – don’t forget to try that!
1.
Technicolor Dream World
• The cornerstone of our color workflow. Richens colors, increases contrast and
saturation, and softens the image all at the same time.
• Use the included skin correction layer to correct skintones that have become
over-richened by the action.
• Use the included burn layer on highlights that have become burnt out by the
action
2.
TDW No-Glow
• Same as above, except without the glowy-softening part
3.
Prettyizer
• Like Technicolor Dream World, but more glowy and more subtle
4.
Super Fun Happy
• Similar to TDW, except with less saturation increase, and a moderate tonal shift
5.
Rusty Cage
• Produces a dark, moody, warm treatment. Very goth.
6.
Derelicte
• Creates a steely, industrial look that’s a little bit cold and gritty
7.
Grunge Rock
• Like Derelicte, but even a little grittier
8.
Pross Crossessed #1
• A Cross-Processing action. Yellow-pink highlights and cyan-blue shadows.
Severely clips shadows and compresses the tonal range.
• If the overall result looks bad, try adding an adjustment layer just before this
action to lighten the photo. The shadow clipping is part of what makes it look
like bona-fide cross processing, but it can also be unforgiving of slightly dark
photos.
9.
Pross Crossessed #2

5
• A Cross-Processing action. Warmer and less contrasty than Pross Crossessed #1.
Creates green-yellow highlights and warm-reddish shadows. Much more “acidy”
looking.
10.
SX-70
• Emulates the look of Polaroid SX-70 film (which has now been discontinued).
Reduces contrast, compresses the tonal scale and gamut, and softens the image
slightly. Retro-Fun!
11.
Big Blue
• This action works wonders on skies. Adds saturation and dramatic contrast.
• Once the action is run, you’ll need to use the layer mask to indicate areas of sky
that you want the action to affect. The best way to do this is with the gradient
tool.
12.
Green With Envy
• Similar to Big Blue, except meant for foliage – specifically works wonders on dull
greens. Use the attached layer mask to specify the areas of green in the photo.
Daily Grind
These are the less-sexy, nuts-and-bolts actions meant for simple, everyday tasks. Little color
tweaks, lightening and darkening, and dodging and burning.
13.
Yin/Yang
• This is our standard-issue dodge / burn action. Paint using the Yang layer to make
the photo lighter, and use the Yin layer to make the photo darker. The action will
select the Yang layer by default – great for emulating fill light in contrasty photos.
• This should be one of your most commonly-used actions. Just about every image
can benefit from a little dodging and burning.
14.
Combine Exposures
• Simple action that copies the current image into the image below it and adds a
layer mask. Great for combining multiple exposures / raw conversions to achieve
a greater dynamic range.
15.
Oh, Snap!
• Adds a slight boost in contrast, saturation, and sharpness. Great for images that
are a little washed out due to flat light or flare.
• If you open up the resulting layer group, you’ll see three layers. You can
individually toggle those layers on and off (or change their opacity) to control the
effect.
16.
Vignette & Blur HQ
• Darkens and blurs the edges of the image.
17.
Vignette & Blur Fast
• Just like above, but use a faster method at the expense of overall quality. Subtle
difference.
18.
Contrast +
• Adds a simple S-curve to increase contrast
19.
Contrast + (Luma)
• Adds a simple S-curve to increase contrast, but doesn’t affect color saturation
20.
Grainstorm

6
• Adds grain to an image – great for simulating film grain, or otherwise adding
texture to an image that’s “too pretty”
21.
Sharpen for Web
• Simple sharpening that is great as a final step before posting images to the web
22.
Boutwell Magic Glasses
• Adds “local contrast” to an image, increasing texture, and the impression of
specularity and detail. Subtle, but can make a big difference.
• Unlike most similar methods, this action is self-masking to avoid creating a haloed
effect.
• Can work wonders on photos that look flat and lack texture, dimension, and
depth.
23.
Boutwell Not-So-Magic Glasses
• Similar in effect to above, but slightly different. Acts on a larger area of the image,
and might introduce some haloing. More subtle effect.
24.
de-blotchifier
• Reduces chroma noise in an image while leaving the luma noise. Doesn’t exactly
reduce noise, but it makes it look much nicer. This basically makes the noise in
the image look like film grain, rather than digital noise. This is our preferred
method of noise reduction.
25.
EZ-Burn
• Adds an edge burn around the outer perimeter of the image. Works regardless of
image orientation or aspect ratio. Use only on full-resolution files (not for smaller,
web-sized files)
26.
Good VS Evil
• An alternate method of dodging and burning, similar to Yin/Yang.
• Has more effect on highlights and shadows at the edge of the tonal scale, at the
expense of occasionally causing saturation shifts that make things look funky.
27.
Warm it Up, Kris
• Warms up a photo
28.
Cool as a Cucumber
• Cools down a photo – mathematically, it’s the inverse of the warming action.
29.
Banding-Aid
• Helps eliminate posterization in an image, especially in skies that have been
worked over really hard by extreme tonal adjustments. Converts the image to 16
bits, flattens it, and then converts back to 8-bit. If you notice color transitions
have bands in them, instead of smooth transitions, try running this action.
• This action will flatten the entire image, and is therefore best as a final step before
saving / printing.
30.
Lights On
• Lightens an image overall
31.
Lights Out
• Darkens an image overall

7
Color Blind
These actions are specifically for converting images to B&W and toning them. Effects range
from extreme to mild. Many of the B&W actions are also great at various opacities over a color
image – there are a ton of effects possible with that. And the toning actions aren’t just for B&W,
either – try them on color images for some cool results.
32.
Old-Skool HQ
• Simulates the look of a vintage (circa 1900) photograph. Converts the image to
black and white through an orthochromatic conversion (reminiscent of wet-
plates), vignettes, blurs the edges (to simulate old-tech lenses), softens, and adds
grain, plus creates a warm tone. Lots of stuff, cool effect. Also looks super-neato
at lower opacities.
33.
Old-Skool Fast
• Same as above, except uses Gaussian Blur instead of Lens Blur, improving speed
at the expense of quality. Basically, the transition from in-focus areas to out-of-
focus areas will look more like a Photoshop effect, and less like an optical effect.
If you can’t tell the difference between the two, just use the fast one ☺
34.
Super Old-Skool HQ
• Like Old-Skool, but with a more pronounced effect (extreme, really)
35.
Super Old-Skool Fast
• Faster version with a slight tradeoff in quality
36.
Magical B&W
• A black-and-white conversion that creates an ethereal, dreamy effect. Can be too
much on skin tones or images with very saturated colors. Try Awesome B&W for
a similar, but less pronounced effect.
37.
Awesome B&W
• Similar to Magical B&W – creates a dreamy look.
38.
Bitchin B&W
• L.a.b. based B&W conversion – great for creating creamy, smooth skintones.
Adds a little snap as well
39.
Boring Old B&W
• This is our preferred B&W method since 2003 – uses a weighted channel mixer to
emulate panchromatic B&W film. Also adds a bit of snap and contrast.
40.
Red Filter B&W
• Really simple action that’s equivalent (basically) to shooting B&W film with a red
filter. Dramatically darkens skies in landscapes, and creates a dreamy look,
especially in hard light. This will also lighten skin tones considerably (sometimes
too much to).
• Pairs well with Technicolor Dream world and Grainstorm to create a quasi-
infared look.
• Also works well at about half-opacity on color images to create an ethereal color
palette
41.
Cinnamon Toast
• Rich brown B&W toning action
42.
Boring Sepia
• Simple sepia-ish warm tone

8
43.
Boring Selenium
• Simple selenium-esque cold tone
44.
Antique Tone
• Our preferred B&W toning – warms the image throughout the tonal scale (yellow-
ish highlights and reddish-brown shadows), and compresses the tonal range
slightly.
45.
Split Tone #1
• A subtle split-toning action that creates warm highlights and brownish-purple
shadows
Retouch
This group includes only one action – the only retouching action we use.
46.
Pro Retouch
• This is a generic, action-ified version of a technique used in high-end retouching
studios for commercial beauty and fashion. Made especially for retouching skin
in tight to semi-tight shots. Smoothes skin and minimizes blotchiness and uneven
texture, without eliminating a believable skin texture. It’s pretty smart about
maintaining detail over hair, facial features, veils, etc, so you can be a little sloppy
with painting in the layer mask. Basically this action blurs out certain patterns of
detail, while retaining others.
• To Use: Simply paint into the layer mask over areas that you want to smooth.
• If you want to add a little sparkle to eyes, paint into the “Eye Bump” (use
sparingly).
• This action will leave less subtle details intact, such as deep wrinkles, pimples,
scars, etc – you’ll have to zap those with the healing brush on your own.
• This action also pairs incredible well with Technicolor Dream World. TDW will
help further smooth skin and make it “glow.”
• Advanced Users: You can tune how much detail is brought back into the image
with the four gray-looking layers inside the group (if the default effect is too
strong). If you open up the resulting layer group, you’ll find two layer sets, each
containing two layers.
Wyszukiwarka
Podobne podstrony:
Marlin Bolt Action Rimfire Manual
Usfa Single Action Manual
2 Instrumenty marketingu mix
t3 Mix PRODUKT
PANsound manual
als manual RZ5IUSXZX237ENPGWFIN Nieznany
Promocja jako element marketingu mix
hplj 5p 6p service manual vhnlwmi5rxab6ao6bivsrdhllvztpnnomgxi2ma vhnlwmi5rxab6ao6bivsrdhllvztpnnomg
BSAVA Manual of Rabbit Surgery Dentistry and Imaging
Okidata Okipage 14e Parts Manual
Bmw 01 94 Business Mid Radio Owners Manual
Manual Acer TravelMate 2430 US EN
manual mechanika 2 2 id 279133 Nieznany
4 Steyr Operation and Maintenance Manual 8th edition Feb 08
Oberheim Prommer Service Manual
Ergonomics In Action
cas test p
więcej podobnych podstron