VAG-COM Programming Procedure for Auto-leveling on 2003+ style OEM Xenon Headlights
Before you begin, please be sure you are on level ground, that the parking brake is not engaged, and
that there is no one sitting in the vehicle.
Step 1.
-
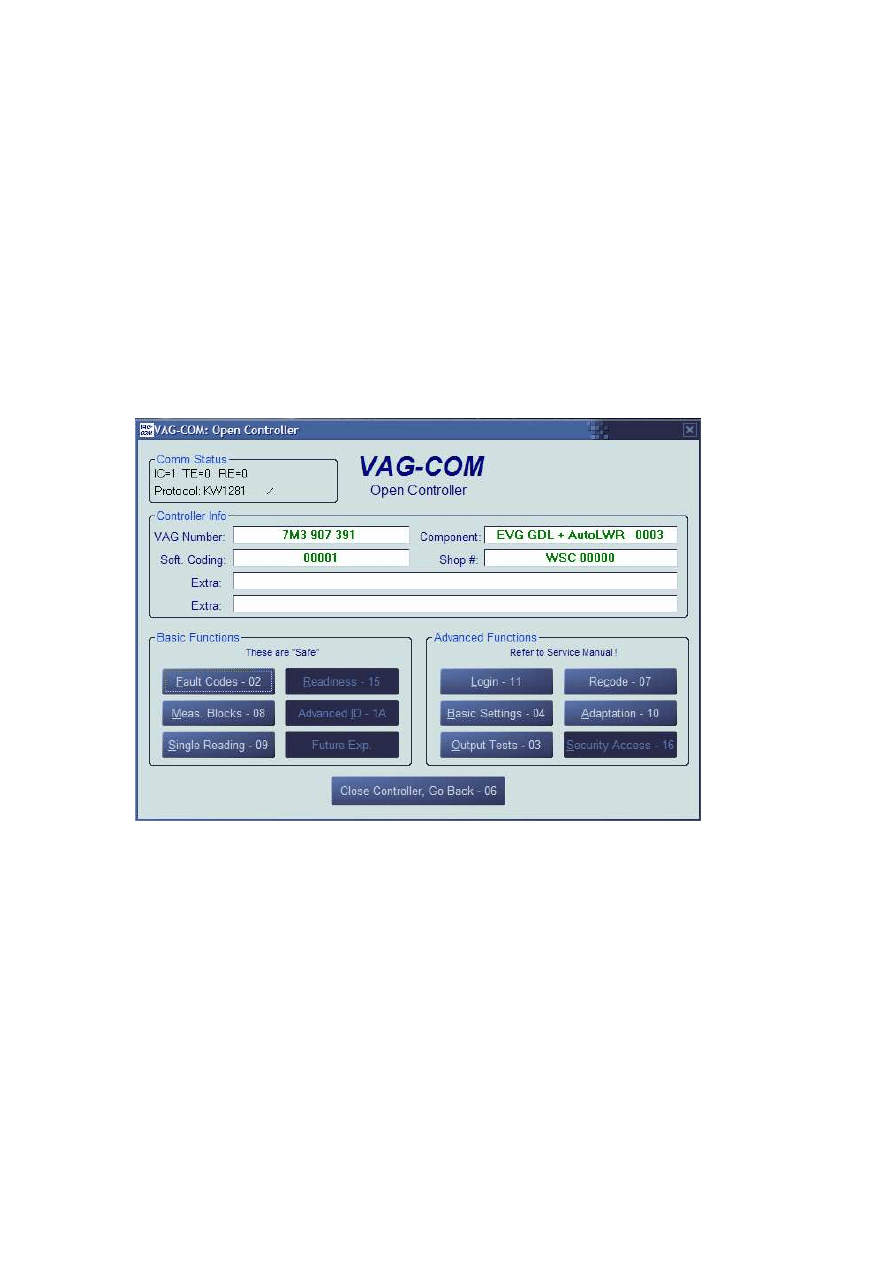
Start the VAG-COM, make sure the ignition switch is on (engine running or not running) and
the headlights are on. Connect to address 39. This is your passenger side headlight leveling
controller.
-
Once you are connected you should see the following display:
-
Note the current soft-coding number in the above example is already set properly
-
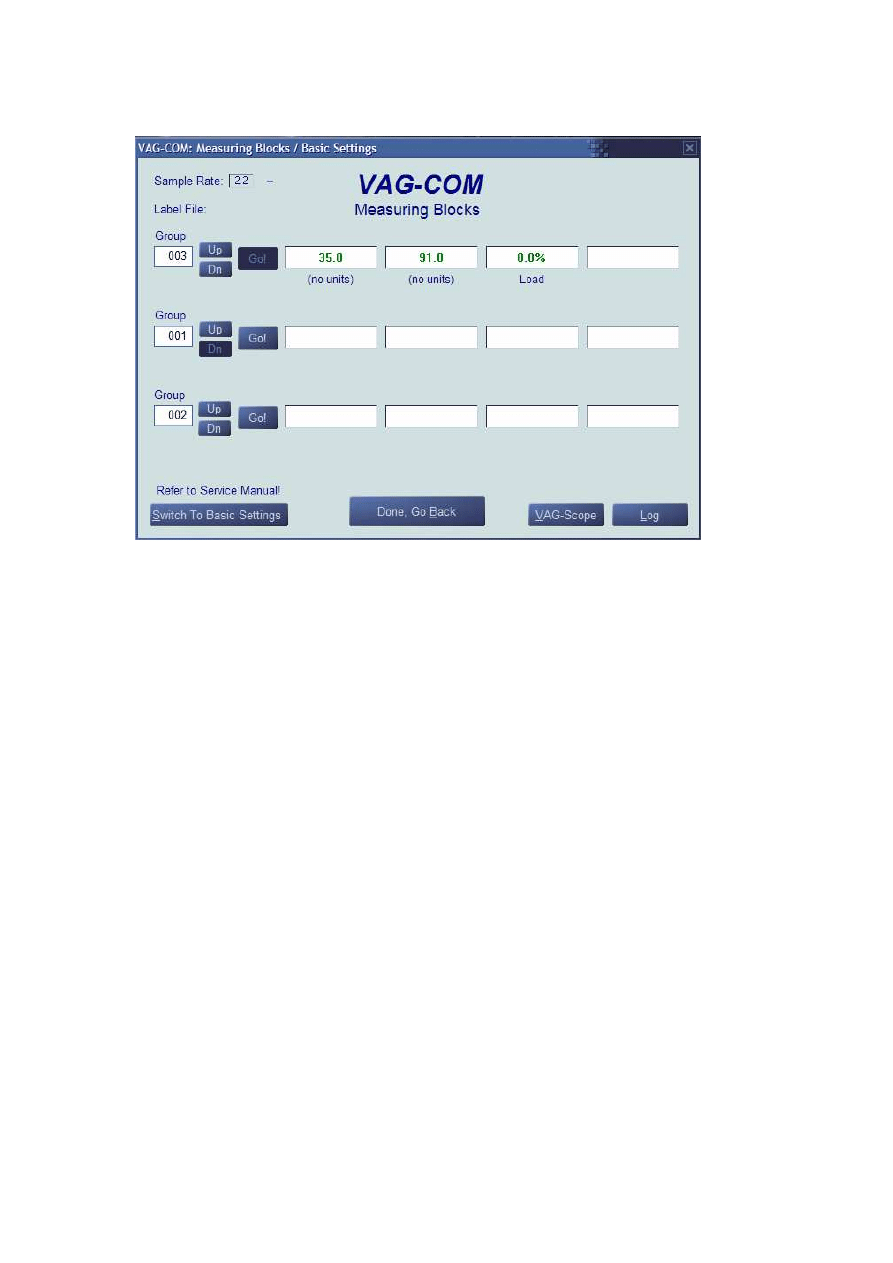
Select 08 – Measuring Blocks
-
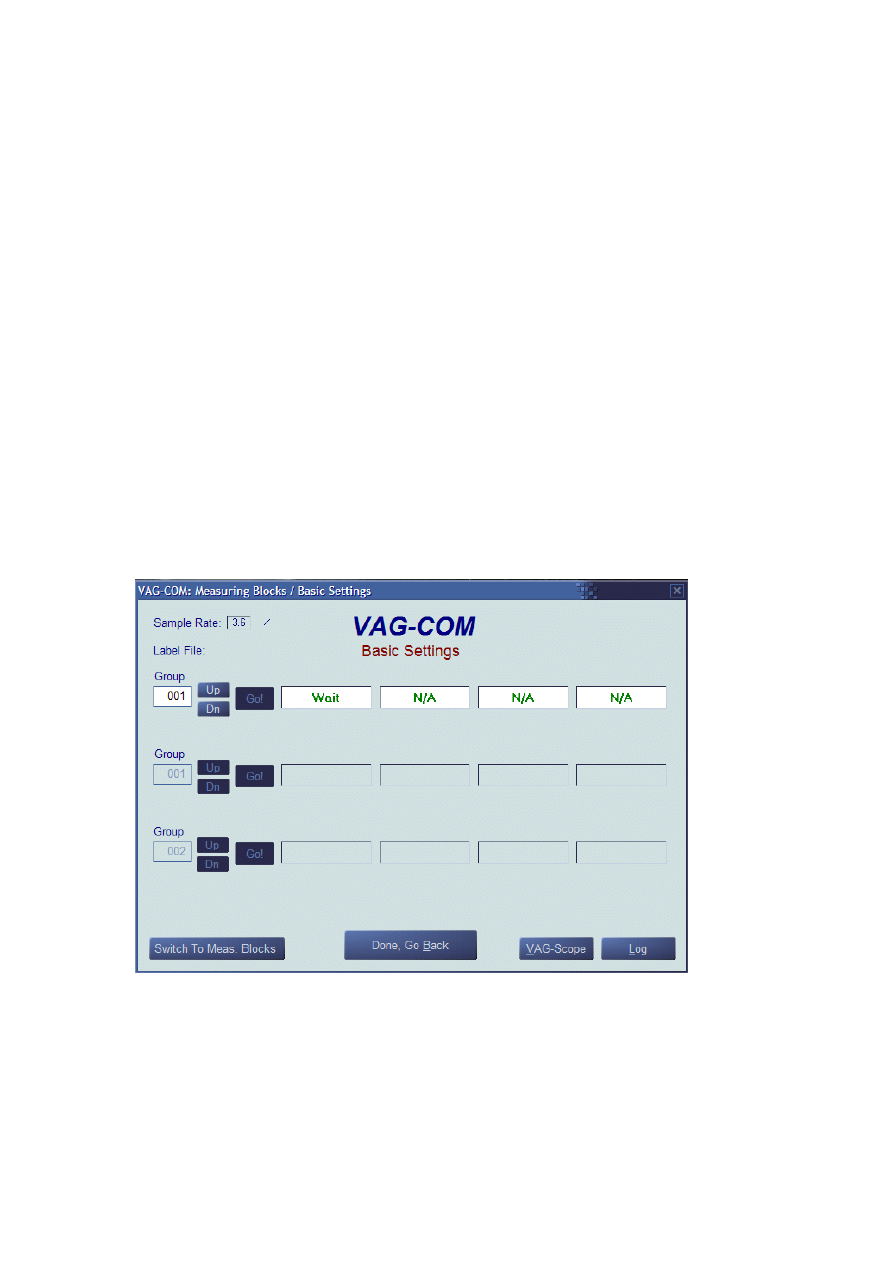
Read channel 003 (hit Go!):
-
After the lights have been on for at least 1 minute, the value in the first column should be
between 30 and 40. This is the current wattage.
-
The value in the second column should be between 68 and 102. This is the current voltage.
-
Hit Done, Go Back
-
Now select 07 – Recode
-
Enter the appropriate coding from the list below:
00001 - Golf 2 wheel drive
00002 - Golf 4 wheel drive
00003 - Jetta/Bora 2 wheel drive
00004 - Jetta/Bora 4 wheel drive
-
Hit Go! and the controller should reload with the new soft-coding shown in the controller
information
-
If the recode was successful, exit the controller.
Step 2.
-
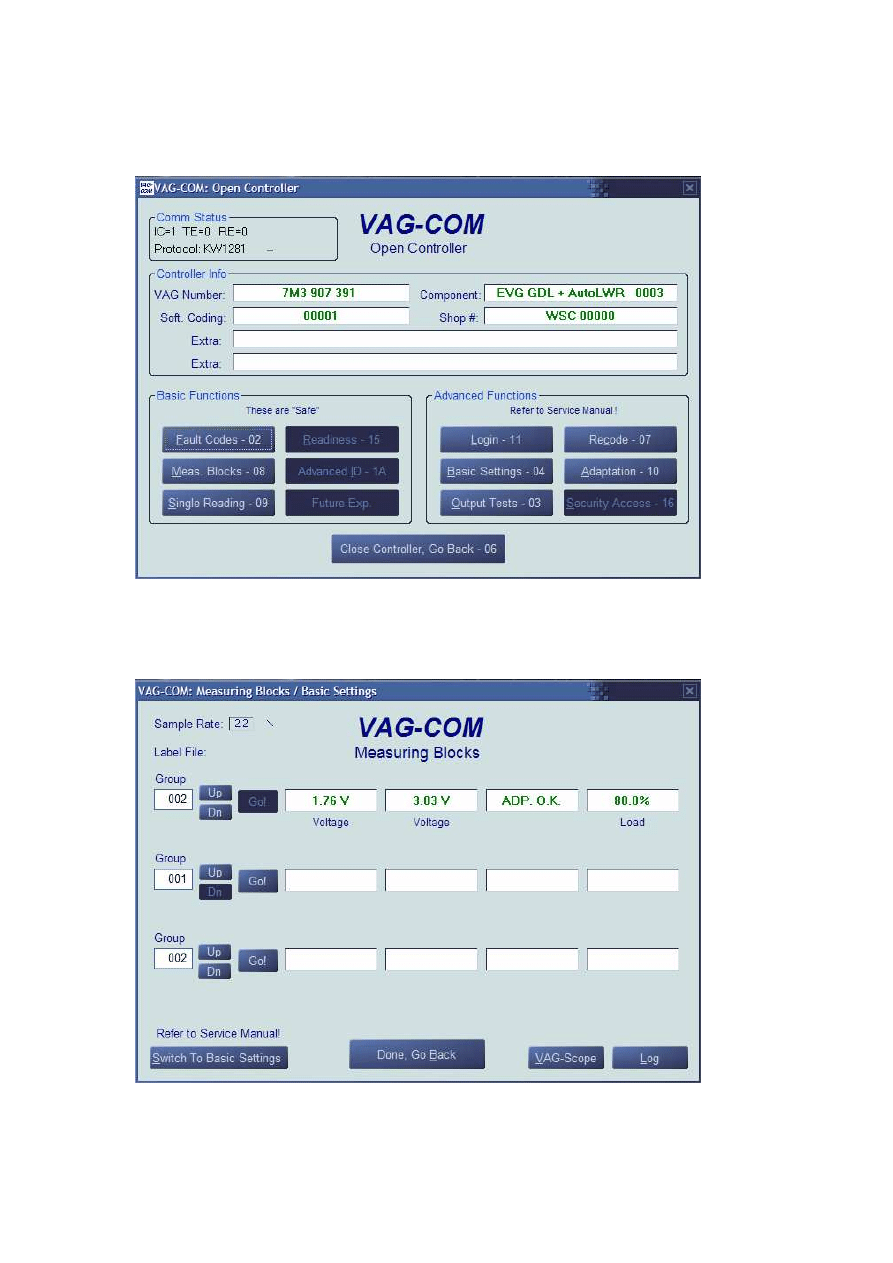
Now connect to address 29. This is your driver side headlight leveling controller. This is
considered the master controller and will be the one we use to initialize the auto-leveling
system.
-
Once you are connected you should see the following display:
-
Select 08 – Measuring Blocks
-
Read channel 002 (hit Go!):
-
-
The value in the first column is the signal from the front axle leveling sensor. The value should
be between 1.6 and 3.0 volts
-
The value in the second column is the signal from the rear axle leveling sensor. This value
should be between 1.6 and 3.0 volts.
-
IF THESE VALUES ARE NOT CORRECT, please go back and read the fault codes (02 –
Fault Codes). Once you have corrected the problem (voltages are within limits for both
sensors), continue. Please note, if your vehicle is lowered, you may have to make modifications
to your mounting bracket so that the “at rest” voltage readings are within specifications.
Ideally, the voltage should be above 2 volts and below 3 volts. If these voltages are not within
specification, the software will not allow you to proceed.
-
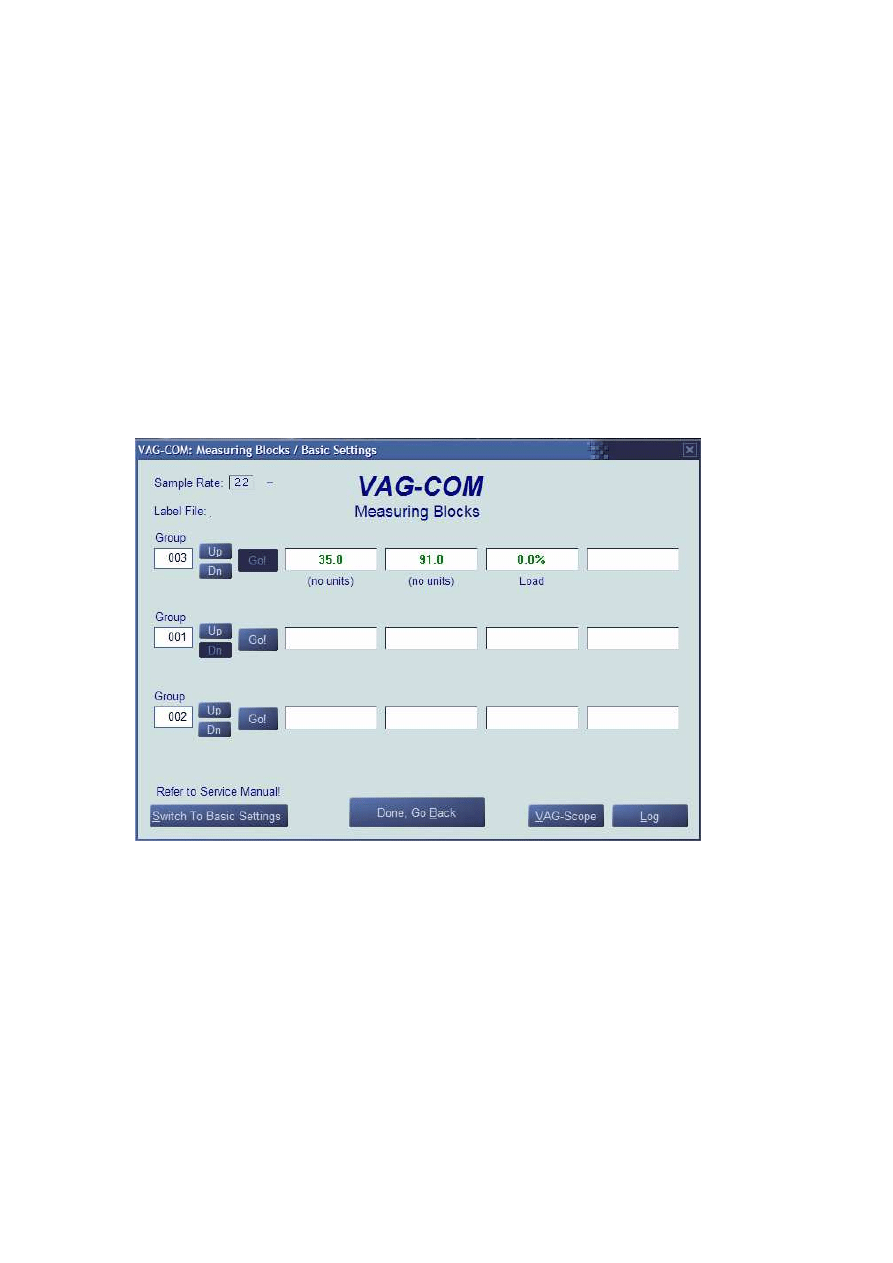
Now read channel 003 (hit Go!):
-
Verify that the value in the first column is between 30 and 40 watts.
-
Verify that the value in the second column is between 68 and 102 volts.
-
Hit Done, Go Back
-
Now select 07 – Recode
-
Enter the appropriate coding value (Same as previous headlight)
-
Hit Go! and the controller should reload with the new soft-coding shown in the controller
information
Step 3.
-
Turn off the ignition and headlights, then turn them on again. This will reinitialize the system.
-
Reconnect to Module 29
-
Now select 04 – Basic Settings
-
Enter channel 001 and hit Go!:
-
The screen should read Wait. While this is happening, the leveling motors are returning to the
initialization position. This can take up to 30 seconds.
-
The message should then change to Adjust Headlights:
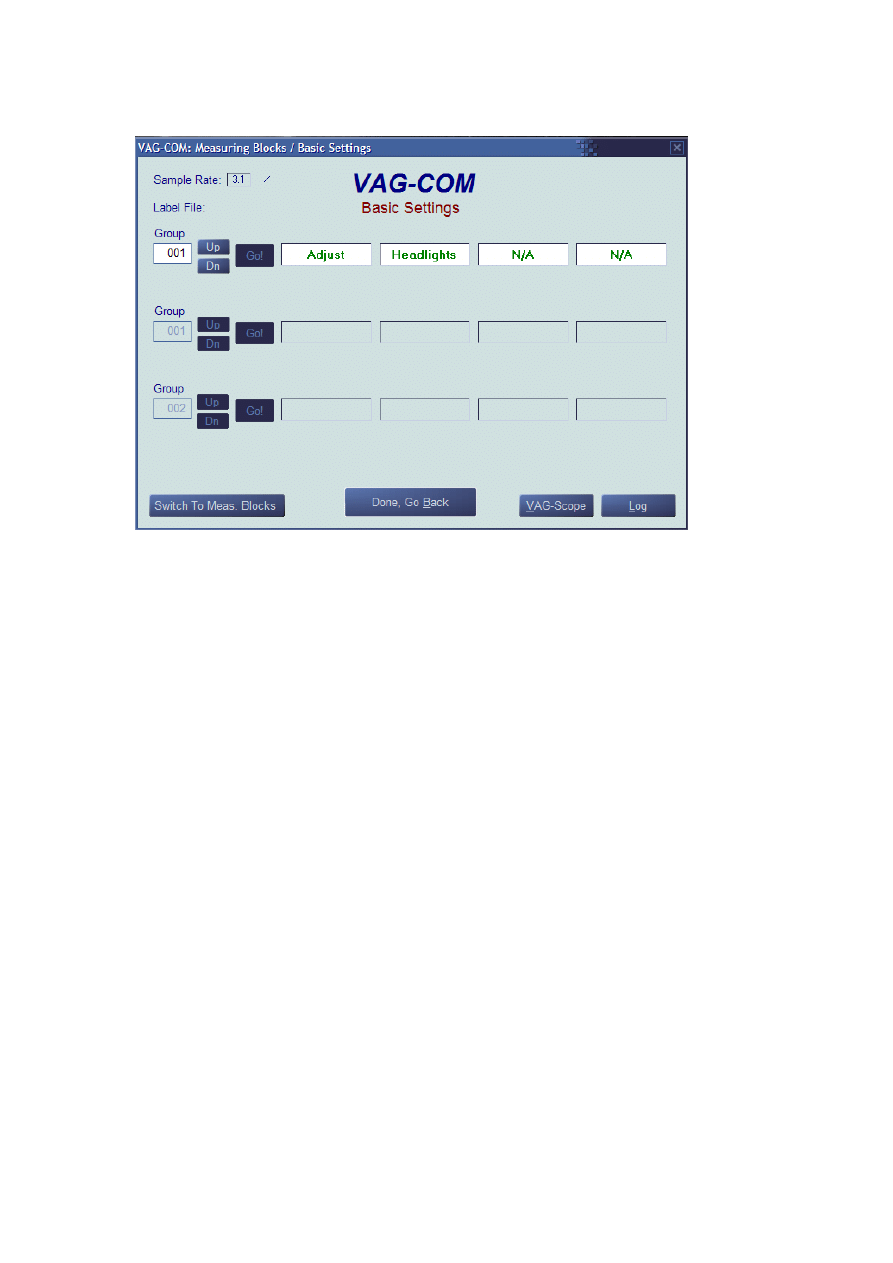
-
Using the manual screws, adjust the horizontal and vertical positioning screws to level the
beams. Using the Bosch xenon headlight aligning system at your dealer or service shop is the
most accurate (and quickest) means to properly aim your headlights.
-
Once you are done aiming, hit Done, Go Back
-
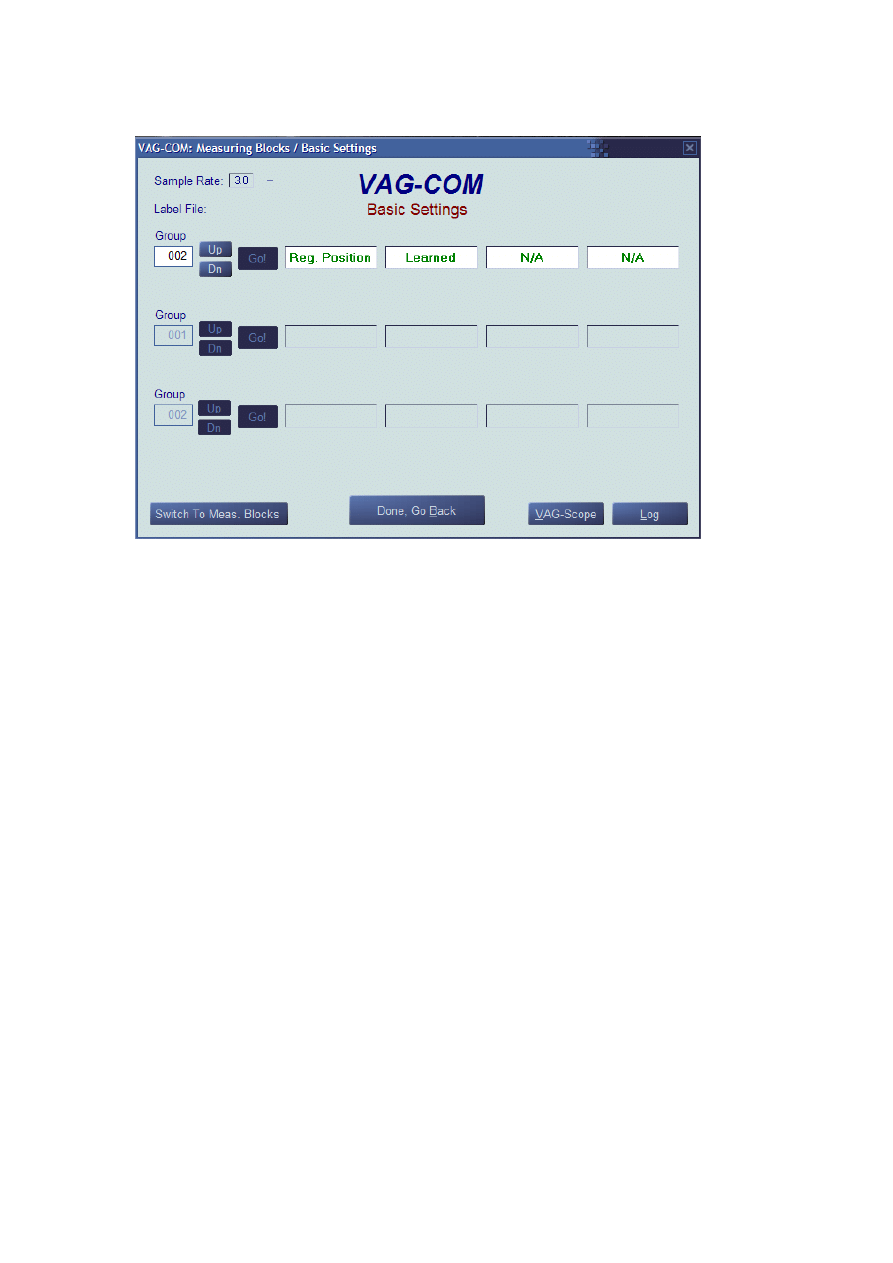
Now enter 04 – Basic Settings again
-
Enter channel 002 and hit Go!:
-
A message should appear Reg. Position Learned
-
If a message appears stating Unable to Program or something along that line, read the fault
codes, fix the problem, and do the coding procedure again starting at Step 3. If you did not go
directly from channel 001, to the menu, back to basic settings, and then channel 002, you will
get an error as well.
-
If the settings were stored properly, CONGRATULATIONS, you are done!
Wyszukiwarka
Podobne podstrony:
DIAGNOSTYKA OPIS DZIAŁANIA I FUNKCJE PROGRAMU VAG COM
Kasowanie wskazań serwisowych za pomocą programu VAG COM
VW Passat, dopasowanie immobilisera kluczyka programem VAG COM
Instrukcja działania DELTASCAN (Polski VAG-COM)
Oznaczenia sterowników VAG, Oznaczenia sterownik˙w VAG-COM
Kody błędów vag com
VAG COM Auto Scan Printout
VAG COM
2 TDI Tuning mit VAG COM
opis PL VAG COM 2
Manual Vag Com
BLOKI POMIAROWE SILNIKA Vag Com PL(1)
ilexa Onboard Diagnostics VAG COM VolksWagen service indicator resetting
VAG COM 512 4 USB Driver Installation Instructions
więcej podobnych podstron