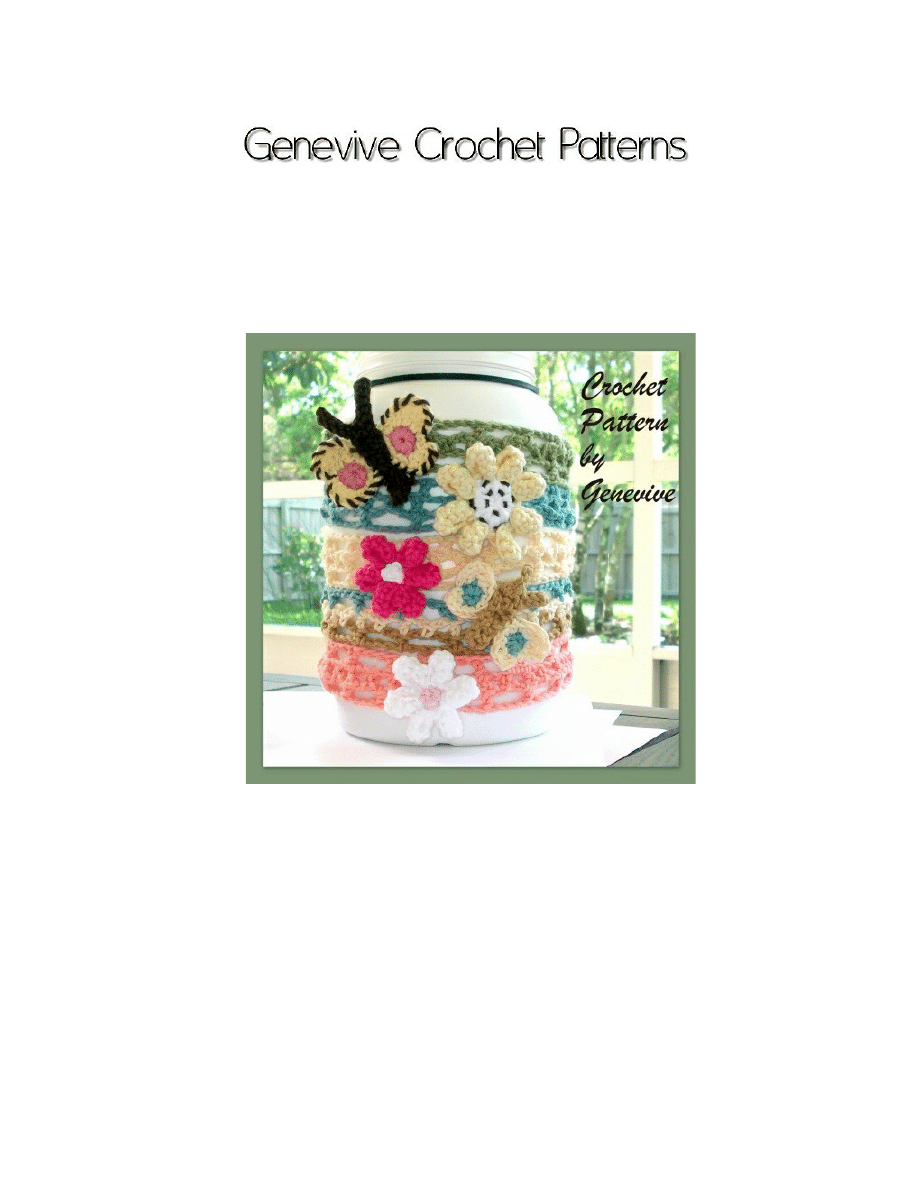
Crochet
Headband with Butterflies
and Flowers
Pattern
by
Genevive
Pattern includes Headband, 3 Variat
Pattern includes Headband, 3 Variat
Pattern includes Headband, 3 Variat
Pattern includes Headband, 3 Variations on flower, and 2
ions on flower, and 2
ions on flower, and 2
ions on flower, and 2
variations on the Butterflies.
variations on the Butterflies.
variations on the Butterflies.
variations on the Butterflies.
Instructions for ALL SIZES - Infant to Adults!
Skill Level -
Beginner to Intermediate
Materials needed
Materials needed
Materials needed
Materials needed -
-
-
- Crochet hook size G/6 and at least 2 colors of size 4
Crochet hook size G/6 and at least 2 colors of size 4
Crochet hook size G/6 and at least 2 colors of size 4
Crochet hook size G/6 and at least 2 colors of size 4
medium weight yarn, darning needl
medium weight yarn, darning needl
medium weight yarn, darning needl
medium weight yarn, darning needle, stitch markers.
e, stitch markers.
e, stitch markers.
e, stitch markers.
Written in American English crochet terms with conversion
Written in American English crochet terms with conversion
Written in American English crochet terms with conversion
Written in American English crochet terms with conversion
chart for British English crochet terms.
chart for British English crochet terms.
chart for British English crochet terms.
chart for British English crochet terms.

Page 2
Crochet hook size - G/6
Stitches used -
ch
(chain)
sl st
(slip stitch),
sc
(single crochet),
hdc
(half double crochet) Yarn over and insert your hook into the stitch or space
indicated, yarn over and pull up a loop. (You should have 3 loops on your hook.)
Yarn over again and draw through all three of the loops on the hook.
dc
(double crochet) Yarn over and insert your hook into the stitch or space
indicated. Yarn over and pull up a loop. (3 loops on hook.)
Yarn over and draw through 2 of the loops. (2 loops on hook.)
Yarn over and draw through the last 2 of the loops.
tr
(triple or treble crochet) Yarn over twice, then insert your hook into the stitch or
space indicated. Yarn over and pull up a loop. (4 loops on hook.)
Yarn over and draw through 2 loops. (3 loops on hook.)
Yarn over and draw through 2 loops. (2 loops on hook.)
Yarn over and draw through two loops.
Abbreviations -
st
= stitch,
sp
= space,
dcr
= decrease,
yoh
= yarn over hook,
ch
= chain,
sl st
= slip stitch,
sc
= single crochet,
hdc
= half double crochet,
dc
=
double crochet,
tr
= triple crochet.
What type of yarn to use: I recommend using stretchy sock yarn such as
Cotton Ease for headband. You can use cotton, but remember cotton is not
stretchy and although the headband pattern is constructed to stretch, you will get
less stretch with cotton then sock yarn that has acrylic added to it. For appliqués
I used 4 ply cotton but you can use any kind of medium weight yarn for these.
Crochet Terms
British English
American English
Slip stitch (sl st)
Slip stitch (sl st)
Chain stitch (ch)
Chain stitch (ch)
Double crochet (dc)
Single crochet (sc)
Half treble crochet (htr)
Half double crochet (hdc)
Treble crochet (tr)
Double crochet (dc)
Cast off
Finish off / fasten off
Page 3
Hints
--
Changing colors
can be challenging because patterns do not include
instructions. However, it's not too difficult to master. In the last stitch of your first color,
stop before the last step. For example, if your stitch is a single crochet stitch, stop before
pulling the last loop through. Instead of yarning over with the original color, use the new
color, leaving a tail. Cut the original yarn color, leaving a tail again. Finish the stitch and
continue with the pattern. Once you have moved on with the pattern, you can weave the
ends into the fabric to hide them. Using this method creates a seamless color change.
Headband
Measure head size with measuring tape. I recommend a stretchy yarn here
such as sock yarn or any kind of yarn that has some stretch to it. If you are
using all cotton, go up 2 sizes because cotton does not stretch and it
shrinks when washed.
Sizes using sock yarn
Here is a chart for normal head sizes to estimate sizes (in case you don’t have
the ability to measure the head in person).
Newborns
Head Circumference 13" - 14 " 33-36cm
Baby - 3 to 6 months
Head Circumference: 14" - 17 " 36-43 cm
Baby - 6 to 12 months
Head Circumference: 16" - 19 " 41-48 cm
Toddler - preschooler (12 months - 3 years)
Head Circumference: 18" to 20 " 46 -48 cm
Child (3 - 10 years)
Head Circumference: 19" - 20 1/2" 48-51 cm
Pre-teens and Teens Hat
Head Circumference: 20 1/2" - 22" 51-56 cm
Adult Woman
Head Circumference: 21.5" - 23" 54-58 cm
Approximate sizes for starting chain numbers (Multiples of 4 + 6)
Ch 70 for 19” to stretching to 23” circumference. 48 - 59cm
Ch 66 for 18” - 22” 46 - 56cm
Ch 58 for 17” - 21” 43 - 53cm
Ch 62 for 16” - 20” 41 - 51cm
Ch 58 for 15” - 19” 38 - 48cm
Ch 54 for 14” - 18” 36 - 46cm
Ch 50 for 13” - 17” 33 - 43cm
Page 4
Headband Crochet Pattern
If using more then one color, remember to change colors at the end of the row as explained under
Hints on page 3.
Chain corresponding number of chs for size according to chart on page 3.
Row 1: Skip 1
st
5 chs from hook,
*
1 dc in next
ch, ch 3, skip next 3 chs
*
, repeat
*
to
*
until last
ch, 1 dc in last ch, ch 4, turn.
Row 2:
*
1 sc in 2
nd
ch of 3-chain group,
→
→
→
→
ch2, 1 dc in next dc, ch 2
*
, repeat from
*
to
*
, 1
sc in turning ch of previous row, ch 5, turn.
Row 3:
*
1 dc in next dc, ch 3
*
, repeat
*
to
*
until turning ch of previous row, 1 dc in turning
ch. Finish off. Sew ends together with darning
needle.
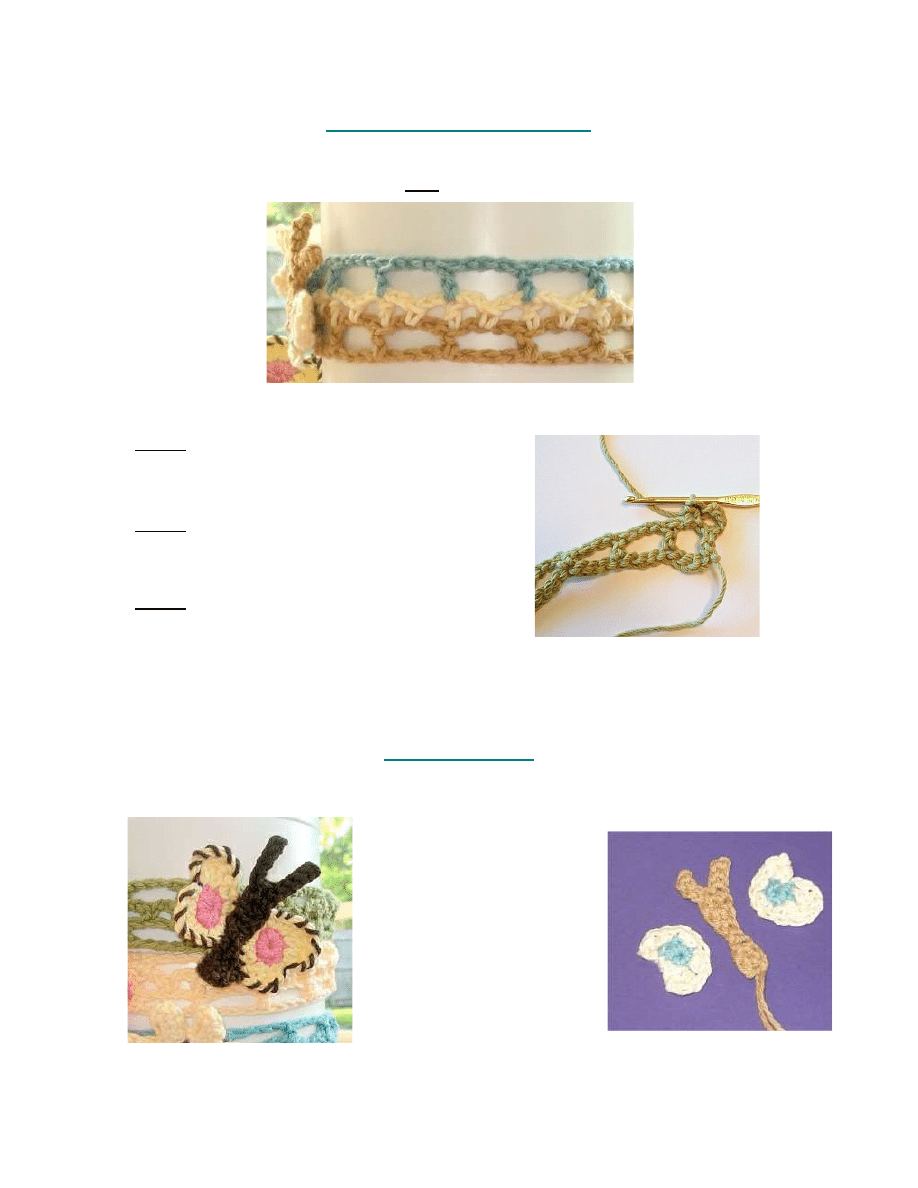
Large Butterfly
3 ½” wide X 3” tall
Butterfly wings are worked in rounds. You will be
making 3 pieces and
sewing them together.
The picture
→
→
→
→
is the small
butterfly, but you can get
the idea of the three
pieces and how they are
assembled.
Page 5
I use three colors, for purpose of the pattern, colors A, B, and C.
Right Wing
Round 1:
With color A
, ch 3, sl st to 3
rd
ch to join. Ch 1 and work 8 sc in ring
(remember to mark your 1
st
sc), sl st to 1
st
sc to join
changing color to color B
.
Round 2: Ch 4, 1 tr in same st, 2 tr’s in next st, 1 dc and then 1 sc in next st
(same stitch), 2 sc in each of the next 4 sts., 2 dc’s in each of the next 2 sts.,
finish off. Use darning needle to work in ends. (you will use the ends on the
body to sew the wings on)
Left Wing
Round 1: Same as Ring Wing.
Round 2:
With color B
ch 3, 1 dc in same st., 2 dc in next st., 2 sc in each of the
next 4 sts., 1 sc and then 1 dc in the next st., 2 tr’s in each of the next 2 st., finish
off and work in ends.
Body
Using color C
, ch 13, sl st in 2
nd
ch from hook and in next 4 ch’s, ch 6 (other
antenna), sl st in 2
nd
ch from hook and in next 5 ch’s, 1 tr in each of the next 2
ch’s (going down the body), sc in each of the next 2 ch’s, 1 tr in each of the next
3 ch’s, finish off leaving approximatedly a 12” tail to sew the wings on.
Sew wings to underside of butterfly body with darning needle. Make sure you
put the larger wing parts on top by the head as pictured.
Optional Finishing
To finish, use darning needle to sew around outer tops of the stitches in a barber
pole pattern
with color C
(as shown in 1
st
picture of butterfly on page 4)
.
This is
optional of course!
Small Butterfly
Right Wing
Round 1:
With color A
, ch 3, sl st to 3
rd
ch to join. Ch 1 and work 4 sc in ring
(remember to mark your 1
st
sc), sl st to 1
st
sc to join
changing color to color B
.
Round 2: Ch 4, 1 tr in same st, 1 dc and then 1 sc in next st (same stitch), 2 sc
in each of the next 2 sts., 2 dc’s in last st., finish off. Use darning needle to work
in ends. (you will use the ends on the body to sew the wings on)

Left Wing
Round 1: Same as Ring Wing.
Round 2:
With color B
ch 3, 1 dc in same st., 2 sc in each of the next 2 sts., 1 sc
and then 1 dc in the next st., 2 tr’s in the last st., finish off and work in ends.
Body
Using color C
, ch 11, sl st in 2
nd
ch from hook and in next 2 ch’s, ch 4 (other
antenna), sl st in 2
nd
ch from hook and in next 2 ch’s, 1 dc in each of the next 2
ch’s (going down the body), sl st in each of the next 2 ch’s, 1 dc in each of the
next 2 ch’s, finish off leaving approximately a 12” tail to sew the wings on.
Sew wings to underside of butterfly body with darning needle. Make sure you
put the larger wing parts on top by the head as pictured.
Flowers
Large flower center:
Make ring: Ch 3, sl st in 1
st
ch to join,
Round 1: Ch 1, work 6 sc’s in ring, sl st join to 1 sc.
Round 2: Ch 1,
*
sc in next st, 2 sc’s in next st
*
,
*
repeat
around
*
, join with sl st
to 1
st
sc. (9 sc’s.)
←
←
←
←
Round 3: Ch 1, insert hook in
of beginning ring, draw up a long
loop, yoh and draw through the
2
loops, repeat 15 more times.
Finish off and work in ends to
middle of the center back
leaving enough yarn to sew onto
headband or slippers. (16 long
sc’s)
Page 6
Petals for large center flowers
These are 8 petal instructions (Instructions
include 2 different petal lengths for shorter or longer petals)
Small Petals: Sl st to join color B to any st on back loops (work in back loops
throughout) of flower center.
*
Ch 8, sc in 2
nd
ch from hook, sc in next ch, dc in
each of the next 3 ch’s, sc in each of the last 2 ch’s, sl st to next st (remember
back loops only here), sl st to next st
*
, repeat around to make 8 petals, finish off
and work in ends.
Large Petals: Sl st to join color B to any st on back loops (work in back loops
throughout) of flower center.
*
Ch 12, sc in 2
nd
ch from hook and in next to 3 ch‘s, dc in each of
the next 3 ch’s, sc in each of the last 4 ch’s, sl st
to next st (remember back loops only here), sl st
to next st
*
, repeat around to make 8 petals.
Don’t finish off.
Fold petal in half and sew ends to center,
→
→
→
→
remember to leave front loops of flower center
free for optional details. Finish off and work in
ends.
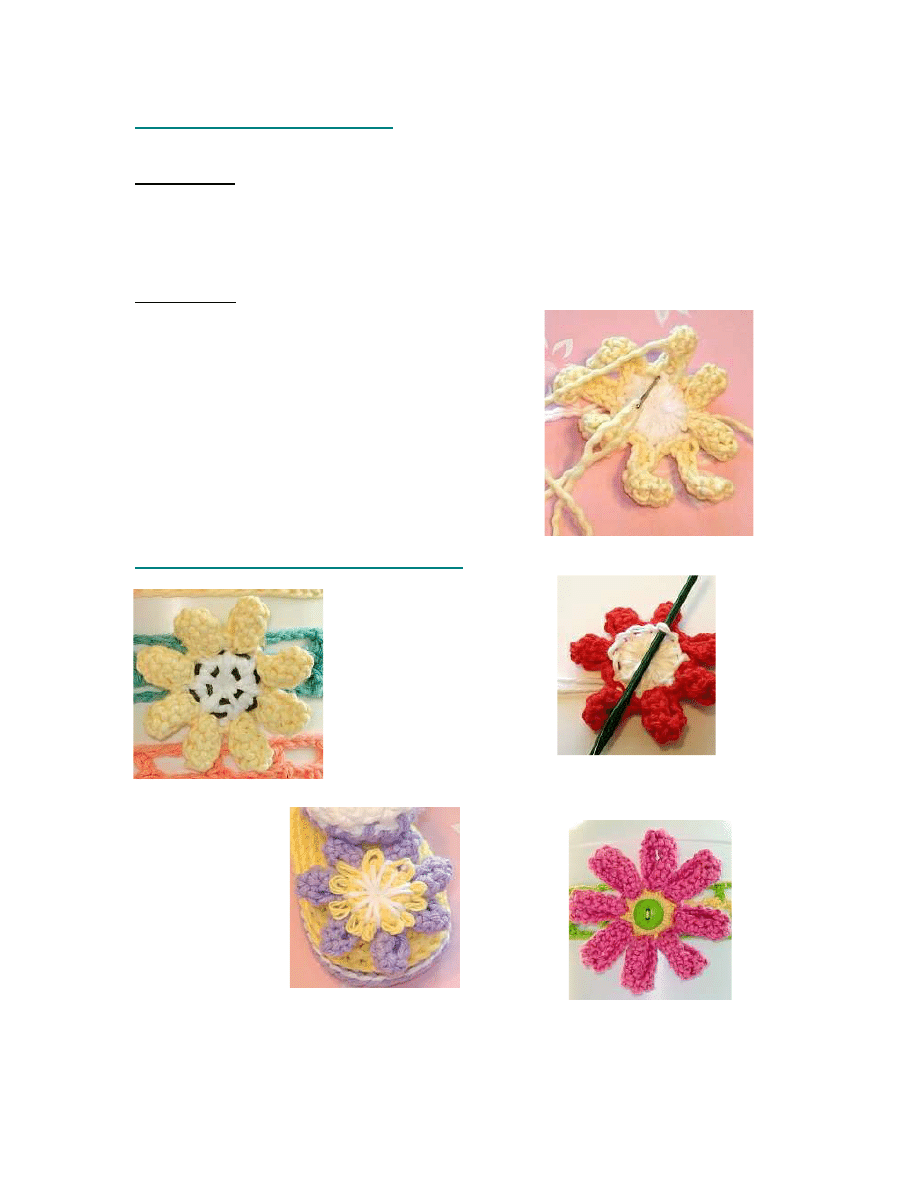
Optional detail on large center flowers
:
←
←
←
←
Stitch with darning
needle sunflower seeds
Pull front loops up with
crochet needle for lacy
flower center look.
→
→
→
→
Sew a button on it!
↓
↓
↓
↓
Use darning
needle to sew
star pattern on
flower center
→
→
→
→
Page 7
Small flower center
Ch 3, sl st to 1
st
ch to make ring, ch 1, 4 sc in ring, 1 sc
in each front loop, finish off. (This makes a little ball for
the flower center. Petals are worked in evenly spaced
loops around the ball)
Petals for small center flowers
: These are 6 petal
instructions
With color B sl st to join
anywhere to side of ball,
*
Ch 8, sc in 2
nd
ch from hook,
sc in next ch, dc in each of the next 3 ch’s, sc in each of
the last 2 ch’s, sl st to next st
*
, repeat around to make 6
petals, finish off and work in ends.
The annoying small print:
These patterns are the sole property of Genevive Designs, Inc. The patterns are not to be copied or resold in any
capacity.
These patterns are copyrighted by the publisher and/or designer. Reproduction of this pattern in any form is limited
to the use of the purchaser. The patterns, written instructions, photographs and figure pictures are intended for personal
NONCOMMERCIAL use and are protected by federal copyright laws. Permission is granted to print patterns for the
personal use of the retail purchaser.
The designer ask that you ask permission if you intend to sell your finished items from your purchased pattern(s).
Genevive Designs
ask that you please reference where you purchased the pattern to your customers on the item page.
www.genevive.etsy.com
or
www.genevive.artfire.com
or
Genevive Designs at www.ravelry.com
Please respect the
copyright on these patterns and do not sell these patterns or reproduce to give away without first obtaining
permission from the publisher or designer.
Page 8
Wyszukiwarka
Podobne podstrony:
(Gardening) Native Landscaping For Birds, Bees, Butterflies, And Other Wildlife
Muse Butterflies And Hurricanes
Cozy Flowered Headband
Hearts and Flowers Border LT Smith
islcollective worksheets beginner prea1 elementary a1 elementary school writing plur lurals with mis
Fuzion Guns and Butter
Nature flowers insects butterflies
Crochet Headband and Wristband
The Spider and the Green Butterfly
2 Different Headbands Buttoned and Ties
#0637 – Planting Flowers and Trees
Flower Agesilaus of Sparta and the Origins of the Ruler Cult
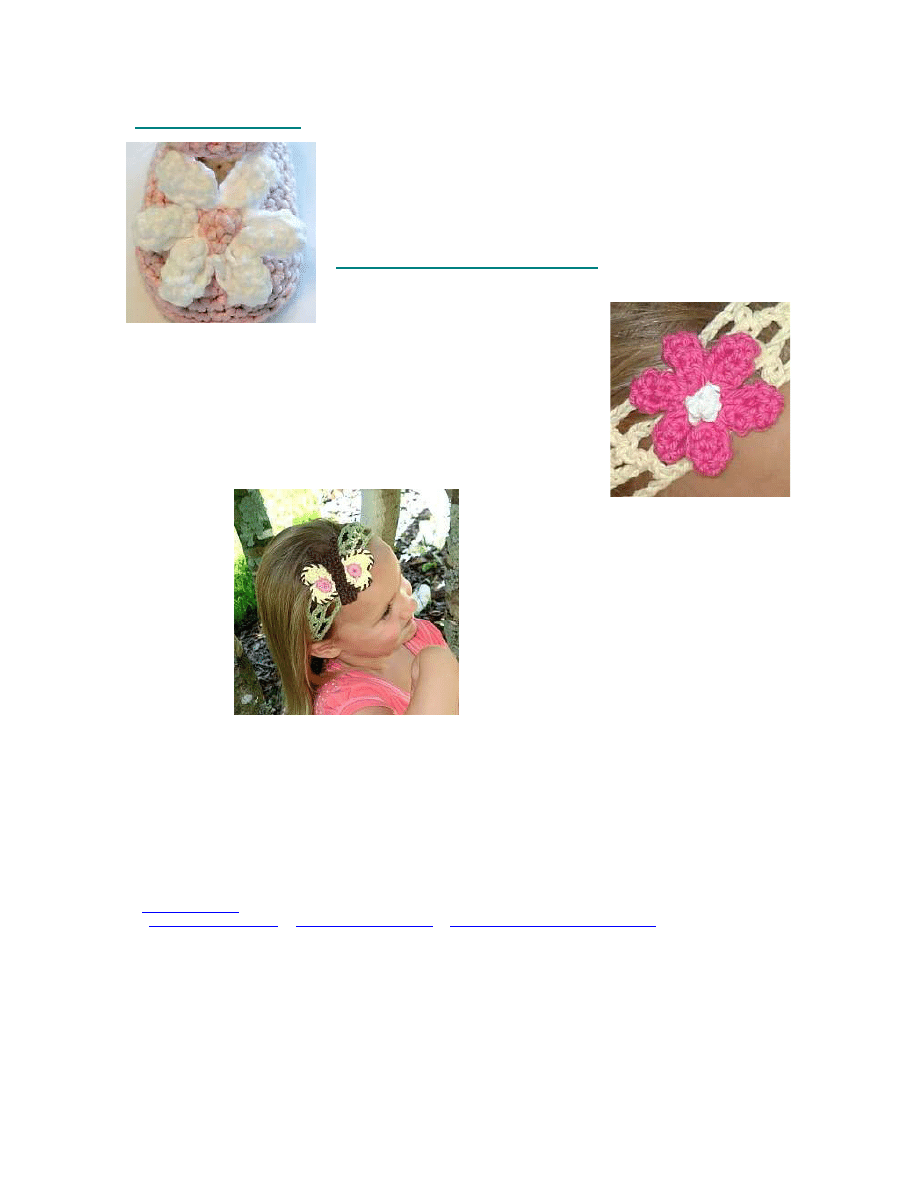
Addison Headband with Flower
więcej podobnych podstron