
2009 Chevrolet Aveo
|
Aveo, Wave, G3, Barina (VIN S/T) Service Manual
|
Body Systems
|
Fixed and Moveable Windows
|
Specifications
| Document ID: 1292127
Fastener Tightening Specifications
Application
Specification
Metric
English
Door Glass Screws
7 N·m
62 lb in
Exterior Rear Door Garnish Molding Screws
1.5 N·m
13 lb in
Guide Rail Bolts
7 N·m
62 lb in
Outside Rearview Mirror Assembly Screws
4.5 N·m
40 lb in
Rearview Mirror Mounting Screw
1.2 N·m
11 lb in
© 2010 General Motors Corporation. All rights reserved.
Page 1 of 1
Document ID: 1292127
7/5/2010
http://localhost:9001/si/showDoc.do?docSyskey=1292127&pubCellSyskey=11207&pubObj...
2009 Chevrolet Aveo
|
Aveo, Wave, G3, Barina (VIN S/T) Service Manual
|
Body Systems
|
Fixed and Moveable Windows
|
Repair Instructions
| Document ID: 2096167
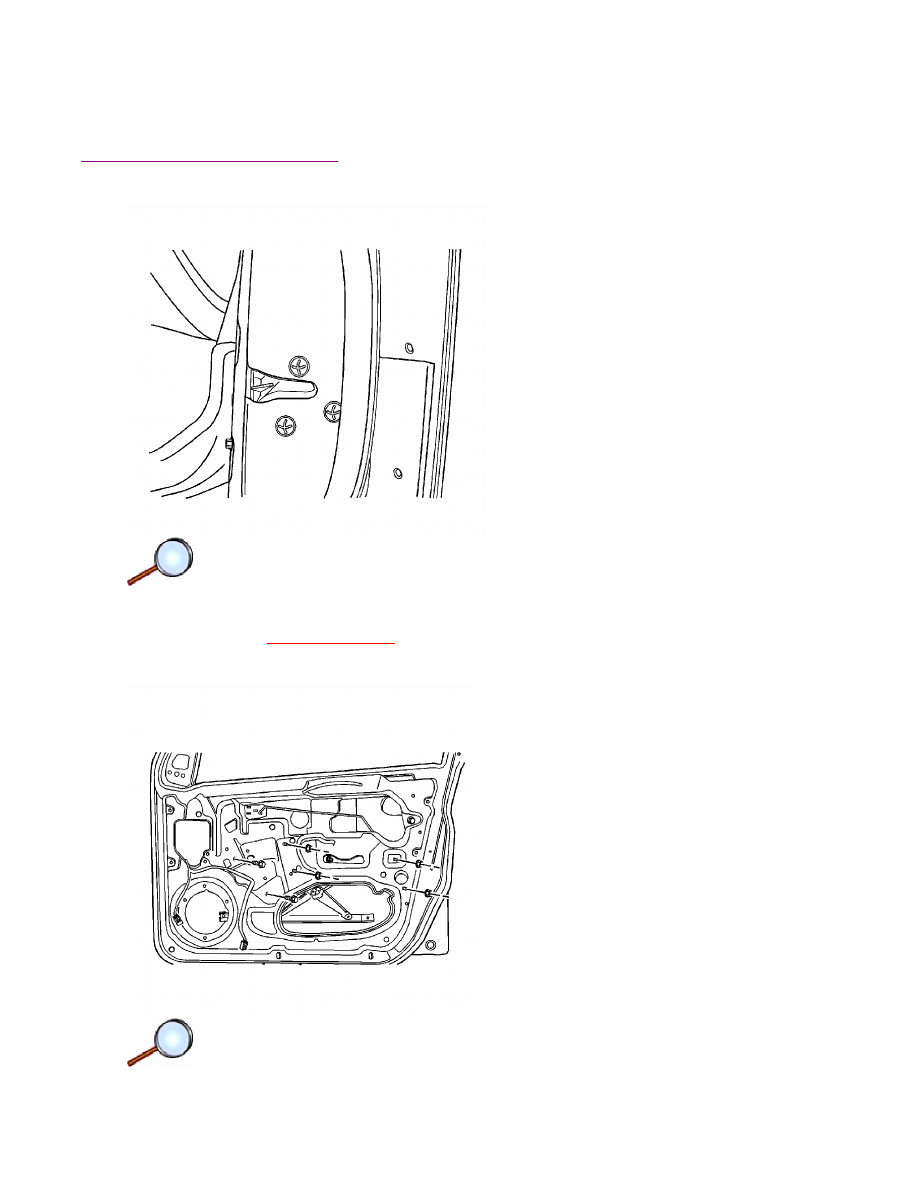
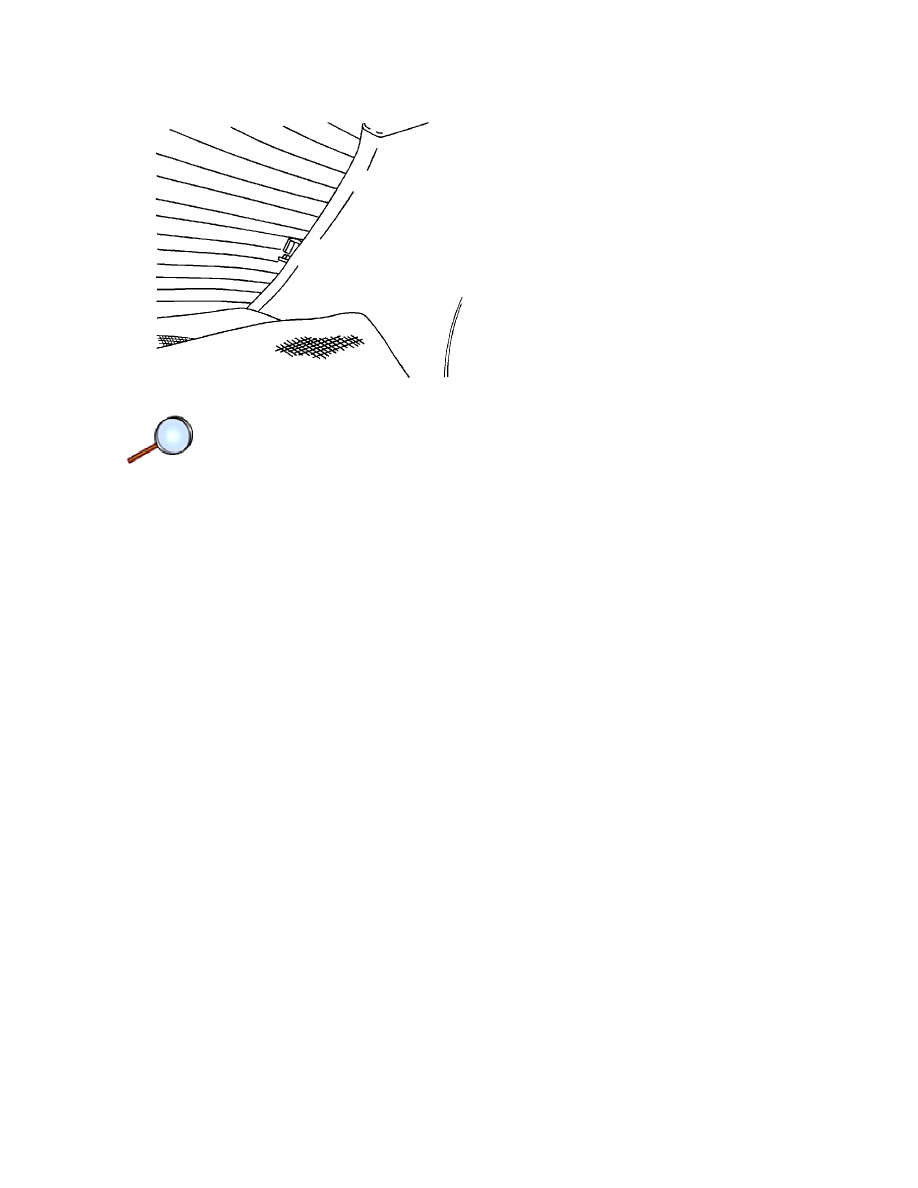
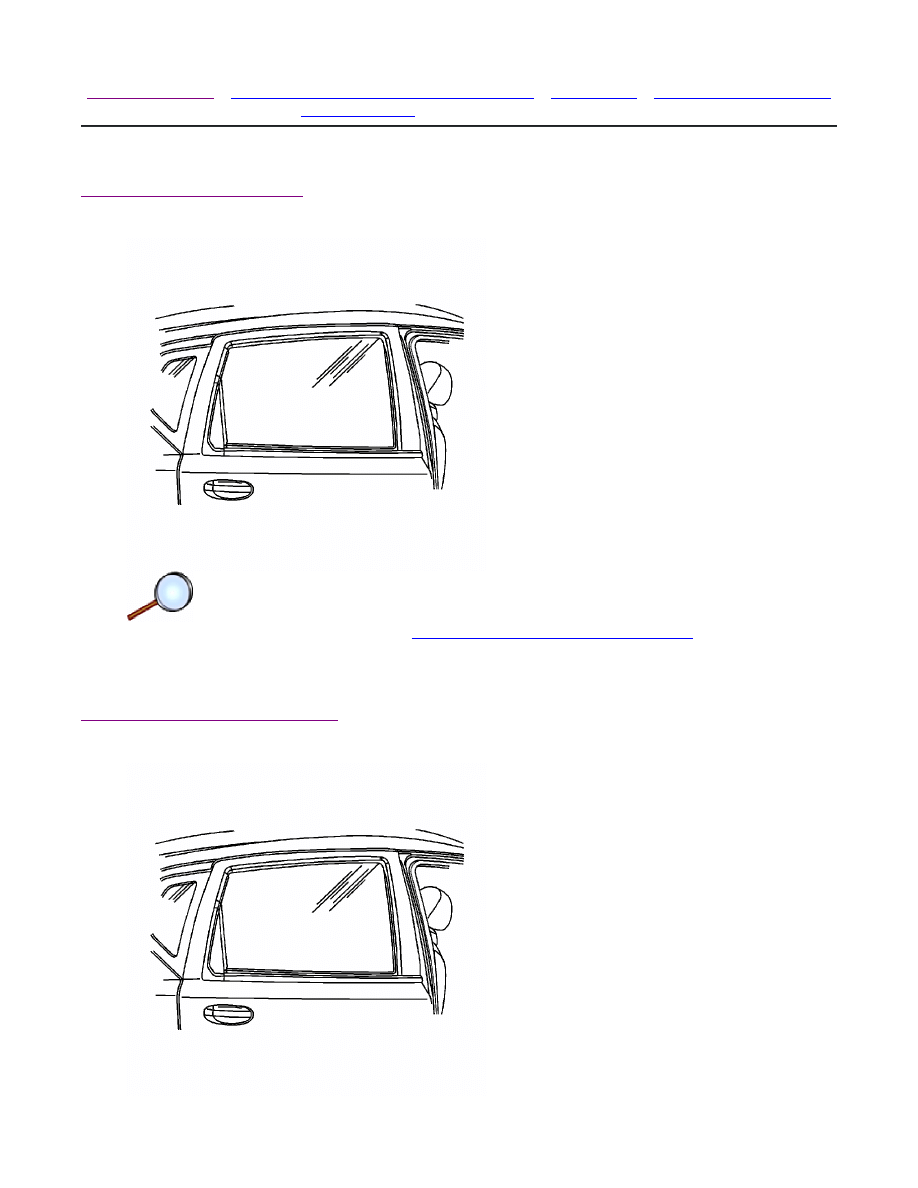
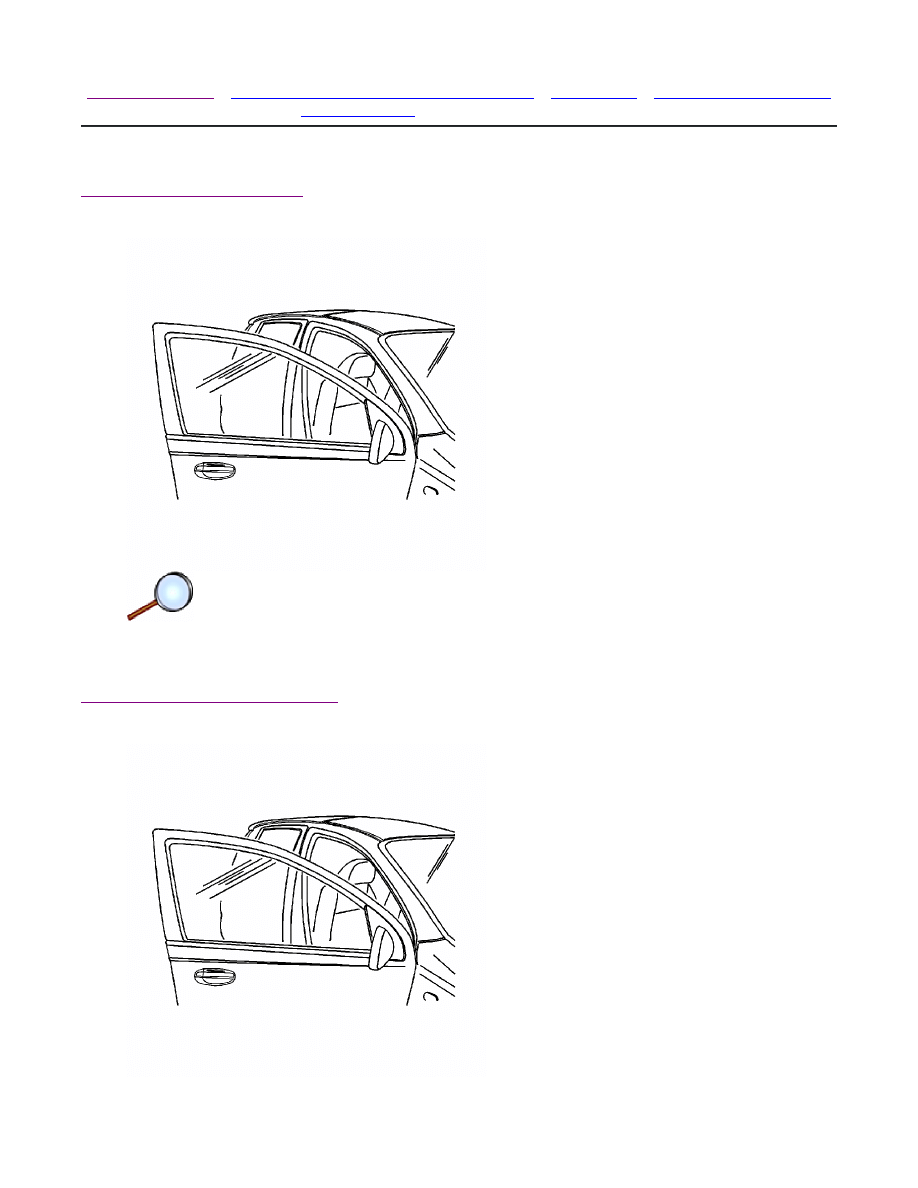
Windshield Replacement
Special Tools
J 24402-A
Glass Sealant Remover
Removal Procedure
1. Remove the air inlet grille. Refer to
Air Inlet Grille Panel Replacement
.
2. Remove the inside rearview mirror. Refer to
Inside Rearview Mirror Replacement
.
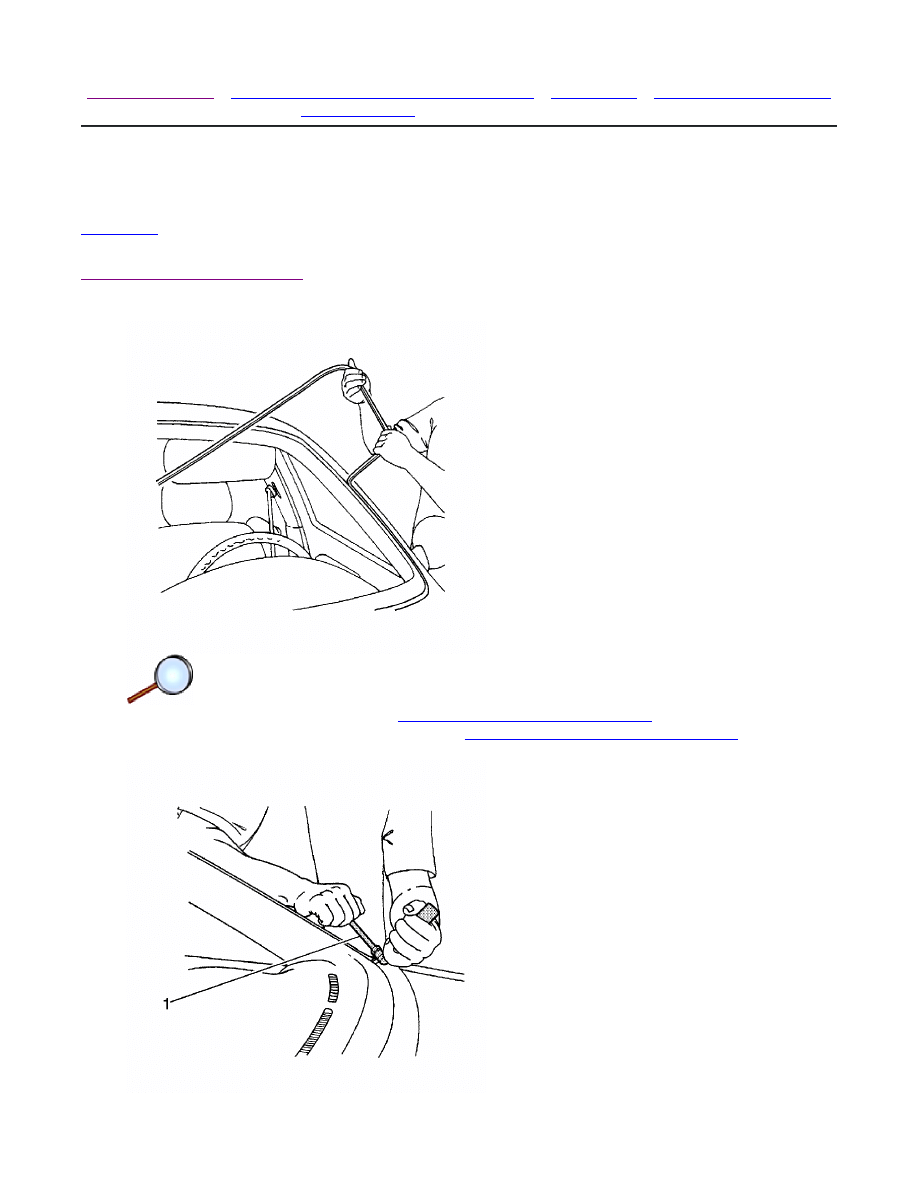
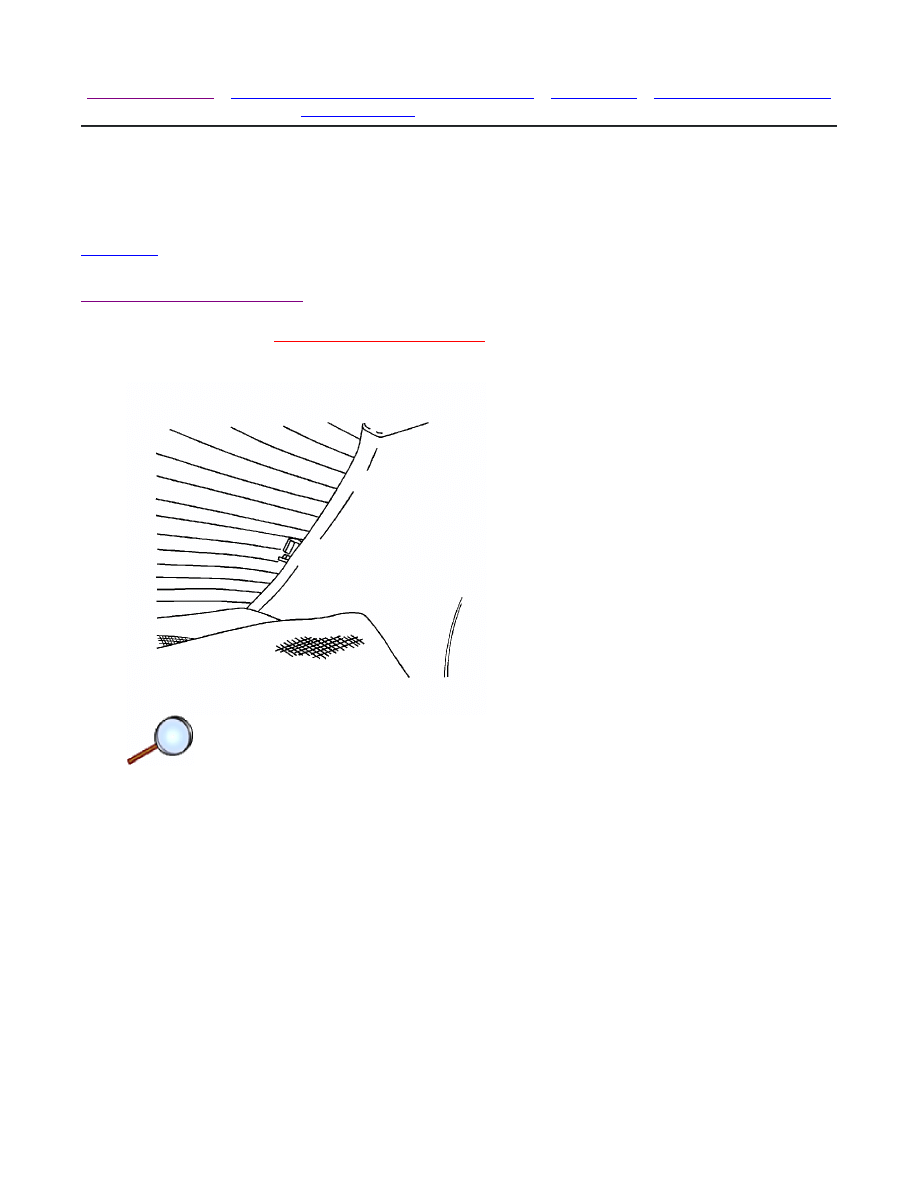
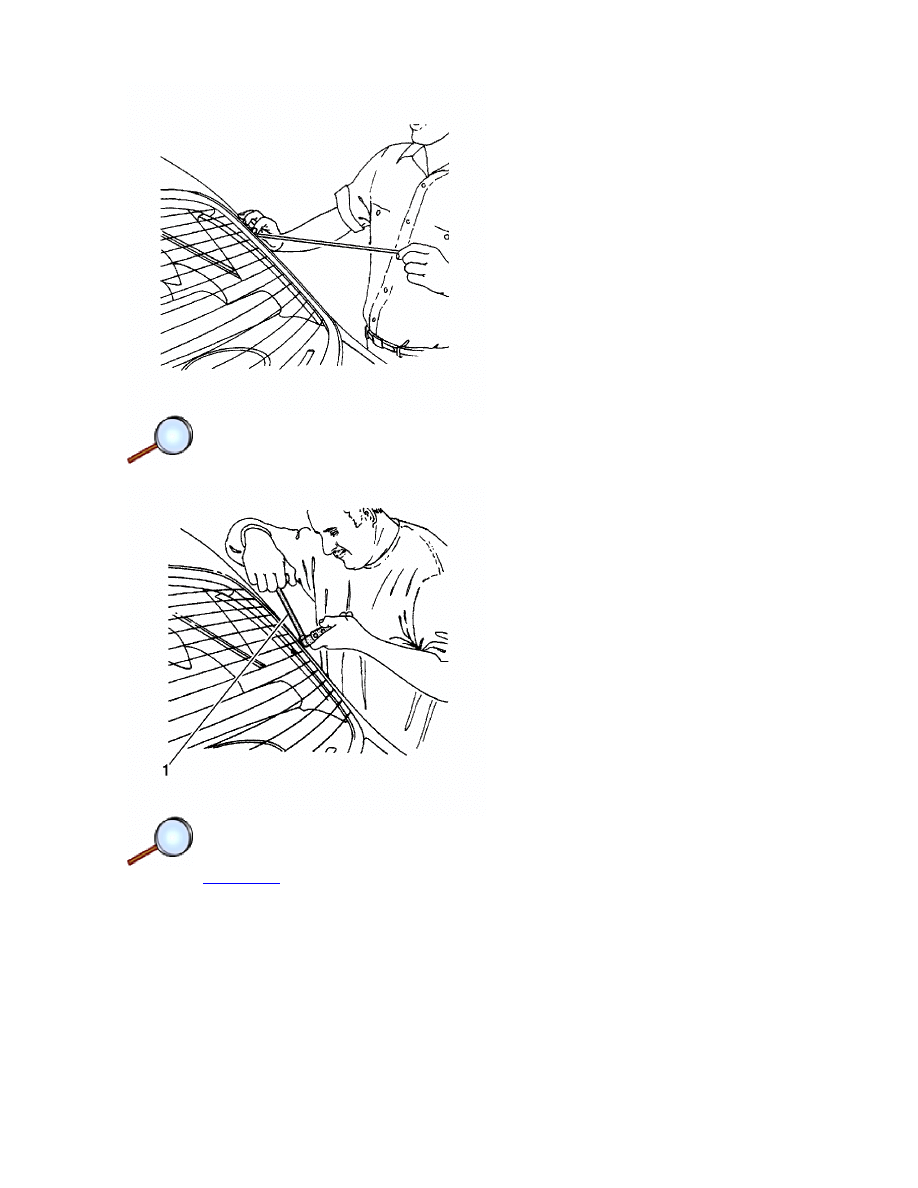
3. Remove the weatherstrip around the windshield.
© 2010 General Motors Corporation. All rights reserved.
Page 1 of 4
Document ID: 2096167
7/5/2010
http://localhost:9001/si/showDoc.do?docSyskey=2096167&pubCellSyskey=150665&pubO...
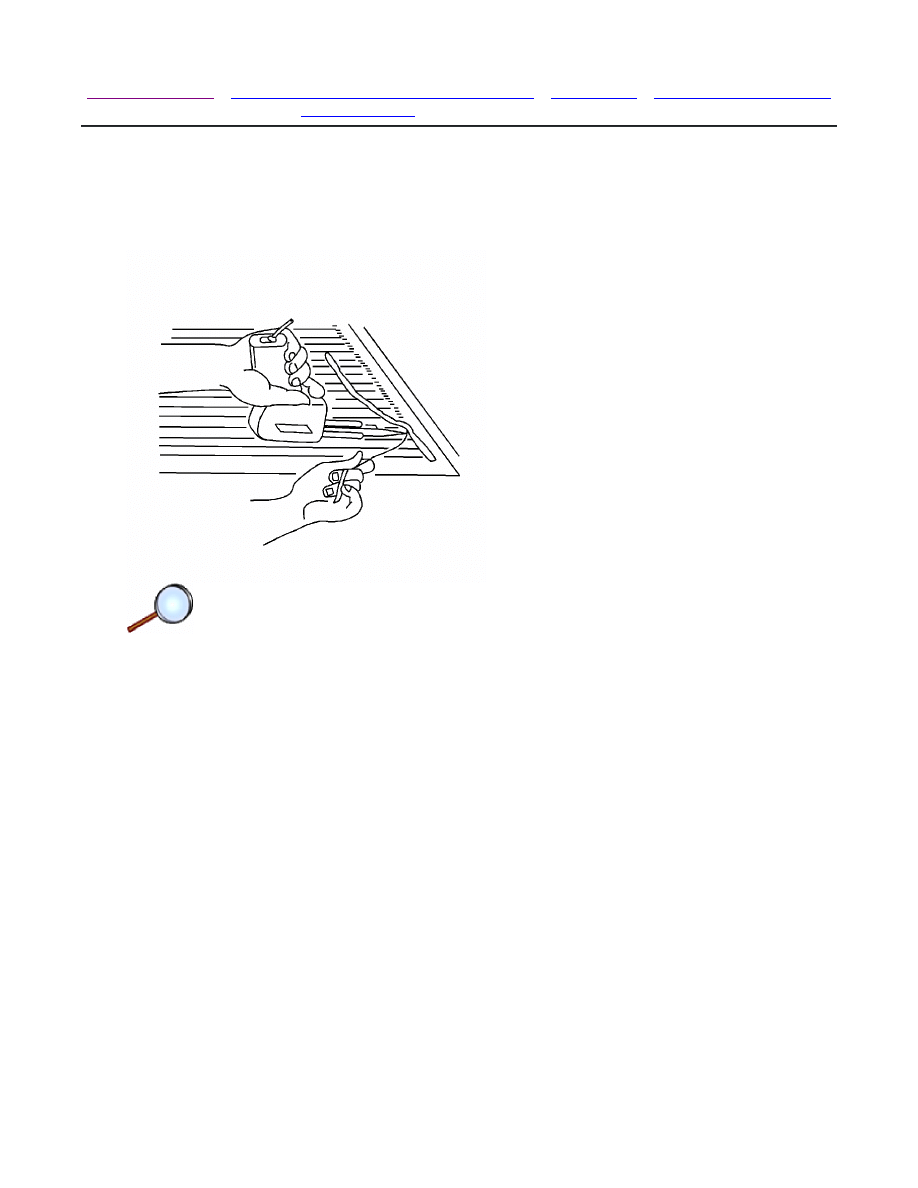
4. Using the glass sealant remover (1)
J 24402-A
, cut the adhesive around the windshield.
5. Remove the windshield from the vehicle.
6. Using a knife, remove the adhesive from the windshield.
7. Using a knife, remove the adhesive from the windshield frame.
Installation Procedure
Caution:
Refer to
Windshield Installation Caution
in the Preface section.
Page 2 of 4
Document ID: 2096167
7/5/2010
http://localhost:9001/si/showDoc.do?docSyskey=2096167&pubCellSyskey=150665&pubO...
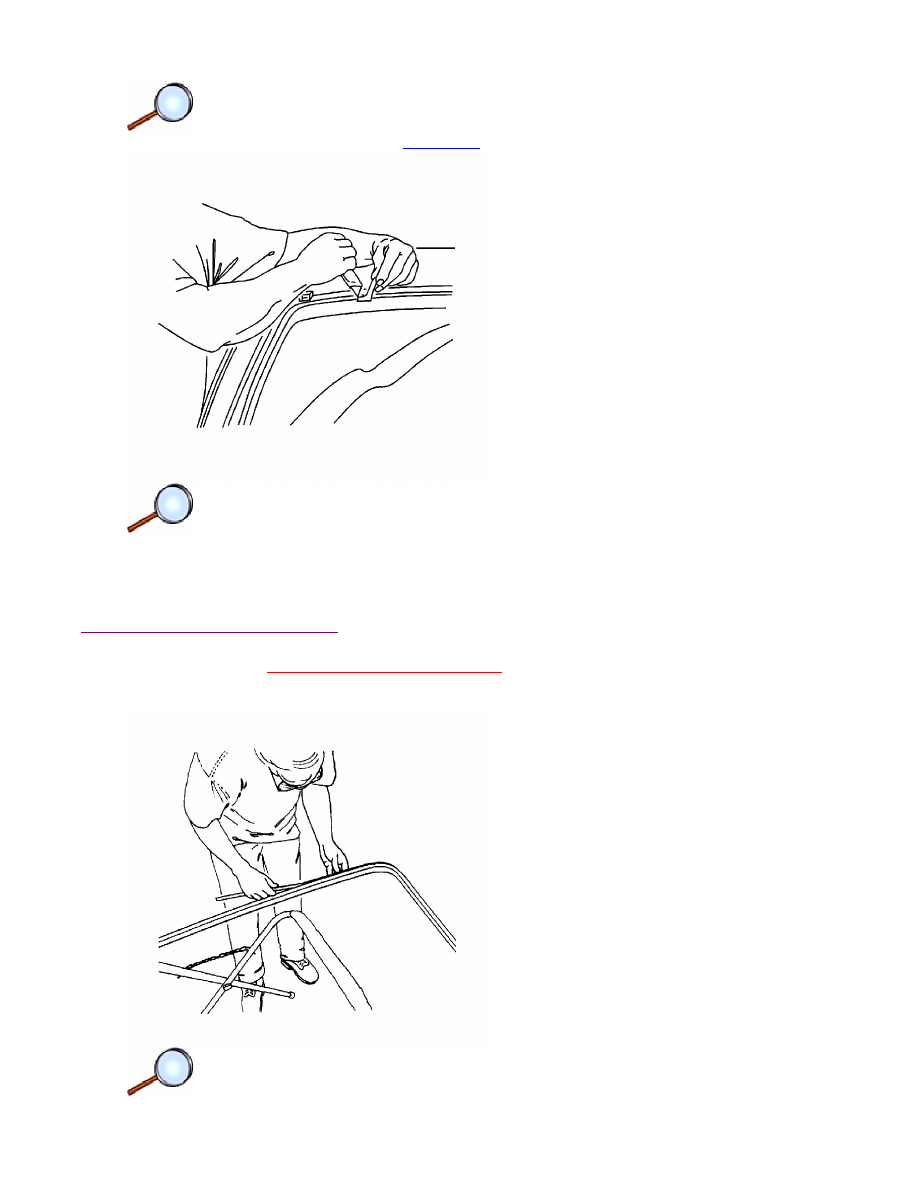
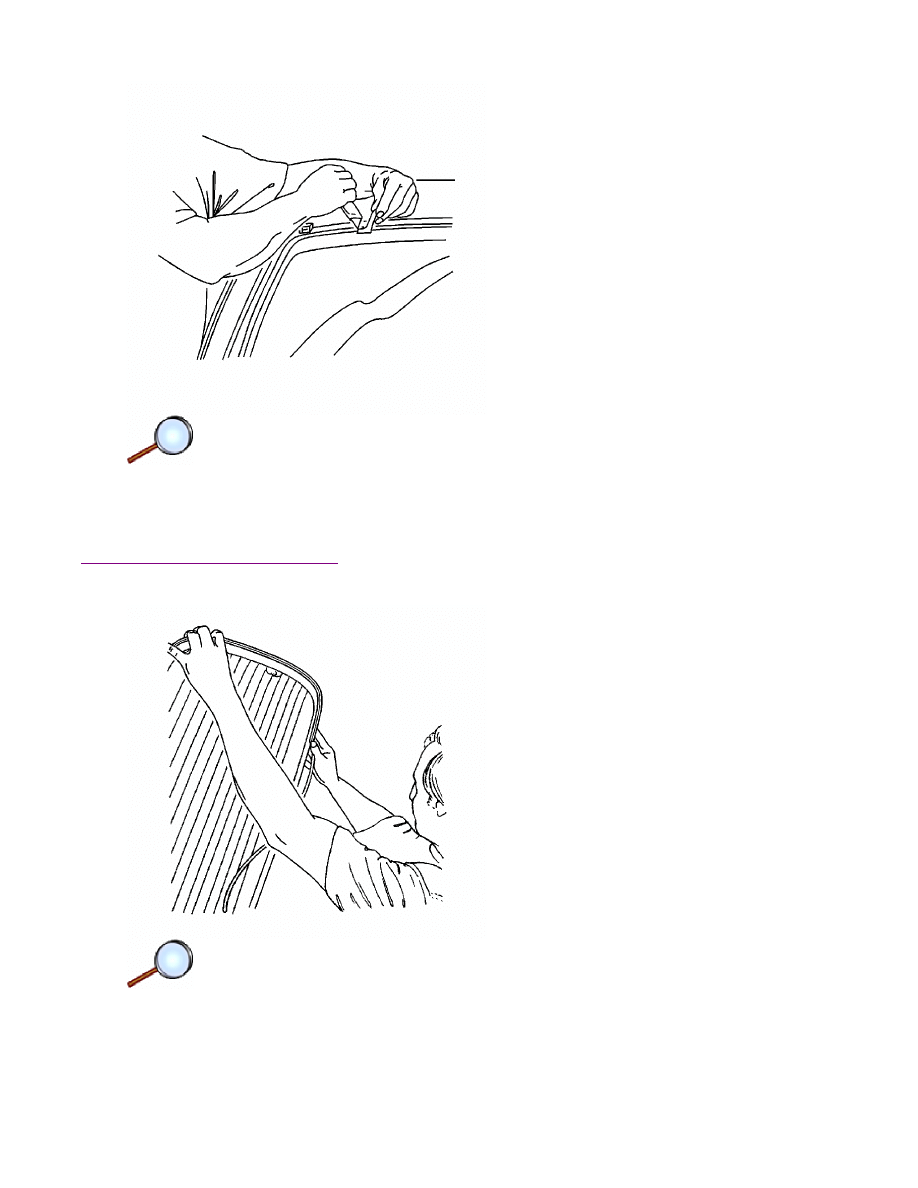
1. Install the new weatherstrip to the windshield.
2. Apply tape to the new weatherstrip and the windshield to hold the weatherstrip in place.
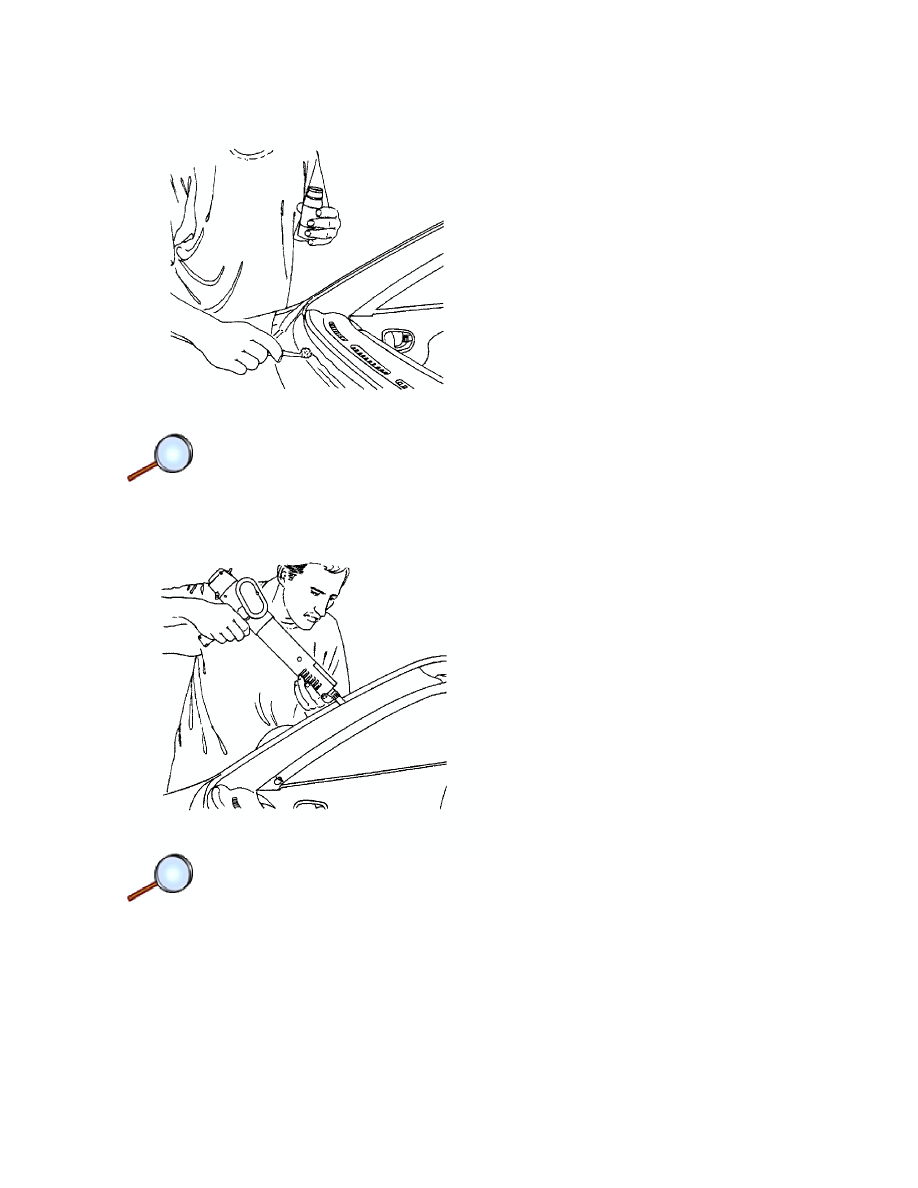
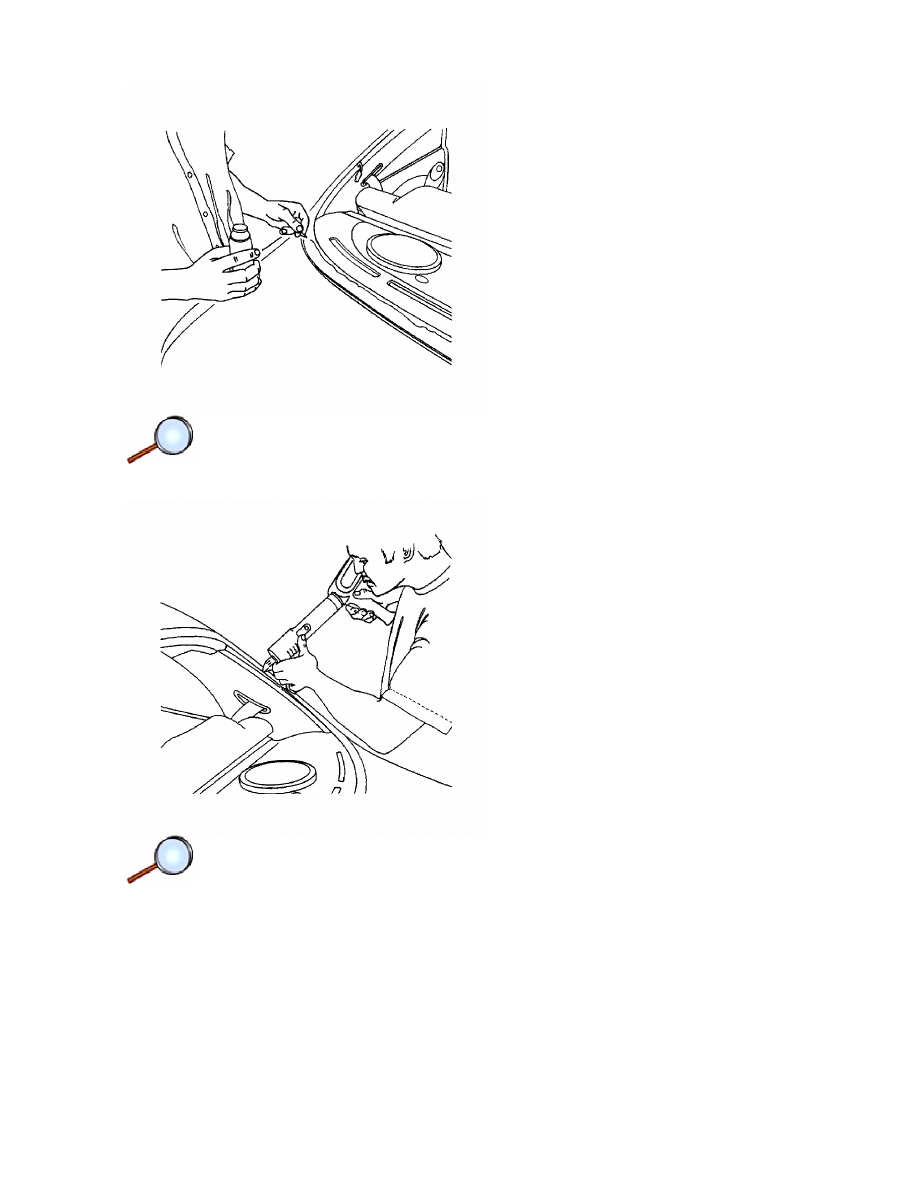
3. Apply adhesive primer to the windshield frame and the perimeter of the windshield.
4. Apply glass adhesive to the windshield frame.
Warning: Insufficient curing of urethane adhesive may allow unrestrained occupants to be
ejected from the vehicle resulting in personal injury.
Do NOT physically disturb the repair area until after these minimum times have elapsed.
• For the moisture-curing type of urethane adhesive, allow a minimum of 6 hours at 21°C
(70°F) or greater and with at least 30 percent relative humidity. Allow at least 24 hours
for the complete curing of the urethane adhesive.
• For the chemical-curing type of urethane adhesive, allow a minimum of 1 hour .
Page 3 of 4
Document ID: 2096167
7/5/2010
http://localhost:9001/si/showDoc.do?docSyskey=2096167&pubCellSyskey=150665&pubO...

5. Install the windshield into the windshield frame.
6. Reposition the tape over the weatherstrip, the windshield, and the windshield frame to hold
the windshield in place.
7. Let the adhesive dry for 24 hours.
8. Remove the tape.
9. Check for waterleaks by pouring water on the windshield. If a leak is found, dry the
windshield and fill the area that leaks with adhesive. If the leak persists, remove the
windshield and repeat the entire procedure.
10. Install the inside rearview mirror. Refer to
Inside Rearview Mirror Replacement
.
11. Install the air inlet grille. Refer to
Air Inlet Grille Panel Replacement
.
Page 4 of 4
Document ID: 2096167
7/5/2010
http://localhost:9001/si/showDoc.do?docSyskey=2096167&pubCellSyskey=150665&pubO...
2009 Chevrolet Aveo
|
Aveo, Wave, G3, Barina (VIN S/T) Service Manual
|
Body Systems
|
Fixed and Moveable Windows
|
Repair Instructions
| Document ID: 2096169
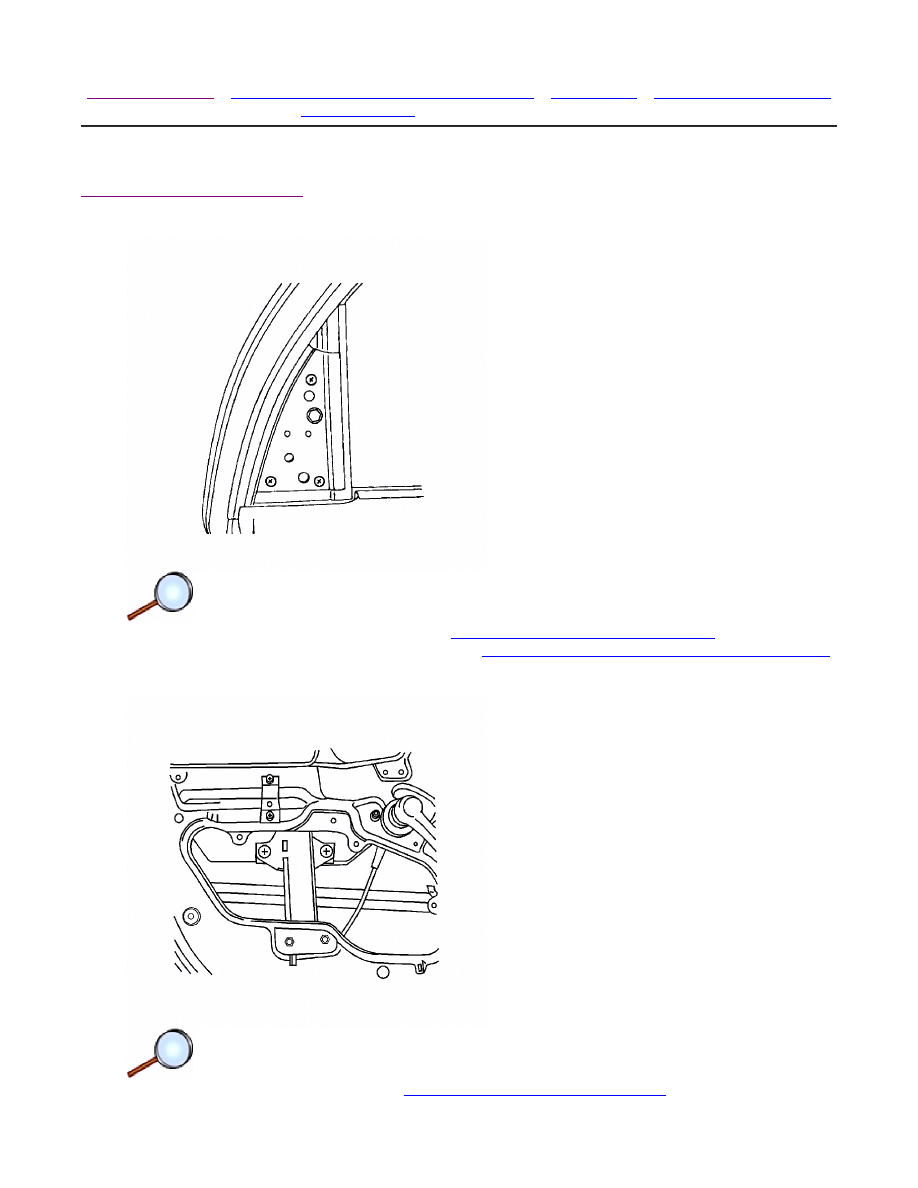
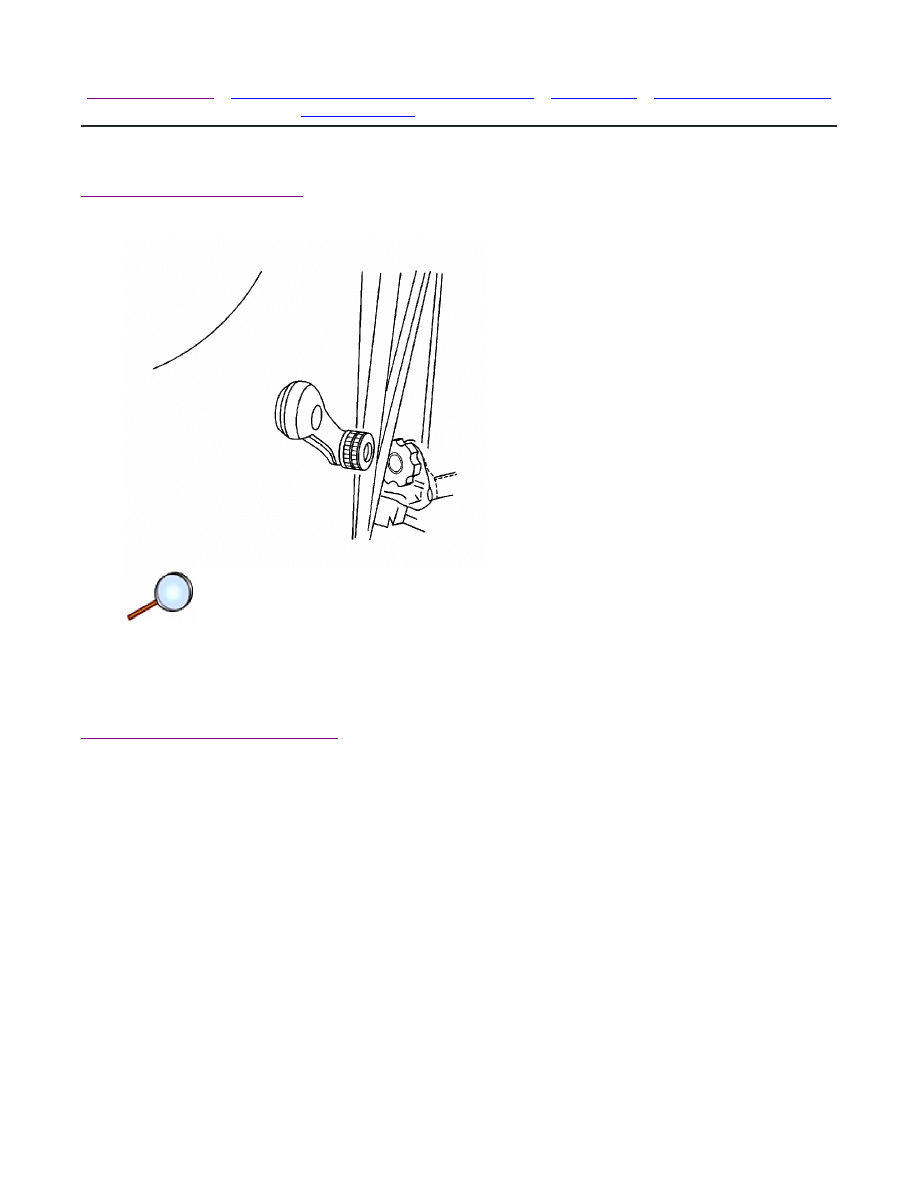
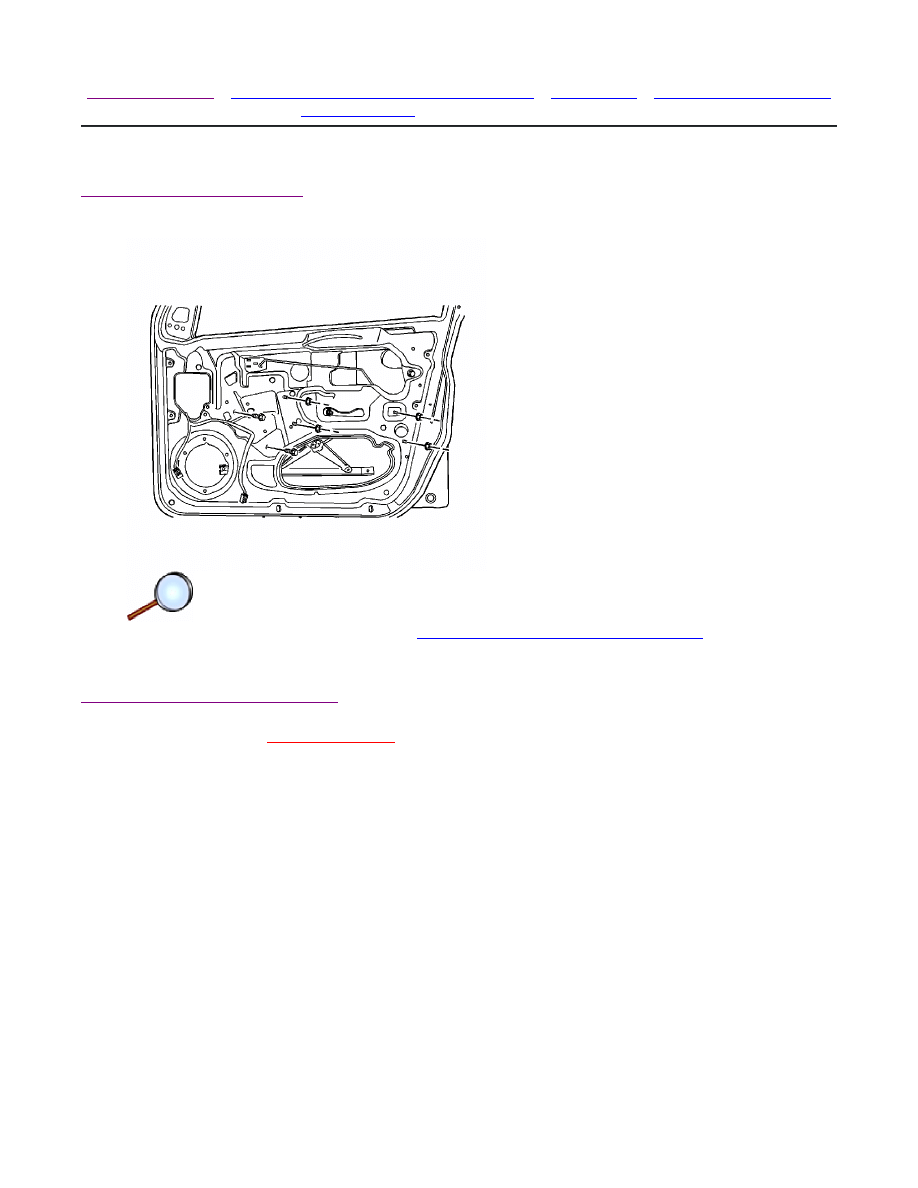
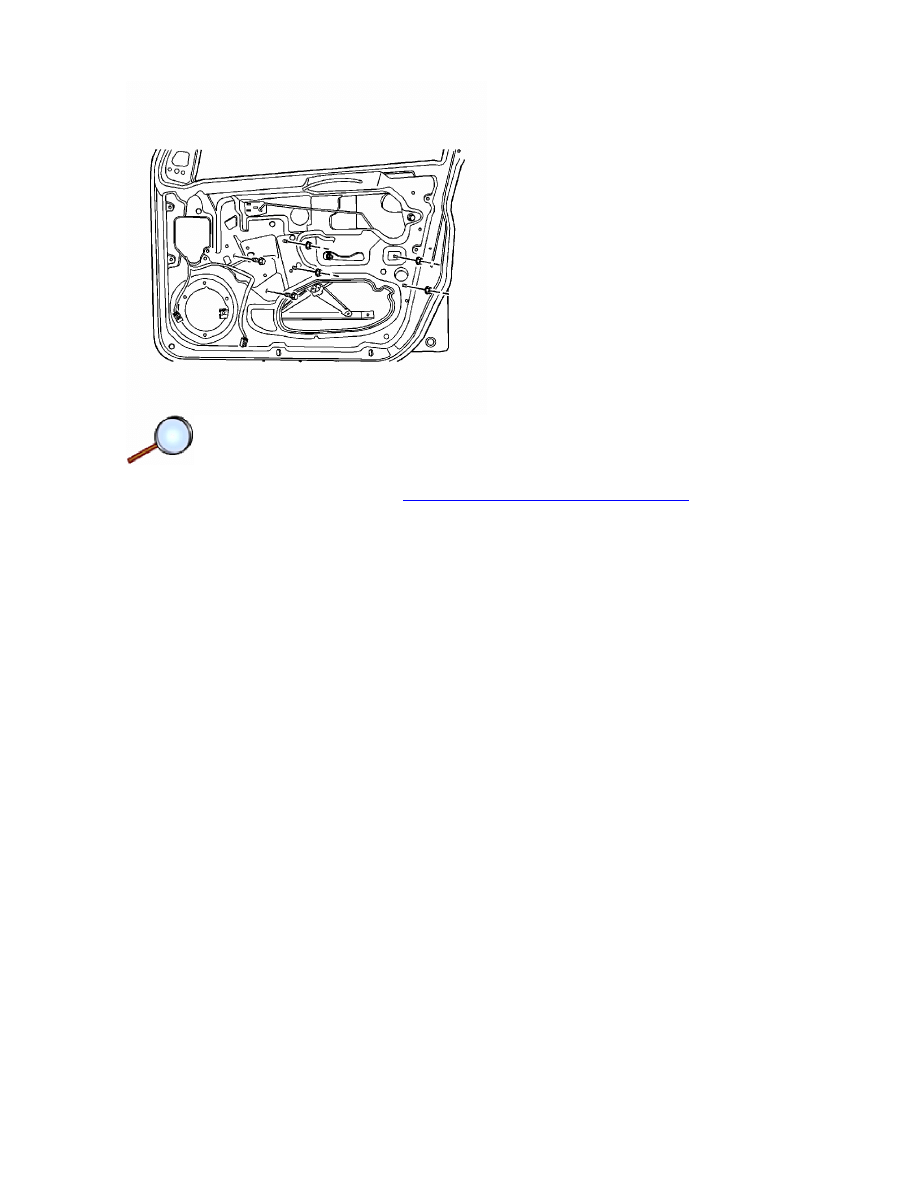
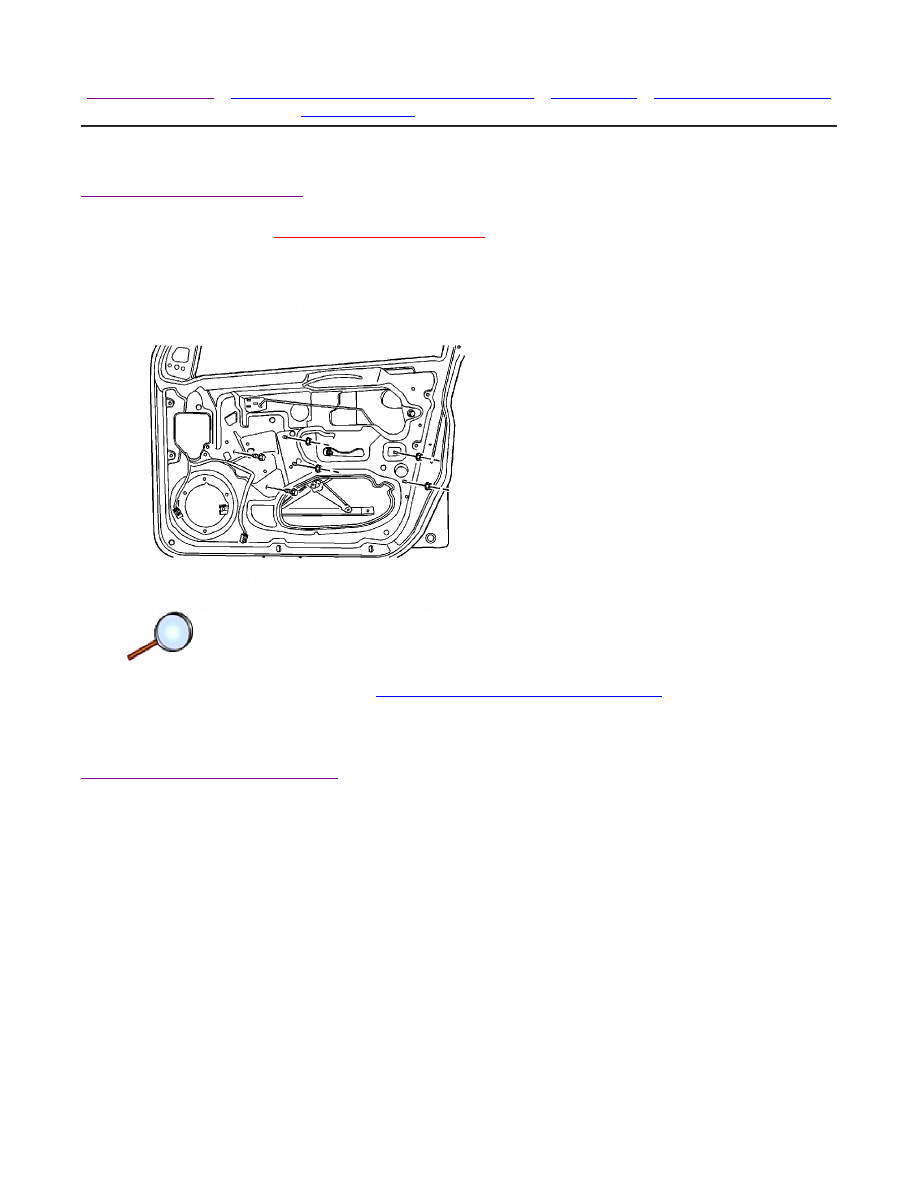
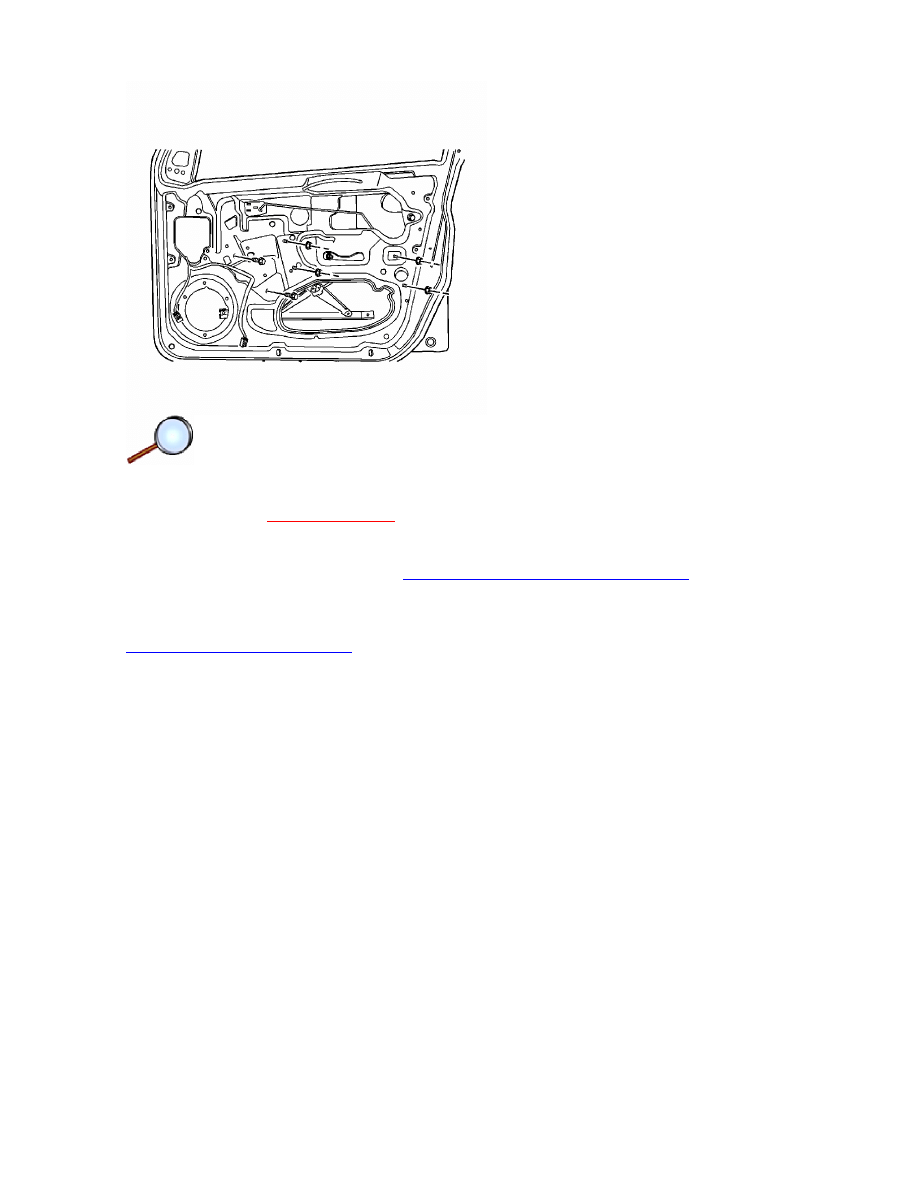
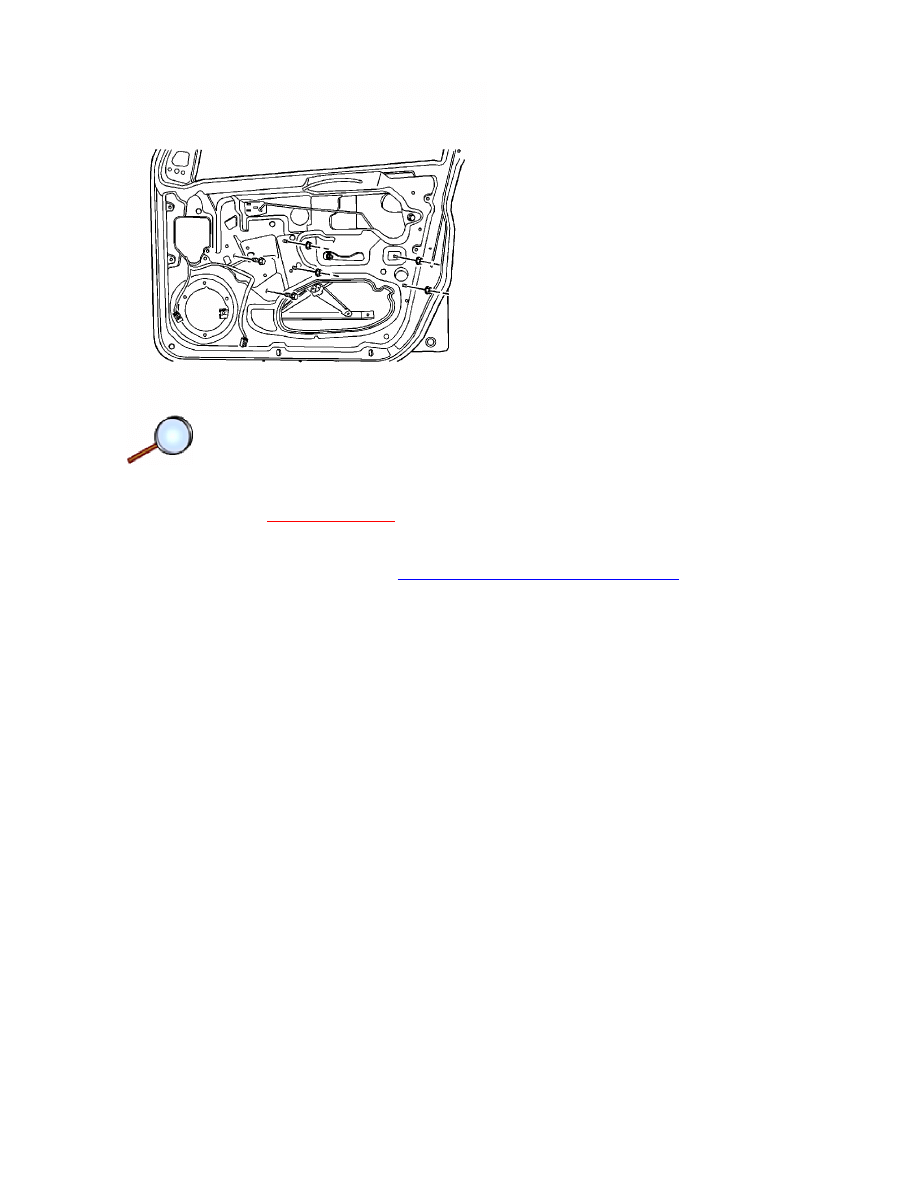
Front Side Door Window Replacement
Removal Procedure
1. Remove the front door trim panel. Refer to
Front Side Door Trim Panel Replacement
.
2. Remove the door seal trim. Refer to
Door Water Deflector Replacement
.
3. Remove the outside channel molding. Refer to
Front Side Door Window Channel
Replacement
.
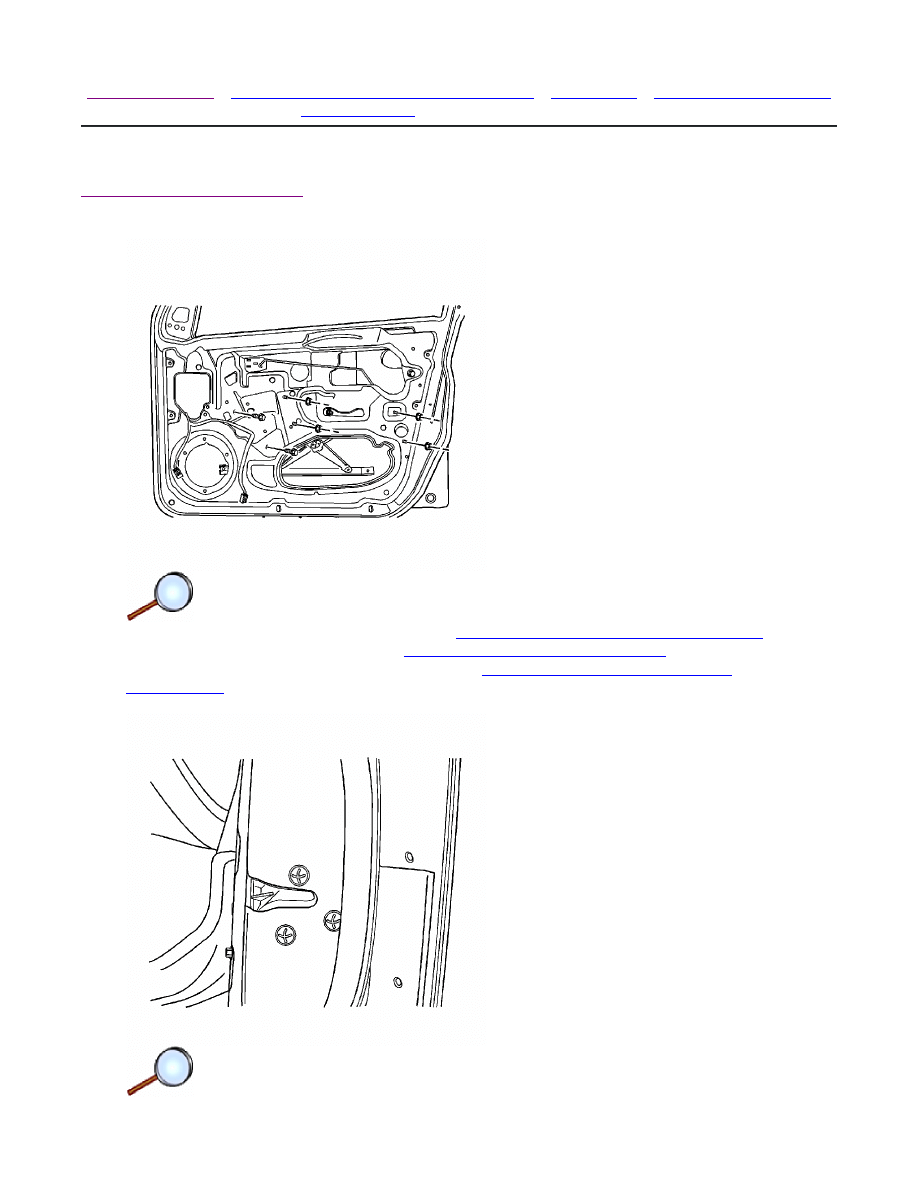
4. Remove the screws that secure the glass to the window regulator.
© 2010 General Motors Corporation. All rights reserved.
Page 1 of 3
Document ID: 2096169
7/5/2010
http://localhost:9001/si/showDoc.do?docSyskey=2096169&pubCellSyskey=11758&pubObj...
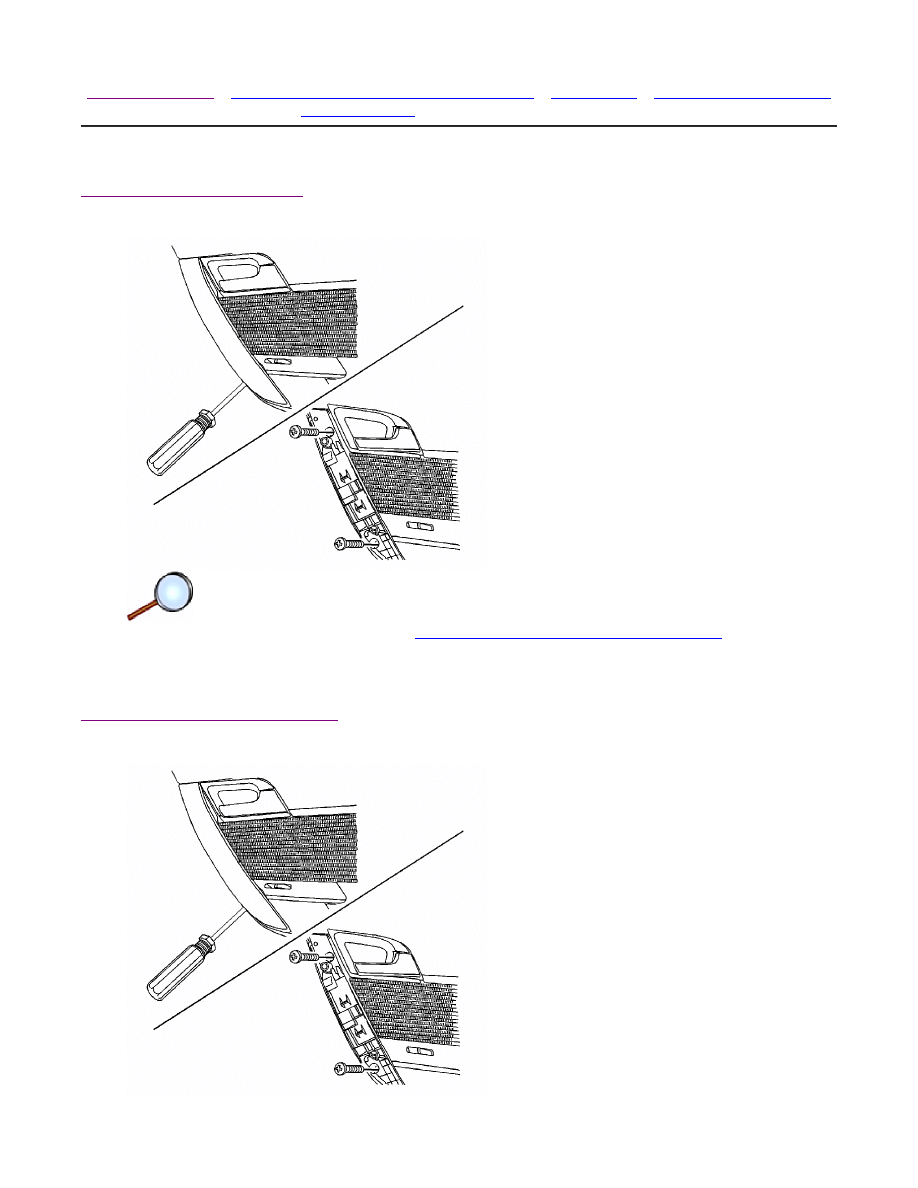
5. Remove the bolts and the guide rail.
6. Remove the glass from the door.
Installation Procedure
1. Install the glass in the door.
Caution:
Refer to
Fastener Caution
in the Preface section.
2. Install the guide rail and the bolts. Tighten the guide rail bolts to 7 N·m (62 lb in).
3. Install the glass to the window regulator with the screws. Tighten the door glass screws to
7 N·m (62 lb in).
Page 2 of 3
Document ID: 2096169
7/5/2010
http://localhost:9001/si/showDoc.do?docSyskey=2096169&pubCellSyskey=11758&pubObj...

4. Install the outside channel molding. Refer to
Front Side Door Window Channel Replacement
.
5. Install the door seal trim. Refer to
Door Water Deflector Replacement
.
6. Install the front door trim panel. Refer to
Front Side Door Trim Panel Replacement
.
Page 3 of 3
Document ID: 2096169
7/5/2010
http://localhost:9001/si/showDoc.do?docSyskey=2096169&pubCellSyskey=11758&pubObj...
2009 Chevrolet Aveo
|
Aveo, Wave, G3, Barina (VIN S/T) Service Manual
|
Body Systems
|
Fixed and Moveable Windows
|
Repair Instructions
| Document ID: 2096170
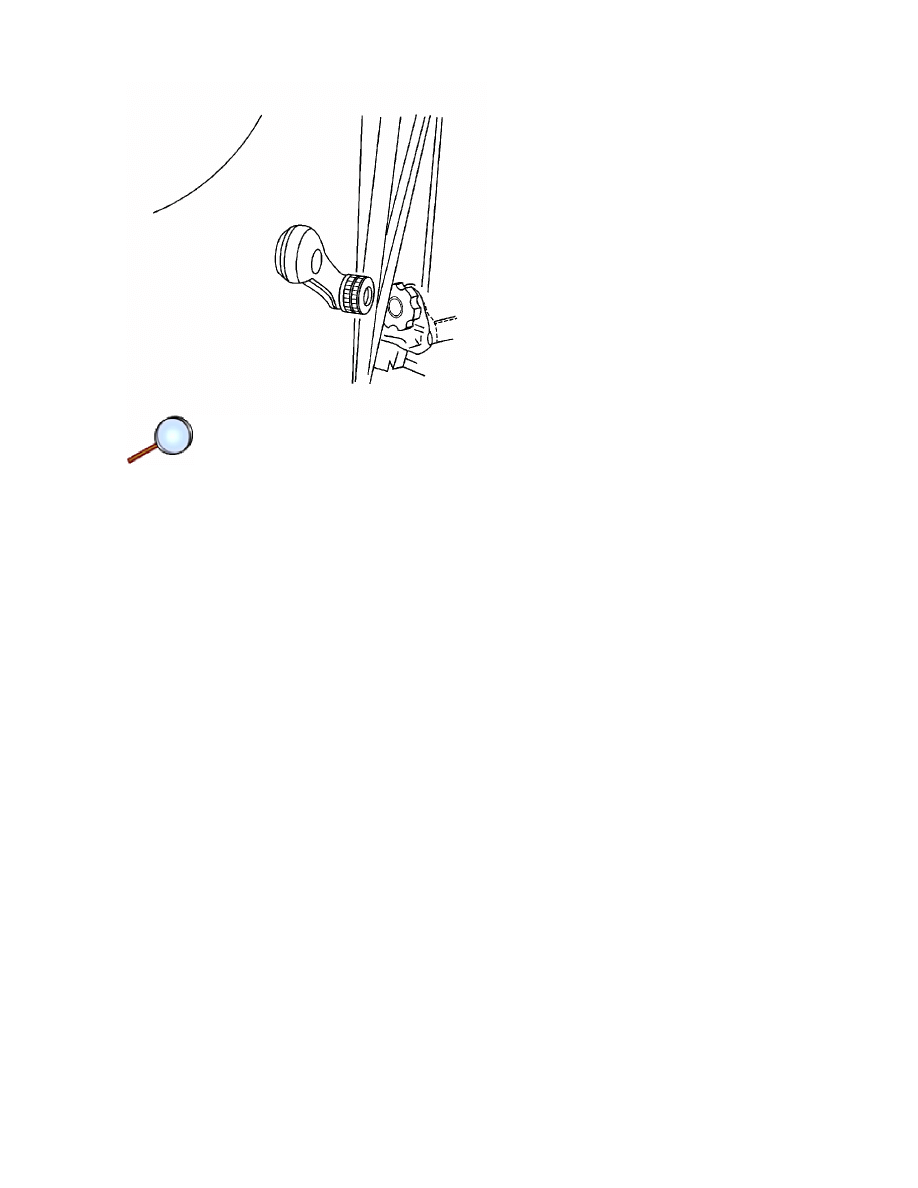
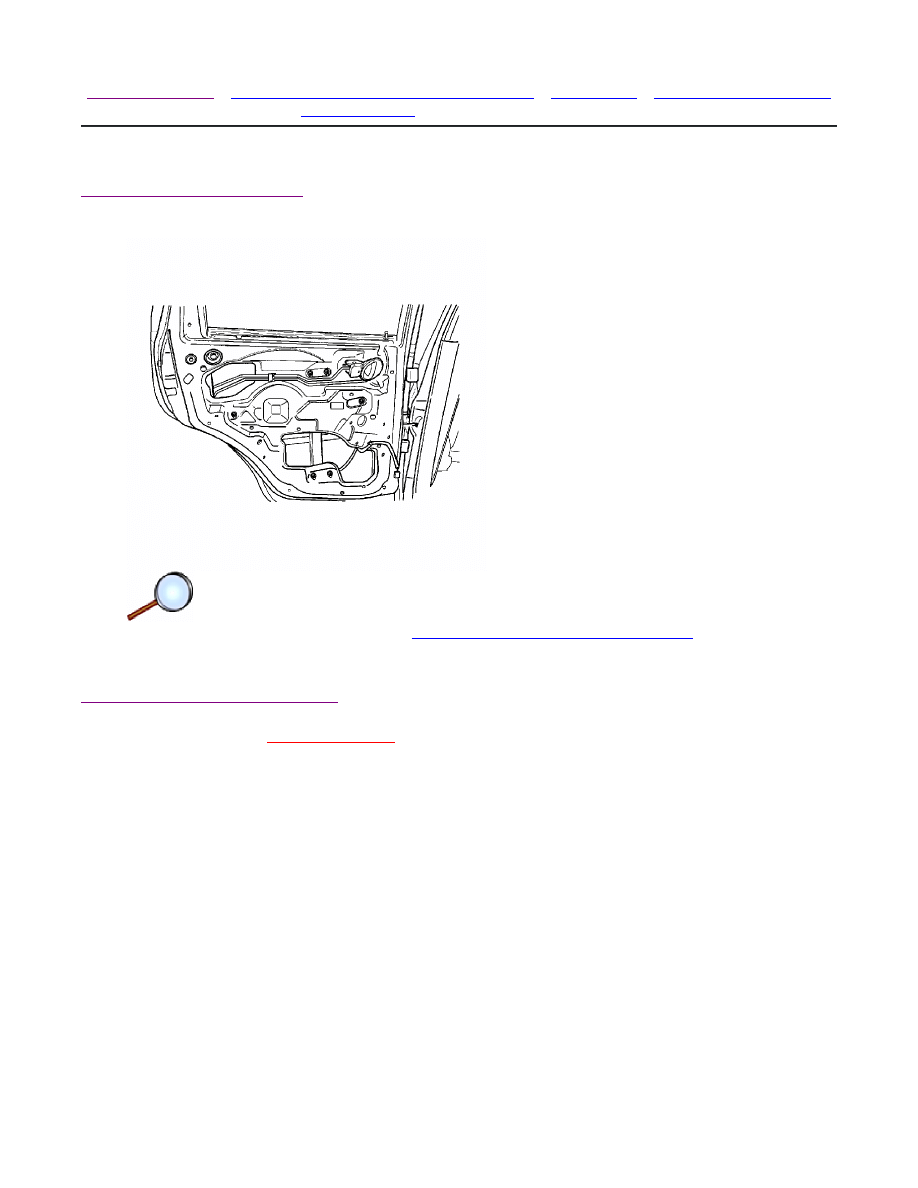
Rear Side Door Window Replacement
Removal Procedure
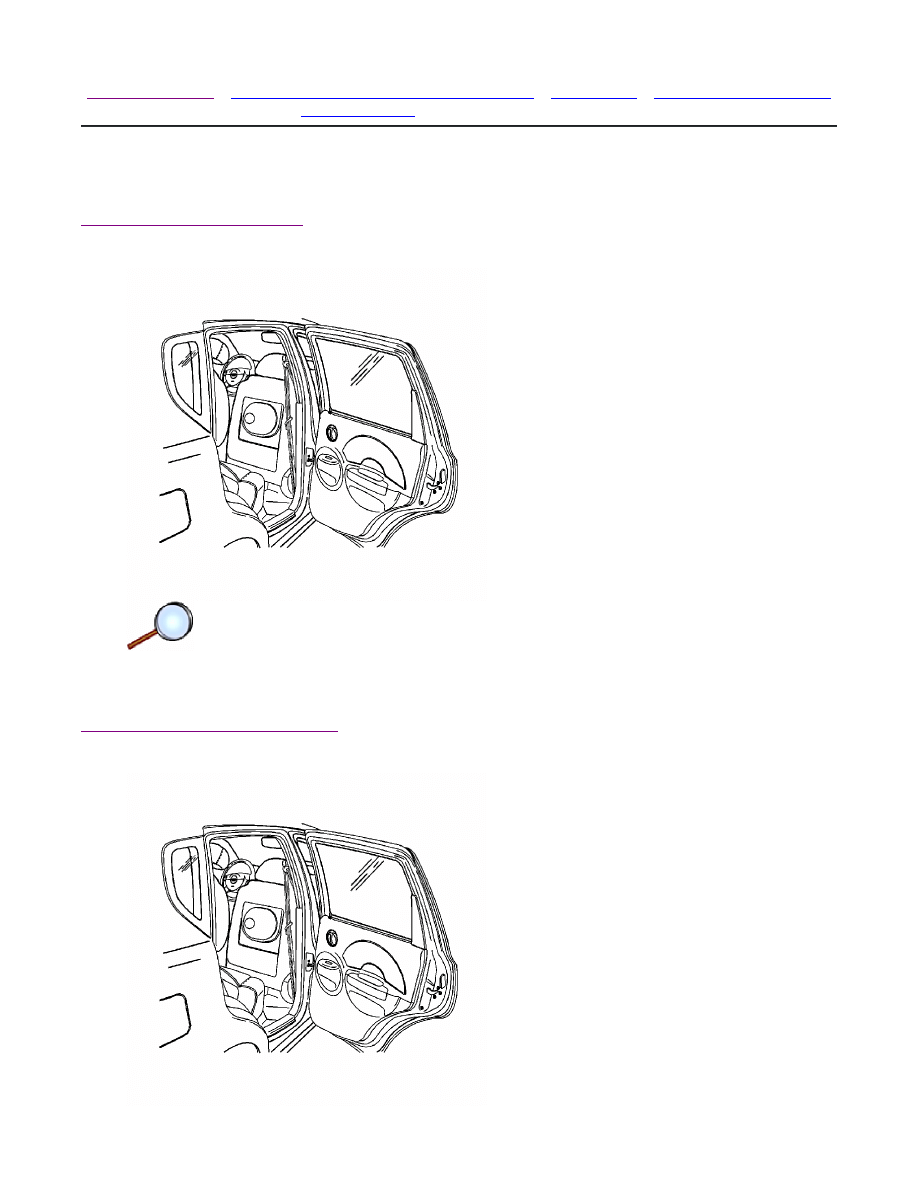
1. Remove the rear door trim panel. Refer to
Rear Door Trim Panel Replacement
.
2. Remove the outside channel molding. Refer to
Rear Side Door Window Channel Replacement
.
3. Remove the interior rear door garnish molding.
4. Remove the screws and the exterior rear door garnish molding.
5. Remove the door seal trim. Refer to
Door Water Deflector Replacement
.
© 2010 General Motors Corporation. All rights reserved.
Page 1 of 3
Document ID: 2096170
7/5/2010
http://localhost:9001/si/showDoc.do?docSyskey=2096170&pubCellSyskey=11688&pubObj...
6. Remove the screws that secure the glass to the window regulator.
7. Remove the bolts and the guide rail.
8. Remove the glass from the door.
Installation Procedure
1. Install the glass in the door.
Caution:
Refer to
Fastener Caution
in the Preface section.
2. Install the guide rail and the bolts. Tighten the guide rail bolts to 7 N·m (62 lb in).
Page 2 of 3
Document ID: 2096170
7/5/2010
http://localhost:9001/si/showDoc.do?docSyskey=2096170&pubCellSyskey=11688&pubObj...
3. Position the glass within the window regulator.
4. Install the glass screws.
Tighten the door glass screws to 7 N·m (62 lb in).
5. Install the door seal trim. Refer to
Door Water Deflector Replacement
.
6. Install the exterior rear door garnish molding with the screws and tighten to 1.5 N·m (13
lb in).
7. Install the interior rear door garnish molding.
8. Install the outside channel molding. Refer to
Rear Side Door Window Channel Replacement
.
9. Install the rear door trim panel. Refer to
Rear Door Trim Panel Replacement
.
Page 3 of 3
Document ID: 2096170
7/5/2010
http://localhost:9001/si/showDoc.do?docSyskey=2096170&pubCellSyskey=11688&pubObj...
2009 Chevrolet Aveo
|
Aveo, Wave, G3, Barina (VIN S/T) Service Manual
|
Body Systems
|
Fixed and Moveable Windows
|
Repair Instructions
| Document ID: 2096171
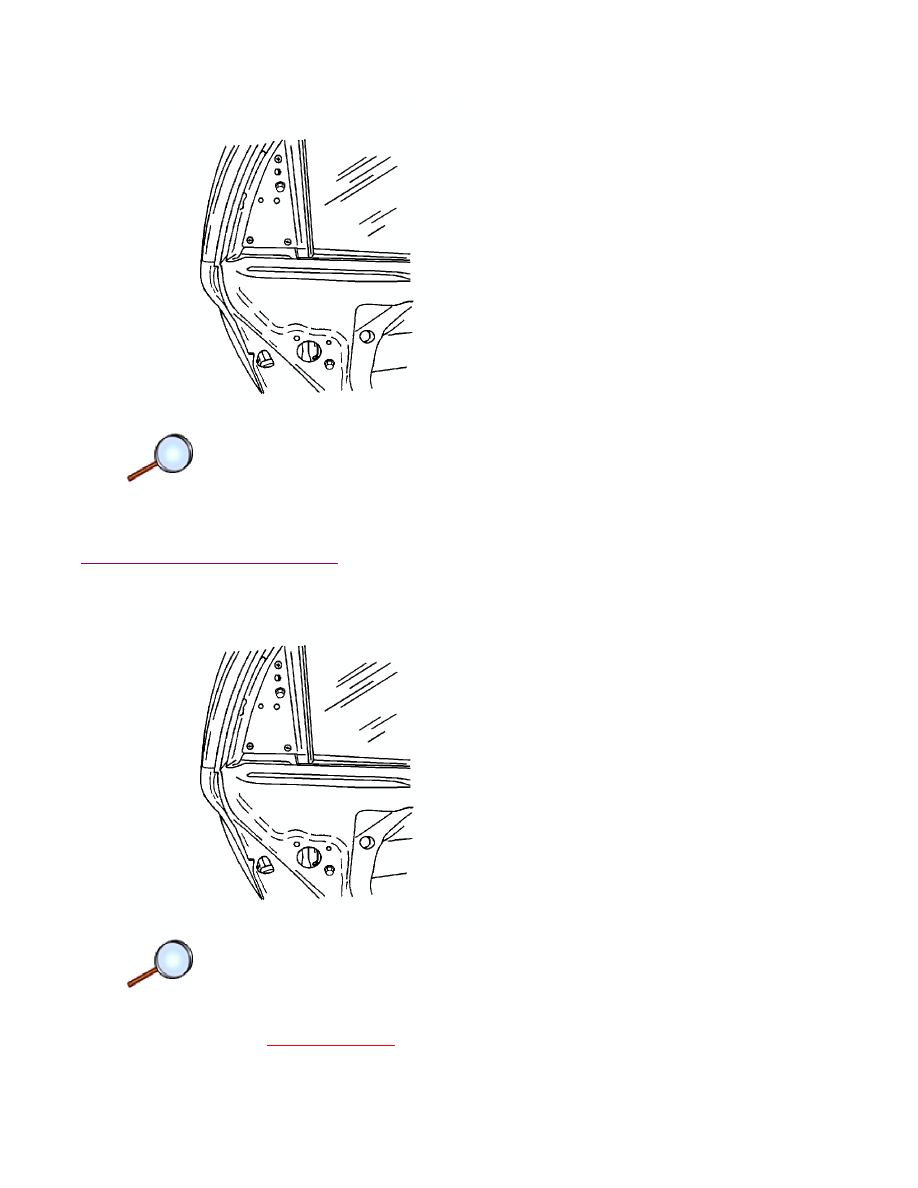
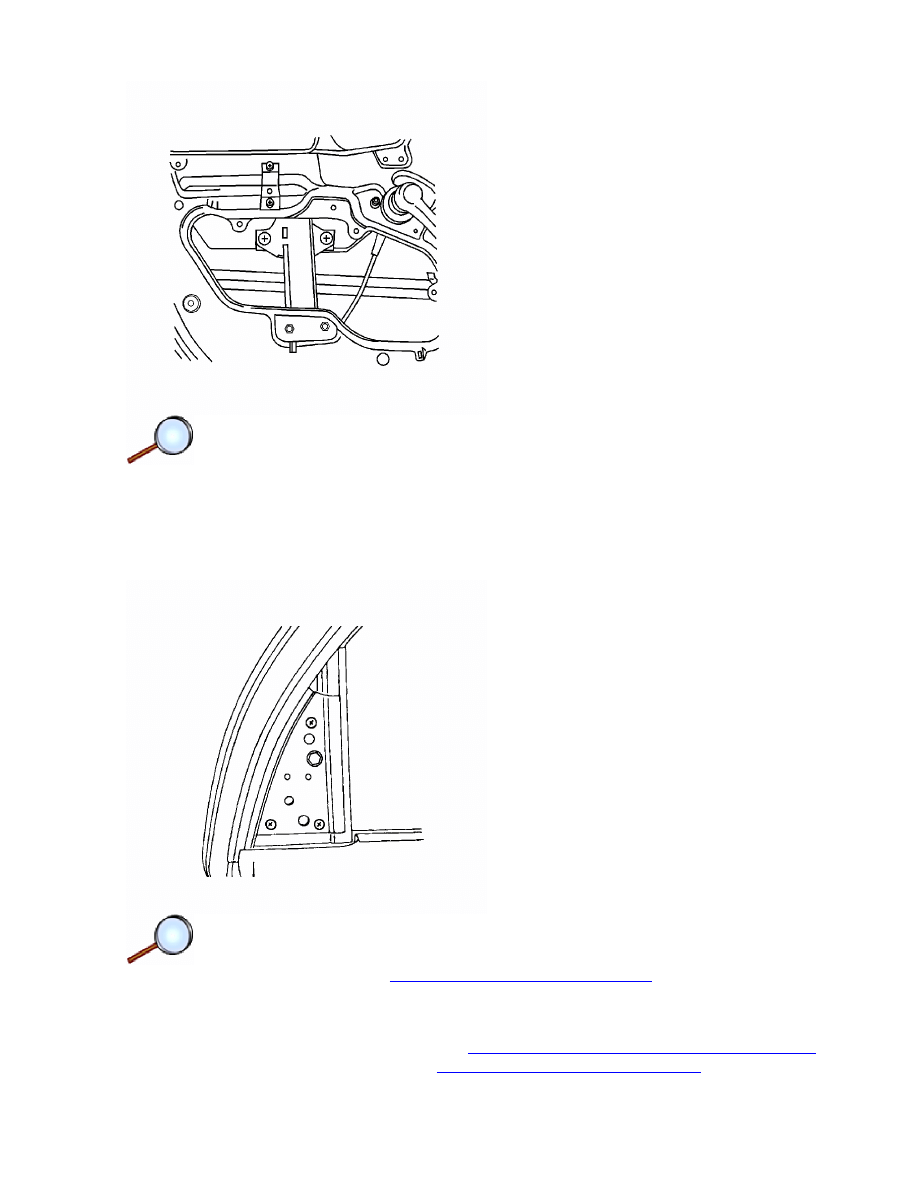
Rear Window Replacement
Special Tools
J 24402-A
Glass Sealant Remover
Removal Procedure
Warning:
Refer to
Battery Disconnect Warning
in the Preface section.
1. Disconnect the negative battery cable.
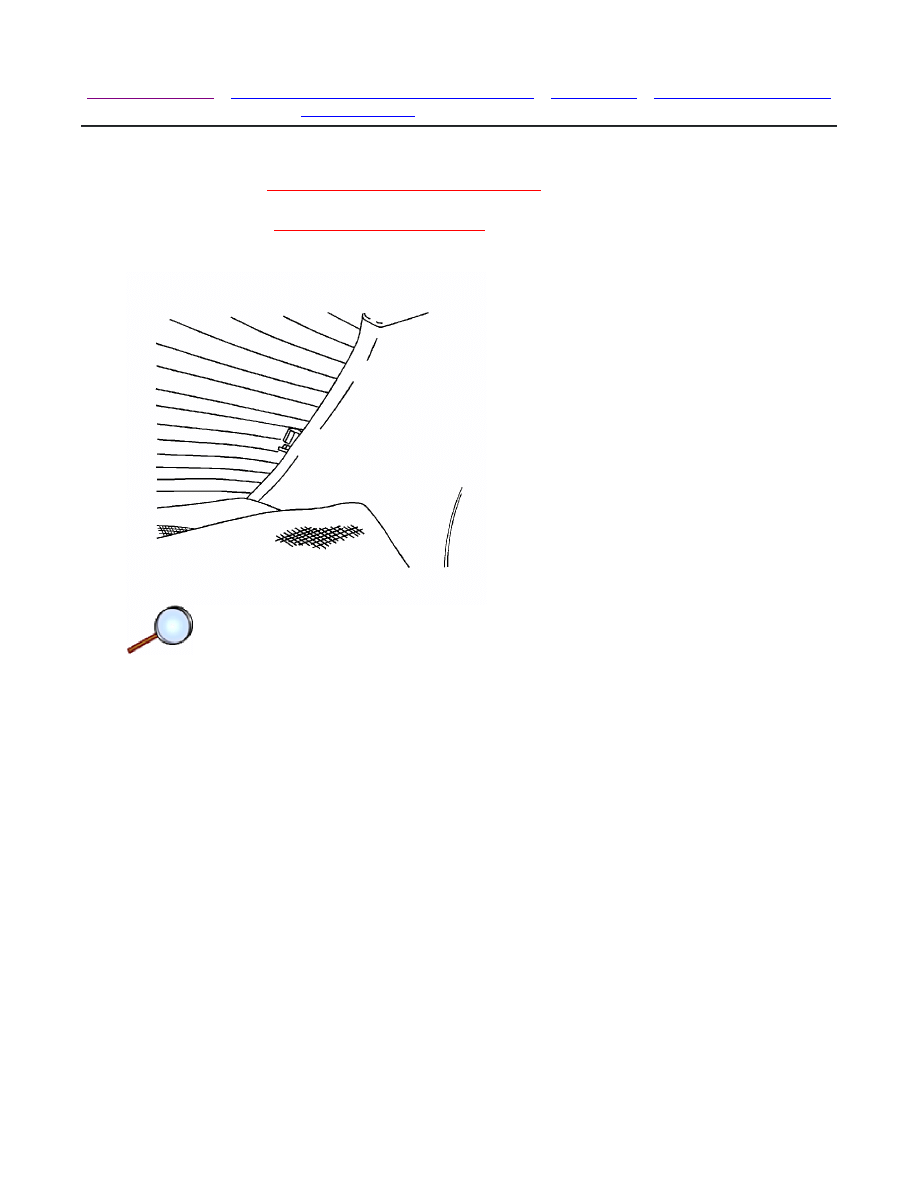
2. Disconnect the rear window defogger electrical connectors, left side electrical connector
shown, right side electrical connector similar.
© 2010 General Motors Corporation. All rights reserved.
Page 1 of 5
Document ID: 2096171
7/5/2010
http://localhost:9001/si/showDoc.do?docSyskey=2096171&pubCellSyskey=150655&pubO...
3. Remove the weatherstrip around the rear window.
4. Using the
J 24402-A
(1), cut the adhesive around the rear window.
Page 2 of 5
Document ID: 2096171
7/5/2010
http://localhost:9001/si/showDoc.do?docSyskey=2096171&pubCellSyskey=150655&pubO...
5. Remove the rear window from the vehicle.
6. Using a knife, remove the adhesive from the rear window.
7. Using a knife, remove the adhesive from the rear window frame.
Installation Procedure
1. Install the new weatherstrip to the rear window.
Page 3 of 5
Document ID: 2096171
7/5/2010
http://localhost:9001/si/showDoc.do?docSyskey=2096171&pubCellSyskey=150655&pubO...
2. Apply tape to the new weatherstrip and the rear window to hold the weatherstrip in place.
3. Apply the adhesive primer to the rear window frame and the perimeter of the rear window.
Warning: Insufficient curing of urethane adhesive may allow unrestrained occupants to be
ejected from the vehicle resulting in personal injury.
Do NOT physically disturb the repair area until after these minimum times have elapsed.
4. Apply glass adhesive to the rear window frame.
• For the moisture-curing type of urethane adhesive, allow a minimum of 6 hours at 21°C
(70°F) or greater and with at least 30 percent relative humidity. Allow at least 24 hours
for the complete curing of the urethane adhesive.
• For the chemical-curing type of urethane adhesive, allow a minimum of 1 hour .
Page 4 of 5
Document ID: 2096171
7/5/2010
http://localhost:9001/si/showDoc.do?docSyskey=2096171&pubCellSyskey=150655&pubO...
5. Install the rear window into the rear window frame.
6. Reposition the tape over the weatherstrip, the rear window, and the rear window frame to
hold the rear window in place.
7. Let the adhesive dry for 24 hours.
8. Remove the tape.
9. Check for waterleaks by pouring water on the rear window. If a leak is found, dry the window
and fill the area that leaks with adhesive. If the leak persists, remove the rear window and
repeat the entire procedure.
10. Connect the rear window defogger electrical connectors, left side electrical connector shown,
right side electrical connector similar.
11. Connect the negative battery cable.
Page 5 of 5
Document ID: 2096171
7/5/2010
http://localhost:9001/si/showDoc.do?docSyskey=2096171&pubCellSyskey=150655&pubO...
2009 Chevrolet Aveo
|
Aveo, Wave, G3, Barina (VIN S/T) Service Manual
|
Body Systems
|
Fixed and Moveable Windows
|
Repair Instructions
| Document ID: 1284819
Door Window Regulator Handle Replacement
Removal Procedure
1. Push the plastic ring behind the window regulator handle toward the door to reveal the metal
clip.
2. Pry off the metal clip.
3. Remove the window regulator handle and the plastic ring.
Installation Procedure
© 2010 General Motors Corporation. All rights reserved.
Page 1 of 2
Document ID: 1284819
7/5/2010
http://localhost:9001/si/showDoc.do?docSyskey=1284819&pubCellSyskey=11321&pubObj...
1. Install the plastic ring.
2. Install the window regulator handle.
3. Insert the metal clip.
Page 2 of 2
Document ID: 1284819
7/5/2010
http://localhost:9001/si/showDoc.do?docSyskey=1284819&pubCellSyskey=11321&pubObj...
2009 Chevrolet Aveo
|
Aveo, Wave, G3, Barina (VIN S/T) Service Manual
|
Body Systems
|
Fixed and Moveable Windows
|
Repair Instructions
| Document ID: 1727980
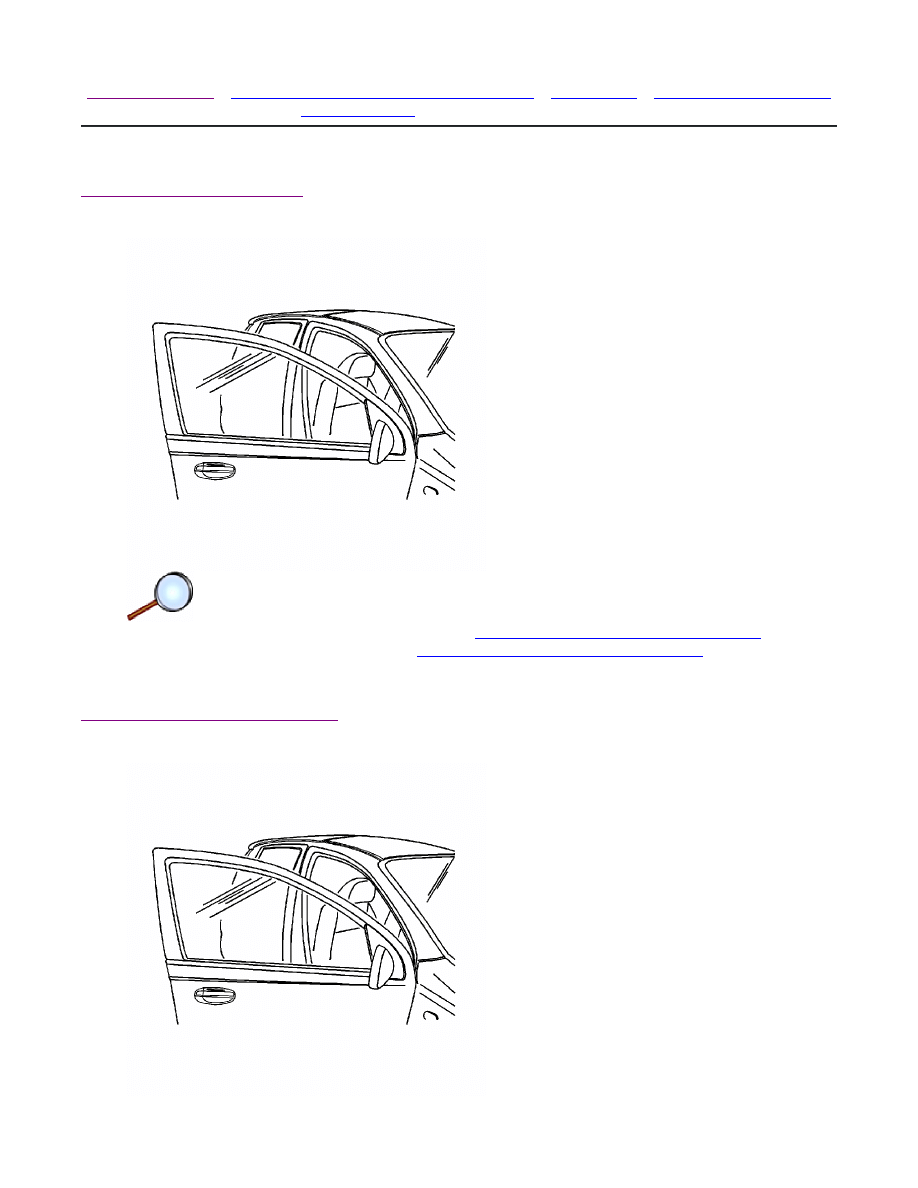
Front Side Door Window Channel Replacement
Removal Procedure
1. Remove the outside rearview mirror. Refer to
Outside Rearview Mirror Replacement
.
2. Remove the front door glass. Refer to
Front Side Door Window Replacement
.
3. Remove the glass run.
Installation Procedure
© 2010 General Motors Corporation. All rights reserved.
Page 1 of 2
Document ID: 1727980
7/5/2010
http://localhost:9001/si/showDoc.do?docSyskey=1727980&pubCellSyskey=11875&pubObj...

1. Install the glass run.
2. Install the front door glass. Refer to
Front Side Door Window Replacement
.
3. Install the outside rearview mirror. Refer to
Outside Rearview Mirror Replacement
.
Page 2 of 2
Document ID: 1727980
7/5/2010
http://localhost:9001/si/showDoc.do?docSyskey=1727980&pubCellSyskey=11875&pubObj...
2009 Chevrolet Aveo
|
Aveo, Wave, G3, Barina (VIN S/T) Service Manual
|
Body Systems
|
Fixed and Moveable Windows
|
Repair Instructions
| Document ID: 1284748
Rear Side Door Window Channel Replacement
Removal Procedure
1. Remove the rear door glass. Refer to
Rear Side Door Window Replacement
.
2. Remove the rear door interior and exterior garnish trim.
3. Remove the glass run.
Installation Procedure
© 2010 General Motors Corporation. All rights reserved.
Page 1 of 2
Document ID: 1284748
7/5/2010
http://localhost:9001/si/showDoc.do?docSyskey=1284748&pubCellSyskey=11874&pubObj...

1. Install the glass run.
2. Install the rear door interior and exterior garnish trim.
3. Install the rear door glass. Refer to
Rear Side Door Window Replacement
.
Page 2 of 2
Document ID: 1284748
7/5/2010
http://localhost:9001/si/showDoc.do?docSyskey=1284748&pubCellSyskey=11874&pubObj...
2009 Chevrolet Aveo
|
Aveo, Wave, G3, Barina (VIN S/T) Service Manual
|
Body Systems
|
Fixed and Moveable Windows
|
Repair Instructions
| Document ID: 2096183
Door Window Regulator Replacement (Manual Front)
Removal Procedure
1. Remove the front door glass. Refer to
Front Side Door Window Replacement
.
2. Remove the nuts and the window regulator.
Installation Procedure
Caution:
Refer to
Fastener Caution
in the Preface section.
© 2010 General Motors Corporation. All rights reserved.
Page 1 of 2
Document ID: 2096183
7/5/2010
http://localhost:9001/si/showDoc.do?docSyskey=2096183&pubCellSyskey=11247&pubObj...
1. Install the window regulator and the nuts and tighten to 7 N·m (62 lb in).
2. Install the front door glass. Refer to
Front Side Door Window Replacement
.
Page 2 of 2
Document ID: 2096183
7/5/2010
http://localhost:9001/si/showDoc.do?docSyskey=2096183&pubCellSyskey=11247&pubObj...
2009 Chevrolet Aveo
|
Aveo, Wave, G3, Barina (VIN S/T) Service Manual
|
Body Systems
|
Fixed and Moveable Windows
|
Repair Instructions
| Document ID: 2096184
Door Window Regulator Replacement (Manual Rear)
Removal Procedure
1. Remove the rear door glass. Refer to
Rear Side Door Window Replacement
.
2. Remove the nuts and the window regulator.
Installation Procedure
Caution:
Refer to
Fastener Caution
in the Preface section.
© 2010 General Motors Corporation. All rights reserved.
Page 1 of 2
Document ID: 2096184
7/5/2010
http://localhost:9001/si/showDoc.do?docSyskey=2096184&pubCellSyskey=11247&pubObj...

1. Install the window regulator with the nuts and tighten to 7 N·m (62 lb in).
2. Install the rear door glass. Refer to
Rear Side Door Window Replacement
.
Page 2 of 2
Document ID: 2096184
7/5/2010
http://localhost:9001/si/showDoc.do?docSyskey=2096184&pubCellSyskey=11247&pubObj...
2009 Chevrolet Aveo
|
Aveo, Wave, G3, Barina (VIN S/T) Service Manual
|
Body Systems
|
Fixed and Moveable Windows
|
Repair Instructions
| Document ID: 2096187
Door Window Regulator Replacement (Power Front)
Removal Procedure
Warning:
Refer to
Battery Disconnect Warning
in the Preface section.
1. Disconnect the negative battery cable.
2. Remove the door glass. Refer to
Front Side Door Window Replacement
.
3. Remove the nuts and the regulator.
4. Disconnect the electrical connector.
Installation Procedure
© 2010 General Motors Corporation. All rights reserved.
Page 1 of 2
Document ID: 2096187
7/5/2010
http://localhost:9001/si/showDoc.do?docSyskey=2096187&pubCellSyskey=11247&pubObj...
1. Connect the electrical connector.
Caution:
Refer to
Fastener Caution
in the Preface section.
2. Install the window regulator with the nuts and tighten to 7 N·m (62 lb in).
3. Install the front door glass. Refer to
Front Side Door Window Replacement
.
4. Connect the negative battery cable.
5. If the vehicle is equipped with a one touch up function, and the driver side power window
regulator has been replaced, perform the window motor reinitialization process. Refer to
Power Window Reinitialization
.
Page 2 of 2
Document ID: 2096187
7/5/2010
http://localhost:9001/si/showDoc.do?docSyskey=2096187&pubCellSyskey=11247&pubObj...

2009 Chevrolet Aveo
|
Aveo, Wave, G3, Barina (VIN S/T) Service Manual
|
Body Systems
|
Fixed and Moveable Windows
|
Repair Instructions
| Document ID: 2096189
Door Window Regulator Replacement (Power Rear)
Removal Procedure
Warning:
Refer to
Battery Disconnect Warning
in the Preface section.
1. Disconnect the negative battery cable.
2. Remove the rear door glass. Refer to
Rear Side Door Window Replacement
.
3. Remove the nuts and the regulator.
4. Disconnect the electrical connector.
Installation Procedure
© 2010 General Motors Corporation. All rights reserved.
Page 1 of 2
Document ID: 2096189
7/5/2010
http://localhost:9001/si/showDoc.do?docSyskey=2096189&pubCellSyskey=11247&pubObj...
1. Connect the electrical connector.
Caution:
Refer to
Fastener Caution
in the Preface section.
2. Install the window regulator with the nuts and tighten to 7 N·m (62 lb in).
3. Install the rear door glass. Refer to
Rear Side Door Window Replacement
.
4. Connect the negative battery cable.
Page 2 of 2
Document ID: 2096189
7/5/2010
http://localhost:9001/si/showDoc.do?docSyskey=2096189&pubCellSyskey=11247&pubObj...

2009 Chevrolet Aveo
|
Aveo, Wave, G3, Barina (VIN S/T) Service Manual
|
Body Systems
|
Fixed and Moveable Windows
|
Repair Instructions
| Document ID: 1927109
Window Motor Programming - Express Function
Windows Motor Reprogramming
Driver side window motor assembly has been designed to memorize closing and opening steps.
If the driver side window motor assembly has been replaced or reassembled, it must be
reprogrammed once in order for the safety function to operate properly. This can be done by
operating the driver side window switch. If the reprogramming procedure does not be performed,
the driver side window does not close automatically.
The following steps explain how to reprogram the driver side window motor assembly:
1. Press the driver side window switch until the window is under 100 mm from the top of
window frame.
Important: Do not pull the window switch to the second step of the Up position.
2. Pull the driver side window switch to the first step of the Up position and hold until the
window is fully UP.
3. Continue holding the window switch for approximately 3 seconds after the window motor
stall.
4. The driver side window motor assembly in now programmed for the safety function.
5. Confirm the reprogramming procedure by performing auto-up operation.
© 2010 General Motors Corporation. All rights reserved.
Page 1 of 1
Document ID: 1927109
7/5/2010
http://localhost:9001/si/showDoc.do?docSyskey=1927109&pubCellSyskey=11862&pubObj...

2009 Chevrolet Aveo
|
Aveo, Wave, G3, Barina (VIN S/T) Service Manual
|
Body Systems
|
Fixed and Moveable Windows
|
Repair Instructions
| Document ID: 1923306
Power Window Reinitialization
Reinitialization Description
If the driver side power window regulator assembly has been replaced or reassembled, it must be
reprogrammed once in the order for the safety function to operate properly. This can be done by
operating the driver side window switch. If the reprogramming procedure is not performed, the
driver side window will not close automatically.
Reinitialization Procedures
1. Press the driver side window switch until the window is under 100 mm (4.0 in) from the top
of the window frame.
2. Pull the driver side window switch to the first step of the UP position and hold until the
window is fully UP.
Important: Do not put the window switch to the second step of the UP position.
3. Continue holding the window switch for approximately 3 seconds after the window motor
stall. The driver side window motor assembly is now programmed for the safety function.
4. Confirm the reprogramming procedure by performing the auto-up operation.
© 2010 General Motors Corporation. All rights reserved.
Page 1 of 1
Document ID: 1923306
7/5/2010
http://localhost:9001/si/showDoc.do?docSyskey=1923306&pubCellSyskey=138391&pubO...
2009 Chevrolet Aveo
|
Aveo, Wave, G3, Barina (VIN S/T) Service Manual
|
Body Systems
|
Fixed and Moveable Windows
|
Repair Instructions
| Document ID: 1284806
Outer Belt Sealing Strip Replacement
Removal Procedure
1. Lower the window completely.
2. Lift the outside channel molding off the door.
Installation Procedure
© 2010 General Motors Corporation. All rights reserved.
Page 1 of 2
Document ID: 1284806
7/5/2010
http://localhost:9001/si/showDoc.do?docSyskey=1284806&pubCellSyskey=11427&pubObj...

1. Press the outside channel molding onto the door.
2. Raise the window.
Page 2 of 2
Document ID: 1284806
7/5/2010
http://localhost:9001/si/showDoc.do?docSyskey=1284806&pubCellSyskey=11427&pubObj...
2009 Chevrolet Aveo
|
Aveo, Wave, G3, Barina (VIN S/T) Service Manual
|
Body Systems
|
Fixed and Moveable Windows
|
Repair Instructions
| Document ID: 1730861
Inner Belt Sealing Strip Replacement (Notchback)
Removal Procedure
1. Remove the door trim panel. Refer to
Front Side Door Trim Panel Replacement
.
2. Straighten the retaining tabs in order to release the channel molding to the door trim panel.
3. Remove the channel molding.
Installation Procedure
© 2010 General Motors Corporation. All rights reserved.
Page 1 of 2
Document ID: 1730861
7/5/2010
http://localhost:9001/si/showDoc.do?docSyskey=1730861&pubCellSyskey=11411&pubObj...

1. Install the channel molding onto the door trim panel.
2. Bend the retaining tabs to secure the channel molding to the door trim panel.
3. Install the door trim panel. Refer to
Front Side Door Trim Panel Replacement
.
Page 2 of 2
Document ID: 1730861
7/5/2010
http://localhost:9001/si/showDoc.do?docSyskey=1730861&pubCellSyskey=11411&pubObj...

2009 Chevrolet Aveo
|
Aveo, Wave, G3, Barina (VIN S/T) Service Manual
|
Body Systems
|
Fixed and Moveable Windows
|
Repair Instructions
| Document ID: 1727801
Front Side Door Window Belt Outer Sealing Strip
Replacement
Removal Procedure
1. Remove the outside rearview mirror. Refer to
Outside Rearview Mirror Replacement
.
2. Remove the front door secondary weatherstrip.
Installation Procedure
© 2010 General Motors Corporation. All rights reserved.
Page 1 of 2
Document ID: 1727801
7/5/2010
http://localhost:9001/si/showDoc.do?docSyskey=1727801&pubCellSyskey=11399&pubObj...

1. Install the front door secondary weatherstrip.
2. Install the outside rearview mirror. Refer to
Outside Rearview Mirror Replacement
.
Page 2 of 2
Document ID: 1727801
7/5/2010
http://localhost:9001/si/showDoc.do?docSyskey=1727801&pubCellSyskey=11399&pubObj...
2009 Chevrolet Aveo
|
Aveo, Wave, G3, Barina (VIN S/T) Service Manual
|
Body Systems
|
Fixed and Moveable Windows
|
Repair Instructions
| Document ID: 1284752
Rear Side Door Window Outer Sealing Strip
Replacement
Removal Procedure
1. Remove the rear door interior and exterior garnish trim.
2. Remove the rear door secondary weatherstrip.
Installation Procedure
© 2010 General Motors Corporation. All rights reserved.
Page 1 of 2
Document ID: 1284752
7/5/2010
http://localhost:9001/si/showDoc.do?docSyskey=1284752&pubCellSyskey=11474&pubObj...

1. Install the rear door secondary weatherstrip.
2. Install the rear door interior and exterior garnish trim.
Page 2 of 2
Document ID: 1284752
7/5/2010
http://localhost:9001/si/showDoc.do?docSyskey=1284752&pubCellSyskey=11474&pubObj...
2009 Chevrolet Aveo
|
Aveo, Wave, G3, Barina (VIN S/T) Service Manual
|
Body Systems
|
Fixed and Moveable Windows
|
Repair Instructions
| Document ID: 2096193
Grid Line Repair
Caution:
Refer to
Avoid Damage to Grid Lines Caution
in the Preface section.
Warning:
Refer to
Battery Disconnect Warning
in the Preface section.
1. Disconnect the negative battery cable.
2. Disconnect the rear window defogger electrical connectors, left side electrical connector
shown, right side electrical connector similar.
3. Inspect the rear window defogger grid lines
4. Mark the grid line break on the outside of the glass with a wax pencil or a crayon.
5. Use steel wool to buff the grid lines that are to be repaired. Wipe the lines clean using a cloth
dampened with alcohol. Buff and clean about 6 mm (0.25 in) beyond each side of the break
in the grid line.
© 2010 General Motors Corporation. All rights reserved.
Page 1 of 3
Document ID: 2096193
7/5/2010
http://localhost:9001/si/showDoc.do?docSyskey=2096193&pubCellSyskey=150599&pubO...
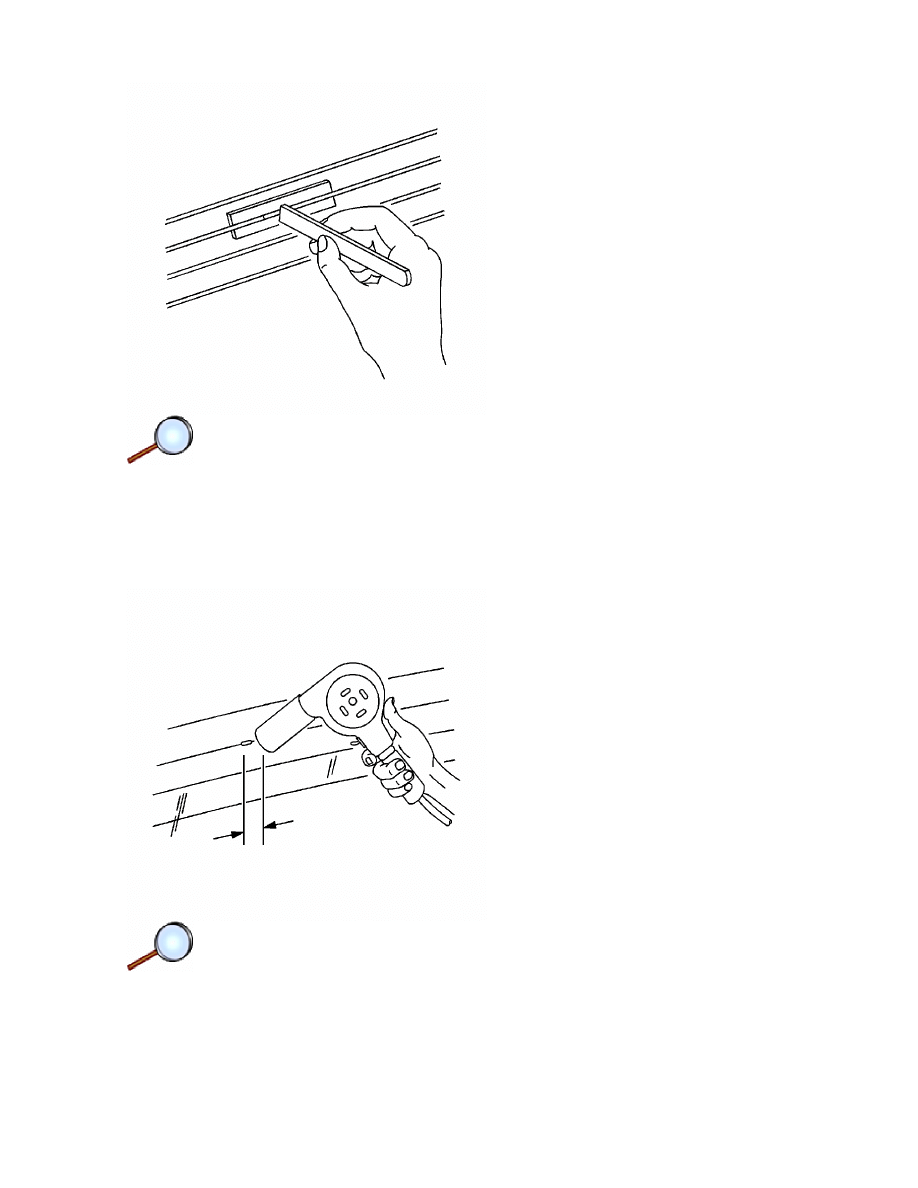
6. Attach a grid line repair decal or 2 strips of tape above and below the repair areas.
7. Apply the grid repair material to the repair area using a small wooden stick or a spatula. The
grid repair material should be at room temperature.
8. Carefully remove the decal or the tape.
Caution: The grid line repair material must be cured with heat. To avoid heat damage to the
interior trim, protect the trim near the repair area where heat is to be applied.
9. Heat the repair area for 1-2 minutes.
10. Hold the heat gun nozzle 25 mm (1 in) from the surface. A minimum temperature of 149°C
(300°F) is required.
• A repair decal or tape must be used in order to control the width of the repair areas.
• If a decal is used, the die-cut metered slot must be the same width as the grid line.
Page 2 of 3
Document ID: 2096193
7/5/2010
http://localhost:9001/si/showDoc.do?docSyskey=2096193&pubCellSyskey=150599&pubO...

11. Inspect the grid line repair area. If the repair appears discolored, apply a coating of tincture
of iodine to the area using a pipe cleaner or a line brush. Allow the iodine to dry for about
30 seconds. Carefully wipe off the excess iodine with lint-free cloth.
12. Connect the rear window defogger electrical connectors.
Warning:
Refer to
Repair Material Curing Warning
in the Preface section.
13. Test the operation of the rear window defogger in order to verify that the repair was
successful.
Page 3 of 3
Document ID: 2096193
7/5/2010
http://localhost:9001/si/showDoc.do?docSyskey=2096193&pubCellSyskey=150599&pubO...
2009 Chevrolet Aveo
|
Aveo, Wave, G3, Barina (VIN S/T) Service Manual
|
Body Systems
|
Fixed and Moveable Windows
|
Repair Instructions
| Document ID: 1336204
Rear Window Defogger Braided Lead Wire
The rear window defogger bus lead wire or the terminal can be reattached by resoldering. Use a
solder containing 3 ercent silver and a rosin flux paste.
1. The repair area should be buffed with fine steel wool before soldering the bus lead wire.
2. Apply the paste-type rosin flux in small quantities to the wire lead and the bus lead wire
repair area using a brush.
3. Coat the soldering iron tip with solder. Use only enough solder to ensure a complete repair.
4. Use only enough heat to melt the solder. Do not overheat the wire when resoldering to the
bus lead wire.
© 2010 General Motors Corporation. All rights reserved.
Page 1 of 1
Document ID: 1336204
7/5/2010
http://localhost:9001/si/showDoc.do?docSyskey=1336204&pubCellSyskey=150666&pubO...
Document Outline
- 1.pdf
- 2.pdf
- 3.pdf
- 4.pdf
- 5.pdf
- 6.pdf
- 7.pdf
- 8.pdf
- 9.pdf
- 10.pdf
- 11.pdf
- 12.pdf
- 13.pdf
- 14.pdf
- 15.pdf
- 16.pdf
- 17.pdf
- 18.pdf
- 19.pdf
- 20.pdf
Wyszukiwarka
Podobne podstrony:
Install and Configure Windows PowerShell
How to Install And Run Windows XP From USB drive
Instructions for manually installing FreeSpace Open and mods (Windows)
5 2 1 8 Lab Observing ARP with the Windows CLI, IOS CLI, and Wireshark
Untold Hacking Secret Untold Windows Tips and Secrets
Prywes Mathematics Of Magic A Study In Probability, Statistics, Strategy And Game Theory Fixed
70 Windows and Mirrors
5 2 1 8 Lab Observing ARP with the Windows CLI, IOS CLI, and Wireshark
Zabezpieczenia Windows Vista and Windows 7
Winlogon Notification Packages Removed Impact on Windows Vista Planning and Deployment
#0642 – Installing Windows and Doors
Windows 7 2008 Event Log forensic and reversing analysis
GDT and LDT in Windows kernel vulnerability exploitation
Vista, Windows 7, and Server 2008 Activation Script
Windows XP SP3 and Microsoft HD Audio UAA Problems
HTTP sys Manageability in Windows Vista and Longhorn Server
A R Moler [Brian & Tristan 04] Windows and Walls
więcej podobnych podstron