
Make Your Own Toy Theatre
You will need:
• The PDF document ‘Theatre Theatre Model’, printed onto thin card
• Thin wooden rods, about 25cm long (kebab skewers work well)
• Glue
• Sticky tack or tape
The support pieces are better printed in colour so that the colour-coded fold and score marks
are clearly visible. The backdrops and characters can be printed in black and then coloured
in.
If you don’t have any card for printing, just use normal paper and then glue the pieces to card
afterwards - the back of a breakfast cereal packet is good for this. It is important that the
support structure is fairly strong to prevent the theatre from wobbling about
!
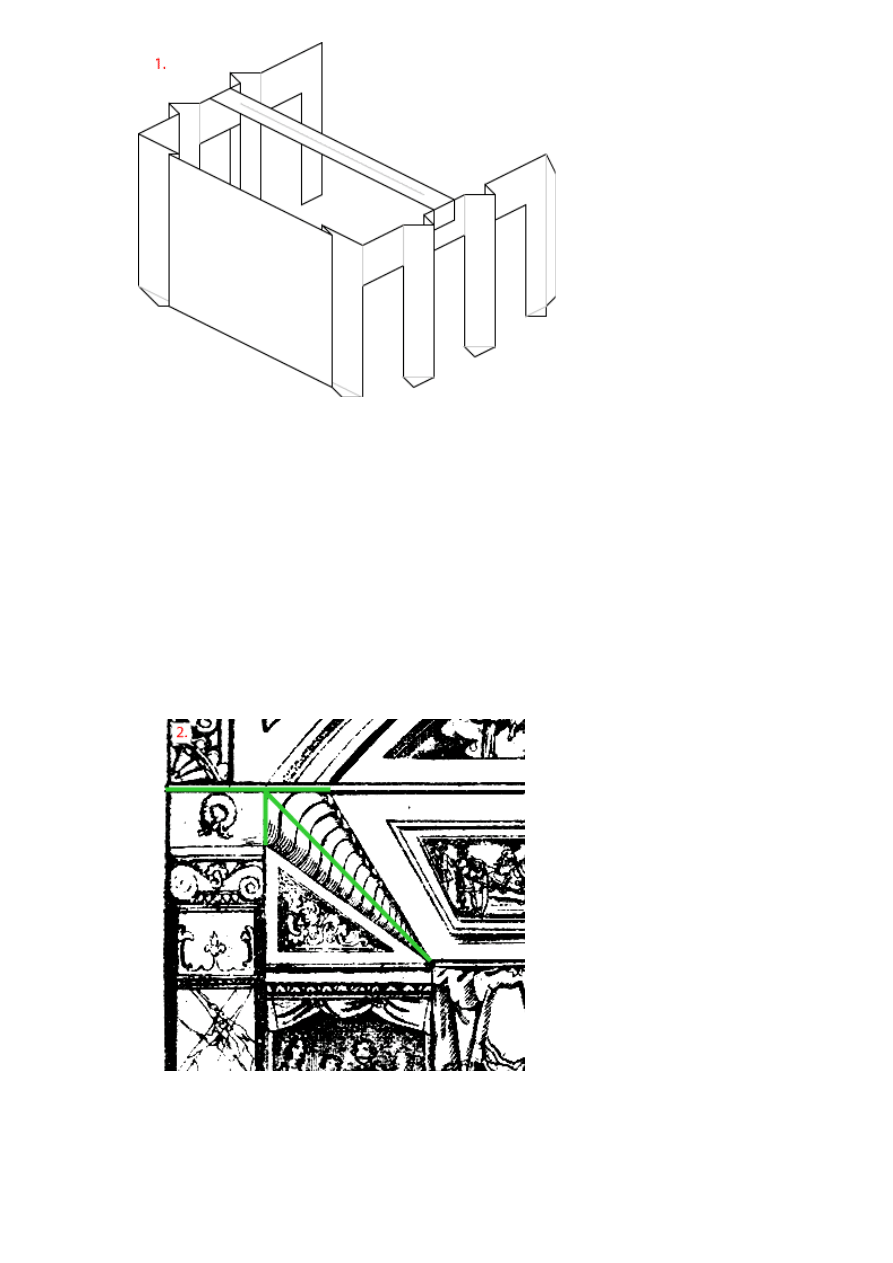
1. Making the support structure
Take the two sides panels and carefully score along the red and blue lines (to make it easier
to fold, the red lines should be scored on the printed side of the line and the blue lines should
be scored on the back). Fold them into shape and glue to the theatre base using the
numbered tabs as a guide. Repeat for the back panel and top supports. (Picture 1).
Once in place, the top bar can be folded along its centre-line to provide more rigidity
toy-theatre-instructions.pdf
Victoria and Albert Museum
Cromwell
Road
London
SW7
2RL
Page
1
of
6
www.vam.ac.uk
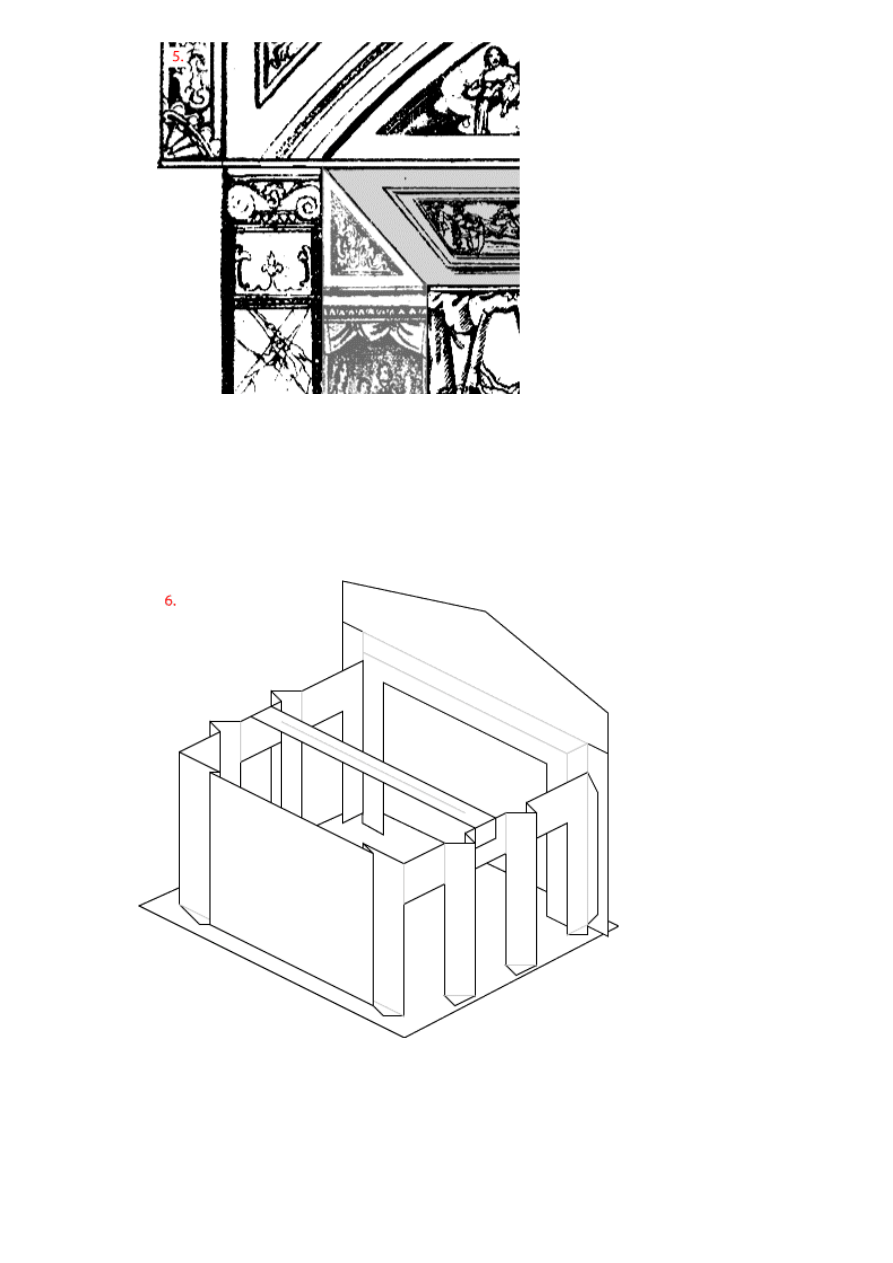
2. Attaching the stage front
First, the stage front needs to be folded to make it stronger, and to create a 3-d effect.
Follow the instructions below for both the left and right sides:
Cut along the lines shown in green (Picture 2, below)
toy-theatre-instructions.pdf
Victoria and Albert Museum
Cromwell
Road
London
SW7
2RL
Page
2
of
6
www.vam.ac.uk

Score along the red and blue lines. Tip: red lines should be scored on the printed side of
the line and the blue lines should be scored on the back of the page. (Picture 3).
Fold the triangular parts outwards so that the rectangular tab ‘A’ moves to position ‘B’, as
shown below (Picture 4).
Now glue the triangular parts together and glue the tab into place to create a 3-d stage front
(Picture 5).
toy-theatre-instructions.pdf
Victoria and Albert Museum
Cromwell
Road
London
SW7
2RL
Page
3
of
6
www.vam.ac.uk
The stage front can now be glued to the support structure, using the long tabs to the side
and the numbered tabs to the base (Picture 6).
toy-theatre-instructions.pdf
Victoria and Albert Museum
Cromwell
Road
London
SW7
2RL
Page
4
of
6
www.vam.ac.uk
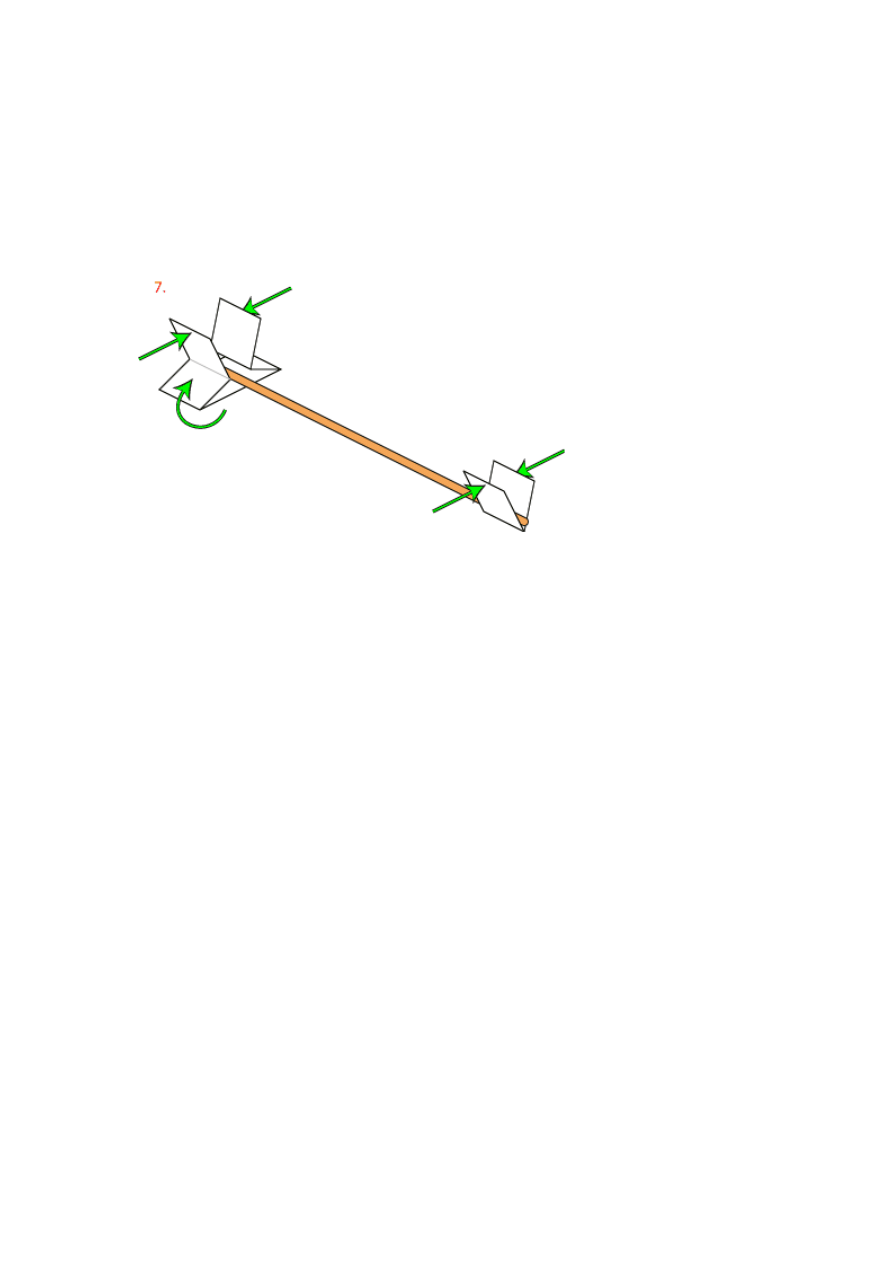
Glue the side wings to the top-frame, matching the numbers. The frame should be folded
along its length to make it more stable.
Hint: the bottom corners of the side wings and the backdrops can be trimmed off to allow
them to be inserted into the support structure more easily.
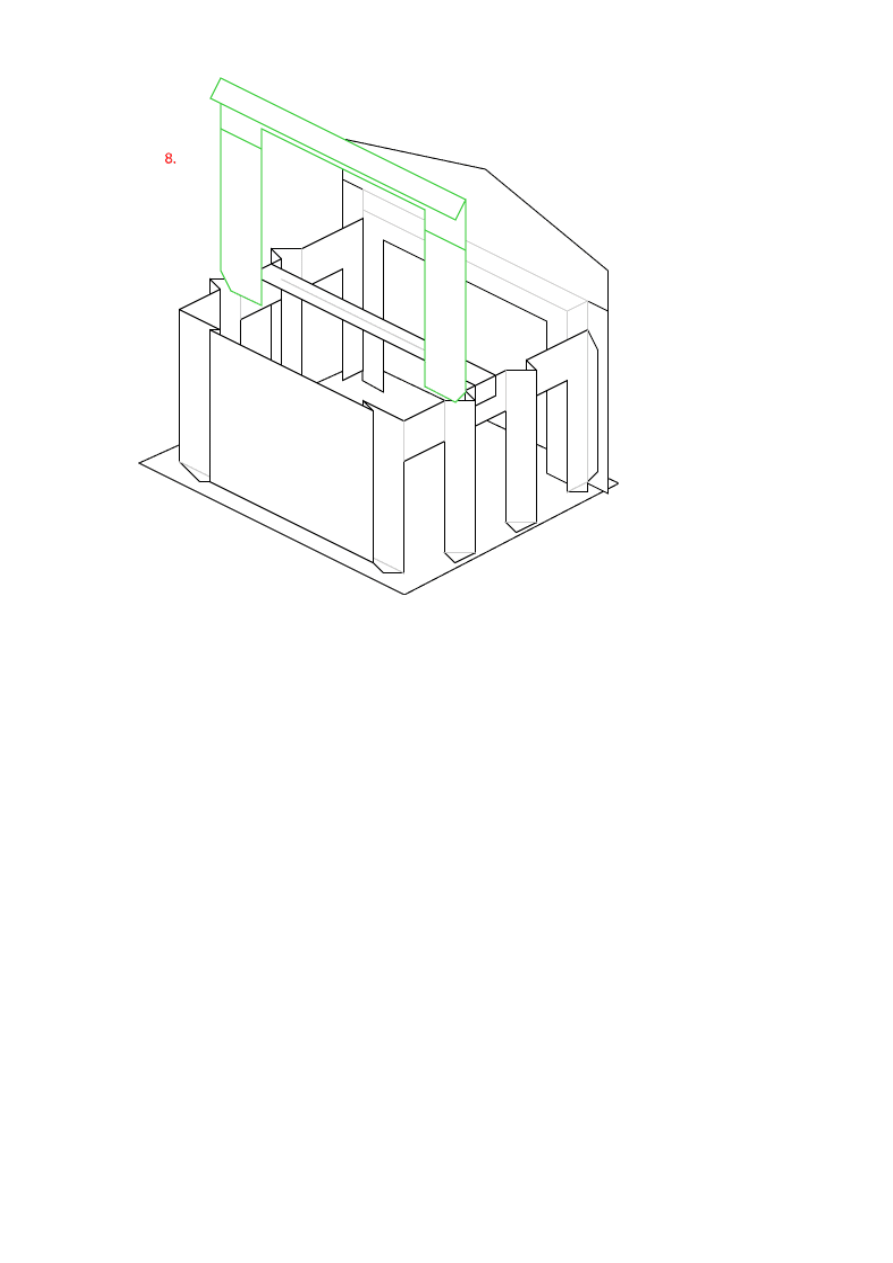
3. Making the character stands
Fold the character into a ‘T’ shape, then glue them to the wooden rods (Picture 7)
.
Attach the characters to the stands using tape or tack.
4. Assemble the Stage
The side wings and the backdrops can now easily slide in and out of the support structure
and characters can enter the stage between the side wings. (See picture: 8)
toy-theatre-instructions.pdf
Victoria and Albert Museum
Cromwell
Road
London
SW7
2RL
Page
5
of
6
www.vam.ac.uk
5. Showtime!
Print out the PDF document ‘Cinderella Script’. Follow the script to show you what to do
with the characters and scenery you’ve created.
Tip: If you print in colour the characters’ lines are blue, stage directions are dark red,
instructions for the set are green and the commentary is grey.
Now, with the theatre complete, your script ready and the characters waiting in the wings,
the play can begin!
toy-theatre-instructions.pdf
Victoria and Albert Museum
Cromwell
Road
London
SW7
2RL
Page
6
of
6
www.vam.ac.uk
Document Outline
Wyszukiwarka
Podobne podstrony:
Czarno biały placek kokosowy
konstrukcje sprężone płyta hc400 A3 czarno biały
Dieta w chorobach nerek 2 czarno biały
Dyplom ptaki cudaki czarno biały
projekt instalacje A4 czarno biały
Sernik czarno-biały, przepisy
Temat, A4 czarno-biały
Palety EPAL Palety EPAL (Europalety) 1-25 (czarno-biały)
Semafor świetlny, trójkomorowy 1 25 (czarno biały)
Semafor świetlny, dwukomorowy 1 25 (czarno biały)
tor dla samochodu CZARNO BIALY
Semafor świetlny, pięciokomorowy 1 25 (czarno biały)
Semafor świetlny, jednokomorowy 1 25 (czarno biały)
Dieta w chorobach nerek 2 czarno biały
CZARNO BIALY SWIAT (praca własna)
więcej podobnych podstron