A
M E R I C A
'
S
F
AVO R I T E
W
O O D WO R K I N G
P
L A N S
U - B I L D
B RO U G H T TO YO U BY
:
Cedar Birdhouse
Plan No. 931
Copyright U-Build, Inc., 2004.
All rights reserved. Printed in the U.S.A.
Bill of Material
Quantity
Size
Material
Item
1
5/8” x 7 1/4” x 72”
cedar fence board
A, B, C, D, E
1
5/8” diameter x 12”
dowel
F
1
7 1/4” x 11 3/4”
16 oz. copper sheet
1 box
1”
finish nails
1 box
#4 x 7/16”
copper tacks
1 bottle
wood glue
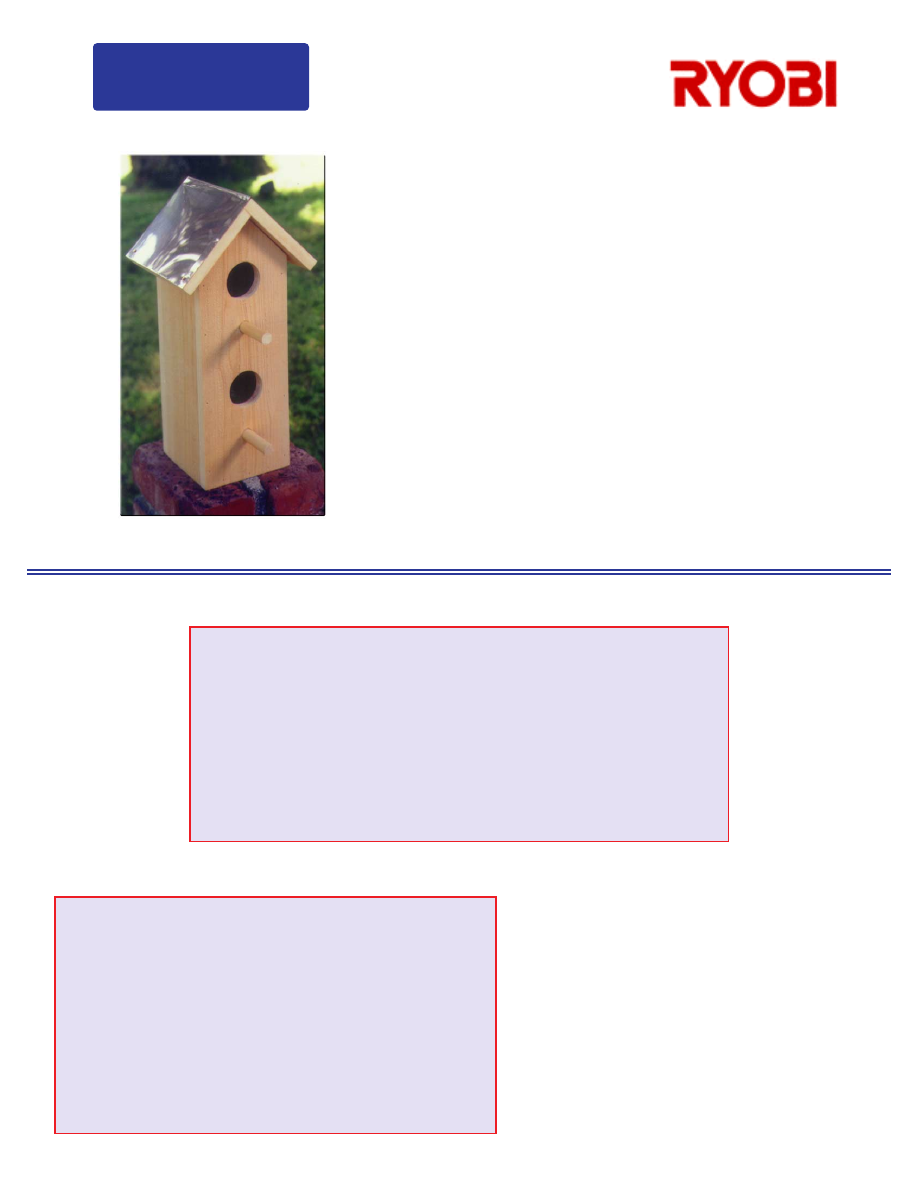
If you spend a lot of time in the yard or garden during the
warm weather, then this do-it-yourself birdhouse will make a
great summer project. Not only will the birds love it, but as it
ages the wood (western cedar) will turn a soft silver color and
the copper roof will acquire a handsome green patina.
The project calls for just eight pieces and is easy enough for
beginners. To build, simply cut the parts out of inexpensive
cedar fencing (other wood may be substituted), cut out, sand
and assemble everything using glue and finish nails. To fin-
ish, roof the projects using sheet copper and copper tacks.
The project measures about 16 inches tall by 8 inches wide
by 7 inches deep.
Cutting Schedule
Item Qty
T
W
L
Material
A
2
5/8”
4”
4”
cedar
B
2
5/8”
4”
12”
cedar
C
2
5/8”
5 1/4”
14 5/8”
cedar
D
1
5/8”
6 3/4”
5”
cedar
E
1
5/8”
6 3/4”
5 5/8”
cedar
F
2
3”
dowels
G
1
7 1/4”
11 3/4”
copper sheet
NOTES
1. Read manufacturer’s instructions before
operating equipment.
2.
Always
wear safety glasses.
3. We used western cedar for this project, but
redwood or sealed pine will work equally
well.
A
A
B
B
C
C
D
E
F
F
Pictorial
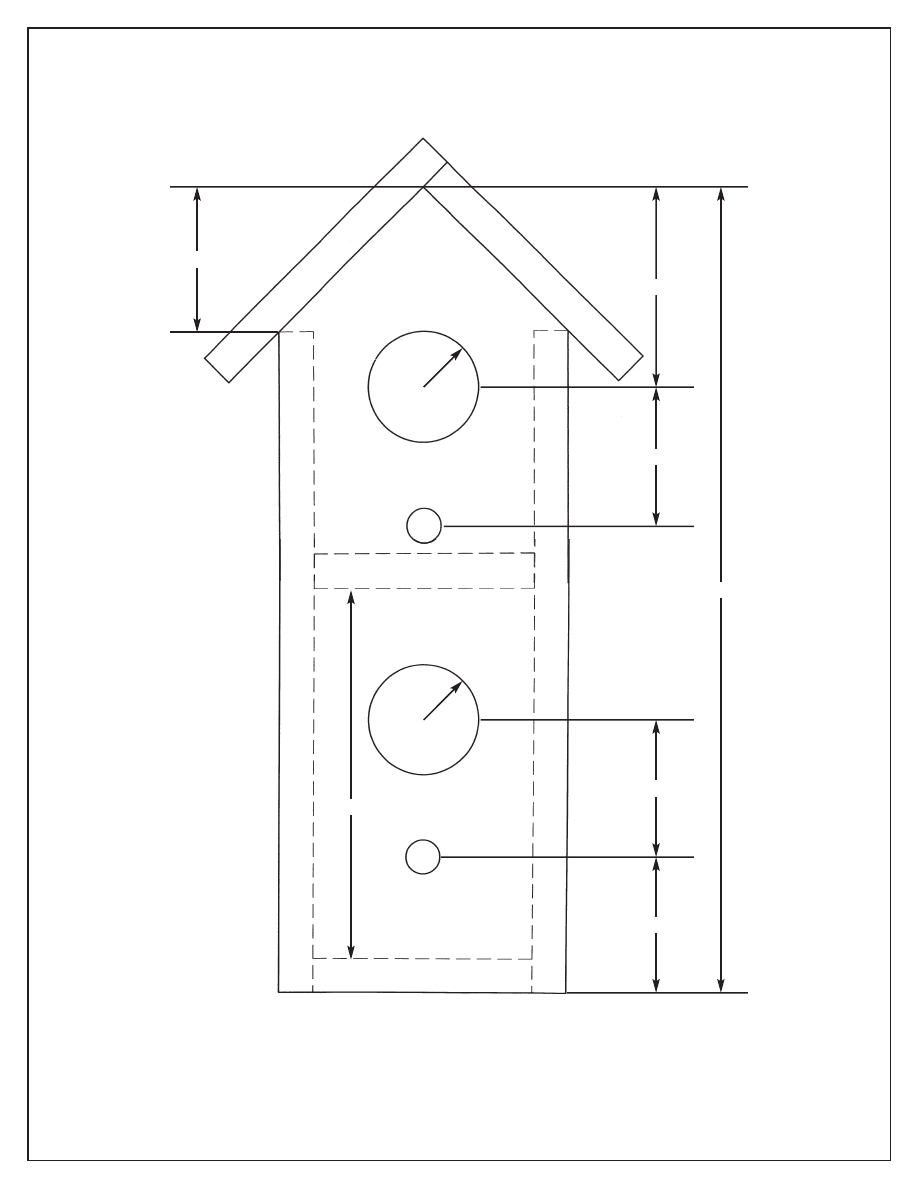
Front View
C
B
B
F
F
A
D
E
A
R 2
R 2
3 5/8”
2 5/8”
2 9/16”
2 9/16”
6 3/4”
2 1/2”
14 5/8”

Read all instructions before beginning any work. Cut all material to sizes shown in cutting schedule.
Assembly Instructions
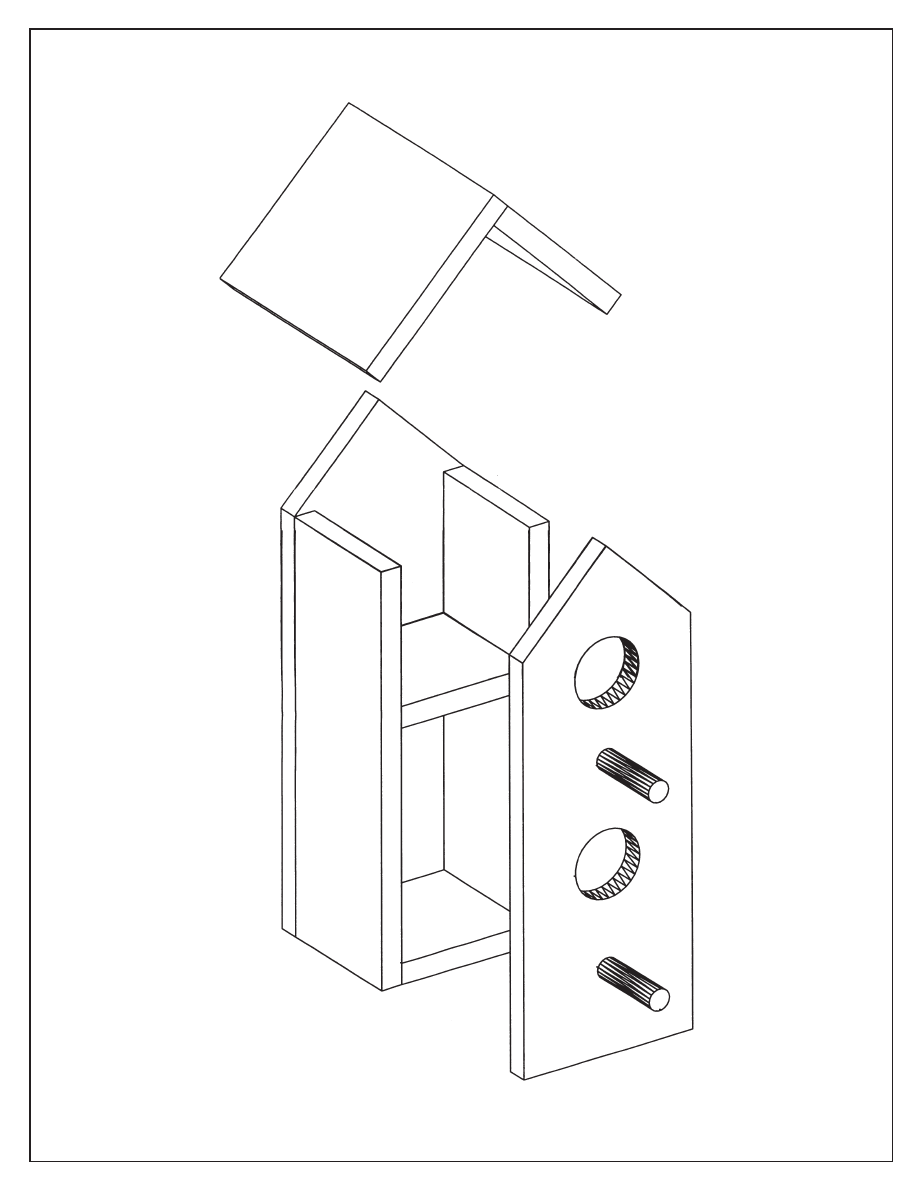
1. Cut angles on one end of front and back boards (C). Refer to Front View and Pictorial.
2. Bore two 2” holes and two 5/8” holes in front board (C). Refer to Side and Front Views and Pictorial.
3. Attach sides (B) to bottom and interior boards (A) using using glue and 1” finish nails. Refer to Front View and Pictorial.
4. Attach front and back boards (C) to subassembly (A, B) using glue and 1” finish nails. Refer to Front View and Pictorial.
5. Glue dowels (F) into 5/8” holes in front board (C). Refer to Front View and Pictorial.
6. Attach roof board (D) to roof board (E) using glue and 1” finish nails. Refer to Front View and Pictorial.
7. Cut and bend copper sheet (G) to fit roof subassembly (D, E).
8. Attach copper sheet (G) to roof subassembly (D, E) using four 7/16” copper tacks spaced 1/2” in from each corner.
9. Attach roof subassembly (D, E, G) to boards (B) and (C) using glue. Refer to Front View and Pictorial.
Wyszukiwarka
Podobne podstrony:
A building a bird house
A building a bird house
BIRD HOUSE various birds guidance
BIRD HOUSE various birds guidance
Bird House
Bird house traditional birdhouse
Bird house Hanging birdhouse
Bird house cupola birdhouse
Bird House nesting box
Bird Feeder Cedar Suet Feeder
Isobel Bird [Circle of Three 11] The House of Winter (lit)
7 House of Korba (The Ghost Bird)
3E D&D Adventure 06 House of Harpies
Dolls house 2
16 Dom Wschodzącego Słońca [The House Of Rising Sun]
house list word impr, ANG
2 bedroom two storey house T shaped
czytanie koło II Man?out the House
więcej podobnych podstron