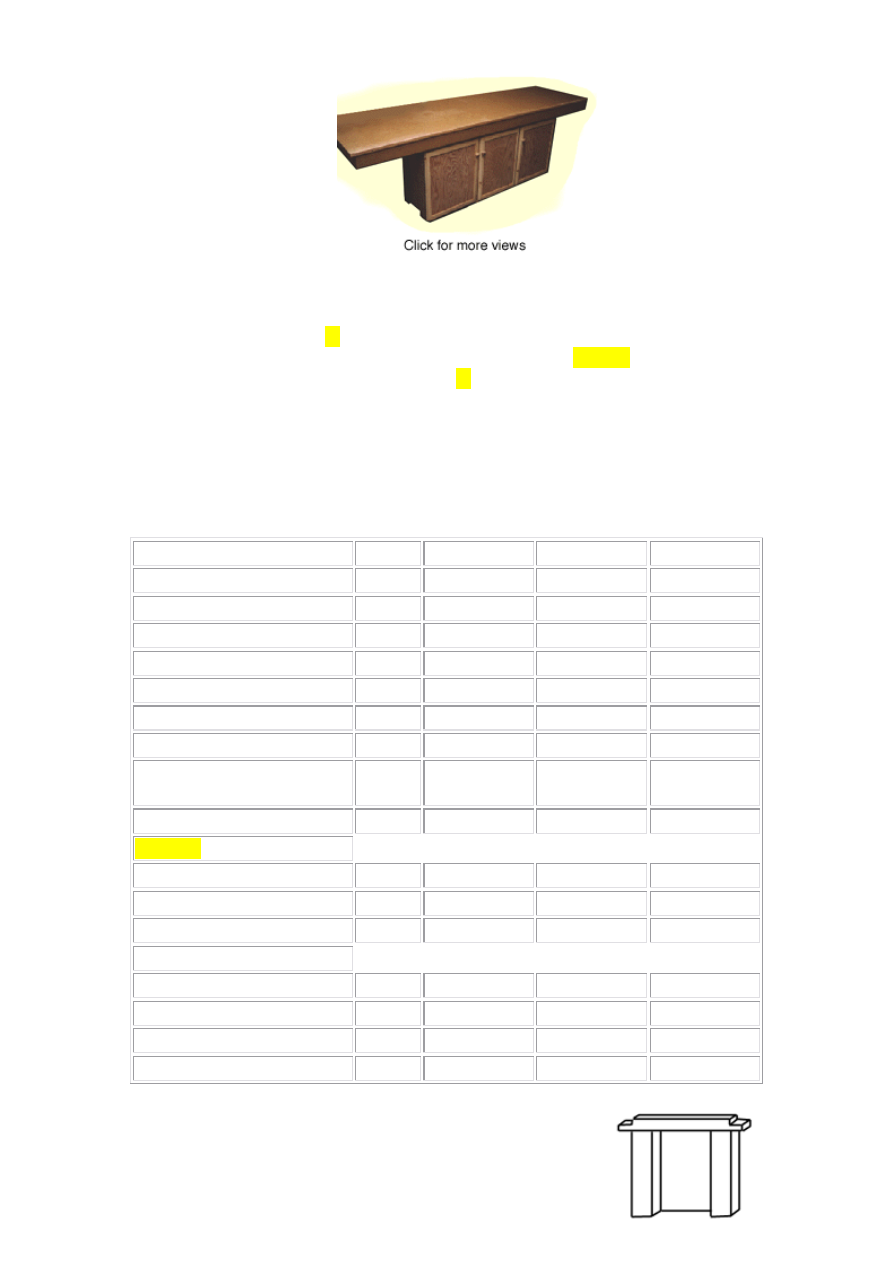
Workbench
This workbench plan uses 2 x 4s to produce a relatively cheap, and functional,
workbench that can be constructed in a day. Although the plan does not include a
vise, the inherent stability
of
this workbench means that you can easily add one if so
required. Under the workbench we have included very basic
drawers
, hidden behind
cupboard doors, that can be used to store all
of
your power - and other - tools.
Construction
Tools required: drill, sander, router, saw
Wood required:
Description Qty
Width
Thickness
Length
Legs
4
3 1/2"
1 1/2"
28 1/2"
Side panels (plywood)
2
24"
1/2"
25"
Cross member supports
4
3 1/2"
1 1/2"
27 1/4"
Central supports
4
2 1/2"
1 1/2"
28 1/2"
Central plywood dividers
4
21"
1/2"
28 1/2"
Main workbench support
2
3 1/2"
1 1/2"
92"
Base supports
2
2 1/2"
1 1/2"
53"
Workbench surface
(plywood)
1 27
1/4" 1/2"
92"
Back panel (hardboard)
1
28 1/2"
1/4"
56"
Drawers
:
Sides 16
4"
3/4"
21
1/2"
Front/back 16
4"
3/4"
15
3/4"
Base (plywood)
8
15 1/2"
1/2"
21 1/2"
Doors:
Top and bottom
6
1 1/2"
3/4"
18 1/2"
Sides 6
1
1/2"
3/4"
23"
Door panel (plywood)
3
17"
1/2"
21 1/2"
Door trim
1
1 1/2"
1/2"
56"
Begin the project by building the leg structures: take two legs
and rest them on a flat surface (wide side down), parallel to

each other and 17" apart. Then, take one
of
the plywood side panels and glue and
screw it to the two legs, flush with the bottom
of
the leg (and therefore 3 1/2"
of
leg
should protrude above the top
of
the plywood). Repeat for the other leg.
Next, take one
of
the cross member supports and cut out a niche 1 3/4" deep by 1 1/2"
long out
of
each end (see diagram). The purpose
of
this niche is that it will form half
of
a lap joint with the main bench support (see later). Once you have cut the niche out
of
both ends
of
the cross member, glue and screw the cross member to the top
of
the
side panel construction made above. This cross member should attach to the two legs
at the point where the plywood left
of
f, and should jut out 1 1/8" either side. Repeat
for the second side panel.
Now take the four central supports and cut out a niche 1 1/2" wide by 3 1/2" long out
of
the bottom
of
each one. Rout a groove that is 1/2" deep and 1" wide out
of
the two
wide sides
of
each support on the non-niched sides (see diagram). This groove is cut
to accommodate the plywood central panels so that they sit flush with the supports.
Once the four central supports have been cut and routed, glue and screw the center
plywood dividers into place. One plywood divider should attach to either side
of
the
central support, thus producing a hollow wall effect.
Now that the walls
of
the under-unit are complete, add the drawer runners. There are
three columns
of
drawers
: the left and right columns should have three
drawers
in
them, while the central column has only two (to accommodate bigger power tools).
Attach drawer runners at a height
of
3 1/2", 11" and 18 1/2" from the bottom
of
the
unit for the left and right two, and at a height
of
3 1/2" and 14" for the central column.
Once the center supports are complete, take the main workbench supports and cut out
a niche that is 1 1/2" wide, 1 3/4" high and 18" from either end, from the bottom half
of
the supports (see diagram). This niche will allow the main support to slot into the
top
of
the two side pieces constructed above. Also, cut out a niche 1 1/2" wide and 1
3/4" deep from the top
of
each end (again, see diagram). These end niches form half
of
a lap joint, the other half being made by the remaining two central supports.
Cut out a niche 1 1/2" wide and 1 3/4" deep from the end
of
each remaining two
central supports, thus allowing these supports to slot into main workbench supports
when we put everything together.

Everything is now ready and we can begin to build the main workbench structure.
Start by placing the two base supports on the floor, parallel to each other and 17"
apart. Then, screw one
of
the side panels to one end
of
these supports, and the other
side panel to the other end.
Next, screw and glue the two central panels into place, equidistant from each end (17
2/3" from each side panel). To attach these, screw in from the front and back
of
the
base support. You should now have four panels sitting perpendicular to the base. Add
the two main workbench supports to the top
of
the construction, gluing and screwing
into all for panels. Make sure that all
of
the panels remain square (i.e. they do not lean
to one side or another).
Now add the two remaining central supports, one to each end
of
the main workbench
supports, to join the ends
of
the workbench together. You now have the basic
framework
of
the workbench complete. Glue and screw the main workbench surface
to the top
of
the construction. This will help to make the unit more sturdy.
Finally, nail the hardboard panel to the back
of
the unit to seal
of
f the
drawers
from
sawdust. This is an optional stage (particularly if the unit is going to be used against a
wall as we would advise) but it should cut down on sawdust "leakage."
Building the
drawers
The main bench frame is complete, and it is time to build the eight
drawers
. The level
of
quality that you throw at this issue is entirely up to you. We chose to make very
simple
drawers
that were screwed together - no dovetailing or other nice joints were
used. This was acceptable (to us at least) because firstly this is a workbench and
secondly, the
drawers
will be hidden behind cupboard doors.
Take the side, front and back pieces and glue/screw them together, ensuring that the
frame is square. Then, glue and screw the plywood base to the underside. Once dry,
attach the drawer runners. The
drawers
should now slot into the spaces allocated for
them.
Building the doors

The doors are made from a pine frame and a plywood center. First, cut the side, top
and bottom pieces
of
pine to the correct sizes. Each end
of
these pieces should be cut
to a 45 degree angle to provide the correct joint (i.e. a 90 degree angle). Next, cut the
outside edge (outer facing)
of
the side frame pieces to a miter
of
45 degrees (see
diagram). This is important firstly because it makes the doors look less heavy, and
secondly, to allow the second door to open without pushing into door three.
Once you have mitered the two sides, rout out a groove on the inside, rear facing
edge. This groove should be 1/2" deep and 3/4" wide and is made to accommodate the
plywood panel. This groove should be cut out
of
both the two sides and the top and
bottom pieces. Once this is done, glue the four frame pieces together. At the same
time, add the plywood panel, gluing it into place (this will help to ensure that the door
is square).
Once the panel is dry, sand the door down to round
of
f the miter to a smooth curve.
Then attach to the main unit with hinges. The door should be attached 1/2" from the
base (this leaving 1 1/2" above the door. Once all three doors have been attached, glue
and screw the final door trim piece into the center supports above the doors (thus
filling the gap between the workbench and the top
of
the doors. Also at this time, add
door knobs to the three doors.
Wyszukiwarka
Podobne podstrony:
Garden Work Bench
Work Bench 3
Build a Work Bench
Catia Sketcher Work Bench (lesson 1)
Work Bench 2
M 5190 Long dress with a contrast finishing work
policy work dev
120222160803 english at work episode 2
121024104303 bbc english at work episode 37
23 299 318 Optimizing Microstructure for High Toughness Cold Work Steels
46 643 656 Vacuum HT of Hot Work Steel
130107151016 bbc english at work episode 48 final
Hollandus J I A Work of Saturn
potting bench
Knockdown Work Support
Arbor Bench id 67571 Nieznany
więcej podobnych podstron